
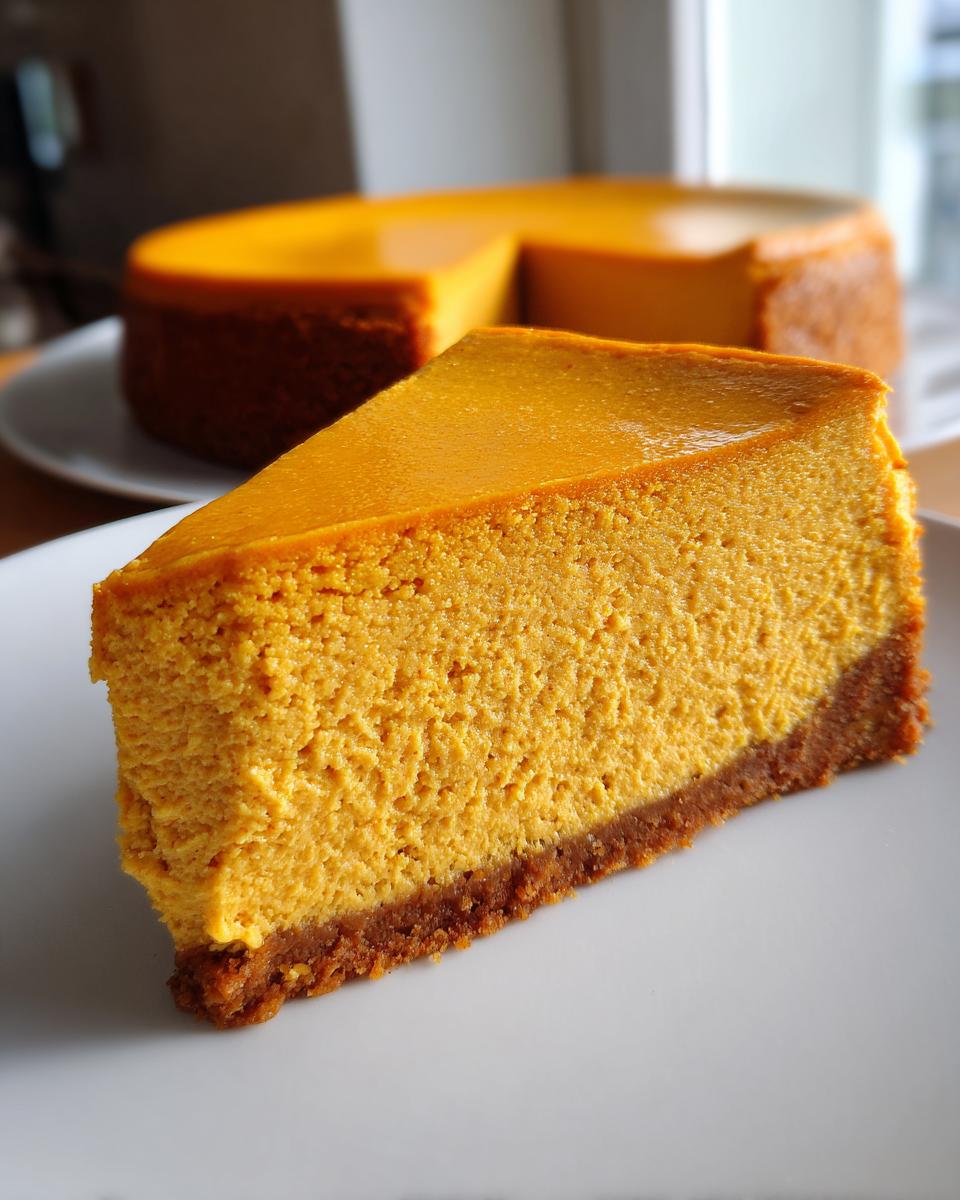
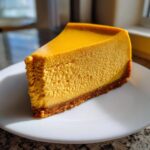
When the air turns crisp and the scent of woodsmoke starts drifting through the neighborhood, you know it’s time for serious fall baking. But if you’re anything like me, the idea of dealing with a cracked top on your centerpiece dessert—the magnificent pumpkin cheesecake—can make you just want to give up and open a can of store-bought pie filling. Not today! Here at HearthBite, Sarah Miller is committed to making sure your holiday desserts are showstoppers, not stress-inducers. That’s why I perfected this recipe for The Ultimate Creamy Baked Pumpkin Cheesecake; it promises that flawless, velvety texture without any hairline fractures.
- Why This Baked pumpkin cheesecake Recipe Is Your New Autumn Staple
- Gathering Ingredients for Your Creamy pumpkin cheesecake
- Simple Steps to Make the Best pumpkin cheesecake
- Tips for the Perfect pumpkin cheesecake Every Time
- Serving Suggestions for Your Ultimate pumpkin cheesecake
- Storage and Make Ahead Dessert Tips for pumpkin cheesecake
- Frequently Asked Questions About Baked pumpkin cheesecake
- Estimated Nutritional Data for This pumpkin cheesecake
- Share Your Ultimate pumpkin cheesecake Creation
Why This Baked pumpkin cheesecake Recipe Is Your New Autumn Staple
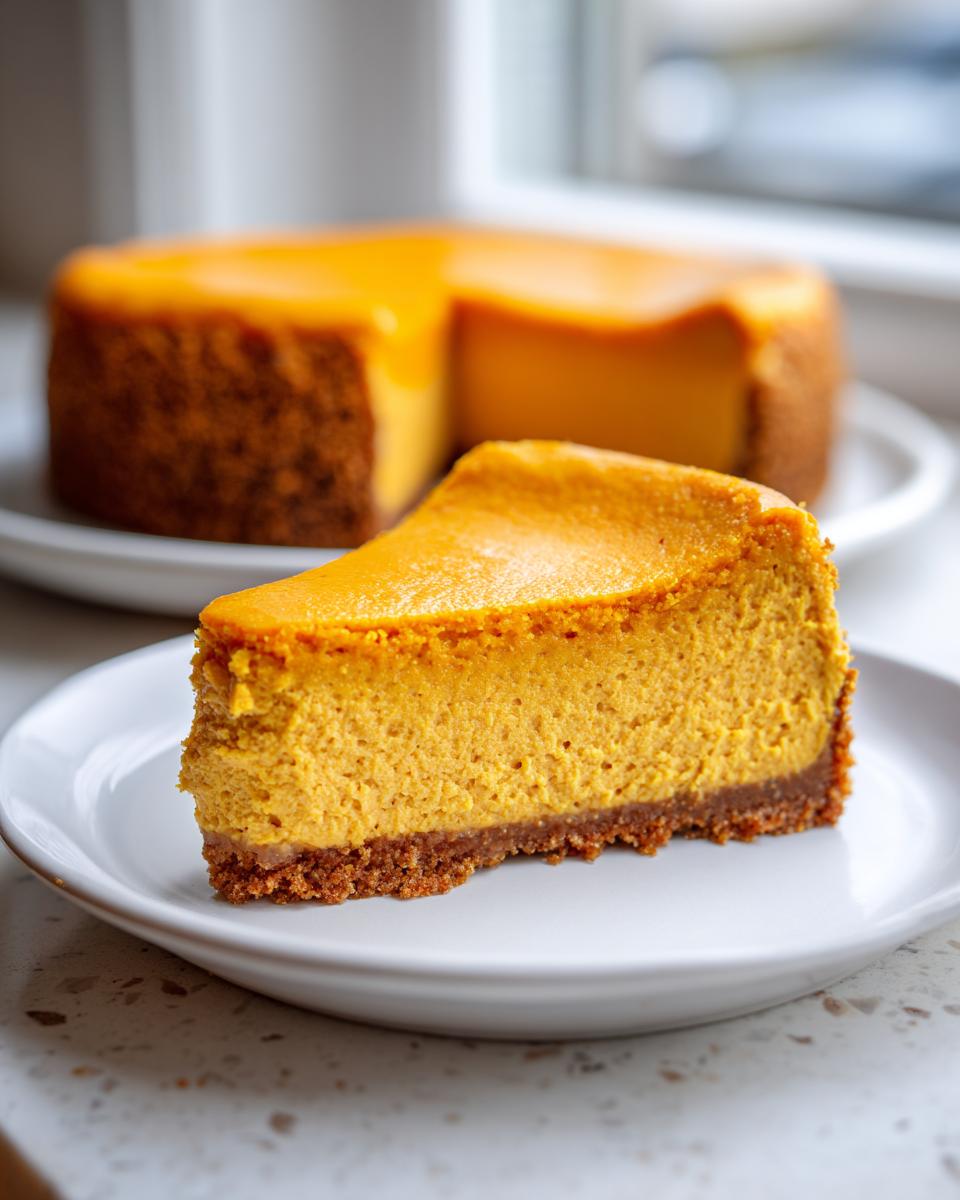
When you’re planning your big Thanksgiving desserts menu, you need reliability, and that’s exactly what this baked recipe delivers. Forget those flimsy, sometimes watery versions you’ve tried before. We are guaranteeing that showstopper look and that melt-in-your-mouth experience. It’s comforting, it’s classic, and it’s all the pumpkin pie flavor you crave in a slice of pure velvet.
- It delivers the ultimate creamy pumpkin cheesecake texture—rich, thick, and utterly indulgent.
- We conquer that dreaded cracked top using simple, proven techniques, so your presentation is always perfect.
- It carries that perfect balance of sweet cream cheese and warm spices, tasting exactly like fall in every bite.
This isn’t just another dessert; it’s the one you’ll reach for year after year!
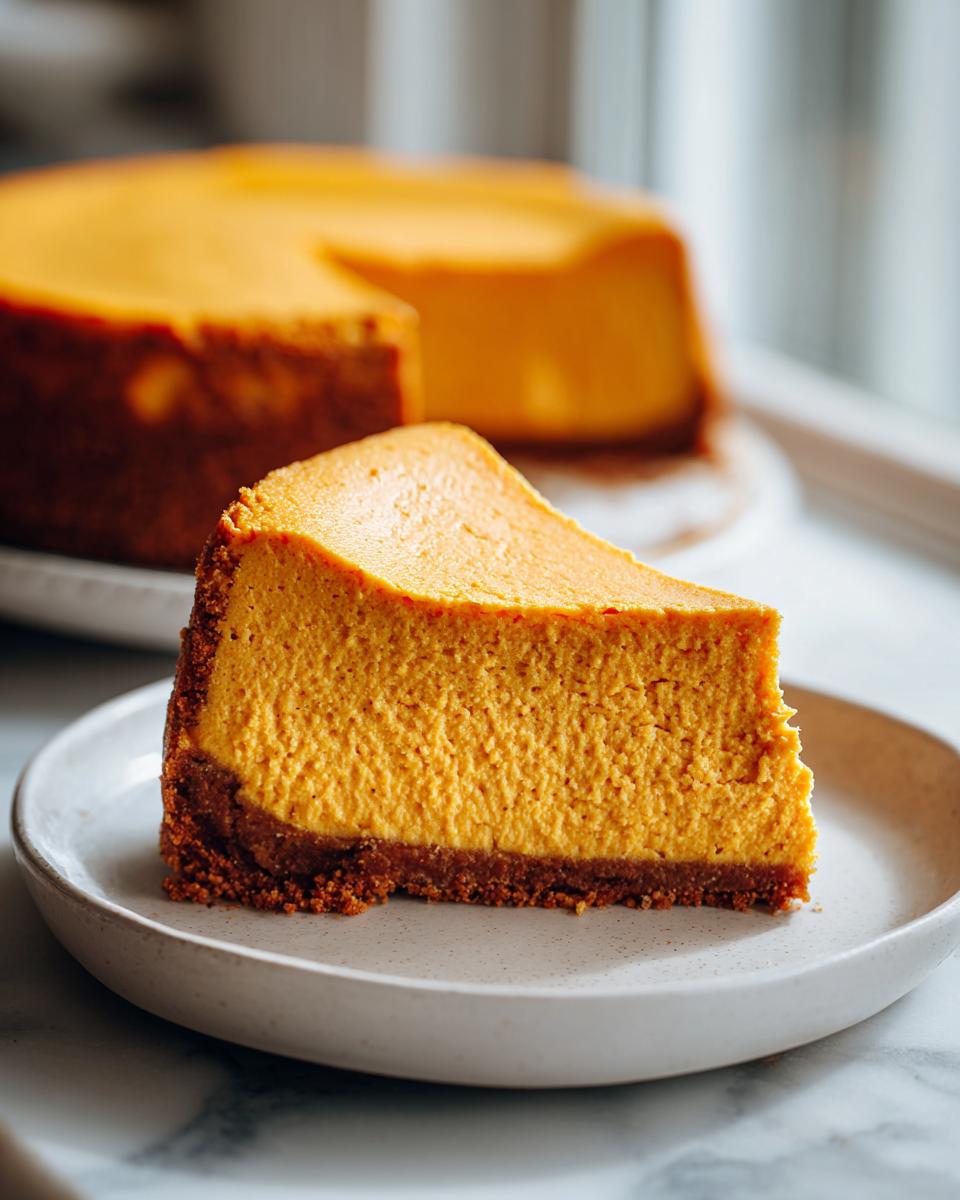
Texture Guaranteed: Achieving Velvety Cheesecake Filling
The secret to that dreamy mouthfeel comes down to two major steps, and trust me, they are easy. First, make sure every single dairy item—the cream cheese, even the eggs—is completely relaxed and at room temperature before you even turn on the mixer. This lets them combine smoothly without needing aggressive beating. Second, that warm water bath we use during baking acts like a cozy spa for your cheesecake. It keeps the oven temperature consistent and gently humid, which prevents the edges from cooking too fast and shrinking away from the center.
Gathering Ingredients for Your Creamy pumpkin cheesecake
Okay, getting ready to make this spectacular pumpkin cheesecake means making sure your pantry and fridge are set up for success. Remember, this isn’t the time to use cold cream cheese! I’ve listed everything right here so you can grab what you need. Having these items measured out makes the whole process feel less like baking and more like assembling a masterpiece. Don’t skimp on the spices; they bring that essential warm flavor we all look forward to in fall baking recipes.
Crust Components: Graham Cracker Crust Dessert Base
The foundation for any great cheesecake is a sturdy, buttery base. For this classic graham cracker crust dessert, you’ll need:
- 1 1/2 cups graham cracker crumbs
- 1/4 cup granulated sugar (for the crust, very important!)
- 6 tablespoons unsalted butter, melted
Now, if you’re feeling adventurous, my notes mentioned swapping those graham crackers for Biscoff crumbs for an even deeper, spiced flavor. It works just as beautifully!
The Spiced pumpkin cheesecake Filling Ingredients
This is where the magic—and that gorgeous orange color—comes from. You must use pure pumpkin puree, not the pie filling mix! For the best pumpkin pie flavor dessert experience, gather these:
- 3 (8 ounce) packages cream cheese, softened
- 1 1/2 cups granulated sugar (for the filling)
- 1 teaspoon vanilla extract
- 1 teaspoon pumpkin pie spice
- 1/2 teaspoon ground cinnamon
- 1/4 teaspoon ground nutmeg
- 1 (15 ounce) can pure pumpkin puree
- 3 large eggs, room temperature—this is non-negotiable for smoothness!
Simple Steps to Make the Best pumpkin cheesecake
Now it’s time to bring all those beautiful ingredients together to create your pumpkin cheesecake masterpiece. Honestly, watching this come together is so rewarding, but the *real* secret isn’t in the mixing—it’s in the patience we show during the cooling process. Follow these steps closely, especially the baking and cooling stages, and you’ll have that picture-perfect slice everyone is hoping for. We want this to be the easiest, most reliable recipe for your holiday table, far better than those quick caramels you might be tempted to buy!
Step 1 & 2: Crust Prep and Preheating for pumpkin cheesecake
First things first, we need to let your oven know we mean business—set it to 325 degrees F. Before anything else, you absolutely must wrap that springform pan tightly in heavy-duty foil. I mean, wrap it like you’re packing it for a trip through a rainstorm! This foil shield is what keeps splashing water from your water bath out of the crust. Once wrapped, mix up your crumbs, sugar, and melted butter, press it down firmly into the bottom of the pan, and give it a quick 10-minute bake. Let it cool just a tiny bit while you whip up the filling.
Creating the Ultra Creamy pumpkin cheesecake Batter
When mixing, remember our goal is velvety, not airy! Start by beating that softened cream cheese until it’s perfectly smooth—no lumps allowed! Then, slowly beat in your sugar until everything looks unified. Next, add the pumpkin and all those lovely spices. Here’s the crucial part: when you add the three room-temperature eggs, turn your mixer speed down low. Mix *just* until you see the yolk disappear. If you over-beat once the eggs are in, you incorporate air, and air equals cracks later. We absolutely want that smooth, creamy pumpkin cheesecake texture.
Baking the pumpkin cheesecake Using a Water Bath
Time to create that spa environment! Place your foil-wrapped pan inside a larger roasting pan. Carefully pour hot water into the roasting pan until it comes about halfway up the side of your cheesecake pan. Pop everything into the oven and bake for 55 to 65 minutes. You’ll know it’s close when the edges look set, but if you gently nudge the pan, the very center wiggles slightly, like Jell-O.
The Slow Cooling Process: Key to a Crack-Free pumpkin cheesecake
This is where we earn that crack-free promise. Do *not* take it out yet! Turn the oven off completely. Prop the oven door open just a crack—maybe an inch or so—and let that pumpkin cheesecake sit inside for a full hour. This slow, gentle decrease in temperature stops the cheesecake from seizing up and cracking. After that hour, remove it from the water bath, peel off the foil, and let it finish cooling on your counter before it heads to the fridge for its required chilling session.
Tips for the Perfect pumpkin cheesecake Every Time
Honestly, even with the best instructions, baking a showstopper dessert like this pumpkin cheesecake can still have little hiccups. That’s why I want to share the little insider tricks that make a huge difference when you’re whipping up this easy pumpkin cheesecake recipe for your fall gatherings. Remembering these details is what separates an ‘okay’ cheesecake from one that everyone asks for next year!
Ingredient Temperature Matters for Creamy pumpkin cheesecake
I’m going to say this until I’m blue in the face: temperature is everything for a truly creamy pumpkin cheesecake. I remember one disastrous batch years ago—I got the cream cheese out just 30 minutes before mixing. It was lumpy, no matter how long I beat it, and the final texture was just slightly stiff. You want your cream cheese and eggs to be completely soft and relaxed, almost the same temperature as the day is warm outside. When they’re properly tempered, they blend into that beautiful, smooth ribbon of batter without struggling.
Crust and Spice Variations for Your pumpkin cheesecake
While the classic graham cracker base is divine, don’t be afraid to experiment! As I mentioned, substituting those crumbs for Biscoff cookies turns this into a richer, slightly more complex spiced cheesecake experience, and it pairs wonderfully with the pumpkin. If you want to double down on the cozy fall aromas, try increasing the cinnamon just a touch, maybe to 1 1/4 teaspoons, and cutting the nutmeg back slightly. It shifts the profile just enough to make it uniquely yours. Remember, the cream cheese frosting you top it with matters too—keep it light so the cheesecake flavor shines through!
Serving Suggestions for Your Ultimate pumpkin cheesecake
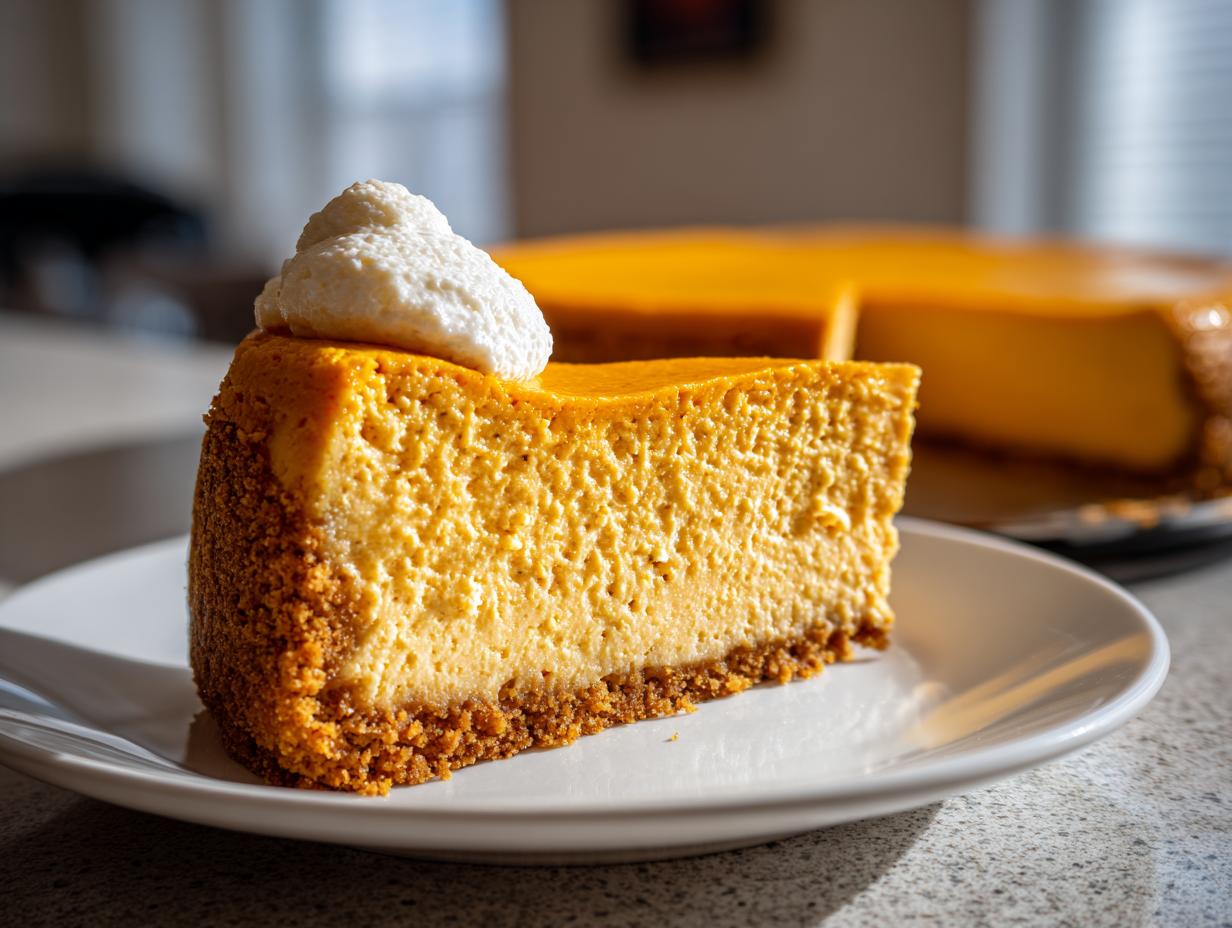
Once your masterpiece has properly chilled—and I truly mean *properly* chilled, not rushed—it’s time for the fun part: the presentation! This rich, spiced dessert is show-stopping enough on its own, but a little something extra on top just elevates it into that perfect centerpiece for your holiday spread. I always think the best toppings are ones that add a textural contrast or a little brightness to cut through the richness.
For a classic look that honors simple, beautiful fall baking recipes, a simple dusting of high-quality ground cinnamon or maybe even some freshly grated nutmeg right before serving is perfect. It looks so elegant against that smooth surface.
If you want something a bit more substantial, lightly sweetened whipped cream is always my go-to partner. You just use a piping bag with a large star tip to make beautiful rosettes around the edge. Don’t use the stuff out of a can, though—you want that homemade, cloud-like texture that melts beautifully on your tongue. If you want to get fancy, drizzling some homemade sea salt caramels over a slice right before serving makes it completely irresistible, though that might be too much deliciousness for one dessert!
As for pairings, this goes beautifully with a strong cup of black coffee or a nice spiced apple cider. The slight bitterness and acidity help balance out the sweetness of the cream cheese filling. Enjoy those cozy moments!
Storage and Make Ahead Dessert Tips for pumpkin cheesecake
Planning ahead for big gatherings is the secret weapon of any successful host, and I truly love that this pumpkin cheesecake is such a wonderful make ahead dessert! You absolutely cannot rush a cheesecake—it needs time to set up properly so you get those clean slices later on. My firm rule is that it needs a minimum of six hours chilling time in the refrigerator. Honestly, if you can manage it, letting your finished cheesecake rest overnight is the best thing you can do for the flavor and texture.
Once it’s fully chilled, you can store leftovers right in the pan (just cover the top loosely with plastic wrap to keep it from drying out) or slice it up first. It keeps beautifully in the fridge for about four days. If you happen to have an overflowing holiday schedule, you can also freeze it! I usually remove the springform ring first, wrap the whole thing very tightly in plastic wrap, and then add a layer of foil. It freezes well for over a month. Thaw it overnight in the fridge for the best results. Knowing you have this amazing make ahead dessert ready to go is such a relief!
Frequently Asked Questions About Baked pumpkin cheesecake
I always get questions after the holidays about how this pumpkin cheesecake came out so perfect, especially since so many amazing no bake desserts are floating around this time of year. It seems like everyone is looking for the absolute **best pumpkin cheesecake** recipe that delivers true results. Here are a few things I hear most often!
Can I make a No Bake pumpkin cheesecake Instead?
That’s a really common question because who doesn’t love a no oven dessert when the weather is nice? While there are fantastic quick options out there for a no bake pumpkin cheesecake, this baked recipe relies on eggs and careful heat management to achieve that deep, rich, melt-in-your-mouth consistency that I promise you won’t forget. If you really need a no-bake option, look for a recipe specifically designed for it, but this baked version gives you that ultimate velvety texture we’re after!
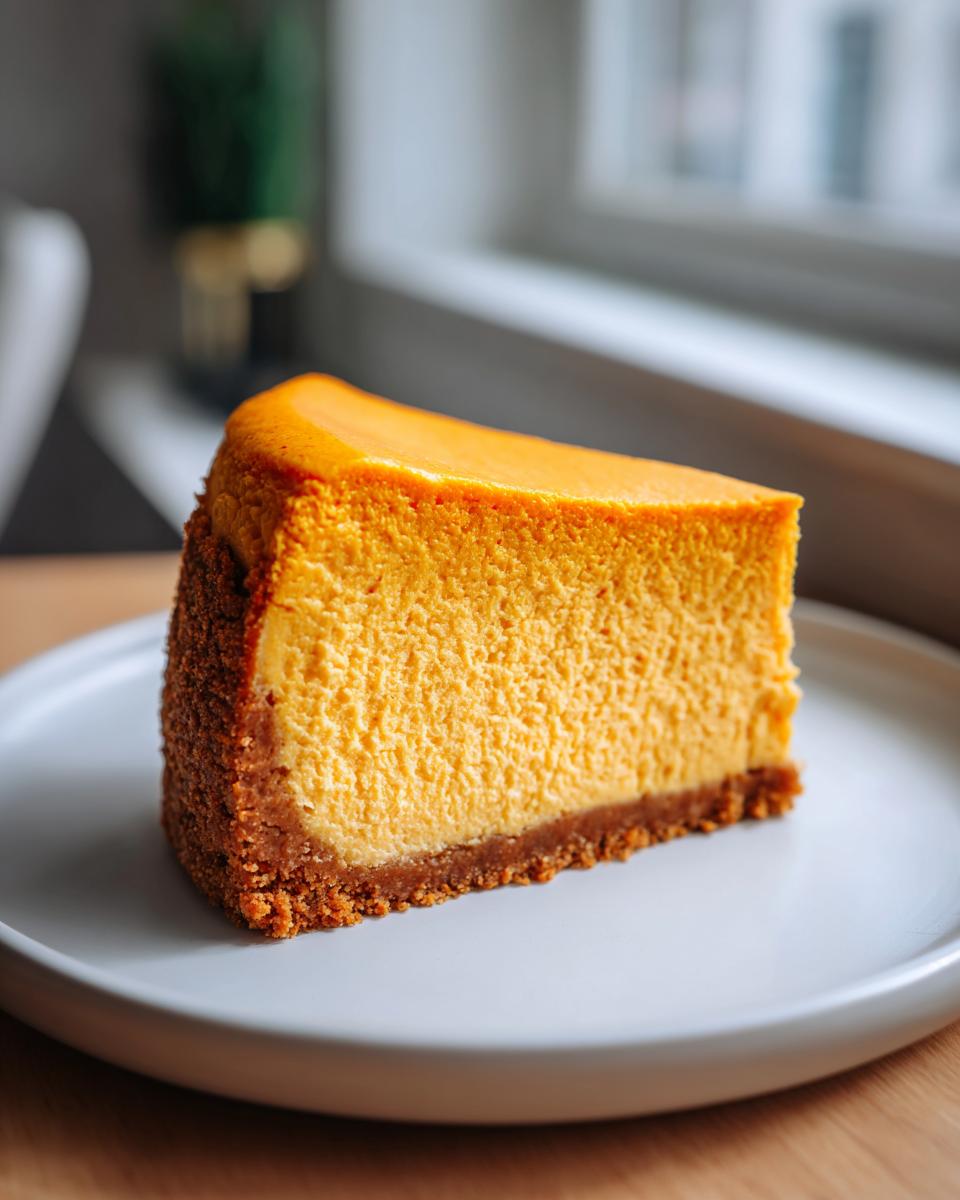
How do I ensure my pumpkin cheesecake is truly crack-free?
It all comes down to gentle handling and smart cooling. Seriously, these two things are the keys to avoiding that dreaded top fracture on your creamy pumpkin cheesecake. First, you must use room-temperature ingredients—this ensures the batter mixes perfectly smooth with no lumps that later expand unevenly. Second, the slow cool-down is non-negotiable. Leaving the cheesecake inside the turned-off oven with the door slightly cracked for a full hour lets it adjust gradually to the lower temperature. Don’t skip that step, and your surface will stay perfect!
Estimated Nutritional Data for This pumpkin cheesecake
I always love sharing the nutritional breakdown, just so everyone at the table knows what they are diving into! Remember, because we are using things like real butter and full-fat cream cheese to ensure that absolute perfect richness, this is definitely an indulgent treat, not an everyday snack. These numbers are calculated based on the ingredients I listed above and how the 9-inch cake yields 12 generous slices.
When you’re planning your holiday menus and considering healthier easy breakfast recipes for the morning after, it’s good context to have this information!
- Serving Size: 1 slice
- Calories: Approximately 450
- Fat: Around 30g (with about 18g being saturated fat—that’s the richness talking!)
- Carbohydrates: About 40g
- Sugar: Roughly 35g (We use good quality sugar, but it’s definitely a holiday treat!)
- Protein: About 7g
- Cholesterol: Around 100mg
A little note from me: these figures are just guides. If you use a different brand of cream cheese or happen to sneak in some Biscoff crumbs instead of graham crackers, those numbers will shift slightly. But what I can promise you is that the satisfaction factor is 100% higher than this chart can possibly measure!
Share Your Ultimate pumpkin cheesecake Creation
I truly hope making this pumpkin cheesecake brings as much warmth to your kitchen as it does to mine. This amazing fall baking recipe is my absolute favorite way to celebrate the season. Once you try a slice, come right back here and let me know how it went! If you loved it, please leave a five-star rating—it helps other bakers find reliable comfort food. I love seeing your holiday spreads, so share your photos in the comments below! If you need a lighter meal after all that sweetness, check out my favorites over at easy breakfast recipes.
PrintThe Ultimate Creamy Baked Pumpkin Cheesecake
Make this rich, velvety pumpkin cheesecake for your next fall gathering. This recipe delivers a flawless, crack-free texture with classic graham cracker crust flavor.
- Prep Time: 25 min
- Cook Time: 60 min
- Total Time: 7 hours 25 min
- Yield: 12 servings 1x
- Category: Dessert
- Method: Baking
- Cuisine: American
- Diet: Vegetarian
Ingredients
- 1 1/2 cups graham cracker crumbs
- 1/4 cup granulated sugar (for crust)
- 6 tablespoons unsalted butter, melted
- 3 (8 ounce) packages cream cheese, softened
- 1 1/2 cups granulated sugar (for filling)
- 1 teaspoon vanilla extract
- 1 teaspoon pumpkin pie spice
- 1/2 teaspoon ground cinnamon
- 1/4 teaspoon ground nutmeg
- 1 (15 ounce) can pure pumpkin puree
- 3 large eggs, room temperature
Instructions
- Preheat your oven to 325 degrees F. Wrap the outside of a 9-inch springform pan tightly with heavy-duty aluminum foil.
- Prepare the crust: Combine graham cracker crumbs, 1/4 cup sugar, and melted butter in a bowl. Press the mixture firmly into the bottom of the prepared springform pan. Bake the crust for 10 minutes. Remove from the oven and let it cool slightly.
- Prepare the filling: In a large bowl, beat the softened cream cheese with an electric mixer until smooth. Gradually beat in the 1 1/2 cups of sugar until fully combined.
- Mix in the vanilla extract, pumpkin pie spice, cinnamon, and nutmeg until blended. Beat in the pumpkin puree until the mixture is uniform.
- Add the eggs one at a time, mixing on low speed just until each egg is incorporated. Do not overmix the batter once the eggs are added.
- Pour the filling over the cooled crust in the springform pan.
- Bake using a water bath: Place the foil-wrapped springform pan inside a larger roasting pan. Carefully pour hot water into the roasting pan until it reaches about halfway up the sides of the springform pan.
- Bake for 55 to 65 minutes, or until the edges are set but the center still jiggles slightly when gently nudged.
- Turn off the oven, crack the oven door open slightly, and let the cheesecake cool inside the oven for 1 hour. This slow cooling helps prevent cracks.
- Remove the cheesecake from the water bath and foil. Let it cool completely on a wire rack at room temperature.
- Chill the pumpkin cheesecake in the refrigerator for at least 6 hours, or preferably overnight, before serving. Remove the springform ring before slicing.
Notes
- For the creamiest texture, ensure your cream cheese and eggs are at true room temperature before starting.
- If you prefer a different crust, substitute Biscoff crumbs for the graham crackers.
- Top with lightly sweetened whipped cream or a dusting of cinnamon before serving for an impressive presentation.
Nutrition
- Serving Size: 1 slice
- Calories: 450
- Sugar: 35g
- Sodium: 300mg
- Fat: 30g
- Saturated Fat: 18g
- Unsaturated Fat: 12g
- Trans Fat: 0.5g
- Carbohydrates: 40g
- Fiber: 1g
- Protein: 7g
- Cholesterol: 100mg