
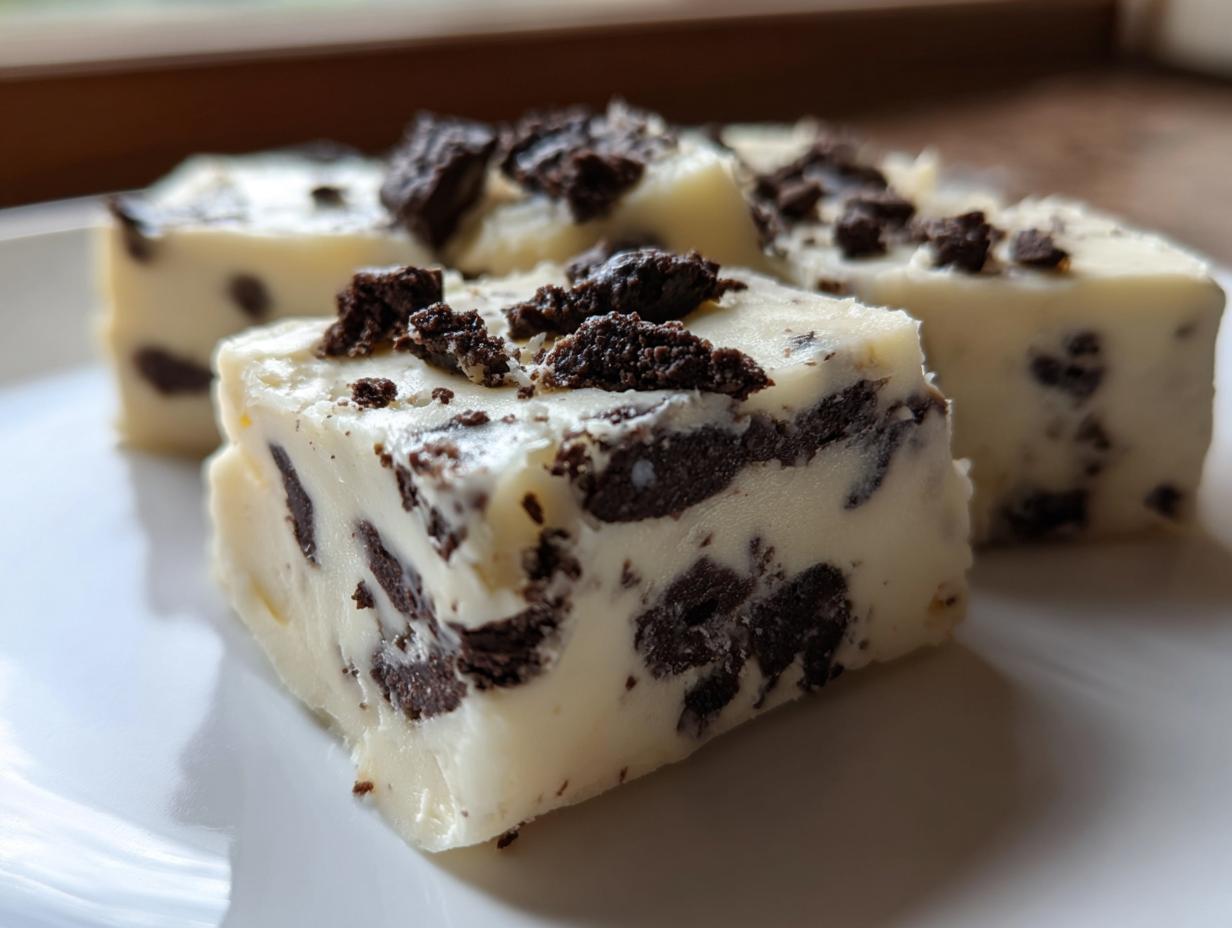
If you’re anything like me, finding the time to bake something truly special can feel impossible sometimes. Life gets busy, and that sweet craving hits hard and fast! Well, when my family needs a comforting treat *right now*, I skip the oven entirely and turn to this utterly foolproof recipe for 3-ingredient, no-bake white chocolate Oreo fudge. Seriously, you won’t believe how rich and perfectly crunchy this turns out with almost zero effort! This Oreo fudge is pure magic, folks—creamy, full of cookies, and ready faster than you can decide what movie to watch. It’s definitely my go-to for quick treats, and if you’re looking for other easy homemade candies, make sure you check out my guide for easy homemade soft chewy sea salt caramels! This recipe is perfect for last-minute potlucks or when I need to whip up some quick, heartfelt gifting desserts.
- Why This 3-Ingredient Oreo Fudge Stands Out (Quick Dessert Ideas)
- Gathering Ingredients for Your Oreo Fudge
- Step-by-Step Guide to Making Easy Oreo Fudge
- Expert Tips for Perfect Homemade Candy (Oreo Fudge Success)
- Storing and Serving Your Rich Chocolate Fudge
- Frequently Asked Questions About Oreo Fudge
- Nutritional Estimate for This Oreo Fudge Recipe
- Share Your Cookies and Cream Treats Experience
Why This 3-Ingredient Oreo Fudge Stands Out (Quick Dessert Ideas)
When I designed this recipe, I wanted something that felt special without any fuss. This is truly one of the best No Bake Desserts you’ll ever meet. It’s proof that the simplest recipes are often the most satisfying. I often have this ready to go when I need Quick Dessert Ideas.
If you’re looking for a recipe that seriously delivers on speed, I promise you this is it:
- It’s a genuine 5 Minute Fudge in terms of mixing time!
- It sets up beautifully without needing the oven—hello, No Oven Treats!
- It’s nearly impossible to mess up, making it great for those new to making Homemade Candy.
Need more quick ideas? You should definitely take a look at my recipe for easy no-bake peanut butter balls when you’re ready for another win.
Unmatched Simplicity: The 3-Ingredient Sweets Factor
Honestly, the best part of this Oreo fudge is that it relies on just three core ingredients. I love recipes that prove you don’t need a stocked pantry to make something incredible. These 3 Ingredient Sweets make it perfect for busy weeknights or when you suddenly need a potluck dessert. It’s the ultimate in easy recipes for beginners!
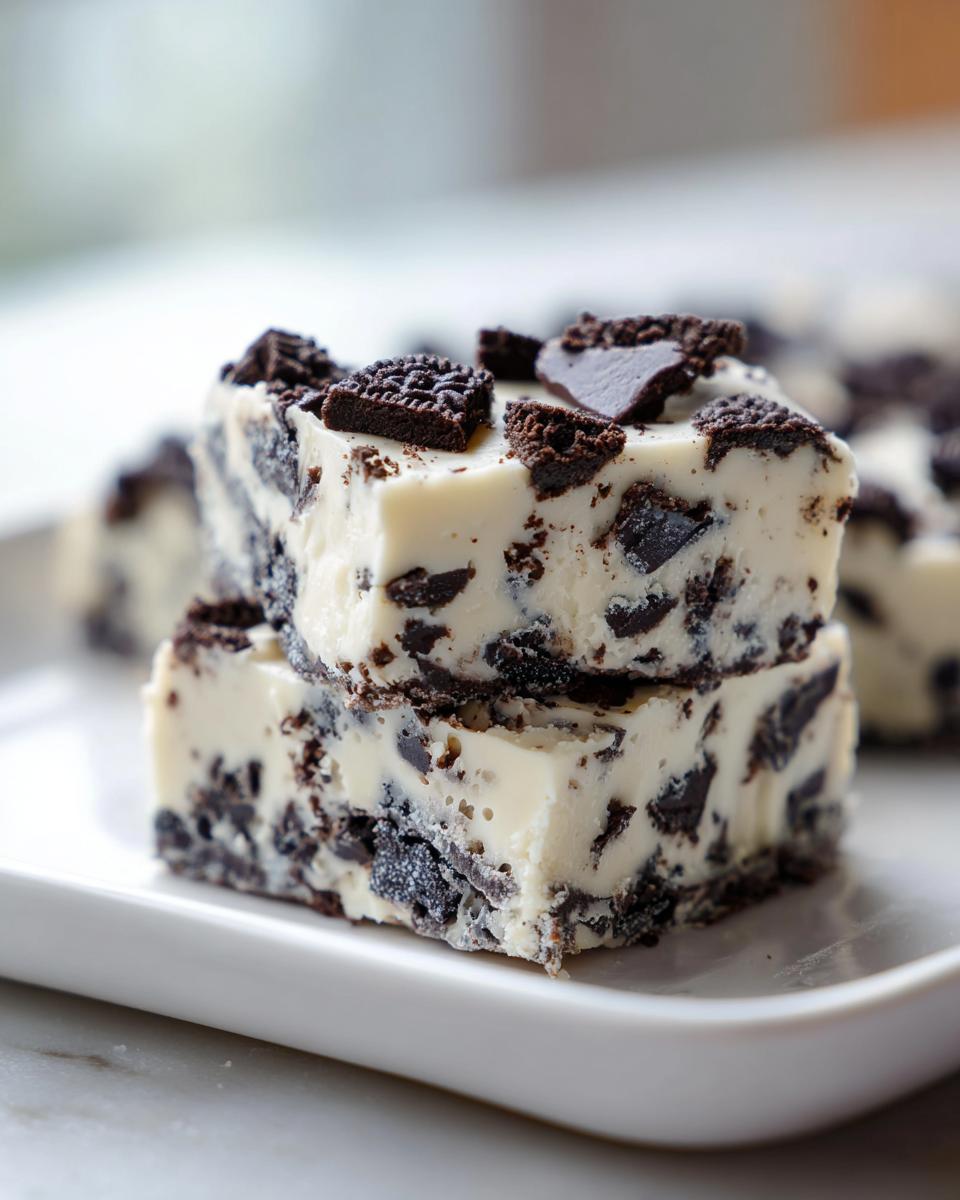
Texture Perfection: Creamy Fudge Meets Crunchy Cookies
What good is ease if the texture is boring? Not much, right? This particular combination gives us that dream factor: the smooth, melt-in-your-mouth richness of the white chocolate base paired with that unmistakable crunch from the Oreos. It’s the ultimate Cookies and Cream Treats experience packed into one bite.
Gathering Ingredients for Your Oreo Fudge
Okay, let’s talk supplies. Since this is such a simple recipe, the quality of what you put in here really shines through. You don’t need a big long list, which is just fantastic for keeping things easy! We are relying on just three powerhouse ingredients that create this amazing, rich texture.
Essential Components for Perfect Oreo Fudge
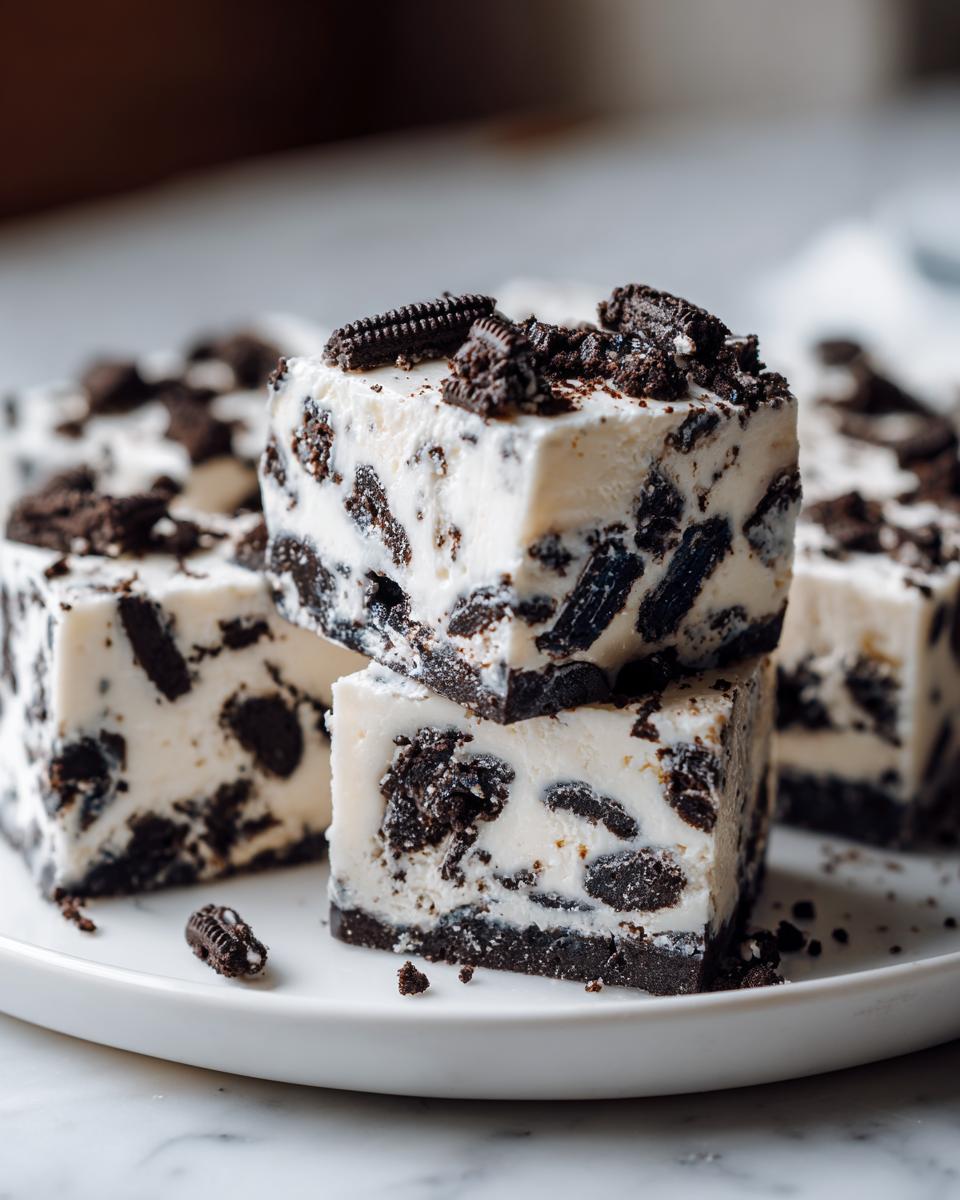
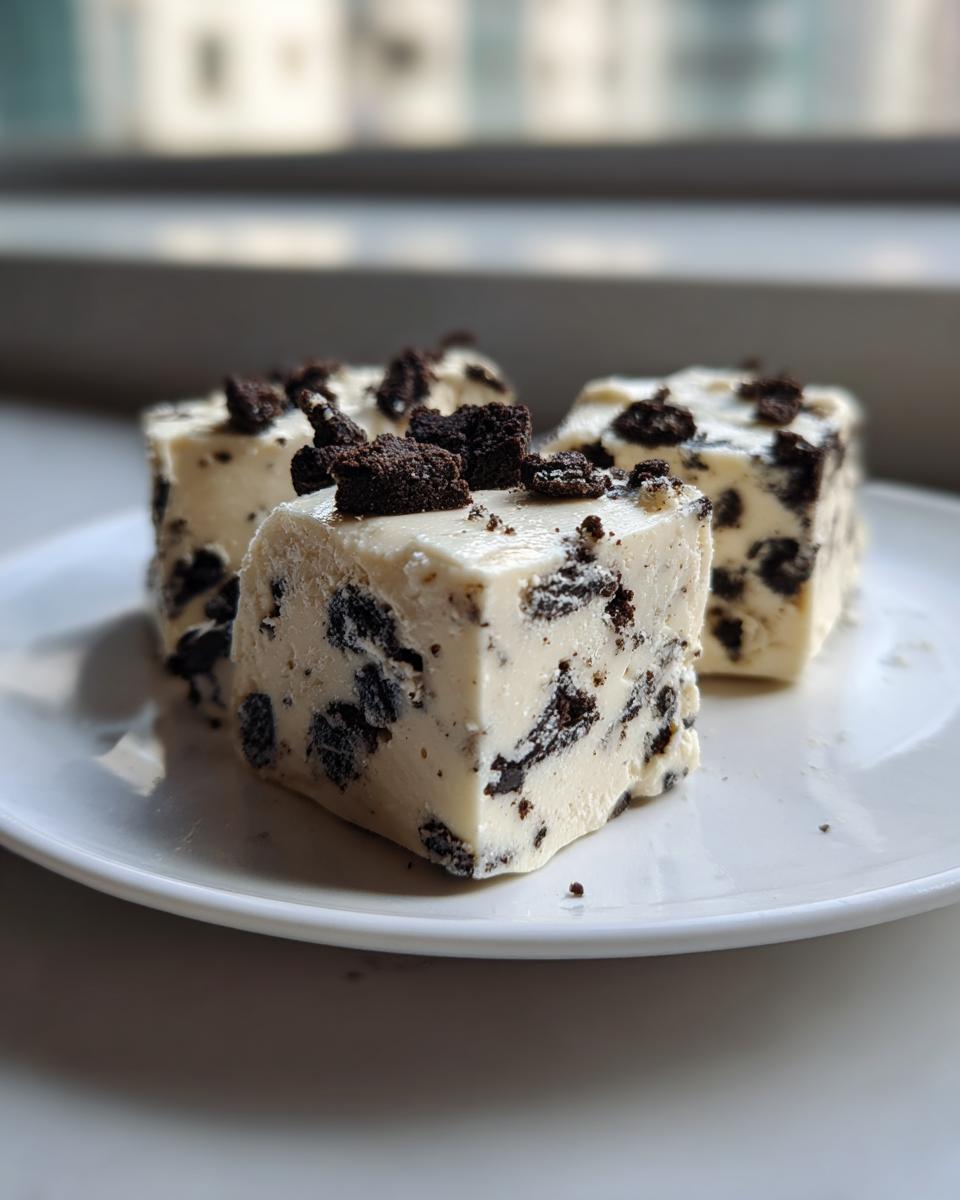
You’ll need one standard 14-ounce can of sweetened condensed milk—that’s the creamy glue holding everything together! Next, grab 12 ounces of white chocolate chips; make sure they are good quality chips because this is what forms the foundation of your White Chocolate Fudge. And finally, we need 2 cups of Oreo cookies, roughly 20 cookies total, already crushed up.
Step-by-Step Guide to Making Easy Oreo Fudge
Now that we have our ingredients ready, let’s get this gorgeous Oreo fudge put together! This process moves so quickly, which is why I always tell people this is the ultimate party dessert idea. If you’re looking for other quick inspiration, you should definitely check out my guide for easy homemade soft chewy sea salt caramels while you work—because who doesn’t love more cookies and cream goodness? Remember, we aren’t using the oven at all, so this is pure kitchen alchemy! For an example of how popular this treat is, you can see the original inspiration over at The First Year Blog!
Prep Work: Setting Up for Success with Your Oreo Fudge
First things first: grab an 8×8 inch baking pan. You absolutely need to line it with parchment paper; make sure you leave a big overhang on the sides—this is how we carefully lift the whole thing out later. Give that parchment a tiny spritz of non-stick spray too, just to be safe. And don’t forget to crush your Oreos now! We want those to be ready to go.
Melting and Mixing the Creamy Fudge Base
Take your white chocolate chips and put them in a sturdy, microwave-safe bowl. You’re going to melt these gently. Microwave them in 30-second bursts, stirring well after every single 30 seconds until it’s perfectly smooth. White chocolate burns so fast, so trust me on this, don’t walk away! Once it’s silky, pour in the entire can of sweetened condensed milk and stir until you have that beautiful, thick, Creamy Fudge base. If you love baking without turning on the heat, check out my easy no-bake Oreo cheesecake recipe too!
Folding in Oreos and Setting the Oreo Fudge
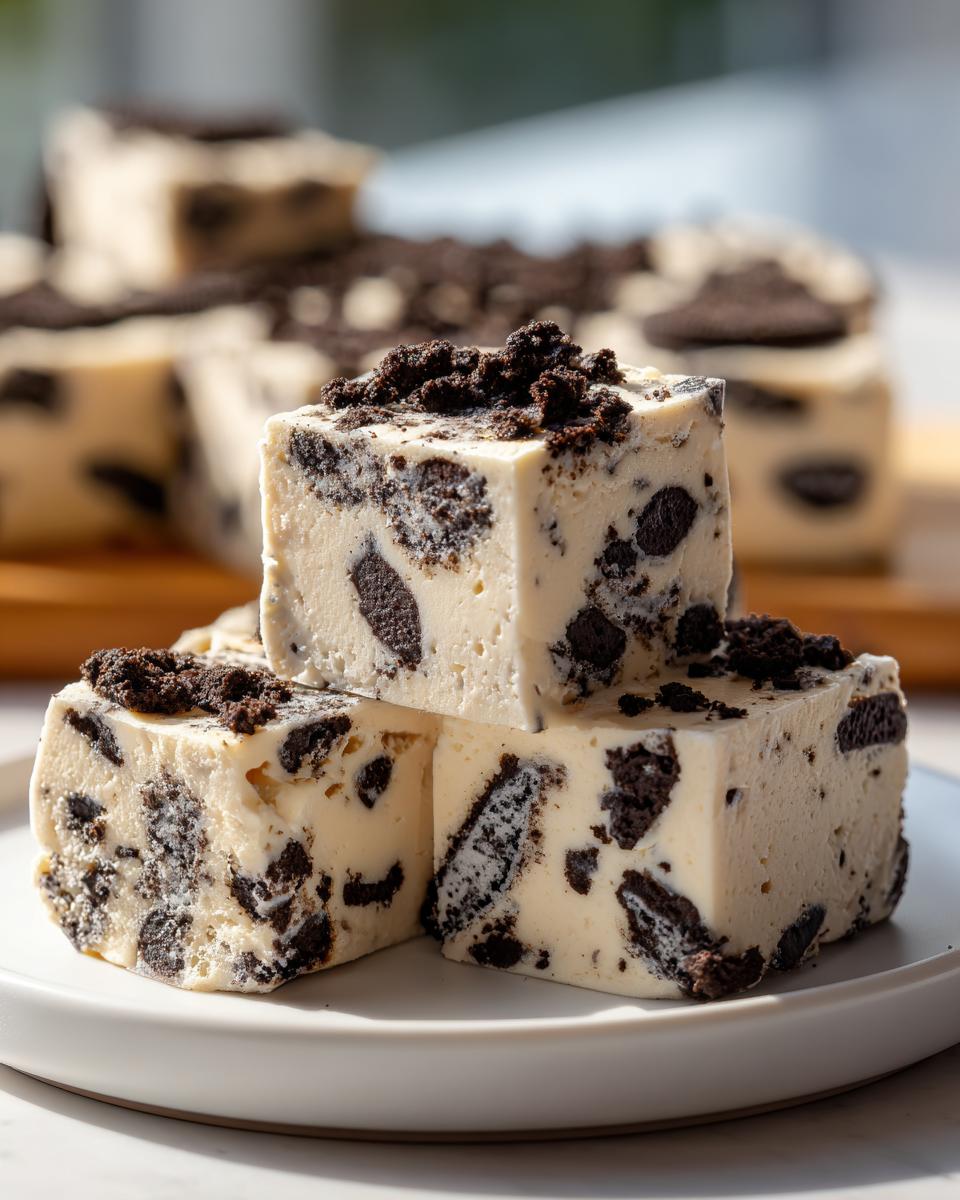
Time for the fun part! Gently fold in those crushed Oreos until they are distributed evenly throughout your fudge base. Don’t over-mix! Then, scrape that wonderful mixture into your prepared pan and use an offset spatula to smooth the top perfectly flat. If you want that extra wow factor, sprinkle a few more crumbs on top and lightly press them in. Pop this pan into the fridge for at least two hours until it’s solid enough to cut. That chilling time is crucial for perfect slices!
Expert Tips for Perfect Homemade Candy (Oreo Fudge Success)
Even though this is one of the simplest Simple Candy Recipes you’ll ever find, a few little tricks will take your Oreo fudge from good to absolutely irresistible. As someone who shares dozens of Easy Recipes for Beginners, I’ve learned that the details matter, even when you’re only using three ingredients. Trust me on these pointers—they’re what keep people asking for my recipe every holiday season!
Achieving the Best Cookie Crush for Your Oreo Fudge
When you crush your Oreos, you have a choice: you can get them almost powdery, or you can leave some good, chunky bits. For the best texture here, I recommend aiming for a mix. If you use a food processor, pulse it a few times and then stop to check. I always use a rolling pin in a zip-top bag because I like the variability—you get those fine little crumbs that meld into the sweetness, and those satisfying chunks of crunch.
Flavor Variations for Your Simple Candy Recipes
Want to make this slightly darker or richer than the pure white chocolate version? It’s easy! You can absolutely swap out a portion of the white chocolate for another type. For example, if you use 12 ounces total of chocolate, substitute 4 ounces of that with good quality semi-sweet chocolate chips. It gives the Oreo fudge a deeper color and cuts the intense sweetness just a tiny bit. Feel free to experiment, though I always suggest starting with the original recipe first! If you’re testing things out, you might want to check out my favorite homemade protein bars for another quick treat idea.
If you’re looking for more inspiration on recipes that go viral, take a peek at this popular version that has lots of great saves: Easy 3 Ingredients Oreo Fudge Recipe.
Storing and Serving Your Rich Chocolate Fudge
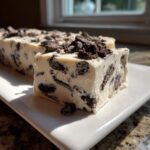
Once your Oreo fudge has set up beautifully in the fridge, you want to make sure it stays just as delicious when you serve it up later. I always aim to keep this treat around for a while, as it makes amazing Sweet Snacks for the week! Letting it set completely is key here for clean cuts.
When you’re ready to slice, lift the whole slab out of the pan using those parchment overhangs we left—it should come out like a perfect brick. Use a large knife and wipe the blade after every couple of cuts if you want those neat edges for your Gifting Desserts. Store the squares in an airtight container. You can keep it on the counter at room temperature for about a week, but if you made a huge batch (and trust me, you might!), pop it in the fridge for longer freshness. If you’re interested in other longer-lasting pantry items, my recipe for easy strawberry freezer jam is a lifesaver!
Frequently Asked Questions About Oreo Fudge
Even with a recipe this straightforward, I always get a few great questions pop up from folks just diving into making their first batch of this wonderful Oreo fudge. People often ask about ingredient swaps because they might not have a specific item on hand, or they just want to know how to keep those edges sharp. I totally get it—when you follow an Easy Fudge Recipe, you want guaranteed success!
Can I make this Oreo Fudge without white chocolate?
That’s a fair question! White chocolate is really what locks in that sweet, creamy texture for our 3-ingredient base. While I haven’t tested it extensively, you could try swapping it out for an equal amount of high-quality melting wafers. Just keep in mind, the final flavor profile is definitely going to shift away from that classic White Chocolate Fudge taste we love so much.
How long does this No Bake Dessert stay fresh?
The beauty of this recipe is that it lasts! Since it’s packed with chocolate and sugar, there’s not much that can go wrong. You can store your airtight container of No Bake Desserts right on the counter at room temperature for up to a week. If you made a giant batch for the holidays, pop it in the fridge for even longer freshness.
What is the best way to cut the fudge cleanly?
For those picture-perfect squares that look beautiful for Gifting Desserts, chilling is your friend! Make sure the fudge is completely firm—I mean rock-solid—straight out of the refrigerator. Use a big, sharp knife, and here’s my secret: wipe that blade clean with a warm cloth between every single cut. It prevents the gooey bits from dragging and keeps your edges super neat.
If you need another comforting favorite while you wait for your fudge to chill, go ahead and try my recipe for easy creamy pumpkin soup!
Nutritional Estimate for This Oreo Fudge Recipe
When we’re talking about a rich homemade candy like this, we know it’s a treat, not an everyday snack! So, I always want to be upfront about what’s in it. Here is the estimated nutritional breakdown for one single, delicious square of our Oreo fudge recipe. Remember, these numbers are just an estimate, but they give you a good idea of what you are enjoying when you snack on these wonderful Sweet Snacks.
Per serving (1 square), you are looking at approximately:
- Calories: 180
- Sugar: 18g
- Fat: 11g (with 6g as saturated fat)
- Protein: 2g
It’s packed with flavor, and that’s what matters most when we are sharing these amazing Party Dessert Ideas!
Share Your Cookies and Cream Treats Experience
That’s it—the easiest, creamiest, crunchiest Oreo fudge you’ll ever make! I hope this recipe brings a little bit of that HearthBite magic—that simple, comforting joy—into your kitchen. If you make this batch of Cookies and Cream Treats, please let me know how it goes! Drop a rating below if you loved this quick dessert, and tell me what you served it with. I love seeing your creations pop up!
If you’re looking for more dishes rooted in that same cozy, from-the-heart feeling, take a peek at all my comfort food recipes. Happy baking (or, you know, happy *not* baking)!
PrintEasy 3-Ingredient No-Bake White Chocolate Oreo Fudge
Make this rich, creamy Oreo fudge with just three simple ingredients. This no-bake recipe is quick to prepare, perfect for satisfying sweet cravings or creating homemade candy for gifts.
- Prep Time: 10 min
- Cook Time: 1 min
- Total Time: 2 hours 11 min
- Yield: 36 small squares 1x
- Category: Dessert
- Method: No-Bake
- Cuisine: American
- Diet: Vegetarian
Ingredients
- 1 (14 ounce) can sweetened condensed milk
- 12 ounces white chocolate chips
- 2 cups crushed Oreo cookies (about 20 cookies)
Instructions
- Line an 8×8 inch baking pan with parchment paper, leaving an overhang on the sides for easy removal. Lightly grease the paper.
- Place the white chocolate chips in a microwave-safe bowl. Microwave in 30-second intervals, stirring well after each interval, until the chocolate is completely smooth. Watch carefully to prevent burning.
- Pour the sweetened condensed milk into the melted white chocolate. Stir until the mixture is fully combined and smooth.
- Fold in the crushed Oreo cookies until they are evenly distributed throughout the fudge base.
- Pour the fudge mixture into the prepared pan. Spread it evenly using an offset spatula.
- If desired, sprinkle a few extra crushed Oreos on top and gently press them into the surface.
- Refrigerate the fudge for at least 2 hours, or until firm enough to cut.
- Lift the fudge out of the pan using the parchment overhang. Cut into small squares before serving or storing.
Notes
- For the best texture, crush your Oreos in a food processor or by placing them in a sealed bag and crushing them with a rolling pin.
- If you prefer a richer flavor, you can substitute 4 ounces of the white chocolate chips with 4 ounces of semi-sweet chocolate chips.
- Store your homemade candy in an airtight container at room temperature for up to one week, or in the refrigerator for longer freshness.
Nutrition
- Serving Size: 1 square
- Calories: 180
- Sugar: 18g
- Sodium: 85mg
- Fat: 11g
- Saturated Fat: 6g
- Unsaturated Fat: 5g
- Trans Fat: 0g
- Carbohydrates: 19g
- Fiber: 0g
- Protein: 2g
- Cholesterol: 10mg