
Sometimes you just crave that deeply satisfying, nostalgic flavor without wanting to heat up the kitchen, right? That’s exactly why I perfected this Easy No-Bake Oreo Cheesecake. It has everything you love—the crunchy chocolate crust, the luscious sweet filling—all ready to go! This truly is the ultimate comfort dessert that doesn’t ask for much work, making it perfect for those busy weeknights or when unexpected guests drop by. When we pull this out, everyone gathers around the table; that’s the magic of a simple, comforting oreo cheesecake.
If you’re looking for a recipe that impresses everyone but keeps your oven off, you’ve absolutely landed in the right spot. You can see how much I love these little indulgent treats by checking out some of my other small-batch recipes, like these easy creamy mini cheesecake bites, too!
- Why This No-Bake oreo cheesecake Recipe is Your New Go-To
- Gathering Ingredients for Your oreo cheesecake
- Step-by-Step Instructions for the Perfect oreo cheesecake
- Tips for Success with Your Homemade Oreo Treats
- Serving Suggestions for This oreo cheesecake
- Storage and Reheating Instructions for Your oreo dessert
- Frequently Asked Questions About oreo cheesecake
- Estimated Nutrition for This oreo cheesecake
- Share Your HearthBite oreo cheesecake Creations
Why This No-Bake oreo cheesecake Recipe is Your New Go-To
I want you to trust this recipe completely. When I say it’s easy, I mean it. This isn’t some finicky, complicated dessert that requires special equipment. This reliably gorgeous oreo cheesecake comes together fast and tastes like pure nostalgia in every creamy bite. It just works, every single time.
- It’s the definition of an easy cheesecake dessert—seriously, total beginner friendly!
- Only 20 minutes of hands-on time, making it a perfect weeknight sweet treat when you need something amazing fast.
- Since there’s no oven involved, cleanup is a breeze, which is always a win in my book.
Speed and Simplicity: The No Oven Required Dessert
We’re talking about a mere 20 minutes to get this whole thing assembled. That’s faster than driving to the store for a sad, pre-made dessert! Once everything is mixed and pressed, it hangs out in the fridge for about six hours, or better yet, overnight. You can literally make this while dinner is going, and it’s ready right when you want dessert. It’s the absolute best no oven required dessert for summertime!
Ultimate Comfort Food Dessert Appeal
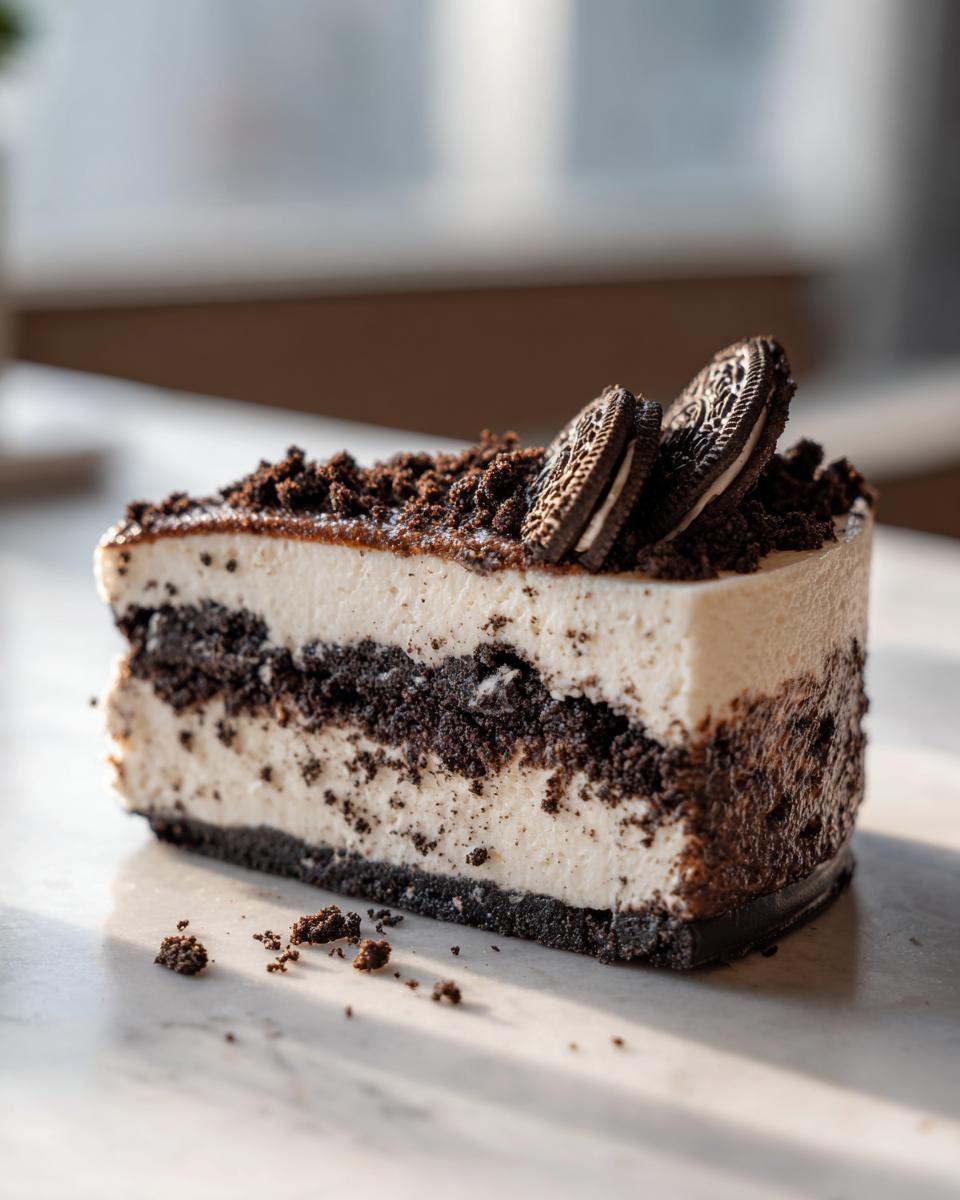
There is something so deeply satisfying about that specific black-and-white contrast of flavor. This isn’t just a dessert; it’s the epitome of comfort. The texture when it’s perfectly chilled is just unbelievable—creamy, cool, and studded with those chocolatey nuggets we all crave. It hits all those velvety, chocolatey notes you look for in a classic cookies and cream cheesecake.
Gathering Ingredients for Your oreo cheesecake
To make sure this oreo cheesecake sets up perfectly solid and creamy, precision matters when gathering your components. We aren’t baking, so every ingredient relies on temperature and measurement to do the job right! Lay everything out first—it makes the 20-minute prep time fly by. For making future cream cheese dessert recipes, I always keep my mixer bowls ready for this kind of setup.
If you want to see how I use cream cheese in savory dishes, you have to try this amazing cream cheese corn casserole recipe sometime—it’s ridiculous!
Crust Components: The Chocolate Cookie Crust Dessert Base
For the foundation, we only need two things, but they must be precise:
- 1 1/2 cups crushed Oreo cookies (that’s about 25 cookies, and yes, crust and filling need separate piles!).
- 1/4 cup unsalted butter, melted until it’s completely liquid.
Getting that right mixture ensures you have a sturdy chocolate cookie crust dessert base that won’t crumble when you slice it.
Cream Cheese Dessert Recipes Filling Essentials
The filling is where the texture truly comes to life. I can’t stress this enough: your cream cheese needs to be fully softened, but your heavy cream needs to be absolutely ice cold for the best results:
- 16 ounces cream cheese, nice and soft.
- 1 cup granulated sugar.
- 1 teaspoon vanilla extract.
- 1 1/2 cups heavy whipping cream, straight from the fridge.
- 1 cup more crushed Oreos to fold right into the filling!
- And just a tiny bit more crushed Oreos (1/2 cup) reserved for the topping.
Step-by-Step Instructions for the Perfect oreo cheesecake
Alright, let’s actually make this magic happen! While this is totally fuss-free, the order we do things in is important for that gorgeous, non-wobbly texture. I always feel like I’m rushing through the mixing, but you need to give each component its moment. If you’re short on time, maybe make sure you have some cold water running while you prep so you can get those Oreo crumbs ready quickly. We’re aiming for that perfect, cool slice—check out how I made things easy in my creamy soup base for comparison; the principles of building flavor layers are the same!
Creating and Chilling the Chocolate Cookie Crust
First up, the crust needs a head start. Take your initial 1 1/2 cups of crushed Oreos and dump them right into a bowl with the 1/4 cup of melted butter. Stir until it looks like wet sand—you should be able to squeeze it and have it hold its shape. Press this mixture down firmly and evenly into the bottom of your 9-inch springform pan. Don’t skimp on pressing! Once it’s packed tight, pop that pan into the freezer. That quick freeze sets the butter, which is a non-negotiable step for a great crust.
Achieving Smooth Filling: Whipping Cream and Cream Cheese
Now for the filling! Grab your softened cream cheese and beat it by itself until it is perfectly smooth—I mean velvety, no lumps visible at all. That takes a minute or two with the electric mixer. Then, slowly add your sugar and that splash of vanilla, beating again until combined. Here’s the vital part for fluffiness: In a completely separate, grease-free bowl, whip your cold heavy cream until it forms stiff peaks—you want it standing up straight when you lift the beaters. We gently fold this whipped cream into the cream cheese mixture. Don’t stir aggressively; folding keeps the air in!
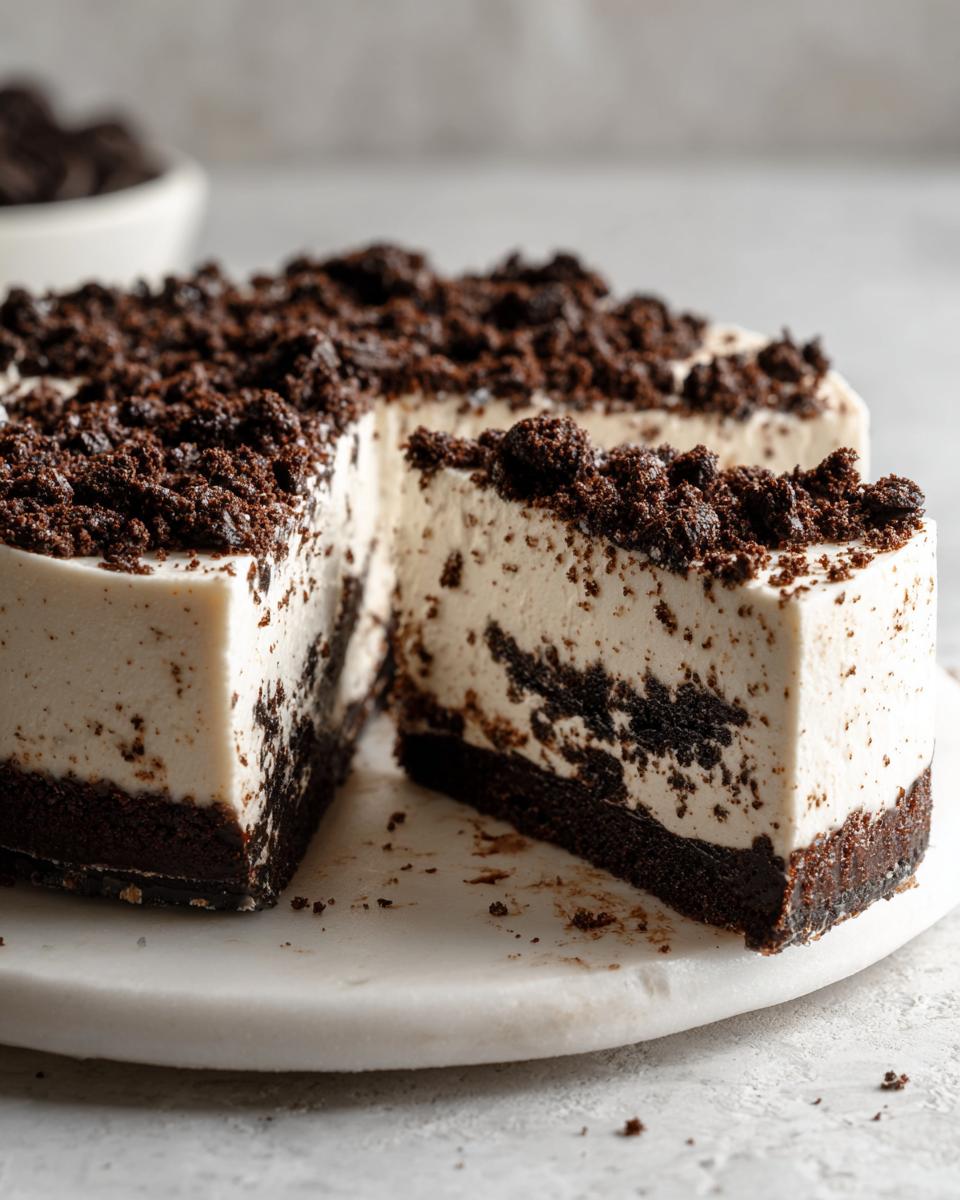
Final Assembly and Setting the Chilled cheesecake recipes
Once the cream is folded in, gently mix in the 1 cup of Oreos meant for the filling step. Don’t overdo it; we want ribbons of texture. Pour all that luscious filling right on top of your frozen crust and spread it out evenly. Now, be patient! Cover it loosely and let it chill in the fridge for a minimum of 6 hours, but honestly, chilling overnight makes these chilled cheesecake recipes taste even better. When it’s firm, you’re ready to serve the best slice of cookies and cream cheesecake!
Tips for Success with Your Homemade Oreo Treats
Even though this is an easy no-bake recipe, the details make the difference between a good homemade Oreo treat and an absolutely spectacular one! I learned over the years that a little mindfulness during assembly really pays off when it comes time to serve. A beautiful, clean slice makes this perfect for any party setting, too!
I always mention my favorite pretzel recipe when talking about successful baking because it reminds me of the importance of temperature—check out my buttery soft pretzel bites for another example of temperature control!
Ingredient Temperature and Texture Control
Listen, if you try to whip up the filling when the cream cheese is even slightly cool, you’ll end up with lumps that won’t smooth out, no matter how long you mix. I always leave the block sitting out for at least an hour before I even think about turning on the mixer. If it’s too warm, though, it gets greasy, so aim for that soft indent when poked! Also, that heavy whipping cream needs to be arctic cold. If your cream is even lukewarm, it won’t whip up to those stiff peaks we desperately need to give this dessert its lift.
Variations: Making Bite Size Cheesecakes or Bars
If you’re making this for a dessert board, you don’t always need a whole 9-inch cake! I love making these into bite size cheesecakes. Just line a muffin tin with cupcake liners and press the crust in the bottom of each cup, then fill them up. They chill faster too, which is a bonus! You can also press the whole batch into a 9×13 pan and slice it into squares later for amazing cheesecake bar recipes. Either way, you’re guaranteed smiles.
Serving Suggestions for This oreo cheesecake
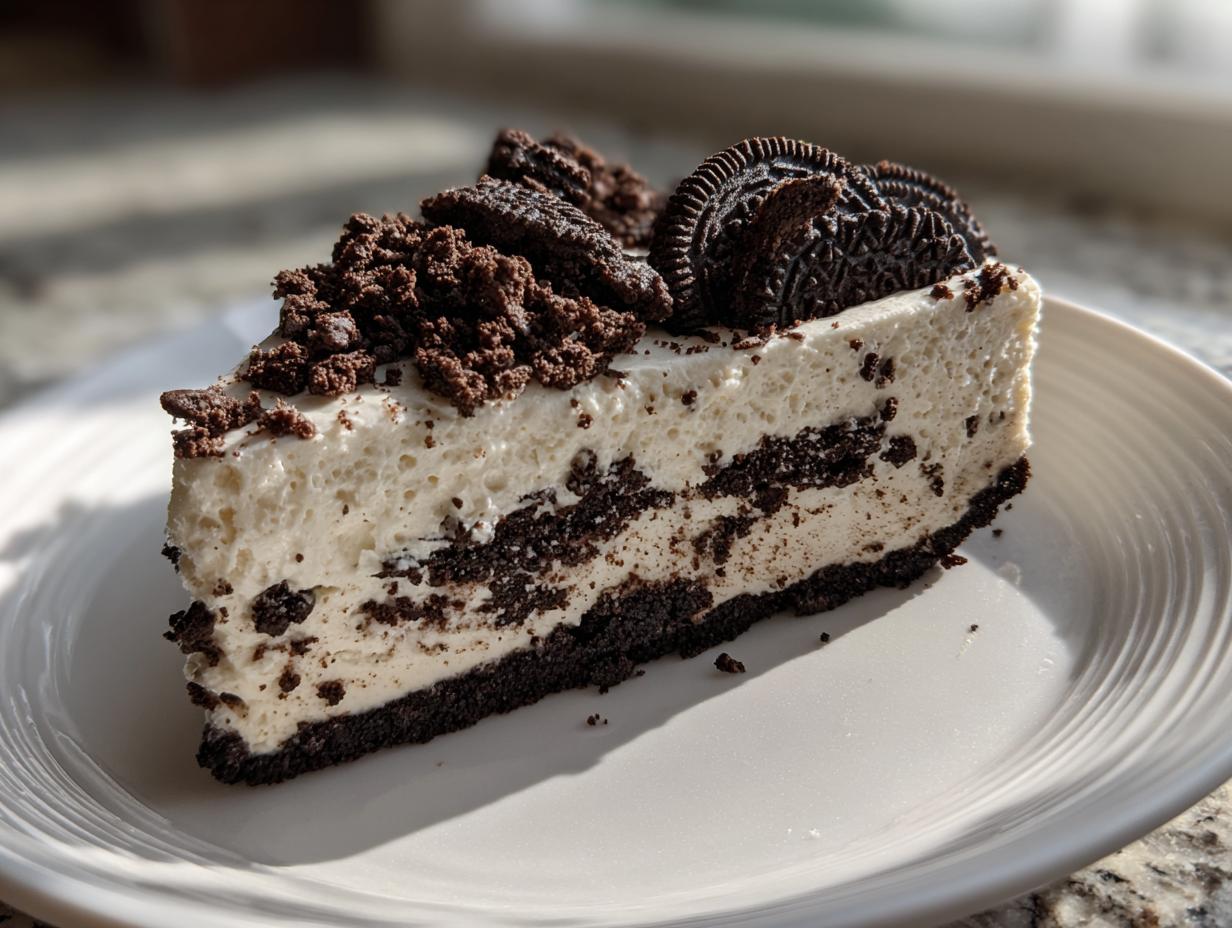
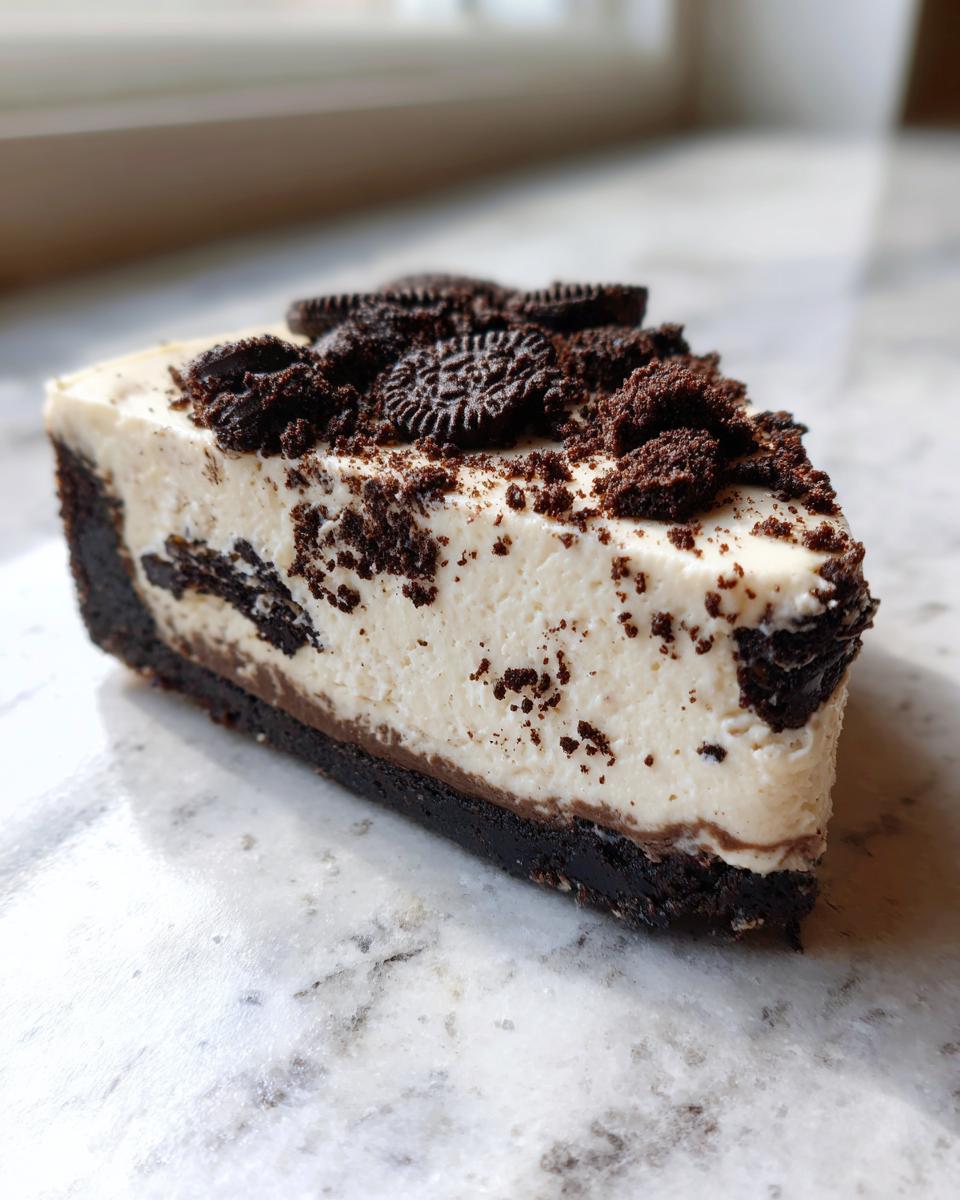
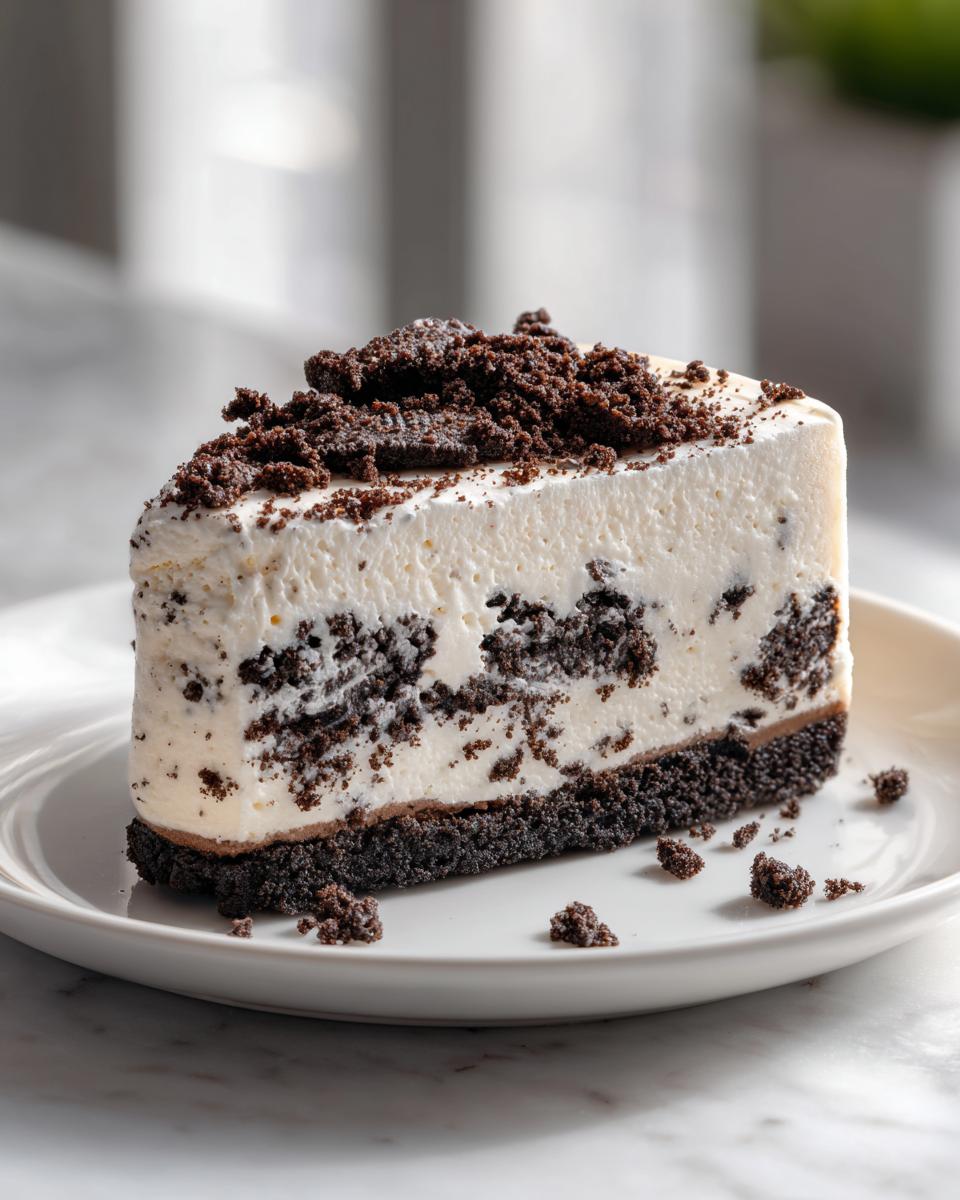
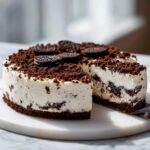
Once this beautiful oreo cheesecake is perfectly chilled and set, the fun only begins! Since this is such a showstopper, presentation is everything, especially if you are creating a big dessert board inspiration display. I love to add a gentle dusting of cocoa powder right before bringing it out of the kitchen, just for that dramatic, dark contrast against the white filling.
For pairings, you honestly don’t need much else, but a few fresh raspberries or a drizzle of high-quality salted caramel sauce cuts through the richness perfectly. Remember, this recipe is already rich, so keep the accompaniments simple so the cookies and cream flavor can really shine! It just begs to be shared, doesn’t it? For more presentation ideas, you should definitely check out my tips on creating the best dessert board inspiration layout.
Storage and Reheating Instructions for Your oreo dessert
Because this is a glorious, creamy, no-bake oreo dessert, we need to treat it right in the fridge! Make sure that springform pan is covered loosely with plastic wrap or aluminum foil. You want to protect it from absorbing any weird smells from the fridge, trust me, that happens! You can safely store this cheesecake for about three to four days, though I doubt it will last that long. Since there’s no baking involved, it never needs reheating—it’s best served right out of the cold. Enjoy that cool deliciousness!
Frequently Asked Questions About oreo cheesecake
I know everyone has a few questions before diving into a new recipe, especially when you’re slotting an oreo cheesecake into a busy schedule. It’s totally normal! I always try to answer the big questions right here so you feel totally confident before you even start crushing those cookies. These are the things I always got asked when I first started sharing this recipe with friends.
Can I use a different cookie in this cookies and cream cheesecake?
Oh, you can certainly try! But I have to be honest here: if you’re looking for that classic, sturdy result, stick with the chocolate sandwich cookies—Oreos are best. Their dark color and specific texture give the crust the right structure when mixed with butter, and they break up nicely in the filling. You might try something like chocolate wafers, but a lot of other cookies won’t hold their shape or give you that recognizable flavor profile we love in a cookies and cream cheesecake.
Is this recipe better than a baked cheesecake recipes?
Better is such a strong word, but for simplicity and texture, I think this no-bake wins every time for ease! A baked version is lovely and dense, sure, but it requires careful temperature watching to prevent cracks, and you have to wait for it to cool completely. This chilled, creamy version is lighter, fruitier, and requires zero oven babysitting. If you must bake, I have my classic recipes ready for you to check out baked cheesecake recipes, but for a simple summer hit, no oven required is the way to go!
How long does it actually need to chill?
I know you’re eager to eat it, believe me! You *can* serve it after about 4 or 5 hours, but those last couple of hours make a HUGE difference. I always insist that you let it go overnight if you can manage it. When it sets overnight, the cream cheese filling firms up beautifully, making for a much cleaner slice when serving at your next party.
Can I make this ahead of time for a party?
Absolutely! This is honestly one of my favorite party dessert ideas because it *needs* to be made ahead. You can successfully make this up to two days in advance. Keep it covered tightly in the fridge, and just add your final sprinkle of crushed cookies right before you slice into it for the freshest presentation!
Estimated Nutrition for This oreo cheesecake
Now, I always say that when you’re eating something this luxurious, you shouldn’t worry too much about the numbers, but I know some of you like to plan ahead! These figures are just my best estimates based on the standard ingredients I typically keep stocked here in my pantry. So, one slice of this glorious oreo cheesecake clocks in around 450 calories, with about 35g of sugar and 6g of protein.
Remember, these are just guidelines, not gospel! The exact numbers will shift depending on the brand of cream cheese or cookies you decide to use in your weeknight sweet treat.
Share Your HearthBite oreo cheesecake Creations
When you make this dreamy oreo cheesecake, I truly want to see it! Sharing our culinary successes is what this HearthBite community is all about. Did you serve it with fresh berries? Did you make a whole batch of bite size cheesecakes? Don’t keep those beautiful creations hidden away!
Please leave a star rating right below the recipe card—if you loved how easy and creamy it turned out, five stars would make my day! It helps other home cooks find this reliable recipe too. If you captured a great photo of your final slice, please tag me on social media! I love seeing how this simple, wonderful dessert graces your tables. You can always reach out to me directly via my contact page if you have any questions while baking!
PrintEasy No-Bake Oreo Cheesecake
Make this irresistible no-bake Oreo cheesecake. It features a chocolate cookie crust, a creamy filling loaded with cookies and cream flavor, and requires no oven time.
- Prep Time: 20 min
- Cook Time: 0 min
- Total Time: 6 hr 20 min
- Yield: 10 servings 1x
- Category: Dessert
- Method: No Bake
- Cuisine: American
- Diet: Vegetarian
Ingredients
- 1 1/2 cups crushed Oreo cookies (about 25 cookies)
- 1/4 cup unsalted butter, melted
- 16 ounces cream cheese, softened
- 1 cup granulated sugar
- 1 teaspoon vanilla extract
- 1 1/2 cups heavy whipping cream, cold
- 1 cup crushed Oreo cookies, for filling
- 1/2 cup crushed Oreo cookies, for topping
Instructions
- Prepare the crust: Mix the 1 1/2 cups of crushed Oreos with the melted butter until fully combined. Press this mixture firmly into the bottom of a 9-inch springform pan. Place the crust in the freezer while you prepare the filling.
- Beat the cream cheese: In a large bowl, use an electric mixer to beat the softened cream cheese until it is smooth and there are no lumps.
- Add sugar and vanilla: Gradually add the granulated sugar to the cream cheese mixture and beat until combined. Mix in the vanilla extract.
- Whip the cream: In a separate, clean bowl, whip the cold heavy whipping cream until stiff peaks form.
- Fold together: Gently fold the whipped cream into the cream cheese mixture until just combined. Do not overmix.
- Add cookies: Fold in the 1 cup of crushed Oreos designated for the filling.
- Assemble the cheesecake: Spread the filling evenly over the chilled crust.
- Chill: Cover the pan loosely with plastic wrap and refrigerate for at least 6 hours, or preferably overnight, until the cheesecake is firm.
- Garnish and serve: Before serving, carefully remove the sides of the springform pan. Top the cheesecake with the remaining 1/2 cup of crushed Oreos. Slice and serve this easy cheesecake dessert cold.
Notes
- For a richer chocolate flavor, use chocolate sandwich cookies that include the cream filling in the crust measurement.
- If you want a slightly firmer texture, you can add 1 teaspoon of unflavored gelatin dissolved in 1/4 cup of hot water to the cream cheese mixture before folding in the whipped cream.
- This recipe works well for making bite size cheesecakes by using a muffin tin lined with paper liners.
Nutrition
- Serving Size: 1 slice
- Calories: 450
- Sugar: 35g
- Sodium: 320mg
- Fat: 30g
- Saturated Fat: 18g
- Unsaturated Fat: 12g
- Trans Fat: 0.5g
- Carbohydrates: 40g
- Fiber: 1g
- Protein: 6g
- Cholesterol: 95mg