
Who doesn’t adore a perfect, bite-sized dessert? They disappear too fast at parties, but they are the best little bursts of joy, especially when they taste like pure indulgence. That’s exactly what we are making today! I am sharing my absolute favorite method for creating the ultimate easy, no-bake red velvet cake balls. Forget the mess of layering and frosting an entire cake; these little spheres capture all that rich, velvety flavor with just a fraction of the effort.
For me, food is about connection, and these vibrant truffles just scream celebration. Whether I’m putting together a platter for a holiday gathering or tucking them into small boxes for neighbor gifts, these red velvet cake balls make people feel special. We’re using a smart hack involving cake mix to keep things incredibly fast, but they taste so rich and fudgy you’d swear you spent all day baking from scratch. If you love this fudgy flavor profile, you absolutely must check out my recipe for fudgy red velvet brownies too! Trust me, these are going to be your new go-to for spreading a little comfort and sweetness around!
- Why You Need This Easy Red Velvet Cake Balls Recipe
- Essential Ingredients for Homemade Red Velvet Treats
- Ingredient Notes and Substitutions for Red Velvet Cake Balls
- How to Prepare Easy Red Velvet Cake Balls Step-by-Step
- Tips for Success When Making Red Velvet Cake Balls
- Serving Suggestions for Party Dessert Bites
- Storage & Reheating Instructions for Red Velvet Cake Balls
- Frequently Asked Questions About Red Velvet Cake Balls Recipe
- Share Your Homemade Red Velvet Treats
Why You Need This Easy Red Velvet Cake Balls Recipe
I know life gets busy, and sometimes you need a showstopper dessert without spending hours beating butter or waiting for things to cool down completely. That’s why this specific recipe for red velvet cake balls is tucked away in my ’emergency dessert’ file! They look so elegant, but the secret is how quickly they come together. Seriously, these little bites are perfect for sharing joy.
-
Perfect Party Dessert Bites
If you are looking for simple dessert recipes that vanish instantly at a gathering, these are it! They are vibrant and festive—absolutely ideal when you need stunning party dessert bites for Valentine’s Day or Christmas. Nobody can resist a perfectly coated, bite-sized treat on a dessert platter!
-
No Bake Red Velvet Simplicity
While we do have to bake the cake initially (we crumble it later!), the assembly is totally no-bake! This saves time and keeps the moisture locked in beautifully. It’s the easiest way to get that classic red velvet taste without fuss.
-
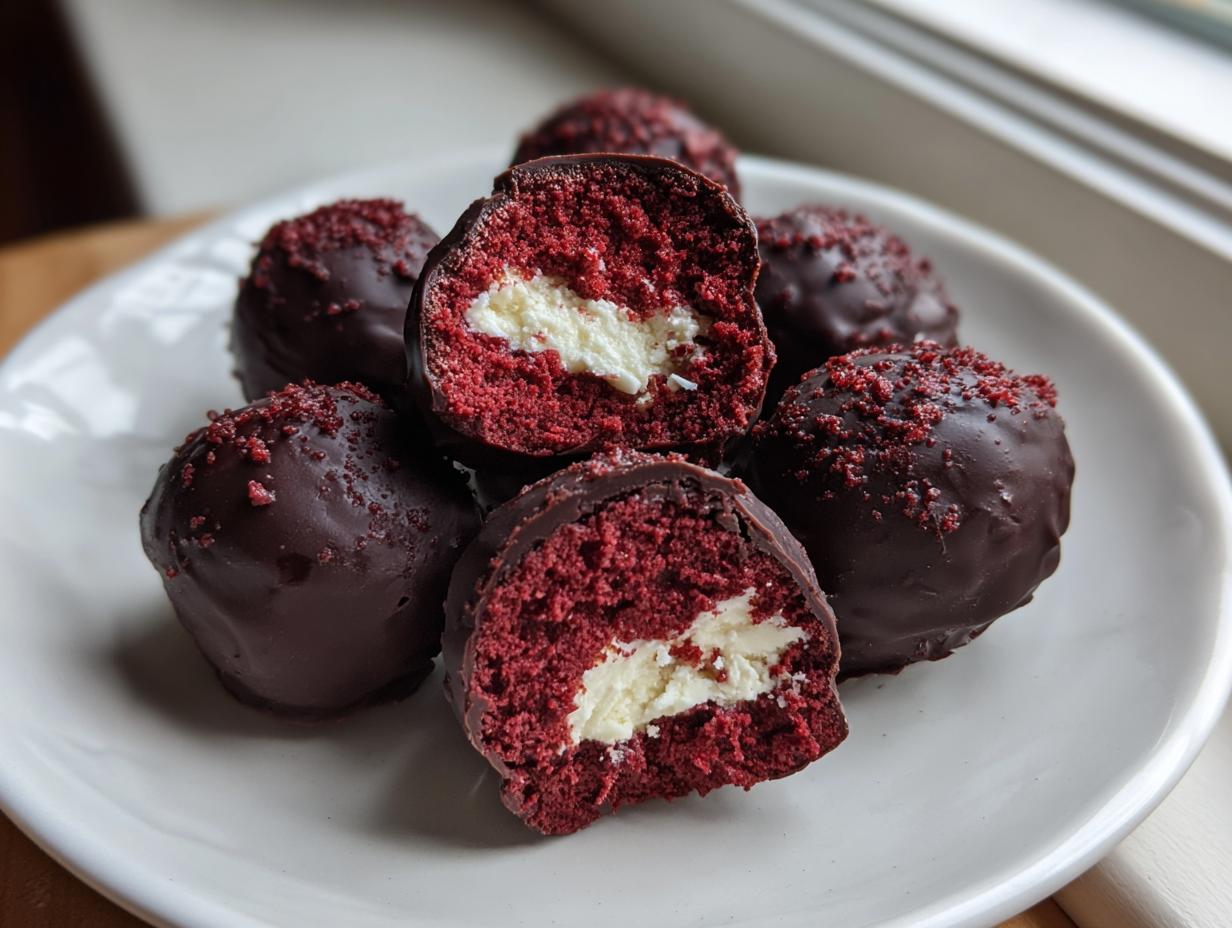
Fudgy Cake Balls with Cream Cheese Center
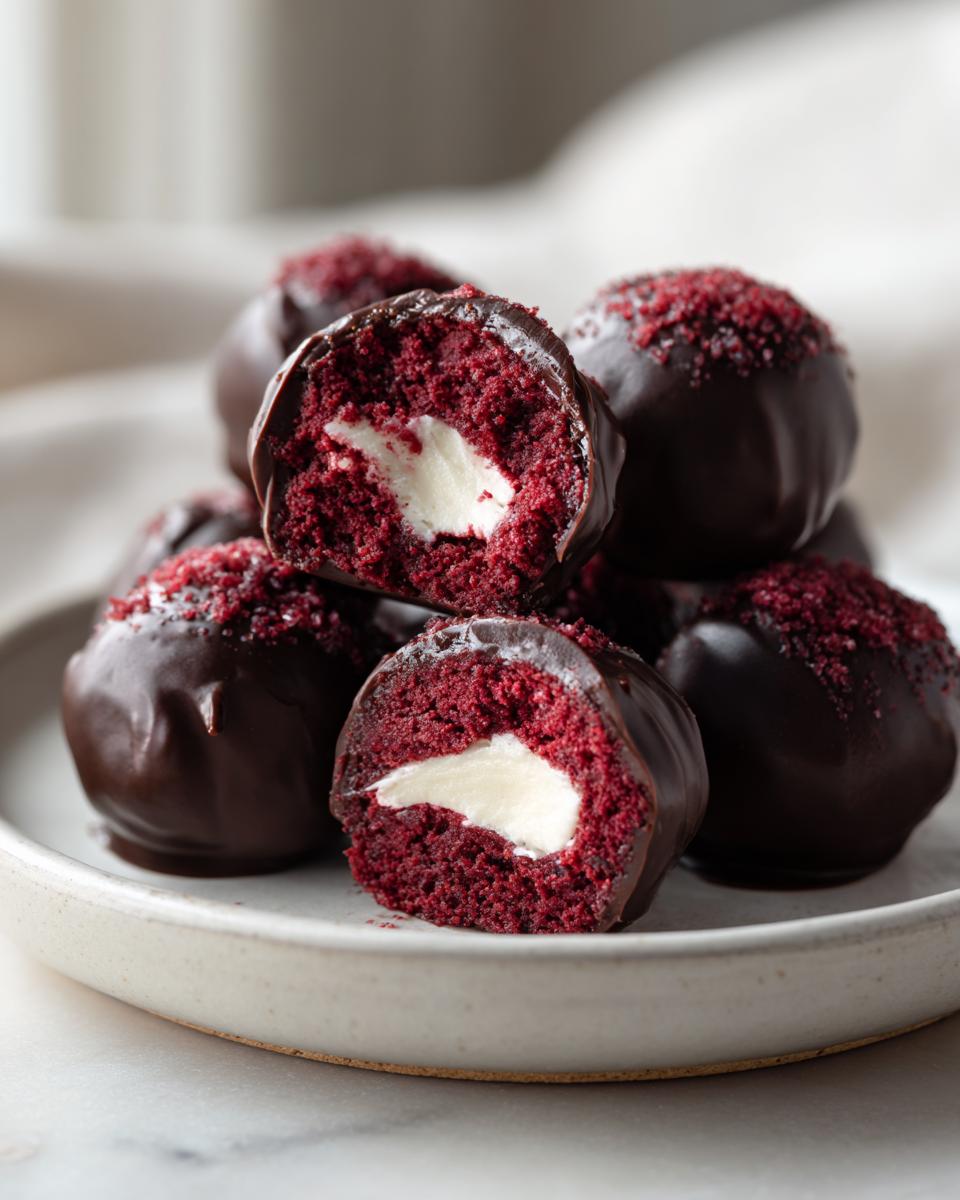
This isn’t just dry cake crumbs glued together! The addition of cream cheese makes the interior incredibly fudgy, almost like a truffle. It’s that tangy, rich center that separates a good cake ball from an absolutely amazing one.
Essential Ingredients for Homemade Red Velvet Treats
Okay, let’s talk ingredients! Since we are keeping this recipe so straightforward, we need to make sure the core components are top-notch. Seriously, because there are so few steps in making these red velvet cake balls, every single item listed below plays a huge role in that final, fudgy texture. Don’t panic about tracking down fancy things; most of this is pantry-stock stuff, which lines up perfectly with the ‘easy dessert’ goal!
For the Red Velvet Cake Balls Base
This is where the magic starts—baking the cake crumb that forms the center.
- 1 (15.25 ounce) box red velvet cake mix
- 1 cup water, or as directed on the box (we want it slightly dense!)
- 2 large eggs, or as directed on the box
- 1/3 cup vegetable oil, or as directed on the box
- 8 ounces cream cheese, softened (I mean fully softened, folks!)
- 1 teaspoon vanilla extract
For the Chocolate Coating and Drizzle
This shell is what makes them look professional and keeps all that creamy goodness locked inside until you take a bite!
- 2 cups semi-sweet chocolate chips (for coating)
- 1 cup white chocolate chips (optional, used for that pretty drizzle effect)
- Vegetable shortening or coconut oil (just a teaspoon or so, if needed to thin the chocolate)
Ingredient Notes and Substitutions for Red Velvet Cake Balls
When you’re aiming for ease, leaning on a good box mix is totally okay—in fact, I encourage it for these red velvet cake balls! The beauty of this dessert is how forgiving it is, but a few tweaks can elevate them from good to *must-make-again* status. I never want you to feel stressed in the kitchen, so here are a few things I’ve learned over the years about the ingredients we’re using.
Cake Mix vs. Scratch Baking
Look, I love baking from scratch, I really do. But for cake balls, that slight sweetness and the texture from a standard box mix works like a charm! When you crumble that baked cake with the cream cheese, the cake mix provides a structural stability that sometimes a scratch cake lacks. It helps keep everything uniform and prevents mushiness, which is crucial when you’re rolling them into perfect little bite sized red velvet dessert pieces!
Cream Cheese Consistency Tip
Here’s my little secret sauce, straight from the recipe notes! If you want these to push past ‘fudgy’ into ‘decadent truffle’ territory, try this swap: use only 4 ounces of the softened cream cheese, and substitute the other 4 ounces with your favorite store-bought or homemade cream cheese frosting. That extra bit of sweetness and smoother texture makes the center simply melt the moment it hits your tongue. It’s fantastic for impressing people!
Coating Alternatives
Melting chocolate can sometimes be fussy, and nobody wants clumpy coating on their beautiful red spheres! If you find the semi-sweet chips are getting too stiff or seizing up when you melt them, don’t stress out. Swap them entirely! You can use good quality candy melts—the ones that come already colored or specifically designed for dipping. They melt beautifully smooth and harden up with a lovely, crisp shell every single time. Super simple fix for a perfect finish on your white chocolate cake balls drizzle.
How to Prepare Easy Red Velvet Cake Balls Step-by-Step
This is the fun part! Turning baked cake into these perfect little nuggets is surprisingly therapeutic. I always put on some good music while I do this part. Remember, the success of these red velvet cake balls really depends on starting with a completely cool cake. Don’t rush this, or things get messy fast!
Baking the Cake and Creating Crumbs
First things first, follow your cake mix directions, but I always recommend baking just until a toothpick comes out clean, maybe even slightly less done than you normally would. We want moistness! Bake it in that 9×13 pan as instructed, and then—this is crucial—let it cool completely. I mean, fully cool, maybe even bake it the night before. Once it’s cool, just use your hands to crumble the entire thing right into a big bowl. Don’t worry about the slightly browned edges; just toss those bits out.
Forming the Fudgy Cake Balls Dough
Now for the binding magic. Get that 8 ounces of softened cream cheese and that vanilla extract beating until they look dreamy and smooth on their own. Then, you slowly introduce the cake crumbs to the cream cheese mixture. Mix it gently, either by hand or on low with your mixer, until it looks like a thick, unified dough. It shouldn’t be sticky anymore. Next, roll that dough into little balls, aiming for about one inch each. Place them carefully on a sheet lined with parchment paper. See? You’re already making gorgeous easy cake balls!
Chilling and Melting Chocolate for Dipping
This waiting period is NON-NEGOTIABLE! Pop those rolled balls into the fridge for at least 30 minutes. Chilling them solid is what prevents them from turning into red mush when they hit the hot chocolate. While they chill, gently melt your semi-sweet chocolate chips. Remember the trick: microwave safe bowl, short bursts—30 seconds at a time—stirring really well between each burst. If it seems too thick to dip, stir in just one tiny teaspoon of shortening or coconut oil to loosen it up.
Coating and Finishing Your Red Velvet Cake Balls
Time to dip! Take the chilled balls out, and working one at a time, drop it right into that melted chocolate. Use a fork or a dipping tool to coat it completely. Seriously lift it out, let it sit at the edge of the bowl for three seconds, and gently tap the fork on the bowl edge to let the extra chocolate drip off. Nobody wants sad, thick chocolate puddles around their dessert! Place them back on the parchment paper. If you’re doing the chocolate covered cake balls drizzle, melt your white chocolate now and drizzle right over the top! Let them sit on the counter until the coating is totally set.
Tips for Success When Making Red Velvet Cake Balls
Listen, making these red velvet cake balls is mostly assembly, but a few little tricks can keep you from having a meltdown when you’re dipping them. When I first started messing around with cake truffles, I learned the hard way that the consistency of that dough is everything. Get this right, and you’ll have flawless, smooth coatings! A perfectly rolled, firm ball makes all the difference when we move onto the chocolate dipping stage.
Achieving the Right Dough Consistency
When you mix that cake crumb and cream cheese together, you’re aiming for something that feels like thick, pliable playdough. If you find your mixture is too wet, don’t worry, that’s an easy fix! Just grab a handful of those leftover cake crumbs you crumbled earlier—or even finely crush a small piece of leftover cake—and mix them in until the dough stops sticking aggressively to your hands. On the flip side, if you chilled your cream cheese mixture for too long (oops, happens to the best of us!), and it feels way too dry and crumbly to roll, add just a tiny splash—maybe a teaspoon—of milk or extra softened cream cheese until it just comes together again.
Dipping Technique for Smooth Chocolate Covered Cake Balls
This is the part that makes people nervous, but I promise, it’s simple once you get the rhythm down. I usually use a dipping tool if I have one, but two standard forks work just fine too. Submerge your chilled cake ball quickly—don’t let it sit too long, or it’ll start absorbing the heat! Lift it out onto the fork and gently tap the fork against the side of your chocolate bowl. You need that excess coating to drip right back in. If the chocolate runs off too slowly, your coating is too thick. Tap it a bit firmer and place it right onto your parchment paper. For more insight on making luscious coatings, you should definitely check out the tips over at Basics with Bails if you’re looking for extra guidance on chocolate work.
And hey, if you’re looking for another fun, fast cookie-like treat, try my recipe for easy cool whip cookies! It keeps that simple dessert vibe going strong.
Serving Suggestions for Party Dessert Bites
These vibrant red velvet cake balls are so versatile! They look fantastic on a dessert table, but they also make a great little surprise treat when you just need something sweet alongside your coffee. Honestly, they are perfect for any time you want an elegant, bite-sized indulgence. Since they are already perfectly portioned, you don’t have to worry about cutting cakes or messy slices. Just grab and go!
Pairing with Beverages
Because they are so rich—you’ve got that fudgy cake center plus that decadent chocolate shell—I find they pair beautifully with something simple. A hot cup of coffee cuts right through the sweetness perfectly, which is why they are my favorite afternoon pick-me-up. But if you’re serving these at a party, don’t forget the basics! Tall glasses of cold milk are always a hit, especially with the kids. For something festive, I love serving them next to a mocktail or a glass of slightly sweet sparkling cider. All those bubbles just make the richness feel a little lighter!
Presentation Ideas for Red Velvet Truffles
Presentation is where you can really make these simple treats shine without adding extra steps to the recipe itself! I highly recommend grabbing those small, fluted paper liners, the ones made for mini-muffins or chocolate kisses. Placing each finished truffle into one of those little cups instantly elevates them from a simple ball to a fancy confection. Then, for a party display, skip just piling them on a flat plate. Instead, stack them delicately on a tiered serving tray. The height draws the eye, and the contrast between the deep red interior (if someone bites one near the edge!) and the smooth chocolate shell looks stunning. They look incredible arranged next to a batch of my Christmas cookie bars!
Storage & Reheating Instructions for Red Velvet Cake Balls
You’ve made these gorgeous red velvet cake balls, and now you need to know how to keep them looking and tasting perfect until the next party—or until you inevitably sneak one later tonight! The great news is that because they are coated in chocolate, they are super sturdy little treats. They are actually fantastic for making ahead of time, which is always a win in my book.
Refrigeration Guidelines
If you plan on serving them within the next week, the refrigerator is your best friend. Because we used cream cheese in that fudgy center, they really shouldn’t hang out on the counter for too long, especially in a warm kitchen. Pop your finished, set red velvet cake balls into a single layer in an airtight container. If you need to stack them, put a little piece of wax paper or parchment paper between the layers so the chocolate coating doesn’t stick together. Kept cool and sealed up tight, they should stay absolutely fresh and creamy for about a week. When you take them out, let them sit on the counter for about 15 minutes before eating so the center softens up just a hair!
Freezer Tips for Cake Mix Cake Balls
Do you know what I love doing? Making a massive batch of these cake mix cake balls right after Christmas, so I have perfect little goodies ready for Valentine’s Day or Easter! These freeze like a dream, which is something I pointed out in the recipe notes. If you need to store them long-term, flash-freeze them first. Lay the coated balls out on a baking sheet, making sure none of them are touching, and stick that tray in the freezer for about an hour until the chocolate shell is rock hard. Once they are frozen solid, you can transfer them into a sturdy, airtight, freezer-safe container. Pop a piece of parchment paper on top, seal it up, and they will keep beautifully for up to three months. Just thaw them slowly in the fridge before serving!
Frequently Asked Questions About Red Velvet Cake Balls Recipe
I always get questions when I post these red velvet cake balls because people can’t believe how easy they are! Below are some of the most common things readers ask me about making sure these turn out perfectly fudgy every single time.
Can I make these red velvet cake balls without baking the cake first?
That’s a great question, especially if you are looking for a truly foolproof no-bake dessert! For this specific recipe, the answer is unfortunately no. While the final assembly is no-bake—meaning we aren’t turning the oven back on after the cake base is made—we absolutely must bake the red velvet cake first. We need that baked cake to crumble up before we mix in the cream cheese. That crumb structure is what gives us that signature fudgy texture that makes these no bake red velvet treats so special!
What is the best way to get a smooth white chocolate cake balls coating?
Oh, the chocolate coating! This is where folks sometimes struggle, but I’ve got you covered! To guarantee that beautiful, smooth shell on your white chocolate cake balls, you have two main options. First, use high-quality melting chocolate or candy melts designed for dipping; they contain stabilizers that help them melt evenly and harden nicely. Second, if you are set on using standard chocolate chips, you absolutely must thin them down just a touch. Stir in about one teaspoon of vegetable shortening or coconut oil after the chocolate is fully melted. This lowers the viscosity just enough so that when you dip your chilled ball, the excess drips right off, leaving a thin, glossy, perfect coat.
How long do these cream cheese cake balls need to chill before dipping?
Patience here pays off big time! Once you’ve mixed the crumble and cream cheese and rolled them into your little spheres, they need a good solid chill. I insist on at least 30 minutes in the refrigerator. If you try to dip them when they are soft or room temperature, they might try to break apart or melt right into your warm chocolate. Chilling them firmly allows that cream cheese cake balls center to become dense and stable enough to handle the dipping process without any hiccups. Don’t skip that step; it’s key to keeping those cute little shapes intact!
Share Your Homemade Red Velvet Treats
Honestly, seeing your beautiful creations is one of the absolute best parts of running HearthBite. I put all my heart into making sure these red velvet cake balls work perfectly for you, but the real joy is seeing them grace your family tables and holiday platters!
If you followed along and whipped up a batch, please, please leave me a comment down below! Tell me how they turned out, if you tried the cream cheese frosting swap, or what you used for your chocolate drizzle. Did they disappear instantly at your party? I want to hear all the details!
Rating the recipe is also such a huge help, as it lets other home cooks know they can trust this simple, fudgy recipe too. From my kitchen to yours, thank you so much for trying out these little bites of comfort. Happy baking (or, well, happy *no-baking* assembly!)!
PrintUltimate Easy No-Bake Red Velvet Cake Balls with Cream Cheese Filling

Make these easy, no-bake red velvet cake balls for a perfect party dessert or holiday treat. They feature a rich, fudgy center made with cream cheese and are coated in smooth chocolate.
- Prep Time: 30 min
- Cook Time: 30 min
- Total Time: 1 hour 10 min
- Yield: 24 servings 1x
- Category: Dessert
- Method: No-Bake (Assembly)
- Cuisine: American
- Diet: Vegetarian
Ingredients
- 1 (15.25 ounce) box red velvet cake mix
- 1 cup water (or as directed on cake mix box)
- 2 large eggs (or as directed on cake mix box)
- 1/3 cup vegetable oil (or as directed on cake mix box)
- 8 ounces cream cheese, softened
- 1 teaspoon vanilla extract
- 2 cups semi-sweet chocolate chips (for coating)
- 1 cup white chocolate chips (for drizzling, optional)
Instructions
- Prepare the red velvet cake according to the package directions, substituting the water and oil amounts if necessary for a slightly denser cake, which works best for rolling. Bake the cake in a 9×13 inch pan. Let the cake cool completely.
- Once cool, crumble the entire cake into fine crumbs into a large bowl. Discard any overly browned edges.
- In a separate bowl, beat the softened cream cheese and vanilla extract until smooth.
- Add the cream cheese mixture to the cake crumbs. Mix by hand or with a stand mixer on low speed until a uniform, thick dough forms.
- Roll the dough into uniform balls, about 1 inch in diameter. Place the balls on a parchment-lined baking sheet.
- Chill the cake balls in the refrigerator for at least 30 minutes to firm up. This step is important for easy dipping.
- Melt the semi-sweet chocolate chips in a microwave-safe bowl in 30-second intervals, stirring until smooth. If the chocolate is too thick, stir in 1 teaspoon of vegetable shortening or coconut oil.
- Dip each chilled cake ball into the melted chocolate, ensuring it is fully coated. Tap the fork gently on the side of the bowl to remove excess chocolate.
- Return the coated cake balls to the parchment-lined sheet.
- If using white chocolate, melt the white chocolate chips separately. Drizzle the melted white chocolate over the semi-sweet coated balls for decoration.
- Allow the chocolate coating to set completely at room temperature, or speed up the process by chilling them for 10 minutes.
Notes
- For an even richer center, use 4 ounces of cream cheese and 4 ounces of softened cream cheese frosting instead of 8 ounces of plain cream cheese.
- If you prefer a different coating, substitute the chocolate chips with candy melts for easier melting and setting.
- These red velvet cake balls freeze well. Place them in an airtight container and freeze for up to three months. Thaw them in the refrigerator before serving.
Nutrition
- Serving Size: 1 ball
- Calories: 220
- Sugar: 20
- Sodium: 150
- Fat: 14
- Saturated Fat: 7
- Unsaturated Fat: 7
- Trans Fat: 0
- Carbohydrates: 23
- Fiber: 1
- Protein: 2
- Cholesterol: 25