
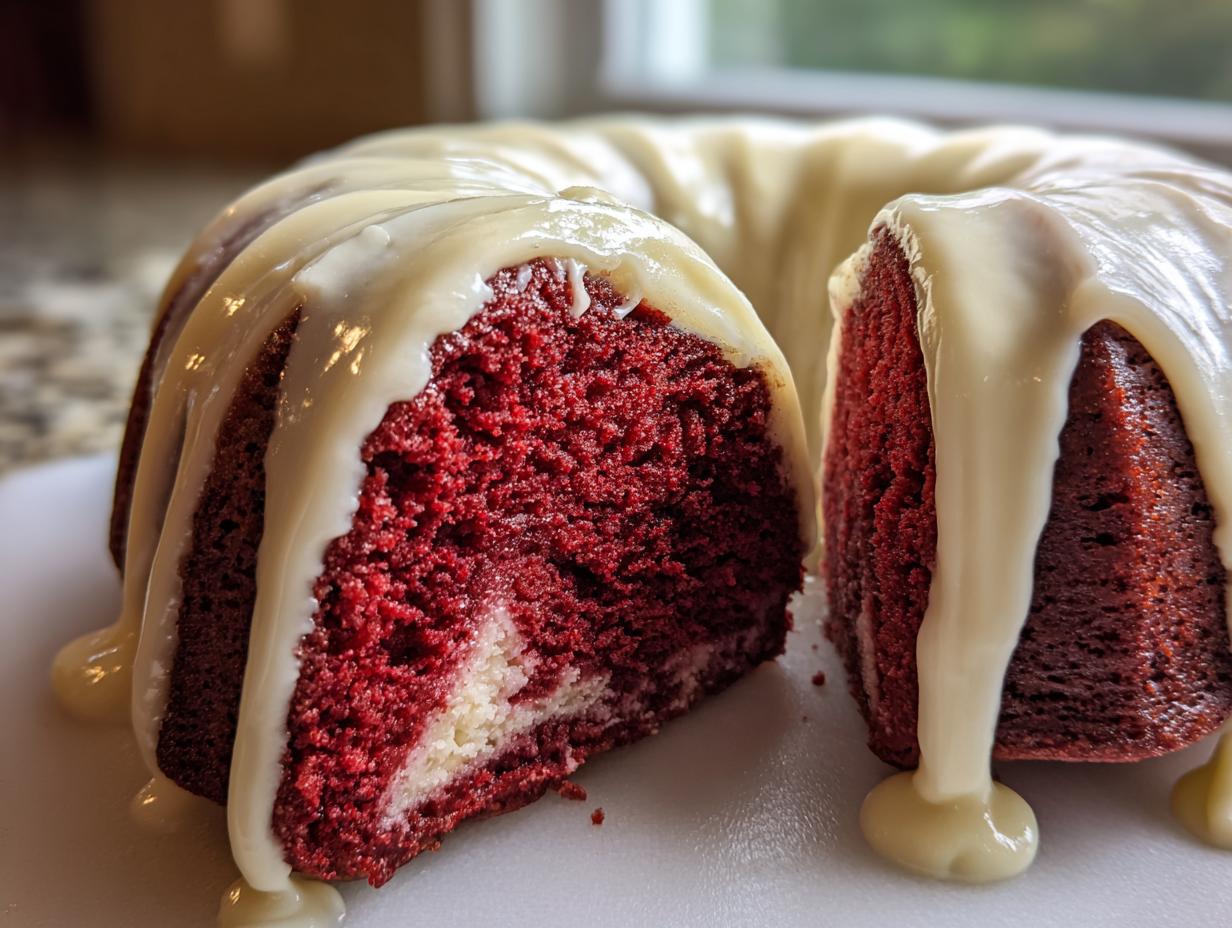
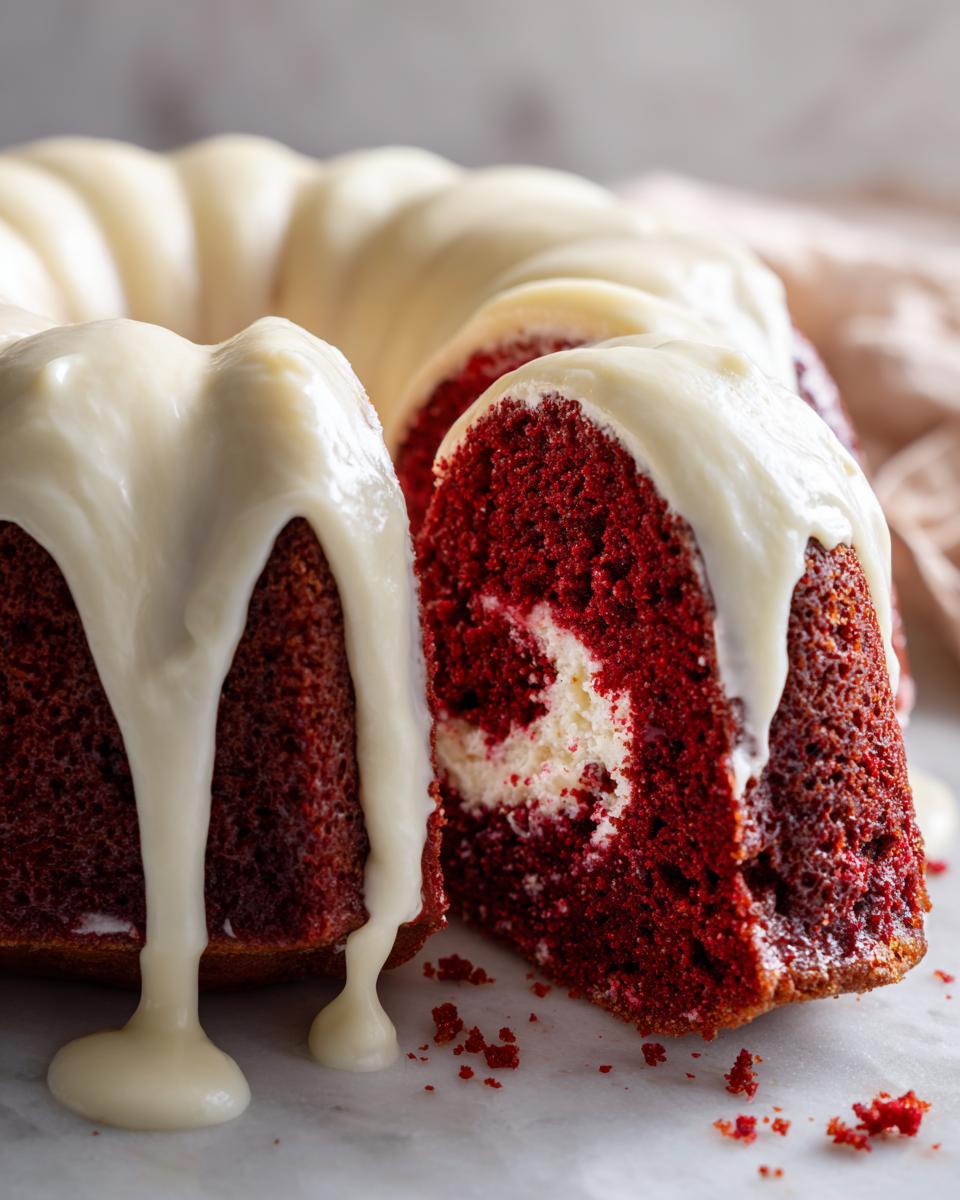
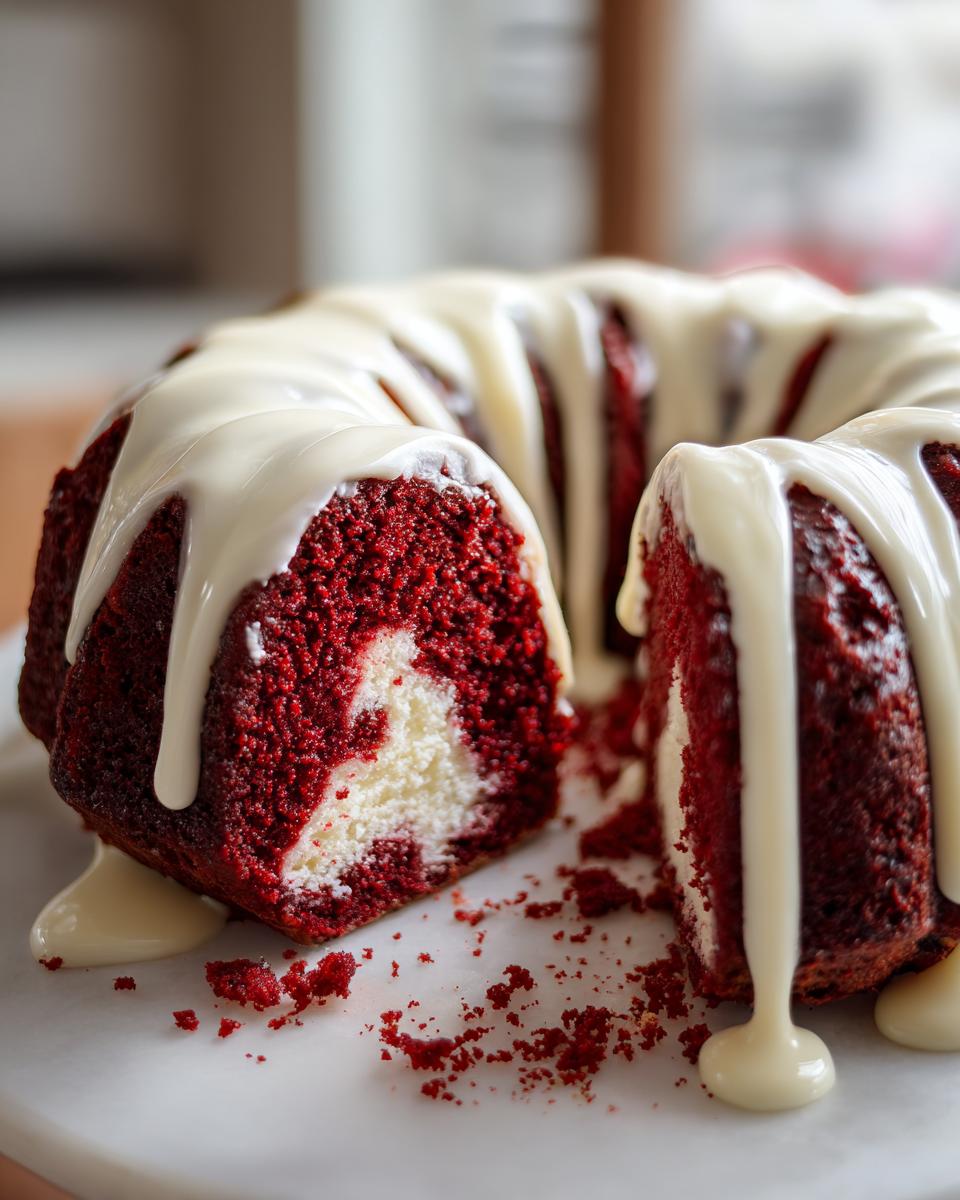
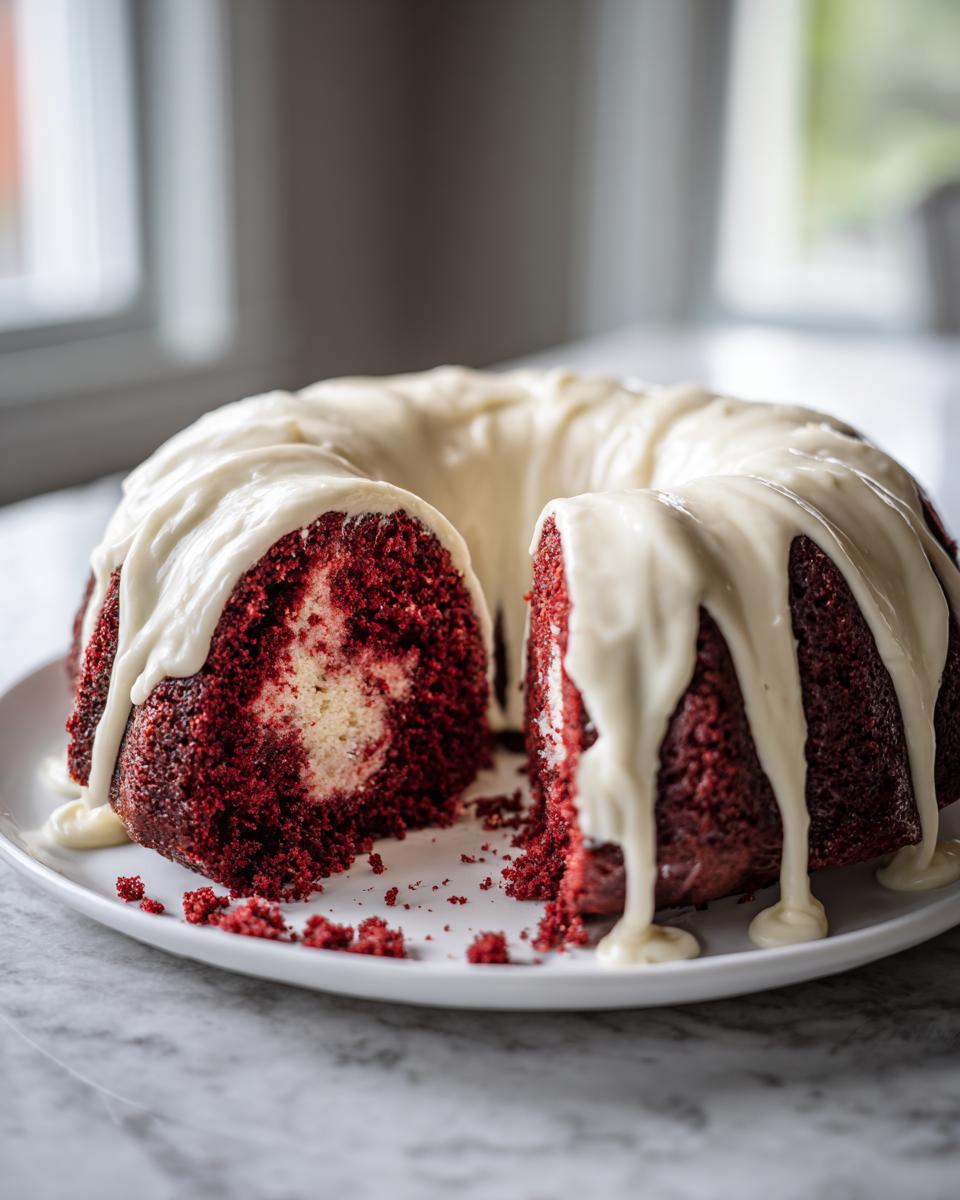
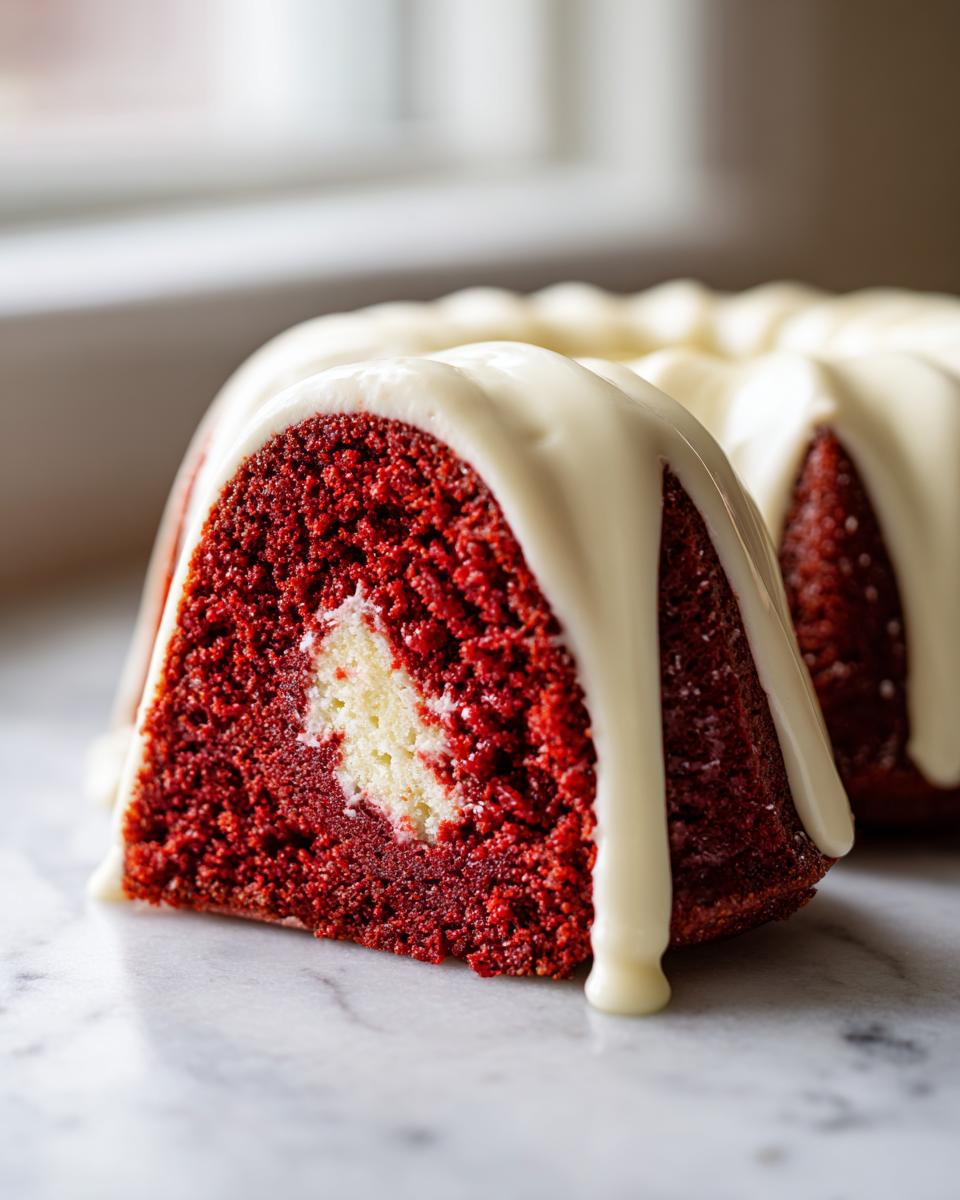
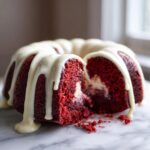
When you need a dessert that truly stops conversations and makes everyone gather around the table, you have to pull out the big guns. Forget those plain sheet cakes; we need drama, elegance, and that unmistakable velvety texture! That’s exactly what this red velvet bundt cake delivers. It’s gorgeous baked right in the fluted pan, and when you drizzle that tangy cream cheese glaze over the top, it just screams special occasion. I developed this recipe because I wanted the visual impact of the Bundt shape combined with the comforting, deep cocoa notes that true red velvet should have. Trust me, making this showstopper totally from scratch brings me right back to my grandmother’s kitchen—it’s instantly memorable, and you’re going to cherish making it for your own family moments.
- Why This Red Velvet Bundt Cake Recipe is a Showstopper (Primary Keyword)
- Ingredients for Your Moist Red Velvet Bundt Cake (Primary Keyword)
- How to Prepare Your Easy Red Velvet Bundt Cake From Scratch (Primary Keyword)
- Expert Tips for a Perfect Red Velvet Bundt Cake Recipe (Primary Keyword)
- Storage and Keeping Your Homemade Bundt Cake Fresh
- Variations on the Red Velvet Bundt Cake
- Frequently Asked Questions About This Red Velvet Bundt Cake Recipe
- Estimated Nutritional Data for the Red Velvet Bundt Cake
- Share Your Holiday Bundt Baking Experience
Why This Red Velvet Bundt Cake Recipe is a Showstopper (Primary Keyword)
There is just something magical about a cake baked in one of those beautiful, heavily detailed pans. This isn’t just any dessert; it’s one of those true showstopper cake ideas that looks like it took days but comes together surprisingly easily. This red velvet bundt cake is special because it nails the balance between that deep chocolate hint and the classic vibrant color. If you are looking for the secret to a perfectly moist bundt cake every single time, this is it. You can see why people save this recipe for holidays and big events!
- It’s incredibly moist, thanks to the oil and buttermilk combination.
- The color is vivid and spectacular, showcasing beautifully in the fluted pan.
- It offers that classic, comforting cocoa flavor you crave in red velvet.
I really think readers looking for comforting comfort food recipes will instantly save this one.
Achieving the Perfect Tender Red Velvet Baking
The secret to that melt-in-your-mouth feeling, the hallmark of tender red velvet baking, comes from the flour mix. We don’t just use all-purpose flour here; we sneak in cake flour too! Cake flour has lower protein, which means less gluten development. When you mix less gluten, you get a softer, more tender crumb that slices beautifully without crumbling apart once you start glazing it. It seems like a tiny step, but it makes a huge difference in the final texture.
Ingredients for Your Moist Red Velvet Bundt Cake (Primary Keyword)
Okay, let’s talk about what you need to gather. For a truly show-stopping red velvet bundt cake, organization is half the battle! I’ve broken this down into the cake itself and the dreamy topping. When you pull these ingredients out, make sure those dairy items have time to relax—warm ingredients mix so much better.
The recipe asks for a bit of everything, oil instead of butter for that signature moist texture, and those dual flours we talked about. Trust me, weighing your flour isn’t necessary, but just make sure you’re measuring correctly and not scooping directly from the bag!
Cake Batter Components for the Red Velvet Bundt Cake Recipe (Primary Keyword)
We need both wet and dry heroes here. Make sure your eggs and that buttermilk are sitting out for at least 30 minutes before you start mixing. This helps everything emulsify smoothly, which is key for preventing sinking!
- Vegetable oil (1 1/2 cups)
- Granulated sugar (1 1/2 cups)
- Large eggs (3), one at a time
- Vanilla extract (1 teaspoon)
- All-purpose flour (1 1/4 cups)
- Cake flour (1 1/4 cups)
- Baking soda (1 teaspoon)
- Salt (1 teaspoon)
- Unsweetened cocoa powder (1 tablespoon)
- Buttermilk (1 cup), must be at room temperature
- Red food coloring (1 tablespoon)
- White vinegar (1 teaspoon)
Ingredients for the Cream Cheese Glaze for Cake
This list is strictly for the luscious, tangy drizzle that goes on top once everything cools down. If you decide to include that cream cheese swirl inside the cake (which I highly recommend!), you’ll need extra cream cheese, but these quantities are specified for the topping.
- Cream cheese (8 ounces), softened
- Unsalted butter (1/2 cup), softened
- Powdered sugar (3 cups)
- Vanilla extract (1 teaspoon)
- Milk or heavy cream (1 to 2 tablespoons, just for thinning)
How to Prepare Your Easy Red Velvet Bundt Cake From Scratch (Primary Keyword)
Alright, let’s get this beautiful red velvet bundt cake in the oven! While this is an easy red velvet cake to put together, following the sequence matters a lot, especially when aiming for a truly moist bundt cake. First things first—grab your 10-cup Bundt pan. You need to grease and flour it really well, or better yet, use that cake release paste we probably talked about earlier! Preheat your oven to 325 degrees F right away so it’s ready when the batter is mixed.
Mixing the Batter and Preparing the Bundt Pan
Grab your big bowl! We start by whisking together the oil and sugar until they look happy together. Then, add those room-temperature eggs one by one, making sure each one is fully incorporated before adding the next, followed by the vanilla. In another spot, whisk all your dry ingredients—the two flours, baking soda, salt, and cocoa powder.
Now for the color magic! Mix your buttermilk, red food coloring, and white vinegar in a small cup. That vinegar activates the baking soda, giving us lift, so don’t skip it! You need to alternate adding your dry mix and your buttermilk mix to the main bowl. Remember, start and end with the dry ingredients. Mix on low speed, and honestly, stop mixing the second you see no more streaks of flour. Overmixing is the enemy of a velvety cake!
Baking and Cooling the Red Velvet Bundt Cake
Once the batter is in the pan (and you’ve swirled that optional cream cheese center like a masterpiece!), slide it into the preheated oven. It usually takes between 50 and 60 minutes. You know it’s done because a wooden pick inserted right into the center should come out clean—maybe with a few moist crumbs clinging to it, but definitely no wet batter.
Resist the urge to dump it out! Let your beautiful homemade bundt cake rest in that hot pan on a cooling rack for 15 minutes exactly. This time is crucial; it lets the cake structure set up so it doesn’t break when you flip it. After 15 minutes, carefully invert it onto the rack and let it cool down completely. Seriously, wait until it’s totally cool before pouring anything on top!
Making and Applying the Cream Cheese Glaze for Cake
While the cake is cooling its heels, whip up that glorious topping. Beat your softened cream cheese and butter together until they are totally smooth—no lumps allowed! Slowly beat in the powdered sugar and vanilla. If it looks rock hard, add your milk or cream, just a teaspoon at a time, until you get a thick but still pourable consistency. It should flow slowly off your spoon. If you ever decide you want a thicker option than this glaze, check out my recipe for the best cream cheese frosting recipe! Once your red velvet bundt cake is completely cool, drizzle that cream cheese glaze for cake all over, letting those ribbons drip down the sides. It looks so elegant!
Expert Tips for a Perfect Red Velvet Bundt Cake Recipe (Primary Keyword)
Look, getting this flavor profile right makes it one of the absolute best red velvet dessert options out there, but a few small habits really push it over the top. The goal here is simple: reliability. We want every single person who tries this red velvet bundt cake recipe to succeed! Don’t skip these little checks; they are why I trust this recipe enough to call it my own favorite for parties.
Ingredient Temperature Matters for Cake Structure
I hammered on this earlier, but it bears repeating when we talk about getting that perfect crust and crumb! Make sure your eggs and buttermilk are truly room temperature. When warm ingredients meet your oil and sugar, you create a beautiful, uniform emulsion. If things are cold, the fat locks up, and you get an uneven batter, which leads to a denser, less fluffy final product—and nobody wants a dense cake when you’re aiming for that signature velvet cake with frosting feel!
It really helps with the overall texture. If you haven’t made these fluffy bakery-style scones yet, I promise, temperature checks are the key to everything good in baking!
Storage and Keeping Your Homemade Bundt Cake Fresh
One of the best things about this red velvet bundt cake, especially since we used oil instead of butter, is how long it stays lovely and moist! You definitely want to keep it covered, that’s rule number one for any homemade bundt cake.
If you plan on eating the whole thing within two days, honestly, leaving it covered tightly at cool room temperature is perfect. We want to avoid the fridge because, just like most cakes, the cold air dries it out quickly, even with that lovely glaze on top. If you are going to serve it over four days, or if your kitchen is super warm, you can put it in the fridge, but you absolutely must bring it back to room temperature for at least an hour before serving. That little bit of warmth brings back the true texture!
If you happen to have too much—which is rare in my house, but it happens!—you can definitely freeze slices. Wrap each slice snugly in plastic wrap first, then slip them all into a freezer-safe bag. They’ll stay great for about two months. When you want one, just unwrap it and let it thaw on the counter. It comes back to life beautifully!
Variations on the Red Velvet Bundt Cake
While I absolutely adore this straightforward red velvet bundt cake with its silky glaze, I know some of you fellow bakers like playing dress-up with your creations! We all have different cravings, right? Good news is this recipe is super adaptable, making it easy to try out a few different looks and textures without starting over completely.
The first popular route people take is going extra decadent by playing up the cream cheese element. If you’re someone who thinks a little chocolate cake needs a big slab of cheesecake next to it, you might adore the idea of weaving in an actual layer. If you are feeling ambitious and want to see how you can layer in tangy cheesecake right into a Bundt design, you absolutely have to check out my layered red velvet cheesecake recipe for inspiration!
Another common request I get asks how to make this more like a certain popular bakery’s style. That usually comes down to the topping! While I think this thin glaze is perfect for letting the beautiful Bundt shape shine, you can easily pivot to a thicker frosting if you want that classic thick, slightly messy swirl on top—you know, more of a copycat bundt cake recipe look. To do this, just skip thinning the glaze down with too much milk. Keep the butter and cream cheese mixture thick; basically, use just enough liquid to get it spreadable rather than fully drizzly. That thicker texture will hold its shape beautifully when you dollop it on!
Sometimes people ask me about using different cocoa powders, too, since they want to lean into the chocolate note more. If you want a richer, darker color, you can try using Dutch-processed cocoa powder instead of natural cocoa, but be aware that it changes the acidity slightly, so you might need an extra tiny splash of vinegar to keep that lift strong. I even found this fantastic version by a chef friend over at Butternut Bakery if you want to see another take on this classic flavor!
Frequently Asked Questions About This Red Velvet Bundt Cake Recipe
I always get asked the same little things when people first bake this cake, especially because they want that stunning look for parties or holidays. Don’t worry if you have questions; that’s why I’m here! Baking a showstopper like this should feel relaxing, not stressful. Here are some of the little details I always clarify when talking about making the best red velvet dessert.
Why is my red velvet bundt cake not red enough?
Oh, that color mystery! It comes down to two things: the quality of your food coloring and the cocoa powder. Cocoa powder, even natural unsweetened, has brown undertones, which fights against the red dye a little bit. I use high-quality gel food coloring—the liquid stuff just isn’t concentrated enough. Don’t get tempted to dump in way too much vinegar trying to ‘fix’ the color, though! The vinegar is there for the baking soda reaction; too much, and your cake will taste tangy or might have a weird texture. Stick to the teaspoon required, and use good coloring for that rich shade!
Can I use regular milk instead of buttermilk in this recipe?
You really, really shouldn’t swap it out 1:1 if you can avoid it. The buttermilk is crucial here because it’s acidic! That acidity is what reacts perfectly with the baking soda we used, helping the cake rise evenly and keeping that texture wonderfully soft. If you absolutely cannot find buttermilk, you can make a quick substitute. Just take one cup of regular milk and stir in one tablespoon of white vinegar or lemon juice. Let it sit on the counter for about five to ten minutes until it looks slightly curdled. That’s your replacement, and trust me, it helps maintain the moisture level, too!
If you love learning how different dairy products affect texture, you should look at how I manage liquids in my buttery Bacardi rum cake—it’s all about control!
Estimated Nutritional Data for the Red Velvet Bundt Cake
I always get comments asking about the nutrition facts for this decadent dessert, and honestly, if you’re making a showstopper like a red velvet bundt cake, you’re probably not tracking every single calorie with intense scrutiny! But in the spirit of sharing everything transparently, especially since we are making this from scratch, here is the estimated breakdown for one slice of this magnificent cake, including that lovely cream cheese glaze.
Remember, these figures are just estimations based on standard ingredients and serving size (which we are setting right here at one generous slice). This is meant as a guide, not a scientific analysis, folks! Good baking is about joy, but I love giving you all the facts when I can.
- Serving Size: 1 slice
- Calories: 450
- Sugar: 55g
- Sodium: 300mg
- Fat: 25g
- Saturated Fat: 10g
- Trans Fat: 0g
- Carbohydrates: 58g
- Fiber: 1g
- Protein: 4g
- Cholesterol: 65mg
There you have it! It’s rich because it’s packed with those comforting flavors and good fats that make a moist bundt cake so satisfying. Enjoy every bite!
Share Your Holiday Bundt Baking Experience
Well, that’s the end of the road for our beautiful red velvet bundt cake! I truly hope you feel confident tackling this one. Seeing this cake emerge from the oven, smelling that rich cocoa, and then drizzling on that tangy cream cheese glaze—it’s pure kitchen joy, and that’s what HearthBite is all about, isn’t it? Making moments, not just meals.
Now that you’ve baked it, I really, really want to hear what you thought! Did it come out as moist as mine? Did you end up adding that swirl? Please take a moment to leave a rating below using the five stars—your feedback helps everyone else know what a winner this red velvet bundt cake recipe really is. And if you snap a picture of your gorgeous creation, tag me! I adore seeing how this recipe shows up in your homes and becomes part of your own family traditions.
If you have any last-minute questions that I didn’t cover, don’t hesitate to reach out through the contact page—I’m always happy to troubleshoot!
Happy baking, everyone. I hope this cake brings as much warmth to your table as it does to mine!
PrintMoist Red Velvet Bundt Cake with Cream Cheese Glaze
Bake a showstopper dessert with this moist red velvet bundt cake recipe. Made from scratch, it delivers rich cocoa flavor and is topped with a silky cream cheese glaze for a comforting, elegant treat.
- Prep Time: 20 min
- Cook Time: 60 min
- Total Time: 80 min
- Yield: 12 servings 1x
- Category: Dessert
- Method: Baking
- Cuisine: American
- Diet: Vegetarian
Ingredients
- 1 1/2 cups vegetable oil
- 1 1/2 cups granulated sugar
- 3 large eggs
- 1 teaspoon vanilla extract
- 1 1/4 cups all-purpose flour
- 1 1/4 cups cake flour
- 1 teaspoon baking soda
- 1 teaspoon salt
- 1 tablespoon unsweetened cocoa powder
- 1 cup buttermilk, room temperature
- 1 tablespoon red food coloring
- 1 teaspoon white vinegar
- 8 ounces cream cheese, softened (for optional swirl or glaze base)
- 1/2 cup unsalted butter, softened (for glaze)
- 3 cups powdered sugar (for glaze)
- 1 teaspoon vanilla extract (for glaze)
- 1–2 tablespoons milk or heavy cream (for glaze consistency)
Instructions
- Preheat your oven to 325 degrees F. Grease and flour a 10-cup bundt pan well.
- In a large bowl, whisk together the vegetable oil and granulated sugar until combined. Beat in the eggs one at a time, then mix in the vanilla extract.
- In a separate medium bowl, whisk together the all-purpose flour, cake flour, baking soda, salt, and cocoa powder.
- In a small bowl, mix the buttermilk, red food coloring, and white vinegar until the color is uniform.
- Gradually add the dry ingredients to the wet ingredients, alternating with the buttermilk mixture, beginning and ending with the dry ingredients. Mix only until just combined; do not overmix.
- Pour half of the batter into the prepared bundt pan. If making a cream cheese swirl, beat the softened cream cheese until smooth, then drop spoonfuls over the batter. Gently swirl with a knife. Top with the remaining batter.
- Bake for 50 to 60 minutes, or until a wooden pick inserted into the center comes out clean.
- Let the cake cool in the pan on a wire rack for 15 minutes before inverting it onto the rack to cool completely.
- Prepare the glaze: Beat the softened butter and cream cheese together until smooth. Gradually add the powdered sugar and vanilla extract. Add milk or cream one tablespoon at a time until you reach a thick, pourable consistency.
- Once the cake is completely cool, drizzle the cream cheese glaze over the top, allowing it to drip down the sides.
Notes
- For the best texture, make sure your eggs and buttermilk are at room temperature before mixing.
- If you skip the cream cheese swirl inside the cake, you can use all the cream cheese for a thicker frosting instead of a glaze.
- This cake keeps well covered at room temperature for up to three days.
Nutrition
- Serving Size: 1 slice
- Calories: 450
- Sugar: 55
- Sodium: 300
- Fat: 25
- Saturated Fat: 10
- Unsaturated Fat: 15
- Trans Fat: 0
- Carbohydrates: 58
- Fiber: 1
- Protein: 4
- Cholesterol: 65