

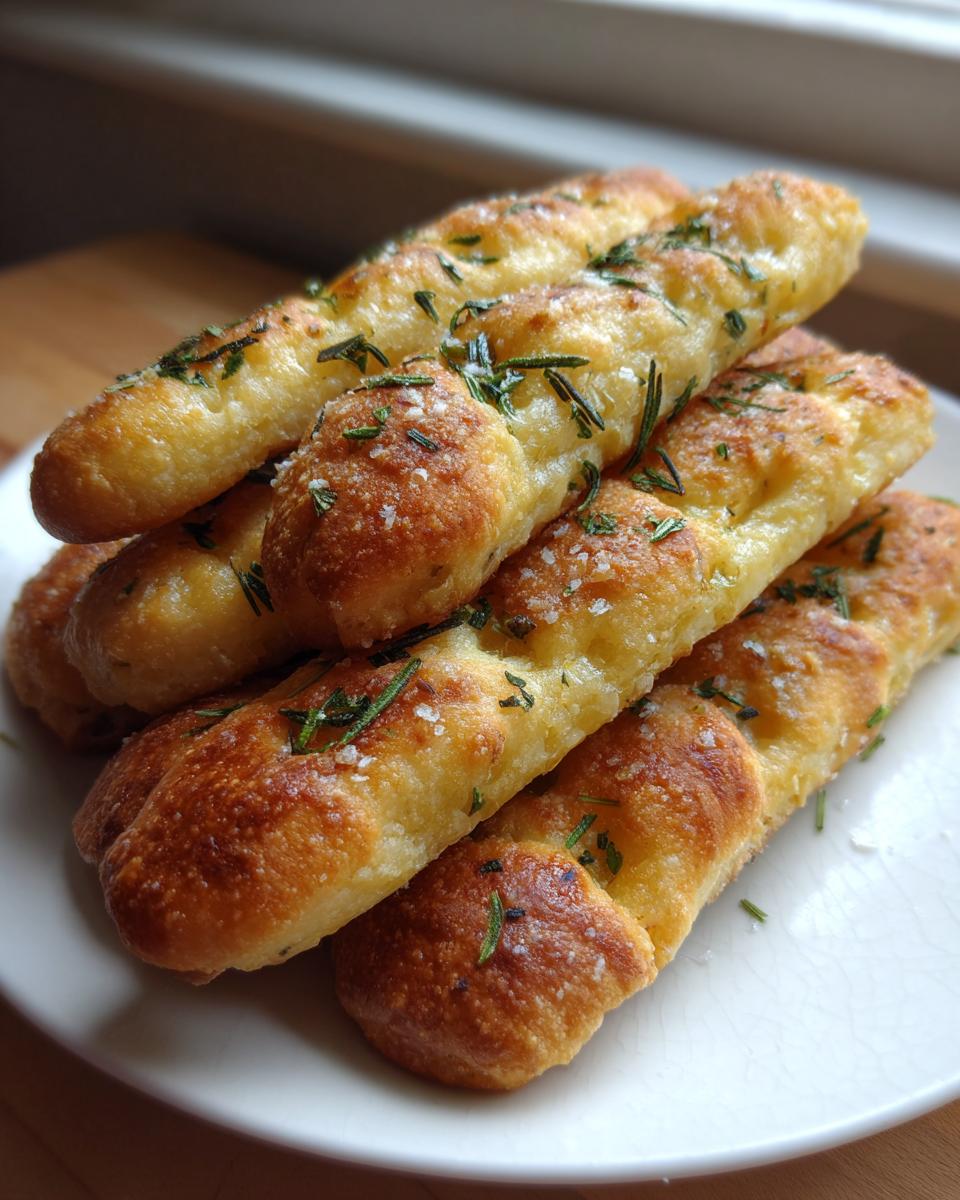
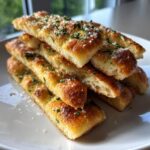
There is just nothing that beats the scent of fresh, savory bread filling your kitchen, is there? It’s pure comfort. If you’re looking for a recipe that brings that artisanal bakery flavor home without needing hours of complex steps, you are in the absolute right place. Today, we’re diving into focaccia breadsticks. These aren’t those dry little sticks you find in a plastic bag; these are soft, chewy, and absolutely perfect for dipping into oil or soup. When I started HearthBite, my goal was always to make those show-stopping family favorites accessible to everyone, and these incredible savory sticks are proof that goodness doesn’t need complicated techniques. Trust me, this simple dough will change your snack game!
- Why You Will Make These Homemade Focaccia Breadsticks Often
- Essential Ingredients for Perfect Focaccia Breadsticks
- How to Make Focaccia Breadsticks: Step-by-Step Guide
- Flavor Variations for Savory Baked Snacks
- Tips for Achieving Chewy Rosemary Focaccia Breadsticks
- Storage and Reheating Instructions for Your Focaccia Breadsticks
- Serving Suggestions: The Best Dipping Breadsticks
- Frequently Asked Questions About Making Focaccia Breadsticks
- Nutritional Estimates for Homemade Focaccia Breadsticks
Why You Will Make These Homemade Focaccia Breadsticks Often
I honestly can’t keep up with how often I end up making these! They are so versatile, and the dough process is just incredibly straightforward. If you’re tired of yeast feeling intimidating, these savory snacks are the ticket to confidence in your kitchen. You’ll want to keep this Easy Focaccia Sticks Recipe handy:
- They are wonderfully soft and chewy on the inside—not brittle or cracker-like!
- The dough requires minimal kneading; the long rest time does most of the heavy lifting for you.
- Perfect appetizer material! They show up at every potluck I host now.
- They are fantastic for busy weeknights since the prep time is so short compared to a full loaf.
- You get that signature olive oil flavor that makes focaccia just irresistible.
- This versatile dough base can easily be adapted for your favorite comfort food recipes later on!
Essential Ingredients for Perfect Focaccia Breadsticks
When it comes to baking, the quality of your starting materials really does make a noticeable difference, especially with something simple like Homemade Focaccia Breadsticks. We aren’t using a ton of fussy things here, so let’s make sure we nail these core items. You’ll need your yeast, warm water, flour, salt, and of course, olive oil. We measure everything precisely, but the real trick is in how we use them. Don’t skimp on the final seasoning salt either—that little crunch is key to a professional finish!
Ingredient Notes and Substitutions for Your Focaccia Breadsticks
Let’s talk specifics because these small things add up! We start with active dry yeast. You want to see that foam, which tells you the yeast is awake and ready to bring life to your dough. If it doesn’t foam, dump it and start over—stale yeast means sad, flat breadsticks.
For the oil—it has to be good olive oil! Since the oil is a primary flavor component in focaccia, a nice fruity oil makes a huge difference. You use it in the dough and then you drench the top, so choose wisely!
As for flour, I use all-purpose because this recipe is designed to be quick and straightforward. However, if you want a chewier, more artisan result, you could swap in bread flour. Just know you might need to add an extra splash of water during the kneading phase, as bread flour sucks up more liquid. And those optional add-ins—the fresh rosemary and minced garlic? Those are non-negotiable for making the best Chewy Rosemary Focaccia Breadsticks!
How to Make Focaccia Breadsticks: Step-by-Step Guide
Okay, deep breath—we’re making bread! But don’t let that scare you. These focaccia breadsticks come together with such a satisfying rhythm. We’re going to move smoothly from activating the yeast to pulling those golden sticks out of the oven. I promise, the process feels more like folding laundry than intense baking. Just follow along, and you’ll see how easy it is to create incredibly soft Italian Breadsticks right at home. You’ll need your large bowl ready for action!
Mixing and Proofing the Quick Focaccia Dough Recipe
First things first: wake up your yeast! Mix that little packet right into your warm water—it needs to be around 105 to 115 degrees Fahrenheit, nothing too hot or you’ll kill it. Wait about ten minutes until it looks foamy, like the top of a great latte. Once you see that foam, toss in your flour and salt. Mix it until it stops looking dusty and turns into a messy ball—we call that “shaggy dough.”
Now, for the work part! Turn that shaggy mess onto your counter and knead it for about seven minutes. I love this part; it’s where I let go of the day’s stress. You’re kneading until the dough feels smooth and elastic, not sticky. Pop it into an oiled bowl, cover it up, and let it rest in a warm spot for an hour to an hour and a half. It needs to double in size. Don’t rush this! That long, slow rise is what gives you those airy pockets in your finished Yeast Breadstick Recipe.
Shaping and Topping Your Focaccia Breadsticks
Once it has puffed up beautifully, gently punch the air out—it’s actually very satisfying! Now, take your oiled baking sheet, and gently press or stretch the dough right onto it, filling the pan. Cover it again and let it relax for 30 minutes. This second, short rest is important so the dough is pliable when we dimple it.
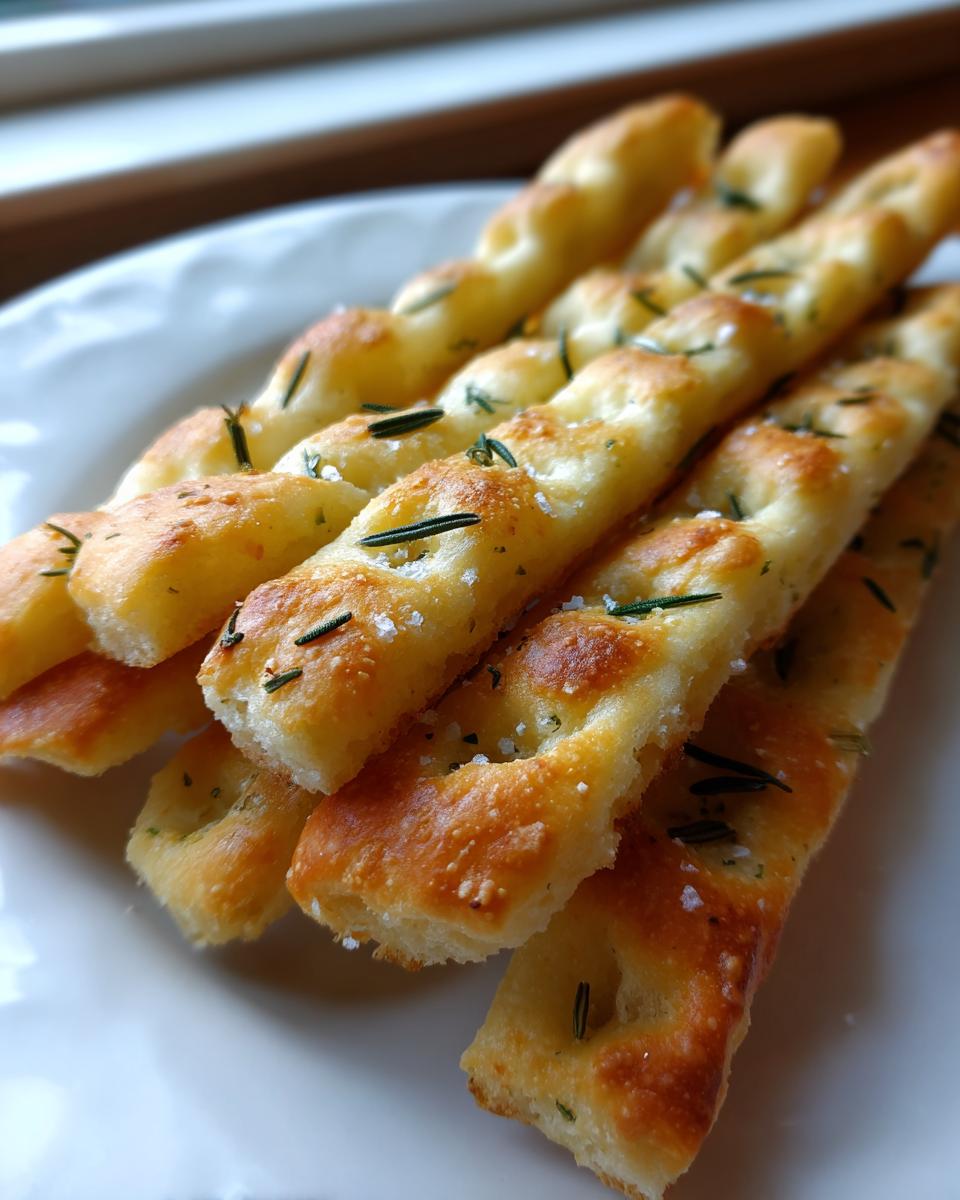
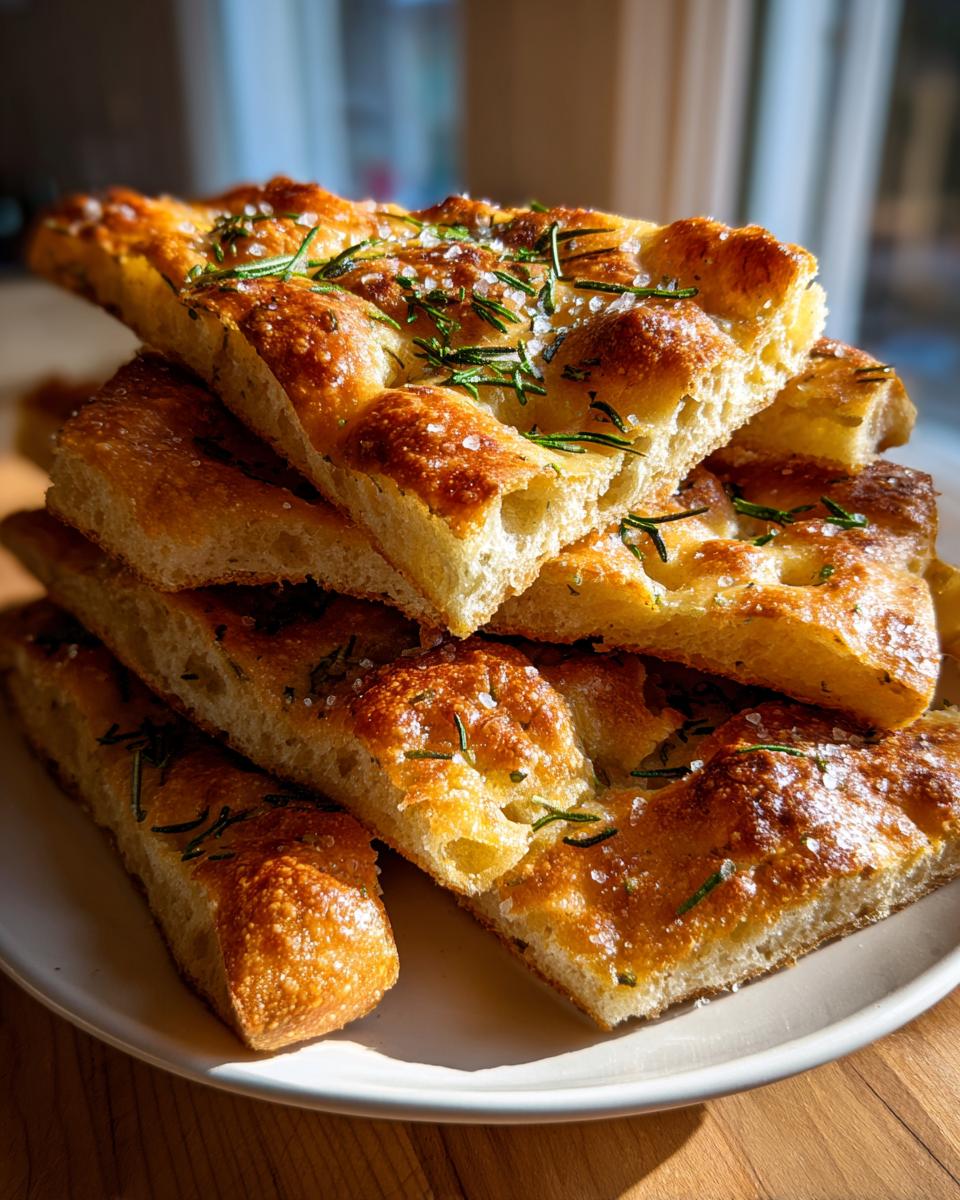
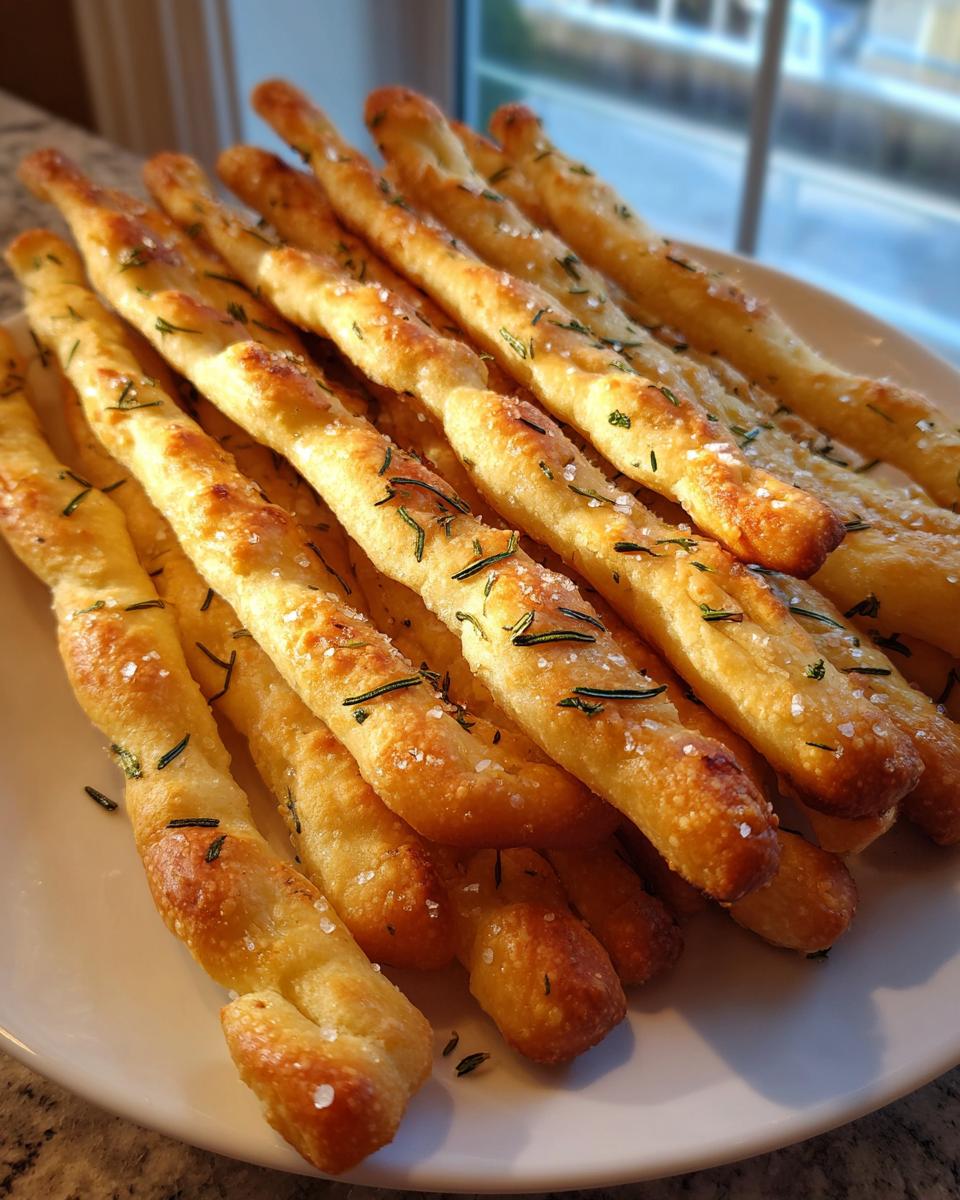
Time to preheat your oven to 400°F! Drizzle that dough heavily with olive oil—and I mean generously! This is where the magic happens. Take your fingertips and push down firmly all over the surface, creating those signature deep dimples. These dimples hold the flavorful oil and prevent the dough from puffing up strangely. If you’re using the rosemary and garlic, sprinkle them on now. Finally, take a pizza cutter and slice the dough into strips, about an inch wide. Important: only cut the surface, don’t separate them yet!
Baking Perfect Focaccia Sticks and Finalizing
Into the 400°F oven they go! You’re looking for about 18 to 22 minutes. Keep an eye on them—you want them deeply golden brown on top, which usually means they are perfectly baked all the way through. This time window ensures you get that crisp exterior we are aiming for in your Baking Perfect Focaccia Sticks.
When they come out, work quickly! Immediately pull them apart along those score lines you made earlier. If you wait, the crust cools and they’ll snap instead of pulling apart cleanly. A little brush of melted butter with some extra garlic powder right now seals the deal for amazing Garlic Butter Focaccia Sticks. Serve them hot!
Flavor Variations for Savory Baked Snacks
Once you’ve mastered the base recipe for these focaccia breadsticks, the flavor possibilities are truly endless. My goal is always to give you something reliable, but then encourage you to play around a little! These breadsticks are meant to be versatile, moving easily from an elegant appetizer to a satisfying, savory baked snack.
If you made the rosemary and garlic version, fantastic! But if you want to try something new next time, here are a few combinations that always get rave reviews around my table:
- Cheesy Goodness: Right after you dimple the dough and drizzle the oil, sprinkle generously with finely grated Parmesan or Pecorino Romano cheese. Bake as directed, and they come out salty and crisp around the edges. They pair perfectly with a hearty tomato sauce.
- Spicy Kick: Try adding a pinch of red pepper flakes right alongside the flaky salt topping. If you want a deeper flavor, toss in some dried oregano with the red pepper flakes for a more Mediterranean feel.
- Everything Bagel Heaven: This is my shortcut for maximum flavor! Skip the fresh herbs and just sprinkle the entire surface heavily with an everything bagel seasoning mix just before they go into the oven. They are incredible served alongside a simple cream cheese dip, almost like a gourmet bagel chip.
And don’t forget what happens *after* they come out! If you want that deep, rich flavor profile of Garlic Butter Focaccia Sticks, melt a few tablespoons of butter and stir in some garlic powder and a tiny pinch of dried parsley. Brush this mixture over the hot breadsticks the moment you pull the pan out of the oven. It makes the kitchen smell heavenly, and they become the absolute best dipping breadsticks you’ve ever had.
Tips for Achieving Chewy Rosemary Focaccia Breadsticks
You know, getting bread to do exactly what you want—that perfect balance between a slightly crisp edge and an impossibly soft, chewy center—is where the real fun is in baking. When making these focaccia breadsticks, texture isn’t just an accident; it’s all down to a few key choices we make with the dough and the pan.
If your goal is that lovely, deeply browned bottom without the whole stick drying out, you need to pay attention to heat transfer. I learned this from my grandmother, who fussed over every pan she used! Metal pans—especially aluminum or light-colored steel—are usually your best friends for home baking because they conduct heat quickly and evenly. This helps achieve that nice crust development toward the bottom faster than, say, a heavy glass baking dish.
If you happen to only have a glass dish, here’s a little trick: put that glass dish into a cold oven and let it preheat *with* the oven. That way, the glass gets thoroughly heated through before the dough ever touches it, which prevents that doughy, undercooked bottom layer.
Now, let’s talk about our MVP ingredient: olive oil. We use a fair amount in this recipe, and that’s on purpose! The oil is crucial for stopping the dough from sticking, yes, but more importantly, it fries the bottom slightly as it bakes, creating a beautiful, tender crumb structure. You need to be generous when you oil your pan *before* stretching the dough, and then even more generous when drizzling it over the top before dimpling.
Think of that top oil layer as a protective sealant against the dry oven air. It keeps the interior moist while allowing the exterior to caramelize beautifully. If you’re worried about crispness on the edges, don’t skip the step mentioned in the notes: preheating your baking sheet for 10 minutes before you stretch the dough onto it is a game-changer. That blast of initial heat locks in the size and helps build that contrast between the soft inside and the slightly firmer crust on these Homemade Focaccia Breadsticks. They’ll be perfect for dipping into your favorite soup, like this amazing homemade bread bowl recipe!
Storage and Reheating Instructions for Your Focaccia Breadsticks
These focaccia breadsticks are, naturally, best eaten the day we make them. That amazing texture—the soft middle and the crisp, oily edge—is fleeting, but don’t worry! We aren’t going to let leftovers go to waste. If you follow my advice for storage, you can keep that fresh-baked flavor going for a couple of days.
The key here is air exposure. If you put these warm sticks into an airtight container right away, the steam gets trapped, and boom—soggy breadsticks! So, let them cool completely on a wire rack first. Once they are totally cool, wrap the whole batch loosely in aluminum foil or wax paper, and place them into a large zip-top bag, pressing most of the air out before sealing.
They stay perfectly good at room temperature for up to two days. Do not put them in the fridge! Cold temperatures make bread go stale faster, and these are too delicate for that treatment.
When you’re ready to enjoy your leftovers, we have to bring them back to life. The microwave is the enemy here; it just makes them rubbery and sad. The oven is your only friend for reviving that original texture in your Soft Italian Breadsticks.
The Best Way to Reheat Focaccia Sticks for Recapturing Crunch
To restore that perfect chewiness and that slightest bit of crispness on the edges, you’re going to want a quick blast of dry heat. Preheat your oven—or better yet, your toaster oven if you just have a few—to about 325°F (160°C). Lay your cooled breadsticks out in a single layer on a baking sheet. Don’t stack them up!
Bake them for about 5 to 8 minutes. Keep an eye on them, especially if you added cheese or heavy seasonings, as those can burn quickly. When they come out, they should be hot all the way through and have that delightful, fresh-from-the-oven aroma again. They are now ready for dipping!
Serving Suggestions: The Best Dipping Breadsticks
Honestly, if you think about serving these focaccia breadsticks plain, you’re missing out on half the fun! They are designed to be tear-and-dip vehicles. Since these sticks are rich with olive oil and herbs, they stand up beautifully to robust flavors. They are so much better than anything store-bought, which is why you’ll want to have some great dipping sauces ready when you pull them out of the oven.
When I serve these, I like to offer a trio of options so everyone finds something they love. Because our dough is savory, it pairs perfectly with tangy, bright flavors, or something super creamy and comforting.
- The Classic Italian: You absolutely have to try them with high-quality extra virgin olive oil mixed with a splash of balsamic vinegar and a pinch of dried oregano. It’s simple, but it lets the flavor of the rosemary and the bread shine through.
- Hearty Soups: These breadsticks are a game-changer when served alongside a big bowl of Minestrone or maybe even a creamy tomato soup. They are sturdy enough to scoop up all the chunky bits at the bottom of the bowl—way better than a standard crouton!
- Creamy Cheese Dips: This is where you can really go decadent! If you’re looking for something luxurious, you have to try them with a warm, salty cheese dip. I often make a batch of my easy 15-minute beer cheese dip when these sticks are baking, and they vanish instantly. That salty, malty cheese clinging to the dimples of the focaccia is just heaven.
Also, think about serving them alongside antipasto platters instead of crackers. They are fantastic cut into smaller pieces and tossed with olives, cherry tomatoes, and mozzarella balls for a light lunch spread. For whatever you pair them with, just make sure you have plenty ready, because once people start dunking, these Homemade Focaccia Breadsticks disappear fast!
Frequently Asked Questions About Making Focaccia Breadsticks
I get so many nice emails from folks who’ve tried this recipe, and usually, the questions come down to dough handling or making sure that texture is just right. Don’t worry if you run into a hitch—that’s just part of learning to bake! Here are some of the most common things I hear when readers are trying out their Homemade Focaccia Breadsticks for the first time.
Can I use instant yeast instead of active dry yeast?
Oh, yes, you absolutely can! Instant yeast is fantastic that way. If you use instant yeast, you can skip that whole 10-minute foamy activation step entirely. Just whisk the instant yeast right into your flour and salt mixture before you add the wet ingredients. It’s a wonderful shortcut when you’re whipping up a batch of these Easy Focaccia Sticks Recipe on a tighter schedule. Otherwise, the rise times will be basically the same.
I want them extra crispy—how do I make them crispy?
That’s an easy fix! The secret to getting that shatter on the outside while keeping the inside soft is all about heat control and oil. If you want a crispier texture for your focaccia breadsticks, make sure you try preheating your baking sheet for 10 minutes before you stretch the dough onto it. Also, go a little heavier on the initial olive oil soak on the pan. That oil essentially flash-fries the bottom layer of the dough as soon as it hits the hot surface, giving you that perfect crunch.
I’m short on time. Can I skip the kneading step?
I totally get needing a faster recipe, but for this dough, I really advise against skipping the kneading time! That seven minutes of kneading is what develops the gluten structure necessary to hold all that olive oil and moisture. If you skip it, you’ll end up with a flatter, denser finished product, more like a cracker than a chewy breadstick. If you absolutely must rush, knead for just five minutes, but try to let the dough rest for an extra 30 minutes during the first rise to compensate.
What’s the difference between these and regular Soft Italian Breadsticks?
That’s a great question comparing the two! While these focaccia breadsticks share the same base dough as a standard Italian breadstick, the major difference is the process and the fat content. Focaccia demands a very high amount of olive oil—we oil the pan, we oil the dough, we oil the top! This extra fat keeps the crumb incredibly tender and moist, which is exactly why they are so great for dipping sauces, like this easy pizza sauce. Traditional, thinner breadsticks sometimes rely less on oil and more on oven spring for a lighter, drier texture.
Can I freeze the raw dough before cutting and baking?
Yes, freezing the dough is a fantastic way to have bread ready when you need it! After you complete the first rise (step 4) and gently punch the dough down, you can stretch it out onto a parchment-lined baking sheet and cut it into strips (Step 9, but don’t bake it). Freeze the entire sheet until the frozen strips into an airtight freezer bag. When you want to bake them later, just thaw them on the counter for about an hour, dimple them, top them, and bake as directed. They make for the best last-minute snack!
Nutritional Estimates for Homemade Focaccia Breadsticks
When we’re talking about baking with love, we don’t always focus on the numbers, but it’s responsible to know what’s going into the amazing food we’re sharing with our families. Since these focaccia breadsticks are made with simple ingredients and a good amount of olive oil, they pack a bit more substance than your standard cracker. I always keep this information handy so I know exactly what I’m serving!
Here are the estimates for two breadsticks based on the recipe yields. Keep in mind, every ingredient choice makes a difference—using a richer olive oil or adding lots of extra Parmesan cheese for your Savory Baked Snacks will change these figures slightly. These numbers are a great guide, but they are just estimates, so treat them as such!
- Serving Size: 2 breadsticks
- Calories: Approximately 180
- Fat: About 6g
- Saturated Fat: Very low, around 1g
- Carbohydrates: Around 28g
- Protein: 5g
- Sodium: Around 250mg
- Fiber: 1g
We keep the cholesterol very low since we aren’t using any eggs or dairy in the base dough, making this a fantastic option for almost everyone at your table. Enjoy them warm as a fantastic appetizer or alongside your next meal!
PrintEasy Homemade Focaccia Breadsticks Recipe
Make soft, chewy focaccia breadsticks at home. This simple recipe yields savory sticks perfect for dipping or serving as a snack.
- Prep Time: 20 min
- Cook Time: 22 min
- Total Time: 1 hour 52 min
- Yield: 12 servings 1x
- Category: Snack
- Method: Baking
- Cuisine: Italian-American
- Diet: Vegetarian
Ingredients
- 1 teaspoon active dry yeast
- 1 cup warm water (about 105-115°F)
- 2 1/2 cups all-purpose flour
- 1 teaspoon fine sea salt
- 2 tablespoons olive oil, plus more for drizzling
- 1 tablespoon fresh rosemary, chopped (optional)
- 1 clove garlic, minced (optional)
- Flaky sea salt for topping
Instructions
- Activate the yeast: In a large bowl, combine the warm water and yeast. Let it stand for 5 to 10 minutes until foamy.
- Mix the dough: Add the flour and fine sea salt to the yeast mixture. Mix until a shaggy dough forms.
- Knead: Turn the dough onto a lightly floured surface and knead for 5 to 7 minutes until the dough is smooth and elastic.
- First rise: Place the dough in a lightly oiled bowl, turning to coat. Cover the bowl with plastic wrap and let it rise in a warm place for 1 to 1.5 hours, or until doubled in size.
- Shape the dough: Gently punch down the risen dough. Turn it out onto a lightly oiled baking sheet (about 10×15 inches). Gently stretch and press the dough to fill the pan.
- Second rise (proofing): Cover the dough loosely and let it rest for 30 minutes.
- Preheat and dimple: Preheat your oven to 400°F (200°C). Drizzle the dough generously with 2 tablespoons of olive oil. Use your fingertips to press deep dimples all over the surface of the dough.
- Add toppings: If using, sprinkle the chopped rosemary and minced garlic evenly over the top. Finish with a sprinkle of flaky sea salt.
- Cut and bake: Using a pizza cutter or sharp knife, cut the dough into strips about 1 inch wide, creating breadsticks. Do not separate them yet. Bake for 18 to 22 minutes, until golden brown.
- Serve: Remove from the oven and immediately cut completely through the strips. Serve warm.
Notes
- For a crispier exterior, use a baking stone or preheat your baking sheet in the oven before stretching the dough onto it.
- If you prefer garlic butter focaccia sticks, brush the baked breadsticks with melted butter mixed with extra garlic powder immediately after removing them from the oven.
- This dough works well for pull apart focaccia breadsticks if you cut them into squares before the second rise.
Nutrition
- Serving Size: 2 breadsticks
- Calories: 180
- Sugar: 1
- Sodium: 250
- Fat: 6
- Saturated Fat: 1
- Unsaturated Fat: 5
- Trans Fat: 0
- Carbohydrates: 28
- Fiber: 1
- Protein: 5
- Cholesterol: 0