
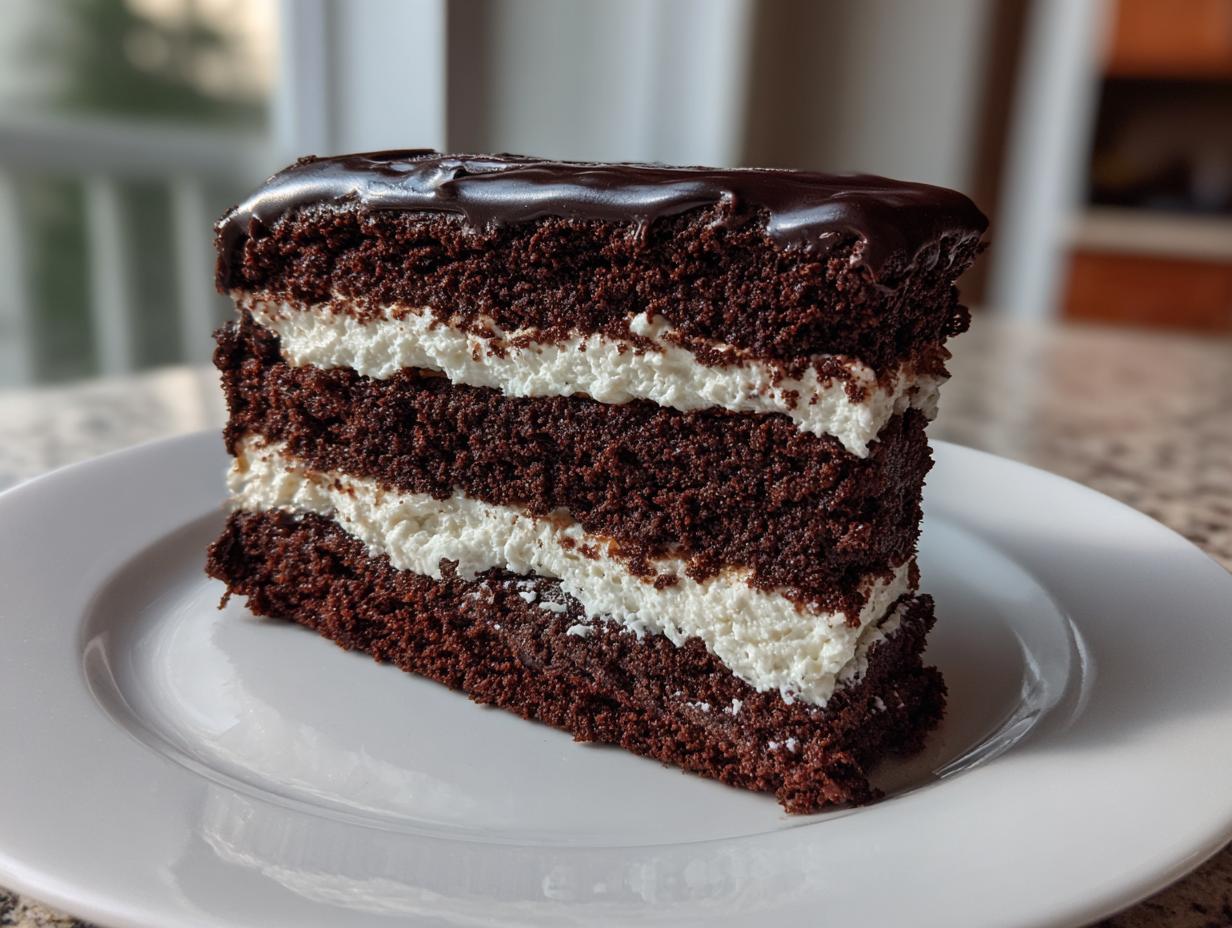
Oh, I absolutely adore those times when you need something incredibly decadent but the thought of turning the oven on makes you sweat! When that chocolate craving hits, especially when we’re entertaining or just hitting a busy weeknight patch, I turn immediately to my Chocolate Fudgy Cake inspiration. That’s exactly why my Ultimate No-Bake Fudgy Brownie Layer Cake—what everyone calls the brownie refrigerator cake—is a legendary recipe in our home. At HearthBite, we focus on comfort and connection, and this recipe proves you don’t need hours of fuss to make something that tastes like pure indulgence. This is reliable baking magic, designed for the modern kitchen!
- Why This Brownie Refrigerator Cake is Your New Go-To Party Dessert Recipe Chilled
- Gathering Ingredients for Your Brownie Refrigerator Cake
- Step-by-Step Instructions for Assembling the Brownie Refrigerator Cake
- Tips for Success When Making a Brownie Refrigerator Cake
- Make-Ahead & Storage Instructions for Your Brownie Refrigerator Cake
- Serving Suggestions for This Chilled Chocolate Dessert
- Frequently Asked Questions About the Brownie Refrigerator Cake
- Nutritional Estimates for This Decadent Brownie Treat
- Share Your Experience with This Quick Refrigerator Cake
Why This Brownie Refrigerator Cake is Your New Go-To Party Dessert Recipe Chilled
Listen, if you’re hosting or planning a potluck, you know the biggest hurdle is always the day-of cooking. That’s why this brownie refrigerator cake is an absolute lifesaver. It’s the ultimate easy make ahead dessert because 90% of the work is done by the fridge! You assemble it the night before, and BAM—you have the most gorgeous, decadent, and structured party dessert recipe chilled, ready to slice when everyone arrives. It’s rich enough for chocolate lovers but cool and refreshing, which is just heavenly. I think you are going to love how simple it keeps your hosting game!
The Joy of a No Oven Chocolate Cake
Seriously, when summer hits, I don’t even want to look at my oven. This recipe gives you that deep, fudgy chocolate fix without adding any extra heat to the kitchen. It truly is the perfect brownie dessert for summer. Because everything sets up beautifully while chilling, you can put it together in under 30 minutes of active time. It’s the definition of a quick refrigerator cake—all the indulgence, zero baking stress on the big day!
Gathering Ingredients for Your Brownie Refrigerator Cake
Okay, let’s talk about what you need to build this spectacular cream cheese layered cake. Since it’s packed with so many rich elements, clarity on the ingredients is key, especially because we have two separate creamy components layered in here! Don’t worry, I’ve broken down the shopping list so you won’t miss a thing. This list is built for success, ensuring you have everything ready for assembly.
You’ll need components for the brownie base, and then ingredients for the different creamy layers. If you’ve ever made pie crusts using refrigerated toppings, you know that ingredient needs careful handling, much like the filling we use in my easy cool whip cookies!
- One box (about 18.25 oz) of fudge brownie mix, plus whatever your box requires for baking (I usually stick to the box directions for guaranteed moisture).
- For the Cream Cheese Layer: 8 ounces of cream cheese (this MUST be softened to room temperature!), 1 cup of powdered sugar, 1 teaspoon vanilla extract, and half of your thawed whipped topping.
- For the Chocolate Pudding Layer: Two full packages (the 3.9 oz size) of instant chocolate pudding mix, and 3 cups of very cold milk.
- For the Top Layer Assembly: The remaining 8 ounces of softened cream cheese, 1 more cup of powdered sugar, 1 teaspoon vanilla extract, and the rest of that thawed whipped topping. It seems like we have two batches of cream cheese fluff, which is just extra decadent, right?
The goal here is maximum flavor with minimum fuss, so trust me on the exact forms of these ingredients!
Ingredient Notes and Substitutions for This Fudgy Brownie Dessert Recipe
This is where we build that trust factor! The beauty of this fudgy brownie dessert recipe is its flexibility, especially since it’s a no bake brownie dessert! If you’re truly in a rush, skip baking the mix entirely and grab a pan of super fudgy, pre-made brownies that you just cut up. That transforms this into a pure assembly job—it’s the quickest way.
When it comes to the pudding, while the recipe calls for standard chocolate, I absolutely preach using the dark chocolate instant pudding mix if you can find it. That deep, slightly bitter profile cuts through the sweetness of the cream cheese layer so beautifully. And please, please make sure that whipped topping is fully thawed before you fold anything in! If it’s still icy, it will leave chunks, and that ruins the smooth texture we are aiming for in this lovely brownie refrigerator cake.
Step-by-Step Instructions for Assembling the Brownie Refrigerator Cake
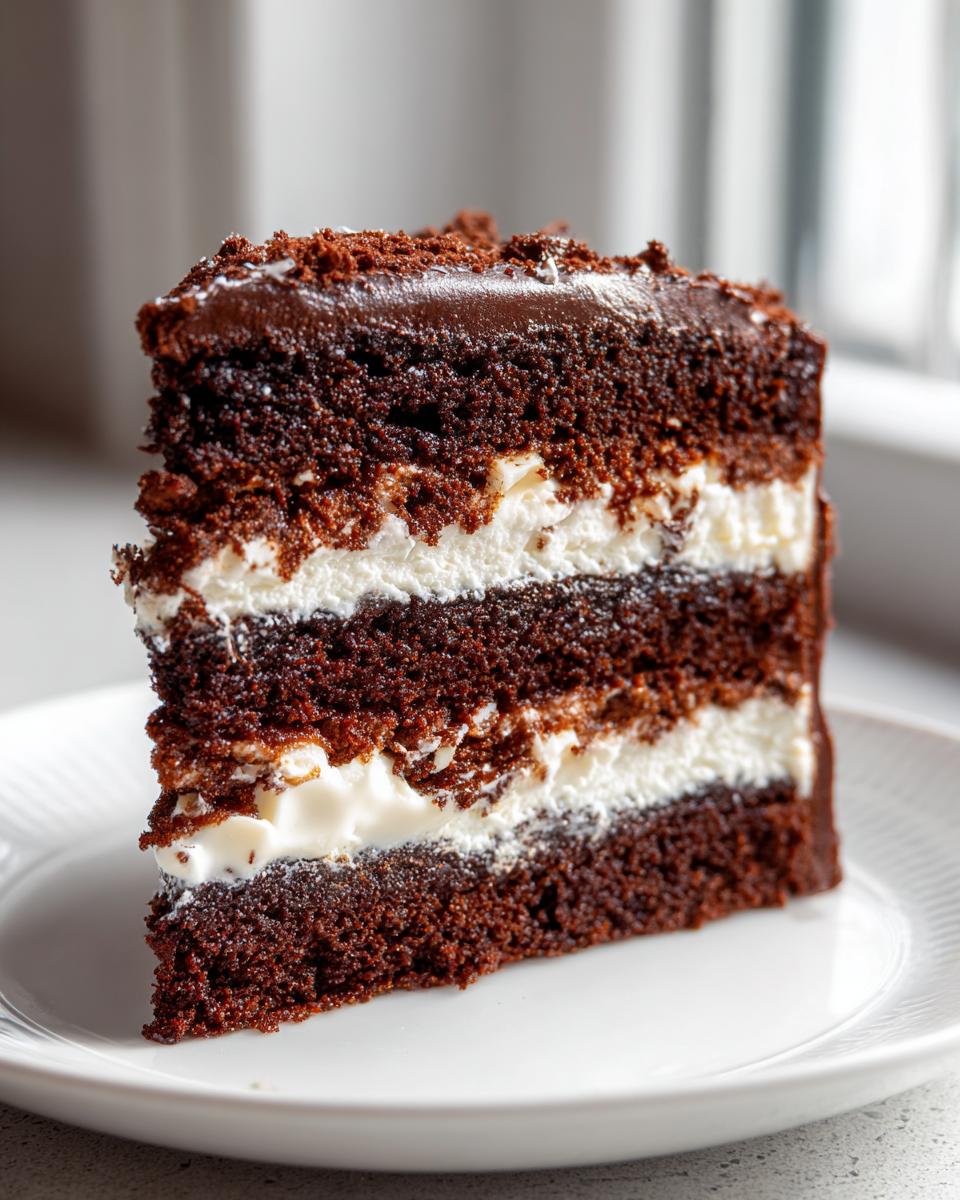
This is the fun part! Once your brownies are baked (or bought!) and totally, completely cool—and I mean stone cold, or they will melt your creamy layers—we can start building this magnificent brownie refrigerator cake. We are going to be creating four distinct layers stacked atop each other, so take your time to keep things neat. A sturdy 9×13 pan works perfectly, or you can springform it if you want to remove the sides later! Remember, the most important step happens last: the chilling. That long chill time is what turns this assembly into a sliceable layered chocolate icebox cake.
Preparing the Cream Cheese Layer and Pudding Base
First up is that gorgeous, tangy cream cheese stuffing. Make sure your 8 ounces of cream cheese is soft—if it fights you, it’s not ready! Beat that cheese, the powdered sugar, and the vanilla until it’s perfectly smooth. We aren’t looking for clumps here! Then, and this is important, gently fold in half of your thawed whipped topping. You want volume and air, not deflated goo, so fold gently until just combined. Set that bowl aside.
Next, tackle the pudding. In a separate big bowl, whisk both packages of chocolate pudding mix right into the 3 cups of icy cold milk. You need to whisk hard for about two full minutes until it starts getting thick. Don’t panic if it seems a little loose; let it just stand on the counter for maybe five minutes. It sets up really fast after that initial whisking!
Layering Your Decadent Brownie Treat
Now for the assembly! First, take half of your cooled, cut brownies and arrange them neatly in the bottom of your pan. This is our foundation. Over these brownies, spread that delightful cream cheese mixture evenly. It should glide right over top! Then, take half of your set chocolate pudding and spoon it carefully over the cream cheese base. Try to keep the layers level!
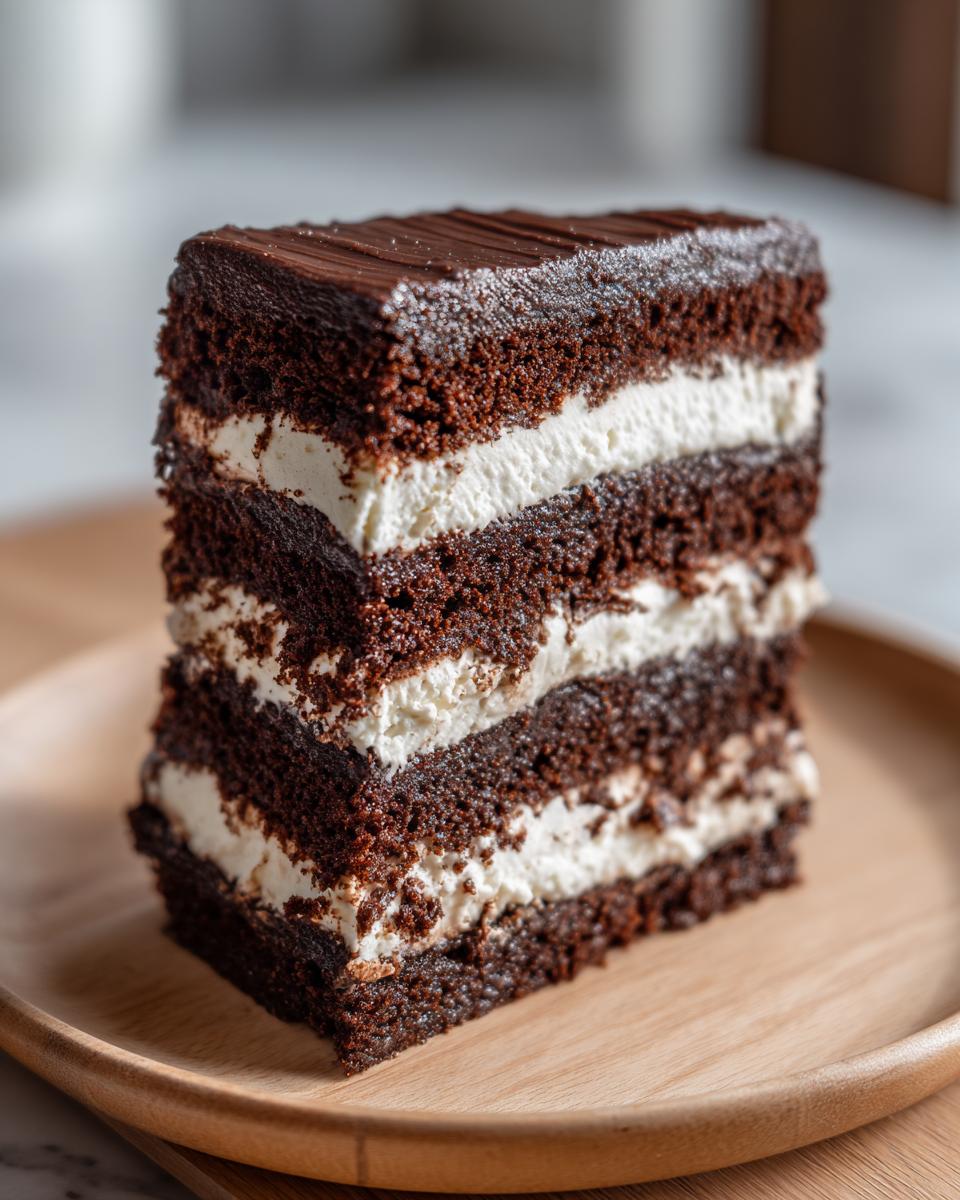
We repeat the chocolate work! Lay down the rest of your cut brownies right on top of that first pudding layer. Then, spread the remaining chocolate pudding over the second layer of brownies. Finally, take the last bit of whipped topping and spread it smoothly across the top to seal everything in. Cover it tightly—I mean tightly—with plastic and move it directly into the fridge. It needs a minimum of six hours, but seriously, do it the day before you need it so it sets like a dream!
Tips for Success When Making a Brownie Refrigerator Cake
Honestly, I’ve made this brownie refrigerator cake so many times that I’ve picked up a few tricks to guarantee it comes out looking as good as it tastes. We want sturdy layers, not a chocolate lava flow, right?
First, let’s talk about the pan. If you are using a standard 9×13 glass dish—which is usually the easiest—make sure you line the bottom and sides with parchment paper first, letting the ends hang over like little handles. This is true protection! If you try to serve this straight from the glass dish, the first slice is always a disaster, but those parchment tabs let you gently lift the entire cake out! If you opt for a springform pan, which is gorgeous for presentation, just grease and flour the bottom really well, but watch those sides; sometimes thick layers can sneak out if you haven’t sealed it perfectly.
When you are spreading any of those creamy layers—the cream cheese fluff or the pudding—use an offset spatula if you have one. It makes leveling so much easier than using a regular spoon. Remember, the flatter the layer going in, the flatter and cleaner your slices will be coming out. And I cannot stress this enough: do not rush the chilling time. I know six hours sounds like forever when you’re dreaming of chocolate, but if you cut it early, that pudding layer just oozes everywhere.
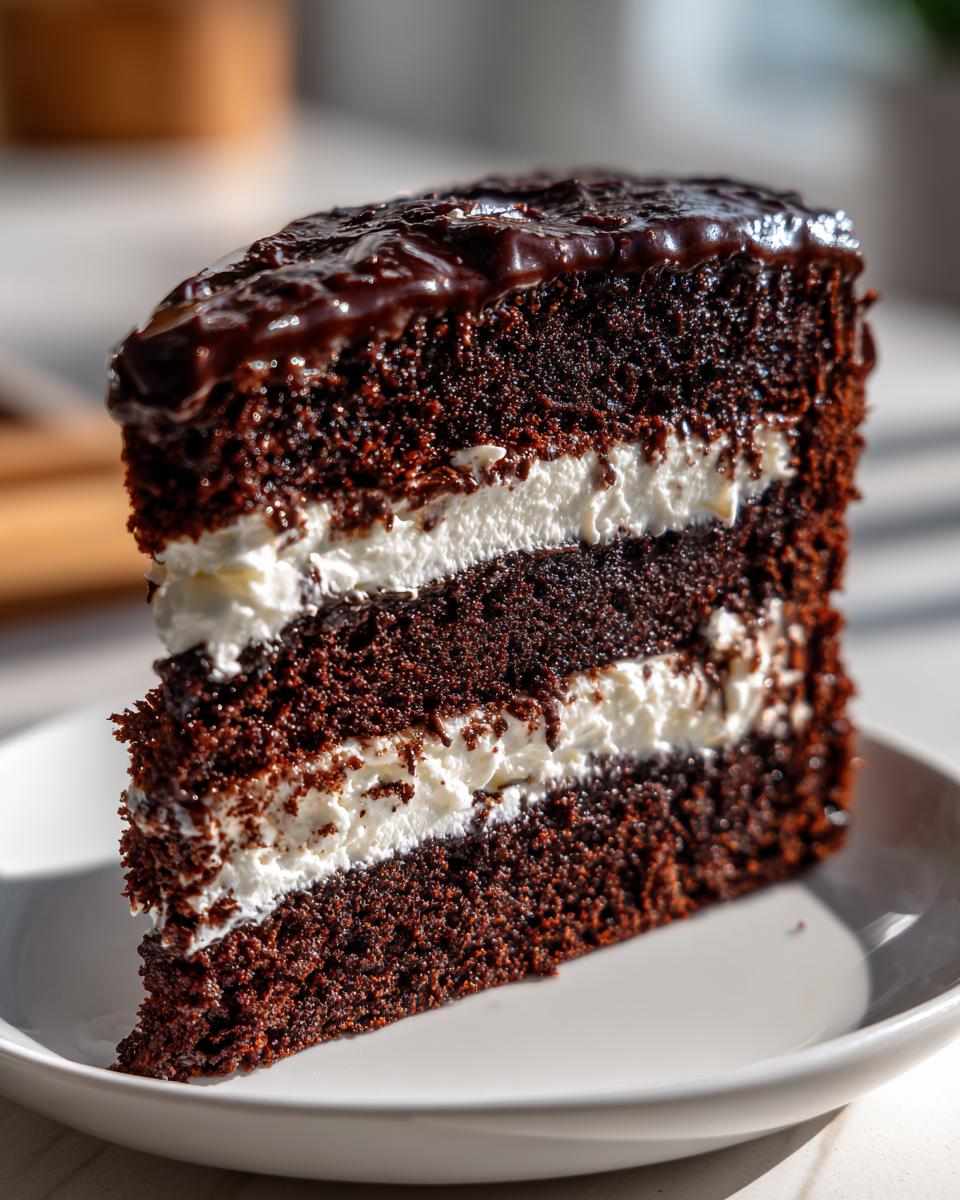
If you can leave it overnight, you’ll find that firming up process makes slicing this decadent brownie treat so satisfying. It allows the creamy layers to truly bond with the brownie squares. You end up with something that holds its structure beautifully when you serve it at your next gathering. Trust me on the extra wait time; your serving platter will thank you!
If you’re looking for an extra fudgy base that complements this recipe perfectly, you should check out my tips on making fudgy red velvet brownies—you could cut those up instead of using a box mix! It’s a little extra effort but worth it for serious chocolate lovers.
Make-Ahead & Storage Instructions for Your Brownie Refrigerator Cake
This is truly what makes the brownie refrigerator cake my favorite make ahead potluck dessert! You are essentially doing all the hard work upfront, and the fridge takes care of the rest, letting you focus on everything else that needs to happen before guests arrive. That’s real peace of mind, isn’t it?
The absolute best time to assemble this cake is the day *before* you plan to serve it. I know I keep saying it, but that overnight chill time is the secret sauce for clean, gorgeous slices. If you assemble it late in the evening, it’s ready by lunchtime the next day, giving you a completely stress-free serving experience. Just make sure before it goes in, you cover that dish really well with plastic wrap.
Because this chilled chocolate dessert is so rich and creamy, it holds up wonderfully! You can keep the assembled and covered brownie refrigerator cake safely in the refrigerator for up to four whole days! Yes, you read that right. It actually tastes just as good on day three as it does on day one, maybe even better as the pudding and cream cheese layers really marry into the brownie.
If you happen to have leftovers (which is rare in my house!), keep them covered in the fridge. They freeze reasonably well too, if you must! You can wrap individual slices tightly in plastic wrap and then foil, and they’ll be fine in the freezer for about a month. If you freeze them, just let them thaw slowly in the refrigerator overnight before you plan to serve them cold again. This recipe is designed to be your faithful friend, ready whenever you need a fantastic decadent brownie treat!
Speaking of advance prep, if you enjoy making things ahead, you should definitely look at my recipe for easy homemade freezer jam next! It’s another one of those recipes that saves time later on.
Serving Suggestions for This Chilled Chocolate Dessert
Even though this brownie refrigerator cake is already a showstopper all on its own—seriously, who needs more help when you have fudgy brownies and two layers of creaminess?—a little finishing touch can really elevate it for company. Remember, we want stunning simplicity, not extra work!
The easiest and classiest garnish, in my opinion, is a light, gentle dusting of unsweetened cocoa powder right before you serve it. Just pop some cocoa powder into a fine-mesh sieve and tap lightly over the top. It gives it that beautiful, professional bakery look without adding any extra texture complexity. Plus, that hint of bitterness is divine against the sweet pudding!
If you want to add a contrasting pop of color, fresh raspberries are fantastic. They are naturally a bit tart, which surprisingly complements chocolate so well. Just arrange a few around the edge of the sliced pieces on the plate—easy peasy!
But if you are asking me for my absolute favorite way to dress up a slice of this cold, dreamy dessert? A drizzle of homemade caramel. If you’ve got some of my easy homemade soft chewy sea salt caramels chilling in the pantry (or if you just bought nice store-bought stuff), warm it up just barely so it flows nicely. Watching that amber ribbon fall over the cool, light whipped topping? That turns a simple brownie refrigerator cake into something truly memorable. It’s the perfect touch for a real chocolate lover’s indulgence!
Frequently Asked Questions About the Brownie Refrigerator Cake
I always get a ton of questions about this recipe, which I take as a huge compliment because it means you’re ready to dive in and make one! Don’t worry if you have questions about the assembly or the chilling process; that just means you want it to be perfect, and I’m here to help you nail it. If you’re looking for a truly reliable simple layered pudding dessert, these answers should help!
Can I make the brownie layer from scratch instead of using a mix for this brownie refrigerator cake?
Absolutely, you totally can! If you have a favorite recipe for fudgy homemade brownies, go for it! That would technically make this a more complete from-scratch experience. But here’s my two cents: since the other layers are already no-bake and quick to assemble, using a boxed mix is the easiest shortcut. If you do bake them from scratch, just promise me you let them cool completely—I mean, fully room temperature, maybe even slightly chilled—before you even think about cutting them into squares. Hot brownie ruins creamy fillings faster than anything else!
How long does the brownie refrigerator cake need to chill before serving?
This is the make-or-break step, friends! You must chill your brownie refrigerator cake for a minimum of six hours. I know, it seems like forever, especially when this no bake brownie dessert smells divine in the fridge. But those six hours are necessary for the pudding and cream cheese layers to firm up enough to hold their shape.
If you can swing it, chilling overnight is truly the gold standard. When you slice it after 10 or 12 hours, the edges come out so clean and sharp, which makes for a much prettier presentation on the serving plate! Plan ahead so you don’t rush that critical rest period.
Is this considered a layered chocolate icebox cake?
Yes, great question! By definition, this absolutely qualifies as a quintessential layered chocolate icebox cake. The “icebox” refers to using refrigeration to set the layers—we aren’t baking the final product at all. We use chilling time to firm up the pudding and the creamy elements against the dense brownie layers. It’s that structured, chilled quality that makes it so perfect when the weather gets warm!
If you’re looking for more simple recipes that come together fast, check out my collection of quick and easy dinner recipes for busy nights!
Nutritional Estimates for This Decadent Brownie Treat
Now, I want to be super clear here: because we are using a mix for the brownies, and depending on the brand of pudding or whipped topping you grab, these numbers are just estimates! I always look up the nearest approximation when I’m tracking things, but I believe in being honest about food, even when it’s pure, wonderful indulgence like this brownie refrigerator cake.
This information is based on planning for 12 good-sized slices. If you cut smaller pieces—which I highly doubt you’ll want to do with this layered chocolate icebox cake!—the numbers naturally go down. If you find yourself needing some lighter inspiration for weekday meals, you can always check out my healthy lunch recipes, but for now, let’s savor this treat!
Here is the breakdown based on one serving:
- Serving Size: Just one slice (but maybe you need two, I won’t judge!).
- Calories: Roughly 380 calories. That’s a solid, satisfying dessert!
- Fat Content: Around 20g of total fat. Remember, this includes rich cream cheese and butter from the brownie!
- Sugar Count: About 35g of sugar. It is a decadent brownie treat, after all!
- Protein and Fiber: Naturally, it’s lower in fiber (about 2g) and protein (around 5g), but it packs a huge punch of happy comfort.
It’s definitely a treat-yourself dessert, designed for parties and special occasions, not your everyday fare. Enjoy it knowing you earned those 380 calories!
Share Your Experience with This Quick Refrigerator Cake
I always get so much joy knowing you’ve made one of my recipes! If you tested this fabulous brownie refrigerator cake, please come back here and leave a star rating—it helps other home cooks feel confident trying it out. I’d also love to hear about any little twists you added in the comments below. Did you use a different topping? Let us know! And if you loved this quick refrigerator cake, share a snap on social media so we can celebrate your success! Once you try this, you might just be ready for more morning treats from my easy breakfast recipes collection next.
PrintUltimate No-Bake Fudgy Brownie Layer Cake

Assemble this easy, make-ahead brownie refrigerator cake featuring fudgy layers, a tangy cream cheese filling, and rich chocolate pudding. This chilled chocolate dessert requires no oven time and is perfect for parties.
- Prep Time: 25 min
- Cook Time: 30 min
- Total Time: 55 min
- Yield: 12 servings 1x
- Category: Dessert
- Method: Chilling
- Cuisine: American
- Diet: Vegetarian
Ingredients
- 1 box (18.25 oz) fudge brownie mix (plus ingredients listed on box for baking)
- 8 ounces cream cheese, softened
- 1 cup powdered sugar
- 1 teaspoon vanilla extract
- 1 tub (8 oz) frozen whipped topping, thawed, divided
- 2 packages (3.9 oz each) instant chocolate pudding mix
- 3 cups cold milk
- 1 package (8 oz) cream cheese, softened
- 1 cup powdered sugar
- 1 teaspoon vanilla extract
- 1 tub (8 oz) frozen whipped topping, thawed, divided
Instructions
- Prepare and bake the brownies according to the package directions using a 9×13 inch pan. Let the brownies cool completely. Once cool, cut the brownies into uniform squares suitable for layering in your serving dish.
- Prepare the cream cheese layer: In a medium bowl, beat the 8 ounces of softened cream cheese with 1 cup of powdered sugar and 1 teaspoon of vanilla extract until smooth. Gently fold in half of the thawed whipped topping until just combined. Set aside.
- Prepare the chocolate pudding layer: In a large bowl, whisk together the two packages of instant chocolate pudding mix and 3 cups of cold milk for about 2 minutes, until the mixture begins to thicken. Let it stand for 5 minutes.
- Assemble the brownie refrigerator cake in a large, deep serving dish or springform pan. Create the first layer with half of the cut brownies.
- Spread the cream cheese mixture evenly over the brownie layer.
- Spoon half of the prepared chocolate pudding over the cream cheese layer.
- Top the pudding with the remaining half of the cut brownies.
- Spread the remaining chocolate pudding over the second brownie layer.
- Spread the remaining half of the thawed whipped topping over the pudding layer to create the top layer.
- Cover the dish tightly with plastic wrap. Refrigerate for at least 6 hours, or preferably overnight, to allow the layers to set firmly. This chilling time is essential for the best texture.
- Slice and serve this decadent brownie treat cold.
Notes
- You can use store-bought, pre-made fudge brownies to save time, making this a true no-bake dessert.
- For an extra rich flavor, use a dark chocolate pudding mix instead of regular chocolate.
- This layered chocolate icebox cake keeps well in the refrigerator for up to 4 days, making it an excellent make ahead potluck dessert.
Nutrition
- Serving Size: 1 slice
- Calories: 380
- Sugar: 35
- Sodium: 250
- Fat: 20
- Saturated Fat: 10
- Unsaturated Fat: 10
- Trans Fat: 0.5
- Carbohydrates: 48
- Fiber: 2
- Protein: 5
- Cholesterol: 35