
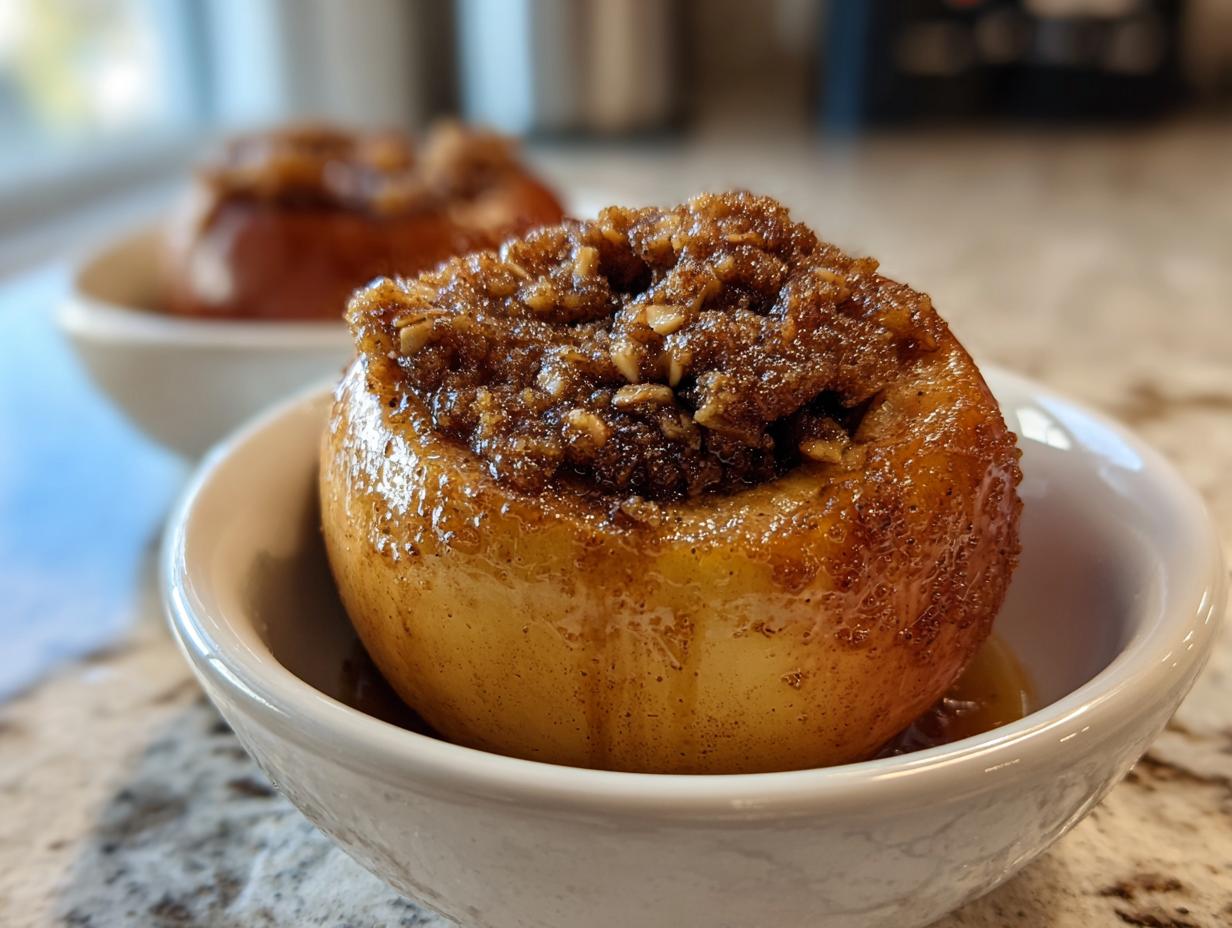
As soon as that first crisp morning hits, doesn’t your heart just ache for the smell of cinnamon and warm fruit floating from the oven? That smell, to me, is the absolute definition of comfort. Sometimes the hustle of life makes us feel like we need complicated techniques to feel truly nourished, but I never forget what my Grandma taught me: the best food is simple food. That’s why I love this Easy Baked Cinnamon Brown Sugar Stuffed Apples recipe so much. It’s straightforward, uses ingredients I always have on hand, and delivers that deep, nostalgic flavor we crave. These baked apples are pure, soulful ease, making them perfect for a weeknight treat or a quick, low-effort holiday side dish. You can find more easy comfort food recipes right here: our collection of comforting meals.
- Why These Are the Best Baked Apples You Will Ever Make
- Gathering Ingredients for Your Stuffed Baked Apples
- Step-by-Step Guide to Perfect Baked Apples
- Expert Tips for Making the Best Stuffed Baked Apples
- Serving Suggestions for Warm Apple Dessert
- Storage and Reheating for Your Baked Apples
- Frequently Asked Questions About Baked Apples
- Nutritional Estimates for Baked Cinnamon Brown Sugar Apples
- Share Your Favorite Fall Dessert Recipe Moments
Why These Are the Best Baked Apples You Will Ever Make
Honestly, I truly believe these are the best baked apples you’ll find because they hit that perfect middle ground—they aren’t too fussy, but they aren’t mushy, either! This is truly the easy baked apples recipe you need in your back pocket for those days when you need a quick dessert but want something that feels special. If you’ve ever tried other recipes that came out watery or hard, I promise this method fixes all that.
- Perfectly balanced flavor: Bright apple tang mixed with warm spices and deep brown sugar.
- Simple stuffing: The oat mixture holds together beautifully inside the cavity.
- No stand mixer needed: You can mix this entire dish by hand in minutes.
The Perfect Texture for Baked Apples
The secret to texture is steam, plain and simple. By pouring that hot water—or, even better, apple cider if you have it—into the bottom of the baking dish, you create a humid environment. This gentle steam cooks the apples slowly, guaranteeing they become tender all the way through without dissolving into applesauce. They hold their shape, offering that satisfying tender bite every time.
Gathering Ingredients for Your Stuffed Baked Apples
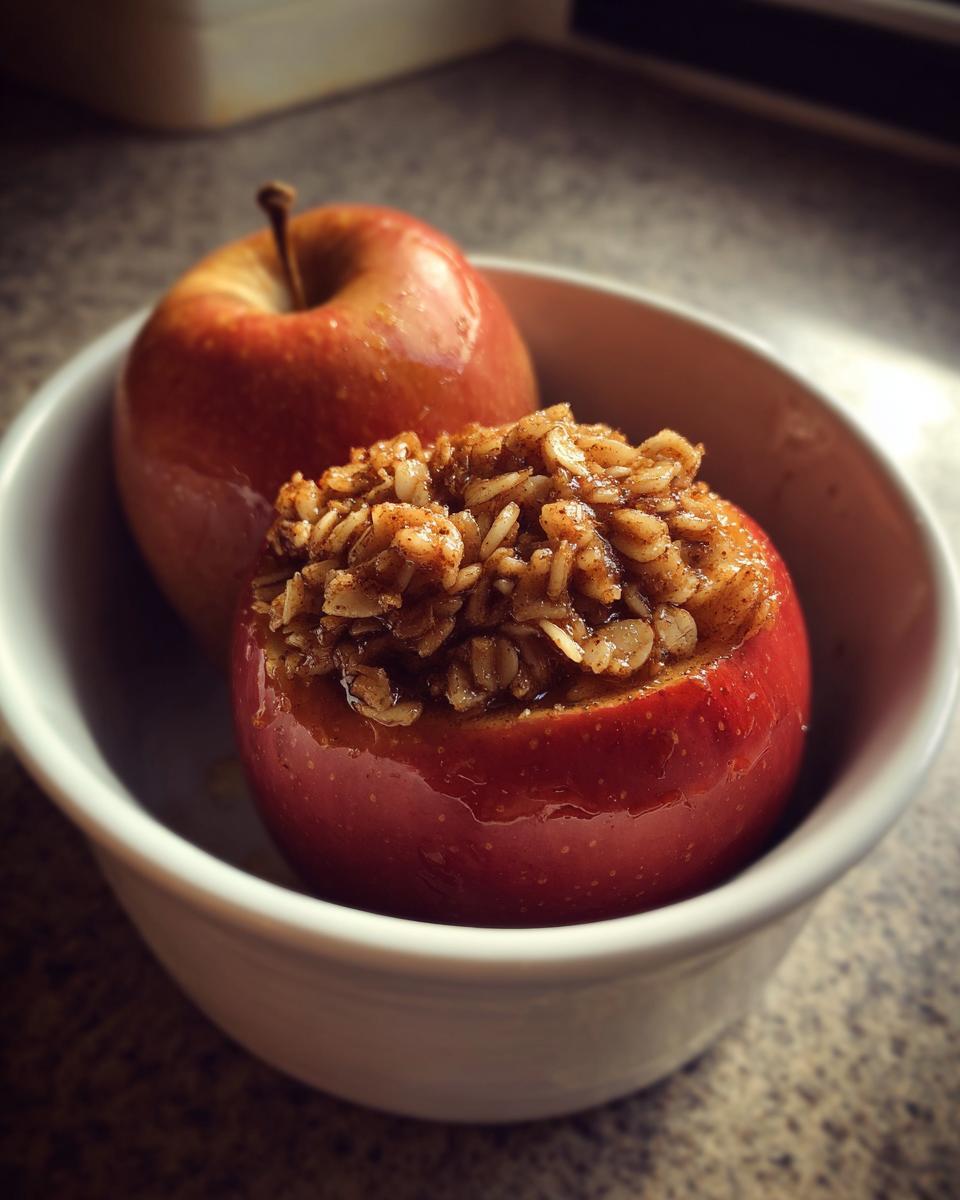
Alright, let’s get our shopping list together! When you’re aiming for that cozy, homemade feel, the quality of what you start with really matters. For this recipe, we aren’t dealing with complicated items, which is the beauty of it! You’ll need four good, firm apples—I love using Honeycrisp because they keep their shape wonderfully, but a classic Granny Smith works great too if you like a bit more tartness to cut through the sweetness.
When you measure out your brown sugar, make sure it’s packed firmly into the spoon or cup. That’s key because we want that deep caramel flavor from the molasses. Also, get your butter ready and cut it into little cubes; this helps it melt evenly into that sweet filling as it bakes. If you’re feeling extra seasonal and want to amp up the moisture underneath, take a peek at my apple pie filling recipe—you can substitute that mixture or even just use apple cider instead of hot water in the bottom of the dish for richer flavor!
Ingredient Notes and Substitutions for Baked Apples
Choosing the right apple really determines the final texture. Granny Smiths are reliable because they are firm and don’t break down too fast. For the filling, remember, the oats absorb moisture and help create structure. If you’re totally obsessed with that crunchy texture—you know, leaning into the apple crisp topping baked apples idea—just bump that rolled oat measurement up to a full half-cup and toss in one tablespoon of all-purpose flour with your brown sugar and spices. It makes the topping wonderfully crumbly without making the whole bake too heavy.
Also, don’t skip the nutmeg! A tiny pinch goes a long way to making these feel like a truly special fall dessert. Think of it as the secret handshake of cozy baking.
Step-by-Step Guide to Perfect Baked Apples
Okay, here is where the magic happens! Getting these baked apples in the oven is surprisingly fast, which is fantastic for a quick apple recipe when that craving hits. First things first, get your set-up ready: You need to preheat your oven to 375 degrees Fahrenheit and lightly grease that 8×8 dish. We want everything smooth sailing when it’s time to assemble.
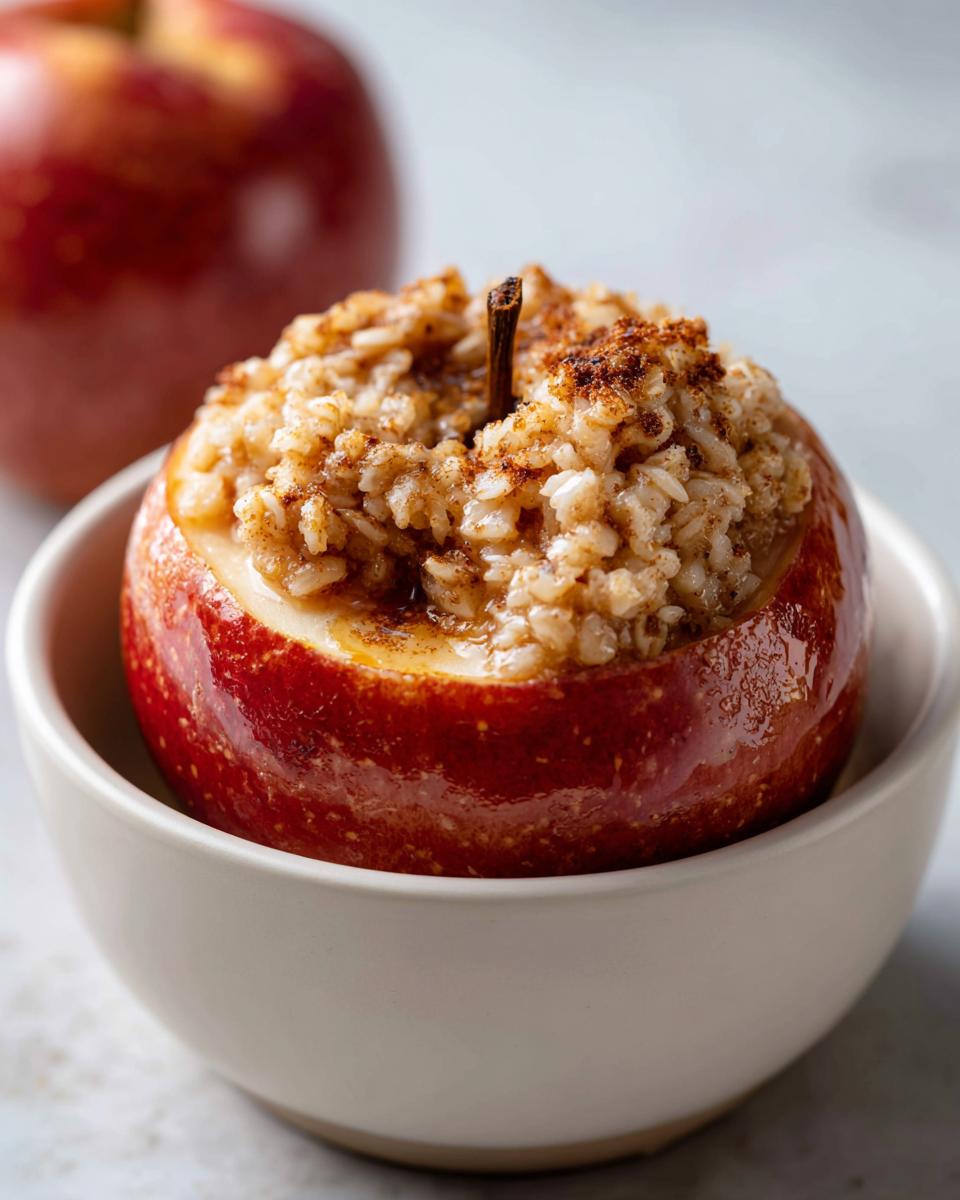
Once your oven is warming up, we move to the apples. You need to wash them well, but the most important part is the coring. Grab a small spoon—sometimes a melon baller works wonders—and carefully hollow out the center. Here’s the big tip: don’t poke all the way through the bottom! Leave about a half-inch of apple intact at the base. This little ‘bowl’ is crucial so your delicious filling doesn’t just leak out into the baking dish.
Preparation: Coring and Creating the Cinnamon Baked Apples Filling
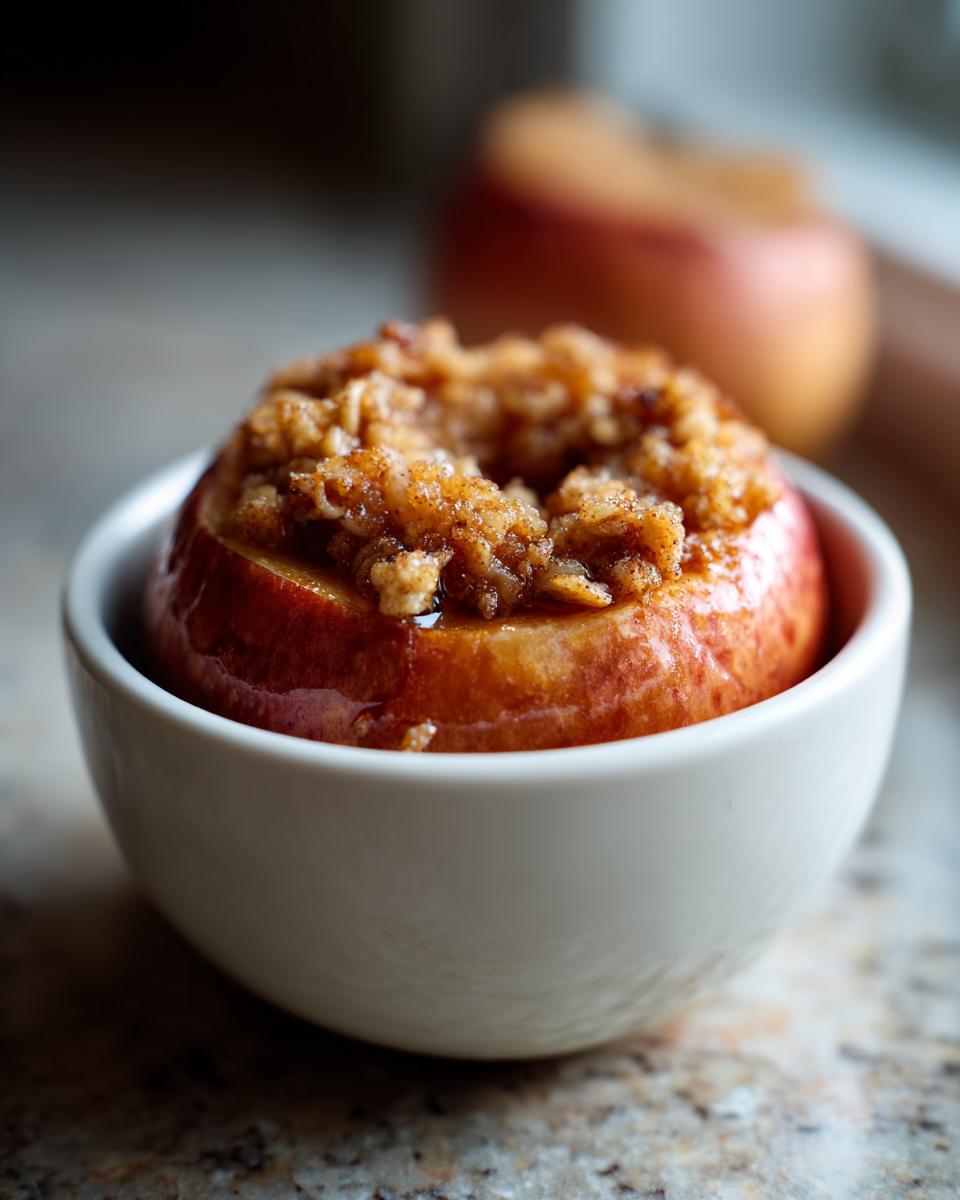
While you’re prepping the fruit, whisk together all your dry filling ingredients in a little bowl. That’s your oats, your beloved brown sugar apples spice mix of cinnamon and nutmeg, and the remaining sugar. Once you have that beautiful, fragrant mixture, gently scoop it into the cored apples. Don’t just dump it in; use your fingers or the back of the spoon to press it down just a little bit so it’s nice and snug in there.
Baking Your Stuffed Baked Apples
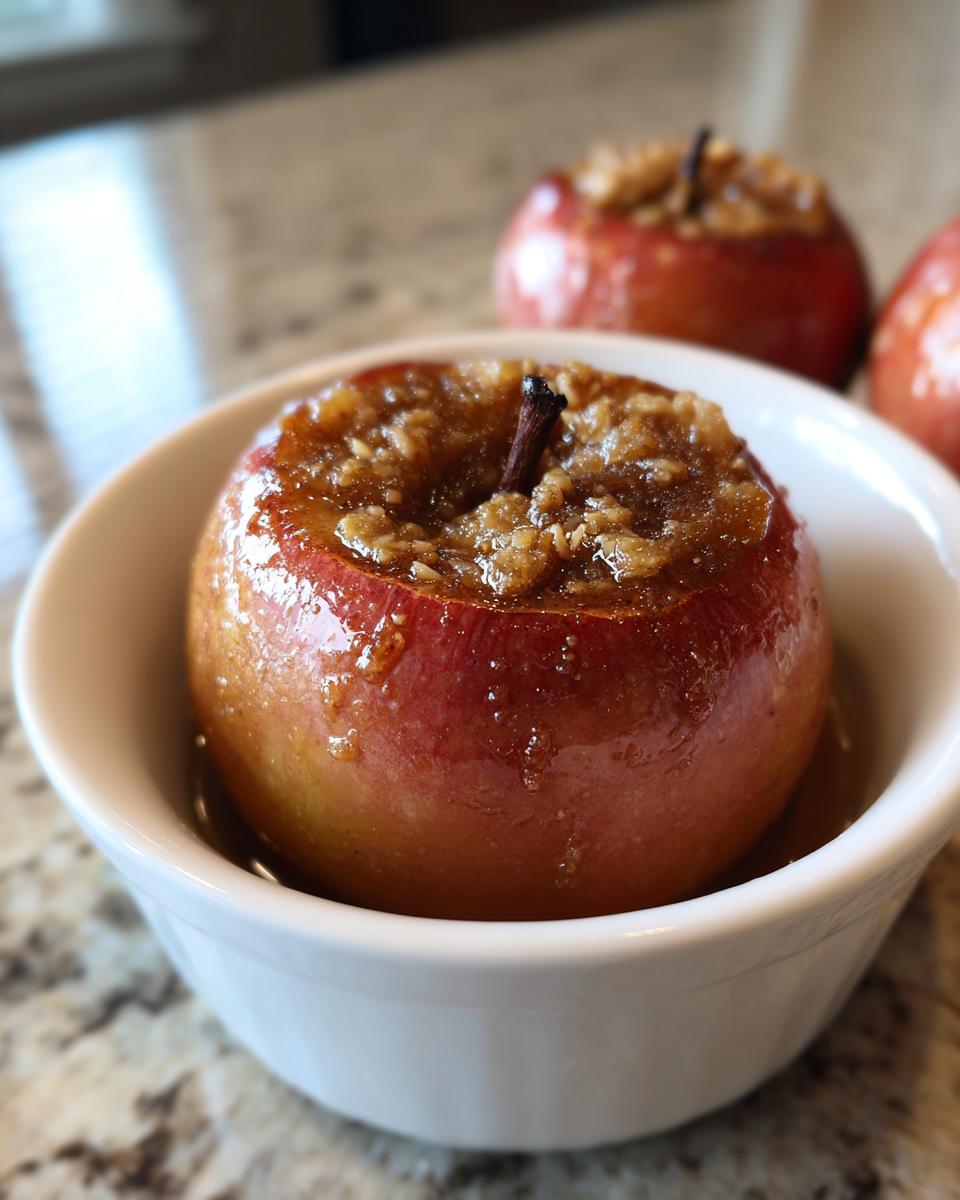
Time to load them up! Place your stuffed apples neatly into that prepared baking dish. Now, slice up your cold butter into small little pats—we are talking tiny—and just drop a few pieces right on top of that filling in each apple. That butter melts down and mixes with the sugar, creating those decadent caramelized apples oven style juices. Next, pour that hot water (or cider, if you’re feeling fancy!) right into the bottom of the dish, making sure the water goes around the base of the apples. Bake them for about 35 to 45 minutes. You’ll know they are done when they are soft, and when you poke one carefully with a fork, it gives way easily. I usually check right around the 40-minute mark for that perfect tenderness!
And don’t forget, if you want to read more about mixing things up, check out my thoughts on apple brownies!
Expert Tips for Making the Best Stuffed Baked Apples
Even though this recipe is super straightforward, I have a few tricks that I’ve picked up over the years that really elevate these stuffed baked apples from good to absolutely unforgettable. If you want that deep, rich flavor that screams autumn romance, you need to pay attention to the spices.
Don’t just rely on the cinnamon in the filling! When you place the apples in the baking dish, toss a very small pinch of cinnamon and a tiny dash of brown sugar right onto the exposed skin of the apple right before it goes into the oven. As it bakes, this creates the faintest, sweetest crust on the outside, complementing the simple spiced apples filling perfectly. Trust me, this tiny extra step is worth the effort.
Also, don’t rush the resting period! Once they come out of the oven, let them sit in that hot liquid for about five to ten minutes before serving. This allows the fruit to settle down and absorb one last little bit of that buttery steam. If you want inspiration on flavor pairings, check out my sea salt caramel recipe—drizzling a tiny bit over the apples right before serving is divine!
Serving Suggestions for Warm Apple Dessert
There is just something magical about a warm apple dessert straight from the oven, isn’t there? While these baked apples are perfectly delicious all on their own, they really shine when you pair them with something creamy or something that elevates them to a full meal. I always encourage my readers to think beyond just dessert—these are versatile!
Of course, if you want pure indulgence, you simply cannot beat serving one of these warm spiced beauties over a scoop of good quality vanilla ice cream. The cold cream melting into the warm, cinnamon-scented juices at the bottom of the bowl? That’s what fall memories are truly made of. It turns a simple bake into the ultimate comfort food dessert experience.
If you’re feeling breakfast for dinner, which lets be honest, I always am, try spooning one of these bad boys right over a bowl of my fluffy oatmeal pancakes. That spiced apple mixture soaks right into the oats—it’s incredible.
Making Baked Apples a Healthy Baked Fruit Side Dish
Believe it or not, these aren’t just for dessert! Because we are using whole fruit and a relatively small amount of topping, these apple cups make a fantastic, naturally sweet addition to a savory meal. If you are looking to keep things on the lighter side or present this as a healthy baked apples side dish, I have a few ideas for you.
If you omit the ice cream or any extra caramel drizzle, the calories drop right down. Instead of serving it with something sweet, try serving it alongside a nice pork tenderloin or a simple roasted chicken. The tartness and spice cut through the savory flavors so beautifully. For a lighter topping, skip the ice cream entirely and use a dollop of plain Greek yogurt instead. It adds protein without adding all that extra sugar, and it still gives you that lovely creamy component you want.
Storage and Reheating for Your Baked Apples
Now, let’s talk about the best part of making comfort food: having leftovers! These baked apples are actually wonderful the next day, provided you store them correctly. After they’ve cooled down completely—and I mean totally—put the apples and any leftover liquid from the bottom of the dish into an airtight container. You can keep them happily in the refrigerator for about three to four days. Anything longer than that, and you risk them getting a bit too soft for my liking.
When you’re ready to enjoy them again, reheating them carefully is key so you don’t turn that lovely tender apple into soup. The oven is definitely the superior method here. Pop the serving directly into a small toaster oven or, if you’re reheating a few, place them back in a small oven-safe dish, maybe add just a teaspoon or two of water if they look dry, and heat at 300 degrees Fahrenheit for about 10 to 15 minutes. This gives them a gentle warm-up that keeps the structure intact.
If you are in a huge rush, the microwave works, but you have to be vigilant. Nuke it for about 30 seconds at 50% power. Check it, stir the liquid around the base, and then do another 15 seconds if needed. Overdoing it in the loud box is what makes them chewy or watery, so use short bursts to bring back that cozy warmth. If you need some good ideas for using up fruit leftovers in general, you should check out my easy freezer jam guide—you never know when a little leftover fruit might turn into something new!
Frequently Asked Questions About Baked Apples
It’s so common to have questions when you step away from the recipe just for a second! I’ve gathered up the things people ask me most often about this dish, especially when they try to tweak it for the family. Baking is all about confidence, and knowing these little answers solidifies that feeling!
What is the best apple to use for baked apples?
When it comes to structure, you want an apple that stands up to heat without completely turning into liquid. For my stuffed recipe, I always lean toward Honeycrisp or Fuji because they are firm and have a wonderful sweet-tart balance. If you really love that sharp, tangy bite balancing the sweetness of the brown sugar, don’t hesitate to use Granny Smith apples. Just know they might need an extra five minutes in the oven since they are naturally harder!
How can I make caramelized apples oven style quickly?
If you are really trying to speed things up while still getting that lovely coating, you can definitely adjust your method. While the 40 minutes is gentle and perfect for holding the filling in place, you can try pulling down the cook time by 10 minutes and then finishing under the broiler for the last 3 to 4 minutes. Watch this part like a hawk! This forces the sugar and butter on top to bubble and brown quickly, giving you that deep, gorgeous look associated with caramelized apples oven baking, but you must be careful not to burn that oat topping.
Can I make these baked apples ahead of time?
Yes, you absolutely can tackle a big batch ahead of time! This is great for holiday gatherings. You can prepare them completely—core them, stuff them, and put them in the baking dish with the water around the base, but then stop right before the butter goes on top. Cover the dish tightly with foil and store it in the fridge for up to 24 hours. When you’re ready to serve, pull them out, top with the butter, and pop them straight into the 375°F oven. They might need an extra minute or two since they are starting cold, but this saves so much stress on serving day! For other make-ahead ideas, take a look at my no-cook pizza sauce—sometimes the best meals are the ones you prep early!
Nutritional Estimates for Baked Cinnamon Brown Sugar Apples
I always get asked about the numbers, and while I’m focused far more on the flavor and the feeling these baked apples bring to the table, it’s only fair to give you an idea of what’s in a serving. Remember, this is HearthBite, so we focus on real ingredients! These numbers are just estimates, naturally, based on the specific ingredients we used in our recipe—especially depending on the type of apple you choose.
If you are watching intake, you can see that the protein and fiber content are pretty decent for a comfort food dessert, mostly thanks to those rolled oats we stuffed inside! We try to keep things honest here, so I always include this quick breakdown for transparency, which is something my marketing background taught me is just essential for building trust.
- Serving Size: 1 apple
- Calories: 280
- Total Fat: 12g (Saturated Fat: 7g)
- Carbohydrates: 45g (Fiber: 6g)
- Sugar: 35g
- Protein: 2g
- Cholesterol: 15mg
As you can see, a good portion of that sugar comes naturally from the fruit and the brown sugar we use to create that beautiful, warm glaze at the bottom of the dish. If you’re looking to reduce sugar, you can always experiment by cutting the brown sugar in the filling by a quarter, though I warn you, the brown sugar apples flavor is part of the magic!
Share Your Favorite Fall Dessert Recipe Moments
And there you have it! Our recipe for the Easy Baked Cinnamon Brown Sugar Stuffed Apples is complete, and hopefully, your kitchen already smells like pure autumn heaven. Creating moments around the table is really why we do what we do here at HearthBite. Food tastes best when it brings people together, and I hope this simple dish helps you make some wonderful new memories with your family and friends.
I put so much care into making sure this recipe delivers that cozy feeling—that reliable, delicious hit of comfort food we all crave when the evenings draw in. Now, I truly want to hear from you! Did you try these? Did you use apple cider instead of water? Did you top them with ice cream or maybe a scoop of oatmeal?
Please, take a moment to leave a review right down below. Five stars are always lovely, but what I truly cherish are the comments telling me how the recipe worked for you. And if you snap a picture of your cozy, warm creation, please do share it on social media and tag us! It absolutely makes my day to see HearthBite recipes showing up in your homes. If you’re looking for another cozy recipe to enjoy right alongside this one, check out my easy creamy pumpkin soup—it’s the perfect savory companion to this sweet ending!
PrintEasy Baked Cinnamon Brown Sugar Stuffed Apples

Make these simple baked apples stuffed with a brown sugar and oat mixture. This recipe delivers warm, comforting flavor perfect for a fall dessert or a healthy side dish.
- Prep Time: 10 min
- Cook Time: 40 min
- Total Time: 50 min
- Yield: 4 servings 1x
- Category: Dessert
- Method: Baking
- Cuisine: American
- Diet: Vegetarian
Ingredients
- 4 large baking apples (like Honeycrisp or Granny Smith)
- 1/4 cup rolled oats
- 1/4 cup packed brown sugar
- 1 teaspoon ground cinnamon
- 1/8 teaspoon ground nutmeg
- 2 tablespoons unsalted butter, cut into small pieces
- 1/4 cup hot water
Instructions
- Preheat your oven to 375 degrees Fahrenheit. Lightly grease an 8×8 inch baking dish.
- Wash the apples. Use a small spoon or melon baller to carefully core the center of each apple, leaving about a half-inch of apple at the bottom so the filling stays inside. Do not cut all the way through the bottom.
- In a small bowl, mix together the rolled oats, brown sugar, cinnamon, and nutmeg.
- Stuff the center cavity of each apple evenly with the oat mixture. Gently press the filling down.
- Place the stuffed apples into the prepared baking dish. Top each apple with a few small pieces of the butter.
- Pour the hot water into the bottom of the baking dish, around the apples, not over the filling.
- Bake for 35 to 45 minutes, or until the apples are tender when pierced with a fork. Baking time depends on the size and variety of your apples.
- Carefully remove the apples from the oven. Let them cool slightly before serving warm.
Notes
- For a richer flavor, substitute half of the water in the baking dish with apple cider.
- If you prefer a crisp topping, increase the oats to 1/2 cup and add 1 tablespoon of flour to the filling mixture.
- Serve these warm baked apples over vanilla ice cream or a scoop of oatmeal for a complete comfort food dessert.
Nutrition
- Serving Size: 1 apple
- Calories: 280
- Sugar: 35
- Sodium: 5
- Fat: 12
- Saturated Fat: 7
- Unsaturated Fat: 5
- Trans Fat: 0
- Carbohydrates: 45
- Fiber: 6
- Protein: 2
- Cholesterol: 15