
When the craving hits for something sweet, crunchy, and gloriously decadent, sometimes you just can’t afford to wait for the oven to preheat. Trust me, I get it! That’s why I’m thrilled to share our recipe for the ultimate quick fix: **avalanche cookies**. These little mounds of joy are pure comfort food magic, coming together faster than you can decide which movie to watch. Here at HearthBite, my whole philosophy, as Sarah Miller, is that food should bring comfort and connection without the fuss. These **avalanche cookies** perfectly embody that idea—simple ingredients, zero baking, and maximum satisfaction delivered right from my kitchen to yours.
- Why You Need These Easy No-Bake avalanche cookies Today
- Gathering Ingredients for Your avalanche cookies
- Step-by-Step Instructions to Make avalanche cookies
- Pro Tips for Perfect avalanche cookies Texture
- Storage and Keeping Your avalanche cookies Fresh
- Frequently Asked Questions About No Bake Cookies
- Understanding the Nutrition in avalanche cookies
- Share Your Homemade avalanche cookies Creations
Why You Need These Easy No-Bake avalanche cookies Today
Honestly, these are my life savers! If you need **Quick Dessert Ideas** that practically assemble themselves, this is it. We are talking about deliciousness with almost no hands-on time. We aren’t even using the oven, which is fantastic when it’s blazing hot outside or you just don’t want to heat up the whole house. If you are looking for something fast, check out my tips for quick, easy dinner recipes too!
Maximum Flavor with Minimal Effort
You won’t believe these chewy, crunchy delights rely on just four core ingredients. They nail that perfect texture combination: the snap of the cereal playing against the soft marshmallows, all held together by creamy peanut butter and white chocolate. They fit right into the category of **30 Minute Desserts** because the prep is so fast!

Perfect for Holiday Cookie Trays and Gifting
These are mandatory for my **Holiday Cookie Trays** every year. Because they set up so nicely and travel well, they make the easiest last-minute gifts. Just scoop them onto parchment paper, let them firm up, and they are ready to go! They look far fancier than the amount of effort you actually put into them, which I love for potlucks.
Gathering Ingredients for Your avalanche cookies
The secret to keeping these **avalanche cookies** so easy is relying on just a handful of straightforward pantry staples. When you are working with just four main components, quality and accuracy really matter, or things just won’t bind up correctly. I always make sure to check the labels so I know exactly what I’m using before I even start melting the chocolate. If you love these simple creations, you might also enjoy my easy cool whip cookies recipe for another super quick win!
Essential Components for Perfect avalanche cookies
Here is exactly what you will grab before setting up your station. No substitutions unless you are following one of my special variation sections later, I promise!
- 16 ounces white chocolate baking chips or almond bark—don’t skimp on this base!
- 3/4 cup creamy peanut butter—the creamy kind is essential for smooth melting.
- 3 cups crispy rice cereal—yes, the standard stuff does the job perfectly.
- 1 1/2 cups miniature marshmallows—they need to be the small ones so they mix in well.
Step-by-Step Instructions to Make avalanche cookies
Okay, friend, this is where the magic happens, and it moves fast! Since these are no-bake, the goal is to get everything coated before the white chocolate starts to firm up—we want creamy, not concrete. If you’re making a big batch, take my advice and grab the biggest microwave-safe bowl you own; you’ll need the elbow room later when everything goes in. If you want to see another one-pot wonder, check out my recipe for peanut butter balls; stirring things into melted chocolate is just therapeutic!
Preparing Your Surface and Melting the Base
First things first, get that baking sheet ready! Line it with parchment paper right away and set it close by. Next, grab your large bowl. Put in the white chocolate chips and the peanut butter. Pop it in the microwave for 30-second blasts. You have to stir it well after every zap. Don’t try to rush this part! Keep going until it’s smooth as silk—no lumps allowed anywhere.
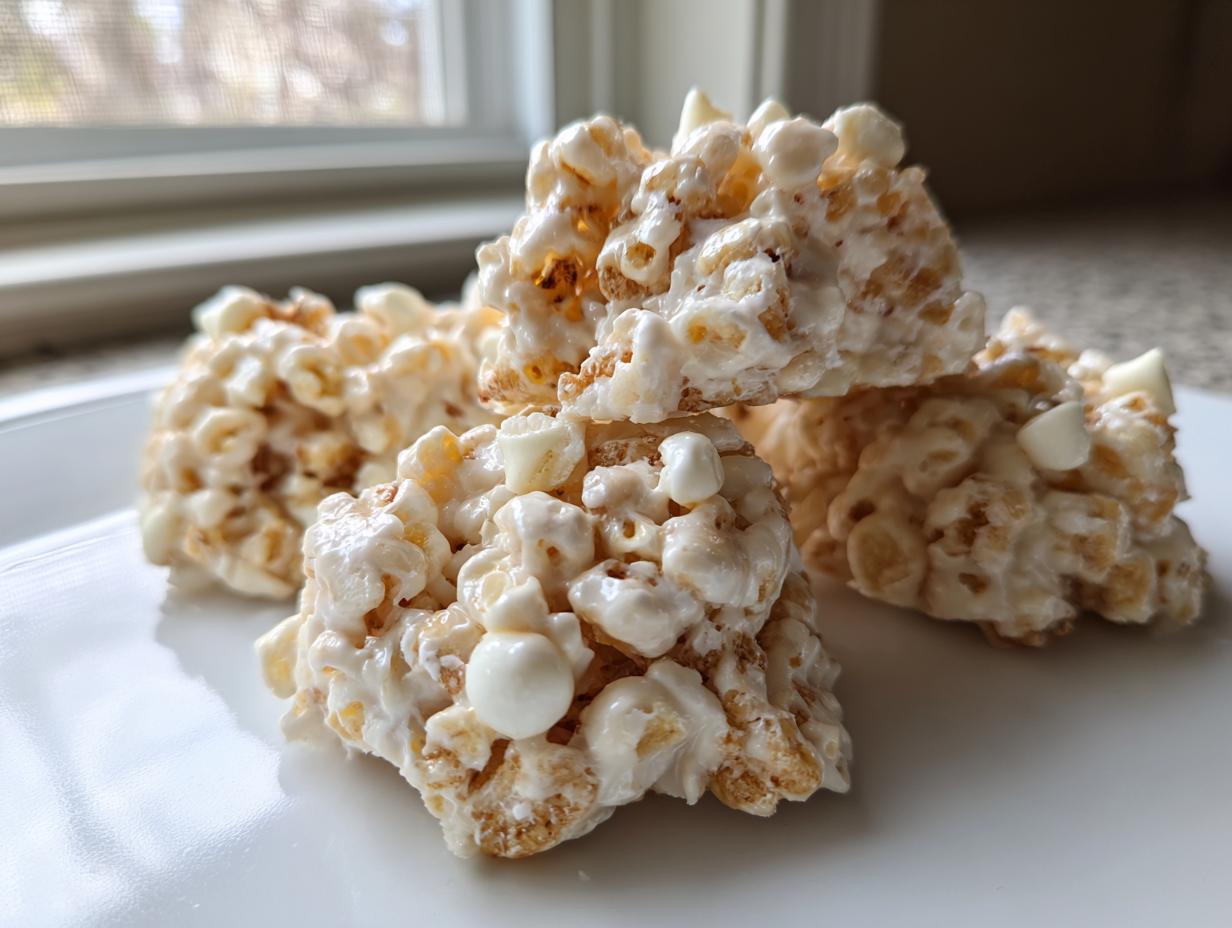
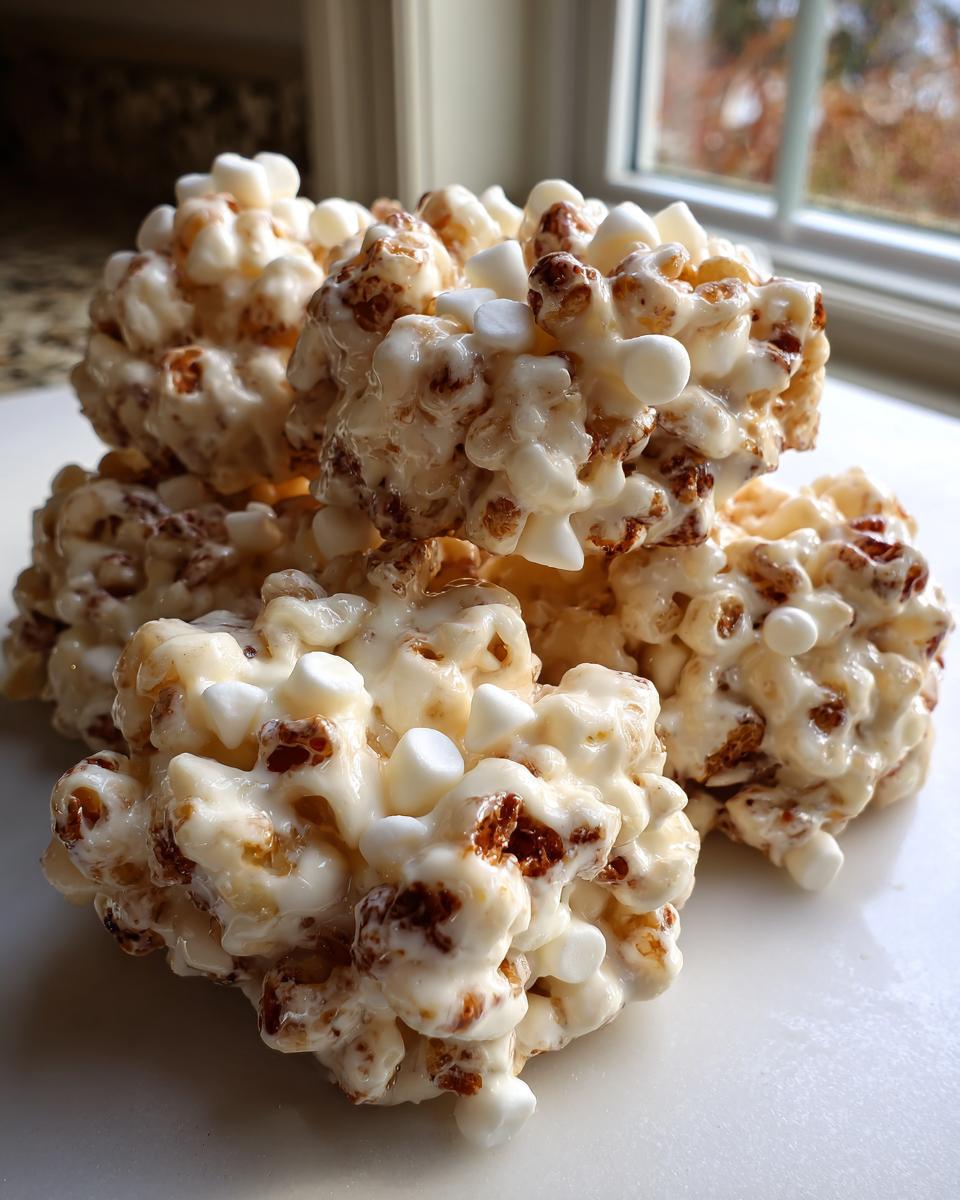
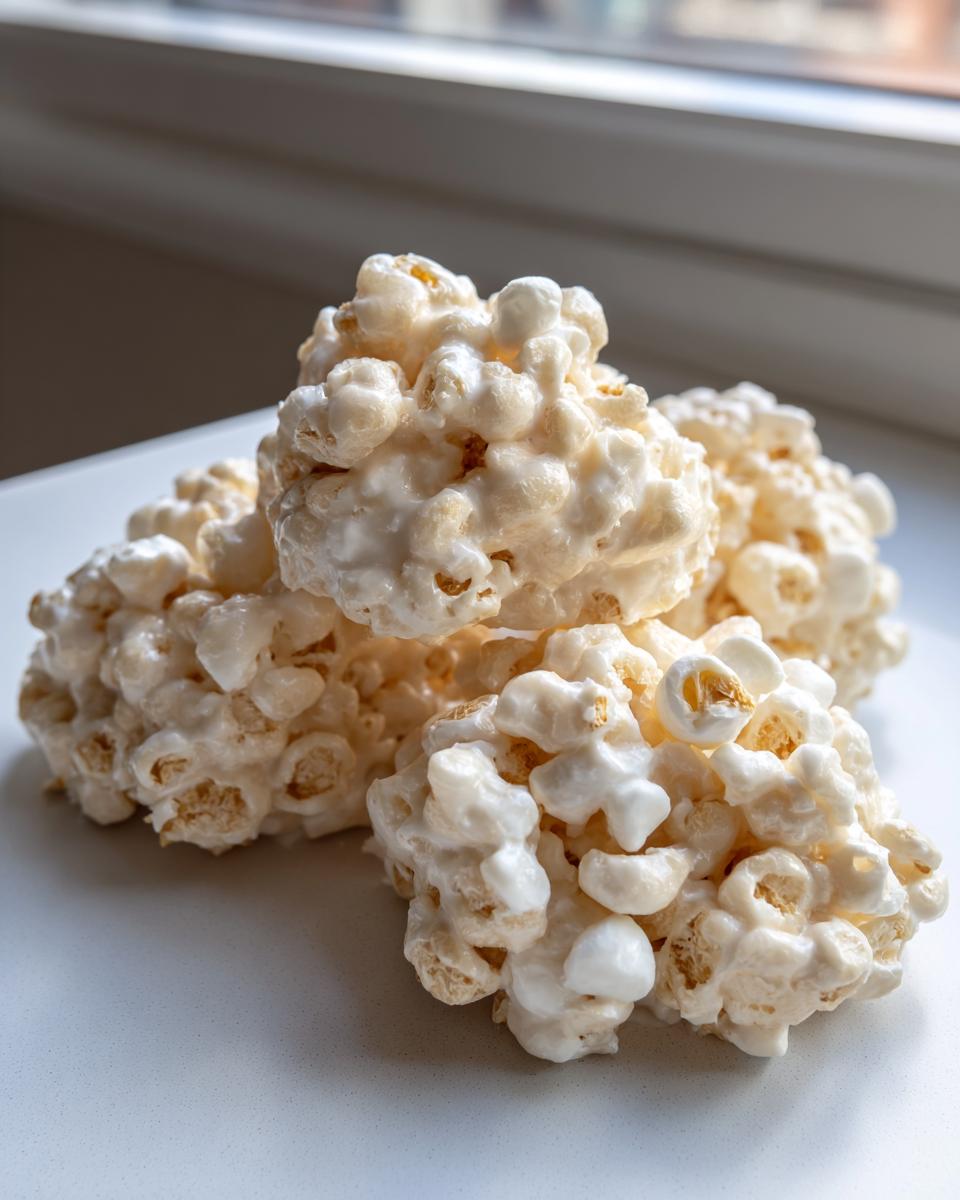
Combining the Crunchy and Chewy Elements of avalanche cookies
While your chocolate mixture is still warm and liquid, toss your crispy rice cereal and all those little marshmallows into a separate, medium bowl. Now, pour that glorious, velvety chocolate peanut butter mix right over the top. Grab your rubber spatula! You need to fold this together quickly but gently. If you stir too hard or take too long, the marshmallows get sticky and the cereal clumps up. We want everything lightly coated before it decides to set!
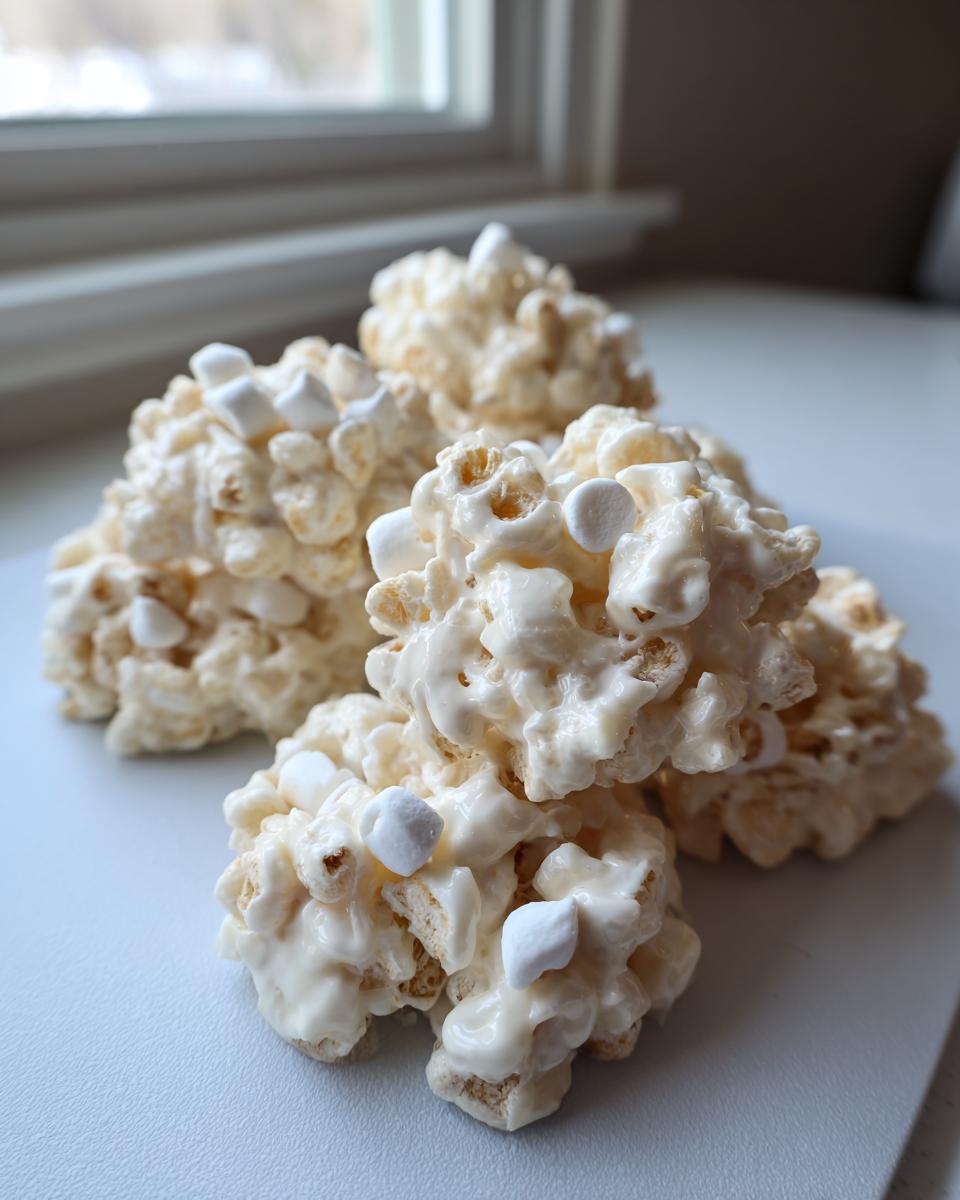
Scooping and Setting Your avalanche cookies
Work fast now! Use a cookie scoop or two spoons to drop rounded dollops onto that parchment paper you prepped. This helps make all your **avalanche cookies** look nice and uniform, which is great for gifting. They will set up fast on their own on the counter in about an hour. But honestly, if you need them faster, stick them in the fridge for just 20 minutes. Once they are totally firm to the touch, you’re done!
Pro Tips for Perfect avalanche cookies Texture
Even though these are famously easy, there are a few little kitchen secrets I’ve picked up over the years that make sure your **avalanche cookies** are perfectly chewy and never turn dry or grainy. We want creamy clouds of goodness, not chalky lumps! I learned these tricky things so you don’t have to mess up a whole batch. If you’ve mastered these, you might want to try my recipe for easy homemade soft chewy sea salt caramels next, because mastering melted chocolate is half the battle!
Melting White Chocolate Correctly
This is the make-or-break moment! If you introduce even one tiny drop of water or steam to your white chocolate chips, they will seize up instantly and turn into a gritty mess. Make sure your microwave bowl is bone dry—seriously, wipe it out with a paper towel if you think there’s residual moisture. Also, stick religiously to those short microwave bursts. If you overheat the white chocolate, it stiffens up before you even get the peanut butter in there, and then you can’t fold properly.
Ingredient Substitution Ideas for avalanche cookies
As I mentioned, white chocolate is the classic binder, but feel free to mix it up! If you want a deeper flavor, try swapping half the white chips for milk chocolate chips or even semi-sweet for a less sweet result. For extra texture and flavor—and to really lean into those fantastic **Peanut Butter Treats**—toss in about half a cup of chopped peanuts along with the cereal. They add a wonderful, sophisticated crunch that works beautifully.
Storage and Keeping Your avalanche cookies Fresh
The best part about these **avalanche cookies**—aside from how fast they come together—is that they actually taste better the next day! Since there is no actual baking involved, they are wonderfully chewy and moist, and they don’t dry out like traditional cookies do. You want to keep that wonderful texture, so storage is key! If you are looking for ways to keep other sweet things fresh, check out my guide on freezer jam for tips on preserving freshness!
You don’t have to worry about keeping these chilled unless your house is really warm. I find that they store best in a simple airtight container right on the counter. Seriously, no refrigeration needed! The chocolate and peanut butter mixture solidifies nicely and keeps everything just right.
They definitely stay good for about a week stored this way. I’ve never had a batch last longer than that because they get gobbled up so fast, but based on how they hold up for the first few days, I’m confident they last up to seven days at room temperature. Keep them away from direct sunlight or heat, and you’ll be enjoying that satisfying crunch all week long!
Frequently Asked Questions About No Bake Cookies
I know when you’re whipping up something this fast, you end up with quick questions pop up! It’s totally normal when stepping outside the oven routine. Whether you’re hosting a last-minute get-together or just need one of those **Quick Dessert Ideas**, I want you to feel totally confident making these. If you’re looking for something fast to eat in the morning after these sweet treats, take a peek at my easy breakfast recipes!
Can I use different types of peanut butter in avalanche cookies?
That’s a great question! For this recipe, I really push for creamy peanut butter. Why? Because the smooth texture melts down perfectly with the white chocolate chips, creating that beautiful, uniform binder that holds everything together. If you use natural peanut butter—you know, the kind where the oil separates—it can make your mixture a little too oily and sometimes prevents a good set. Crunchy works flavor-wise, but you lose some of that delightful, smooth texture, so stick to creamy processed peanut butter for the best **avalanche cookies** result.
How long do these No Bake Cookies take to fully set?
It depends on how impatient you are, haha! If you let them sit on the counter at room temperature, give them a full hour. They’ll be firm enough to pick up, though maybe still a touch soft. If you need them fast—maybe guests are coming over in twenty minutes—pop that lined baking sheet into the refrigerator. They set up much faster there, usually achieving great firmness in about 20 minutes. They are wonderful options when you need **30 Minute Desserts**!
Are these considered an Easy Candy Recipe?
Absolutely! That’s why I love them so much. Since we skip the whole baking process—no flour, no eggs, really just melting and stirring—they fall perfectly into the **Easy Candy Recipe** category. They act like a fudge or a truffle more than a traditional cookie. Anytime you need a confection that sets up rather than baking, you know you’re in the simple candy zone!
Understanding the Nutrition in avalanche cookies
Now, let’s talk real talk about what goes into these glorious little treats. Since we are using white chocolate, peanut butter, and marshmallows, these are definitely meant to be a fun indulgence! The numbers I’m giving you here are just estimates based on those four main ingredients for one cookie, so keep that in mind. If you are looking for healthier spins on lunch, take a peek at my healthy lunch recipes for something green!
For one serving (one cookie), you’re looking at roughly 220 calories. They have about 18 grams of sugar, which isn’t shocking with all that white chocolate coating, but they pack a nice punch with 4 grams of protein too! Remember, these are meant for enjoyment, not daily fuel, but knowing the scoop is always important.
Share Your Homemade avalanche cookies Creations
Alright, my friend, now it’s your turn! I’ve shared all my secrets for making perfect **avalanche cookies**—the melting tricks, the folding technique, everything! But HearthBite is truly about sharing those wonderful food moments we create together. Once you’ve made a batch and enjoyed that incredible crunch, I want to hear all about it!
Did you give them a fun flavor twist? Did they disappear faster than you thought they would? Don’t just slink away with the leftovers! Please take a moment to leave a rating and a comment right down below. Telling me about your experience helps other home cooks feel confident jumping into this **Easy Candy Recipe**!
If you snapped a picture of your beautiful, no-bake masterpieces—maybe resting on a pretty platter for a party or cooling on the rack—I would absolutely *love* to see them! You can always share them on social media and tag me, or if you have a specific question about your batch, feel free to send a note through my contact page. Hearing how these simple treats bring a moment of joy to your kitchen is truly the best part of what I do here at HearthBite.
PrintEasy 4-Ingredient No-Bake Avalanche Cookies
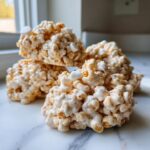
Make these incredibly simple No-Bake Avalanche Cookies. They combine creamy peanut butter, melted white chocolate, crispy rice cereal, and mini marshmallows for a sweet, crunchy, and chewy treat that sets fast. This is your go-to recipe for quick desserts and last-minute gifts.
- Prep Time: 15 min
- Cook Time: 0 min
- Total Time: 1 hour 15 min
- Yield: About 20 cookies 1x
- Category: Dessert
- Method: No-Bake
- Cuisine: American
- Diet: Vegetarian
Ingredients
- 16 ounces white chocolate baking chips or almond bark
- 3/4 cup creamy peanut butter
- 3 cups crispy rice cereal
- 1 1/2 cups miniature marshmallows
Instructions
- Line a baking sheet with parchment paper. Set aside.
- In a large microwave-safe bowl, combine the white chocolate chips and peanut butter. Microwave in 30-second intervals, stirring well after each interval, until the mixture is completely smooth and melted.
- In a separate large bowl, combine the crispy rice cereal and miniature marshmallows.
- Pour the melted white chocolate and peanut butter mixture over the cereal and marshmallow mixture. Use a spatula to gently fold everything together until all the dry ingredients are evenly coated. Work quickly, as the mixture will start to set.
- Drop rounded spoonfuls of the mixture onto the prepared parchment-lined baking sheet. You can use a cookie scoop for uniform size.
- Allow the cookies to set completely at room temperature for about 1 hour, or place them in the refrigerator for 20 minutes for faster setting.
- Once firm, serve or store the cookies in an airtight container.
Notes
- For extra flavor, you can substitute half of the white chocolate chips with milk or semi-sweet chocolate chips for a marbled look.
- If you prefer a richer flavor, use a slow cooker to melt the chocolate and peanut butter mixture instead of the microwave.
- Store these easy candy recipe treats in an airtight container at room temperature for up to one week.
Nutrition
- Serving Size: 1 cookie
- Calories: 220
- Sugar: 18
- Sodium: 110
- Fat: 14
- Saturated Fat: 6
- Unsaturated Fat: 8
- Trans Fat: 0
- Carbohydrates: 22
- Fiber: 1
- Protein: 4
- Cholesterol: 5