
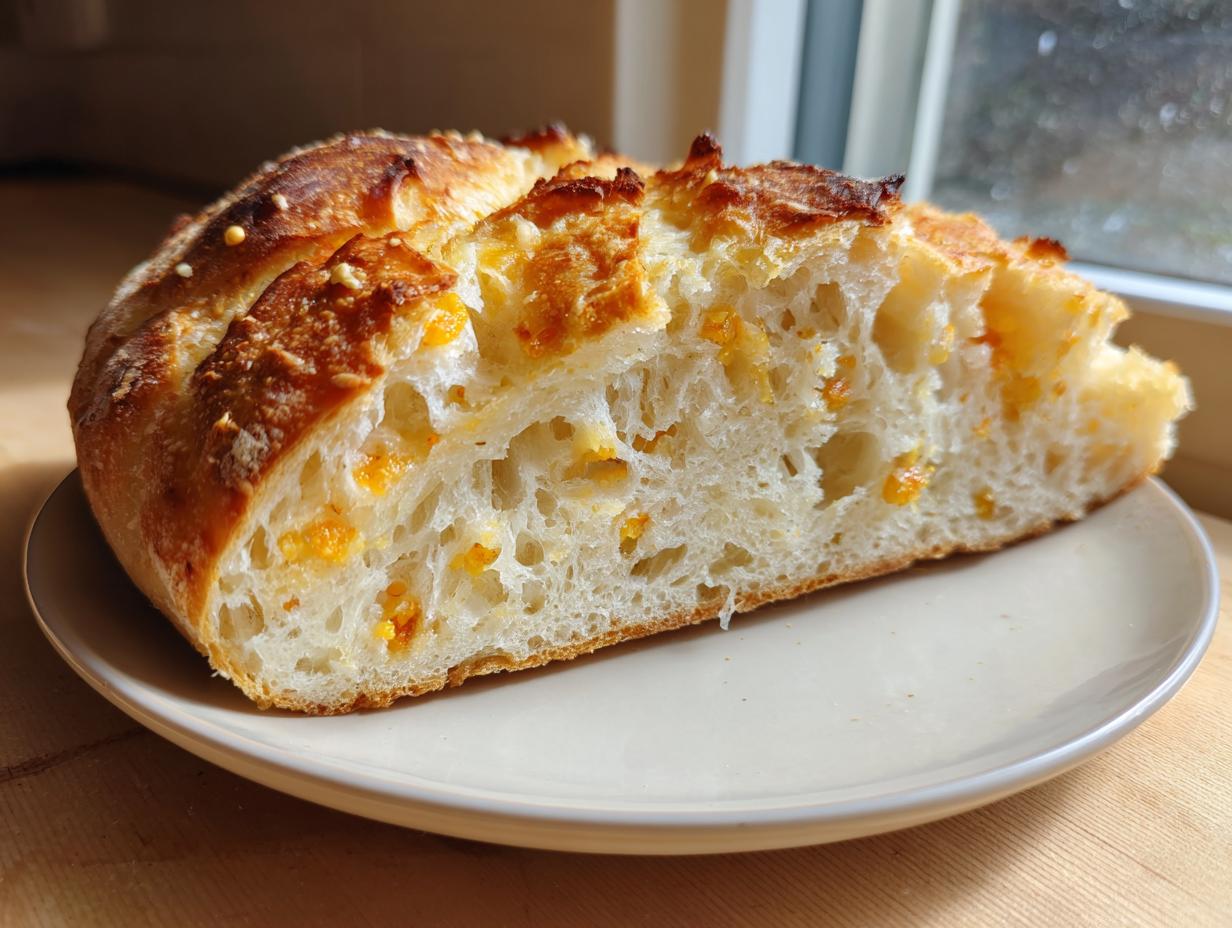
Oh, friends, let me tell you about a bread that changed my entire baking life! Forget fussy kneading and complicated folding schedules. We are making bread that tastes like it came straight out of a rustic European bakery but uses the absolute easiest method known to humankind. My ultimate secret weapon, the parmesan garlic artisan bread recipe, gives you that incredible, shatteringly crisp crust and that gorgeous, chewy, open interior everyone dreams about. It’s pure comfort baked into a loaf, and it totally embodies HearthBite’s philosophy: creating simple, yet spectacular results that bring everyone straight to the table. Trust me when I say, this savory loaf is going to become your weeknight staple.
- Why This parmesan garlic artisan bread recipe Works for Home Bakers
- Gathering Ingredients for Your parmesan garlic artisan bread recipe
- Step-by-Step Instructions for the No Knead parmesan garlic artisan bread recipe
- Tips for Making Amazing parmesan garlic artisan bread
- Serving Suggestions for Your Rustic Italian bread recipe
- Storage and Reheating Instructions for the Garlic Parmesan loaf
- Frequently Asked Questions About This Artisan Bread Loaf Tutorial
- Nutritional Estimates for Your Savory Dinner Bread Recipes
- Share Your Crusty Parmesan Garlic Bread Creation
Why This parmesan garlic artisan bread recipe Works for Home Bakers
I know, ‘artisan’ sounds intimidating, right? Like you need special equipment or a ten-year apprenticeship. But this Homemade artisan bread recipe completely bucks that trend. The magic here is that we use time, not effort, to develop the structure and flavor. That long, slow rest—that’s where the deep, satisfying flavor comes from! It truly is the easiest way to get amazing results. If you love other rustic bakes, check out my tricks for easy crusty Italian bread too.
It’s the foundation for mastering the Chewy artisan bread technique without ruining your mixer. Plus, the combination of sharp Parmesan and fresh garlic infuses every strand of gluten beautifully. We aren’t just making bread; we are making an experience!
Achieving the Perfect Artisan Crust
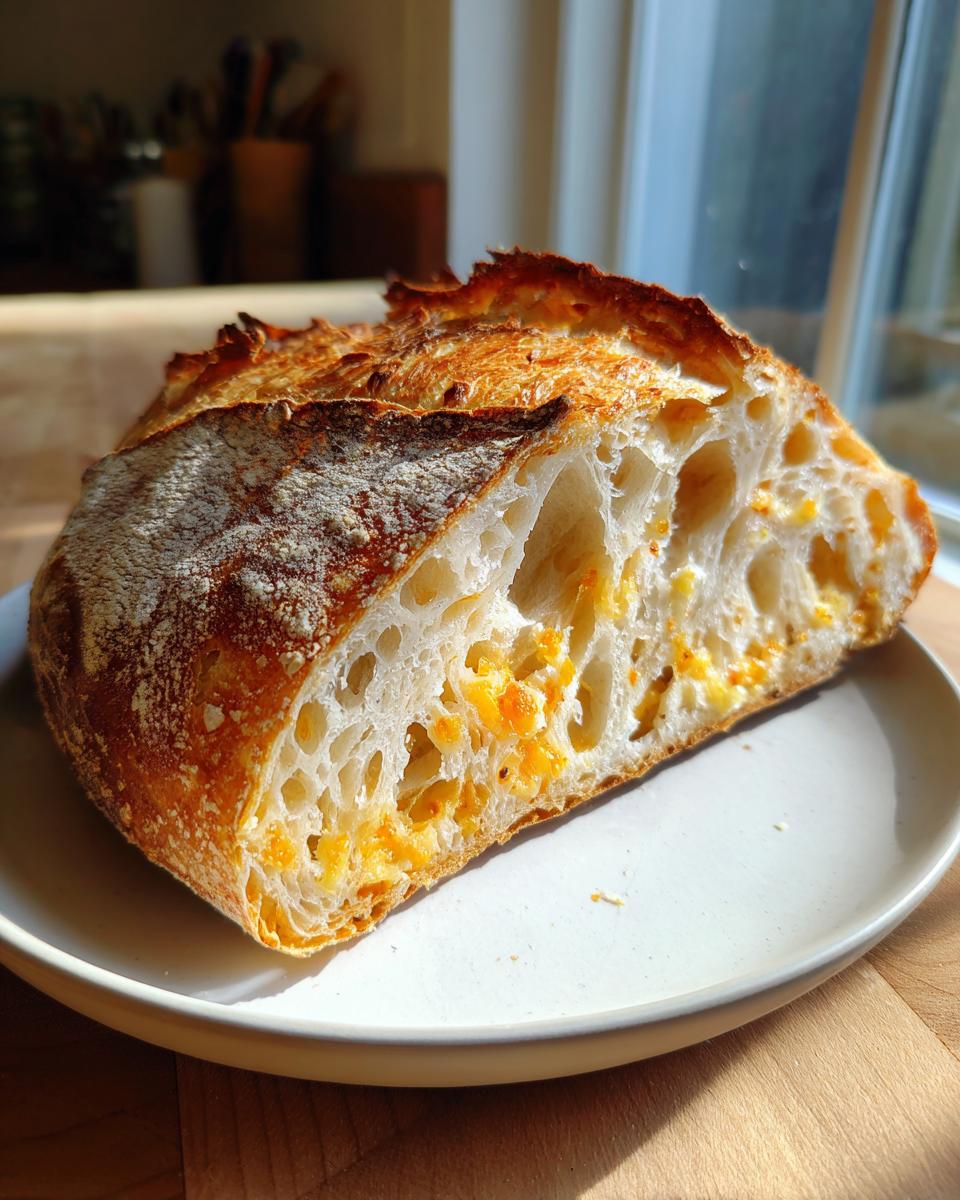
The crust is non-negotiable for me, and it all comes down to steam. The long fermentation lets the dough develop beautifully, but trapping that steam in the preheated Dutch oven during the initial bake is what forces that glorious, crackly shell to form. It truly is the secret to making a Crusty Parmesan garlic bread at home!
Gathering Ingredients for Your parmesan garlic artisan bread recipe
Okay, let’s talk about what you need to pull off this show-stopping loaf. Since we’re relying on time instead of kneading, the quality of these few ingredients really shines through. We are making a Garlic bread from scratch, so don’t skimp on the good stuff! You’ll need a few pantry staples—all-purpose flour, salt, and instant yeast—but the real star power comes from our additions.
Here’s the list. Make sure you have everything ready to go before you start mixing:
- 3 cups all-purpose flour (plain old AP works perfectly for this)
- 1 1/2 teaspoons salt
- 1/4 teaspoon instant yeast (yes, just a tiny bit!)
- 1 1/4 cups cool water (not warm, definitely not hot, cool!)
- 1/2 cup grated Parmesan cheese, plus extra for topping
- 4 cloves garlic, minced finely (don’t even think about using the jarred stuff here!)
- 1 tablespoon olive oil
If you end up with extra garlic flavor, you might want to whip up some easy garlic aioli to serve alongside this bread later!
Ingredient Notes and Substitutions
For the Parmesan, please, please use an aged, wedge-style Parmesan that you grate yourself. The pre-shredded stuff is coated in anti-caking agents and just won’t melt or taste as sharp as we need it to. That deep flavor is what makes this bread sing!
Now, about that garlic: 4 cloves minced is a good punch, but if you like things milder, you can skip that step and use roasted garlic instead—just like I mention in the main notes! Roasted garlic will give you a subtle, sweet garlic essence throughout the crumb. And honestly, stick with all-purpose flour for this one, as it has the right protein content for the long, slow hydration we’re using.
Step-by-Step Instructions for the No Knead parmesan garlic artisan bread recipe
This is where the real magic happens, but I promise it’s simple! Seriously, this process separates the weekend bread makers from the folks who think they need to be professional bakers. Getting the structure right first is key to making a perfect No knead artisan loaf that’s sturdy enough to hold all that garlicky goodness.
Mixing and Long Fermentation
First step is just getting everything wet! In a big bowl, whisk together your flour, salt, and that tiny bit of instant yeast. Then pour in the cool water. You are going to mix this with a sturdy spoon—or even your hand—until *just* combined. I look for what we call a ‘shaggy dough.’ It’s messy, it’s uneven, and there are still dry spots. Do NOT overmix this part! Overmixing stops the fermentation magic we need later.
Next, cover that bowl tight with plastic wrap, put it somewhere around room temperature, and walk away! I mean it—walk away for 12 to 18 hours. This long rest is what builds those amazing, complex flavors and creates the structure for that beautiful open crumb. Don’t stress about the time frame; if you can hit 14 hours, great! If you can stretch it to 18, even better for flavor!
Incorporating Garlic and Parmesan
Once your dough has rested and looks bubbly and alive, it’s time to wake it up gently. Scrape it out onto a lightly floured counter. Now, sprinkle that gorgeous, sharp Parmesan and the finely minced fresh garlic right over the dough. We aren’t kneading it in aggressively; we are *folding* it in. Just gently fold the dough over on itself maybe four or five times. You want to incorporate the cheese and garlic without crushing all those air bubbles the long rest created!
Form it into a rough ball, and then gently put it back into your lightly oiled bowl. Cover it up again and let it chill out for just 30 minutes. This lets the dough relax before we get it hot! If you are planning on soup for dinner, look at my ideas for shaping loaves to fit right next to your bowl, like in my homemade bread bowls recipe.
Baking the Crusty Parmesan garlic bread
Now we activate the Dutch oven bread baking guide! Put your empty Dutch oven—lid and all—into the cold oven. Crank the heat up to 450 degrees Fahrenheit (which is 232 Celsius). We need that pot screaming hot!
When the oven is fully preheated, very carefully take out that hot Dutch oven. Gently lift your dough ball and place it right inside. That sizzle when it hits the bottom? That’s the sound of a perfect crust starting! Drizzle the top with your olive oil and generously sprinkle on that extra Parmesan. Put the lid on tight and bake it covered for exactly 30 minutes. This traps the steam, which is essential for a great rise and a crisp exterior.
After 30 minutes, take the lid off. Keep baking uncovered for another 15 to 20 minutes, or until that crust looks deep, deep golden brown and feels really firm to the touch.
Tips for Making Amazing parmesan garlic artisan bread
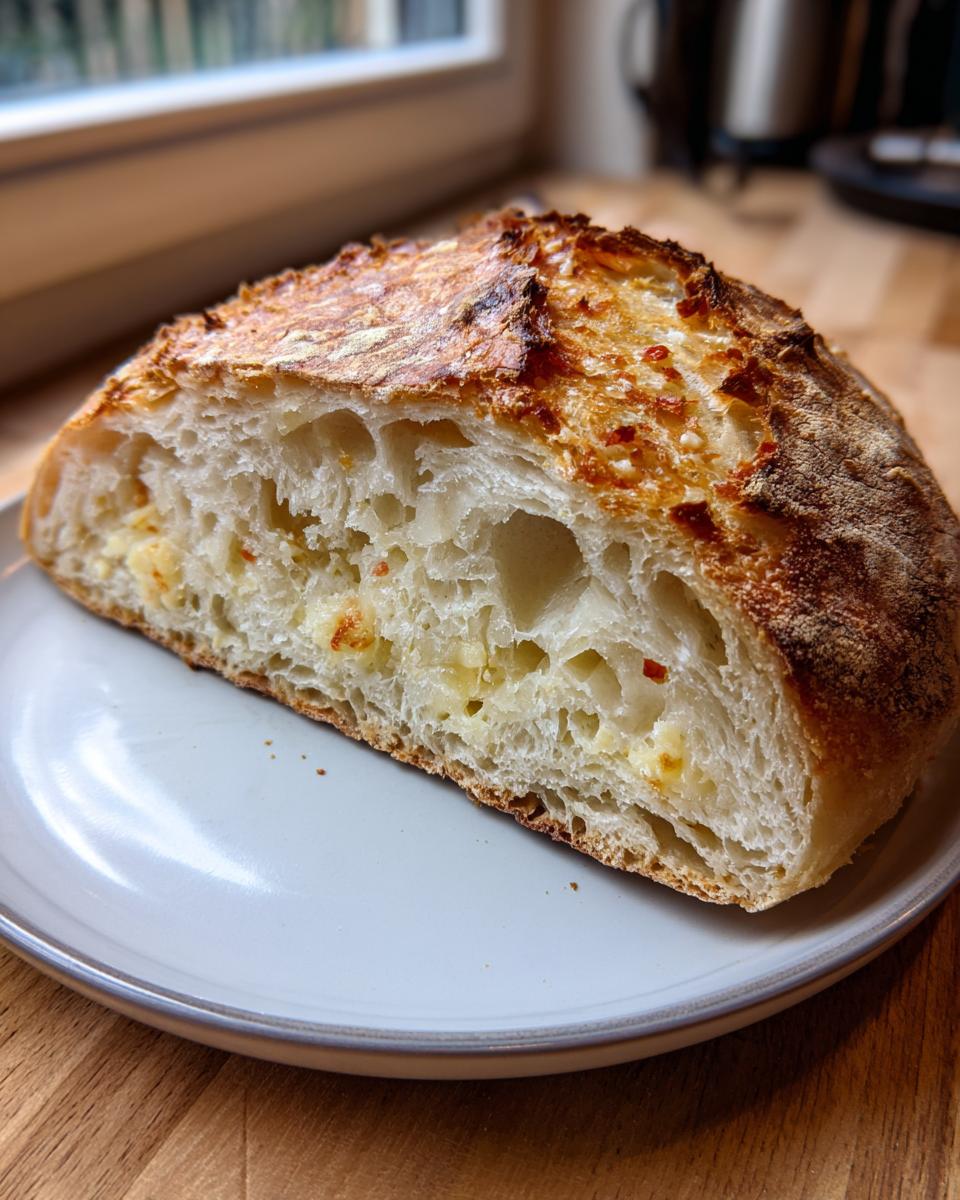
You’ve pulled off the bake! Now comes the hardest part: patience. To truly master Baking artisan bread at home and ensure that interior is wonderfully chewy and not dense or gummy later on, you must listen to me on this next step. It’s tempting to slice into that gorgeous loaf the second it comes out of the oven, but resist!
We worked hard to create air pockets and structure, and slicing too soon releases all that built-up moisture. It needs time to equalize so your loaf doesn’t collapse into a sad, dense mass. This gorgeous Flavorful savory bread loaf needs at least an hour, preferably two, on a wire rack. Trust me, waiting makes the texture perfect!

Also, don’t forget how good this bread is when you turn leftovers into something new! If you have a day-old slice, it’s fantastic repurposed with some cheese, maybe baked under the broiler. You could even use savory bits in a recipe like my cheese straws recipe if you want a salty snack!
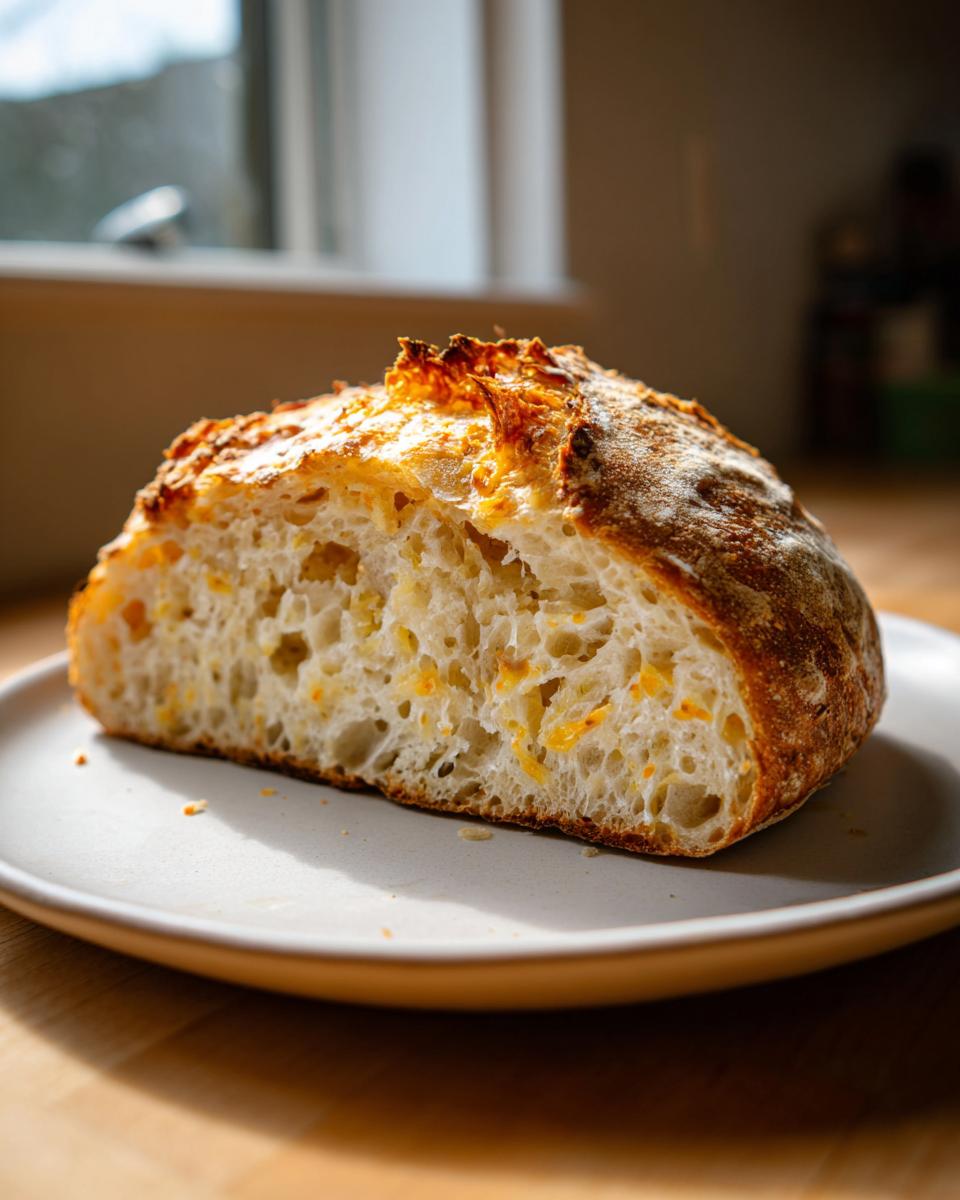
The Importance of Cooling Completely
I can’t stress this enough: that steamy, moist interior needs to finish cooking outside the heat of the Dutch oven. If you cut it hot, that steam rushes out, often leaving the gluten structure sticky and gummy—the absolute opposite of the open, chewy texture we aimed for. When you let it cool totally on a wire rack, the internal structure sets up perfectly. That wire rack allows air to hit all sides, crisping up the bottom crust too. Wait for it—you won’t regret the payoff!
Serving Suggestions for Your Rustic Italian bread recipe
So, you’ve got an incredible, aromatic loaf cooling on the counter—what now? This isn’t just eating bread; this is utilizing one of the best Savory dinner bread recipes you’ll ever make! Because of that sharp cheese and robust garlic flavor, this loaf demands bold partners. Honestly, serving it sliced thick with good quality butter is a treat, but we can do better!
My absolute favorite way to serve this Rustic Italian bread recipe is dipped generously into soup. Imagine dipping a crusty chunk right into a bowl of my French onion soup; that cheese crust just captures all that savory broth. It’s heavenly!
It’s also the perfect companion for anything wet or saucy. Have you made a big pan of spaghetti or lasagna? Instead of just plain garlic bread, use this instead! It soaks up marinara sauce like a dream, and that hit of Parmesan elevates the whole dinner instantly. Or, for something a little more refined for a cozy night in, it’s fabulous alongside a creamy soup. I highly recommend pairing a thick slice with my creamy roasted tomato bisque recipe. It’s a pairing that always gets rave reviews!
Storage and Reheating Instructions for the Garlic Parmesan loaf
This amazing Garlic Parmesan loaf isn’t meant to last more than a day, right? But if you happen to have leftovers, we need to handle storage carefully to protect that gorgeous crust we worked so hard for. Do **not** put this bread in the refrigerator! Cold air is the enemy of crusty bread; it makes it stiff and stale almost immediately.
Keep it on the counter, cut-side down if you sliced into it, wrapped loosely in a paper bag or clean kitchen towel. That lets it breathe a little while keeping the inside soft. If you really need it to last two or three days, an airtight container is fine, but be warned: the crust won’t be as craggy.
To bring back the magic texture? Simple! Pop the slices right back into a 350-degree oven for just 5 to 7 minutes. That dry heat wakes up the crust beautifully and warms that cheesy interior right back up. Instant gratification!
Frequently Asked Questions About This Artisan Bread Loaf Tutorial
I totally get it—baking can cause anxiety, especially when you are aiming for that perfect look. Since I’ve made this Artisan crusty loaf tutorial dozens of times, I can answer the bits people usually worry about most. If you’ve got questions about the timing or equipment, chances are I’ve run into that issue myself!
Can I skip the 18-hour rest period in the parmesan garlic artisan bread recipe?
Oh, you definitely *can* try to rush it, but I really, really advise against it if you want the signature flavor and texture of this parmesan garlic artisan bread recipe. That long, slow rest is essential! It’s not just about the rise; it’s about the *fermentation*. That time allows enzymes in the flour to break down starches into complex sugars, giving you that deep, slightly tangy flavor profile that makes an artisan loaf special.
If you cut that time short, you end up with a loaf that’s flatter, denser, and frankly, pretty bland compared to what this recipe is capable of. If you need bread sooner, aim for at least 8 hours, but know that the depth of flavor won’t be there, and the crumb might be a little tighter.
What if I don’t have a Dutch oven for this homemade bakery style bread?
That’s a common hurdle when trying to achieve that homemade bakery style bread look! Don’t worry at all. The Dutch oven is primarily there to trap steam at the beginning of the bake. If you don’t have one, you can absolutely use a heavy baking sheet or a pizza stone. But you need to recreate that humid environment.
Here’s what I always do in a pinch: Put a shallow, oven-safe pan (like a metal pie plate) on the bottom rack of your oven while it preheats. Once you put your dough (on the preheated stone or sheet) into the oven, carefully pour about a cup of boiling water into that hot, shallow pan below. Be super careful opening the door; you are creating a blast of steam! Bake covered (maybe loosely with foil if using a stone) for the first 20 minutes, then remove the foil/steam pan and continue baking uncovered until golden brown. It works nearly as well!
If you want to check out my philosophy on why we bake bread the way we do over here at HearthBite, I share more about our commitment to reliable baking over in my about section!
Nutritional Estimates for Your Savory Dinner Bread Recipes
Now, I love that you’re looking at the details—it shows you really care about what goes into your body! But anyone who bakes knows that the nutritional count on a homemade loaf like this is just a moving target. Because we’re using real, whole ingredients and the amount of cheese that melts into the crumb can change batch to batch, I can’t give you one hard answer.
Please treat any numbers floating around (even in my initial recipe card above) as estimates only! The final sodium, fat, and protein content depends entirely on the type of flour you chose, how much oil you brushed on top, and most importantly, how much of that fantastic aged Parmesan cheese actually makes its way into the final bake. This is honest, home cooking, and we value flavor over perfect spreadsheets every single time!
Share Your Crusty Parmesan Garlic Bread Creation
I truly cannot wait for you to try this loaf! When you pull that stunning, richly browned, garlicky crust out of the oven, I want to see it! Baking is about community and sharing those small victories, right? That’s the whole point of HearthBite—connecting around food.
Once you’ve sliced into your loaf and experienced that chewy, savory interior, please come back and let me know how your bake went! Did the garlic come through strongly enough? Did you use your favorite sharp Parmesan? Leaving a rating and a comment helps me know which recipes are working perfectly for everyone else, and it helps other home bakers gain confidence trying out this Crusty homemade bread recipe.
If you snap a photo of your beautiful, rustic results—maybe sitting next to a huge bowl of soup—definitely share it with me on social media! Seeing your creations is the absolute best part of what I do. Happy baking, everyone, and I hope this becomes a cherished part of your kitchen traditions!
PrintParmesan Garlic Artisan Bread Recipe

Make a rustic, crusty loaf of homemade artisan bread flavored deeply with fresh garlic and sharp Parmesan cheese. This recipe uses a simple no-knead method for an open, chewy interior.
- Prep Time: 10 min
- Cook Time: 50 min
- Total Time: 19 hours 0 min
- Yield: 1 loaf 1x
- Category: Baking
- Method: No Knead Baking
- Cuisine: American
- Diet: Vegetarian
Ingredients
- 3 cups all-purpose flour
- 1 1/2 teaspoons salt
- 1/4 teaspoon instant yeast
- 1 1/4 cups cool water
- 1/2 cup grated Parmesan cheese, plus extra for topping
- 4 cloves garlic, minced finely
- 1 tablespoon olive oil
Instructions
- In a large bowl, whisk together the flour, salt, and instant yeast.
- Add the cool water to the dry ingredients. Mix with a wooden spoon until just combined into a shaggy dough. Do not overmix.
- Cover the bowl tightly with plastic wrap and let it rest at room temperature for 12 to 18 hours. This is the long fermentation step.
- After the long rest, gently scrape the dough onto a lightly floured surface. Sprinkle the minced garlic and 1/2 cup of Parmesan cheese over the dough. Gently fold the dough over itself a few times to incorporate the cheese and garlic without fully kneading.
- Shape the dough into a rough ball. Lightly oil the bowl you used before, place the dough back in, and cover it again. Let it rest for 30 minutes.
- While the dough rests, place a Dutch oven with its lid inside your oven. Preheat the oven to 450 degrees Fahrenheit (232 degrees Celsius).
- Once preheated, carefully remove the hot Dutch oven. Gently lift the dough and place it inside the Dutch oven. Drizzle the top with olive oil and sprinkle with extra Parmesan cheese.
- Cover the Dutch oven and bake for 30 minutes.
- Remove the lid and continue baking for another 15 to 20 minutes, or until the crust is deep golden brown and firm.
- Carefully remove the bread from the Dutch oven and let it cool completely on a wire rack before slicing to achieve the best chewy texture.
Notes
- For a stronger garlic flavor, roast the garlic cloves before mincing and adding them to the dough.
- Use high-quality, aged Parmesan cheese for the best flavor payoff in this savory dinner bread recipe.
- If you do not have a Dutch oven, you can bake this on a baking stone or sheet pan, but place a shallow pan of water on the bottom rack to create steam for a better crust.
Nutrition
- Serving Size: 1 slice
- Calories: 220
- Sugar: 1
- Sodium: 350
- Fat: 5
- Saturated Fat: 2
- Unsaturated Fat: 3
- Trans Fat: 0
- Carbohydrates: 38
- Fiber: 2
- Protein: 8
- Cholesterol: 10