
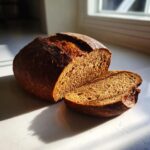
There’s just something deeply comforting about a loaf of dark, rustic bread, isn’t there? It smells like history and the best kind of hearty effort. Here at HearthBite, for me, the kitchen is my quiet spot, and baking the perfect **dutch oven pumpernickel bread recipe** is pure joy. This isn’t a fancy, fussy loaf that needs hours of kneading. Oh no! We are harnessing the incredible power of cast iron to do the hard work for us.
My goal with this recipe is simple: to give you that incredible, thick, crackly crust you usually only get at a specialized bakery, paired with the dense, deeply flavored interior that makes pumpernickel special. If you have a Dutch oven sitting on your stovetop, you’re halfway there to baking the best bread you’ve ever made at home. You can read a little more about why I started HearthBite right here. Trust me, once you smell this baking, you’ll understand why I keep coming back to this method myself.
- Why This Dutch Oven Pumpernickel Bread Recipe Works So Well
- Gathering Ingredients for Your Dutch Oven Pumpernickel Bread Recipe
- Step-by-Step Instructions for Homemade Pumpernickel Baking
- Preheating and Preparing for Crusty Dutch Oven Bread Baking
- The Covered Bake: Creating Steam for the Perfect Dutch Oven Pumpernickel Bread Recipe
- Finishing the Dutch Oven Pumpernickel Bread Recipe: Uncovered Baking
- Cooling and Slicing Your Dense Rye Loaf Recipe
- Serving Suggestions for Your Dutch Oven Pumpernickel Bread Recipe
- Frequently Asked Questions About This Dutch Oven Pumpernickel Bread Recipe
Why This Dutch Oven Pumpernickel Bread Recipe Works So Well
When I first tried making pumpernickel, I was completely disappointed by how soft the crust turned out. That shouldn’t happen with rye! But this specific **dutch oven pumpernickel bread recipe** fixes that right away. Using a cast iron pot isn’t just a trend; it’s essential for getting that professional result at home. I’ve linked some of my other favorite comfort food recipes that use simple equipment, too.
- It creates a mini-oven environment that traps all the moisture released by the dough.
- The high, steady heat from the cast iron gives you unbelievable oven spring right at the start.
- We manage the moisture actively, ensuring the interior stays perfectly dense while the outside gets that desirable crunch.
The Magic of Baking Bread in Cast Iron Pot
The Dutch oven is your best friend here because it handles steam retention better than anything else. By preheating the pot, you hit that dough with intense heat immediately. This sudden blast helps the loaf expand rapidly—that’s your oven spring! The lid keeps the steam in, essentially steaming the surface of the bread so it stays flexible long enough to puff up before forming a thick, fantastic crust. That makes this the go-to method for **baking bread in cast iron pot**.
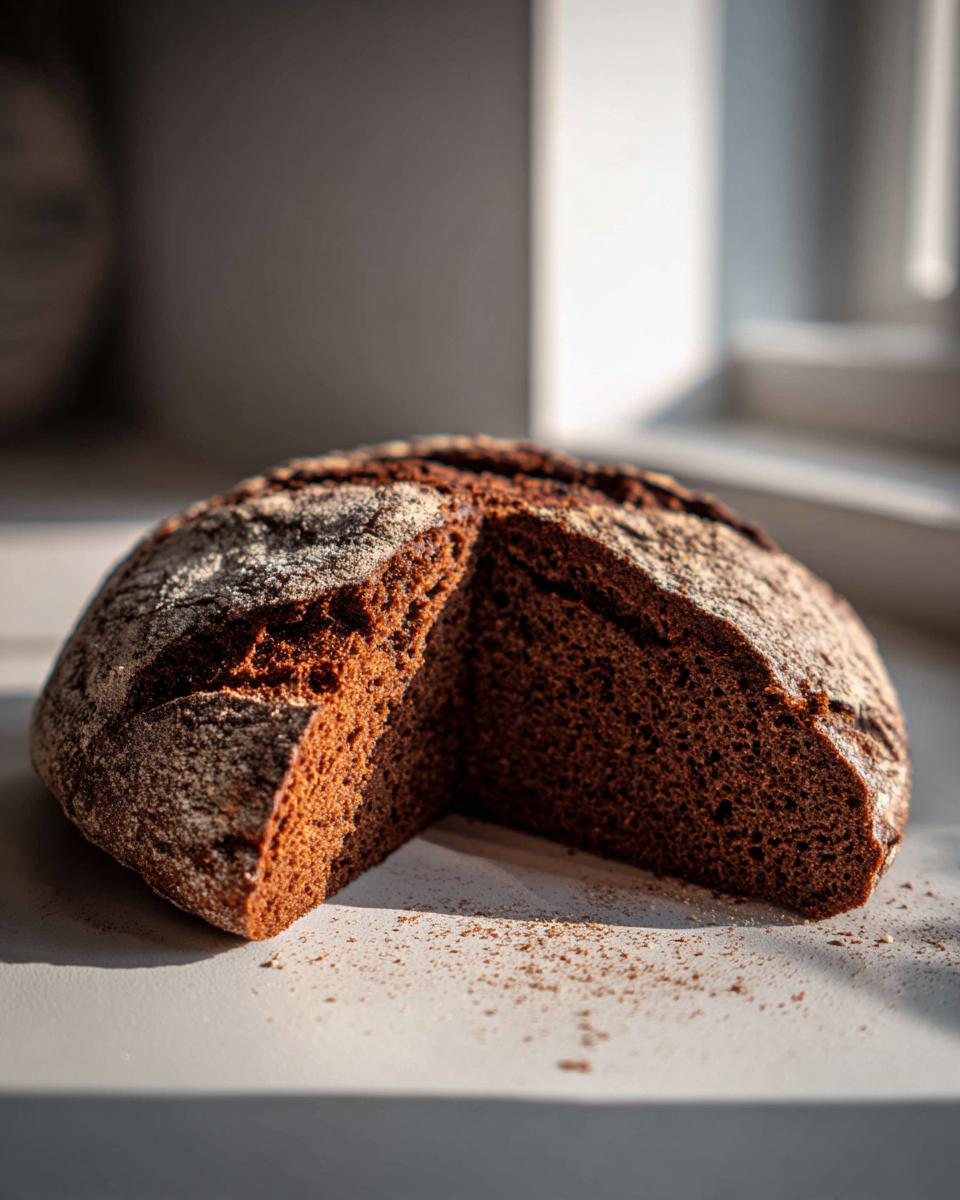
Achieving that Deep, **Dark Rye Bread Recipe** Color
Nobody wants pale pumpernickel, right? It needs that deep, almost mahogany look. I rely on two powerhouses for this: dark molasses and unsweetened cocoa powder. The molasses adds incredible depth of flavor, lending a slightly earthy sweetness that balances the rye tang, and the cocoa does the heavy lifting for color without tasting chocolatey. That little bit of cocoa is the secret weapon for an authentic-looking **dark rye bread recipe** loaf.
Gathering Ingredients for Your Dutch Oven Pumpernickel Bread Recipe
Okay, gathering our supplies! For such a hearty loaf, the ingredient list is surprisingly short, which I love. We’re relying on quality here, not quantity. This recipe is built to give you incredible flavor without hunting down obscure ingredients. I always link my favorite quick meals in case you need something simple for dinner while this bakes!
- 1 cup warm water (make sure it’s 105-115°F, or it won’t wake up the yeast!)
- 2 teaspoons active dry yeast
- 1/4 cup dark molasses (the darker the better for flavor!)
- 2 tablespoons unsalted butter, melted
- 1 tablespoon unsweetened cocoa powder (this is key for color!)
- 1 teaspoon salt
- 1 cup rye flour
- 2 cups bread flour
- 1/2 cup whole wheat flour
- 1/4 cup boiling water (this is just for the steam bath later, don’t mix it in!)
Ingredient Notes and Substitutions
The flour blend is important here. We use rye for that classic flavor, but we bulk it up with bread flour and whole wheat to give the gluten enough strength to hold up to that heavy moisture. If you want an even deeper, richer color that tastes complex, try swapping 1 teaspoon of the bread flour for instant coffee granules. Seriously, it adds depth! Also, if you have access to rye starter, you can swap out a bit of flour for that for a fantastic tangy twist.
Step-by-Step Instructions for Homemade Pumpernickel Baking
Now for the fun part! This is where we put the simple ingredients together to start our **homemade pumpernickel baking** journey. Remember, because we are using a high ratio of rye flour, we aren’t going to be kneading this much at all. That’s the beauty of this specific **dutch oven pumpernickel bread recipe**—it does the heavy lifting while you sit back and wait for the magic to happen. Make sure your yeast is foamy before you move on; that’s your signal that everything is ready to go. You can see how I use parchment paper when making bread bowls—we’ll use that trick here too!
Once you add the flours, you will just mix until everything is incorporated. Don’t look for a smooth ball of dough here! That is the absolute wrong texture for this recipe. We want something that looks messy and quite wet at this stage. Trust me on this one when I say less work leads to better flavor.
Mixing the Dough for Your No Knead Pumpernickel Bread
When combining your flours into the wet yeast mixture, use a big wooden spoon. Mix just until there is no dry flour left visible. Seriously, stop mixing then! If you try to turn this into a smooth ball, you’ll end up with a dense brick because rye doesn’t develop gluten the way white bread flour does. Cover it tightly and let it sit on the counter for a full 60 minutes. That rest time is crucial for flavor development in this **no knead pumpernickel bread** creation.
Preheating and Preparing for Crusty Dutch Oven Bread Baking
This next step is the make-or-break moment for getting that beautiful, thick crust we talked about. You must preheat your oven with the Dutch oven—lid and all—inside. Set your temperature to 450°F (232°C) and let it get screaming hot. I mean let it sit for a solid 30 minutes once the oven says it’s ready!
When the time is up, you need to work quickly and carefully! Use really good oven mitts, because that cast iron pot is volcanic. Take the hot Dutch oven out and set it on a heat-safe surface. Now, remember that sticky dough? Gently scrape it out onto a sheet of parchment paper you have laid out. Don’t try to knead it; just gently coax it into a rough round shape. This parchment paper sling is the absolute key to successful **oven spring bread techniques** because it lets us lower the dough into the searing hot pot without losing any precious air.
You can check out how I use similar techniques for crusty Italian bread—it’s a game-changer for beautiful crusts!
The Covered Bake: Creating Steam for the Perfect Dutch Oven Pumpernickel Bread Recipe
This is where the Dutch oven truly earns its keep! Remember that parchment paper sling you shaped the dough on? Now you use it to gently lower the pumpernickel loaf right into the center of that blazing hot cast iron pot. Be careful and take your time here; you don’t want to collapse that beautiful round shape we just made.
Once the dough is resting safely inside, you need to create steam—this keeps the crust soft during the first half of the bake, allowing the loaf to maximize its rise. Take that 1/4 cup of boiling water and splash it carefully into the bottom of the Dutch oven, making sure you pour it *next to* the dough, not over it. Immediately slap the lid back on tight.
Now we bake covered for exactly 30 minutes. That retained steam locks in moisture and gives you that gorgeous lift we’re aiming for in this **dutch oven pumpernickel bread recipe**. Don’t peek! Let the high heat and trapped moisture do their work.
Finishing the Dutch Oven Pumpernickel Bread Recipe: Uncovered Baking
Okay, 30 minutes are up! Now, you carefully take that hot lid off. Wow, the steam that escapes is incredible—it smells intensely flavorful! Once that lid is off, we need to let the crust fully develop its deep color and amazing crunch. Continue baking uncovered for another 15 to 20 minutes.
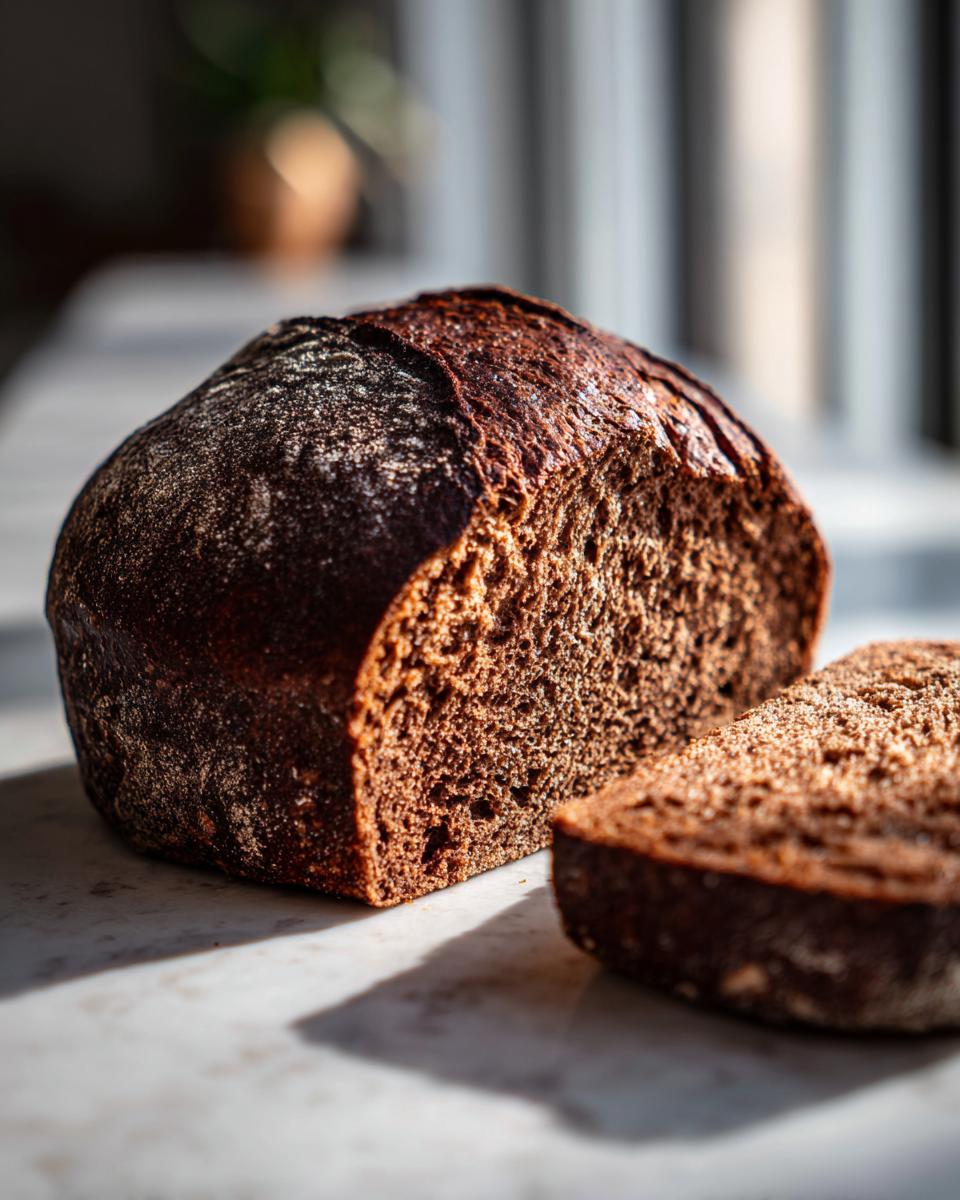
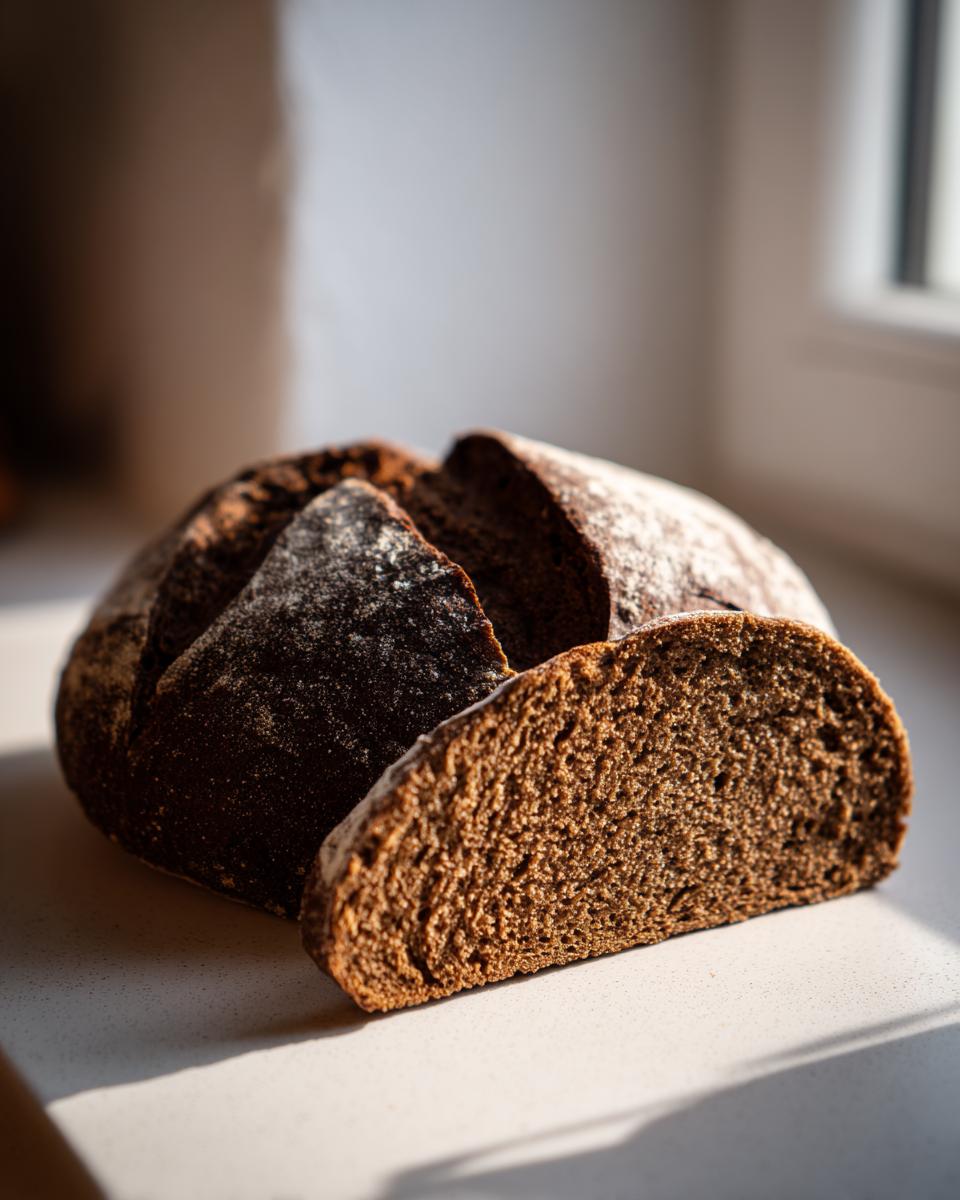
Watch it closely after the 15-minute mark. You’re looking for that deep, rich brown color that tells you the molasses has caramelized perfectly. When it looks firm and dark, gently use your parchment sling to pull the whole loaf out of the hot pot. Don’t let it sit in that scorching cast iron a moment longer! Transfer it straight onto a wire rack immediately.
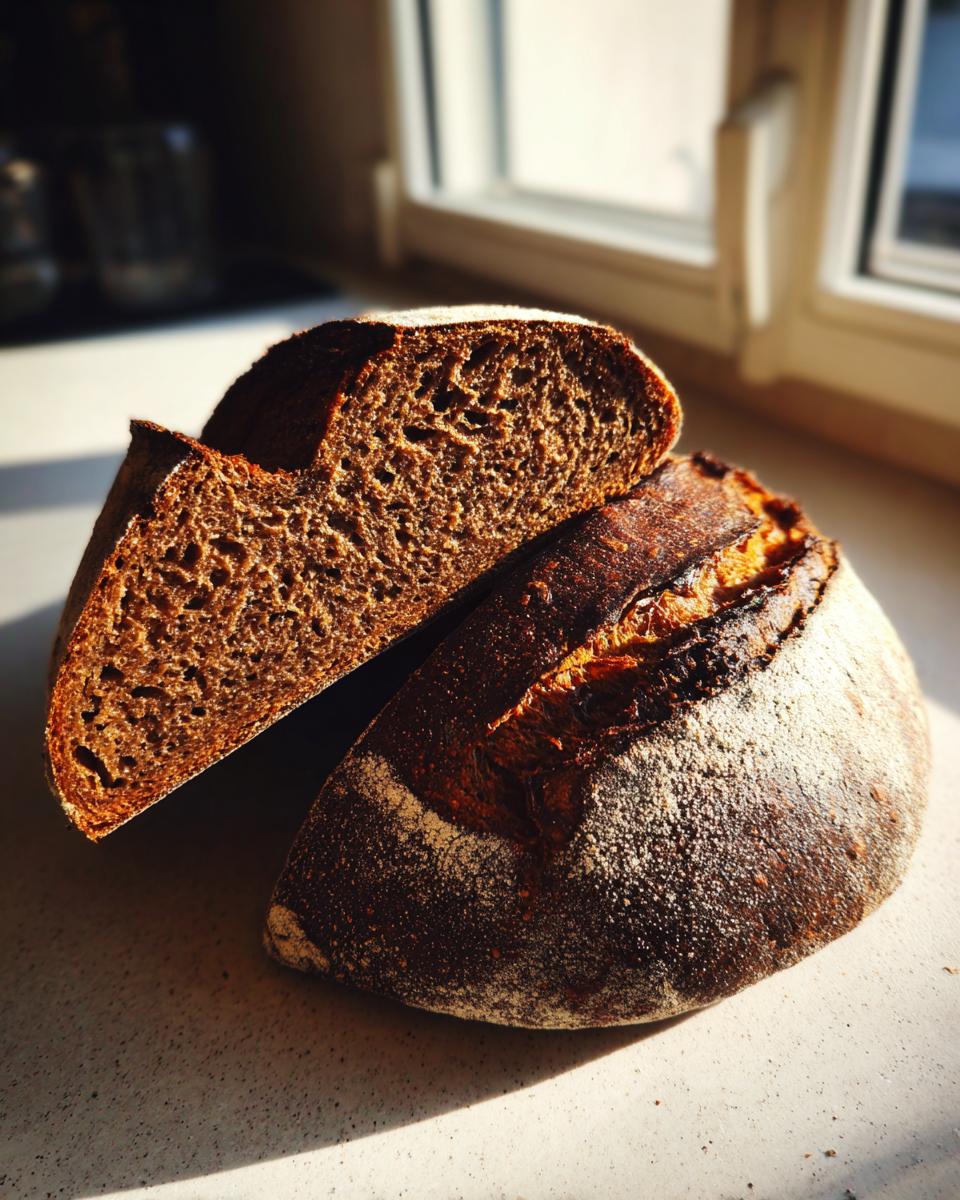
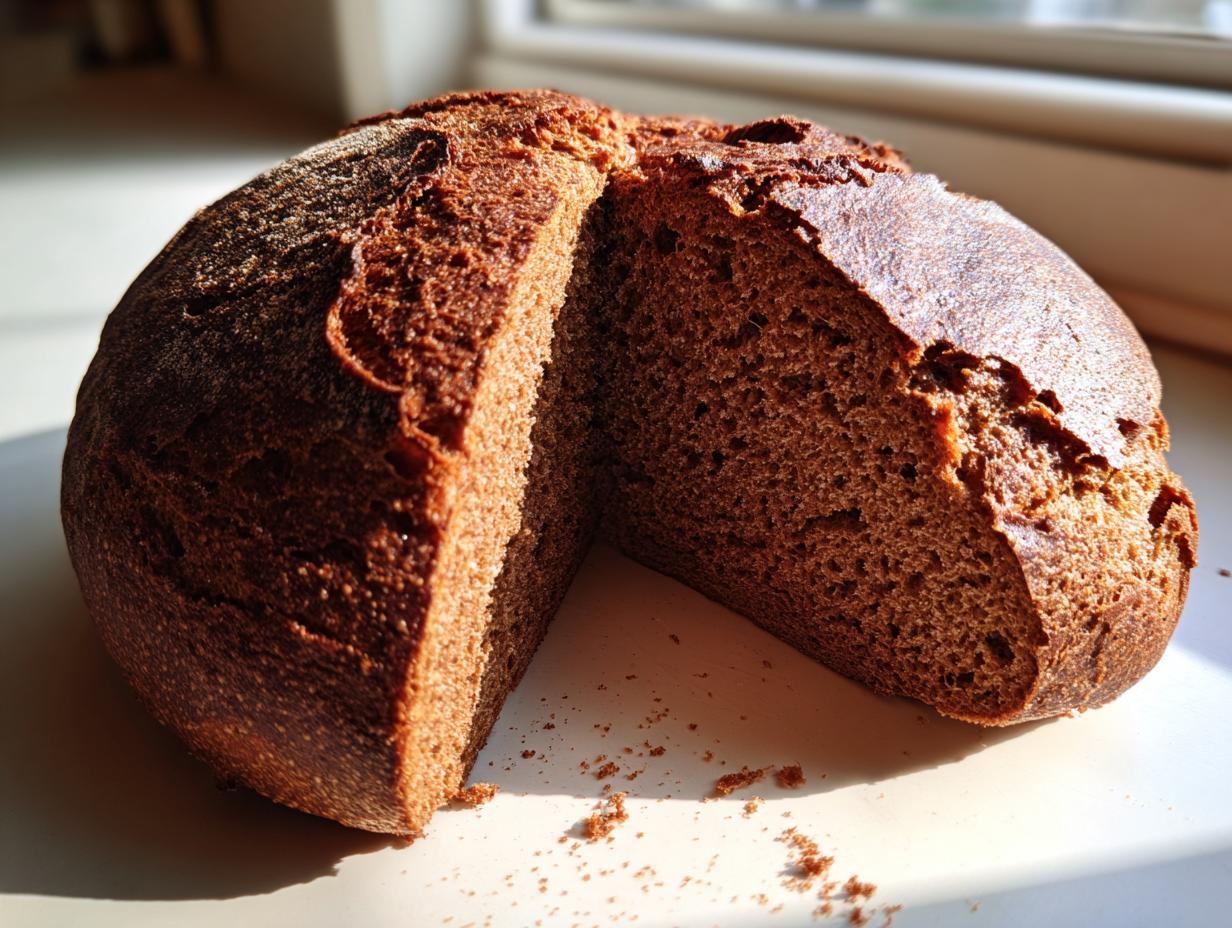
Cooling and Slicing Your Dense Rye Loaf Recipe
This is probably the hardest step, but you absolutely have to listen to me here: You must let this bread cool completely on a wire rack, preferably for several hours, before you slice into it. If you dig in early, I guarantee you’ll end up with a gummy, sticky mess inside. That’s because these higher moisture breads, like this beautiful **dense rye loaf recipe**, are still setting up their structure as they cool down.
The high molasses content in this **molasses bread recipe** also means it needs time to firm up. Patience is rewarded! Once it’s fully cooled—the knife will glide right through—you get that perfectly moist but sliceable texture. You can see how I recommend cooling my date nut bread; the same principles apply!
Serving Suggestions for Your Dutch Oven Pumpernickel Bread Recipe
This rich, dark pumpernickel baked in a cast iron pot deserves the best partner! Because the loaf is so dense and flavorful, it pairs beautifully with rich, savory toppings. If you’re having it for breakfast, you absolutely must try it toasted with a thick layer of whipped cream cheese—the tang is just divine.
For lunch, I love serving thick slices alongside a bowl of homemade soup. This bread stands up perfectly to heavy broths, unlike flimsy sandwich bread. It’s amazing dipped into my creamy roasted cauliflower soup! And if you’re feeling fancy, this is the perfect vehicle for smoked salmon and capers. Enjoy every hearty bite!
Frequently Asked Questions About This Dutch Oven Pumpernickel Bread Recipe
I know that putting time into a special loaf like this means you want it to turn out perfectly, so here are the things I get asked most often when people try this dutch oven pumpernickel bread recipe for the first time. Baking bread is always an adventure, but these tips should help smooth out the path to a perfect slice!
If you’re looking for ways to use up this amazing bread, I have some great easy breakfast recipes that work well with dark rye too!
Can I make this Traditional Pumpernickel Baking Steps recipe without a Dutch oven?
You totally can, though it won’t have quite the same punch! If you don’t have a cast iron pot, place a baking stone or heavy baking sheet on the bottom rack while preheating. After you place your loaf (on parchment) onto the hot stone, put a metal pan on the rack below it. Pour boiling water into that bottom pan right before you close the door. It will create steam, but the crust won’t be as incredibly thick as when **baking bread in cast iron pot**.
Why did my bread turn out gummy in the middle?
Ah, that’s the impatience talking! This happens if you slice into the loaf before it cools completely. Rye retains moisture so intensely that it needs hours—sometimes four or five—to fully set the crumb structure. If you slice it warm, it’s still cooking inside and will feel dense and sticky. Give it time; the result is worth the wait!
Can I skip the molasses or cocoa powder?
If you skip the molasses, you lose so much of that earthy, malty flavor that makes pumpernickel taste traditional. The cocoa powder is mostly for deep color—you could theoretically use dark rye flour instead—but skipping both will seriously change the final taste and look of your loaf. I really wouldn’t recommend skipping the molasses if you want that classic, **dark rye bread recipe** flavor.
Is this **No Knead Pumpernickel Bread** truly no-knead?
Yes, it really is! Since we are using a higher percentage of rye flour, which doesn’t develop gluten in the same way wheat flour does, kneading is actually counterproductive here. We mix it just enough to bring the flours and liquids together, creating that shaggy dough. The long rest period handles the structure development, making this a fantastic **no knead pumpernickel bread** option!
PrintDutch Oven Pumpernickel Bread
Bake a dense, dark, and flavorful pumpernickel loaf using your Dutch oven for a thick, crusty exterior and moist interior. This recipe uses molasses for color and traditional rye flavor.
- Prep Time: 15 min
- Cook Time: 50 min
- Total Time: 1 hour 5 minutes
- Yield: 1 loaf 1x
- Category: Bread
- Method: Baking
- Cuisine: American
- Diet: Vegetarian
Ingredients
- 1 cup warm water (105-115°F)
- 2 teaspoons active dry yeast
- 1/4 cup dark molasses
- 2 tablespoons unsalted butter, melted
- 1 tablespoon cocoa powder (unsweetened)
- 1 teaspoon salt
- 1 cup rye flour
- 2 cups bread flour
- 1/2 cup whole wheat flour
- 1/4 cup boiling water (for steaming)
Instructions
- In a large bowl, dissolve the yeast in the warm water. Let stand for 5 minutes until foamy.
- Stir in the molasses, melted butter, cocoa powder, and salt into the yeast mixture.
- Add the rye flour, bread flour, and whole wheat flour to the wet ingredients. Mix with a wooden spoon until a shaggy, sticky dough forms. Do not overmix.
- Cover the bowl with plastic wrap and let the dough rest at room temperature for 1 hour.
- Place your Dutch oven, with the lid on, into your oven. Preheat the oven to 450°F (232°C).
- Once the oven is preheated, carefully remove the hot Dutch oven from the oven.
- Gently scrape the dough onto a piece of parchment paper. Shape it into a rough round loaf.
- Using the parchment paper as a sling, carefully lower the dough into the hot Dutch oven.
- Pour the 1/4 cup of boiling water into the bottom of the Dutch oven, next to the dough, to create steam. Immediately cover with the lid.
- Bake covered for 30 minutes.
- Remove the lid and continue baking for another 15 to 20 minutes, or until the crust is deep brown and firm.
- Carefully remove the bread from the Dutch oven and parchment paper. Cool completely on a wire rack before slicing to achieve the best texture.
Notes
- For a deeper, more authentic color, you can substitute 1 tablespoon of the bread flour with dark rye flour or add 1 teaspoon of instant coffee granules to the wet ingredients.
- This bread benefits greatly from cooling completely. Slicing while warm results in a gummy texture.
- If you prefer a slightly tangier flavor, use 1/2 cup of active sourdough starter instead of 1/2 cup of the bread flour and reduce the yeast slightly.
Nutrition
- Serving Size: 1 slice
- Calories: 180
- Sugar: 4
- Sodium: 250
- Fat: 2
- Saturated Fat: 1
- Unsaturated Fat: 1
- Trans Fat: 0
- Carbohydrates: 37
- Fiber: 3
- Protein: 6
- Cholesterol: 5