
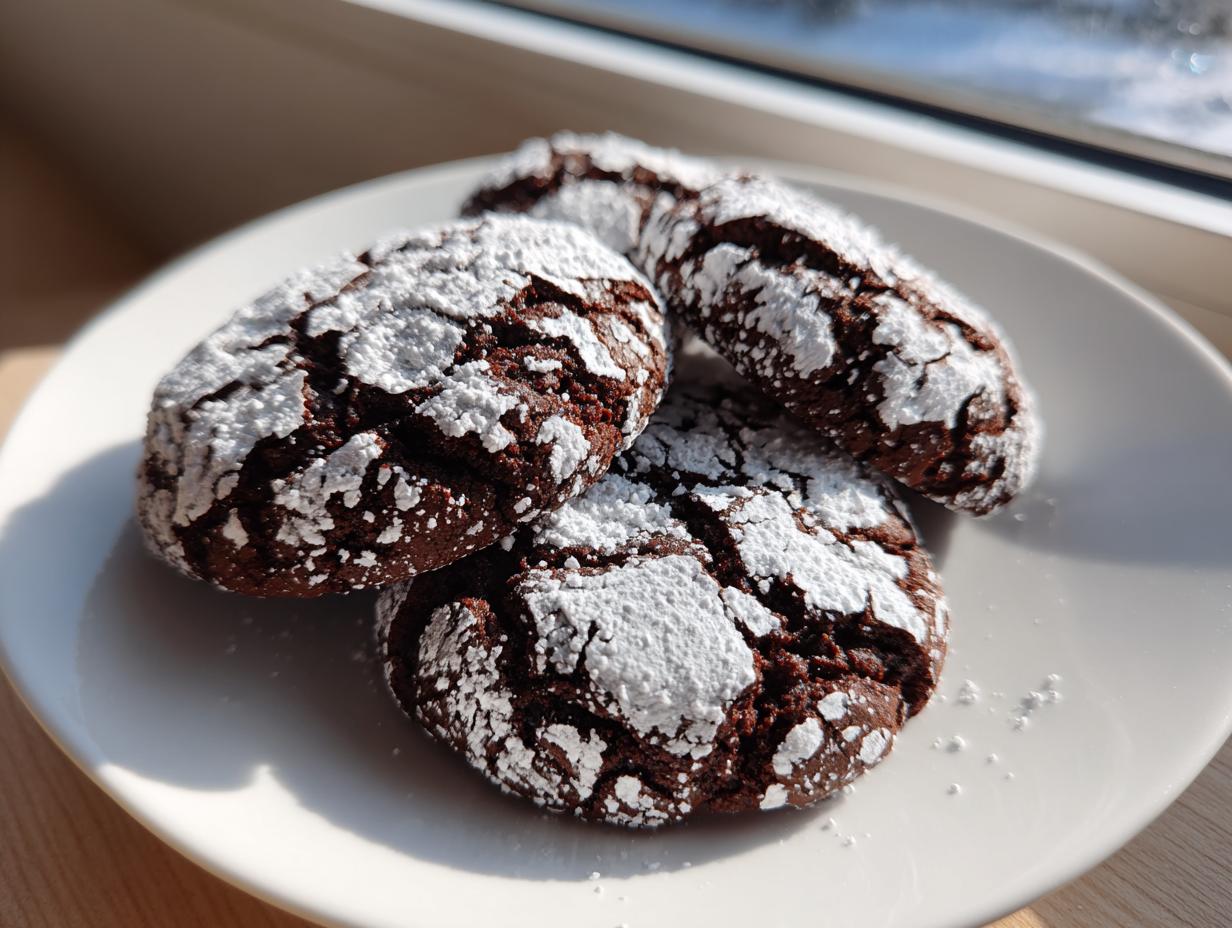
There is just something about pulling a tray of warm, chocolatey treats out of the oven that instantly takes me back to bustling holiday kitchens. If you’re looking for that perfect, nostalgic dessert that always vanishes first from the cookie platter, I’ve got you covered. These crinkle cookies are, without a doubt, the best chocolate version I have ever made. Forget hard, dry holiday cookies! My secret to these gorgeous treats is ensuring they come out absolutely soft and delightfully fudgy inside, with that signature, snowy crackle top.
When I was growing up, my mom always saved the batch of these for Christmas Eve after all the wrapping was done. Now, I carry that tradition forward. They are centerpiece-worthy, but honestly, they are surprisingly easy to make. Trust me, once you master the coating technique, you’ll be bringing these beautiful, cocoa-dusted beauties to every single gathering. We’re diving into my foolproof recipe right now, and I’ll show you how to get that perfect texture every time. Oh, and if you love holiday chocolate classics, be sure to check out my peppermint bark recipe too!
- Why You Will Love These Fudgy Chocolate Crinkle Cookies
- Essential Ingredients for Perfect Chocolate Crinkle Cookies
- Step-by-Step Guide to Making the Best Chocolate Crinkle Cookies
- Tips for Achieving the Ultimate Crinkle Top on Your Crinkle Cookies
- Storage and Making Ahead for Your Crinkle Cookies
- Variations on Classic Chocolate Crinkle Cookies
- Frequently Asked Questions About Crinkle Cookies
- Estimated Nutritional Data for These Crinkle Cookies
- Share Your Homemade Crinkle Cookies
Why You Will Love These Fudgy Chocolate Crinkle Cookies
Look, I know you have a million holiday cookie recipes crowding your inbox, but trust me when I say you need to make room for these crinkle cookies. I’ve refined this recipe over the years specifically to hit that sweet spot between easy assembly and incredible flavor. They are always the first thing gone at any party in Ohio!
Here’s why this specific crinkle cookie recipe has earned a permanent spot in my rotation:
- They are wonderfully fudgy crinkle cookies inside; they practically melt in your mouth!
- The contrast between the deep chocolate interior and the bright white powdered sugar coating is simply gorgeous for any festive spread.
- It’s an incredibly straightforward dough that doesn’t require any weird chilling time before you can roll it out.
- These are sturdy enough to survive a cookie tin but tender enough to feel special—perfect for all your holiday cookie exchanges!
Essential Ingredients for Perfect Chocolate Crinkle Cookies
Okay, when we talk about making the absolute best chocolate crinkle cookies, the quality of what goes into the bowl really matters. Don’t try to pull a fast one on these! This isn’t the time for cheap stuff, because the intense chocolate flavor is what sets these apart from just any old powdered sugar cookie. You want that deep, dark color and richness, right? This recipe highlights those core flavors, so we need good players on our team.
I’ve listed everything out for you below. Remember how I mentioned the sugar needed dividing? Pay close attention to that, because half of that granulated sugar goes into the batter, and the other half is a crucial step before they get coated in white sugar. It adds texture!
- 1 cup unsalted butter, softened—make sure it’s actually soft, not melted!
- 1 3/4 cups granulated sugar, divided
- 2 large eggs
- 1 teaspoon vanilla extract
- 1 teaspoon baking soda
- 1/2 teaspoon salt
- 3/4 cup unsweetened cocoa powder
- 2 cups all-purpose flour
- 1/2 cup powdered sugar, for rolling
Ingredient Clarity and Preparation Notes
Let’s talk cocoa. For that true, dramatic contrast against the white sugar coating, skip the Dutch-process stuff here. We want natural, unsweetened cocoa powder. It reacts perfectly with the baking soda to give you the best lift and that amazing deep color. Also, remember to have your butter truly softened; it needs to cream up beautifully with the sugar to trap air. That aeration is what makes these cookies chewy instead of dense bricks! If you love working with chocolate, you might want to check out my recipe for hot cocoa mix when winter really settles in!
Step-by-Step Guide to Making the Best Chocolate Crinkle Cookies
This part is where the magic really happens, but take your time! If you rush the mixing, you won’t get those gorgeous, flaky cracks we are after in our crinkle cookies. First things first, you need to get your kitchen ready. Preheat your oven to 350 degrees F (175 degrees C) and make sure you have your baking sheets lined with parchment paper. I always keep parchment on hand; it saves a ton of scrubbing later! These might be cookies, but I treat my baking sheets like I treat my soup pans—I want easy cleanup after the best results! I was thinking about how much easier cleanup is when whipping up a big batch of easy creamy chicken tortilla soup, and it’s the same principle here.
Now, about chilling—while I recommend a brief chill for the *best* result, this dough is forgiving enough that you can mix it and start the rolling process pretty quickly if you’re in a hurry. But for that ultimate chewy texture, I like to let the dough chill out in the fridge for at least 30 minutes while the oven heats up. It firms things just enough to handle the coating process without being too sticky.
Mixing the Crinkle Cookies Dough
Grab your biggest mixing bowl, because we’re building flavor! Start by creaming together that softened butter and 1 cup of the granulated sugar. You need to beat this until it’s genuinely light and fluffy—I mean, pale yellow and airy looking. This step is crucial because we’re whipping air into the batter, which helps keep these cookies soft later on. Don’t skip this; really work that mixer!
Once you have that light base, beat in your eggs one at a time, ensuring each one is mixed in before adding the next. Then, drizzle in that vanilla extract until everything looks smoothly combined.
In a separate bowl, quickly whisk together your dry stuff: the baking soda, salt, that rich cocoa powder, and the flour. You want these to be thoroughly incorporated *before* they meet the wet ingredients. Then, add the dry mixture to your wet mixture gradually. And here is the golden rule for cookies in my kitchen: mix on low speed until *just* combined. I mean it—stop mixing the second you don’t see any more streaks of flour. Overmixing develops gluten and makes your cookies tough, and nobody wants a tough chocolate cookie!
Time for the coating! Set up your dip station. Pour the remaining 3/4 cup of granulated sugar into one shallow dish. Pour the 1/2 cup of powdered sugar into a second shallow dish. This dual-coating process is key for that deep crackle. Roll your dough balls—aim for about 1 inch wide, like a decent-sized jawbreaker. Roll it first lightly in the granulated sugar, making sure it gets a dusting all over. Then, immediately roll that sugar-dusted ball *generously* in the powdered sugar. You want it completely smothered in white powder!
Baking for That Perfect Fudgy Crinkle Cookies Texture
Place those heavily powdered dough balls onto your parchment-lined sheets, leaving about 2 inches between each one because they will spread out a bit. They are ready for the oven!
Bake them at 350 degrees F (175 degrees C) for about 10 to 12 minutes. Now, listen closely, because this is how you guarantee fudgy crinkle cookies. You want the edges to look set, maybe even a tiny bit firm when you nudge them, but the very center should still look soft, almost underbaked. If you cook them until the center looks dry, they will turn into hard disks! We want that bakery style chewiness.
When they come out, resist the urge to touch them right away! Let the chocolate crinkle cookies sit right there on that hot baking sheet for a full 5 minutes. This residual heat finishes setting the centers perfectly. As they cool on the sheet, you will see those beautiful cracks set into place, solidifying their gorgeous snowy appearance. Then, very gently, transfer them to a wire rack to cool completely. The wait is hard, but trust me, those slightly fudgy centers are worth every second!
Tips for Achieving the Ultimate Crinkle Top on Your Crinkle Cookies
The main event for these chocolate crinkle cookies is that mesmerizing, snowy crackle top, right? If they come out looking like solid chocolate tops, well, we’ve missed the mark! Getting those beautiful fissures to show up takes a tiny bit of strategy, but it’s nothing complicated. It all boils down to two key things: temperature control and coating coverage.
I’ve experimented a ton over the years—trying to bake them warm, rolling them once, rolling them three times—and I settled on the technique that gives me the most dramatic, bakery style results every time. These tips are what my mom always did, and frankly, they work better than any quick fix I’ve found.
Dough Temperature is Everything
If your dough is too warm, it’s greasy and soft. When it hits the heat of the oven, it spreads out too quickly before the exterior sugar coating has a chance to truly crack. It just ends up melting together into a smooth, dark dome. Yuck, no thank you!
This is why I always recommend that chill time, which I mentioned briefly before. Even 30 minutes in the fridge makes a huge difference. You want the dough balls firm enough to hold their shape when you roll them through the sugars. When the ball is colder, it spreads slower in the oven, allowing that beautiful powdered sugar shell to set up and then spectacularly break apart as the cookie expands underneath. It’s simple science, but it makes all the difference in the visual payoff!
The Double Dip: Coat Generously!
The second secret isn’t just dipping twice—granulated then powdered—it’s how much sugar you apply. You need a seriously heavy coat of powdered sugar. Think about it: that white coating is what you are actually seeing when the cookie cracks. If you skimp on the powdered sugar, you won’t get that stark white contrast against the dark chocolate!
When you roll the chilled dough balls, make sure they are utterly blanketed. I like to turn the dough ball in the powdered sugar dish until I genuinely can’t see any brown dough peeking through at all. If it looks like a little snowy snowball, you’ve done it right. Don’t worry about the excess sugar falling off onto the baking sheet later; that’s fine, it just means you used enough! Once you get that robust coating over a chilled, firm dough ball, those cracks are guaranteed to be sharp and defined every single time you bake these holiday cookies.
Storage and Making Ahead for Your Crinkle Cookies
One of the best things about these chocolate crinkle cookies (besides tasting like pure joy) is that they are fantastic make-ahead candidates! I love baking ahead of time when the holidays get hectic, and these hold up beautifully until it’s time to serve them. They are so soft, which usually means they go stale fast, but the high sugar content in that powdered coating actually acts as a little preservative shield.
If you’re baking for a big event, knowing how to store them properly means you can bake them a few days in advance without worrying about losing that wonderful fudgy texture inside. When I make a double batch, I always have one batch ready to go and a second batch waiting patiently in the pantry!
Keeping Them Fresh on the Counter or in My Pantry
Once your crinkle cookies are completely cool—and I mean totally cool, otherwise you might trap moisture and have them sweat—you can store them in an airtight container right on the counter or in your pantry. You don’t need refrigeration for these at all. I find they stay perfectly soft and chewy for about three to four days. After that, they are still tasty, but they lose a little of that melt-in-your-mouth sensation.
A little tip: if you are worried about the powdered sugar coating getting messy or thinning out, you can actually place a single layer of parchment paper between the layers of cookies inside the container. It keeps them separated and keeps that snowy look sharp. If you’re looking for another great make-ahead treat for winter gatherings, my recipe for easy homemade marshmallows might be just the ticket too!
Freezing Baked Cookies and Keeping Dough Ready
Want to be ahead by weeks, not days? You absolutely can freeze these! Once cooled, place the cookies on a baking sheet in a single layer and freeze them until they are solid—this only takes an hour or so. Then, transfer them into a freezer-safe, airtight bag or container. They keep beautifully for about two months this way. When you want to serve them, just let them thaw on the counter for an hour or so while still in the container so the condensation doesn’t ruin that lovely coating.
You can also freeze the dough balls! This is my top trick for easy holiday baking. Roll the dough into balls, coat them heavily in the granulated sugar, and then the powdered sugar, just like the recipe says. Place those coated balls onto a parchment-lined tray and freeze them solid. Once frozen, toss them into a zip-top bag. When you want fresh cookies tomorrow, just pull out the frozen balls, place them on a baking sheet, and bake them straight from frozen! You might need to add just 2 or 3 extra minutes to the baking time, but you don’t even need to thaw them. Talk about making easy crinkle cookies!
Variations on Classic Chocolate Crinkle Cookies
If you’re the type of baker who likes to switch things up—and honestly, who doesn’t love a good twist on a classic?—you can absolutely modify this recipe while still keeping that signature look. The beauty of these chocolate crinkle cookies is that the cocoa base is so rich, it holds up well to a few additions without losing integrity, as long as we remember the goal: a beautiful crackle top cookies finish!
I’ve seen people try lemon versions, and while those are great, if you’re working with this dark chocolate dough, the flavor additions really need to complement chocolate. If you’re interested in something tangy, I highly suggest tackling my apple brownies recipe later, but for keeping this recipe chocolate-focused, here are the two tweaks I stand by.
Boosting the Chocolate Intensity
This is perhaps the easiest way to elevate these cookies from great to absolutely irresistible. If you want a serious hit of cocoa flavor that feels almost professional—we’re talking intense, dark chocolate territory—try this: add one and a half teaspoons of instant espresso powder to the dry ingredients when you mix in the flour and cocoa. You won’t taste coffee, I promise you that! What you *do* get is a background depth that makes the chocolate flavor stand out so much more.
It deepens the entire profile. It’s one of those little chef secrets that really pays off, and it doesn’t change the wet-to-dry ratios at all, so the texture of your crinkle cookies remains exactly the same soft, fudgy dream we aimed for. Just be sure to mix that espresso powder in really well with the cocoa so it dissolves nicely into the batter.
Using Cake Mix as a Stand-In (The Easy Crinkle Cookie Shortcut)
Some people are really into the idea of cake mix cookies because they are the definition of easy crinkle cookies. If you want to experiment with that route, you can often swap out about half a cup of the all-purpose flour in this recipe for an equal amount of dry, plain chocolate or devil’s food cake mix. It introduces extra stabilizers and flavorings already present in the mix.
Now, be warned: this *will* slightly affect the texture. It tends toward being a little less purely fudgy and maybe a touch more cake-like or chewy. If you try this variation, you absolutely must re-emphasize the chilling step we discussed earlier. Because the cake mix can sometimes make the dough a bit looser, firming it up in the fridge before rolling ensures those beautiful cracks still appear when baked.
Frequently Asked Questions About Crinkle Cookies
It happens to the best of us! Baking is fun, but sometimes that little thing we expect to go perfectly decides to throw a curveball. I figured I’d gather up the most common questions I hear about these wonderful crinkle cookies right here so you can feel 100% confident heading into your next batch. Don’t stress if your first try isn’t perfect; these are still cookies, after all!
Why are my crinkle cookies not cracking?
Oh, this is the million-dollar question! There are two main culprits when you’re trying to get that perfect crackle top. First: temperature. If the dough balls aren’t cold enough when they enter the oven, they spread too fast, and the sugar coating melts into the cookie instead of cracking on top. Make sure you chill that dough for at least 30 minutes, or even longer! Second reason: coating coverage. Did you roll them heavily enough in that final layer of powdered sugar? If you can see any dough peeking through that white coating, you need to roll it more generously. That thick sugar shell cracks spectacularly when the cookie expands underneath it. If you want truly easy crinkle cookies, chilling and coating thick are your non-negotiables!
Can I make these lemon crinkle cookies instead?
That’s a fun idea! While this specific recipe is tuned purely for that deep, fudgy chocolate flavor—and it works really well as a classic Christmas cookie—you absolutely can make lemon crinkle cookies or other flavor varieties! Typically, when switching flavors for crinkle cookies, you swap the cocoa powder entirely for an additional half-cup of flour and add lemon zest and juice to the wet ingredients instead of vanilla. You’d still use the double sugar coat, though! If you enjoy bright, citrusy bakes, you might love the results of my easy creamy mini cheesecake bites recipe next time.
For this chocolate recipe, however, stick to the cocoa for the best contrast and that rich, dark interior. The beauty of these powdered sugar cookies is in that dramatic look!
Estimated Nutritional Data for These Crinkle Cookies
I always like to add a little note about nutrition because, let’s be honest, these crinkle cookies are a treat, not a health food! When you’re baking for the holidays or a cookie exchange, knowing roughly what you’re sharing with friends and family is important. Keep in mind that these numbers are based on the standard recipe ingredients I shared above, calculated per serving. They reflect the beautiful, rich ingredients we use, like that butter and cocoa powder!
If you add anything extra—say, a cup of chocolate chips or a hint of espresso powder—those numbers will shift a little. So, consider this table a wonderful guideline rather than a strict scientific analysis. They are estimates based on average ingredient data, but they give you a solid idea of what one of these gorgeous, fudgy bites contains:
- Serving Size: 1 cookie
- Calories: 180
- Sugar: 18g
- Fat: 9g
- Carbohydrates: 24g
- Protein: 2g
See? Totally worth it for that chocolate fix! If you are looking for something a little lighter but still seasonal, you might want to bookmark my recipe for sweet potato muffins for a breakfast treat later in the season. But right now? Embrace the fudge factor on these powdered sugar cookies!
Share Your Homemade Crinkle Cookies
I’ve shared all my best secrets for achieving that perfect, soft center and that beautifully sharp, snowy crackle top on these rich chocolate crinkle cookies. I truly hope that making these brings as much warmth and joy to your kitchen as they bring to mine every single year. They are truly a labor of love, but they taste like pure magic!
But honestly, the absolute best part of running HearthBite is hearing from you! I live for it when you tell me how these recipes turned out for your family. Did you make them for your kids’ school party, or did they end up as the star dessert at your big family dinner? Did they disappear as fast at your house as they do at mine?
Please, don’t be shy! If you loved how simple and fudgy these came out, please take a minute to rate the recipe right below this post—that feedback really helps other home cooks feel confident trying it out. And if you took a picture of your beautifully coated, deep chocolate crinkle cookies, I would absolutely adore seeing them! Tag me on social media or leave a comment telling me about your experience. I love connecting with fellow bakers who believe that the kitchen is always the heart of the home. If you want to learn more about why I started this little journey sharing recipes from my hearth, you can always check out my About Page!
PrintBest Chocolate Crinkle Cookies: Soft and Fudgy Holiday Treats

Follow this easy recipe to make soft, fudgy chocolate crinkle cookies with the perfect powdered sugar crackle top. These are classic Christmas cookies for any cookie exchange.
- Prep Time: 20 min
- Cook Time: 12 min
- Total Time: 32 min
- Yield: 24 cookies 1x
- Category: Dessert
- Method: Baking
- Cuisine: American
- Diet: Vegetarian
Ingredients
- 1 cup unsalted butter, softened
- 1 3/4 cups granulated sugar, divided
- 2 large eggs
- 1 teaspoon vanilla extract
- 1 teaspoon baking soda
- 1/2 teaspoon salt
- 3/4 cup unsweetened cocoa powder
- 2 cups all-purpose flour
- 1/2 cup powdered sugar, for rolling
Instructions
- In a large bowl, cream together the softened butter and 1 cup of the granulated sugar until light and fluffy.
- Beat in the eggs one at a time, then mix in the vanilla extract.
- In a separate bowl, whisk together the baking soda, salt, cocoa powder, and flour.
- Gradually add the dry ingredients to the wet ingredients, mixing on low speed until just combined. Do not overmix.
- Place the remaining 3/4 cup of granulated sugar in one shallow dish and the powdered sugar in another shallow dish.
- Roll the dough into balls, about 1 inch in diameter. Roll each ball first in the granulated sugar, then thoroughly coat it in the powdered sugar.
- Place the coated dough balls on baking sheets lined with parchment paper, spacing them about 2 inches apart.
- Bake in a preheated oven at 350 degrees F (175 degrees C) for 10 to 12 minutes. The edges should be set, but the centers should still look slightly soft for a fudgy texture.
- Let the cookies cool on the baking sheet for 5 minutes before transferring them to a wire rack to cool completely. The crinkles will set as they cool.
Notes
- For the best crackle effect, chill the dough for at least 30 minutes before rolling and coating.
- If you want bakery style cookies, slightly underbake them; they firm up as they cool.
- You can substitute cake mix for some of the flour for a slightly different texture, but this recipe uses traditional flour for the best fudgy result.
Nutrition
- Serving Size: 1 cookie
- Calories: 180
- Sugar: 18
- Sodium: 95
- Fat: 9
- Saturated Fat: 5
- Unsaturated Fat: 4
- Trans Fat: 0
- Carbohydrates: 24
- Fiber: 2
- Protein: 2
- Cholesterol: 30