
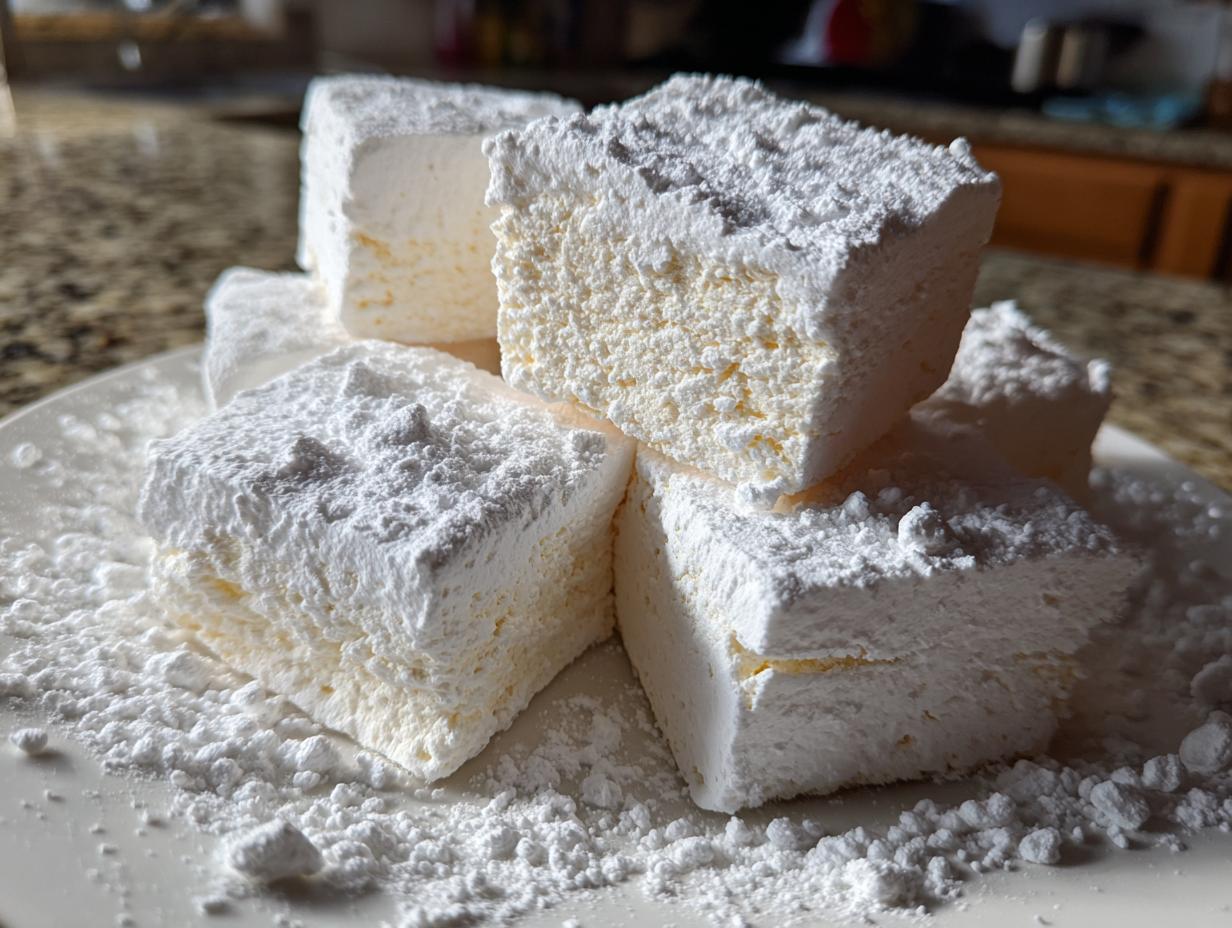
You think you know marshmallows? Think again! Once you pull these sweet, soft clouds out of the mixer, you’ll realize that the puffy, waxy cylinders from the grocery aisle don’t even belong in the same conversation. We are moving past the stale and chalky and straight into the realm of pure, pillowy heaven. I’m Sarah from HearthBite, and since starting this journey rooted in reliable, comforting American home cooking, I haven’t looked back. Trust me when I say that this is the absolute best, easy homemade marshmallows recipe out there for achieving that signature soft, springy texture. If you love these kinds of deeply satisfying sweets, you should definitely check out our collection of comfort food recipes too!
- Why This Is the Best Easy Homemade Marshmallows Recipe (Soft, Fluffy, and Pillowy)
- Gathering Ingredients for Perfect Homemade Marshmallows
- Step-by-Step Instructions: How to Make Marshmallows
- Tips for Perfect Homemade Marshmallows Every Time
- Making Homemade Marshmallows for Hot Chocolate and S'mores
- Storage and Gifting Gourmet Marshmallows at Home
- Frequently Asked Questions About Homemade Marshmallows
- Estimated Nutritional Data for Homemade Marshmallows
- Share Your Pillowy Marshmallow Recipe Experience
Why This Is the Best Easy Homemade Marshmallows Recipe (Soft, Fluffy, and Pillowy)
What makes these marshmallows truly different? It’s the texture, plain and simple. Store-bought versions often feel stiff or just melt into a sticky mess when hot cocoa hits them. But this easy marshmallow recipe? It hits that sweet spot every time. We chase that perfectly soft springy marshmallows feel that makes you want to squeeze them before you eat them!
I spent ages trying to nail the ratios so you don’t have to. After testing batch after batch—trying to get that airy, cloud-like structure—I found that letting the mixer run for that full 12 to 15 minutes is non-negotiable. That’s where the magic happens for a true pillowy marshmallow recipe. It’s about getting enough air in there to keep them lofty. If you stick to the temperature guide and give it the time it asks for, you’ll have gourmet treats that rival anything fancy you could buy. For more insight into why certain techniques work, check out this great resource on marshmallow tips and tricks!
As we talked about on my About page, HearthBite is all about reliable recipes that build confidence. This one delivers! They are so much better than the boxed stuff, especially for gifting or just enjoying a cozy night.
Gathering Ingredients for Perfect Homemade Marshmallows
Okay, let’s get organized because in candy making—and yes, we are leveling up to making candy here!—precision is everything. Unlike baking a simple cake where you can sometimes be a little loose with measurements, when that hot syrup hits the gelatin, you need everything measured out perfectly. Don’t skip the blooming step for the gelatin; it’s important for getting that strong foundation!
You’ll need a few things that might not be in your pantry every day, but trust me, stocking up is worth it once you taste these. We are using granulated sugar and corn syrup for that classic texture, and please, whatever you do, use a good quality pure vanilla extract! That makes such a difference in the final flavor profile.
- 3 packets unflavored gelatin
- 1 cup cold water, divided
- 1 cup granulated sugar
- 1 cup light corn syrup
- 1/4 cup water (for the syrup)
- 1/4 teaspoon salt
- 1 tablespoon pure vanilla extract
- 1/2 cup powdered sugar, for dusting
- 1/2 cup cornstarch, for dusting
Ingredient Notes and Substitutions for Homemade Marshmallows
I know some of you want to avoid corn syrup, and I respect that! If you’re looking to make marshmallows without corn syrup, you can try swapping it out one-for-one with honey or maple syrup. Just be warned, those natural sweeteners change the pH balance a bit, so your final result might be slightly softer or stickier than the version listed above. It still works, but it’s not quite the same structure.
Now, for the flair! If you want to elevate these even further and make beautiful vanilla bean marshmallows? Heat the seeds from one vanilla bean pod right along with the sugar and corn syrup. It infuses that gorgeous, speckled vanilla all through the marshmallow base. Keep those notes handy; it’s one of my favorite ways to switch things up for a special occasion!
Step-by-Step Instructions: How to Make Marshmallows
This is where the real fun starts! I know for some of you, cooking with a candy thermometer feels like stepping into professional territory, but honestly, making these homemade marshmallows is totally approachable for candy making for beginners. We are using simple physics here—heat and time—to create that incredible texture. Follow these steps, and I promise you’ll be amazed at what you pull out of your stand mixer later!
The process is split into three main parts: hydrating the gelatin, cooking the syrup perfectly, and then whipping it into fluffy submission! If you love this kind of satisfying, no-fuss sweet, you might also want to try my recipe for an easy no-bake peanut butter pie.
Preparing the Pan and Blooming the Gelatin
First things first: we need to set up the landing zone! Take your 9×13 inch pan—this is the perfect size for achieving a nice, manageable thickness. Generously grease it up, and then mix your powdered sugar and cornstarch. We use a heavy hand here because we want every single surface coated! If you skimp, you’ll be wrestling hot, sticky goo out of that pan later, and nobody has time for that.
Now, for the gelatin. Sprinkle a packet over 1/2 cup of cold water in your stand mixer bowl. This process is called “blooming,” and it’s vital. We need the gelatin granules to fully absorb that water before we introduce them to heat. If you dump hot syrup onto dry gelatin, it clumps up instantly, and that’s game over for fluffy clouds.
Cooking the Sugar Syrup to the Right Temperature
This is the temperature-critical stage, so keep that candy thermometer handy! In a saucepan, gently combine your granulated sugar, corn syrup, the remaining 1/4 cup of water, and the salt. Heat this over medium heat, but here’s the crucial bit: stir *only* until the sugar is dissolved. The second it starts to boil vigorously, step away from the spoon!
Let it bubble away merrily until it hits exactly 240 degrees Fahrenheit. That’s the soft-ball stage, and it means the syrup has the right structure to support all that air we’re about to whip in. If you go over 245°F, your marshmallows will be chewy and hard, not soft and cloud-like. Once it hits temperature, yank it off the heat immediately!
Whipping for Fluffy Homemade Treats
Time to bring the hot and the bloomed together! Turn your stand mixer on LOW speed—and I mean low, or you’ll wear hot syrup! Slowly, carefully drizzle that blazing hot syrup in a thin stream down the side of the bowl, making sure it misses the whisk. Pouring it directly onto the whisk causes huge splatters, which is dangerous and messy!
Once everything is incorporated, crank that mixer up to high! This is the longest part of the whole process—12 to 15 minutes, minimum. You are looking for two huge signs that you’ve achieved your fluffy homemade treats: the batter will triple in volume, look brilliant glossy white, and it will form stiff, solid peaks when you lift the whisk. Also, stick your hand on the outside of the metal bowl; it should feel cool or just barely warm. Once that vanilla extract goes in during the final minute, give it a quick last blast of mixing.

Setting and Cutting Your Homemade Marshmallows
Grab that greased and heavily dusted pan! Use an offset spatula—lightly greased, too—to quickly scrape that marshmallow mixture into the pan. It will be thick, sticky, and heavy, so you have to work fast before it sets up too much. Gently spread it into an even layer.
Dust the top heavily with the remaining powder mixture and leave it alone! Seriously, don’t poke it. It needs at least four hours to set, but I always leave mine overnight at room temperature to ensure they are totally firm. When it’s time to cut, turn the whole slab out onto a well-dusted cutting board. Use a large, sharp knife that you’ve coated with oil or spray—this keeps it from dragging against the sticky sides. Cut them into your desired squares, and then toss the newly cut sides in the leftover powder mix. This last step is what prevents them from turning into one giant sticky brick in the container!
If you want to see a great example of how many people are loving this process, take a peek at this guide from Six Dollar Family!
Tips for Perfect Homemade Marshmallows Every Time
Even with the best instructions, baking candy can sometimes throw you a curveball! Since you’re aiming for that dreamy, cloud-like texture, here are a few extra things I’ve learned over the years to ensure this recipe for perfect marshmallows works beautifully for you.
First, let’s talk about the weather. Humidity is the enemy of sugar structure, plain and simple. If it’s raining or super muggy outside, you might need to whip your mixture for an extra minute or two, and you definitely need to be extra generous with that cornstarch/powdered sugar dusting. Sticky marshmallows are usually a symptom of high humidity interfering with the sugar setting up.
Second, when you are cooking that syrup, don’t cheat on the thermometer check. If you think it looks “about right” and pull it off early, those marshmallows will collapse like sad little soufflés. If you cook it too high, they get tough. The 240°F zone is your happy place, and a reliable candy thermometer is the only way to guarantee it.
Also, for those of you trying to get that beautiful vanilla bean specks but don’t have enough time, try this: warm your vanilla extract slightly before adding it in the last minute of mixing. Warm liquids incorporate better into that thick foam, rather than shocking the structure with something ice cold. It sounds minor, but I noticed it makes the vanilla flavor distribute more evenly.
Finally, when it’s time to cut, use a pizza cutter if you have one! A long, rolling blade can sometimes glide through the sticky slab more smoothly than repeatedly plunging a knife in, which minimizes dragging. We want clean, gorgeous squares! For more advanced baking topics, you can check out my recipe for easy garlic aioli—it’s all about mastering the technique, whatever you’re making!
If you want gorgeous inspiration for using vanilla beans, check out this fantastic vanilla bean marshmallow recipe!
Making Homemade Marshmallows for Hot Chocolate and S’mores
This is where my homemade marshmallows really shine, folks! Forget the tiny white blobs you usually drop into your mug that instantly dissolve into sugary sludge. Because we used real sugar and got that syrup cooked just right, these marshmallows have integrity. They hold their shape beautifully when plunged into hot beverages.
When you use these in your homemade marshmallows for hot chocolate, they don’t vanish immediately. Instead, they melt slowly, creating this rich, creamy, cloud of almost meringue-like sweetness right on top of the cocoa. It’s a totally different experience!
And don’t even get me started on s’mores. If you’ve ever tried roasting a store-bought pillow and it immediately bursts into flame or collapses into a sad, dripping puddle, you know the struggle. These homemade ones have a better internal structure, which means you can get a gorgeous, deep golden-brown caramelization on the outside before the soft, warm center gets gooey enough to ooze out. They’re fantastic when you use them in my recipe for frozen hot chocolate, too, served right on top!
How to Achieve the Perfect Toasted Marshmallow Recipe
Toasting them takes a little technique, but it’s so worth the effort. Sure, you can absolutely stick them on the end of a coat hanger (don’t tell my husband I said that) and hold them over an open flame from a backyard fire pit—that’s the classic way, and it works great!
If you are stuck inside and want that campfire effect, the broiler is your best friend. Place your squares on a baking sheet lined with parchment—make sure they aren’t touching! Slide them under a hot broiler, but keep the oven door slightly ajar so you can watch like a hawk. Seriously, they go from golden to charcoal in about ten seconds! You are just looking to get the exterior lightly browned and blistered; the interior will heat up wonderfully without turning into lava. It creates that perfect textural contrast for the ultimate s’more.
Storage and Gifting Gourmet Marshmallows at Home
Once you’ve managed to cut these beautiful cloud-like squares, you have to know how to keep them perfect! The biggest mistake people make right off the bat is thinking they belong in the fridge. Please resist that urge! Cold air actually dries out the sugar structure, and they can get tough fast. For the best results, store your gourmet marshmallows at home in an airtight container at room temperature. I find they are perfect just sitting right there on the counter for up to two solid weeks. They truly stay soft and springy the entire time, which is amazing for a homemade sweet!
These also make the absolute best little presents. If you are looking for some wonderful homemade marshmallow gift ideas, packaging is everything. Forget just tossing them in a Ziploc bag! Layer them nicely in clear cellophane bags and tie them off with some festive baker’s twine. They look so elegant!
If you want to make the gifts extra special, this is the time to try a flavor variation we talked about—maybe a batch finished with a dusting of cocoa powder instead of the sugar mix, or perhaps some peppermint extract added in place of vanilla if it’s around the holidays. You can even dip the bottoms of a few squares in melted dark chocolate before they fully set, which makes them look super fancy. If you’re looking for other great homemade presents, my cranberry orange cookies are always a huge hit too!
For even more gifting inspiration on how cute these can look, you should see the photos over at Best Christmas Desserts; it really shows how beautiful a simple bag of these can be!
Frequently Asked Questions About Homemade Marshmallows
I know sometimes even the best recipe can leave you with a few nagging questions, especially when you’re dealing with hot syrup! That’s perfectly normal. We want you to feel totally confident making these homemade marshmallows, so here are the questions I get asked most often after people try this recipe.
Can I skip the corn syrup and use natural sweeteners like honey or maple syrup?
You absolutely can try to make natural sweetener marshmallows, but I have to give you the real scoop here. Corn syrup (glucose) helps control how quick the sugar crystallizes, which is key to that beautifully soft, springy texture we are aiming for. If you swap it out for honey or maple syrup—for example, using an equal amount—it will work, but your marshmallows might end up a little stickier or softer than the recipe intends.
It’s an understandable modification, but for your absolute first time, I highly recommend sticking to the corn syrup so you can really nail that classic texture. If you want to experiment, try swapping out only half the corn syrup first! If you’re looking for more simple sweet recipes that don’t require cooking, check out my easy no-bake chocolate coconut balls!
Why are my homemade marshmallows so sticky even after dusting?
Oh, the dreaded sticky factor! This usually comes down to two things, and mastering these makes you a pro at making these soft springy marshmallows. First reason: humidity in the air. If it’s a really muggy day where you live, the sugar in the marshmallows wicks moisture right out of the air, making them tacky. Be extra generous with that dusting powder if it’s raining!
The second reason is under-setting time. If you try to cut them before they’ve sat for at least four hours (or overnight is truly best), they haven’t fully firmed up. Be patient! They need that time at room temperature to fully stabilize before they hit the powder coating.
How long will these homemade marshmallows last?
Because these are made like true artisanal confections, they have fantastic staying power, provided you store them correctly! You must keep them in an airtight container at room temperature. Do not put them in the refrigerator! The cold humidity wrecks the texture and makes them weep. Stored correctly, they stay wonderfully soft and fluffy for about two weeks. They rarely last that long in my house, though, because they disappear into hot chocolate so fast!
Are these considered a simple gelatin dessert?
That’s a great question! Since the base relies heavily on bloomed gelatin mixed with a cooked sugar syrup—and we aren’t baking them at all—yes, these absolutely fall under the umbrella of a simple gelatin dessert, just highly specialized! They take a little more active time than Jell-O, obviously, because of that whipping stage, but the core binder is the same. They feel super gourmet, but they follow foundational chemistry for gelatin treats.
Estimated Nutritional Data for Homemade Marshmallows
Now, I know we are here for the pure joy of eating a cloud, not counting calories, but since we are sharing everything about this recipe, I wanted to give you a rough idea of what you’re looking at nutritionally. Remember, this information is just an estimate based on the ingredients listed above and assumes you are dividing the recipe evenly into about 48 squares (Option A!). As with any candy, these are a treat reserved for special occasions, but they are a delicious one!
I use these figures mostly to track my own treats, but honestly, knowing they are homemade and generally free from the weird preservatives you find in store-bought sacks makes me feel better about indulging!
| Component | Measurement (Per Serving) |
|---|---|
| Serving Size | 4 squares |
| Calories | 150 |
| Sugar | 35 |
| Sodium | 15 |
| Fat | 0 |
| Protein | 3 |
| Carbohydrates | 38 |
When you break down the ingredients, most of these calories come straight from the sugar content, which is expected for any proper confection! I’ve kept the fat content at zero because, well, we aren’t adding any of that in here, which is one less thing to worry about compared to some baked goods.
Share Your Pillowy Marshmallow Recipe Experience
Well, folks, we’ve done it! We’ve gone from simple packets of gelatin to creating these incredible, cloud-like pillowy marshmallow recipe masterpieces. That’s the kind of satisfaction I live for here at HearthBite—taking something seemingly complicated and making it into a reliable, joyful kitchen moment.
Now that you’ve made your batch, I desperately want to hear how they turned out! Did you hit that perfect springy texture? Are you dropping them in cocoa like I am, or did you get brave and toast every single one? Please, please leave a review or a comment down below. Telling me about your success helps me know I’m sharing the right kind of recipes!
If you took a picture of your beautiful final squares—maybe you even dusted them with cocoa powder for a gourmet look—share it on social media and tag us! Seeing these treats land on your tables is the whole reason I document these recipes. Connecting over shared food is what HearthBite is all about, whether it’s a five-minute dip or a 4-hour marshmallow set time.
If you have any lingering questions that I didn’t cover in the FAQ, or maybe you tried a swirl of cinnamon in the sugar syrup that worked brilliantly, don’t hesitate to reach out through our contact page. Happy snacking, and thank you for letting my family’s favorite sweet into your home!
PrintThe Best Easy Homemade Vanilla Marshmallows
Make soft, springy, and fluffy homemade vanilla marshmallows. This simple recipe results in treats better than store-bought, perfect for hot chocolate or s’mores.
- Prep Time: 20 min
- Cook Time: 15 min
- Total Time: 4 hr 35 min
- Yield: About 48 squares 1x
- Category: Dessert
- Method: Candy Making
- Cuisine: American
- Diet: Vegetarian
Ingredients
- 3 packets unflavored gelatin
- 1 cup cold water, divided
- 1 cup granulated sugar
- 1 cup light corn syrup
- 1/4 cup water
- 1/4 teaspoon salt
- 1 tablespoon pure vanilla extract
- 1/2 cup powdered sugar, for dusting
- 1/2 cup cornstarch, for dusting
Instructions
- Lightly grease a 9×13 inch baking pan. Mix the powdered sugar and cornstarch together in a small bowl. Dust the bottom and sides of the prepared pan generously with this mixture. Set aside.
- In the bowl of a stand mixer, sprinkle the gelatin over 1/2 cup of the cold water. Let it sit for 10 minutes to bloom.
- While the gelatin blooms, combine the granulated sugar, corn syrup, 1/4 cup water, and salt in a medium saucepan. Stir over medium heat until the sugar dissolves. Stop stirring once it boils.
- Continue to cook the syrup without stirring until it reaches 240 degrees Fahrenheit on a candy thermometer (soft-ball stage). This takes about 8 to 10 minutes.
- Once the syrup reaches temperature, carefully remove the saucepan from the heat.
- Turn the stand mixer on low speed. Slowly and carefully pour the hot sugar syrup down the side of the mixing bowl into the bloomed gelatin. Avoid pouring directly onto the whisk attachment.
- Once all the syrup is added, increase the mixer speed to high. Beat for 12 to 15 minutes until the mixture is very thick, glossy, white, and holds stiff peaks. The outside of the bowl should feel cool to the touch.
- Beat in the vanilla extract during the last minute of mixing.
- Working quickly, use a lightly greased offset spatula to scrape the marshmallow mixture into the prepared pan. Gently spread it evenly.
- Dust the top surface generously with the remaining powdered sugar and cornstarch mixture.
- Let the marshmallows set uncovered at room temperature for at least 4 hours, or preferably overnight.
- Once set, turn the marshmallow slab out onto a cutting board dusted with the sugar/cornstarch mix. Dust the sides. Use a large, sharp, oiled knife or pizza cutter to cut the slab into squares. Toss the cut sides in the remaining powder to prevent sticking.
Notes
- For vanilla bean marshmallows, scrape the seeds from one vanilla bean pod and add them to the sugar syrup while it heats.
- If you want to make marshmallows without corn syrup, substitute the corn syrup with an equal amount of honey or maple syrup, but know the texture may change slightly.
- To store, keep the cut marshmallows in an airtight container at room temperature for up to two weeks. Do not refrigerate.
Nutrition
- Serving Size: 4 squares
- Calories: 150
- Sugar: 35
- Sodium: 15
- Fat: 0
- Saturated Fat: 0
- Unsaturated Fat: 0
- Trans Fat: 0
- Carbohydrates: 38
- Fiber: 0
- Protein: 3
- Cholesterol: 0