
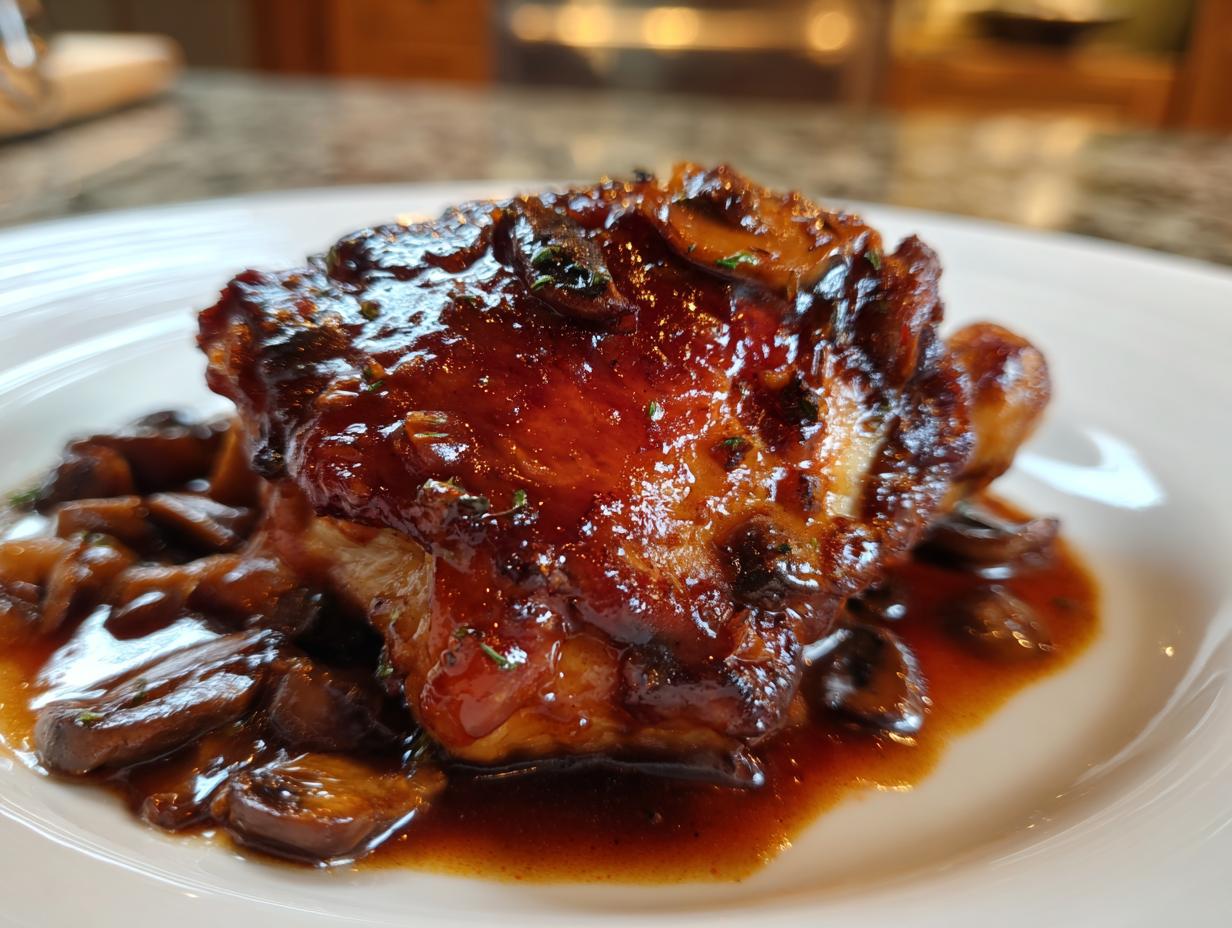
There’s just something about chicken thighs that screams ‘real home cooking’ to me, isn’t there? They are so forgiving, so flavorful, and just inherently comforting. But often, we have to choose: do we want that beautiful, snappy, crispy skin, or do we want that deep, slow-cooked, fall-off-the-bone tenderness that only braising can give? Well, my friends, I’m here to tell you we don’t have to choose anymore! My go-to braised chicken thighs recipe solves that eternal conflict by giving you the best of both worlds in one single Dutch oven. This is reliability in a pot, meaning you get an elegant, rustic meal perfect for cozy nights or company, every single time. Trust me, this is the weeknight salvation you’ve been looking for! Check out my favorite comfort food recipes for more inspiration.
- Why This One-Pot Red Wine Braised Chicken Thighs Recipe Works
- Ingredients Needed for Perfect Braised Chicken Thighs
- Step-by-Step Instructions for Your Braised Chicken Thighs Recipe
- Tips for Success with Your Savory Chicken Recipes for Dinner
- Serving Suggestions for Your One Pot Chicken Thighs Dinner
- Storage and Reheating: Keeping Your Braised Chicken Thighs Perfect
- Frequently Asked Questions About Braised Chicken Thighs
- Nutrition Estimates for Red Wine Braised Chicken Thighs
- Share Your Comfort Food Chicken Recipes
Why This One-Pot Red Wine Braised Chicken Thighs Recipe Works
What makes this technique different? Honestly, it’s the sheer practicality coupled with the resulting texture. Most braises result in wonderfully moist meat, but you end up with soggy skin, which just feels like a missed opportunity, right? This tender braised chicken preparation skips that problem entirely. I use a little trick that ensures you get that satisfying contrast—that deeply browned, utterly delicious texture—before the slow simmer even begins. We’re aiming for absolute perfection here, folks.
If you want the secret to the best chicken thigh cooking methods, look no further than this two-step dance in the Dutch oven.
Achieving Crispy Skin Before Braising
Seriously, don’t rush this! The absolute number one thing you need to do is pat your chicken thighs bone-dry with paper towels. I mean it—drier than the dust in Grandma’s attic. Moisture is the enemy of crispiness. When they hit that hot oil, you need that sizzling sound, not a sad hiss. Those 6 to 8 minutes of searing are non-negotiable because that’s what locks in the flavor and creates the great texture contrast you want from crispy skin braised chicken.
The Magic of Dutch Oven Braised Chicken Thighs
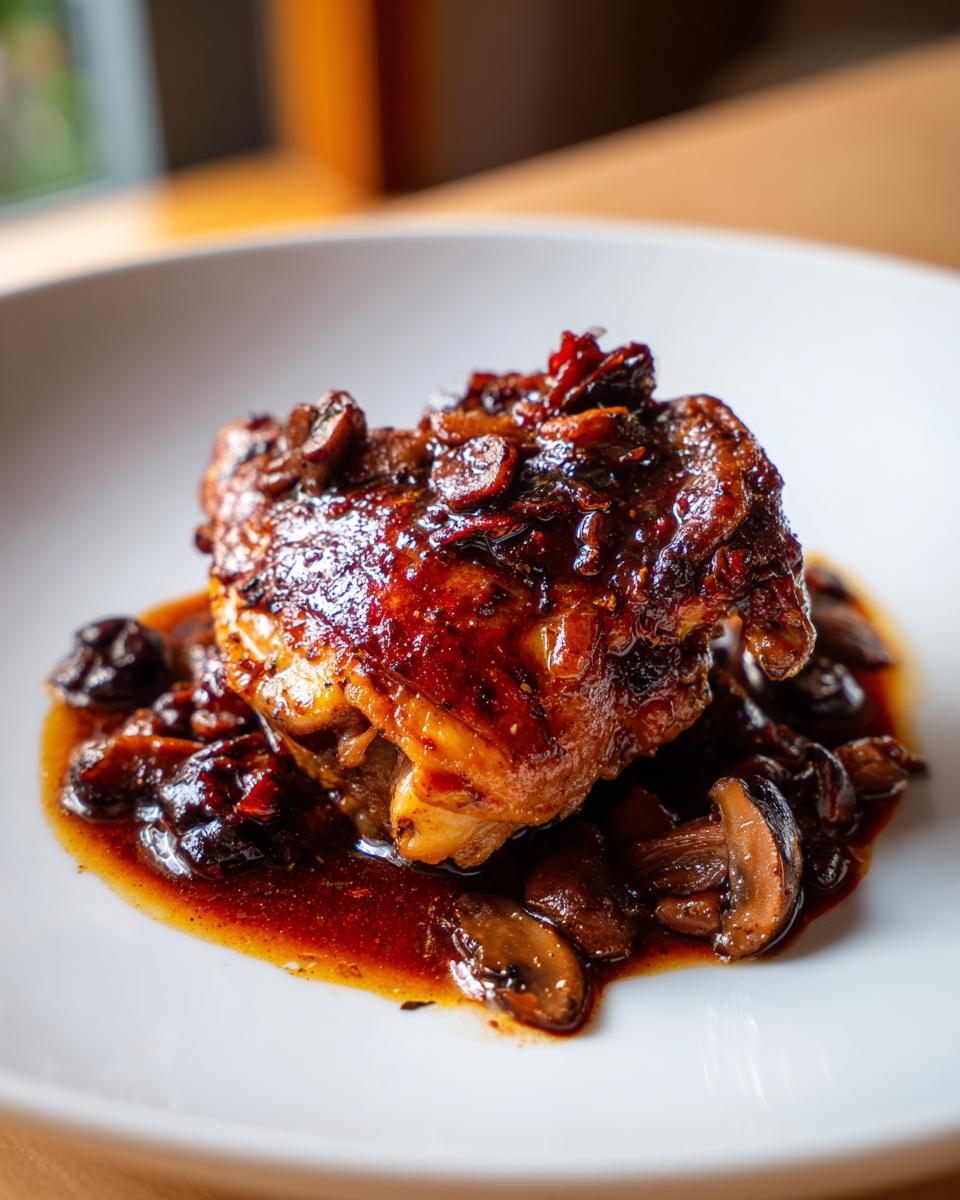
Once the skin is locked in, we move to the magic phase! This is where the *easy dutch oven chicken thighs* nickname comes in. Because we finish these in the oven, the Dutch oven acts like a little moist sauna around the meat, but the skin stays mostly above the liquid level. This slow, gentle heat breaks down all that connective tissue beautifully, guaranteeing you get those incredible fall off the bone chicken thighs without drying them out at all. It’s one glorious cleanup, too!
Ingredients Needed for Perfect Braised Chicken Thighs
You know I love recipes that look fancy but rely on super simple pantry staples, right? This recipe for braised chicken thighs is exactly that. We’re keeping things rustic and rich here with minimal fuss in the ingredient list. The most important thing you need is high-quality chicken thighs—bone-in and skin-on is the only way to go for maximum flavor and that crispy potential we talked about!
You’ll also need a few aromatics to build our sauce base, some good, dry red wine (please use something you’d actually drink!), and plenty of chicken broth to keep things juicy while they cook. Grab your trusty list, because here is what needs to be ready before we hit the stovetop:
- 8 bone-in, skin-on chicken thighs (make sure these are patted dry, seriously!)
- 2 tablespoons olive oil (a good sturdy one)
- 1 teaspoon salt and 1/2 teaspoon black pepper (don’t skimp on seasoning!)
- 1 large yellow onion, chopped coarsely
- 3 cloves garlic, minced finely
- 8 ounces cremini mushrooms, sliced up (the brown ones have more flavor)
- 1 cup dry red wine (Merlot or Cab works best for me)
- 2 cups good quality chicken broth
- 2 sprigs fresh thyme (snip them right off the stem)
- 1 bay leaf (don’t forget to fish this out later!)
- 1 tablespoon thick tomato paste
Step-by-Step Instructions for Your Braised Chicken Thighs Recipe
Ready to transform these simple ingredients into the most incredible one pot chicken thighs dinner you’ve ever made? Don’t worry if you’re nervous about the browning part; that’s where all the flavor for our braised chicken thighs gets locked in! We are going to move quickly through the initial steps to build that flavor foundation, and then let the oven do the heavy lifting. You’ll be amazed how little active time this takes for such a deeply flavored result. For more speedy meals that don’t sacrifice flavor, check out my collection of quick and easy dinner recipes!
Preparation and Searing for Flavorful Braised Chicken Thighs
First things first: grab those thighs and pat them down until they are completely dry. I’m talking absolutely towel-dried! Season them generously on both sides with your salt and pepper. Now, heat your olive oil in that Dutch oven over medium-high heat—it needs to be properly hot. Place the chicken skin-side down and just let it sit there and sizzle for a good 6 to 8 minutes. No peeking! We are looking for a deep, golden-brown crust. Once they look perfect, pull those beauties out and set them aside. Leave just a tablespoon or so of that rendered chicken fat in the pot; that’s liquid gold!
Building the Red Wine Braising Liquid
Now we focus on the sauce base—this is where the flavor for the braised chicken thighs really develops. Toss your chopped onions into the heat and let them soften up for about five minutes. Then, you’ll add the minced garlic and mushrooms and cook them until they start to look lovely and brown too, maybe another five minutes. Stir in that tomato paste and cook it for just a minute until it darkens a little. Here’s the fun part: pour in your cup of red wine. Scrape up all those browned bits off the bottom—that’s called deglazing, and it’s critical! Let that wine bubble away and reduce by half before you pour in your chicken broth, thyme, and bay leaf.
The Slow Braise to Tender Braised Chicken Thighs
Time to bring the chicken home! Gently nestle those pre-seared chicken thighs back into the flavorful liquid, making absolutely sure the skin side is up and trying to stay as far out of the liquid as possible. Cover that Dutch oven tightly and slide it right into your oven, which should be preheated to 350°F (175°C). They need about 45 to 60 minutes in there. You’ll know they’re done because they will be unbelievably tender—like, fork-tender, ready-to-fall-off-the-bone tender! If your sauce seems a little thin when you pull them out, just transfer the pot back to the stove, take the chicken out, and simmer the sauce until it thickens up nicely for serving.
Tips for Success with Your Savory Chicken Recipes for Dinner
You know I always want your kitchen adventures to be a total success, especially when we’re trying to pull off something that feels a little special, like these amazing savory chicken recipes for dinner. The beauty of this braise is its flexibility, but there are two key areas where I insist you pay attention: skin crispiness and sauce thickness. If you nail those, you’ve won the dinner game!
Ingredient Notes and Substitutions for Braised Chicken Thighs
Let’s talk about backup plans! If you don’t have red wine—no panic! You absolutely can swap it for extra chicken broth mixed with a splash of balsamic vinegar. It gives you that needed acidity without the alcohol. Also, the recipe notes mention adding root vegetables if you want an all-in-one meal. If you do add carrots or potatoes, toss them in right when you add the broth so they have enough time to soften up completely during the braise. Now, if your sauce is still lagging in thickness at the end, here is my favorite little hack: whisk a teaspoon of cornstarch with a tablespoon of cold water until it’s smooth, and stir that right into the simmering sauce. It thickens up instantly! For more gravy goodness, check out my tips on making homemade brown gravy.
Serving Suggestions for Your One Pot Chicken Thighs Dinner
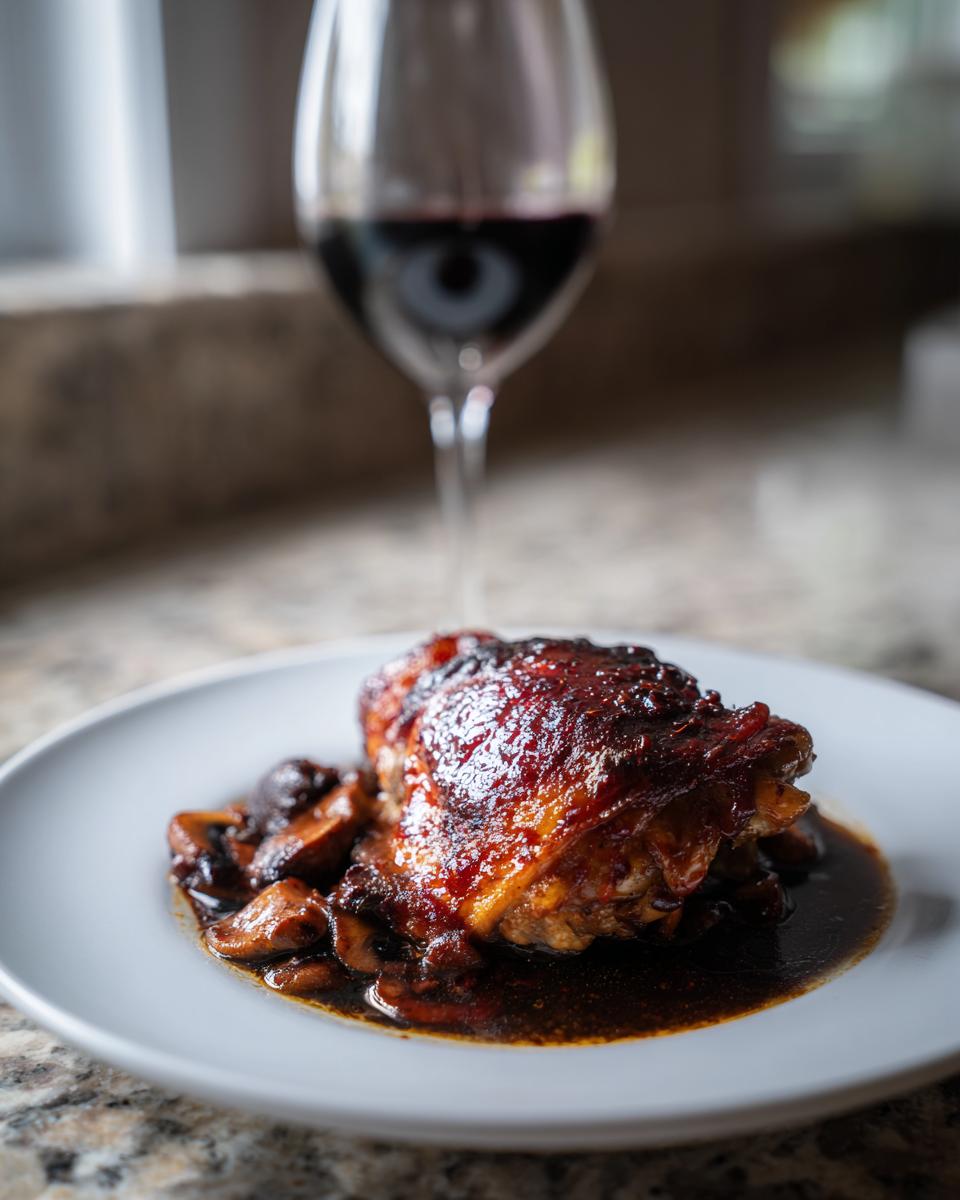
Okay, so you’ve pulled this gorgeous, tender chicken out of the oven, and you have this incredibly rich, savory sauce pooling in the bottom of your Dutch oven. What do you serve it with? My absolute favorite way to enjoy this one pot chicken thighs dinner is spooned right over something soft that can soak up every last drop of wine sauce. Mashed potatoes are classic for a reason, but don’t rule out creamy polenta or even just some nice crusty bread if you’re feeling lazy!
If you want to bulk it up even more while keeping it simple, serve it over buttered egg noodles or alongside some crusty bread. If you haven’t tried my mashed potato cakes yet, this dish is the *perfect* excuse to make them—they offer the perfect crispy exterior with a creamy heart to cradle that sauce!
Storage and Reheating: Keeping Your Braised Chicken Thighs Perfect
One of the best things about making a hearty dish like this braised chicken thighs recipe is that the leftovers are often even *better* the next day, right? The flavors really have time to meld together overnight in the fridge. When it comes to storing them, make sure everything cools down before you put it away. Scoop the chicken and sauce into an airtight container. This will keep beautifully in the refrigerator for about three to four days. I usually store the chicken and the sauce together because that rich red wine gravy is what we are really after!
Now, reheating is where we need to be careful, especially if you managed to keep *any* of that gorgeous skin semblance of crispiness. You definitely want to avoid microwaving the chicken if you can, because that just steams everything and turns the skin to rubber. I strongly recommend reheating this on the stovetop in a skillet or saucepan over low to medium heat. If you use a skillet, just add a tiny splash of extra broth or even water, and let it gently simmer until heated through. This keeps the meat tender yet gives the residual sauce a chance to warm up without getting aggressively hot.
If you absolutely must use the microwave for speed, cover the container loosely with a paper towel—this helps catch some of the steam, though it won’t bring back that sear. Reheat in short bursts, maybe 60 or 90 seconds at a time, stirring gently between bursts. For a real winner, if you plan on having leftovers, I always save a little bit of the sauce separately. Then, when reheating the chicken, you can just add a fresh spoonful of that sauce to keep things moist!
Frequently Asked Questions About Braised Chicken Thighs
I get so many great questions every time I post about one of my favorite braised chicken thighs recipe variations! It stands to reason—we all want that perfect combination of easy cleanup and gourmet-tasting results. Here are a few things you ask me about most often when you’re planning your weeknight chicken dinner ideas.
Can I make these braised chicken thighs in a slow cooker?
Oh, that’s a great question about using your slow cooker for slow cooker chicken thigh recipes! You absolutely can, but I really, *really* recommend you do the searing step in a separate skillet first. That crisp skin won’t happen at the bottom of the slow cooker, trust me. After you get that beautiful brown crust, transfer the thighs to the slow cooker and tuck them into your veggies and liquid. Since the lid seals better on a slow cooker than a Dutch oven, you might want to reduce the total liquid slightly, maybe by half a cup, just so you don’t end up with too much thin broth.
How do I ensure the meat is ‘fall off the bone chicken thighs’ tender?
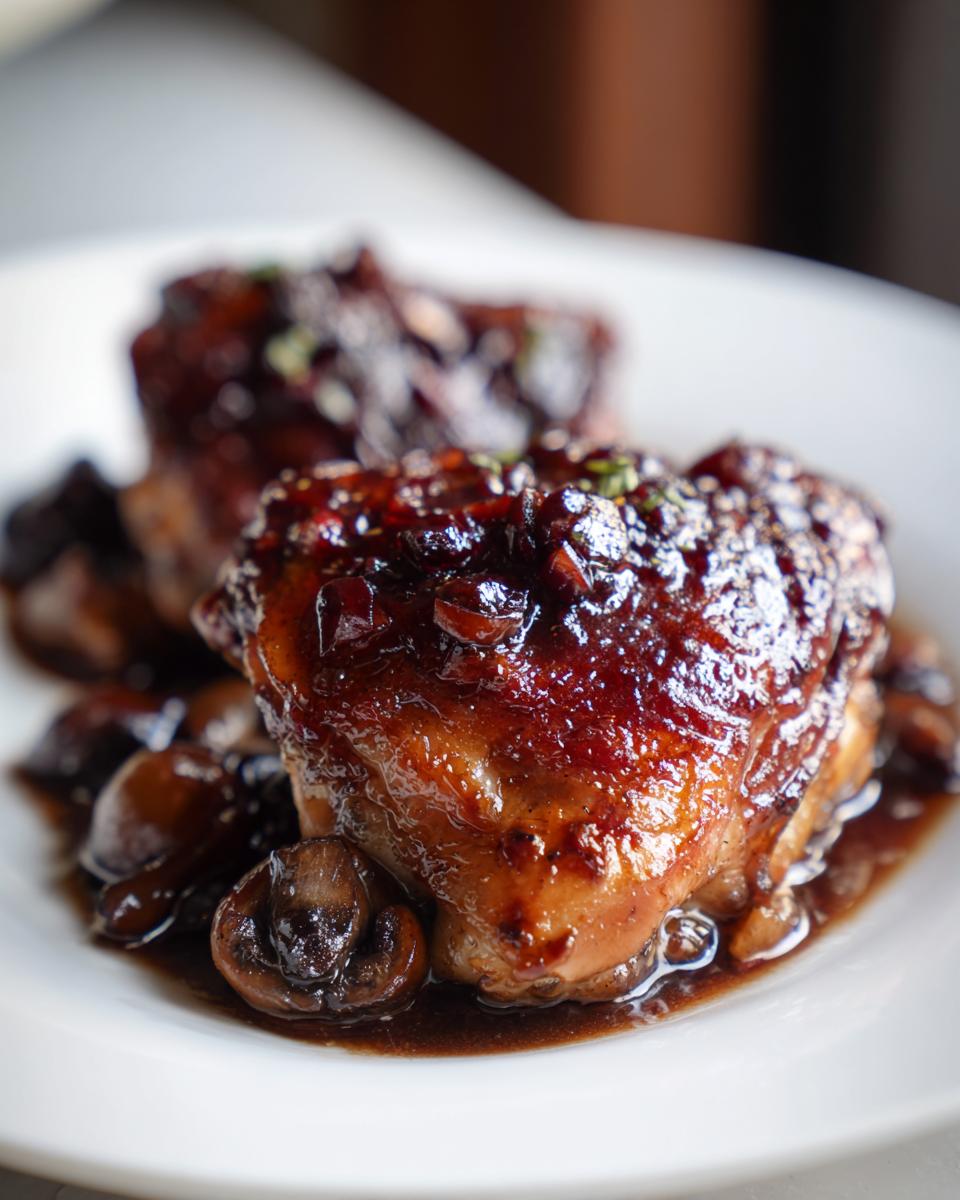
This is the true test of a good braise! We aren’t aiming for a specific minute mark; we are aiming for texture. The key to achieving those magical fall off the bone chicken thighs is maintaining a steady, gentle heat—which is why 350°F (175°C) works so well in the oven. When you think they are done, just poke one with a fork. If the meat gives way immediately with zero resistance and you can see the meat easily separating from the bone, it’s ready! If it’s fighting you even a little bit, put the lid back on and give it another 10 or 15 minutes. Patience is key for that ultimate tenderness!
What if I don’t have red wine for this braised chicken thighs recipe?
Don’t let a missing ingredient stop you from making this comfort food masterpiece! If you don’t have the dry red wine, you can still get that lovely acidic balance needed to tenderize the meat and deepen the sauce flavor. You can swap the wine amount with extra chicken broth mixed with about a tablespoon of balsamic vinegar. That gives you a similar dark color and tanginess. Or, if you’re feeling the bright flavors, follow the direction of the apple cider braised chicken flavor profile and use apple juice or cider instead of wine, maybe adding just a tiny splash of apple cider vinegar at the end for that necessary bite!
I hope this helps you get dinner on the table with confidence! If you’re looking for something maybe a little creamier next time, you should absolutely try my recipe for easy creamy chicken tortilla soup!
Nutrition Estimates for Red Wine Braised Chicken Thighs
I always like to give you a general idea of what you’re serving up, but remember, these figures are just estimates for the purposes of tracking. Since this recipe uses bone-in, skin-on thighs, the fat content is higher when you eat it all, but you can easily trim extra fat off before eating, or let it cool and skim the layer off the top of the sauce!
For one serving of this rich braised chicken thighs recipe (one thigh plus sauce), here is the breakdown:
- Calories: Right around 450
- Fat: About 25g (mostly healthy fats, but fat nonetheless!)
- Protein: A huge 40g to keep you full!
- Carbohydrates: Only about 12g
- Sodium: Roughly 550mg
It’s a fantastic, hearty helping of protein that satisfies that craving for rustic home cooked chicken meals without a ton of fuss!
Share Your Comfort Food Chicken Recipes
Now that you know the secret to unbelievably tender and crispy braised chicken thighs, I want to see what you create! Cooking is all about sharing joy, so please give this recipe a try and leave a comment below. Hearing how you adapted this for your family’s favorite comfort food chicken recipes truly warms my heart. I’m Sarah, and welcome to the HearthBite family—I can’t wait to connect with you! Visit the About Page to learn more about our kitchen!
Print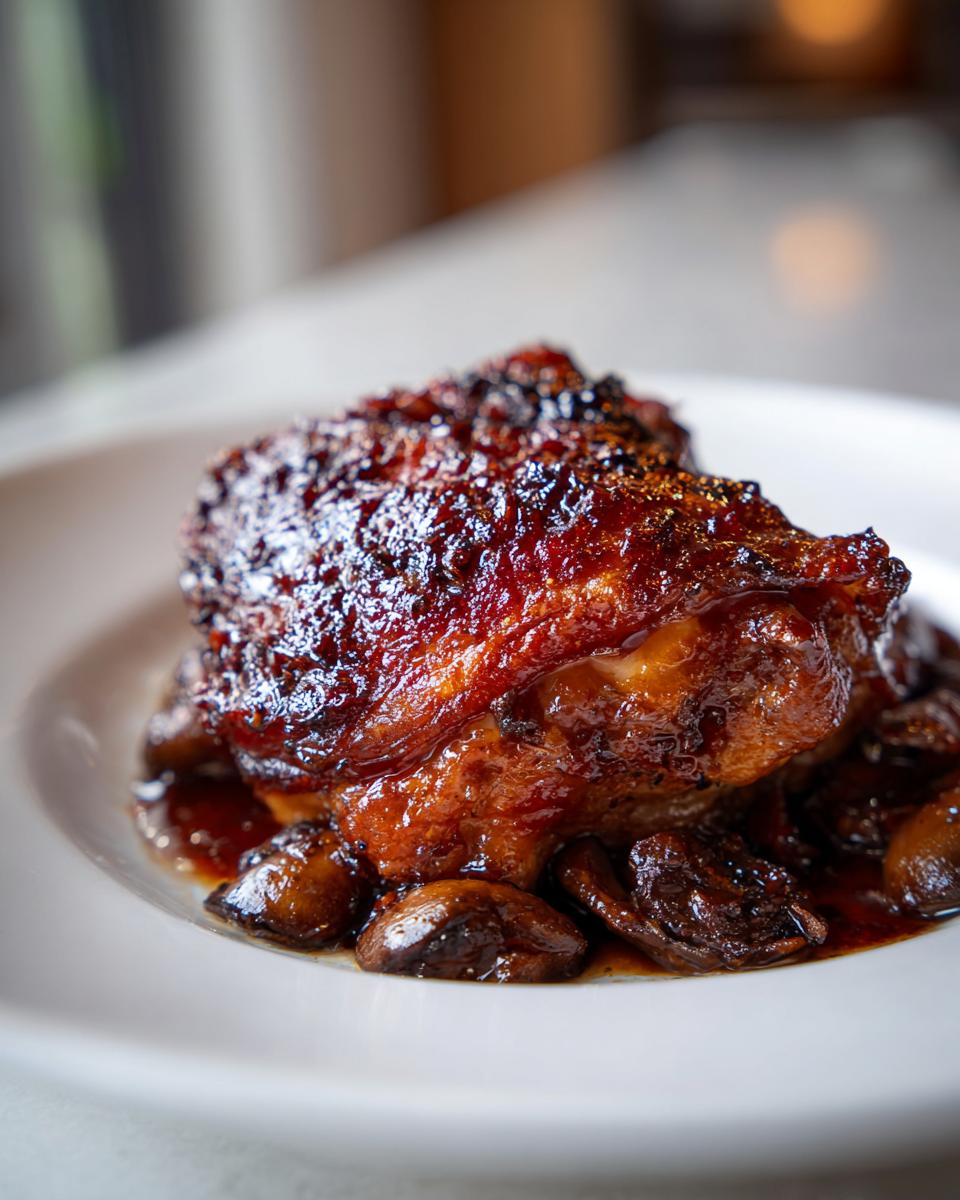
One-Pot Red Wine Braised Chicken Thighs with Crispy Skin
Make tender, fall-off-the-bone chicken thighs with a rich red wine sauce in one pot. This recipe includes a technique to keep the skin crispy before braising for a satisfying texture.
- Prep Time: 15 min
- Cook Time: 75 min
- Total Time: 90 min
- Yield: 4 servings 1x
- Category: Dinner
- Method: Braising/Stovetop to Oven
- Cuisine: American Comfort
- Diet: Low Fat
Ingredients
- 8 bone-in, skin-on chicken thighs
- 2 tablespoons olive oil
- 1 teaspoon salt
- 1/2 teaspoon black pepper
- 1 large yellow onion, chopped
- 3 cloves garlic, minced
- 8 ounces cremini mushrooms, sliced
- 1 cup dry red wine (like Cabernet Sauvignon or Merlot)
- 2 cups chicken broth
- 2 sprigs fresh thyme
- 1 bay leaf
- 1 tablespoon tomato paste
Instructions
- Pat the chicken thighs very dry with paper towels. Season both sides generously with salt and pepper.
- Heat the olive oil in a large Dutch oven or oven-safe pot over medium-high heat. Place the chicken thighs skin-side down in the hot oil. Sear for 6 to 8 minutes until the skin is deeply golden brown and crisp. Do not overcrowd the pot; work in batches if necessary. Remove the crispy chicken and set aside, leaving about 1 tablespoon of rendered fat in the pot.
- Reduce the heat to medium. Add the chopped onion to the pot and cook until softened, about 5 minutes. Add the minced garlic and sliced mushrooms and cook until the mushrooms release their liquid and start to brown, about 5 more minutes.
- Stir in the tomato paste and cook for 1 minute. Pour in the red wine, scraping up any browned bits from the bottom of the pot. Let the wine simmer and reduce by half, about 5 minutes.
- Pour in the chicken broth. Add the thyme sprigs and bay leaf. Bring the liquid to a gentle simmer.
- Nestle the seared chicken thighs back into the pot, skin-side up, ensuring the skin is mostly above the liquid level.
- Cover the Dutch oven and transfer it to a preheated oven at 350°F (175°C). Braise for 45 to 60 minutes, or until the chicken is fork-tender.
- Carefully remove the chicken thighs from the pot. If the sauce is too thin, place the pot back on the stovetop over medium heat and simmer until it thickens slightly. Remove the thyme sprigs and bay leaf before serving.
- Serve the chicken thighs immediately over mashed potatoes or polenta, spooning the rich sauce over the top.
Notes
- For the best crispy skin, ensure the chicken is completely dry before searing. Do not skip the initial searing step.
- If you prefer a thicker sauce, you can whisk 1 teaspoon of cornstarch mixed with 1 tablespoon of cold water into the simmering sauce at the end.
- This recipe works well with root vegetables like carrots or potatoes added along with the onions for a complete one-pot dinner.
Nutrition
- Serving Size: 1 thigh with sauce
- Calories: 450
- Sugar: 4
- Sodium: 550
- Fat: 25
- Saturated Fat: 7
- Unsaturated Fat: 18
- Trans Fat: 0
- Carbohydrates: 12
- Fiber: 2
- Protein: 40
- Cholesterol: 140