
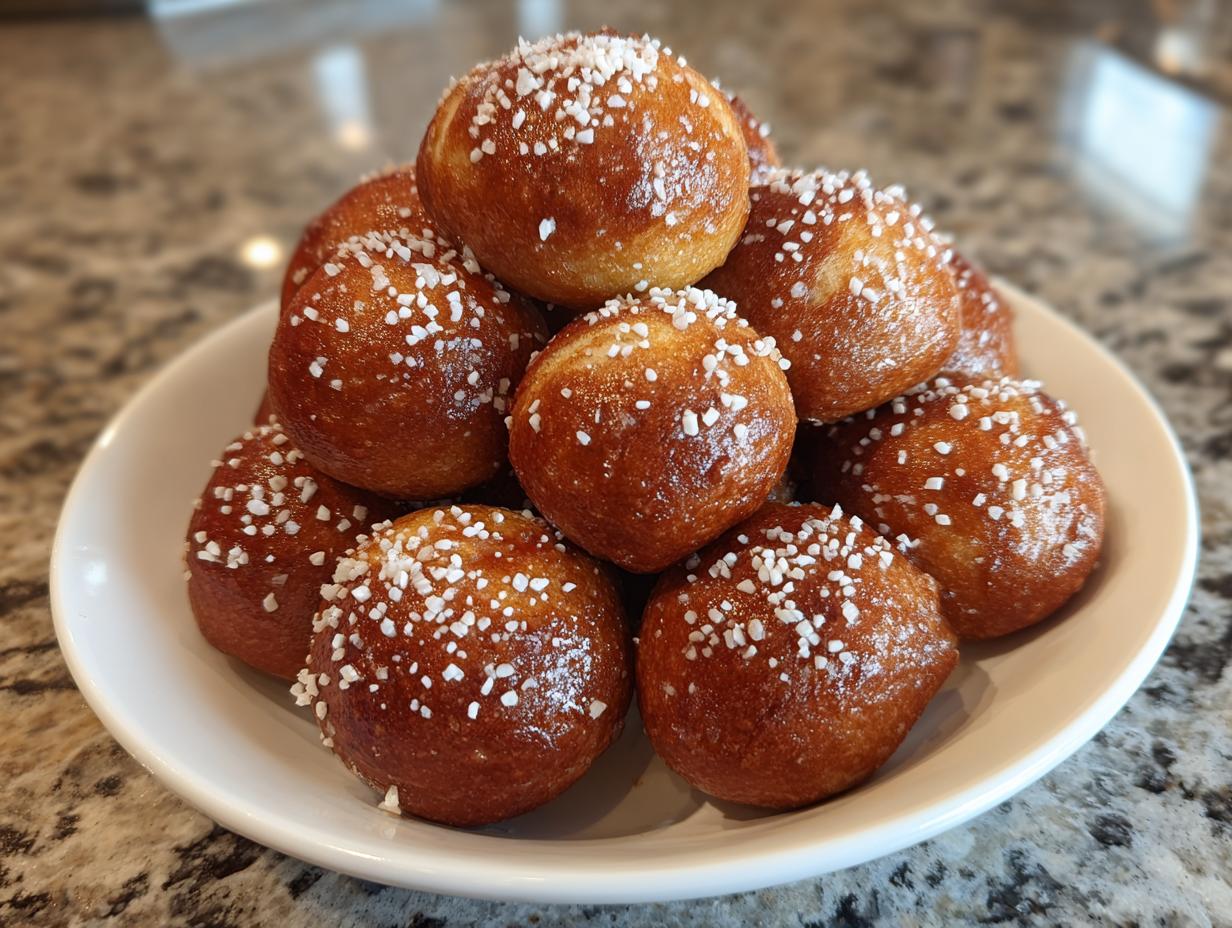
Oh, my goodness, is there anything in the world better than a warm, salty snack fresh out of the oven? I don’t think so! If you’re hunting for the absolute BEST buttery soft pretzel bites recipe out there, you’ve landed in the right spot. Forget those stiff, store-bought versions; we are making truly chewy pretzel bites today, and the secret is all in that unique, bubbly bath. Here at HearthBite, Sarah Miller always says food is our language of love, and these pretzel bites feel like the warmest hug. They are unbelievably delicious and bring that comforting, homemade magic right to your game day spread or cozy movie night. We’re going to serve these up with my incredible cheesy goodness later, but first, let’s make the dough for this ultimate addition to our favorite family meals.
- Why Our Buttery Soft Pretzel Bites Recipe Stands Out
- Essential Ingredients for Perfect Pretzel Bites
- Step-by-Step Guide to Making Homemade Pretzel Bites
- Serving Suggestions for Your Pretzel Appetizers for Parties
- Flavor Variations: Beyond Classic Salty Pretzel Bites
- Storage and Reheating Tips for Fresh Baked Pretzel Bites
- Troubleshooting Common Issues with Homemade Dough Pretzels
- Frequently Asked Questions About Pretzel Bites
- Nutritional Snapshot of These Pretzel Appetizers for Parties
Why Our Buttery Soft Pretzel Bites Recipe Stands Out
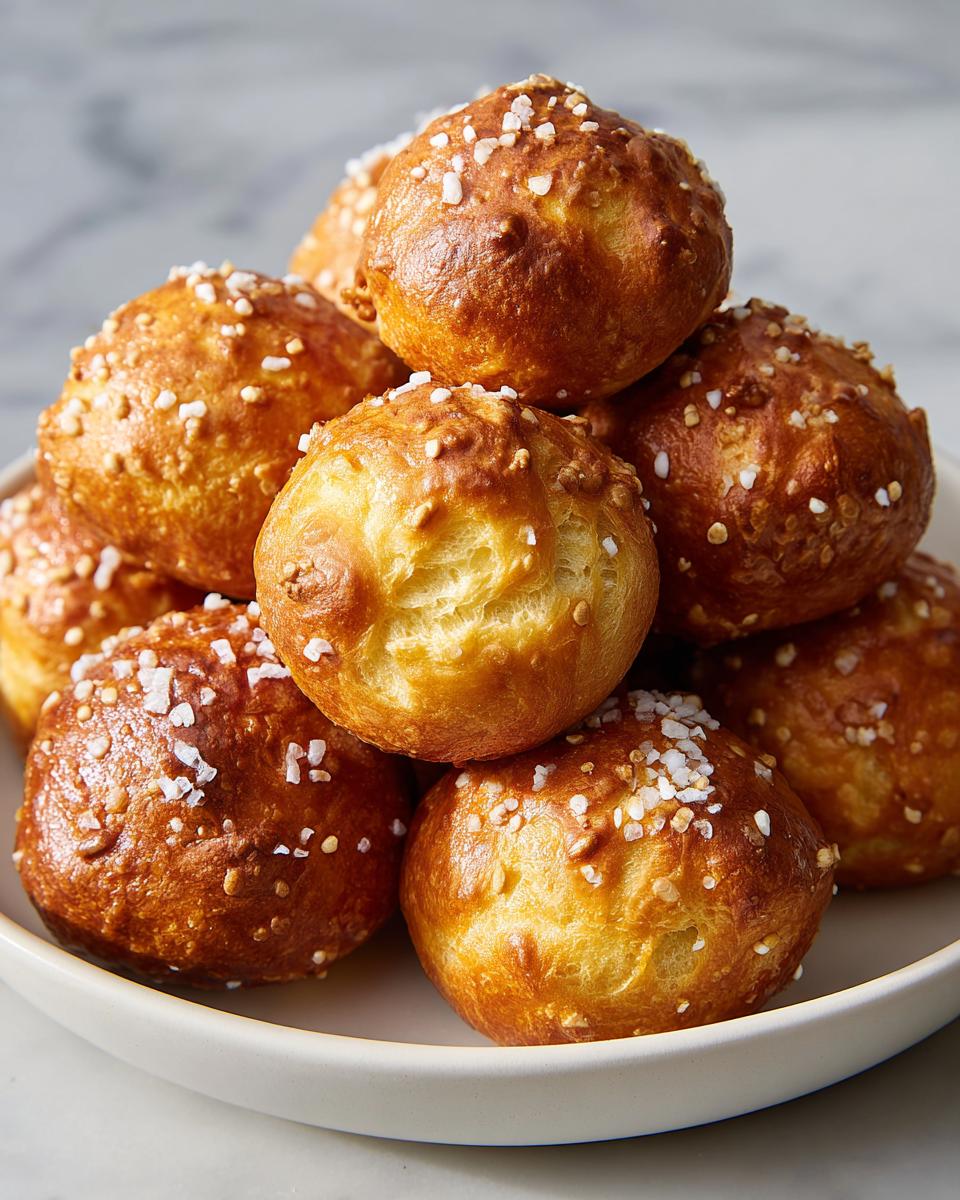
I’m telling you, these aren’t just any bread snacks; they are truly memorable! While you can definitely find other soft pretzel bites recipe instructions out there, ours focuses on creating that perfect bite every single time—soft on the inside but with the slightest, deeply colored chew on the outside. They cool down surprisingly well, making them the ultimate grab-and-go game day snacks. Plus, they use simple ingredients and come together faster than you’d think, which is why I always keep the dough instructions handy. They pair perfectly with a salty-sharp dip, or you can whip up my quick copycat nacho cheese sauce!
The real magic isn’t just in the butter wash, though that helps! It’s in the technique that ensures you get authentic pretzel flavor without needing a pretzel factory in your backyard. They’re perfect for huge crowds or just when you need a fun, warm snack right now.
Achieving That Signature Soft Pretzel Bites Texture
The whole game changes when you use the baking soda bath. Seriously, don’t skip this part! That hot water mixed high with baking soda creates an alkaline environment. This is what helps the exterior of our pretzel bites set up fast and develop that signature mahogany color and wonderfully chewy shell while the inside stays fluffy.
Also, patient resting time is key for soft pretzel bites. Letting that dough go through its first rise lets the gluten relax. That relaxation stops the dough from snapping back when you roll those ropes, giving you a much softer, more tender final product after we dip them in the bath.
Essential Ingredients for Perfect Pretzel Bites
Okay, time for the fun part: gathering our supplies! Look, these ingredients look like regular bread supplies, but using the right type of water temperature and yeast measurement is crucial if you want those perfect, puffy pretzel bites. Trust me, having everything measured out beforehand makes the process so much smoother when we get to that dough mixing stage. We need the basics, plus the magic ingredients for the boil and the brush finish.
Here’s what you’ll need on your counter before you even think about waking up that yeast:
- 1 1/2 cups warm water (about 110°F—too hot and you kill the yeast, too cool and it won’t wake up!),
- 1 packet active dry yeast (that’s exactly 2 1/4 teaspoons, measure it twice!),
- 1 teaspoon granulated sugar (this feeds the yeast, don’t skip it!),
- 3 3/4 cups all-purpose flour, plus more for dusting later,
- 1 1/2 teaspoons salt for the dough itself,
- 2 tablespoons melted unsalted butter, plus extra for brushing later,
- 1/2 cup baking soda (this is for the bath, it’s an essential chemical reaction!),
- 8 cups water (just regular tap water for the main boil), and finally,
- Coarse salt, because every good pretzel needs that satisfying chunky sprinkle on top.
Ingredient Notes and Substitutions for Pretzel Bites
While I constantly champion making these homemade dough pretzels from scratch—because nothing beats that texture—I get it; sometimes you’re in a hurry for easy homemade pretzels. If you absolutely must, you can use refrigerated biscuit dough, but I warn you, the result isn’t quite as satisfyingly chewy. It’s easier, sure, but it misses that authentic bite.
For your topping salt, go for real pretzel salt if you can find it! If you can’t, use chunky sea salt or kosher salt. Skip the fine table salt, please, or you’ll have a solid salt patch instead of those lovely little crunch points on your chewy pretzel bites.
Step-by-Step Guide to Making Homemade Pretzel Bites
Alright, roll up those sleeves! Following the ingredient prep, the fun—and the dough development—starts. The key here is patience during the rise, which gives us that beautiful, soft texture we’re after in these pretzel bites. Don’t rush anything, especially that kneading! It’s how we build structure for the chewiness.
Preparing the Soft Pretzel Dough
First, make sure your yeast is happy—that frothy layer on top of your water/sugar mix tells you it’s alive and ready to work its magic! Once you mix in the flour, the dough will look messy at first. Don’t panic! Turn it out onto your counter—give it some elbow grease and knead for about 7 minutes until it feels smooth, elastic, and stops sticking everywhere. It should feel supple, sort of like a firm stress ball. Then, tuck it into an oiled bowl, slap a clean towel over it, and let it sit somewhere warm for a full hour. This rising time is non-negotiable for truly chewy pretzel bites.
The Baking Soda Bath Pretzels Technique
This step sounds scary, but it’s SO worth it! Get your big pot of water going with all that baking soda; remember, it’s going to bubble up vigorously when it boils, so watch it carefully—we don’t want a volcanic eruption on the stove! Once it’s boiling hard, grab your dough balls (I cut mine into about 64 little pieces for perfect snacking portions) and gently drop just a few into the bath at a time. Please be careful, that water is ripping hot! You only want to leave them in there for 20 to 30 seconds total. Any longer and they start dissolving; we want that classic baking soda bath pretzels exterior, not mush!
Baking and Finishing Your Buttery Pretzel Bites
As soon as they hop out of the bath, place them on your parchment-lined sheet trays. This is the moment to work fast: brush them generously with melted butter while they are piping hot! That butter helps the coarse salt stick perfectly. Sprinkle them right away with your coarse salt. Then, they zip into a screaming hot oven—450°F!
Bake them for about 10 to 12 minutes. I always make sure to rotate the pans halfway through so every one of these precious buttery pretzel bites gets that gorgeous, even golden-brown coloring. Once they come out, they smell incredible! You should check out my tips on making protein bars just to appreciate a dough that *doesn’t* need a boiling bath!
Serving Suggestions for Your Pretzel Appetizers for Parties
Okay, don’t let these beautiful buttery pretzel bites sit around lonely on the platter! They absolutely cry out for a great dip. These are my famous game day snacks for a reason, and the dips are half the fun! My absolute favorite pairing is a super sharp cheese sauce; I’ve got a killer recipe for an easy 15-minute beer cheese dip that you just have to try alongside these warm, salty treats.
For something slightly different, a tangy honey mustard is always a winner. Or, if you’re feeling really bold, try my cowboy butter dipping sauce—it’s got a little kick that cuts through the richness of the butter so nicely. I promise, the first time I brought these to a neighborhood Super Bowl party, people asked for the dip recipe before they even asked for the pretzel recipe! You can see how popular soft pretzel dip ideas are when you look around, but trust me, skip the jarred stuff and make a fresh pot!
If you’re looking for more inspiration on classic party spreads, I always recommend checking out where I first saw someone serving up killer homemade ones like these, like this idea here.
Flavor Variations: Beyond Classic Salty Pretzel Bites
So, you’ve mastered the perfect salty, buttery bite, but maybe you want to switch things up for your next crowd? That’s exactly what I love about this dough base—it’s a chameleon! We don’t have to stop at coarse salt, even though I adore it. If you want something truly decadent, try the sweet route! Toss those hot, buttered balls in a mixture of cinnamon and sugar for amazing cinnamon sugar pretzel bites.
Oh, and for my fellow savory sweethearts, you MUST try the Parmesan twist. After they come out of the oven, while they are still glistening with butter, toss them immediately with grated Parmesan and maybe a pinch of garlic powder. They become these incredible garlic parmesan pretzel bites that taste amazing dipped in marinara, or you can check out my favorite garlic parmesan flavors elsewhere on the site!
It’s so much fun to offer a mix on the platter! You can even see how other food bloggers like to dress theirs up; grab some inspiration over here for more ideas once you master the basic bake!
Storage and Reheating Tips for Fresh Baked Pretzel Bites
I know you won’t be able to stop eating these right away, but if you somehow have leftovers of these fresh baked pretzel bites, we need to talk about storage! Yeast snacks go stale faster than you think. The absolute best way to keep them soft is in an airtight container at room temperature for about two days. Do not fridge them, please! Refrigeration makes bread hard, and we want chewy, not crusty.
When you’re ready for round two, the reheating process matters! The microwave works in a pinch for just a few bites—zap them for maybe 10 seconds. Honestly, though, for the best texture restoration, pop them on a baking sheet at 350°F for about 4 or 5 minutes. That little blast of oven heat reminds them they are supposed to be warm and wonderfully soft again!
Troubleshooting Common Issues with Homemade Dough Pretzels
Even though this recipe for easy homemade pretzels is pretty foolproof, sometimes kitchen gremlins pop up! If your dough feels way too sticky after kneading, just add flour one tablespoon at a time. Don’t dump a whole cup in, or you’ll end up with tough bread bites! If your pretzel bites are coming out pale after the bath, chances are your baking soda water wasn’t quite hot enough, or you boiled them for way too short a time. They need that alkaline hit!
If you find your bites keep sinking into the boiling bath, that means your dough balls were too large, or you might have over-proofed the dough before you cut them. Next time, make sure you stick to the 64-piece division! For more deep dives on dough issues, sometimes I reference the tips on how others tackle dough challenges, but honestly, mastering the yeast is half the battle.
If you’re curious about bread making in general, check out my ultra-reliable method for crusty bread—it really helps build your dough confidence!
Frequently Asked Questions About Pretzel Bites
Can I skip the baking soda bath for these pretzel bites?
Oh, I really, really advise against skipping it! That step is the whole reason we get that characteristic, satisfyingly chewy pretzel texture and the lovely browned crust. If you skip the baking soda bath, you’ll end up with more like soft, boiled bread balls—still tasty, sure, but not a true soft pretzel experience. If you are in a massive hurry for quick pretzel snacks, maybe use the biscuit dough shortcut I mentioned earlier, but for the real deal, the bath is a must.
How long do these soft pretzel bites stay soft once they cool down?
Because we use such a rich, buttery dough, they stay wonderfully soft for quite a while, especially compared to regular bread recipes. If you keep them airtight, they are fantastic the day you bake them, naturally. They should still be nicely pliable the second day. After that, they firm up a little, but proper reheating, which I detail above, brings them right back to life. They are definitely best served warm!
Can I freeze these pretzel bites if I make a huge batch?
Yes, you absolutely can freeze them! If you make a huge batch for your next big event, let them cool completely first. Then, place them in a freezer bag, making sure to put parchment paper sheets between layers so they don’t all fuse into one giant pretzel clump. When you reheat them in the oven, they come out tasting almost exactly like fresh baked pretzel bites. It’s a great trick when planning snack recipes for crowds!
Is there a way to make these even faster than the stated time?
The dough rising takes up the bulk of the time, clocking us around the 1 hour mark before we even boil them. If you need speed, use the canned biscuit dough trick, which cuts the prep down significantly, maybe leaving you with just 30 minutes total time. However, if you stick to the from-scratch route, the best way to save time is to set up your boiling station while the dough is rising, so you are ready to go the second that hour is up. Need some quick and easy dinner recipes later? I have those too! Check out my speedy dinner ideas for another time!
Nutritional Snapshot of These Pretzel Appetizers for Parties
Okay, deep breath, I’m definitely not a dietitian, so treat these numbers as a happy estimate based on 8 bites per serving for the entire recipe yield. Since these are wonderful pretzel appetizers for parties, we usually just graze, but it’s good to know what we’re dealing with!
When divided into 8 servings (that’s 8 bites per person), here’s the general idea:
- Calories: Around 210
- Fat: About 4g
- Protein: Around 5g
- Carbohydrates: Roughly 40g
- Sodium: This one is higher, hovering around 450mg because of the salt topping!
If you are looking for lighter options for weekday meals, you should browse my section on healthy lunch recipes!
PrintThe BEST Buttery Soft Pretzel Bites with Baking Soda Bath

Make irresistible, chewy soft pretzel bites at home. This recipe uses a simple dough and a baking soda bath for authentic texture, perfect as a game day snack or party appetizer.
- Prep Time: 20 min
- Cook Time: 15 min
- Total Time: 1 hour 35 min
- Yield: 64 bites 1x
- Category: Appetizer
- Method: Boiling and Baking
- Cuisine: American
- Diet: Vegetarian
Ingredients
- 1 1/2 cups warm water (about 110°F)
- 1 packet active dry yeast (2 1/4 teaspoons)
- 1 teaspoon granulated sugar
- 3 3/4 cups all-purpose flour, plus more for dusting
- 1 1/2 teaspoons salt
- 2 tablespoons melted unsalted butter, plus more for brushing
- 1/2 cup baking soda
- 8 cups water (for boiling bath)
- Coarse salt, for topping
Instructions
- Combine the warm water, yeast, and sugar in a large bowl. Let stand for 5 to 10 minutes until foamy.
- In a separate bowl, whisk together the flour and salt.
- Add the melted butter and half of the flour mixture to the yeast mixture. Mix until just combined. Gradually add the remaining flour until a shaggy dough forms.
- Turn the dough out onto a lightly floured surface and knead for 5 to 7 minutes until smooth and elastic.
- Place the dough in a lightly oiled bowl, turning to coat. Cover the bowl and let the dough rise in a warm place for 1 hour, or until doubled in size.
- Preheat your oven to 450°F (232°C). Line two baking sheets with parchment paper.
- Bring the 8 cups of water and 1/2 cup of baking soda to a boil in a large, wide pot.
- Punch down the risen dough. Divide the dough into 8 equal pieces. Roll each piece into a long rope, about 1 inch thick. Cut each rope into 8 equal pieces to form 64 small dough balls.
- Working in batches, carefully drop 4 to 6 dough pieces into the boiling baking soda bath for 20 to 30 seconds, flipping once. Do not overcook.
- Use a slotted spoon to remove the dough pieces and place them on the prepared baking sheets.
- Brush the tops of the boiled dough pieces generously with melted butter. Sprinkle immediately with coarse salt.
- Bake for 10 to 12 minutes, rotating pans halfway through, until golden brown.
- Serve warm with your favorite dips, like cheese sauce or honey mustard.
Notes
- For a sweet variation, skip the coarse salt and toss the warm bites in cinnamon sugar after brushing with butter.
- If you want a savory Garlic Parmesan flavor, brush the baked bites with melted butter and toss with a mixture of grated Parmesan cheese and garlic powder.
- You can use store-bought biscuit dough for a quicker option, but the texture will be less authentic than using homemade dough.
Nutrition
- Serving Size: 8 bites
- Calories: 210
- Sugar: 1
- Sodium: 450
- Fat: 4
- Saturated Fat: 2
- Unsaturated Fat: 2
- Trans Fat: 0
- Carbohydrates: 40
- Fiber: 1
- Protein: 5
- Cholesterol: 5