
I remember staring at those perfectly uniform, slightly plastic-tasting slices from the grocery store, thinking, “There has to be a better way.” For me, a happy home needs real bread, and that’s why mastering the Soft Sourdough Sandwich Bread became an obsession. We started HearthBite because we believe the best memories are made around the table, and nothing elevates a simple family lunch like bread made with natural yeast. This recipe is my answer to everyday baking; it’s reliable, gut-friendly, and gives you that pillowy interior you just can’t find pre-sliced. If you’re ready to ditch the plastic wrap and bring that comforting aroma back into your kitchen, you are in the right place. You can learn more about our philosophy here: Sarah Miller’s Journey.
- Why This Soft Sourdough Sandwich Bread is Perfect for Families
- Essential Ingredients for Your Soft Sourdough Sandwich Bread
- Equipment Needed for Artisan Sandwich Bread Baking
- Step-by-Step Method for Soft Sourdough Sandwich Bread
- Baking Temperatures for the Ideal Soft Crust Bread
- Tips for Success with Soft Sourdough Sandwich Bread
- Storing and Reheating Your Pillowy Sourdough
- Troubleshooting Common Soft Sourdough Sandwich Bread Issues
- Frequently Asked Questions About This Sourdough Sandwich Loaf
Why This Soft Sourdough Sandwich Bread is Perfect for Families
If you’re like me, you want that whole-wheat goodness of comfort food recipes but need something that holds up to PB&J squishing. This recipe delivers that ideal balance.
- It’s genuinely gut-friendly because we use only natural yeast bread methods.
- The structure is reliable; it slices beautifully without tearing up, unlike some rustic boules.
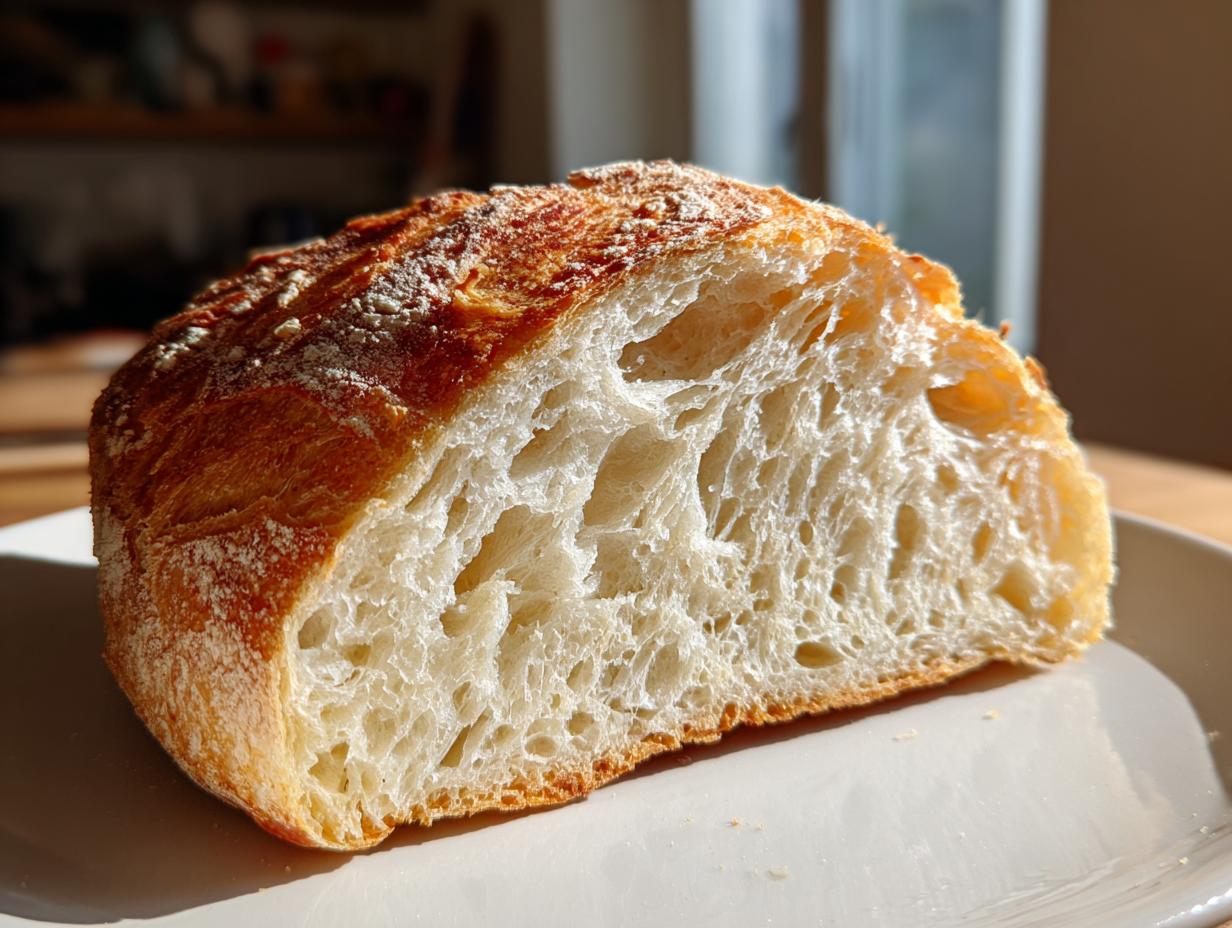
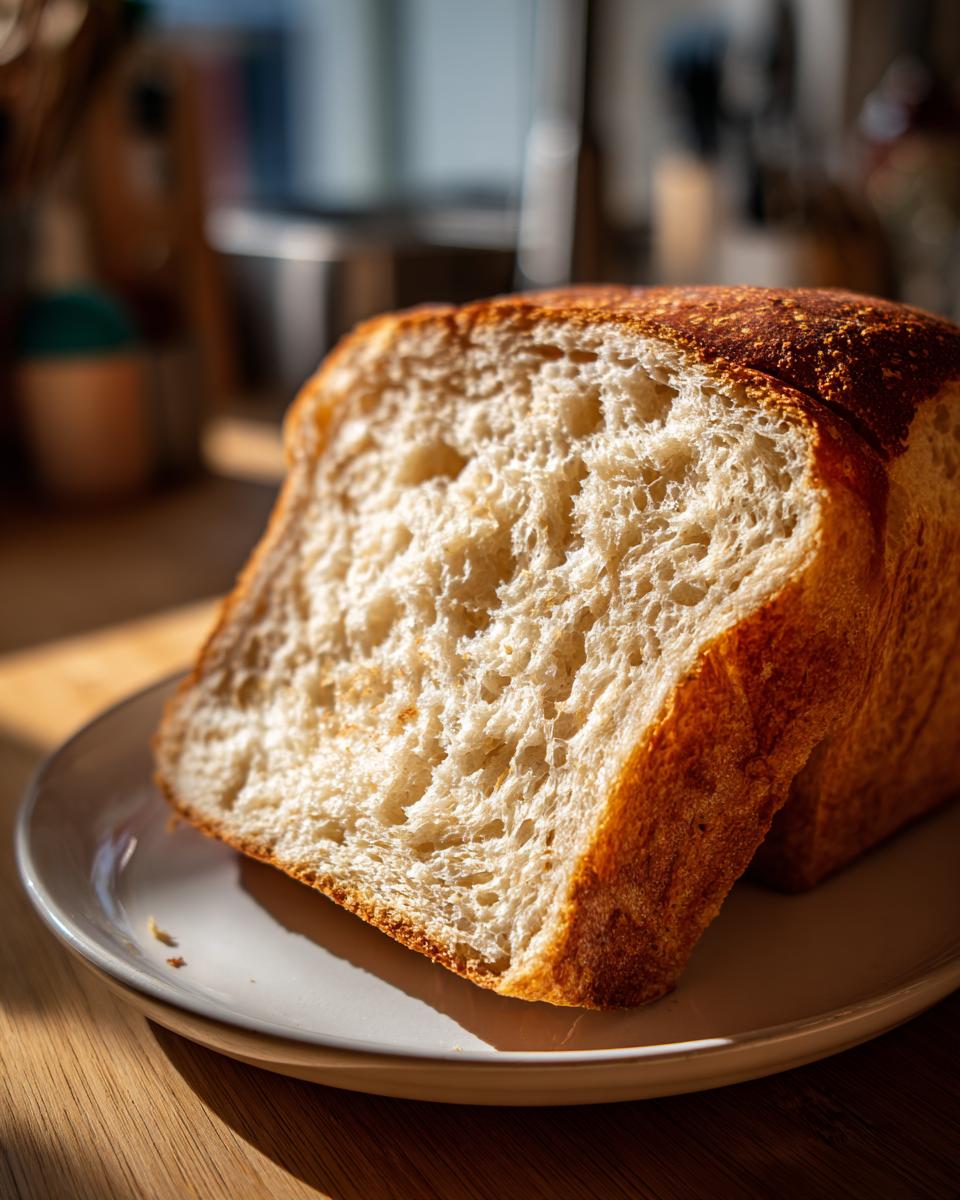
- You get that luxurious, pillowy sourdough crumb that makes even plain toast magical.

Achieving That Perfect Soft Crust Bread Texture
Forget those hard, crackly artisan loaves for a minute—this isn’t that kind of bread! We are aiming for soft crust bread here. The trick is using a standard loaf pan which contains the dough during baking, preventing excessive oven spring and crust development. The final proofing stage is also non-negotiable; it ensures the dough is light enough, so the starches set into something tender, not dense.
Essential Ingredients for Your Soft Sourdough Sandwich Bread
I’ve learned over the years that you can’t fake good sourdough, no matter how much you wiggle the measurements around. For this sourdough sandwich loaf to work its magic, everything needs to be right, especially the flour. You only need four things, but their quality really matters for that final structure.
- 100g active sourdough starter
- 375g warm water (about 85°F)
- 500g bread flour
- 10g fine sea salt
Ingredient Notes and Flour Selection
Make sure that 100g of starter is truly active—it should double in size within four to five hours when fed. That’s your engine! For the flour, please, please use a high-protein bread flour. It gives the artisan sandwich bread the strength it needs to rise tall in that pan instead of collapsing into a sad, flat disc.
Equipment Needed for Artisan Sandwich Bread Baking
You don’t need a fancy Dutch oven or a lame for this loaf! Since we are aiming for that easy, routine bake for daily sandwiches, the tools are pretty straightforward. Having these items ready makes the process so much smoother, trust me.
- Large mixing bowl (one big enough to comfortably stretch and fold the dough inside)
- A 9×5 inch standard loaf pan (this shape is key for the final sandwich loaf structure)
- A cooling rack. This is essential! Don’t even think about slicing this bread until it’s completely cool.
- Plastic wrap or a clean kitchen towel for covering the dough during proofing.
If you ever have questions about substitutions or need to get in touch about a recipe, please don’t hesitate to reach out to us here: Contact HearthBite.
Step-by-Step Method for Soft Sourdough Sandwich Bread
This is where the magic happens, and honestly, it’s mostly waiting! I always tell people that sourdough is more about gentle management than heavy kneading. We are going to coax this dough into shape over several hours. You’ll see how this no-knead method produces amazing results, far better than what you’d get trying to rush a traditional loaf like my easy crusty Italian bread recipe. Keep your bowl handy and have a timer set!
Mixing and Autolyse for Better Soft Sourdough Sandwich Bread
Start by mixing that bubbly, active starter right into the warm water until it dissolves a bit. Then, dump in all your bread flour and the salt. Don’t overthink it! Just mix it by hand until there are absolutely no dry patches of flour left. It will look rough—shaggy, we call it. Cover that bowl up and let it chill out for 30 minutes. This rest time, the autolyse, lets the flour soak up the water, making it ready to develop strength without any work from you.
Building Structure with Stretch and Folds
Now for the gentle work. We need four rounds of stretch and folds, spaced exactly 30 minutes apart. Slide your hand under one side of the dough, stretch it up gently, and fold it right over the top of itself. Turn the bowl 90 degrees and repeat three more times. That’s one set! After the fourth set, the dough should look noticeably smoother and hold its shape better in the bowl. Give it one final hour of rest after that to let the gluten really settle in.
Shaping and Proofing Your Natural Yeast Bread
Time to shape it for the pan! Turn the dough out onto a lightly floured counter. Gently stretch it into a rough rectangle, then shape it into a tight log, pulling the outside edges in so you get some surface tension on the top. Place that log seam-side down into your floured 9×5 pan. Cover it loosely and let it proof—usually two to four hours. You’re done when it’s risen about 50% and passes the poke test: poke it gently, and the indentation should slowly, slowly fill itself back in. Don’t let it fully spring back, or you’ll overproof it!
Baking Temperatures for the Ideal Soft Crust Bread
This two-step temperature dance is crucial for making sure the inside cooks through while keeping the crust soft—it prevents drying out! First, you need that big blast of heat. Get your oven blazing hot to 450°F (232°C) with your baking surface already inside. Place your lightly proofed loaf right into the oven, and almost immediately, drop that temperature down to 425°F (220°C). After twenty minutes, lower it again to 375°F (190°C) for the remaining bake time.
My kitchen rule? Always use an instant-read thermometer if you want mastery over your bake! You’re looking for that internal temperature to hit 205°F (96°C). That magic number assures me the starches have set perfectly. If you check out my recipe for homemade bread bowls, you’ll see I apply similar temp logic there too. Knowing the internal temp takes all the guesswork out of whether your bread might look golden but still be gummy inside!
Tips for Success with Soft Sourdough Sandwich Bread
Making this loaf successful day after day is totally doable, but a couple of little tricks make the difference between good and *great*. If you want that final slice to practically melt in your mouth, you absolutely have to brush the top with a little melted butter right as it comes out of the oven. It’s a small step, but it locks in moisture and really seals the deal on that soft crust bread texture.

I remember one week when my kitchen felt unusually warm—I mean humid! My dough looked much wetter than usual after the bulk fermentation, and I almost panicked, thinking I ruined my batch by mistake. What I did was add maybe 10 extra grams of flour during the shaping stage, just enough to make it manageable but not enough to compact the crumb. Don’t be afraid to adjust based on your environment; that’s what separates the recipe follower from the real home cook. If you’re looking for more ways to use that starter, check out my sourdough discard rolls recipes!
Storing and Reheating Your Pillowy Sourdough
Okay, the hardest part is waiting for it to cool completely, but trust me, slicing into this pillowy sourdough warm guarantees gummy frustration. Once it’s totally cool—and I mean *totally*—you need to store it smartly so it stays soft for those important family sandwiches all week long. My biggest piece of advice? Try to keep it out of the fridge!
Refrigeration is the enemy of soft bread; it makes it stale much faster, even if it feels firm. I wrap my cooled loaf tightly in plastic wrap first, and then slip that into a paper bag or a breathable bread box. This keeps the moisture in but lets the crust breathe just a tiny bit.
If you notice it stiffening up on day two, don’t toss it! We rescue bread all the time here. A quick zip in the microwave—just 10 seconds—works wonders to revive the softness, or you can reheat a full slice for 5 minutes at 300°F. If you’ve got leftovers that are truly old, I highly recommend turning them into something cozy, like the crumbs for my date nut bread toppings. It just feels right to use every last bite!
Troubleshooting Common Soft Sourdough Sandwich Bread Issues
Even with the best methods, sometimes a loaf doesn’t look exactly like the picture, right? That’s okay! Troubleshooting is part of learning to bake with natural yeast bread. If your loaf ends up too dense, it usually means your starter wasn’t quite strong enough, or you rushed the bulk fermentation phase. Don’t worry; just make sure your starter is doubling reliably next time.
When it comes to slicing, if it squishes down instead of cutting cleanly, you didn’t let it cool long enough. I know you want that sandwich right away, but patience is key! If you get too much spread in the pan, try shaping your log a little tighter during the final shaping stage. A tight skin on the dough helps it hold its structure against the pan walls!
Frequently Asked Questions About This Sourdough Sandwich Loaf
I get so many messages asking about timing and adjustments, so let’s clear up a few things! Baking with natural yeast bread always comes with a few variables, usually depending on how warm your kitchen is that day. I promise, once you get the feel for this reliable recipe, it’s going to become a staple for your family breakfasts and lunches. If you’re looking for more easy meal ideas, I always keep my favorite easy breakfast recipes bookmarked!
Can I use discard instead of active starter for this Soft Sourdough Sandwich Bread?
Oh, that’s a common question! For this specific format—where we need major oven spring and structure—you really need an active starter that has recently doubled. Discard rarely has the strength to lift this whole loaf properly, and you’ll likely end up with a dense brick instead of our beautiful soft sourdough sandwich bread. Wait until your starter is bubbly and ready to peak!
What is the best way to get a uniform slice from this artisan sandwich bread?
This is all about patience, honey! If you try to slice the bread while it’s even slightly warm, the steam inside turns the starches gummy, and your knife will just tear through it, leaving you with crumbs instead of usable slices of artisan sandwich bread. You absolutely must let it cool completely—I mean, three or four hours on the rack—before you even touch it with a serrated knife. Once it’s totally cool, the structure is set, and it cuts beautifully.
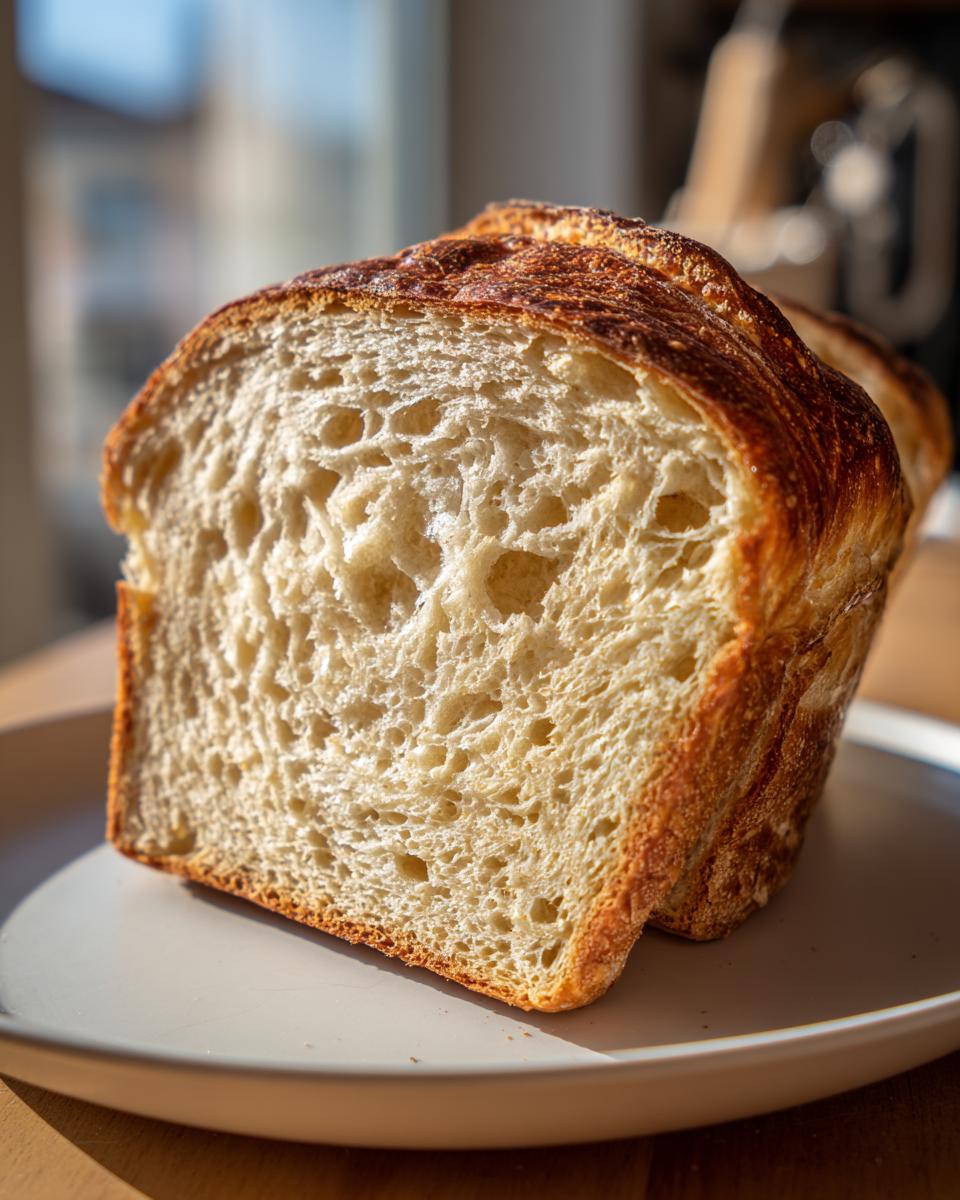
PrintSoft Sourdough Sandwich Bread for Family Sandwiches

Bake a pillowy sourdough sandwich loaf using natural yeast bread methods. This recipe yields soft crust bread perfect for daily family meals.
- Prep Time: 30 min
- Cook Time: 45 min
- Total Time: 5 hours 45 min
- Yield: 1 loaf 1x
- Category: Baking
- Method: No-Knead Baking
- Cuisine: American
- Diet: Vegetarian
Ingredients
- 100g active sourdough starter
- 375g warm water (about 85°F)
- 500g bread flour
- 10g fine sea salt
Instructions
- Mix the active sourdough starter and warm water in a large bowl until combined.
- Add the bread flour and salt to the wet ingredients. Mix by hand until a shaggy dough forms and no dry flour remains.
- Cover the bowl and let the dough rest for 30 minutes (autolyse).
- Perform four sets of stretch and folds, spaced 30 minutes apart. Gently stretch a portion of the dough up and fold it over itself, rotating the bowl after each fold.
- After the final set of folds, let the dough rest, covered, for 1 hour at room temperature.
- Shape the dough into a tight log and place it seam-side up in a lightly floured 9×5 inch loaf pan.
- Cover the pan loosely and allow the dough to proof at room temperature for 2 to 4 hours, or until it has increased in volume by about 50% and passes the poke test (a gentle poke leaves an indentation that slowly springs back).
- Preheat your oven to 450°F (232°C) with a baking stone or steel inside, if using.
- Place the loaf pan into the preheated oven. Immediately reduce the oven temperature to 425°F (220°C).
- Bake for 20 minutes. Then, reduce the temperature to 375°F (190°C) and continue baking for another 20 to 25 minutes, until the crust is golden brown and the internal temperature reaches 205°F (96°C).
- Remove the bread from the pan immediately and cool completely on a wire rack before slicing for your family sandwiches.
Notes
- For an extra soft crust, brush the top of the loaf lightly with melted butter immediately after removing it from the oven.
- Use high-quality bread flour to achieve the best structure for this artisan sandwich bread.
- If your kitchen is cool, place the dough in a slightly warmer spot during bulk fermentation to maintain activity.
Nutrition
- Serving Size: 1 slice
- Calories: 250
- Sugar: 1
- Sodium: 300
- Fat: 1
- Saturated Fat: 0
- Unsaturated Fat: 1
- Trans Fat: 0
- Carbohydrates: 52
- Fiber: 3
- Protein: 10
- Cholesterol: 0