
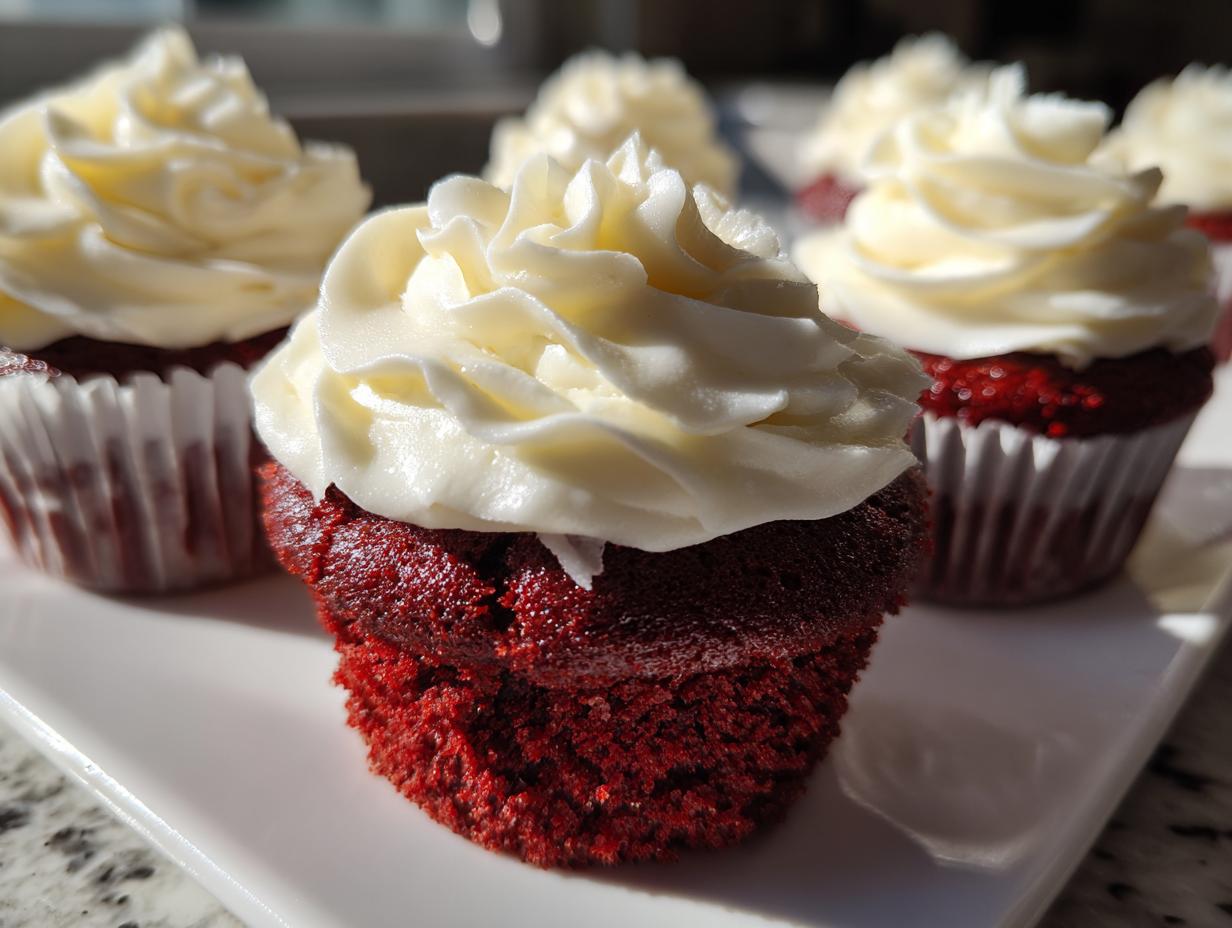
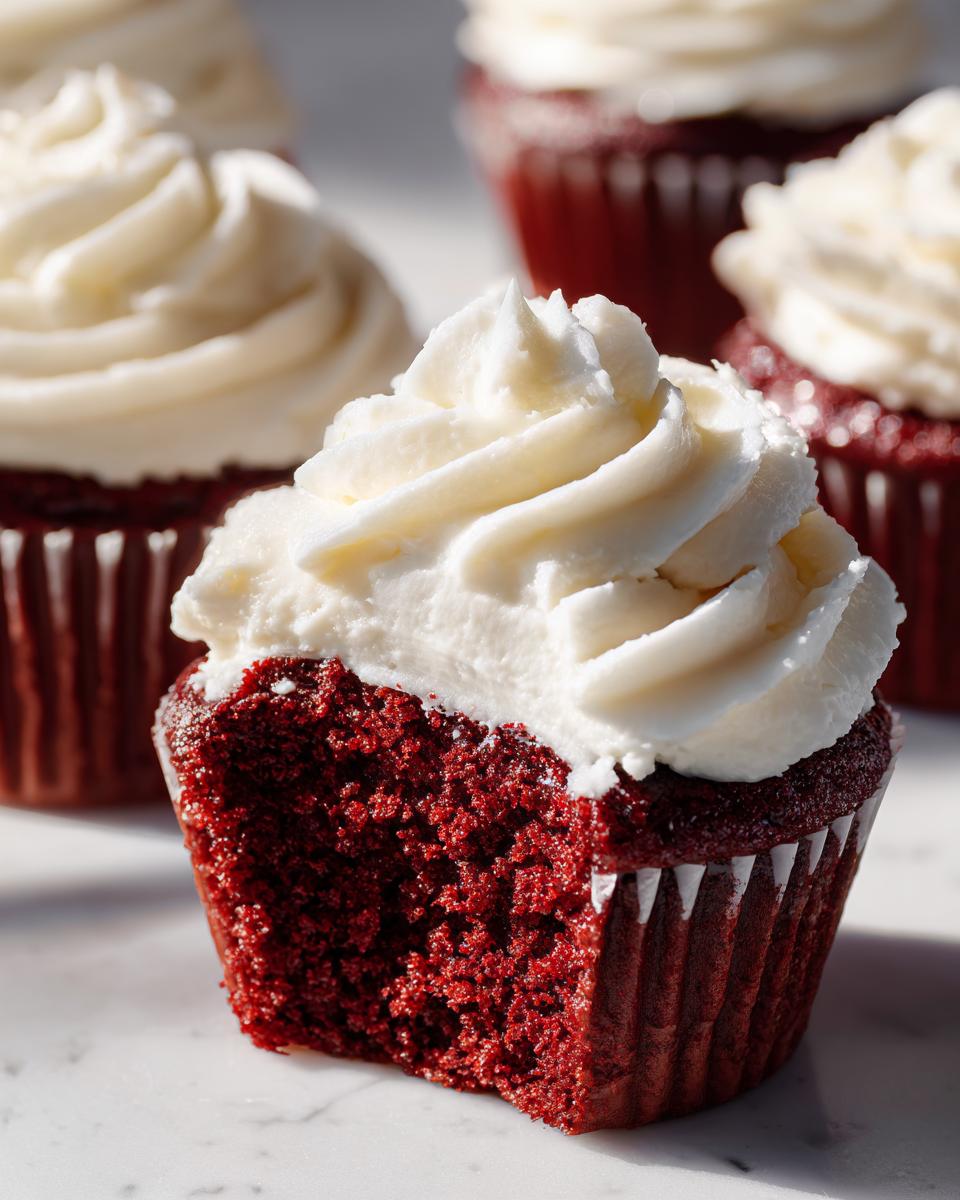
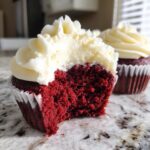
There’s just something magical about a classic dessert that truly stands the test of time, isn’t there? I’m talking about that quintessential Southern treat that demands attention: the red velvet cupcakes. For years, I tested and fussed because I didn’t just want a good cupcake; I wanted the absolute best—the kind that has that gorgeous, ultra-moist, velvety crumb you find at the most beloved bakeries. This recipe, I promise you, is it! Here at HearthBite, my goal is always to give you real, reliable comfort food that works every single time, and these decadent red velvet treats are the culmination of that search. If you love sinking into those deeply comforting flavors, you’ll want to check out all our comfort food recipes too. Get ready to bake something absolutely show-stopping.
- Why These Red Velvet Cupcakes Are The Ultimate Dessert
- Ingredients for Moist Red Velvet Cupcakes
- Step-by-Step Instructions for Homemade Red Velvet Cupcakes From Scratch
- Crafting the Best Cream Cheese Frosting for Red Velvet
- Tips for Perfect Red Velvet Cupcakes Every Time
- Serving and Storing Your Red Velvet Cupcakes
- Frequently Asked Questions About Red Velvet Cupcakes
- Estimated Nutrition for These Decadent Red Velvet Treats
- Share Your Red Velvet Cupcakes Creations
Why These Red Velvet Cupcakes Are The Ultimate Dessert
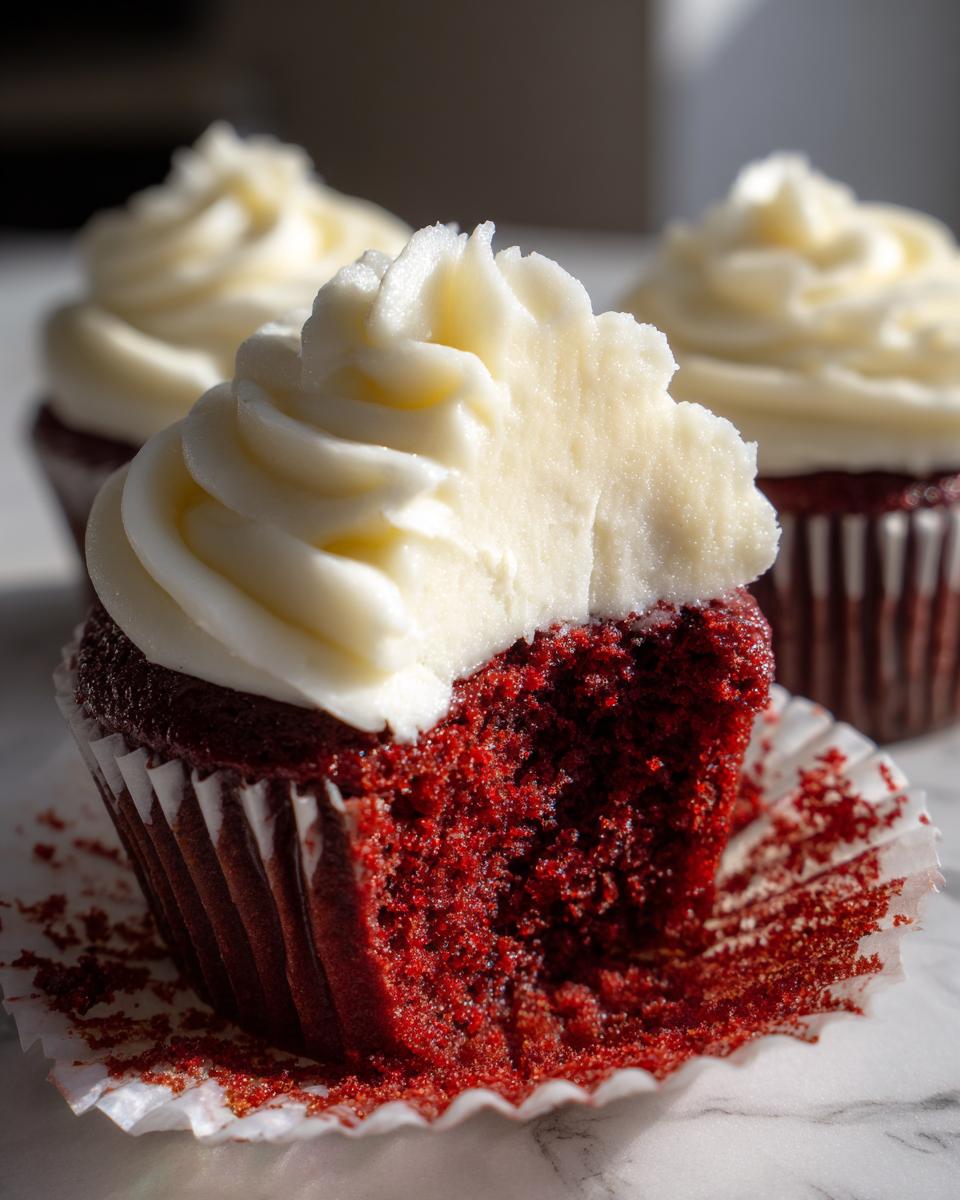
What truly sets this recipe apart from all the others you see floating around? It comes down to the subtle science behind the flavor and texture. We nail that perfect balance you’re looking for: a deep, classic red hue combined with just enough unsweetened cocoa powder so you taste the chocolate, but it doesn’t overpower that signature tang. Using full-fat buttermilk is non-negotiable here, folks! Its acidity reacts beautifully with the baking soda to create those incredibly moist red velvet cupcakes.
I spent months trying to master that elusive tenderness. You want a crumb that just melts—a real velvet crumb recipe, not something dry or crumbly. Trust me, achieving this texture is all about respecting the wet and dry ingredients when you bring them together.
Achieving True Bakery Style Red Velvet Cupcakes
The secret to that signature, soft, bakery style is less about what goes in, and more about what you *don’t* do! Once you start alternating those wet and dry ingredients, you need to stop mixing the second they come together. Seriously, put the mixer down the second you see no more white streaks. Overmixing develops gluten, and gluten is the enemy of fluffiness in our famous buttery soft pretzel bites, and it’s the enemy of the velvet crumb here too!
Ingredients for Moist Red Velvet Cupcakes
Okay, let’s gather our treasures! For these moist red velvet cupcakes, we need quality components. Remember, good ingredients make for happy baking and those reliably easy homemade soft chewy sea salt caramels that everyone begs for. We need 1 1/2 cups of all-purpose flour, 1 teaspoon of baking soda, just 1 teaspoon of unsweetened cocoa powder, and half a teaspoon of salt. For the wet side, we’re using 1 cup of granulated sugar creamed with a half cup of unsalted butter that’s perfectly softened. Two large eggs, a teaspoon of vanilla, a cup of full-fat buttermilk—which gives us that wonderful tang—a teaspoon of white vinegar, and of course, the coloring. That buttermilk is the key, so please don’t try to switch it out for regular milk if you can help it!
Ingredients for the Tangy Cream Cheese Frosting
Now, for the crowning glory! You absolutely must have 4 ounces of full-fat cream cheese, softened, and a half cup of unsalted butter, also softened until it feels like room temperature playdough. You’ll need 3 cups of powdered sugar, and this one is important: make sure you sift it well! Sifting prevents those little hard lumps that ruin a beautiful swirl. Finish it up with 1 teaspoon of vanilla extract. Remember, the cream cheese and butter need time to soften up properly—that’s how we get that dreamy, smooth texture without any chunks.
Step-by-Step Instructions for Homemade Red Velvet Cupcakes From Scratch
It’s time to get baking! We’re aiming for those gorgeous, homemade red velvet cupcakes from scratch that just melt in your mouth. First things first: get your oven preheated to 350°F (175°C). I always line my 12-cup tin now; it makes cleanup a snap later. We don’t want any cake sticking to the pan after all that hard work, right?
Next, let’s tackle our dry ingredients in one bowl—that’s the flour, baking soda, cocoa powder, and salt whisked together. Set that aside. In a separate, larger bowl, we move on to the creaming. This is where the texture magic starts to happen!
Mixing the Batter for a Perfect Velvet Crumb Recipe
Grab your half-cup of softened butter and the cup of sugar. Beat them together until they look genuinely light and fluffy! I always check by scraping down the sides of the bowl, just to make sure every bit is incorporated. Then, beat in your two eggs one by one. Once that’s smooth, stir in the vanilla extract.
In a little bowl, mix your buttermilk, vinegar, and all that beautiful red food coloring together until the color looks deep and uniform. Now comes the crucial technique for that perfect velvet crumb recipe. You’re going to alternate adding the dry mixture and the buttermilk mixture into the butter base. Always start and end with the dry ingredients—so, Dry, Wet, Dry, Wet, Dry. Mix each addition only until it *just* disappears. Don’t fall into the trap of wanting to mix everything smooth; stopping early prevents toughness in your finished cupcakes.
Baking and Cooling the Red Velvet Cupcakes
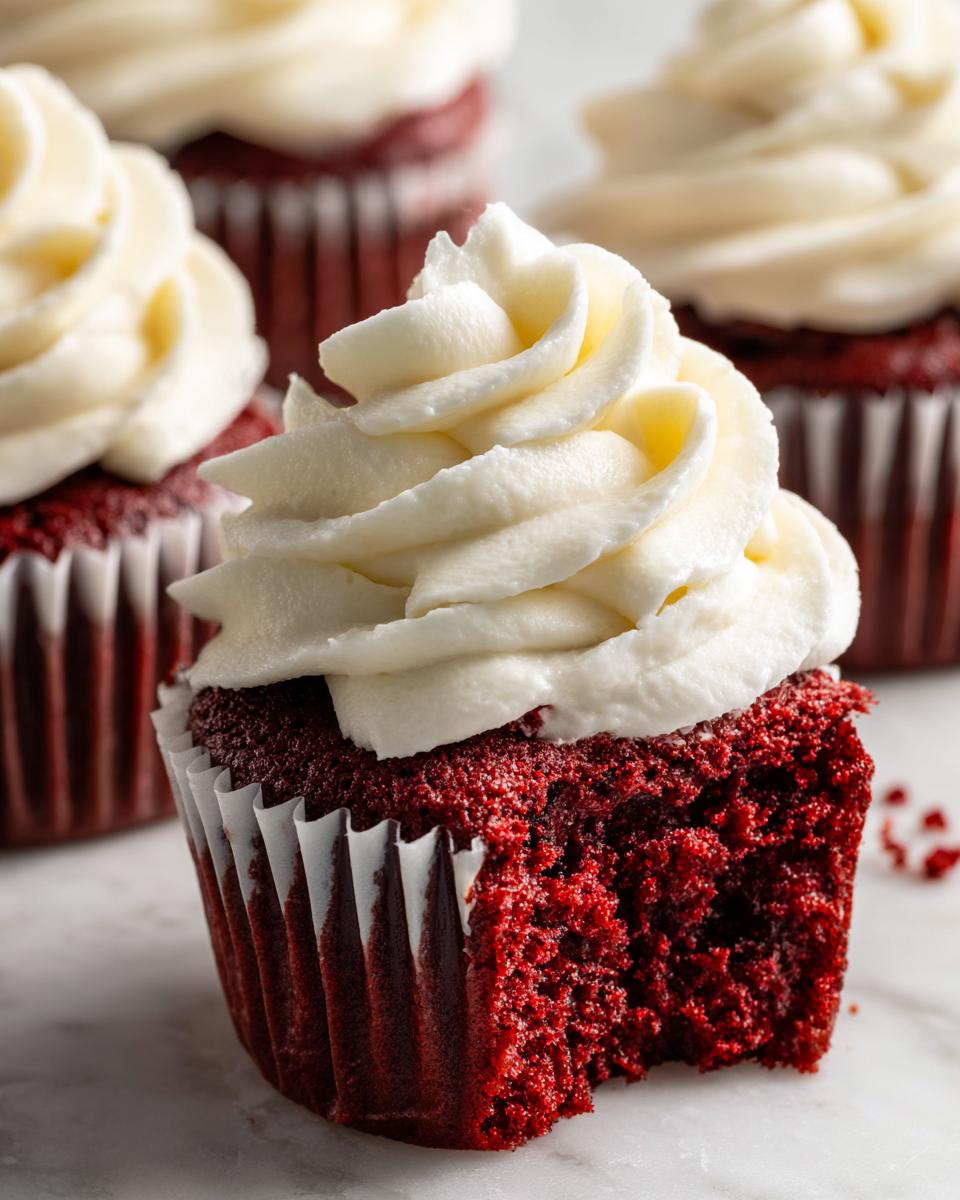
Once the batter is ready, divide it evenly among your 12 lined cups. I find filling them about two-thirds full gives them a lovely dome shape. Pop them into that preheated oven for about 18 to 20 minutes. You’ll know they are done when that toothpick you poke in the center comes out clean, with maybe just a few moist crumbs clinging to it. Resist the urge to overbake them; dry red velvet is a tragedy!
Let them hang out in that warm tin for a gentle 5 minutes—this helps them set up slightly—before carefully moving them over to a wire rack. And this last part is vital for successful frosting: they must be completely, 100% cool to the touch before you even *think* about adding that luscious cream cheese topping. If you frost them even slightly warm, the frosting will just melt right off into a sticky, sugary puddle. We worked too hard for that!
Need a quick, easy side recipe for tonight while these bake? Check out my guide for easy, quick, no-cook pizza sauce recipe; sometimes you need savory after all that sugar training!
Crafting the Best Cream Cheese Frosting for Red Velvet
Alright, let’s talk about the component that truly makes or breaks this whole experience: the frosting! You simply cannot have a good red velvet without that perfect, slightly tangy counterpoint to the sweet cake. We are aiming for the best cream cheese frosting for red velvet—and that means airy, fluffy, and beautifully smooth. No grainy bits allowed in my kitchen, ever!
The key is temperature control here, just like in the cake part of the recipe. Make absolutely sure your 4 ounces of cream cheese and your half-cup of butter are softened perfectly, which means they should yield easily if you poke them, but they shouldn’t look greasy or melty. Start by whipping those two elements together until they are truly combined and look light in color. This initial beating incorporates air, which is what gives us that gorgeous, cloud-like texture we love.
Next up is the sugar. Take your 3 cups of sifted powdered sugar—yes, always sift it!—and add it in about thirds while the mixer is running on low. Once it’s all incorporated, crank that mixer up to medium-high speed and let it go for a good minute or two until you see it start puffing up, getting paler, and looking dreamy. If it seems too thick after that whipping session, add just a tiny splash of milk or cream until it reaches that perfect, spreadable consistency. You can find my full, detailed method on making homemade frosting right here, but trust me, this texture is non-negotiable for these decadent treats!
Tips for Perfect Red Velvet Cupcakes Every Time
Even with the best recipe, sometimes little things can go wrong, right? That’s why I always keep a few little tricks up my sleeve to ensure these red velvet cupcakes are perfect every time I bake. For that deep, vibrant red, you really need to use a high-quality, concentrated gel or liquid food coloring. I learned this the hard way once when I used cheap coloring, and my cupcakes looked pale pink instead of rich red! It’s worth grabbing the good stuff.
And please, I beg you, go for the full-fat buttermilk! It’s essential for activating that beautiful velvet crumb we talked about. I’ve tried making them when I was out of buttermilk and substituted sour cream cut with milk, and honestly, it just didn’t give me that signature tanginess that cuts through the sweetness of the frosting.
If your frosting ever seems a little too loose, don’t panic! Adding just a bit more sifted powdered sugar helps immensely. If you want to explore making some other goodies from scratch sometime, you should check out my recipe for easy homemade marshmallows recipe—it’s surprisingly fun!
Serving and Storing Your Red Velvet Cupcakes
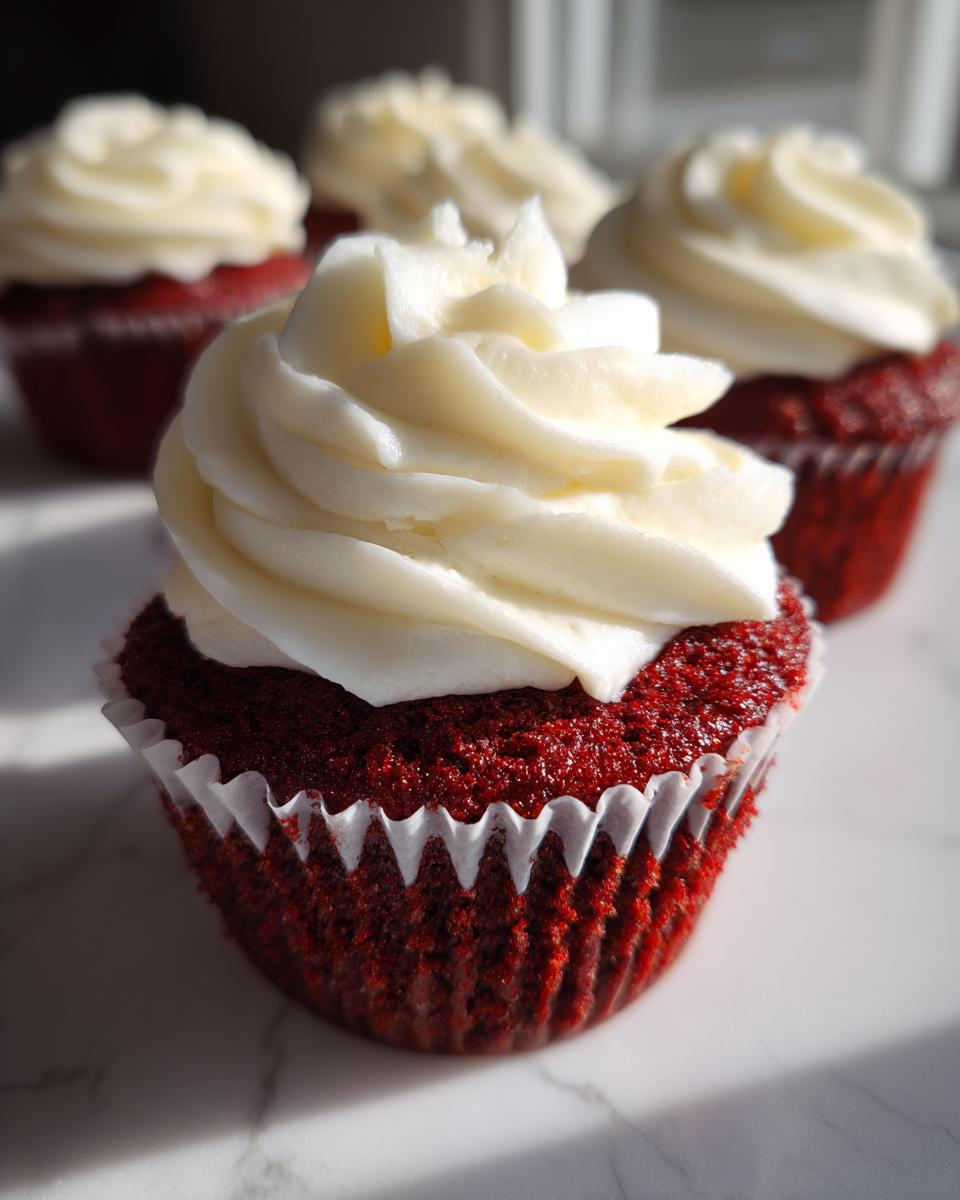
These gorgeous red velvet cupcakes deserve a starring role, no matter the occasion! Since they shout special celebration, these are fantastic for birthdays, Valentine’s Day, or setting up a beautiful dessert table for the holidays. Honestly, anything that involves gathering people around food is the perfect excuse for these beauties. I always try to make a few extra, because people grab them fast!
Now, let’s talk keeping them fresh. The main goal is protecting that moist texture we worked so hard for and preserving the swirl on top of that tangy frosting. If you aren’t eating them all on baking day—which, let’s be honest, is tough to do—you need to know the drill.
For the cupcakes themselves, leave the frosting off if you plan on waiting more than a day. Store the completely cooled, unfrosted cakes in an airtight container at room temperature. They stay wonderfully moist for about two days this way. If you’re making them ahead for a party, this is my preferred method.
Once they are frosted, the best place for them is the refrigerator, especially since we used real cream cheese and butter in the topping. Keep them snugly in a plastic container—don’t just leave them sitting out uncovered, or the cake will dry out and the frosting might absorb funny smells. When you take them out of the fridge to serve, let them sit on the counter for at least 30 minutes before guests arrive. This lets the frosting soften up just a tiny bit so it’s dreamy again, rather than firm. For more holiday-themed ideas, you might love my guide for Christmas cookie bars.
If you want to see how another great baker tackles this classic, you should take a peek at In Bloom Bakery’s version! It’s always fun to see different techniques that deliver that same high-quality feel we are aiming for here at HearthBite.
Frequently Asked Questions About Red Velvet Cupcakes
Why are my red velvet cupcakes dry?
Oh, this is the saddest thing when it happens! Most often, dry red velvet cupcakes signal one of two things: you either baked them for too long, or you overmixed the final batter. Remember what I said about stopping mixing right when the streaks disappear? That step is crucial for creating that soft, fluffy red velvet cupcakes texture. Also, check your oven temperature with a separate thermometer if you can. If your oven runs hot, they bake too fast and dry out before they are truly done.
Can I use regular milk instead of buttermilk?
Yes, you *can*, but if you’re chasing that authentic, tangy flavor and the best rise possible, I really urge you to grab the buttermilk. Buttermilk is acidic and it works with the baking soda to give you that signature tender crumb. If you are in a genuine pinch, take regular milk and stir in one tablespoon of white vinegar or lemon juice. Let it sit on the counter for about five minutes until it slightly curdles—that makes a decent substitute for baking!
What is the secret to the velvet crumb recipe?
The secret to achieving that melt-in-your-mouth, almost plush texture is a combination of things we discussed, really. It’s the gentle reaction between the acidity (buttermilk/vinegar) and the leavening agent, combined with the proper fat content from the butter. But honestly, the biggest secret to a great velvet crumb recipe is *not* skipping the gentle creaming stage for the butter and sugar. Those tiny air pockets you beat in early are what give the whole structure lift while baking.
Do I have to use red food coloring?
Technically, no! If you mixed the dry ingredients properly, you’ll naturally get a very faint, slightly brownish-red hue just from the cocoa and the reaction with the buttermilk. That’s how the original “velvet” cakes were made! But let’s be real, we expect the vibrant color these days. I always use a high-quality gel coloring because it gives you that deep color without adding excess liquid, which could thin out your batter and ruin the texture of these easy red velvet cupcake recipe.
I hope these answers help you feel confident about baking these beauties! If you’re looking for more comforting ideas while you wait for those cupcakes to cool, take a peek at my easy creamy pumpkin soup recipe; it’s perfect for a cool evening!
Estimated Nutrition for These Decadent Red Velvet Treats
Now, before we finish up, I always like to give a little heads-up about what goes into these delicious bites! Since we are making everything completely from scratch, you have full control over the ingredients, but that also means the final numbers are estimates. I’ve tried my best to calculate these based on standard yields, but remember, if you use extra frosting (which, honestly, who wouldn’t?), your final tally will change!
When you’re looking at these decadent red velvet treats, just treat this information as a guideline. If you want some ideas for lighter meals to balance out your baking adventures, you might want to browse through my easy breakfast recipes. It’s all about balance, right?
Here are the estimated nutritional details per one finished cupcake:
- Serving Size: 1 cupcake
- Calories: 380
- Total Fat: 21g (Saturated Fat: 12g)
- Carbohydrates: 48g (Sugar: 42g)
- Protein: 4g
- Cholesterol: 65mg
See? They are rich, they are buttery, and they have a good amount of sugar, just like a classic American dessert should! That’s what makes them so comforting and perfect for special times.
Share Your Red Velvet Cupcakes Creations
I truly hope these instructions helped you achieve the most perfect, moist batch of red velvet cupcakes! Now that you’ve baked them, I’d love to hear all about it. Please, leave a comment below and let me know how your crumb turned out—was it ultra-velvety? Your experiences help build our HearthBite community. Don’t forget to share photos of your beautiful results with us!
If you need to get in touch with any specific questions about the recipe, you can always reach out through my contact page. Happy baking, everyone!
PrintThe Ultimate Moist & Velvety Red Velvet Cupcakes with Tangy, Dreamy Cream Cheese Frosting (Bakery Style at Home)
Bake bakery-style red velvet cupcakes that are incredibly moist and tender with a subtle cocoa flavor. This easy recipe includes instructions for the best, tangy cream cheese frosting, making them perfect for any special occasion.
- Prep Time: 20 min
- Cook Time: 20 min
- Total Time: 40 min
- Yield: 12 servings 1x
- Category: Dessert
- Method: Baking
- Cuisine: American
- Diet: Vegetarian
Ingredients
- 1 1/2 cups all-purpose flour
- 1 teaspoon baking soda
- 1 teaspoon unsweetened cocoa powder
- 1/2 teaspoon salt
- 1 cup granulated sugar
- 1/2 cup unsalted butter, softened
- 2 large eggs
- 1 teaspoon vanilla extract
- 1 cup buttermilk
- 1 teaspoon white vinegar
- 1 tablespoon red food coloring (high-quality liquid or gel)
- 4 ounces cream cheese, softened
- 1/2 cup unsalted butter, softened
- 3 cups powdered sugar, sifted
- 1 teaspoon vanilla extract
Instructions
- Preheat your oven to 350°F (175°C). Line a 12-cup muffin tin with paper liners.
- In a medium bowl, whisk together the flour, baking soda, cocoa powder, and salt. Set this dry mixture aside.
- In a large bowl, cream together the 1 cup of sugar and 1/2 cup of softened butter until light and fluffy. Beat in the eggs one at a time, mixing well after each addition. Stir in the vanilla extract.
- In a small bowl, mix the buttermilk, vinegar, and red food coloring until the color is uniform.
- Alternate adding the dry ingredients and the buttermilk mixture to the butter mixture, beginning and ending with the dry ingredients (three additions of dry, two of wet). Mix only until just combined; do not overmix to keep the crumb velvety.
- Divide the batter evenly among the prepared cupcake liners, filling each about two-thirds full.
- Bake for 18 to 20 minutes, or until a toothpick inserted into the center comes out clean. Let the cupcakes cool in the pan for 5 minutes before transferring them to a wire rack to cool completely.
- Prepare the cream cheese frosting: In a large bowl, beat the softened cream cheese and 1/2 cup of softened butter until smooth.
- Gradually add the sifted powdered sugar, beating until fully incorporated. Add the vanilla extract and beat on medium-high speed until the frosting is light and fluffy.
- Once the cupcakes are completely cool, pipe or spread the tangy cream cheese frosting onto each one.
Notes
- For the best velvet crumb, use full-fat buttermilk.
- Use high-quality, concentrated red food coloring for a deep, vibrant color without thinning the batter too much.
- If you prefer a slightly less tangy frosting, reduce the vinegar in the cake batter slightly.
Nutrition
- Serving Size: 1 cupcake
- Calories: 380
- Sugar: 42g
- Sodium: 250mg
- Fat: 21g
- Saturated Fat: 12g
- Unsaturated Fat: 9g
- Trans Fat: 0.5g
- Carbohydrates: 48g
- Fiber: 1g
- Protein: 4g
- Cholesterol: 65mg