
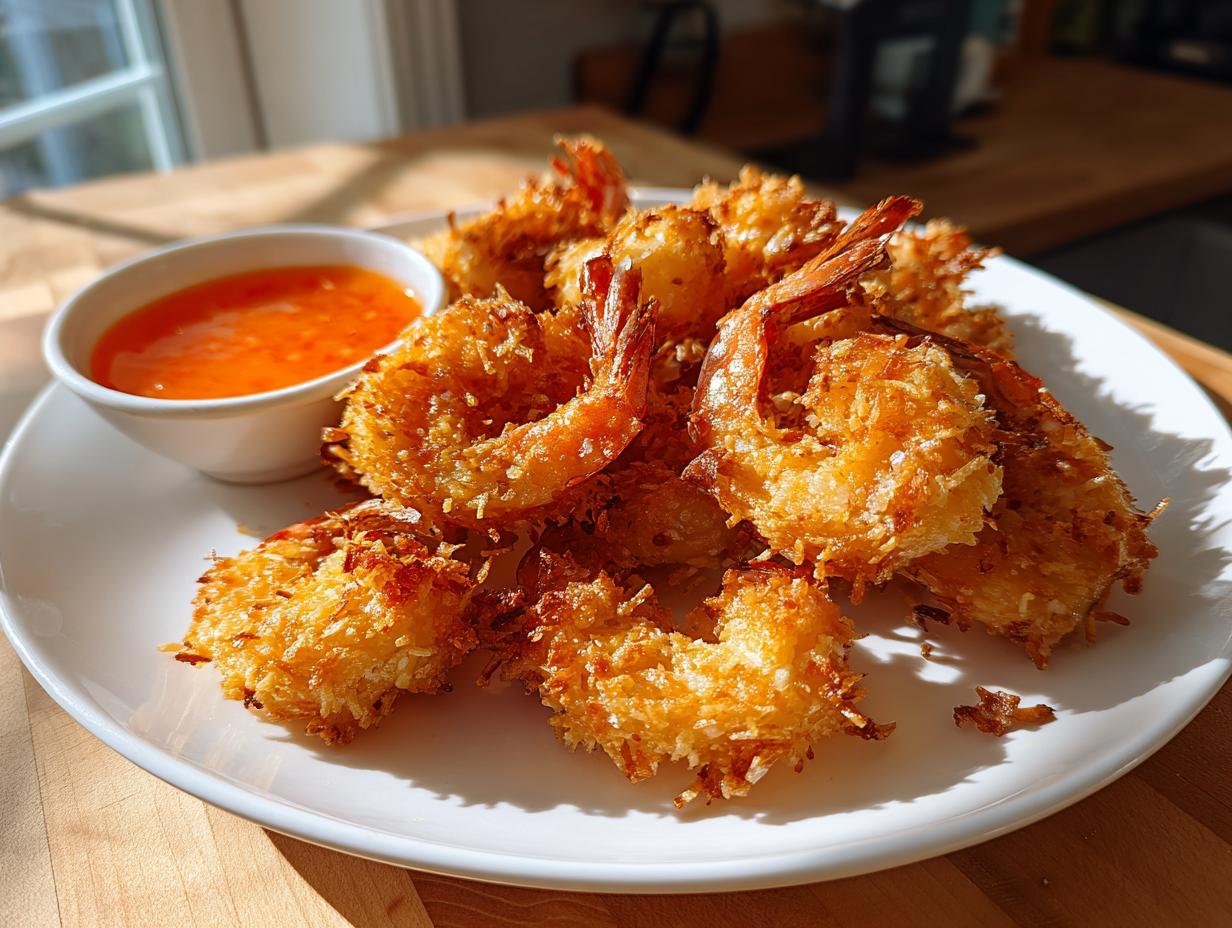
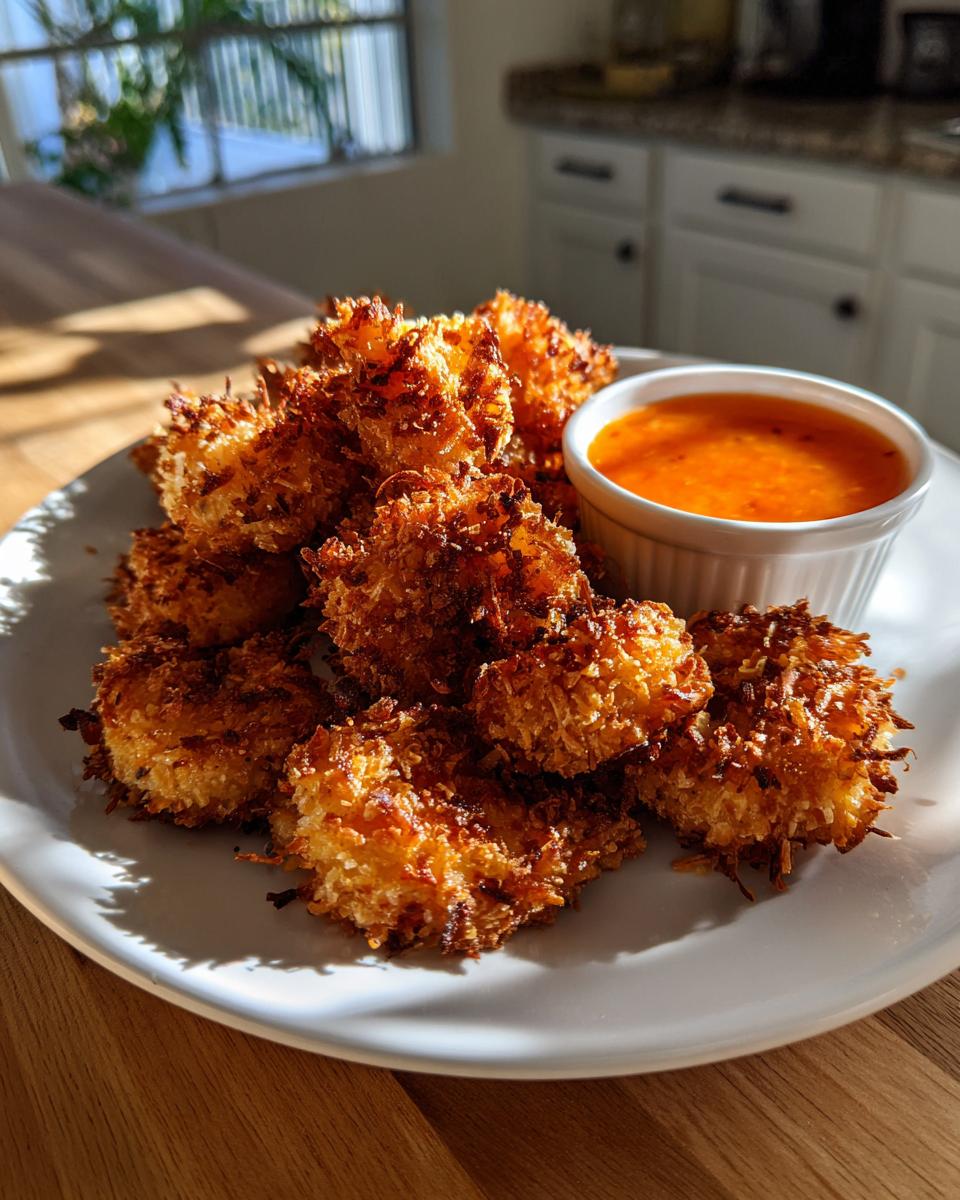
I don’t know about you, but when I see crispy coconut shrimp on a menu, it’s a non-negotiable order. That perfect, shatteringly crisp coating paired with sweet, tender shrimp? Absolute heaven! For years, I tried to replicate that restaurant-quality crunch at home, and frankly, I failed more often than I succeeded. But through plenty of testing (and a few slightly soggy batches!), I finally cracked the code. Say hello to The Ultimate Crispy Panko Coconut Shrimp! This isn’t just an appetizer; this is about bringing those special, comforting, and shareable moments right to your kitchen table. Once you master this technique, you won’t be ordering takeout anymore, I promise.
- Why This Crispy Coconut Shrimp Recipe is Your New Favorite
- Essential Ingredients for Perfect Coconut Shrimp
- How to Make Crispy Coconut Shrimp Step-by-Step
- Tips for Perfect Coconut Shrimp Every Time
- Variations: Baked Coconut Shrimp and Air Fryer Coconut Shrimp
- Serving Suggestions for Your Tropical Shrimp Appetizer
- Storage and Reheating Instructions for Leftover Coconut Shrimp
- Frequently Asked Questions About Coconut Shrimp
- Nutrition Estimates for This Easy Coconut Shrimp Recipe
Why This Crispy Coconut Shrimp Recipe is Your New Favorite
You want that crunch, right? That’s the whole reason we make coconut shrimp, and frankly, I won’t settle for anything less than perfect. This recipe cuts through all the fuss so you can get that amazing tropical shrimp appetizer on the table without stressing out.
Achieving Ultimate Crunch with Panko
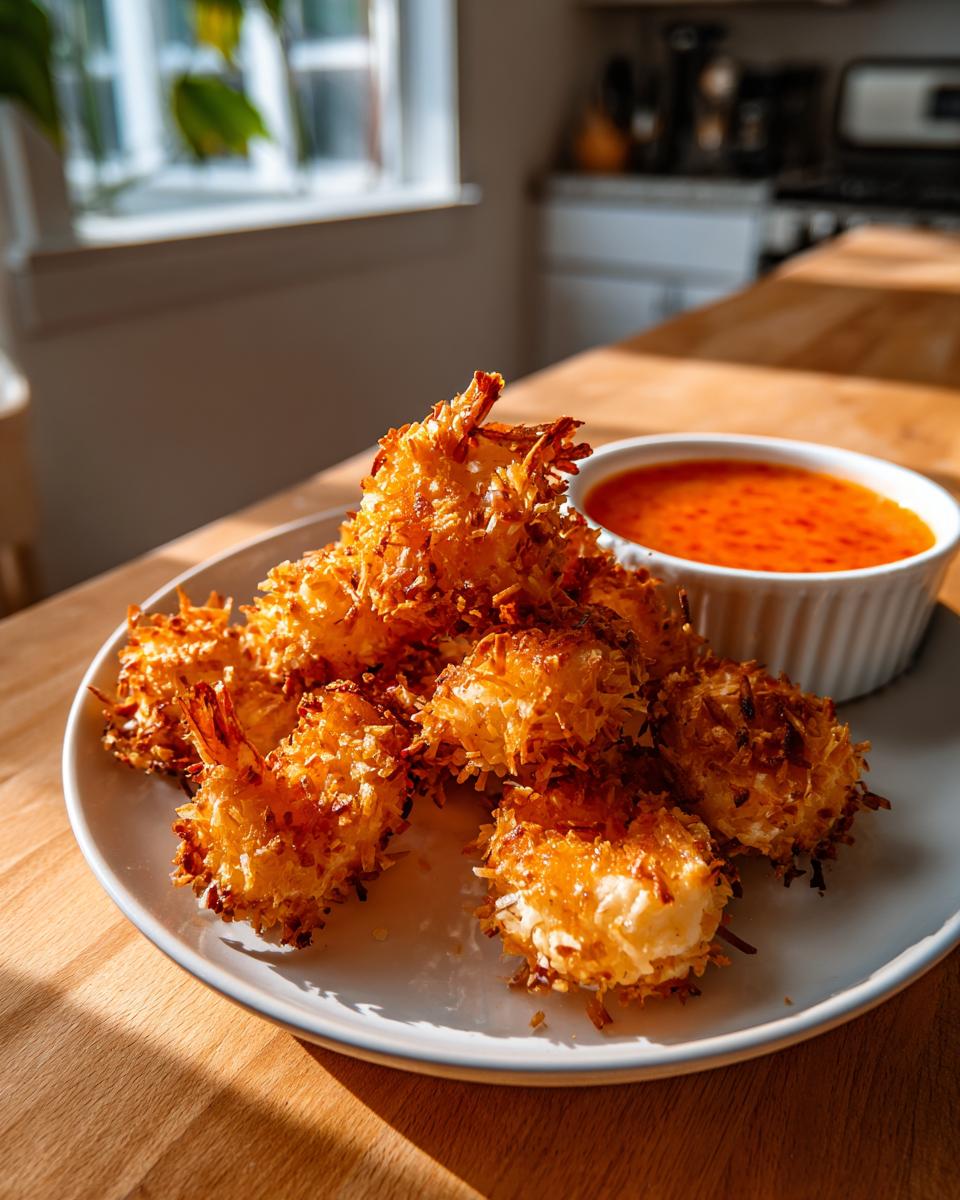
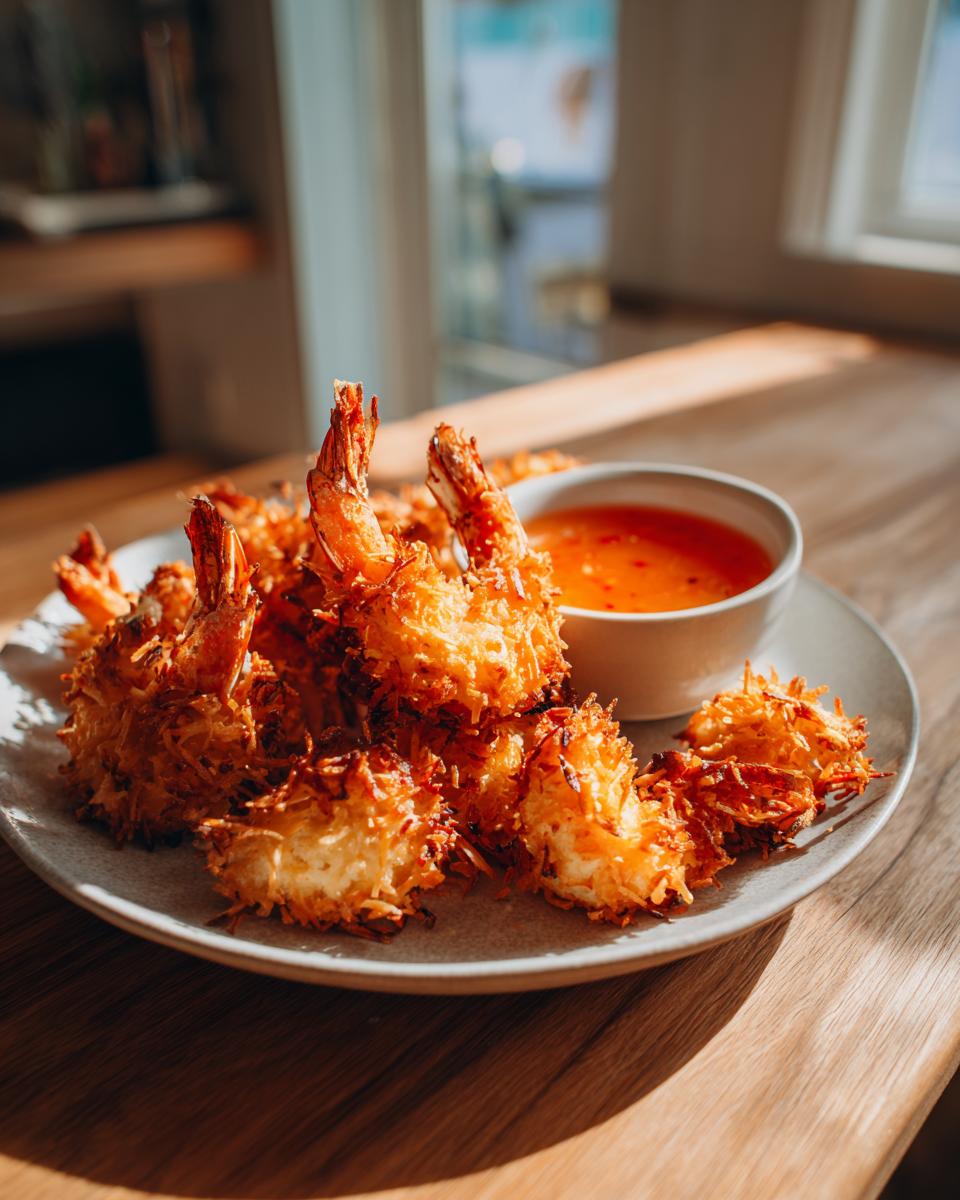
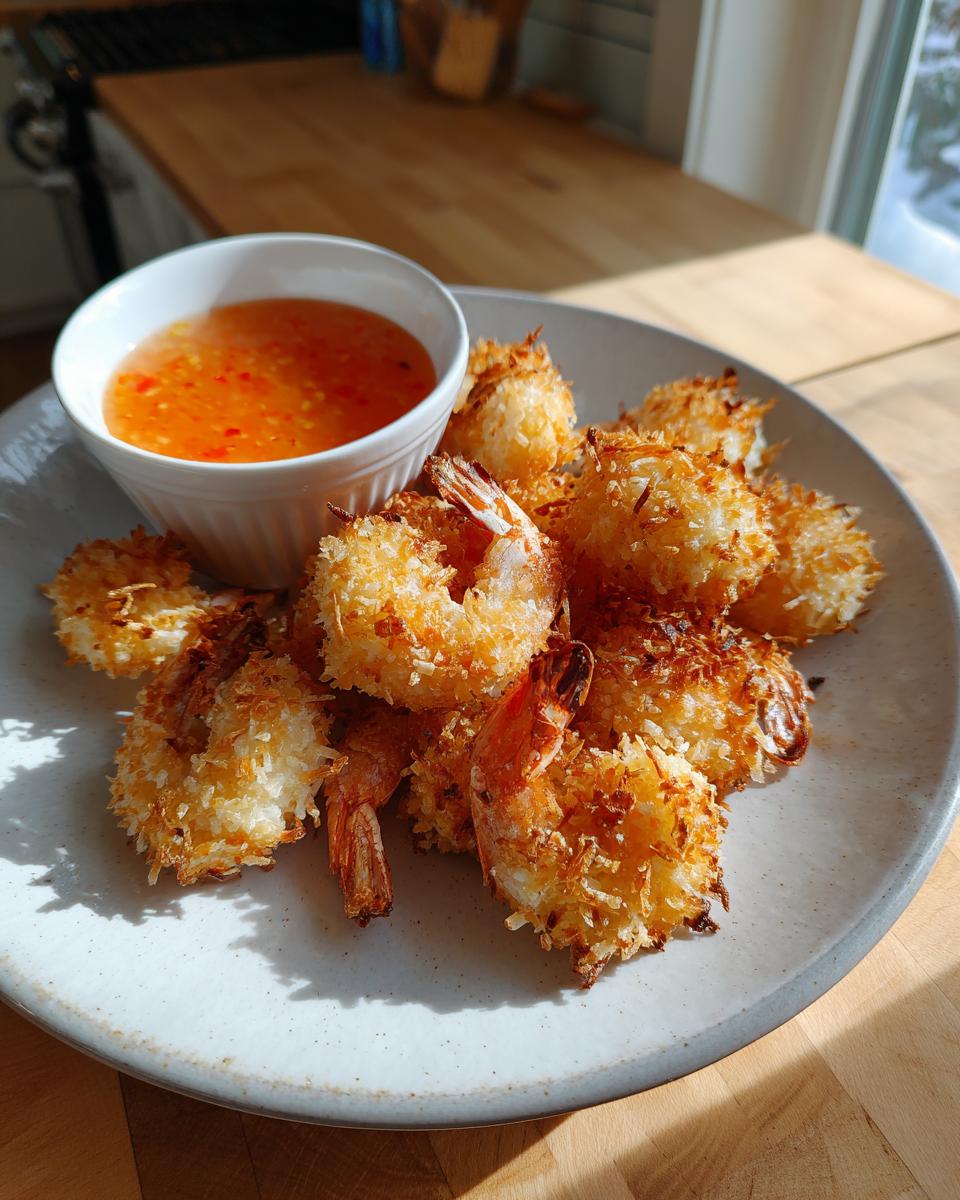
The absolute key to a shatteringly crunchy coconut shrimp is Panko breadcrumbs. Trust me on this one! Regular breadcrumbs get gummy when they hit the hot oil, but Panko flakes are rougher and lighter. They create those gorgeous little spikes that toast up beautifully, locking in the flavor and keeping everything incredibly crisp. It’s the secret sauce, really.
Perfect for Parties or a Quick Shrimp Appetizer
Even though we’re aiming for restaurant style, this whole thing moves fast. You can have this ready to go faster than you can decide what movie to watch! It’s such a wonderful quick shrimp appetizer that always makes people ask for the recipe. If you’re looking for more fast options, check out my other favorite quick and easy dinner recipes!
Essential Ingredients for Perfect Coconut Shrimp
Okay, this is where the magic really starts! Getting the right ingredients is just as important as the technique later on, especially when you’re aiming for that top-tier, best coconut shrimp recipe experience. Don’t worry, I kept this simple—nothing too hard to find at your regular grocery store. But there are a few specific things you need to make sure you grab so your coating adheres fiercely and your sauce sings!
For the Crispy Coconut Shrimp
First up, the shrimp itself! You absolutely need 1 pound of large shrimp, peeled and deveined. Bigger shrimp hold up much better to the dredging. For the coating trio, we need 1 cup of all-purpose flour to start the sticking process, 2 large eggs, which you’ll want to lightly beat until they are just combined. The crunch factor comes from combining 1 cup of Panko breadcrumbs (remember, Panko!) with 1 cup of sweetened flaked coconut. Don’t forget to season everything right in the coating mix with 1 teaspoon of salt and 1/2 teaspoon of black pepper. This seasoning step ensures flavor isn’t just on the outside!
For the Homemade Sweet Chili Dipping Sauce Recipe
If you just use bottled sauce, well, we are leaving that extra point of deliciousness on the table! This homemade sweet chili dipping sauce recipe is so easy it feels like cheating. You’ll gather 1/2 cup of granulated sugar, 1/2 cup of rice vinegar, and 1/4 cup of water for the base. For that chili kick, grab 2 tablespoons of sweet chili sauce you already have. Finally, to get that perfect glossy thickness, you need 1 teaspoon of cornstarch mixed with 1 tablespoon of cold water—that combination is called a slurry, and it’s your insurance policy against a watery sauce.
How to Make Crispy Coconut Shrimp Step-by-Step
Listen, this cooking process is straightforward, but you have to dedicate a small bit of focus to the coating. Once you nail this dredging, you are basically done—we can consider the rest smooth sailing even for a weeknight seafood dinner. Give yourself about 20 minutes of prep time, and boom, you’ll be enjoying sweet and savory shrimp fast.
Preparing the Shrimp and Dredging Stations
First things first: your shrimp need to be completely dry. I mean bone dry! Grab some paper towels and pat every single 1-pound portion of shrimp until they feel almost rough. If they are wet, that coating absolutely will not stick. Set up your three stations in a line. Plate one gets the flour. Bowl two gets your lightly beaten eggs. And station three—the glorious one—gets your Panko and coconut mixture. Dredge systematically: flour first (shake off excess!), then egg (let the drip stop!), and finally, press that shrimp firmly into the crunchy mixture. Make sure that Panko-coconut layer is thick!
Making the Best Dipping Sauce for Shrimp
While maybe you are working your way through the shrimp coatings, get your sauce going! In a little saucepan, combine the sugar, rice vinegar, and water. Heat this up over medium heat until it’s simmering gently and that sugar is completely dissolved. Then, whisk in your store-bought sweet chili sauce for an extra flavor boost. Now for the thickening magic: stir in that cornstarch slurry. Keep it moving until the sauce coats the back of a spoon—that’s how you know you have the best dipping sauce for shrimp that isn’t runny.
Frying the Coconut Shrimp to Golden Perfection
Time for the sizzle! This is where we lock in the crunch. Heat about 1.5 inches of vegetable oil in your skillet until it hits exactly 350°F (175°C). Please use a thermometer; if the oil isn’t hot enough, your coconut shrimp will soak it up like a sponge! Fry in small batches—I aim for about 5 or 6 shrimp at a time. Don’t overcrowd the pan, or the temperature tanks! Fry for just 2 to 3 minutes per side until they are beautifully golden brown. Pop them out onto a wire rack to drain. You can find more helpful tips in my guide to quick and easy dinner recipes!
Tips for Perfect Coconut Shrimp Every Time
You know, I almost gave up on this recipe once. I had this beautiful batch of shrimp, perfectly seasoned, and they looked amazing going into the oil. But five seconds later, the coating was floating on top of the oil like tiny, sad rafts! Ugh! It was the most frustrating thing, but it taught me that the preparation steps for coconut shrimp are non-negotiable if you want that restaurant-quality payoff. Once I started respecting what the shrimp needed before they hit the heat, everything changed!
Expert Tips for Maximum Adhesion
The number one rule, and I can’t stress this enough, is making sure those shrimp are dry. I mean, wipe them down like you are cleaning a delicate antique! Any residual water on the surface will sneak under the flour and basically tell the coating, “Nope, not staying here!” You really need to pat them thoroughly dry with paper towels before introducing them to the flour station. Also, when you get to the final Panko/coconut mixture, don’t just gently roll them. You need to press that mixture onto the shrimp firmly—like you’re trying to adhere packing tape. That physical pressure is what bonds the coating so it doesn’t flake off during frying.
Remember, the heat of the oil is also your friend. If the oil is too cool—and I learned this the hard way—the coating has too much time to absorb grease before it sets, leading to that limp, doughy nightmare. Keep that temperature locked in around 350°F (175°C) so you get that immediate, satisfying *sizzle* and golden crust. These little details are what separate an okay shrimp from truly incredible crispy coconut shrimp!
If you love comfort food that brings everyone together, you should definitely check out more of my favorite comfort food recipes for your next cozy night!
Variations: Baked Coconut Shrimp and Air Fryer Coconut Shrimp
I know deep frying is the king of crunch, but honestly, sometimes I just don’t want to deal with a whole pot of oil, or maybe you’re trying to keep things a bit lighter for a weeknight meal. That’s okay! We can absolutely deliver that satisfying crunchy coconut shrimp texture using other methods. When I adapted this recipe for the oven or the air fryer, I felt like I was cheating because the texture turned out shockingly good!
If you’re exploring ways to make comfort food a little lighter, this section is for you. We love our classics, but learning to adapt them is key to keeping them in rotation. If you’re looking for other lighter takes on favorites, you might want to peep my gluten-free recipes section too!
Making Healthy Coconut Shrimp Recipe (Air Fryer Method)
Listen, if you have an air fryer, you absolutely have to try this! This is my go-to when I crave coconut shrimp but I’m watching the oil. You need to prepare the shrimp exactly the same way—flour, egg, Panko mix—but once they are coated, give them a light spray all over with cooking spray. That little bit of fat helps them brown nicely.
Place them in the air fryer basket in a single layer—don’t stack them or they steam instead of crisping! Set your temperature to 380°F (195°C) and let them cook for about 8 to 10 minutes total. They need a flip halfway through, around the 5-minute mark, so they get golden on both sides. They come out fantastic!
Tips for Baked Coconut Shrimp
Baking takes a little longer, but it’s hands-off, which I love when I’m juggling a side dish or two. For the best results when baking, use a baking sheet that has a wire rack sitting inside it. This lets the hot air circulate underneath the shrimp, which prevents a soggy bottom crust. That’s a rookie mistake I learned about early on!
Set your oven heat just a little higher, around 400°F (200°C). Coat them just like the fried version, place them on that rack, and bake them for about 12 to 15 minutes. You’ll flip them halfway through, too. They won’t have that super-deep, dark-fried color, but they will definitely give you that tender interior and a beautifully toasted, crispy coconut shrimp shell. Serve that sweet chili dipping sauce right alongside and nobody will even notice the difference!
Serving Suggestions for Your Tropical Shrimp Appetizer
So, you’ve mastered the ultimate crispy coconut shrimp, and now you have a mountain of golden perfection sitting on your platter. Fantastic! But what goes next to it? Serving this stunner just sitting there feels lonely, doesn’t it? Food is about the whole experience, and that means thinking about texture and flavor balance on the plate.
Because this appetizer leans so sweet, juicy, and crunchy, you really want sides that offer something fresh or tangy to cut through that richness. If you serve this up as a main course, you’ll want something hearty but bright. For when you need lighter fare, definitely check out my collection of healthy lunch recipes for inspiration.
Here are a few things I always have on hand when I make these: A simple pineapple salsa is heavenly—the acidity loves the sweetness of the coconut. If I’m serving them as a full dinner, I lean into tropical dinner ideas like coconut rice; it doubles down on the theme but makes it a complete meal. You can also look for great ideas on what goes well with them over at this helpful guide!
If you’re feeling ambitious, a simple, crisp green salad tossed with a ginger-lime vinaigrette is always a winner. The sharpness cleanses the palate between those rich bites of shrimp. Honestly, though, if you bring out that homemade sweet chili dipping sauce, half the battle is already won!
Storage and Reheating Instructions for Leftover Coconut Shrimp
Oh, leftovers! That’s only a problem for me if I forget to hide some before the party ends, because these really are best fresh from the fryer. But hey, sometimes life happens, and you end up with a few pieces of beautiful, crispy coconut shrimp the next day. The biggest challenge here is conquering that sogginess, right? Nobody wants a limp, sad shrimp.
The key to good leftovers is keeping the moisture out. Always let any leftover shrimp cool down completely to room temperature before you even think about putting them away. Once they are cool, you need an airtight container. I usually line the bottom of the container with a paper towel first—it just helps wick away any lingering condensation that tries to soften that glorious crust.
Now, how to reheat? Forget the microwave! I am begging you, do not microwave them. You’ll end up with rubbery shrimp wrapped in soggy breading. That’s just a tragedy.
The best way to bring back that *crackle* is going back into dry heat. If you’re making a frozen dessert later, maybe check out my recipe for easy homemade soft chewy sea salt caramels!
Try the oven if you have time: set it to about 375°F (190°C). Place the shrimp in a single layer on a baking sheet lined with a wire rack—yes, that rack again!—and bake them for about 8 minutes, maybe 10, until they are hot through and you hear that little crunch when you tap them. The air fryer is even faster if you just have three or four pieces left; set it to 350°F (175°C) for about 4 minutes. Both methods revive that wonderful texture we worked so hard to create in the first place!
Frequently Asked Questions About Coconut Shrimp
I always get so many questions when I post photos of these beauties online, which totally makes sense because everyone wants that perfect result! Whether you’re new to making coconut shrimp or you’re a seasoned cook trying to elevate your spread, these little tidbits should help you out. Please don’t hesitate to reach out if you have more! If you’re looking for something quick for the morning later on, swing by my easy breakfast recipes!
Can I make the coconut shrimp ahead of time?
This is a classic party planning query! You can certainly prepare everything ahead of time, which I 100% recommend for hosting. You can mix your dredging stations and even coat all of your shrimp. Once they are fully coated, lay them on a baking sheet lined with parchment paper and keep them in the fridge for up to 4 hours. Do not let them sit longer, or the moisture from the shrimp starts to break down the flour/egg glue. When you’re ready to cook, just pop them straight into the hot oil or air fryer—no thawing needed!
What is the secret to restaurant style coconut shrimp?
If you want that true restaurant style coconut shrimp crunchiness that you dream about, it comes down to three things that we discussed, but I’ll shout them again because they are that important. First: Pat the shrimp bone dry. Seriously, dryer than a bone! Second: Use Panko breadcrumbs mixed with your coconut; it’s what gives you the rough, crispy texture. And third: Oil temperature is everything! You must hit that 350°F (175°C) mark. It’s the extreme heat that instantly sets the coating and protects the shrimp flesh inside.
Nutrition Estimates for This Easy Coconut Shrimp Recipe
Now, I always feel a little tricky giving out exact numbers here at HearthBite because who measures everything down to the drop when we are cooking for joy? Plus, the type of shrimp you buy, the oil you use for frying, and whether you drown the shrimp in sauce will change things wildly.
But I know you want a ballpark idea, especially if you are counting macros or just curious! Based on the ingredient list for four servings (about 4 shrimp per person), here is a rough estimate for the coconut shrimp *before* dipping sauce. Please keep in mind these numbers are just guidelines, but they give you a good baseline to see where we land on this fun appetizer. If you’re looking for other ways to incorporate more protein into your meals, you might enjoy my guide to making easy homemade protein bars!
- Serving Size: 4 shrimp
- Estimated Calories: 350
- Estimated Total Fat: 18g
- Estimated Carbohydrates: 30g
- Estimated Protein: 18g
Also, just so you know, the estimated sugar is around 18g because we use sweetened coconut flakes and those are mixed right into the primary coating! That’s where that tropical sweetness comes from. If you fry them, oil absorption will kick up the fat content slightly, too. Try to use a clean oil and drain them well, and you’ll keep things right in line with these estimates. Enjoy them, and don’t stress too much! Food made with love tastes better, nutritional facts aside!
PrintThe Ultimate Crispy Panko Coconut Shrimp with Homemade Sweet Chili Dipping Sauce

Achieve that perfect shatteringly crisp texture on your shrimp using Panko breadcrumbs for a true restaurant-style experience. This easy coconut shrimp appetizer is addictive and pairs perfectly with our simple homemade sweet chili dipping sauce recipe. It is great for weeknight dinners or your next party spread.
- Prep Time: 20 min
- Cook Time: 10 min
- Total Time: 30 min
- Yield: 4 servings 1x
- Category: Appetizer
- Method: Frying
- Cuisine: American
- Diet: Vegetarian
Ingredients
- 1 pound large shrimp, peeled and deveined
- 1 cup all-purpose flour
- 2 large eggs, lightly beaten
- 1 cup Panko breadcrumbs
- 1 cup sweetened flaked coconut
- 1 teaspoon salt
- 1/2 teaspoon black pepper
- Vegetable oil, for frying
- 1/2 cup granulated sugar (for sauce)
- 1/2 cup rice vinegar (for sauce)
- 1/4 cup water (for sauce)
- 2 tablespoons sweet chili sauce (for sauce)
- 1 teaspoon cornstarch mixed with 1 tablespoon cold water (for sauce slurry)
Instructions
- Prepare the shrimp: Pat the peeled and deveined shrimp completely dry with paper towels. This step helps the coating adhere.
- Set up the dredging stations: Place the flour on one plate. In a shallow bowl, whisk the eggs. On a third plate, combine the Panko breadcrumbs, flaked coconut, salt, and pepper.
- Coat the shrimp: Dredge each shrimp first in the flour, shaking off any excess. Dip the floured shrimp into the egg mixture, allowing excess to drip off. Finally, press the shrimp firmly into the Panko-coconut mixture until fully coated. Place coated shrimp on a clean plate.
- Make the dipping sauce: In a small saucepan, combine the sugar, rice vinegar, water, and sweet chili sauce. Bring the mixture to a simmer over medium heat, stirring until the sugar dissolves.
- Thicken the sauce: Whisk in the cornstarch slurry. Continue to cook and stir until the sauce thickens enough to coat the back of a spoon, about 1 minute. Remove from heat and set aside to cool slightly.
- Fry the shrimp: Pour vegetable oil into a deep skillet or Dutch oven to a depth of about 1.5 inches. Heat the oil to 350°F (175°C).
- Cook in batches: Carefully place 5-6 shrimp into the hot oil, ensuring you do not overcrowd the pan. Fry for 2 to 3 minutes per side, turning once, until the coating is golden brown and crispy.
- Drain: Remove the cooked coconut shrimp with a slotted spoon and place them on a wire rack set over a paper towel-lined baking sheet to drain excess oil.
- Serve immediately with the homemade sweet chili dipping sauce.
Notes
- For an air fryer method, spray the coated shrimp lightly with cooking spray and cook at 380°F (195°C) for 8 to 10 minutes, flipping halfway through, until golden.
- For a baked method, place shrimp on a wire rack over a baking sheet and bake at 400°F (200°C) for 12 to 15 minutes, flipping halfway.
- You can substitute the sweet chili sauce in the dipping sauce with apricot preserves for a different sweet and tangy flavor profile.
Nutrition
- Serving Size: 4 shrimp
- Calories: 350
- Sugar: 18g
- Sodium: 450mg
- Fat: 18g
- Saturated Fat: 10g
- Unsaturated Fat: 8g
- Trans Fat: 0g
- Carbohydrates: 30g
- Fiber: 1g
- Protein: 18g
- Cholesterol: 150mg