
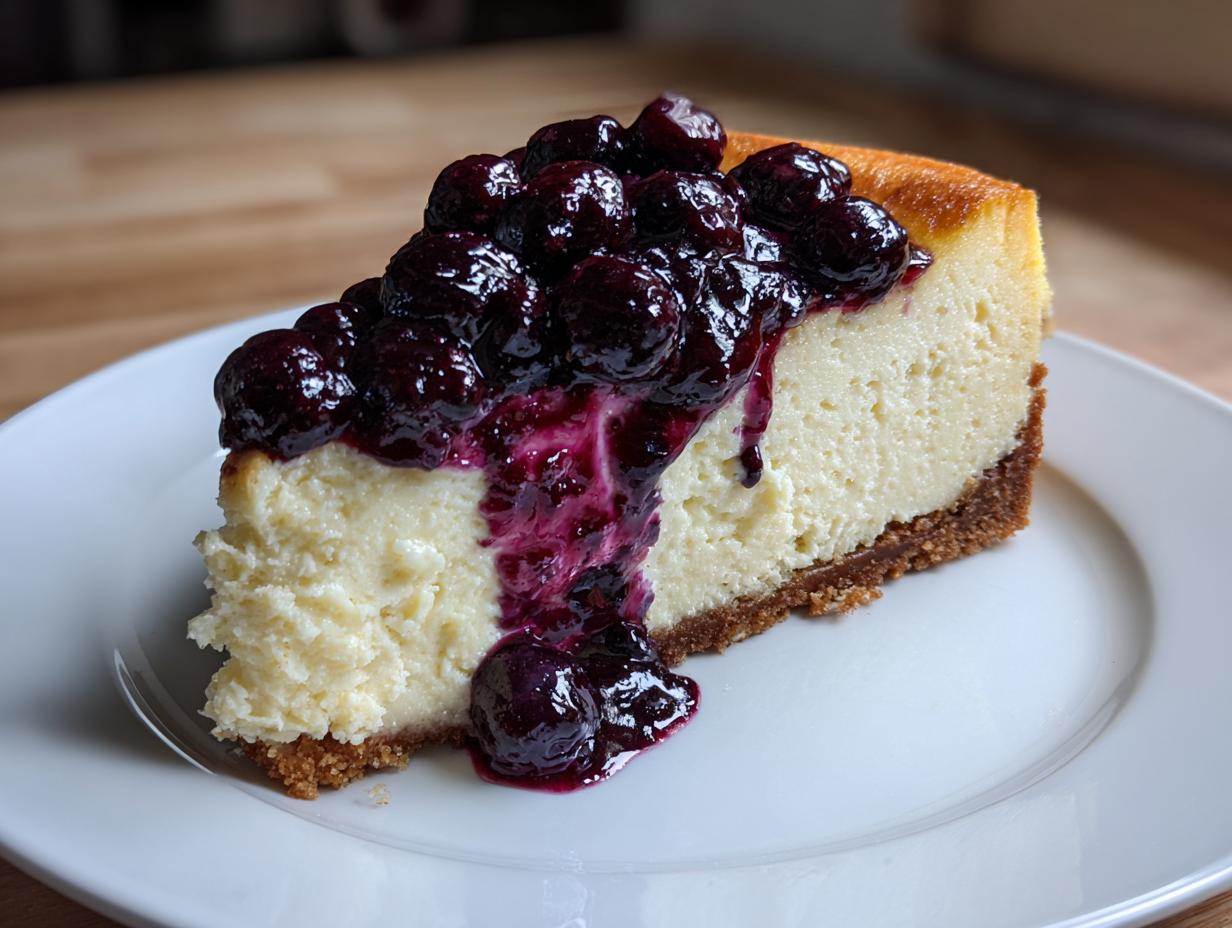
There is just something about creating a true showstopper dessert that warms my heart, and nothing beats the look on my family’s faces when I pull a perfect, towering cake out of the oven. If you’re dreaming of a rich, dense, and genuinely decadent berry experience, you absolutely have to try this classic baked blueberry cheesecake. We aren’t talking about flimsy, quick desserts here; this is a proper, New York style experience, complete with a buttery graham cracker crust and a homemade blueberry topping that bursts with flavor. Trust me, it’s worth every careful step to achieve that gorgeous, crack-free surface. It’s the centerpiece for our summer gatherings, and I’m so happy to share how we make it work beautifully every time in the HearthBite kitchen.
For more comforting, beloved recipes perfect for family time, check out my growing collection of comfort food recipes.
- Why This Baked blueberry cheesecake Recipe is a Showstopper
- Gathering Ingredients for Your blueberry cheesecake
- Step-by-Step Instructions for Baked blueberry cheesecake
- Expert Tips for Your Perfect blueberry cheesecake
- Storage and Make Ahead Dessert Planning for blueberry cheesecake
- Serving Suggestions for This Decadent Berry Dessert
- Frequently Asked Questions About blueberry cheesecake
- Estimated Nutritional Data for This blueberry cheesecake Recipe
- Share Your Homemade blueberry cheesecake Experience
Why This Baked blueberry cheesecake Recipe is a Showstopper
When I say this is the best blueberry cheesecake, I mean it comes close to what you’d find in a fancy New York bakery! This recipe is built for a decadent berry dessert experience. We tackle the two biggest fears head-on: the texture and the cracking. The inclusion of sour cream gives you a noticeable, lovely tang that cuts through the richness and ensures that velvety cheesecake texture we all crave.
It’s a rock-solid recipe, and I’ve even linked to my layered red velvet cheesecake guide if you want to see another showstopper!
Achieving That Creamy Cheesecake Filling
The secret to that smooth, almost silken filling starts before you even turn the mixer on! You absolutely must have cream cheese and those four large eggs at true room temperature. If they’re cold, you end up with lumps, and we just can’t have that. Beat the cream cheese until it’s completely fluffy on its own first. Low speed is your friend here; we’re mixing, not whipping air into it. The sour cream we add gently slides right into that rich base, keeping it incredibly creamy without fighting the structure.
Tips for a Crack-Free blueberry cheesecake
Oh, the dreaded crack! It happens when the cake cools too fast and shrinks unevenly. That’s why we use the water bath, which you see in Step 7. That warm, steamy environment keeps the bake gentle. But the real safety net is Step 9: turning the oven off and letting the finished blueberry cheesecake cool *inside* that warm oven for a full hour with the door slightly ajar. It’s a slow transition, almost like a spa retreat for your cake, and it keeps that surface perfectly smooth right up until chilling time.
Gathering Ingredients for Your blueberry cheesecake
Sourcing the right ingredients is the first step in creating something truly special, right? At HearthBite, we believe that high-quality components make all the difference, transforming a good cheesecake into the kind you dream about! Since this classic baked blueberry cheesecake has three distinct parts—the crust, the filling, and that luscious topping—I’ve broken down exactly what you’ll need for each component. Make sure your cream cheese and eggs have plenty of time sitting out on the counter before you start; it’s vital for that smooth finish!
If you’re looking for other great ways to use cream cheese, my guide to the best cream cheese frosting recipe is a winner.
For the Graham Cracker Crust Dessert Base
This base needs to be sturdy enough to hold up to all that creamy goodness later on. You’ll need:
- 1 1/2 cups graham cracker crumbs
- 1/4 cup granulated sugar (just for the crust, don’t forget to measure this out separately!)
- 6 tablespoons unsalted butter, completely melted
Just mix these three things up until they look like wet sand, press it firmly into your foil-wrapped pan, and you are good to go for that quick pre-bake!
For the Creamy Cheesecake Filling
This is where the magic really happens, and remember: room temperature for everything here! You will need:
- 3 (8 ounce) packages cream cheese, softened (make sure they are truly soft!)
- 1 1/2 cups granulated sugar (the main batch)
- 1 teaspoon vanilla extract
- 1/4 teaspoon salt
- 4 large eggs (make sure they are large for the right structure)
- 1/2 cup sour cream
- 1 cup fresh or frozen blueberries (for swirling inside the batter)
Quick reminder: If you decided to add that hint of brightness, this is where you’d mix in 1 teaspoon of lemon zest with the sugar!
For the Homemade Blueberry Topping
Please don’t reach for that jar from the grocery store. The homemade topping is worth the extra five minutes on the stove, and it tastes so much brighter and juicier. You’ll use the second batch of fruit for this:
- 1 cup fresh or frozen blueberries (for the topping sauce)
- 1/4 cup granulated sugar (for sweetening the sauce)
- 1 tablespoon lemon juice (this brightens everything up!)
- 1 tablespoon cornstarch (our thickening secret weapon right here)
- 1/4 cup water
That tiny bit of cornstarch mixed with the water creates a slurry that guarantees a thick, jammy sauce rather than just watery berry juice. Cook this until it bubbles—you’ll know it’s ready when it coats the back of a spoon!
Step-by-Step Instructions for Baked blueberry cheesecake
Okay, deep breath! This is where we assemble our beautiful dream. Making a gorgeous, perfectly baked blueberry cheesecake with fresh berries isn’t about rushing; it’s about following the rhythm. Don’t worry if you’ve never done a water bath before—I’ll walk you through it. Once you taste that perfectly rich, creamy filling, you’ll realize the patience was absolutely worth it for this make ahead dessert!
If you need some practice with careful mixing or want to try another sweet treat, my guide for easy homemade soft chewy sea salt caramels uses similar gentle mixing techniques.
Preparing the Pan and Crust
First things first, let’s tackle that pan. You need a 9-inch springform pan, and we are going to protect it! Tear off two large squares of heavy-duty aluminum foil—the heavy stuff works best here—and wrap the outside bottom and sides of the pan very securely. We want a waterproof shield because this is going into a bath later. Once that’s done, press your crust mixture (crumbs, butter, sugar) firmly and evenly into the bottom. Pop that into your 325-degree oven for just 10 minutes. Pull it out and let it cool while you focus on the filling.
Mixing the Velvety Cheesecake Filling
Remember: low and slow mixing is the key to that flawless, creamy cheesecake filling. Start by beating your room-temperature cream cheese until it’s totally lump-free. Now, slowly mix in the remaining sugar, vanilla, and salt. Once that’s incorporated, add your eggs one at a time. I mean it—wait until the first egg is completely blended in before adding the next one. Overmixing eggs adds too much air, which leads to bubbles and potential cracks later! Finish by gently stirring in the sour cream until the batter is homogenous and smooth.
Assembling and Creating the Homemade Blueberry Swirl
Time for structure! Pour about half of the creamy batter over your cooled crust. Now, sprinkle that first cup of blueberries evenly over that layer. Don’t dump them in a pile, or they’ll sink! Carefully pour the rest of the filling on top. For the swirl effect, take the last handful of blueberries and drop spoonfuls randomly across the top. Use a butter knife or a skewer and gently drag it through the top layer—just a few times, reaching maybe an inch deep—to get that lovely marbled, homemade blueberry swirl cheesecake look. Don’t overdo the swirling!
Baking in a Water Bath and Slow Cooling
Place your foil-wrapped springform pan inside a large roasting pan. This is crucial! Transfer both pans carefully into the oven. Then, pour hot water—and trust me, hot water works faster—into the roasting pan until it comes about halfway up the sides of the springform pan. Bake this setup at 325°F for about 60 to 75 minutes. You’re looking for the edges to be set, but the center should still have a slight jiggle, almost like firm gelatin. Once that bake time is up, turn the oven OFF. Crack the door open just a little bit, and let that beautiful baked cheesecake recipe just sit in there for one whole hour. This gradual cooling is your best defense against sharp cracking.
Making the Final Blueberry Crumble Topping
Once the cheesecake is removed to cool on the rack, go ahead and make your topping. In a small saucepan, combine your second measure of blueberries, sugar, lemon juice, cornstarch, and water. Cook this over medium heat, stirring constantly. As it heats up, the mixture will start to look cloudy, and then suddenly, it will thicken and bubble hard. That means the cornstarch has done its job! Pull it off the heat immediately. You *must* let this topping cool completely—preferably chill it in the fridge—before you spoon it over your cheesecake later. A hot topping will melt your chilled dessert!
Expert Tips for Your Perfect blueberry cheesecake
We’ve got the main recipe down pat, but what about those little things that make the difference between good and absolutely unforgettable? I always tell people that baking this classic blueberry cheesecake comes down to a few non-negotiable details. These aren’t complex steps, honestly, but they are the difference between a picture-perfect slice and something that’s a little bit disappointing. Remember how I stressed room temperature ingredients earlier? That’s the first big one!
Speaking of flavor, if you want to peek at how lemon brightens things up, check out my moist lemon loaf recipe—the principle of using fresh zest is the same!
Ingredient Temperature and Texture Control
I know it’s tempting to just use the cream cheese right out of the fridge because you’re eager to start, *but please don’t*. If your cream cheese and eggs are cold, they simply won’t emulsify with the sugar and butter properly. Think about it: cold ingredients resist blending smoothly. This creates tiny, hard pockets of cream cheese that bake unevenly, leading directly to that grainy texture we are trying to avoid. When everything is soft and room temperature, the mixture becomes one smooth, unified batter, which helps us achieve that incredible velvety cheesecake texture. Just set them out an hour before you plan to mix!
Variations: Adding Lemon Blueberry Cheesecake Flavor
If you love that bright pop of citrus with berries, you’re in luck because this recipe is so forgiving! For a true lemon blueberry cheesecake experience, you can boost the filling easily. Just grab a microplane zester and add about a teaspoon of fresh lemon zest right in with the sugar and vanilla. That bright oil from the zest infuses perfectly during the gentle bake. Alternatively, if you want to keep the filling pure, just use a bit more lemon juice—maybe an extra half tablespoon—in the final homemade blueberry topping. It just makes the berry flavor sing louder against the richness!
If you are looking at other topping ideas, I saw a fantastic-looking blueberry crumble cheesecake recipe that adds a beautiful crunch if you ever want a change!
Storage and Make Ahead Dessert Planning for blueberry cheesecake
One of the best things about making a truly decadent dessert like this classic baked blueberry cheesecake is that it’s fantastic when made ahead of time! In fact, I often prefer it the next day. The chilling process isn’t just about making it firm enough to slice; it actually lets those complex flavors—the tang from the sour cream, the sweet vanilla, and the earthy blueberries—really marry together. This makes it the perfect make ahead dessert for busy weekends or when you’re hosting a big dinner party. You get all the hard work done the day before!
If you’re interested in making things even further ahead, you should check out my tips for freezer jam—though that’s strictly for fruit preserves, the make-ahead concept is the same!
Chilling and Serving Your blueberry cheesecake
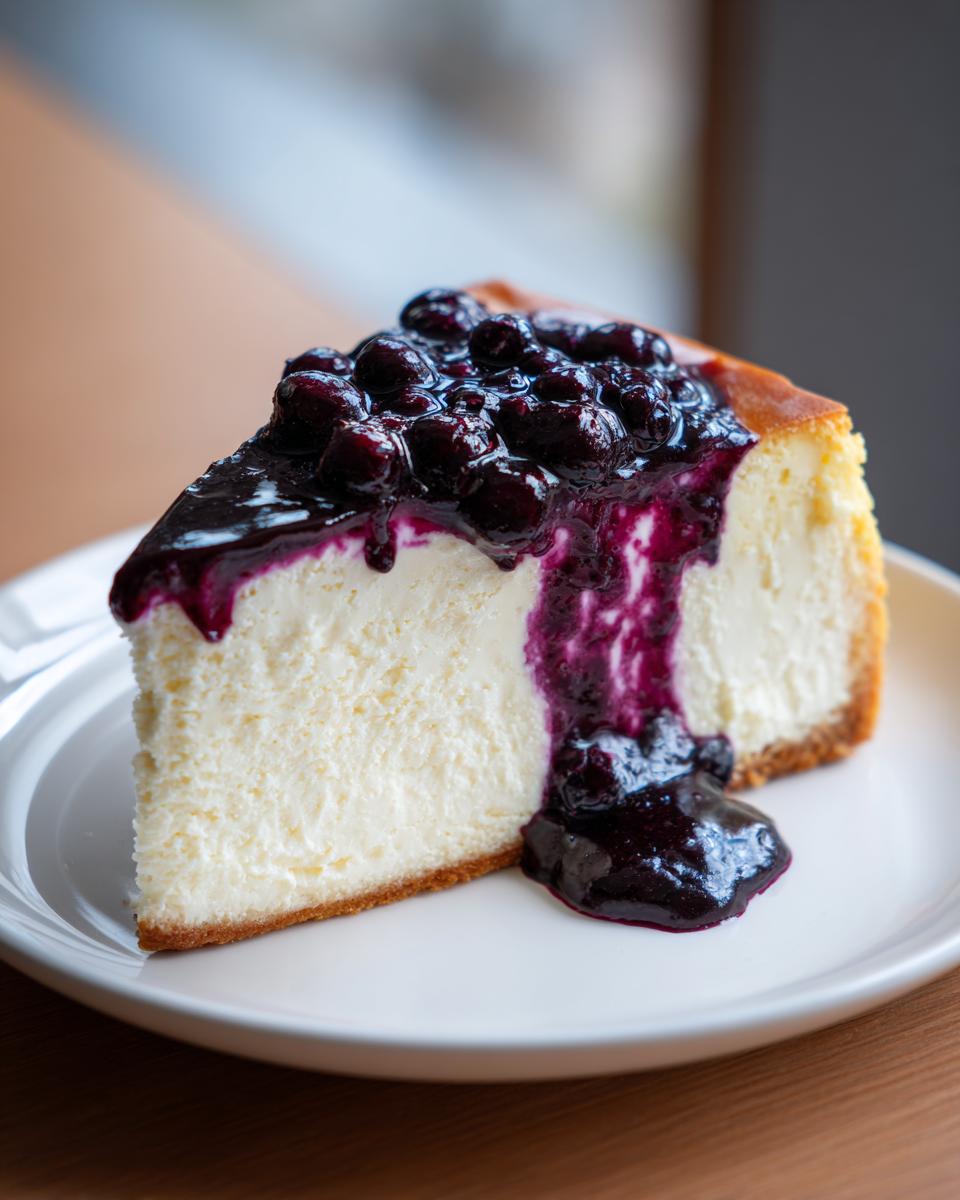
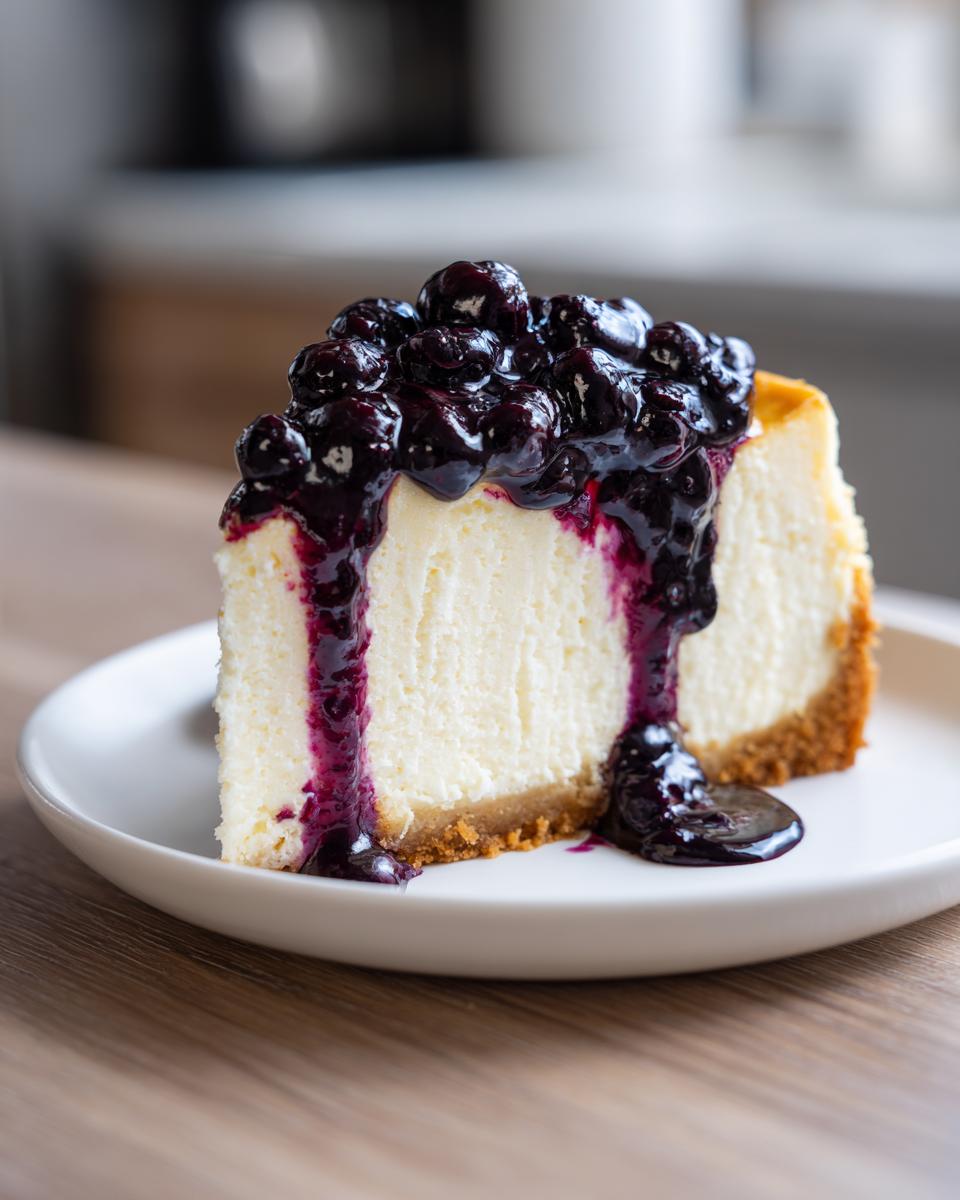
Here’s the most important rule for serving: you absolutely need to chill this baby for a minimum of six hours, but I am telling you, overnight is the sweet spot. That long, slow chill is what locks in that dense, velvety texture. When you take it out of the springform pan (after it’s fully chilled!), it will slice like a dream. Now, about that gorgeous topping you made—wait to put it on! If you apply the thick, cooled blueberry topping before chilling, it can sometimes seep into the top of the cheesecake, changing the clean texture you worked so hard for.
I always place the topping into a small bowl and serve it alongside the chilled cake, letting everyone spoon on as much as they want. If you absolutely MUST top it before serving, make sure the topping is refrigerator-cold and apply it no more than an hour before guests arrive. For folks craving that speedier option, I hear the easy no bake blueberry cheesecake sets up much faster, but nothing beats the body of this baked version!

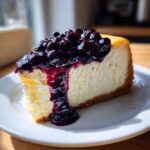
Serving Suggestions for This Decadent Berry Dessert
This classic baked blueberry cheesecake is so rich and luxurious all on its own, but serving it up with the right accompaniments just elevates it from dessert to an event! Because it’s so creamy and substantial, you really don’t need a lot of fuss. We’re aiming for simple elegance here, especially when hosting guests during the warmer months.
If you’re looking for another sweet element to contrast the rich texture, you might like my recipe for easy homemade soft chewy sea salt caramels—a little saltiness is just divine against blue cheese!
Here are my favorite ways to present this stunner at a summer gathering:
- A Dollop of Fresh Whipped Cream: You don’t even need to sweeten it much! Just cold heavy cream whipped until soft peaks form. It adds a lightness right before eating that cuts through the density beautifully.
- Citrus Zest Sprinkle: Even if you didn’t add lemon to the filling, a final light grate of fresh orange or lemon zest right over the finished blueberry swirl topping just wakes up the whole flavor profile. It smells incredible!
- Matching the Tang: If you enjoyed the citrus variation, serve it alongside a light, cold drink like iced herbal tea or, for the adults, a crisp, slightly sweet Pinot Grigio or Prosecco. The acidity pairs wonderfully with the baked cream cheese tang. I also saw this gorgeous lemon blueberry cheesecake that uses citrus throughout, proving how well those flavors blend!
Honestly, though, with the homemade topping glistening on top, this decadent berry dessert really shines all by itself. A nice slice on a simple white dessert plate is all it needs!
Frequently Asked Questions About blueberry cheesecake
Baking always brings up questions, and you know I’m here to help clear up any confusion so you end up with that showstopper blueberry cheesecake every time! We’ve covered the main steps, but here are the quick answers to the things I hear most often about texture, troubleshooting, and swapping styles.
If you love exploring no-bake options after you master this one, my Oreo cheesecake guide is always a big hit!
Can I make an Easy No Bake Blueberry Cheesecake instead?
You absolutely could, and it’s a fantastic, speedy treat for summer when you don’t want the oven on! But you have to know that the texture will be different. This baked recipe gives you that classic, dense, almost heavy New York style experience that can’t be beaten. A no-bake version will be lighter, fluffier, and definitely less tangy. If you need something fast, check out the details for an easy no bake blueberry cheesecake online, but for true cheesecake indulgence, this baked version is the one!
What if I don’t have a springform pan for my blueberry cheesecake?
Don’t panic if your cabinets are hiding a springform! If you have a sturdy, deep-dish glass pie plate or even a standard 9-inch cake pan, you can try it. The main challenge is getting the cake out, so I would suggest lining the pan with parchment paper, cutting circles for the bottom and strips for the sides, leaving an overhang—like little handles. Just be warned: the edges of a regular pan are thinner than a springform, so your graham cracker crust dessert edges might brown a little faster, so watch your oven around the 50-minute mark.
My cheesecake cracked slightly. How do I cover it?
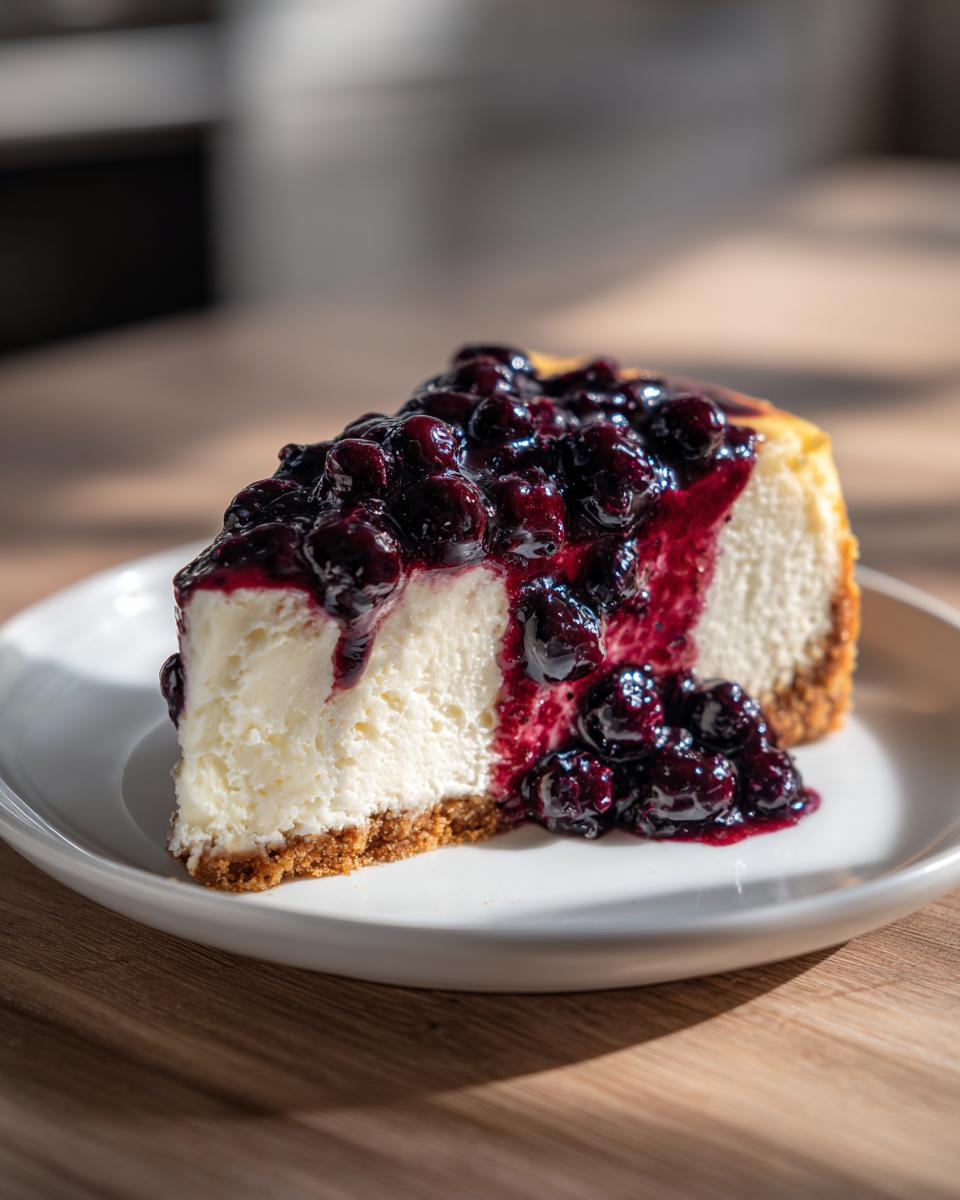
First, don’t stress! It’s still going to taste amazing, and that’s the most important part. A slight crack is usually just a tiny bit of deflation, and it’s easily hidden. This is exactly why we make that beautiful, thick homemade blueberry topping instead of using weak store-bought syrup! Just let the cheesecake chill completely, and then be generous when you spoon that cooled topping right over the center. Let it drizzle slightly down the sides. Your guests will only see a gorgeous, elegant dessert, not a baking imperfection!
Estimated Nutritional Data for This blueberry cheesecake Recipe
You work hard to make this incredible, decadent dessert, and while we certainly aren’t making this blueberry cheesecake because it’s low-calorie—life is too short for boring food!—I believe in being transparent about what we’re eating, especially when it’s so rich. Based on my careful calculations using standard quantities for the ingredients listed, here is the approximate nutritional breakdown for one slice serving this recipe. It’s powerful stuff, so a small slice really goes a long way!
Remember, these figures are just estimates. If you use light cream cheese or skip the topping, your numbers will change! For more ideas on balancing indulgence and everyday eating, I always try to keep things lighter with my healthy lunch recipes during the week.
- Serving Size: 1 slice
- Calories: Approximately 450
- Fat: About 28g (mostly from the rich cream cheese and butter)
- Carbohydrates: Around 45g
- Sugar: Roughly 38g (this includes the sugar in the crust, filling, and homemade topping)
- Protein: About 7g
- Cholesterol: Approximately 110mg
It’s clearly a treat, meant for special occasions! That little bit of fat is what gives you that unbeatable, velvety cheesecake texture.
Share Your Homemade blueberry cheesecake Experience
Well, that’s the journey from crust to glorious, juicy topping! I truly hope you feel inspired to recreate this classic baked blueberry cheesecake, because bringing one of these beauties out for dessert is one of those moments that just feels like pure joy. Food tastes so much better when it’s made with love and shared with people you care about, right?
I poured all my best tips for achieving that perfect structure and getting that gorgeous swirl into the recipe above, but I know you all get creative in your own kitchens too! Whether you tried the lemon zest addition, maybe you experimented with a different style of berry, or perhaps you finally conquered the water bath like a pro—I want to hear all about it.
Don’t be shy! Please scroll down to the comments section below and let me know how your creamy cheesecake filling turned out. Tell me if you thought this was a 5-star experience! I love seeing your photos and hearing how you’ve woven this recipe into your own family traditions. Happy baking, friends—I can’t wait to connect with you!
And when you need something totally different for the morning after, make sure you check out my other favorites, like these easy breakfast recipes!
PrintClassic Baked Blueberry Cheesecake with Homemade Topping
Make a dense, creamy, New York style blueberry cheesecake that stays crack-free. This recipe includes a sweet graham cracker crust and a homemade, juicy blueberry topping.
- Prep Time: 30 min
- Cook Time: 75 min
- Total Time: 105 min
- Yield: 12 servings 1x
- Category: Dessert
- Method: Baking
- Cuisine: American
- Diet: Vegetarian
Ingredients
- 1 1/2 cups graham cracker crumbs
- 1/4 cup granulated sugar (for crust)
- 6 tablespoons unsalted butter, melted
- 3 (8 ounce) packages cream cheese, softened
- 1 1/2 cups granulated sugar (for filling)
- 1 teaspoon vanilla extract
- 1/4 teaspoon salt
- 4 large eggs
- 1/2 cup sour cream
- 1 cup fresh or frozen blueberries (for swirling)
- 1 tablespoon lemon juice (for topping)
- 1 cup fresh or frozen blueberries (for topping)
- 1/4 cup granulated sugar (for topping)
- 1 tablespoon cornstarch
- 1/4 cup water
Instructions
- Preheat your oven to 325 degrees F. Wrap the outside of a 9-inch springform pan tightly with heavy-duty aluminum foil to prevent water from entering during the water bath.
- Prepare the crust: Mix graham cracker crumbs, 1/4 cup sugar, and melted butter. Press the mixture firmly into the bottom of the prepared springform pan. Bake for 10 minutes. Let cool slightly.
- Prepare the filling: In a large bowl, beat the softened cream cheese with an electric mixer until smooth. Gradually beat in 1 1/2 cups sugar, vanilla extract, and salt until combined. Do not overmix.
- Beat in the eggs one at a time, mixing just until each egg is incorporated. Mix in the sour cream until the batter is smooth.
- Pour half of the cream cheese filling over the cooled crust. Scatter 1 cup of blueberries evenly over the filling. Pour the remaining filling over the top.
- Create the swirl: Gently drop spoonfuls of the remaining blueberries over the top of the batter. Use a knife or skewer to gently swirl the berries into the top layer of the batter.
- Bake in a water bath: Place the foil-wrapped springform pan into a larger roasting pan. Carefully pour hot water into the roasting pan until it reaches halfway up the sides of the springform pan.
- Bake for 60 to 75 minutes, or until the edges are set but the center still has a slight jiggle.
- Turn off the oven, crack the oven door open slightly, and let the cheesecake cool inside the oven for 1 hour. This slow cooling helps prevent cracking.
- Remove the cheesecake from the water bath and foil. Cool completely on a wire rack, then chill in the refrigerator for at least 6 hours, or preferably overnight.
- Prepare the topping: In a small saucepan, combine the second measure of blueberries, 1/4 cup sugar, lemon juice, cornstarch, and water. Cook over medium heat, stirring constantly, until the mixture thickens and bubbles. Remove from heat and let cool completely.
- Before serving, carefully remove the sides of the springform pan and spoon the cooled blueberry topping over the chilled cheesecake.
Notes
- For a truly crack-free surface, make sure your cream cheese and eggs are at room temperature before mixing.
- If you prefer a lemon tang in the filling, add 1 teaspoon of lemon zest to the cream cheese mixture.
- This dessert is excellent as a make-ahead dessert; the flavor improves after a full day of chilling.
Nutrition
- Serving Size: 1 slice
- Calories: 450
- Sugar: 38g
- Sodium: 320mg
- Fat: 28g
- Saturated Fat: 17g
- Unsaturated Fat: 11g
- Trans Fat: 0.5g
- Carbohydrates: 45g
- Fiber: 1g
- Protein: 7g
- Cholesterol: 110mg