
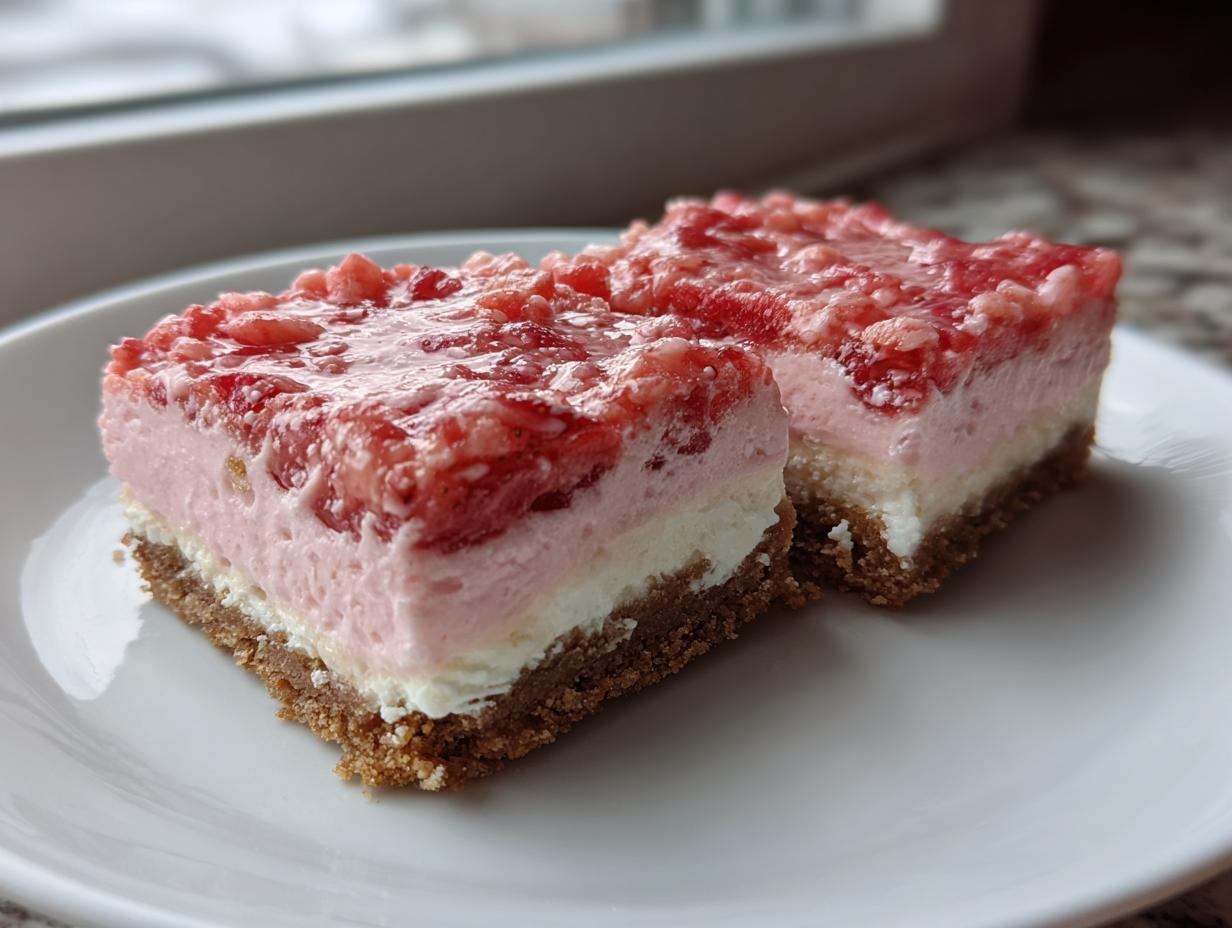
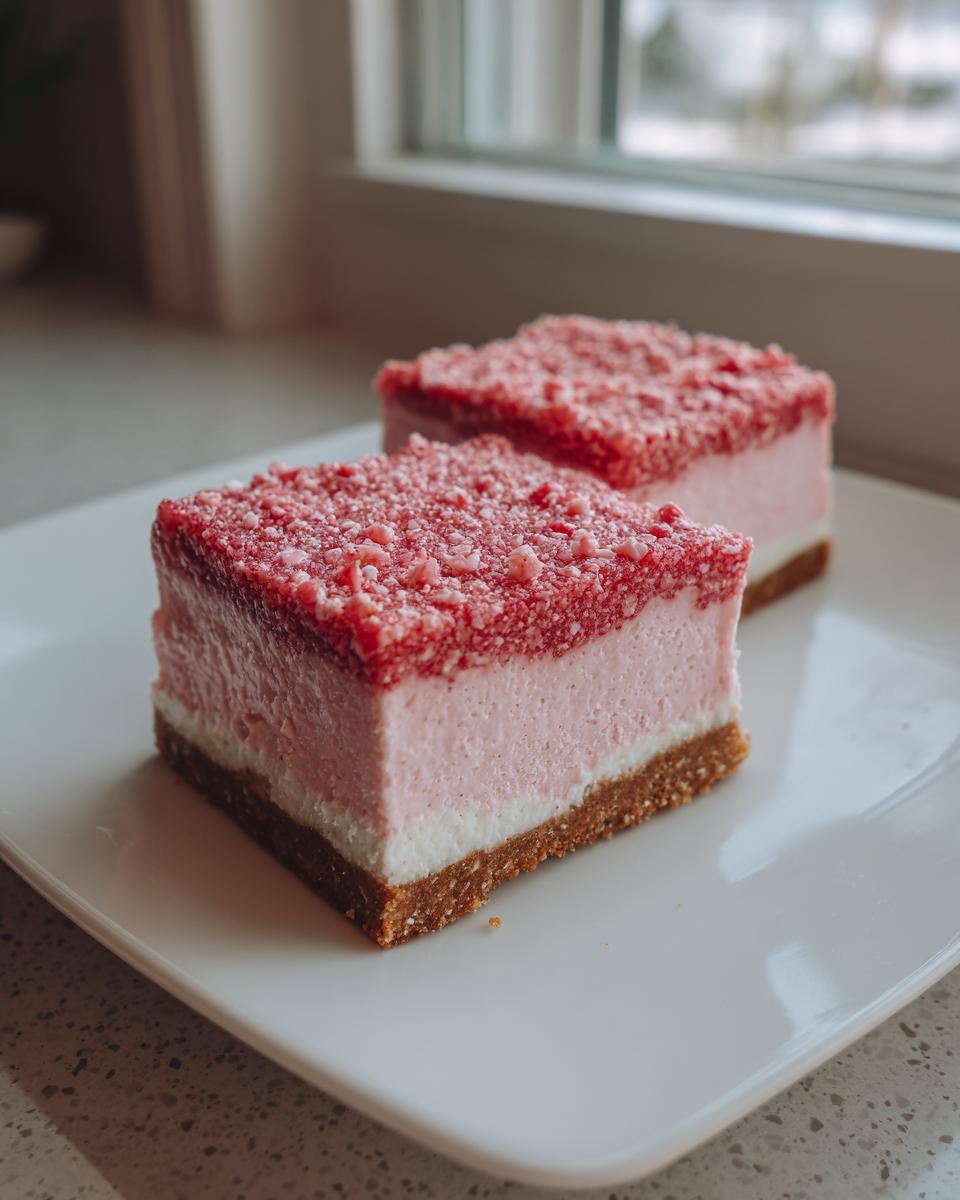
When the weather heats up, all I want is something cool, creamy, and just a little bit naughty! I grew up loving those strawberry ice cream bars with that signature crunchy coating, and trust me, I’ve spent ages trying to capture that exact flavor in a grown-up dessert. That’s why I’m so thrilled to finally share my absolute favorite cool-down treat: the **strawberry crunch cheesecake** bars. This recipe, tested right here in my kitchen, brings that perfect texture contrast—a smooth, rich cream cheese layer swirled with bright strawberry flavor, all sitting on a buttery crust. Sarah Miller believes that every good recipe should bring joy and simple comfort, and this no-bake wonder is definitely one of those. It’s seriously impressive but deceptively easy! If you love pairing fruity notes with cooling dairy, you might also want to check out my recipe for a quick strawberry matcha latte.
- Why You Need This Easy Strawberry Crunch Cheesecake Recipe
- Gathering Ingredients for Your Strawberry Crunch Cheesecake
- Step-by-Step Instructions for No Bake Strawberry Crunch Cheesecake
- Expert Tips for the Best Strawberry Crunch Topping Tutorial
- Ingredient Notes and Substitutions for Your Strawberry Crunch Cheesecake
- Variations on the Layered Strawberry Cheesecake Tutorial
- Serving Suggestions for This Rich Creamy Dessert
- Storage and Make-Ahead Tips for Strawberry Crunch Cheesecake Bars
- Frequently Asked Questions About Strawberry Crunch Cheesecake
- Share Your HearthBite Creations
Why You Need This Easy Strawberry Crunch Cheesecake Recipe
The best part about this dessert is that it checks every single box without requiring you to turn on your oven for the main event! Seriously, who has time to wait around for a baked cheesecake to cool down perfectly?
- It’s a genuine no-bake superstar, meaning less stress for you.
- The textural payoff is huge—that crunchy topping against the creamy filling is just addictive.
- It’s perfect for hot days and incredibly simple to make ahead. You can even find quick inspiration for weeknight meals over at my collection of fast dinner recipes, but this dessert is worth the time!
Gathering Ingredients for Your Strawberry Crunch Cheesecake
Okay, getting organized is the secret to making this stress-free. Since this is a no-bake recipe, the quality of your ingredients really shines through! Don’t worry if you don’t have everything lying around; most of these are staples for any good baker. We’re tackling this in three easy parts: the base, the creamy filling, and that gorgeous, amazing crunch. If you love making things from scratch, you might want to check out my guide on easy homemade soft chewy sea salt caramels for another weekend project!
For the Graham Cracker Crust
- 1 1/2 cups graham cracker crumbs (I use the fine crumbs, not the coarse meal!)
- 1/4 cup granulated sugar
- 6 tablespoons unsalted butter, melted
For the Creamy No Bake Filling
- 16 ounces cream cheese, softened (This MUST be softened, or it won’t whip smooth!)
- 1 cup powdered sugar
- 1 teaspoon vanilla extract
- 1 cup heavy whipping cream, cold (Keep this in the fridge until the very last second!)
- 1/2 cup strawberry puree (Made from fresh or thawed frozen strawberries—strain them slightly if they’re super watery!)
For the Homemade Strawberry Crunch Topping
- 1 cup vanilla wafer crumbs (or shortbread cookie crumbs if you like a buttery base)
- 1/2 cup freeze-dried strawberries, crushed into fine pieces (This is where the big flavor comes from!)
- 1/4 cup granulated sugar
- 1/4 cup (1/2 stick) unsalted butter, melted
- 1 teaspoon pink or red food coloring (optional, but it definitely makes it look like the inspiration!)
Step-by-Step Instructions for No Bake Strawberry Crunch Cheesecake
Alright, time to get busy! Since we are making no bake dessert bars, the steps are straightforward, but timing matters, especially for setting time. We want that crust firm before we start piling on the creamy goodness. If you are looking for other fantastic no-bake ideas, I have a great no-bake Oreo cheesecake recipe you might want to bookmark for later!
Preparing the Crust and Chilling
First off, line that 8×8 pan with parchment paper, making sure you leave some overhang—that’s your handle later! Combine your crumbs, sugar, and melted butter right in a bowl. Press it down into the bottom of the pan. You really want to pack this firmly, using the bottom of a measuring cup works wonders! Pop that crust into the freezer for about 15 minutes while you work on the next layer. It needs to set up hard!
Creating the Rich Creamy Strawberry Cheesecake Filling
In your big bowl, you’re going to beat that softened cream cheese until it’s totally silky—no lumps allowed! Slowly mix in the powdered sugar and vanilla. Now for the lightness: In a separate, completely chilled bowl, whip your heavy cream until you get stiff peaks. Gently fold that whipped cream into the cream cheese mixture. Don’t stir aggressively; we need to keep those air bubbles! Finally, fold in your strawberry puree. If you want that pretty swirl effect, just do a couple of strokes. Mix completely for a uniform pink.
Baking the Crunchy Dessert Topping
This is the step that makes all the kids (and adults!) obsessed. Mix those vanilla wafer crumbs, crushed freeze-dried strawberries, and the last bit of sugar in a small bowl. Pour in the melted butter and that optional food coloring. Keep mixing until it looks like moist, brightly colored sand. Spread this topping out onto a small sheet lined with parchment paper. Bake it at 350 degrees F for about 8 to 10 minutes, stirring halfway. This toasts the crumbs and really locks in that crunch factor. Let it cool completely before you even think about touching the cheesecake!
Assembling and Setting the Strawberry Crunch Cheesecake
Spread that beautiful pink filling carefully over your firm, chilled crust. Now comes the hard part: waiting! Cover this carefully and get it into the fridge for a minimum of six hours, but truly, overnight is best for this **best cheesecake recipe with crunch topping**. Once it’s fully set and firm to the touch, you sprinkle that completely cooled, crunchy topping all over the top surface. Lift it out using the parchment sling, slice it up, and serve those amazing bars!
Expert Tips for the Best Strawberry Crunch Topping Tutorial
Getting that perfect crunch layer is honestly where the magic happens for this **strawberry crunch cheesecake**. It’s so easy to get enthusiastic and throw everything in a bowl, but trust me on this one: a little finesse makes all the difference in texture. If you’re looking for other projects that require this kind of careful attention, you should definitely explore my notes on making easy homemade soft chewy sea salt caramels.
If you’re using those freeze-dried strawberries—and you absolutely should—you’ve got to treat them right. My biggest secret? I place them in a zip-top bag and crush them using the bottom of a heavy saucepan. You want mostly fine dust, but leave a few tiny chunks in there for surprise bursts of intense berry flavor. These should resemble coarse sand, not powder.
Also, don’t skimp on toasting those crumbs! If you skip baking the topping, it will start absorbing moisture from the creamy cheesecake filling and turn soft way too fast. Toasting them gently in the oven, just until you smell that nutty, baking aroma, sets the crunch beautifully. I often test it by listening—it should sound distinctly sandy when you stir it, not damp.
Ingredient Notes and Substitutions for Your Strawberry Crunch Cheesecake
I get so many questions about substitutions, which I totally understand! We all bake with what we have on hand, but for this specific **strawberry crunch cheesecake**, a couple of ingredients really make or break that iconic flavor. If you’re having a cookie emergency, don’t stress too much about the base.
For the crust, graham crackers are classic, but if all you have are shortbread cookies or even those simple vanilla wafers, those work just fine in a pinch. Just crush them up nice and fine! If you’re looking for other simple, great cookies recipes, I’ve put together my guide for easy cool whip cookies which might be helpful.
Now, about that color! The food coloring is purely aesthetic—it makes the topping look exactly like the ice cream bar we all remember. If you prefer a natural look, just leave it out! The freeze-dried strawberries still give you a gorgeous, subtle pink hue within the crumbs. My big rule, though, is don’t substitute the real cream cheese! You need that full-fat stuff for the rich, creamy texture this dessert deserves.
Variations on the Layered Strawberry Cheesecake Tutorial
While I absolutely adore these easy no bake dessert bars, I know some of you might want to turn this into a showstopper centerpiece. You can totally adapt this formula! If graham crackers aren’t your favorite, go for a shortbread crust instead; it gives the base a wonderfully mellow, buttery flavor. For a grander presentation, skip the 8×8 pan and use a 9-inch springform pan. Just remember, if you go round, you’ll need a bit more chilling time—at least 8 hours—to ensure the center sets up perfectly for slicing.
If you’re feeling extra adventurous or just love a dramatic bake, you could swap this out for a traditional baked cheesecake base, though you’d need to adjust the texture of the topping slightly. For more impressive baked goods inspiration, take a look at my rich red velvet bundt cake recipe!
Serving Suggestions for This Rich Creamy Dessert
Once you’ve managed to nail that perfect set and the crunch is topping the creaminess, you want to serve this Strawberry Crunch Cheesecake looking its best! Because the flavor profile is already so bright and rich, it hardly needs much help, which I love for weeknight treats.
If you’re serving these on a platter, a few tiny fresh mint leaves sprinkled over the top look stunning next to the pink and white. They add a wonderful little fragrance, too! This dessert pairs beautifully with a simple, strong cup of coffee—I have a recipe for a wonderfully moist, sour cream coffee cake if you need something to snack on later!
Don’t overthink the topping when serving; the crunch coating does ninety percent of the heavy lifting for you!
Storage and Make-Ahead Tips for Strawberry Crunch Cheesecake Bars
Because this is a no-bake stunner, it is absolutely fantastic for making ahead! That’s my favorite kind of recipe, honestly. You can have the entire cheesecake base and filling set in the fridge overnight, which is great for busy days. If you want to prep even further, I sometimes make a batch of my easy strawberry freezer jam a week early to use for the puree!
The biggest worry for any **strawberry crunch cheesecake** is keeping that topping crispy. If you plan to freeze the bars, here’s my trick: store the cooled, baked crunch topping in a completely airtight container separate from the cheesecake. Once the bars are fully set, you can slice them, then just sprinkle that heavenly crunch layer on top right before you serve them. That way, every bite snaps perfectly, even if you made them three days prior!
Frequently Asked Questions About Strawberry Crunch Cheesecake
I know sometimes when you try a new recipe, especially something as special as a **dessert with strawberry crunch layer**, you have little questions pop up! That’s totally normal. I’ve pulled together the things I get asked most often when I make this **creamy strawberry cheesecake** for gatherings. I hope this helps you feel super confident before you start!
Can I use fresh strawberries instead of puree in the filling?
Oh, absolutely you can! Fresh fruit always smells amazing, and I love using what’s in season. If you go that route, you just need to be mindful of the water content. Fresh strawberries are often much wetter than even thawed frozen ones. I recommend slightly heating your mashed fresh strawberries on the stove for just five minutes with a tiny sprinkle of sugar, letting it simmer down until it thickens up just a hair. Strain it well before folding it into the filling. Too much liquid, and your beautiful **no bake dessert bars** might never set up right!
How do I keep the crunch topping from getting soggy?
This is the number one concern when dealing with any **crunchy dessert topping recipes**! The enemy here is moisture migration from the cheesecake itself. The trick, which I mentioned in the steps, is not to put the topping on until basically the last minute. If you are making these for a party the next day, keep the fully set cheesecake covered in the fridge, and store the baked, cooled crunch topping in a separate Ziploc bag on the counter. Sprinkle it on right before you slice and serve. You get that perfect snap every single time!
Is this recipe easier than a traditional baked cheesecake?
Yes, yes, a thousand times yes! This is why I love promoting this as an **easy strawberry crunch cheesecake recipe**. With a baked version, you have to worry about water baths, preventing surface cracks, and all that tricky temperature management. With this no-bake version, as long as you let it chill long enough—and I mean *long* enough, overnight is my preference—it sets up beautifully and reliably every time! It saves you time and stress, leaving you free to enjoy your food!
If you’re looking for more simple ways to use your oven space efficiently, maybe check out my collection of easy breakfast recipes that can sometimes double as a light dessert!
Share Your HearthBite Creations
When you finish pulling together these fabulous **strawberry crunch cheesecake** bars, I truly want to know what you think! My whole mission here at HearthBite is to make sure these recipes work perfectly in your busy home kitchens, and your feedback helps me immensely.
Please, take a moment after you sample it to leave a rating right below this article. Did the crunch hold up? Was the strawberry flavor just right for your family? I read every single comment, and they bring me so much joy.
If you snap a picture of your gorgeous, layered dessert—especially that beautiful textural moment where the creamy cheesecake meets the crunchy topping—please tag me on social media! Seeing my recipes come to life in your home is what keeps my passion stoked. You can reach out anytime through my contact page if you have general questions or just want to share an extra baking victory. Happy baking, friends!
PrintNo-Bake Strawberry Crunch Cheesecake Bars
Make this easy, creamy no-bake strawberry crunch cheesecake. It features a rich cream cheese filling and a crunchy topping inspired by strawberry ice cream bars.
- Prep Time: 30 min
- Cook Time: 10 min
- Total Time: 6 hours 40 min
- Yield: 9 servings 1x
- Category: Dessert
- Method: No Bake
- Cuisine: American
- Diet: Vegetarian
Ingredients
- For the Crust: 1 1/2 cups graham cracker crumbs
- 1/4 cup granulated sugar
- 6 tablespoons unsalted butter, melted
- For the Filling: 16 ounces cream cheese, softened
- 1 cup powdered sugar
- 1 teaspoon vanilla extract
- 1 cup heavy whipping cream, cold
- 1/2 cup strawberry puree (from fresh or thawed frozen strawberries)
- For the Strawberry Crunch Topping: 1 cup vanilla wafer crumbs (or shortbread cookie crumbs)
- 1/2 cup freeze-dried strawberries, crushed into fine pieces
- 1/4 cup granulated sugar
- 1/4 cup (1/2 stick) unsalted butter, melted
- 1 teaspoon pink or red food coloring (optional)
Instructions
- Prepare the pan: Line an 8×8 inch baking pan with parchment paper, leaving an overhang on two sides for easy removal.
- Make the crust: In a medium bowl, combine graham cracker crumbs, 1/4 cup sugar, and melted butter. Press the mixture firmly and evenly into the bottom of the prepared pan. Chill in the freezer for 15 minutes while you prepare the filling.
- Make the filling: In a large bowl, beat the softened cream cheese until smooth. Gradually beat in the powdered sugar and vanilla extract until fully combined.
- Whip the cream: In a separate, chilled bowl, whip the cold heavy cream until stiff peaks form. Gently fold the whipped cream into the cream cheese mixture until just combined.
- Add strawberry flavor: Gently fold in the strawberry puree until streaks of pink appear. Do not overmix if you want a marbled look, or mix completely for a uniform pink color.
- Assemble the cheesecake: Spread the cheesecake filling evenly over the chilled crust. Cover the pan and refrigerate for at least 6 hours, or preferably overnight, until firm.
- Make the crunch topping: In a small bowl, combine the vanilla wafer crumbs, crushed freeze-dried strawberries, and 1/4 cup sugar. Pour in the melted butter and food coloring (if using). Mix until the mixture resembles wet sand and is evenly colored.
- Bake the topping: Spread the crunch mixture onto a small, parchment-lined baking sheet. Bake at 350 degrees F for 8 to 10 minutes, stirring halfway through, until lightly toasted. Let cool completely.
- Finish the bars: Once the cheesecake is fully set, sprinkle the cooled strawberry crunch topping evenly over the top surface.
- Serve: Use the parchment overhang to lift the cheesecake out of the pan. Cut into bars before serving. Keep refrigerated.
Notes
- For the best crunch texture, ensure your freeze-dried strawberries are crushed finely before mixing with the butter.
- If you prefer a baked cheesecake, use a 9-inch springform pan and bake the crust for 10 minutes before adding the filling and baking the cheesecake according to a standard baked cheesecake recipe. Omit the chilling time for the topping application.
- Use high-quality, full-fat cream cheese for the creamiest texture in your filling.
Nutrition
- Serving Size: 1 bar
- Calories: 450
- Sugar: 35
- Sodium: 250
- Fat: 28
- Saturated Fat: 17
- Unsaturated Fat: 8
- Trans Fat: 0
- Carbohydrates: 45
- Fiber: 1
- Protein: 5
- Cholesterol: 85