
Listen, I know meringue can seem fussy. You hear the word and immediately picture cracked shells and weeping goo. But here in the HearthBite kitchen, we believe cooking should be an act of joy, not a chore you dread! That’s why I spent ages perfecting what I call my No-Fail Easy Meringue Cookies. These aren’t your fancy French patisserie numbers; these are simple egg white desserts that come together with just a few pantry staples. I promise you, if you can whisk, you can master these light and airy cookies. They bake up into that beautiful, crispy exterior and deliver that pure, melt-in-your-mouth dessert magic that makes you close your eyes after the first bite.
We’re focusing on technique so you gain confidence as a baker, and trust me, the results are worth that tiny bit of attention! If you love reliable, heartwarming recipes like this, you should also check out all the great options over in my comfort food recipes collection.
- Why These Meringue Cookies Are Your New Go-To Recipe
- Gathering Ingredients for Perfect Meringue Cookies
- The Perfect Meringue Technique: Making Your Meringue Cookies
- Shaping and Low and Slow Baking for Crispy Baked Meringue
- The Secret to No Fail Meringue Cookies: Cooling Inside the Oven
- Flavor Variations for Your Homemade Meringues
- Storage & Serving Suggestions for Meringue Cookies
- Frequently Asked Questions About Meringue Cookies
- Share Your Beautiful Dessert Cookies
Why These Meringue Cookies Are Your New Go-To Recipe
I truly believe you are going to fall head-over-heels for these meringue cookies. Why? Because they hit every mark we look for in a truly satisfying, yet simple, sweet. These are not cookies that crumble into sad little piles; these are dependable recipes from the HearthBite kitchen that you can trust right out of the gate. After years of perfecting this method, I know they’ll be your new favorite, too, especially if you’re looking for easy cool whip cookies alternatives!
- They deliver that perfect, crisp exterior that snaps just right.
- The inside is purely light and airy—they practically dissolve the second they hit your tongue.
- They only use standard, accessible ingredients, making them perfect for last-minute baking.
Light and Airy Cookies Perfection
The secret to that ethereal texture is all in the whipping and the baking temperature. When we beat those egg whites just right to stiff peaks and then bake them low and slow, we are essentially dehydrating them into tiny, sweet clouds. They won’t deflate or crack if you let them cool properly, which is half the battle!
Beginner Baking Recipes Confidence
If you’ve been avoiding recipes that call for whisking egg whites, let this recipe be your gateway! This is one of my favorite beginner baking recipes because the visual cues are so clear. You cannot sneak past the stiff, glossy peaks stage, and once you see them, you know you’ve got the foundation solid for these melt-in-your-mouth delights.
Gathering Ingredients for Perfect Meringue Cookies
Pulling these simple meringue cookies together is honestly the easiest part! You don’t need a pantry full of specialty items here, which is part of why I love them so much. We are keeping the ingredient list short and sweet. Just make sure you have the right basics on hand. If you’re looking for quick and easy dinner recipes next, I’ve got you covered!
- 4 large egg whites (room temperature, please!)
- 1 cup granulated sugar
- 1 teaspoon pure vanilla extract
- A tiny pinch of salt
Ingredient Notes and Substitutions for Meringue Cookies
Okay, let’s talk details because even with just four ingredients, preparation matters. First, those egg whites absolutely must be room temperature. Cold whites just will not whip up into the stable volume we need for those light and airy cookies. Second, I insist on pure vanilla extract—it makes a difference in the subtle flavor!
You might notice I skipped the cream of tartar here, which some recipes call for. Honestly, with the slow methodical way we add sugar to create stiff peaks, the chemical stabilizer just isn’t necessary for this recipe. We are relying on good technique! Trust me, my results are consistently beautiful and crisp without it.
The Perfect Meringue Technique: Making Your Meringue Cookies
This is where the magic really happens, and I want you to feel totally confident every step of the way. Forget complicated chemical stabilizers; we are using pure elbow grease and my tried-and-true method! First, get that mixer going on medium speed with those room-temperature egg whites and that tiny pinch of salt. You want them to get foamy, then turn into soft peaks—they’ll look like fluffy, barely holding-their-shape clouds.
Now, the crucial part: adding the sugar. You have to go slow, honey, *slow*. Add it in just one tablespoon at a time, waiting about 20 to 30 seconds between each addition. This slow incorporation dissolves the sugar perfectly into the air bubbles we’re making. It takes patience, but if you rush it, the sugar won’t dissolve, and you’ll end up with sticky weepiness later on. Definitely check out these guidelines on French meringue technique if you want to see how seriously people take this step!
Once all that sugar is in, crank that mixer high until you see stiff, glossy peaks. Then, we swirl in the vanilla extract from my soft, chewy sea salt caramels recipe for an extra hint of flavor.
Achieving Stiff, Glossy Peaks for Stable Meringue Cookies
When you lift that whisk attachment out, the peak should stand straight up without flopping over—that’s stiff! It should also look incredibly shiny, almost like polished porcelain. I learned this the hard way years ago when I tried to speed things up after quickly wiping out my mixing bowl with my hand instead of washing it properly. Oops! That microscopic bit of residual hand cream or oil meant the first batch collapsed into sad, foamy puddles, and I had to start over with a spotlessly clean bowl. Remember: meringue hates grease more than I hate soggy salads!
Shaping and Low and Slow Baking for Crispy Baked Meringue
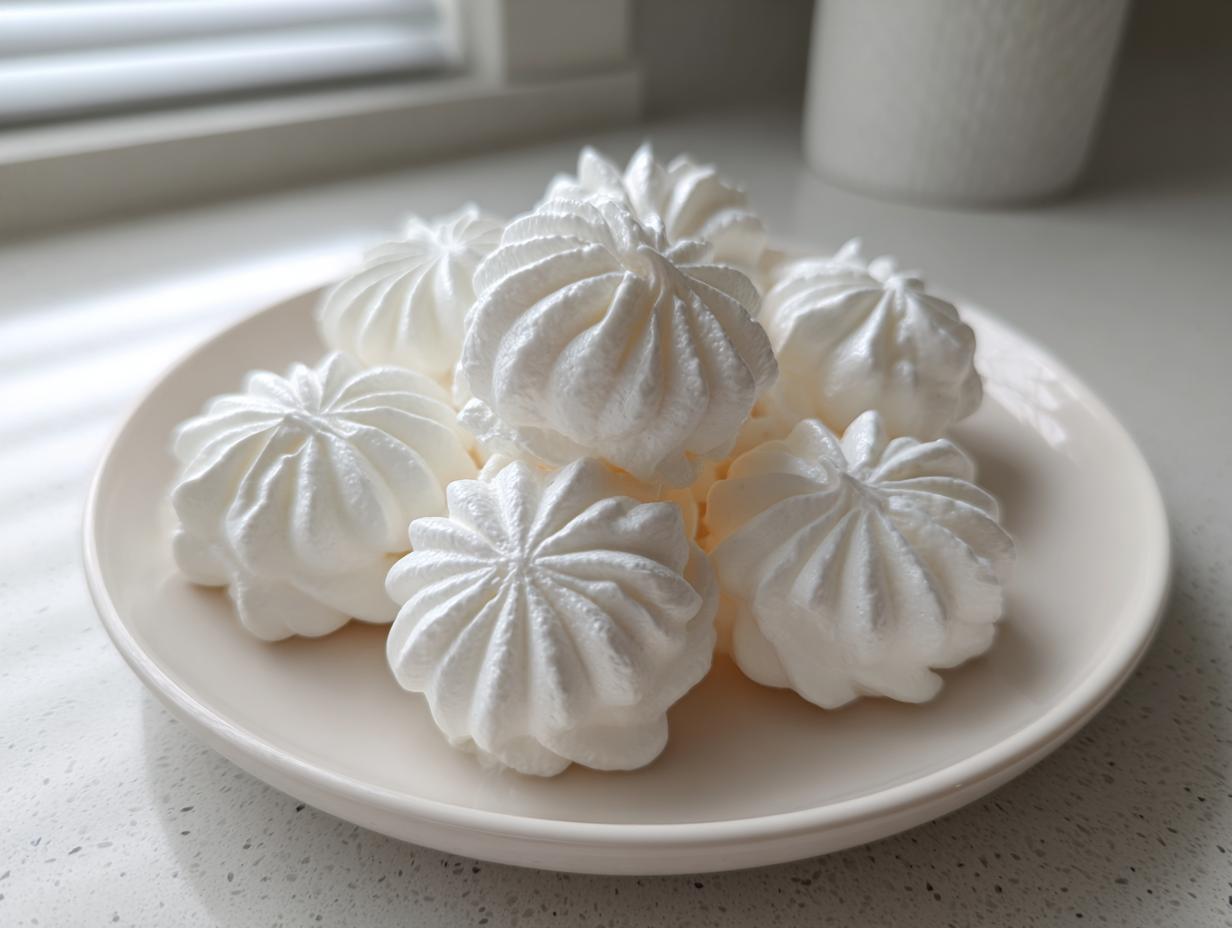
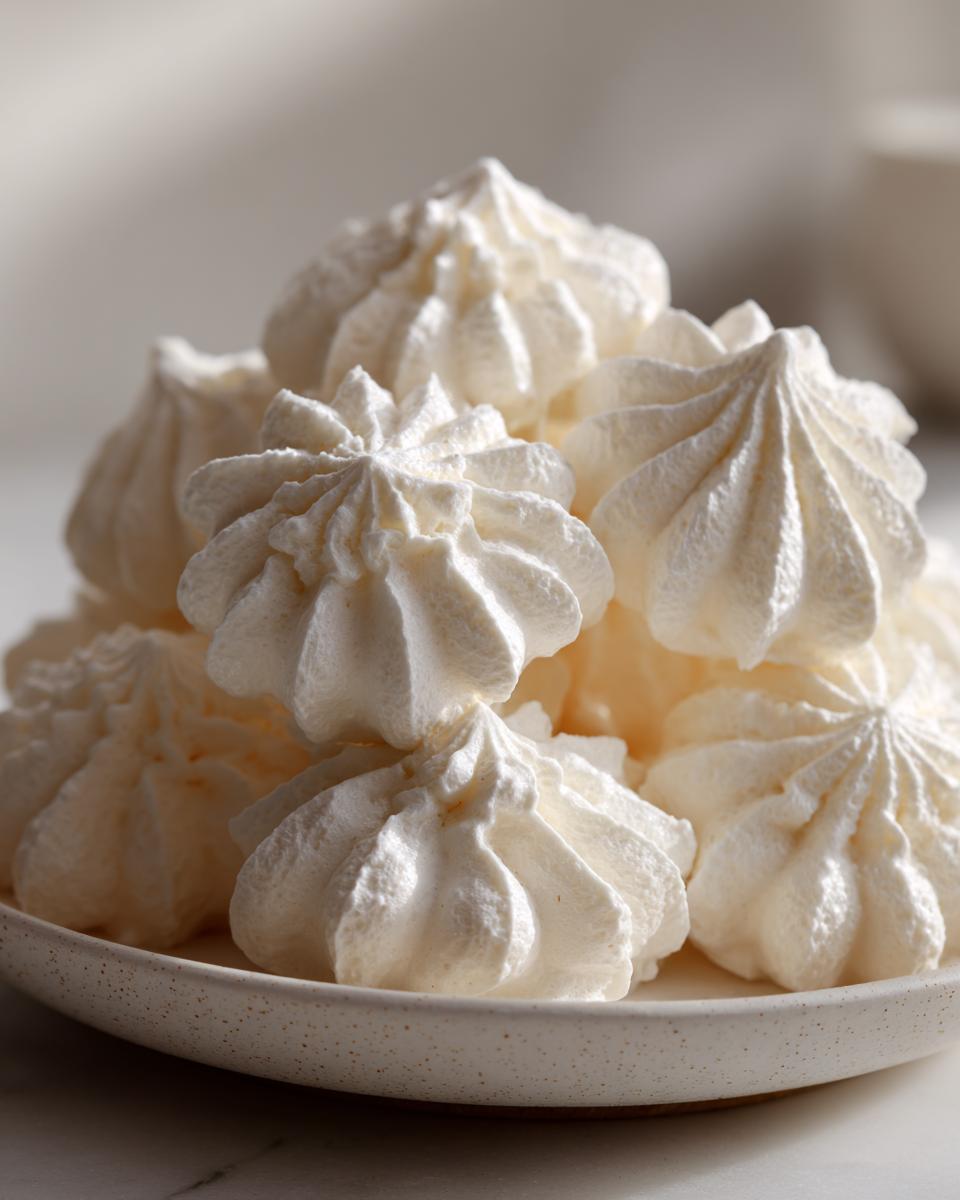
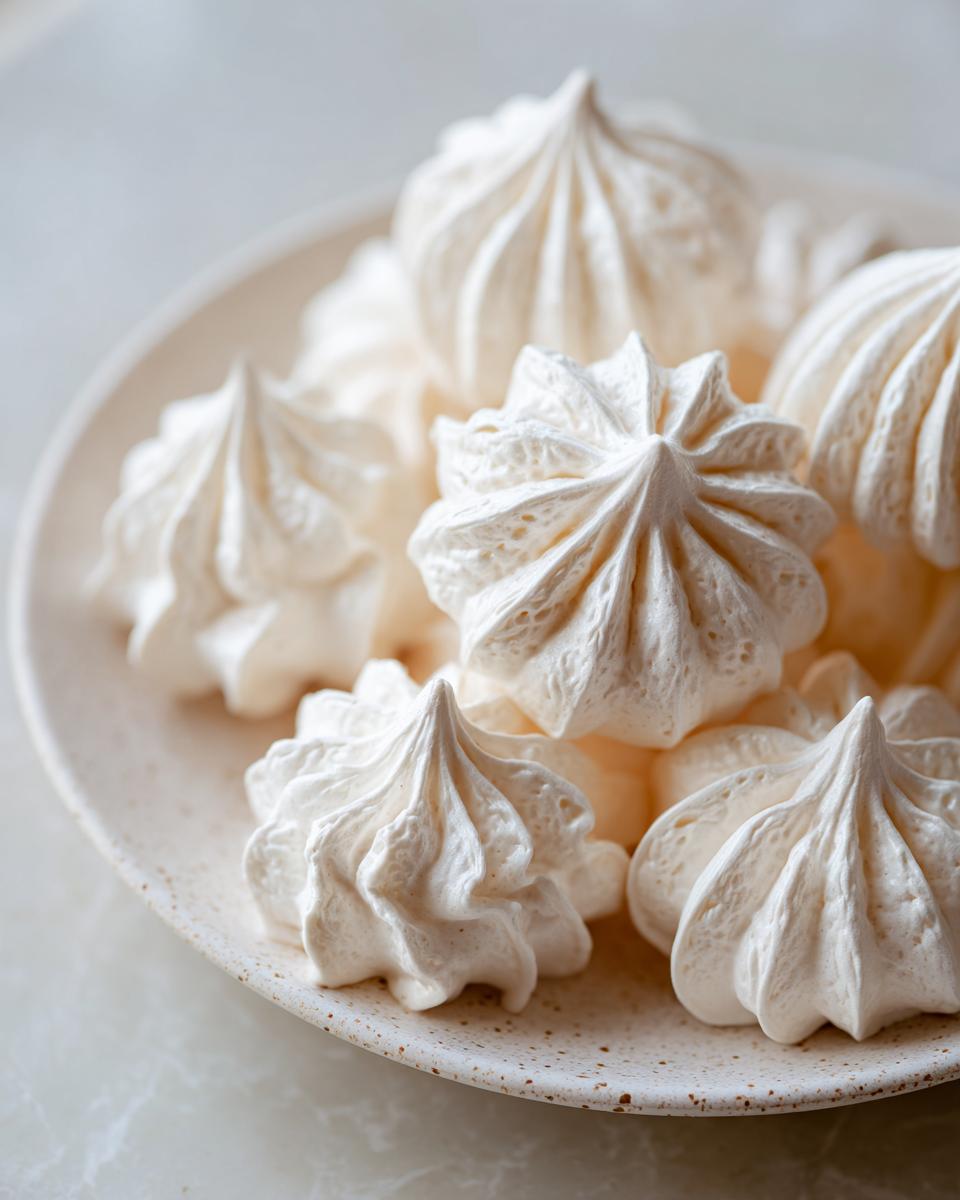
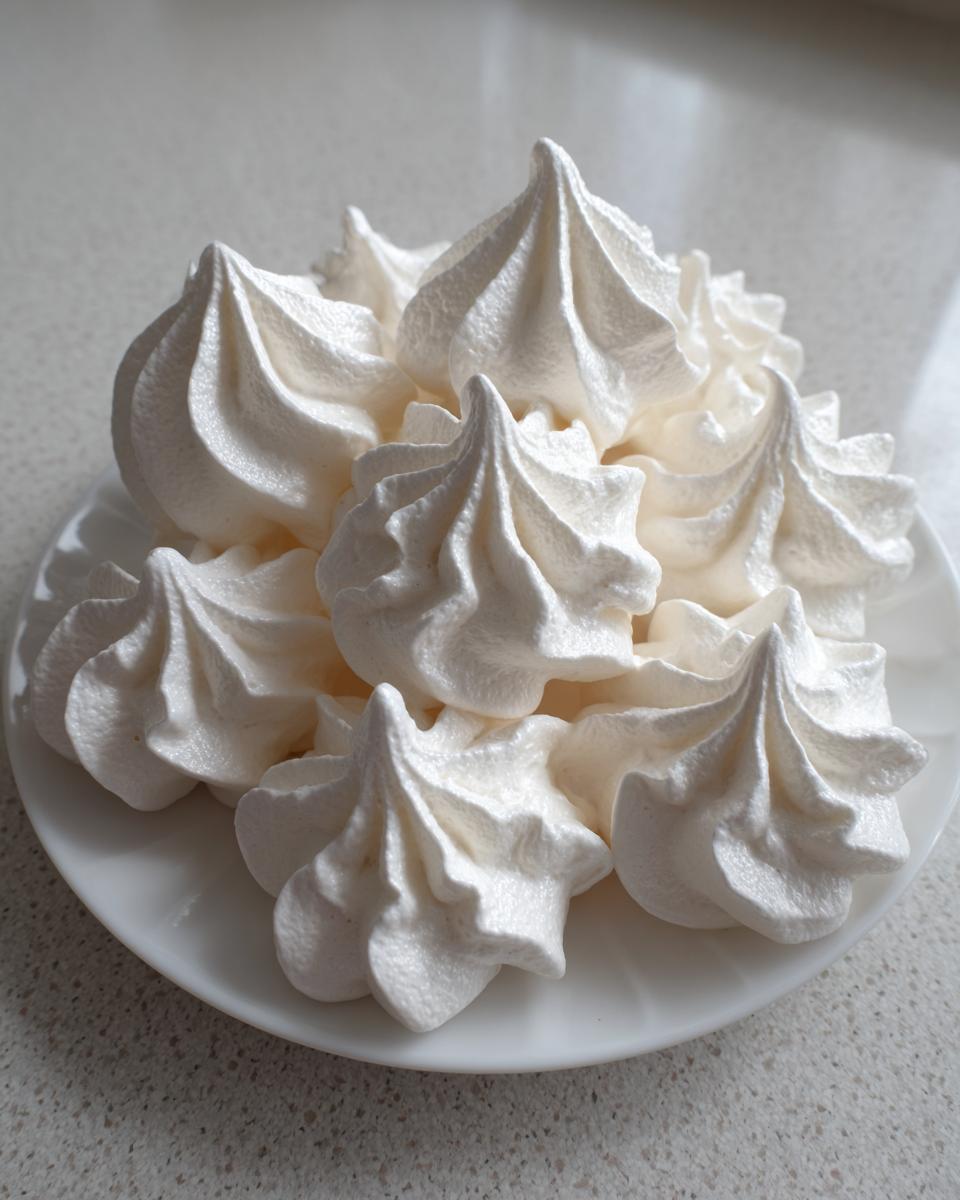
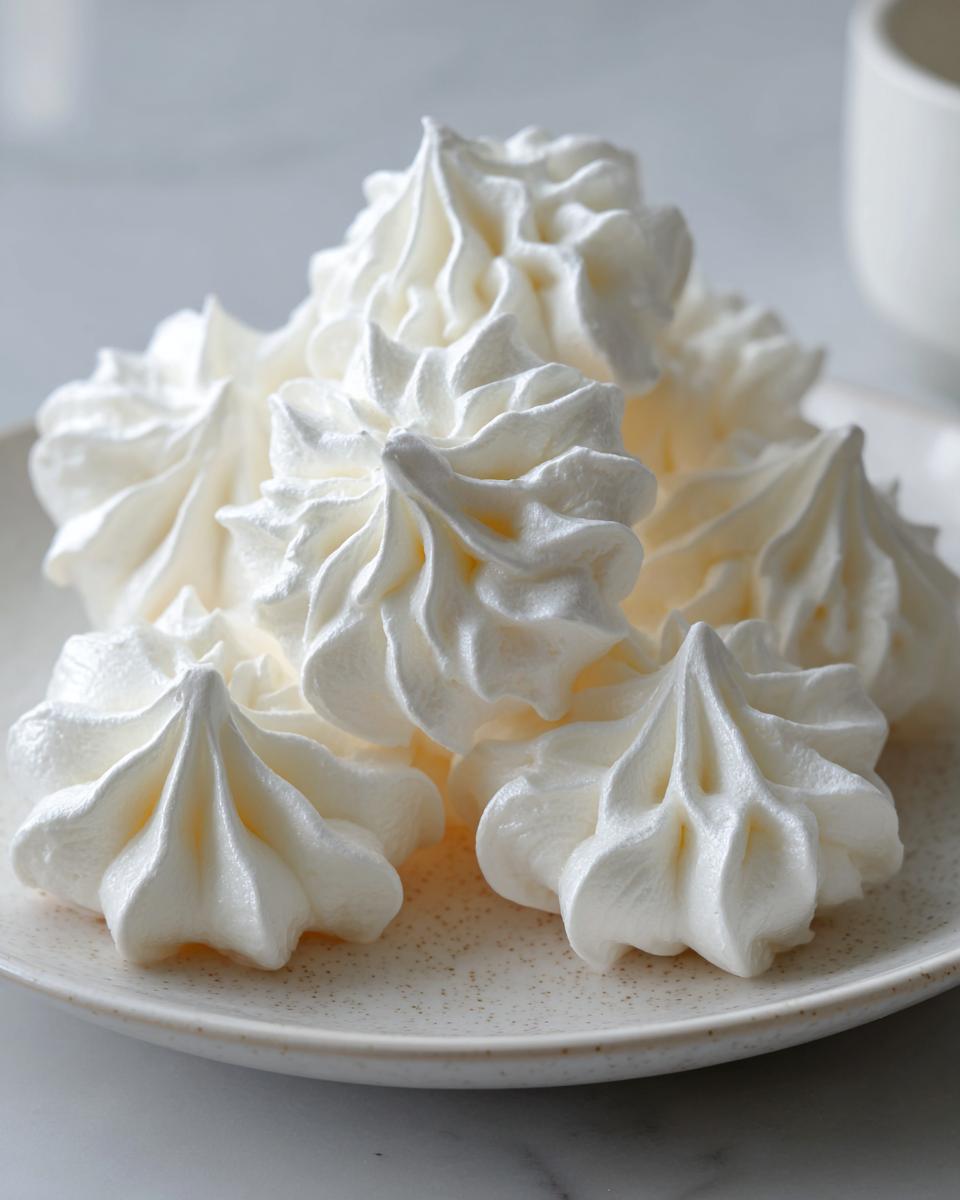
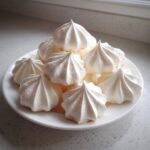
Now that the batter—I mean, the beautiful, glossy meringue—is ready, we get to the fun part: making them look like little clouds! You can absolutely use a spoon to drop rustic mounds onto your parchment paper if you want truly simple meringue cookies. They still bake up wonderfully crunchy on the outside. But, if you want those gorgeous, picture-perfect meringue kisses, load the mixture into a piping bag fitted with a star tip (I use the Wilton 1M every time) and pipe little swirls onto your sheets.
The baking itself is the most counter-intuitive step for first-timers. We aren’t actually baking these; we are drying them out! This is the secret to achieving that super crispy baked meringue. Pop those pans into a super low oven—somewhere between 200°F and 225°F. We want them to cook gently for at least an hour, maybe 90 minutes depending on how big your drops are. Watch them carefully; if they start browning too much, your oven is too hot, and we want white, sweet clouds, not toasted ones! If you’re planning ahead for the holidays, these are just as stunning as my Christmas cookie bars.
The Secret to No Fail Meringue Cookies: Cooling Inside the Oven
I’m not kidding when I tell you this next bit is what separates the *okay* meringue cookies from the ones that actually melt in your mouth. Once your meringue cookies look dry and feel firm to the touch—that means they are done cooking! Do NOT take them out yet, though. Resist that urge! This slow cooling process is the real key to achieving that next-level, shatter-crisp exterior without any annoying cracks.
As soon as they’re done baking, turn your oven completely off. Seriously, switch it off. Then, take a wooden spoon—any sturdy wooden spoon will do—and prop the oven door open just a tiny crack. Just enough space to let the heat slowly, slowly escape. This gentle temperature adjustment is pure baking gold; it prevents the sudden temperature drop that causes those nasty cracks in your beautiful homemade meringues.
You need to leave them in there like that for at least an hour, but honestly? I always leave mine overnight. When you let them finish cooling inside the turned-off oven, you get the best batch of No Fail Meringue cookies every single time. They emerge bone dry and perfect, ready to store away in an airtight container, just like I explain later in my tips for fudgy crinkle cookies!
Flavor Variations for Your Homemade Meringues
Once you’ve mastered the basic vanilla meringue cookies—those ethereal little clouds—you’ll see how versatile they are. This recipe is such a fantastic foundation for all sorts of fun additions, making them perfect for holiday cookie recipes or just brightening up your party dessert ideas! You can easily switch up the flavor profile without needing complicated steps. Trust me, once you get the texture down, the rest is just playing around!
If you love chocolate, you absolutely have to try folding in some chips! It’s a classic for a reason. For other bright parties, sometimes folks love using a tiny bit of lemon or orange zest, or even mixing in a packet of colorful Jello powder for a fruity pop.
Making Chocolate Chip Meringues (Forgotten Cookies)
The version I heard called ‘Forgotten Cookies’ are my favorite way to dress these up! After your meringue has reached those stiff, glossy peaks—and I mean *after* you’ve finished whipping—you gently, and I mean gently, fold in about a half cup of mini chocolate chips. We’re talking careful, deliberate strokes here. You don’t want to deflate all that air we worked so hard to incorporate!
The key is folding them in just until they are evenly distributed throughout your batter. Then, pipe them out just like the vanilla ones and let them dry slowly. The result is a surprisingly light cookie with little pockets of chocolate. It’s so fun to cut into one of these airy treats and find a gooey surprise inside! If you’re enjoying this light baking, you might also want to check out my recipe for the ultimate moist chocolate fudge cake.
Storage & Serving Suggestions for Meringue Cookies
Okay, you’ve successfully baked and cooled your beautiful, crispy baked meringue! Now we need to keep them that way. The single biggest enemy of a perfectly dry meringue cookie is humidity, so listen closely. You must store your finished meringue cookies in a completely airtight container at room temperature. Don’t even think about the fridge; the moisture in there will turn them soft faster than you can say ‘melt in your mouth’! They stay fantastic for a good week this way, provided your kitchen isn’t swampy.
When it comes to serving, these lovely little things are so versatile. They are incredible just sitting next to a cup of coffee or tea in the afternoon. They also look unbelievably elegant scattered over a dessert platter, especially if you’ve made a few colorful variations! If you love simple, elegant sweets, you’ll adore these just as much as my easy homemade marshmallows recipe.
Frequently Asked Questions About Meringue Cookies
I know going through the initial baking steps can bring up questions, especially when dealing with just egg whites! It’s totally normal to wonder about those little quirks that happen in the oven. I’ve gathered up the most common concerns I hear from people trying out their first batches of meringue cookies so you can feel prepared. If you’re looking for the perfect ending to a meal, you need to check out my Southern banana pudding for something truly comforting!
Why are my meringue cookies weeping or sticky?
Ugh, weeping meringue—the bane of every baker’s existence! Usually, this stickiness happens for one of two reasons. First, they were pulled out before they were truly done drying. Remember, we are drying them low and slow; if they are soft inside, they will weep sugar syrup as they cool quickly. Second, it’s high humidity outside. If you try to make these light and airy cookies on a rainy summer day, you might struggle! Making sure you let them cool completely inside the turned-off oven using that slow cooling method is the best defense against sticky bottoms.
Can I make these meringue cookies ahead of time?
Absolutely! In fact, I highly recommend it. These are some of the best make-ahead treats because they actually *improve* over a couple of days once they’ve fully set in their airtight container. They store beautifully at room temperature, making them perfect for holiday cookie recipes that you need to bake weeks in advance.
Are these meringue cookies naturally Gluten Free Meringue?
Yes, they totally are! Since these homemade meringues are made only from egg whites, sugar, and vanilla, they are inherently gluten-free. That’s one more reason they are such a wonderful addition to any dessert platter or holiday tray—you can bake a batch that everyone can safely enjoy!
Share Your Beautiful Dessert Cookies
Well, that’s it! You’ve made it through the technique, and now you have a batch of the most charming, melt-in-your-mouth meringue cookies waiting to be devoured. I really, truly hope you loved the process as much as I do. For me, seeing those tiny, crisp clouds stacked up feels like winning a mini-baking trophy!
Now that you’ve tried my no-fail method for those light and airy cookies, I would genuinely love to hear all about it! Did you pipe perfect kisses, or did you opt for the rustic spoon method? Did you try that chocolate chip variation we talked about? Please take a moment and leave a star rating right down below so others can see how reliable this recipe is. And if you snapped a picture—please tag me! I cherish seeing your finished homemade meringues. If you’re already thinking about what to make next, my easy breakfast recipes are perfect for the morning after all this sweet baking!
PrintNo-Fail Easy Meringue Cookies: Light, Crisp, and Melt-In-Your-Mouth
Create perfect, light, and airy meringue cookies with this simple recipe. These beginner-friendly meringue kisses bake up crisp on the outside and melt in your mouth, making them an ideal sweet snack or holiday treat.
- Prep Time: 15 min
- Cook Time: 90 min
- Total Time: 105 min
- Yield: About 3 dozen kisses 1x
- Category: Dessert
- Method: Baking
- Cuisine: American
- Diet: Gluten Free
Ingredients
- 4 large egg whites, room temperature
- 1 cup granulated sugar
- 1 teaspoon pure vanilla extract
- Pinch of salt
Instructions
- Preheat your oven to the lowest setting, typically between 200°F and 225°F (95°C to 107°C). Line two baking sheets with parchment paper.
- Place the egg whites and salt in the clean, dry bowl of a stand mixer fitted with the whisk attachment. Beat on medium speed until soft peaks form.
- Gradually add the sugar, about one tablespoon at a time, beating well after each addition. Continue beating until the meringue is stiff, glossy, and holds firm peaks when the whisk is lifted. This step is crucial for stable meringue cookies.
- Beat in the vanilla extract until just combined.
- Transfer the meringue to a large piping bag fitted with a star tip (like a Wilton 1M) or simply use a spoon to drop mounds onto the prepared baking sheets. For meringue kisses, pipe small swirls.
- Bake for 60 to 90 minutes. The exact time depends on your oven and the size of your cookies. You are looking for them to be dry and crisp, not browned.
- Turn off the oven, prop the door open slightly with a wooden spoon, and allow the meringue cookies to cool completely inside the oven for at least one hour, or preferably overnight. This slow cooling prevents cracking and ensures a crisp texture.
- Store your homemade meringues in an airtight container at room temperature.
Notes
- Ensure your mixing bowl and whisk attachment are completely free of any grease or water; any trace of fat will prevent the egg whites from whipping properly.
- For chocolate chip meringue cookies (Forgotten Cookies), gently fold in 1/2 cup of mini chocolate chips after the meringue is stiff.
- If you live in a humid climate, baking time may need to be extended, and the cookies might not achieve the same level of crispness.
Nutrition
- Serving Size: 1 cookie
- Calories: 45
- Sugar: 11g
- Sodium: 5mg
- Fat: 0g
- Saturated Fat: 0g
- Unsaturated Fat: 0g
- Trans Fat: 0g
- Carbohydrates: 11g
- Fiber: 0g
- Protein: 0.5g
- Cholesterol: 0mg