
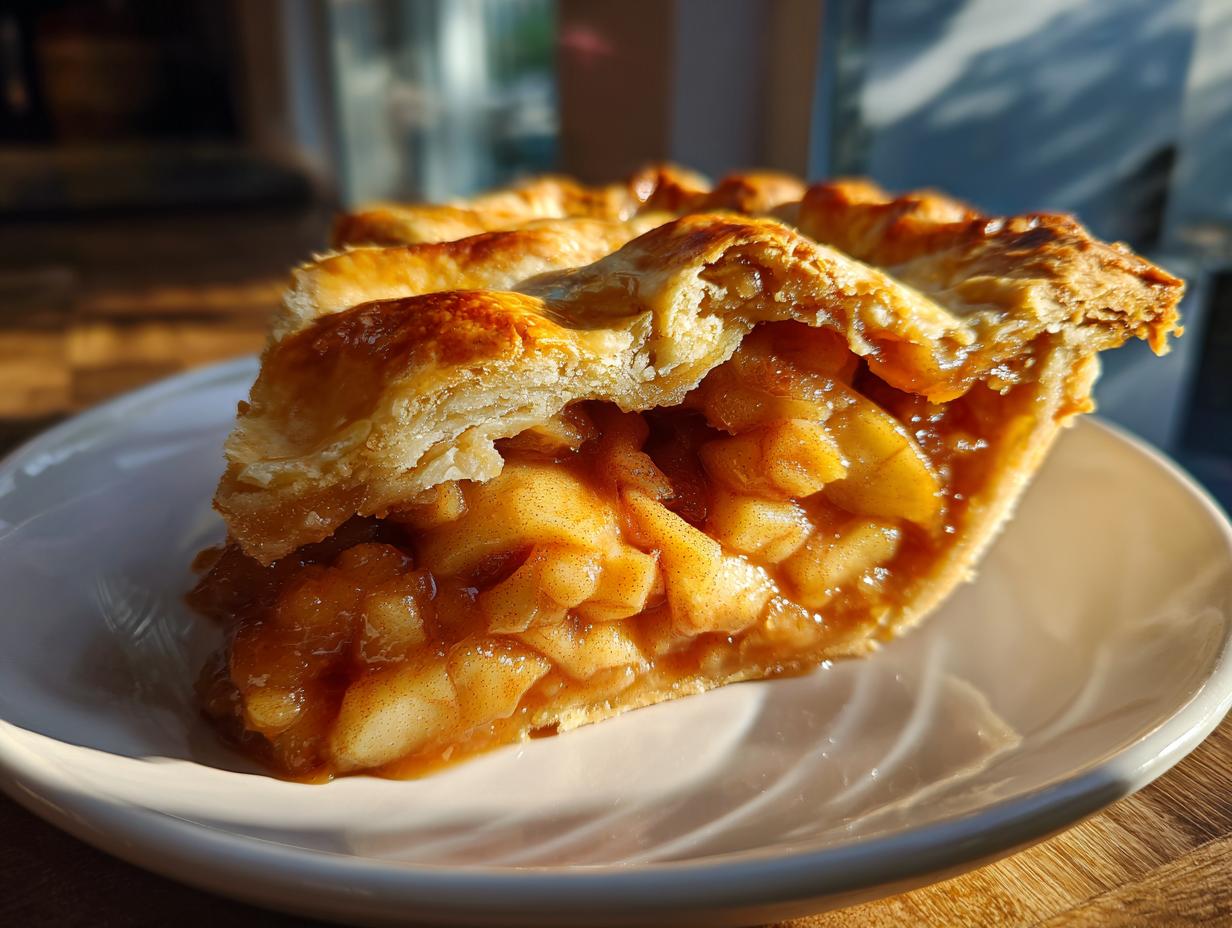
There is nothing that settles the soul quite like the smell of apples baking with cinnamon drifting through the house. It’s the essence of comfort food, isn’t it? When I finally nailed this recipe, I thought about my grandmother instantly. Her classic apple pie was legendary—always perfectly crisp, never soggy. So, I took those old lessons and brought them into the modern kitchen to bring you The Ultimate homemade apple pie from Scratch. We are going to focus on creating that impossibly flaky, buttery pie crust and a deeply flavorful, slightly spiced filling that sings. Trust me, once you make this, it’ll become your go-to fall dessert recipe. If you love this feeling, you can find more of these cozy dishes in my collection of comfort food recipes.
- Why This Is The Best Homemade Apple Pie Recipe
- Gathering Ingredients for Your Homemade Apple Pie
- Step-by-Step Instructions for Classic Apple Pie from Scratch
- Tips for the Best Homemade Apple Pie Success
- Storage and Reheating Instructions for Your Homemade Apple Pie
- Serving Suggestions for Your Apple Pie from Scratch
- Frequently Asked Questions About Homemade Apple Pie
- Estimated Nutritional Data for This Homemade Apple Pie
- Share Your Homemade Apple Pie Creations
Why This Is The Best Homemade Apple Pie Recipe
Making a truly great homemade apple pie isn’t about magic spells; it’s about respecting the science behind the texture. I want you to feel confident taking this recipe on, which is why I break down the critical success points right here. This isn’t just another pie; it’s the foundational recipe that gets rave reviews every single time I pull it out for a gathering. Honestly, it’s the best version I’ve ever made.
- The crust shatters beautifully—it’s rich, layered, and truly buttery.
- The filling isn’t runny or bland; it’s perfectly spiced and holds its shape when you slice it.
- It’s incredibly accessible. We use simple techniques that give you that bakery-quality finish without needing fancy equipment.
Achieving the Perfect Flaky Buttery Crust
This is where ninety percent of kitchen anxiety comes from, right? A bad crust can ruin a spectacular filling. The secret to my flaky pie crust is temperature, temperature, temperature! You must use ice-cold butter—I mean, almost frozen cold—cut into small cubes. When you cut that cold fat into the flour, you have to work fast. We want distinct little pieces of butter left in there because those steam in the oven and create those gorgeous, flaky layers. If you are looking for another recipe where cold ingredients are key, check out these salt caramels; the method is surprisingly similar!
Balancing the Spiced Apple Filling
For the filling, ditch the idea of sticking to just one apple type. A mix gives you depth! I insist on using Granny Smiths for that sharp bite that cuts through the sweetness, paired with something sweeter like Golden Delicious. We use a blend of cinnamon, nutmeg, and allspice to build that deep, autumnal warmth. And here is a huge apple pie tip and trick: After tossing everything together, you need to let the apples sit for 15 minutes. This allows the sugar to pull moisture out slowly, which we then absorb with the small amount of flour we add. That step is key to avoiding that dreaded soupy mess at the bottom of your dish!
Gathering Ingredients for Your Homemade Apple Pie
Okay, now that you know *why* this **homemade apple pie** is going to be the best you’ve ever tackled, let’s talk about the things you need to bring into your kitchen. Remember, great outcomes start with quality materials! I’ve broken down everything you need for both the crust magic and the glorious filling below. Don’t skip the chilling time for the butter—that’s non-negotiable for a stunning result!
When you’re prepping the apples, be specific about consistency; you want slices about 1/4-inch thick so they soften nicely without turning completely to mush. For the dough, you absolutely need very cold, cubed butter. And while you are gathering your supplies, maybe toss some of these delicious baked apples into your prep list for another day!
Here is what you should have ready to roll:
- 2 1/2 cups all-purpose flour
- 1 teaspoon salt
- 1 cup (2 sticks) unsalted butter, very cold and cubed
- 1/2 cup ice water, plus more if needed
- 6 large apples (we love a mix of Granny Smith for tartness and Golden Delicious for sweetness)
- 3/4 cup granulated sugar
- 1/4 cup packed light brown sugar
- 1/4 cup all-purpose flour (this is for thickening the filling!)
- 1 teaspoon ground cinnamon
- 1/4 teaspoon ground nutmeg
- 1/8 teaspoon ground allspice
- 1 tablespoon lemon juice (to keep those apples pretty!)
- 2 tablespoons unsalted butter, cut into small pieces (for dotting the top of the filling)
- 1 large egg, beaten with 1 teaspoon water (for that shiny egg wash)
- 1 tablespoon coarse sugar (for sprinkling on top—this adds a lovely crunch!)
Step-by-Step Instructions for Classic Apple Pie from Scratch
Alright, deep breath! This is where the magic happens. Making an apple pie from scratch feels like such a huge accomplishment, and I promise you, it’s completely within your reach. We’re moving step-by-step, focusing on getting every stage right so we don’t end up with a hot, soupy mess. We need to handle the dough gently, give the apples time to macerate, and then use that two-temperature trick in the oven to get that amazing golden crust.
I’ve always found that sticking strictly to the timing outlined here is what makes my pies winners. Seriously, don’t rush the chilling, and don’t skip that initial high heat blast! For more foundational skills that build confidence like this, you should definitely bookmark my guide on baking from scratch.
Making the Buttery Pie Crust Dough
Remember that cold butter we talked about? Start mixing your flour and salt, then cut in that butter until you see those pea-sized treasures locked into the flour mixture. Work quickly! Pour in the ice water slowly—just until the dough looks shaggy but holds together when you squeeze a bit. Don’t knead it like bread; we are aiming for tenderness!
Once it’s just combined, split it into two equal disks. Wrap them tightly—and I mean tight!—in plastic wrap. They need to chill in the fridge for a minimum of one hour. If you’re short on time, two hours is even better. This resting period lets the gluten calm down so your crust rolls out beautifully later.
Mixing the Spiced Apple Filling
This smells like heaven, even before it hits the oven. Take your sliced apples and toss them gently in a large bowl with both sugars, the flour (that’s our secret weapon against runniness!), cinnamon, nutmeg, and allspice. Don’t forget that little squeeze of lemon juice!
Now, this resting time is crucial. Let those apple slices just sit there for about 15 minutes. You’ll see liquid start to pool at the bottom of the bowl. That’s the moisture prepping to be thickened perfectly. If you want a deeper flavor base, sometimes I lean towards making a fruit butter first, but for this pie, a quick rest does the trick!
Assembling and Baking Your Homemade Apple Pie
Preheat that oven to a hot 425°F (220°C)! Roll out one dough disk into a 12-inch circle—it needs to hang over the edges of your 9-inch pie plate. Ease that bottom crust in, trim the overhang to about an inch, and now you can pile in those apples, mounding them up in the middle! Dot the top with those little squares of butter; they melt down and help moisten the center.
Roll out the second disk for the top crust. Lay it over the filling, trim, and then seal the edges together—you can just crimp them with your fingers or roll an edge under. Remember to cut several slits in the top! These vents let the steam escape, keeping your crust crisp. Brush everything with the egg wash and sprinkle that coarse sugar over the top for sparkle and crunch. Bake at 425°F for 15 minutes! Then, dramatically—or maybe just quietly—drop the heat down to 375°F (190°C) and bake for another 40 to 50 minutes. Keep an eye on the edges; if they look too dark, throw a little strip of foil around them so they don’t burn before the apples are done. If you want to see a fantastic example of a finished pie, check out this ultimate recipe online. And don’t forget to use those caramels if you need that gooey factor!
Tips for the Best Homemade Apple Pie Success
Even when you follow directions perfectly, baking sometimes throws you a curveball. That’s why I always keep these little bits of wisdom handy—my own collection of apple pie tips and tricks that guarantee a professional-looking result on your very first try. This is the stuff my mother taught me only after realizing I’d burned three crusts in a row!
The goal here is that golden-brown, flaky exterior and a filling that has seriously set up, not turned into soup. If you’ve ever ended up with a soupy mess, stick with me, because we are fixing that right now. For more detailed help on pie structure, my guide on apple pie tips and tricks goes even deeper!
How to Guarantee You Won’t Get a Soggy Bottom
Ugh, the nightmare! The bottom crust seems cooked, but it’s slightly doughy underneath all that delicious fruit? You must ensure all your ingredients are cold, as we discussed, but here are two extra steps for defense. First, make sure you let that filling sit for those critical 15 minutes so the flour can start working *before* it hits the cold dough.
Second, try placing your pie on the lowest rack for the first 15 minutes of baking—that initial blast of heat directly to the bottom crust helps set it fast. Also, I saw a brilliant trick over at The Food Charlatan where they brush the bottom crust with a thin layer of egg white before adding the filling. It acts like a sealant! That seals in juices beautifully.
Achieving That Perfect Golden Top
If you feel your crust edges are getting too dark before the center is bubbling, stop fighting it! Pull a strip of foil—just a plain piece, no fancy shield necessary—and gently drape it over the edges of the pie plate. This shields the crust from direct heat while letting the center keep cooking and releasing steam. You want that egg wash applied evenly for shine, and that extra sprinkling of coarse sugar is non-negotiable for that little bit of sparkle and crunch on top.
The Non-Negotiable Cooling Time
This is probably the hardest tip to follow, especially when your kitchen smells like heaven and everyone is hovering with forks. You absolutely must let your finished homemade apple pie cool for at least three hours. At least! The filling is liquid-hot when it comes out of that oven. If you cut it early, all the juices run out immediately, and you end up with a less-than-perfect slice.
Cooling allows the flour and starches in the filling to fully gel and set up the structure. Patience yields that beautiful sliceable texture. Seriously, just pour yourself a cup of coffee and walk away. It’s worth the wait!
Storage and Reheating Instructions for Your Homemade Apple Pie
Okay, you made it! This classic apple pie is so rich you probably won’t finish it in one sitting—though I certainly wouldn’t blame you if you tried! Storing it correctly is important because we want that **homemade apple pie** to taste just as amazing tomorrow as it did fresh out of the oven today. The key here is understanding that butter crust doesn’t love the fridge, but the fruit filling does.
Truthfully, because this pie has such a good filling structure (thanks to that light flour thickener), it holds up really well on the counter for a little while. If your kitchen isn’t scorching hot, you can leave it loosely covered at room temperature for up to 24 hours. I usually put mine under a glass cake dome—it looks pretty and keeps dust off! I made a batch of strawberry freezer jam last week and I’ve been tempted to try slathering some on a cold slice of this pie!
Room Temperature vs. Refrigerated Storage
After that first day, or if you live somewhere humid, it’s time for cold storage. Cover the pie loosely with foil or plastic wrap—don’t wrap it super tight, or the crust might get steamy and soft. In the fridge, your glorious apple pie from scratch will last beautifully for about four days.
If you know you won’t get to it by day four, pop it straight into the freezer! Wrap the entire pie tightly in two layers of plastic wrap, followed by a layer of heavy-duty foil. It freezes just fine for up to three months. If you want individual slices instead, wrap those separately before bagging them up!
Reheating Slices for Maximum Flakiness
Nobody wants a cold slice of pie unless they are seriously desperate (and that’s okay sometimes!), but reheating requires care if you want to keep that flaky crust happy. Absolutely avoid the microwave if you can, because microwaves turn buttery crusts into rubbery sadness almost instantly.
The oven or an air fryer is your friend here. Preheat your regular oven to a gentle 350°F (175°C). Place the slice directly on a baking sheet or a piece of foil. Heat it for about 10 to 15 minutes. You just want it warmed through gently, not cooked again. If you use an air fryer, 325°F for about 6 to 8 minutes should do the trick. This lets the filling get warm and gooey again while keeping the crust crisp and buttery. That first warm bite after it has set up? That’s why we bake from scratch!
Serving Suggestions for Your Apple Pie from Scratch
We’ve done the hard work, we’ve waited the agonizing three hours for it to set up, and now it’s time to enjoy the fruits—or should I say, apples—of our labor! The beauty of a truly great apple pie from scratch is that it stands perfectly well by itself, but sometimes, a little something extra just elevates the whole experience, right?
My go-to classic suggestion—and I’m sure you guessed it—is a hefty scoop of vanilla bean ice cream. The cold richness of the ice cream melts slowly onto that warm, spiced filling, and honestly, it’s one of life’s perfect moments. But if you want to get a little fancier, let’s talk about toppings! If you want to lean into incredible decadence, you absolutely need to try drizzling some homemade caramel sauce over the top. I happen to have the easiest recipe for soft, chewy sea salt caramels that you can thin out slightly with cream for a perfect drizzle!
Dairy Delights
A dollop of fresh whipped cream never hurt anyone! Make sure it’s barely sweet, nothing overpowering. A little vanilla bean paste mixed in is all it needs. If you can get your hands on some good quality vanilla ice cream, that warmth meeting the cold creaminess is unbeatable.
Unique Twists to Elevate Your Slice
If you’re trying to impress guests, try topping your slice with a small smear of sharp cheddar cheese. Yes, you heard me! It seems old-fashioned, but the savory, salty cheese melts just slightly against the warm, sweet apples, and the flavor contrast is *stunning*. It really highlights the cinnamon and nutmeg.
Another idea is a light drizzle of maple syrup, especially if you use a lot of tart Granny Smiths. It just enhances that earthy flavor of the apple without making the whole dessert too heavy. Enjoy every single bite!
Frequently Asked Questions About Homemade Apple Pie
I know when you’re tackling something as iconic as a homemade apple pie, you’re going to have questions! I always do—even after baking hundreds of pies. It’s totally normal to double-check things like apple choice or whether you can sneak a shortcut. We baked this recipe using fresh ingredients for the absolute best result, but I want to answer the common queries I always get about texture and timing so you can bake with total confidence.
Don’t see your question here? Drop it in the comments! I love chatting about all things baking. If you are looking for something quick to bake in the morning, check out my easy breakfast recipes for a change of pace!
Can I use pre-made crust for this homemade apple pie recipe?
Oh, the eternal shortcut debate! Look, I’m usually a firm believer that if you’re making an apple pie from scratch, you should make the crust from scratch too—especially because our buttery pie crust is so good. That being said, sometimes life gets hectic, and there is zero shame in grabbing a high-quality, pre-made, all-butter crust! It will definitely save you about 45 minutes of prep time.
Just know that for *this* specific recipe, the homemade crust is what separates it from good to great. If you do use a store-bought option, make sure it’s the refrigerated kind, not the frozen, pre-formed shells. If you need more guidance on store-bought versus homemade, I saw a great breakdown on crust options on Tasteful Dishes, which might help you decide!
How do I prevent my apple pie filling from being watery?
This is the number one fear for people baking an old fashioned apple pie! We talked about our defense strategy during assembly, but let me reiterate the two big hitters here. First, you must let those apple slices rest for 15 minutes after tossing them with the sugars and spices. This pulls the initial moisture out of them so we can bind it.
Second, make absolutely sure you are including the 1/4 cup of flour (or substitute with cornstarch if you prefer) in the filling mixture. That flour is your binder! It absorbs the liquid released as the apples cook. If you skip the resting time or forget the flour, you are inviting soup into your beautiful crust. Don’t do it!
What is the absolute best type of apple to use?
I firmly believe the magic happens when you mix textures and flavors! If you only use crisp, tart Granny Smiths, the pie can taste too sharp and a little one-note. If you only use sweet apples like Gala, you run the risk of it tasting flat and mushy. For the absolute best flavor contrast in your **spiced apple filling**, aim for a 50/50 split between a tart variety (like Granny Smith) and a sweeter, slightly firmer variety (like Honeycrisp or Golden Delicious).
Can I make this pie ahead of time?
Yes, and I highly recommend it! The chilling time for that dough is only an hour, but letting the assembled pie sit in the fridge for a few hours before baking really helps everything meld and makes rolling the top crust easier. If you are making this days ahead for the apple pie for holidays rush, assemble the entire pie (bottom, filling, top) and wrap it tightly in plastic wrap. Store it blanketed in the fridge for up to 24 hours. When you are ready to bake, just remove the plastic, add your egg wash and sugar, and go straight into the preheated oven! You might add about 10 extra minutes to the baking time since it’s going in colder.
Estimated Nutritional Data for This Homemade Apple Pie
Now, I’m going to be super honest with you—getting an exact calorie count for a homemade apple pie made with all that wonderful butter is like trying to capture smoke! The final count depends heavily on exactly how thick you roll your crust, how thick you slice your apples, and which variety you pick. So, please think of the numbers below as a friendly ballpark guestimate only!
We calculated these figures based on 8 generous slices of this classic apple pie recipe, using average fruit sizes. It’s a decadent dessert, but considering we are baking from scratch and controlling every ingredient, I feel good knowing exactly what goes into this comfort food dessert!
- Serving Size: 1 slice
- Calories: Approximately 450 (Expect this to go up if you drizzle it heavily with caramel!)
- Fat: Around 25g (that’s the butter doing its job of making that crust flaky!)
- Saturated Fat: About 15g
- Carbohydrates: Roughly 58g
- Sugar: About 35g (Mostly from the apples and brown sugar—nature’s candy!)
- Protein: About 5g
- Fiber: Around 3g
- Sodium: Approximately 280mg
If you are watching those numbers, remember that the fruit itself is full of great vitamins, and by making this apple pie from scratch, you skip all those mystery ingredients found in store-bought versions. It’s a trade-off I’m always willing to make for that homemade flavor!
Share Your Homemade Apple Pie Creations
Well, friend, that’s it! You have successfully conquered The Ultimate Homemade Apple Pie from Scratch. I truly hope your kitchen smells incredible right now and that you are resisting the urge to cut into it before it cools down (remember that three-hour cooling window—it’s tough, but necessary!).
Honestly, the best part of sharing these recipes is hearing from you. Did you try the apple mix I suggested? Did your **buttery pie crust** come out impossibly flaky? I want to see the gorgeous golden tops and those perfectly set slices!
Please take a moment to come back here and leave a rating for the recipe—it helps other home cooks know this recipe is worth their time. If you managed to snap a picture of your masterpiece, tag me on social media! Seeing your beautiful creations really makes my day. If you’re already thinking about what to make next, check out my quick and easy dinner recipes for something comforting later in the week!
Thank you so much for trusting me with your baking time today. Happy eating!
PrintThe Ultimate Homemade Double-Crust Apple Pie from Scratch

Bake the best homemade apple pie with a flaky, buttery crust and a perfectly spiced, slightly cooked apple filling. This classic recipe yields bakery-quality results for your next holiday or cozy gathering.
- Prep Time: 45 min
- Cook Time: 65 min
- Total Time: 110 min
- Yield: 8 servings 1x
- Category: Dessert
- Method: Baking
- Cuisine: American
- Diet: Vegetarian
Ingredients
- 2 1/2 cups all-purpose flour
- 1 teaspoon salt
- 1 cup (2 sticks) unsalted butter, very cold and cubed
- 1/2 cup ice water, plus more if needed
- 6 large apples (mix of Granny Smith and Golden Delicious recommended)
- 3/4 cup granulated sugar
- 1/4 cup packed light brown sugar
- 1/4 cup all-purpose flour (for filling)
- 1 teaspoon ground cinnamon
- 1/4 teaspoon ground nutmeg
- 1/8 teaspoon ground allspice
- 1 tablespoon lemon juice
- 2 tablespoons unsalted butter, cut into small pieces (for dotting)
- 1 large egg, beaten with 1 teaspoon water (for egg wash)
- 1 tablespoon coarse sugar (for sprinkling)
Instructions
- Prepare the Pie Dough: In a large bowl, whisk together the 2 1/2 cups flour and 1 teaspoon salt. Cut in the cold, cubed butter using a pastry blender or your fingers until the mixture resembles coarse crumbs with some pea-sized pieces of butter remaining.
- Gradually add the ice water, one tablespoon at a time, mixing until the dough just comes together. Do not overmix. Divide the dough in half, flatten each half into a disk, wrap in plastic, and chill for at least 1 hour.
- Prepare the Apple Filling: Peel, core, and slice the apples about 1/4-inch thick. In a large bowl, gently toss the apple slices with the granulated sugar, brown sugar, 1/4 cup flour, cinnamon, nutmeg, allspice, and lemon juice until evenly coated. Let the mixture sit for 15 minutes.
- Preheat Oven and Prepare Bottom Crust: Preheat your oven to 425°F (220°C). On a lightly floured surface, roll out one dough disk into a 12-inch circle. Carefully transfer the dough to a standard 9-inch pie plate. Trim the edges, leaving a 1-inch overhang.
- Fill the Pie: Spoon the apple mixture into the bottom crust, mounding the apples slightly in the center. Dot the top of the filling with the 2 tablespoons of small butter pieces.
- Top the Pie: Roll out the second dough disk. Place it over the filling. Trim the top crust, leaving a 1-inch overhang. Crimp the top and bottom edges together to seal. Cut several slits in the top crust to allow steam to escape.
- Bake: Brush the top crust with the egg wash and sprinkle with coarse sugar. Place the pie on a baking sheet to catch drips. Bake at 425°F (220°C) for 15 minutes.
- Reduce Heat: Reduce the oven temperature to 375°F (190°C). Continue baking for an additional 40 to 50 minutes, or until the crust is golden brown and the filling is bubbling thickly. If the edges brown too quickly, cover them loosely with foil strips.
- Cool: Let the **classic apple pie** cool on a wire rack for at least 3 hours before slicing. This allows the **spiced apple filling** to set properly.
Notes
- For the flakiest buttery crust, keep all dough ingredients very cold. Work quickly when mixing and rolling.
- Use a mix of apples for the best flavor balance; Granny Smith provides tartness, and Golden Delicious adds sweetness.
- If you prefer a slightly cooked filling texture before baking, you can simmer the apples with the sugar and spices on the stovetop for 5 minutes before adding them to the crust.
Nutrition
- Serving Size: 1 slice
- Calories: 450
- Sugar: 35g
- Sodium: 280mg
- Fat: 25g
- Saturated Fat: 15g
- Unsaturated Fat: 10g
- Trans Fat: 0g
- Carbohydrates: 58g
- Fiber: 3g
- Protein: 5g
- Cholesterol: 60mg