
Oh my goodness, the minute I see those vibrant pink stalks popping up in the garden, I know exactly what time of year it is. That beautiful, tart rhubarb is begging to be baked into something spectacular! If you’ve got a haul of that gorgeous spring produce, you absolutely must make these Rhubarb Dream Bars. They are hands-down the easiest, most comforting way to capture that perfect sweet-and-tart flavor combination, all nestled in a seriously buttery shortbread dessert crust. For me, like Sarah Miller always talks about over at HearthBite when she talks about her kitchen philosophy, these bars are the definition of seasonal baking; it feels like a celebration of spring whenever I pull them out of the oven.
Using fresh, in-season ingredients is just what my Mama taught me. We always had to use up the early harvest, and these bars were the answer every single time. They are sturdy enough for a picnic but elegant enough for company. I promise you, you won’t find a better slice!
- Why These Rhubarb Dream Bars Are a Seasonal Baking Must-Have
- Gathering Ingredients for Perfect Rhubarb Dream Bars
- Step-by-Step Instructions to Make Amazing Rhubarb Dream Bars
- Tips for Success When Making Rhubarb Dream Bars
- Storage and Reheating Instructions for Your Rhubarb Dream Bars
- Serving Suggestions for This Seasonal Rhubarb Dessert
- Frequently Asked Questions About Rhubarb Dream Bars
- Estimated Nutritional Snapshot for Rhubarb Dream Bars
- Share Your Rhubarb Dream Bars Experience
Why These Rhubarb Dream Bars Are a Seasonal Baking Must-Have
Folks, this recipe nails that gorgeous tension between tart and sweet, and that’s why it’s a staple when spring hits. The filling is pure, electric tang from the rhubarb, but it calms down beautifully when it meets that rich, buttery crust. I remember the first time I brought these to my cousin’s engagement party—everyone was asking for the recipe immediately. They looked so pretty with that slight dusting of flour on top!
These can’t just be called ‘rhubarb bars’; they are truly tangy sweet bars, perfectly suited for seasonal baking. They have that homemade, humble look that just screams comfort, which is what my whole philosophy here at HearthBite is about. You can find more of my favorite cozy recipes right here if you love this kind of simple, soulful food!
Gathering Ingredients for Perfect Rhubarb Dream Bars
To make these heavenly bars, you need quality ingredients, especially for that amazing crust! Don’t stress, though; what you see is what you get. We’re keeping things straightforward so you can focus on that beautiful fruit. Remember, for the crust, make sure your butter is softened—that means you can press an indent into it easily, but it shouldn’t feel greasy or melted at all.
Here is the full shopping list for one 9×13 pan of pure joy. We’ll use most of the flour and sugar twice, so keep an eye on your bowls!
- 1 cup unsalted butter, softened
- 1/2 cup granulated sugar (for the crust)
- 2 cups all-purpose flour (for the crust)
- 1/4 teaspoon salt
- 2 cups chopped fresh rhubarb
- 1 cup granulated sugar (for the filling)
- 1/4 cup all-purpose flour (for the filling)
- 2 large eggs
- 1/2 teaspoon vanilla extract
- 1/4 cup all-purpose flour (for dusting/topping)
Ingredient Notes and Substitutions for Rhubarb Dream Bars
A couple of quick pointers just so we nail this the first time! First, that butter needs to be room temperature for the shortbread dessert base; cold butter leads to a tough crust, and nobody wants that. Second, if you can only find frozen rhubarb, that’s totally fine! Just toss it straight into the mixing bowl—do not thaw it first, or you’ll end up with a watery situation.
We use fresh rhubarb because spring is all about fresh, right? But if you’re making these in October, frozen works beautifully to get that necessary level of tartness in these rhubarb bars.
Step-by-Step Instructions to Make Amazing Rhubarb Dream Bars
Alright, let’s get baking! This part is so satisfying because you start building those layers of texture. You’ll want to preheat your oven right now to 350 degrees Fahrenheit. Also, while that’s heating up, line a 9×13 inch baking pan with parchment paper. Don’t be shy with the overhang! That little sling of paper is our secret weapon for getting these beautiful bars out in one perfect piece later on. Trust me, it saves so much heartache.
Preparing and Pre-Baking the Buttery Shortbread Dessert Crust
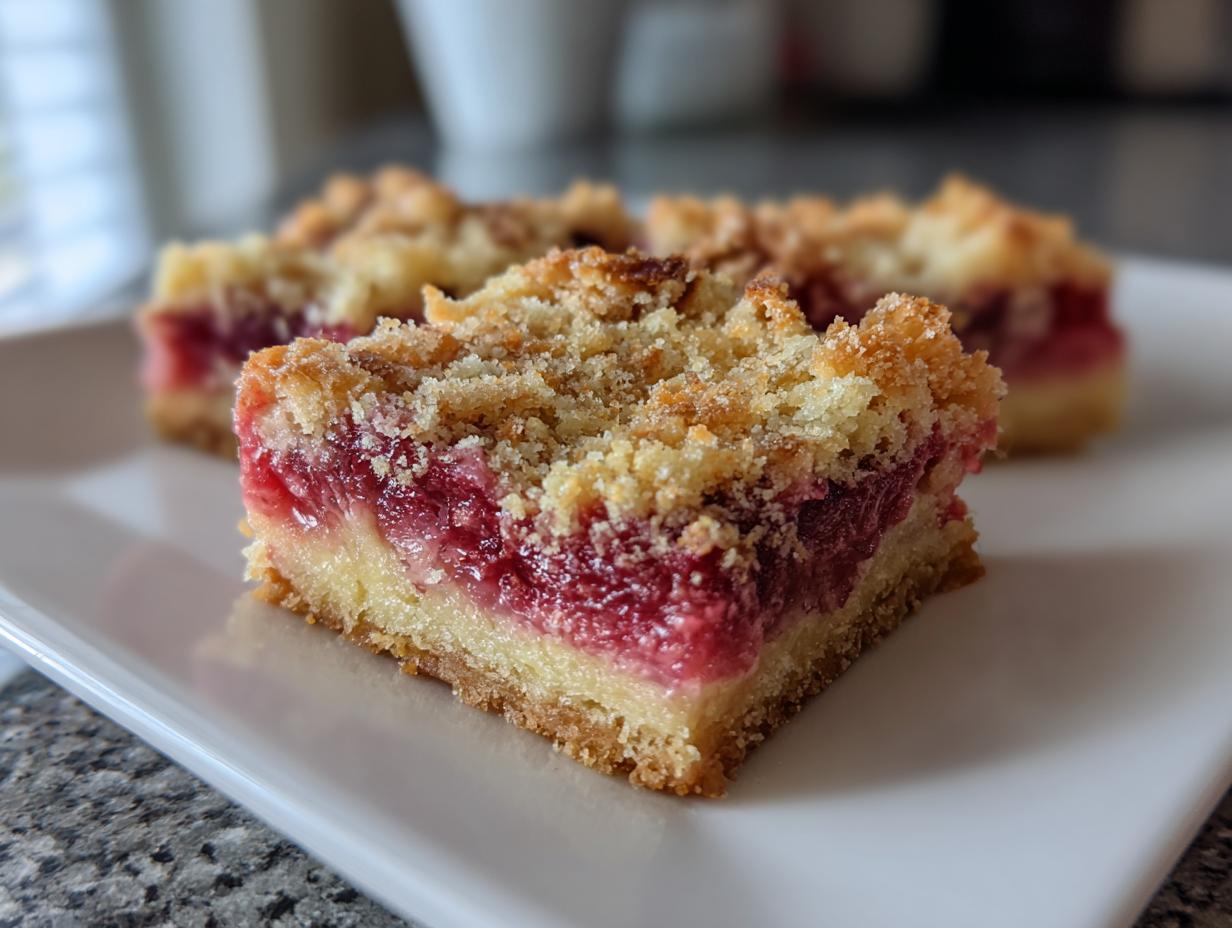
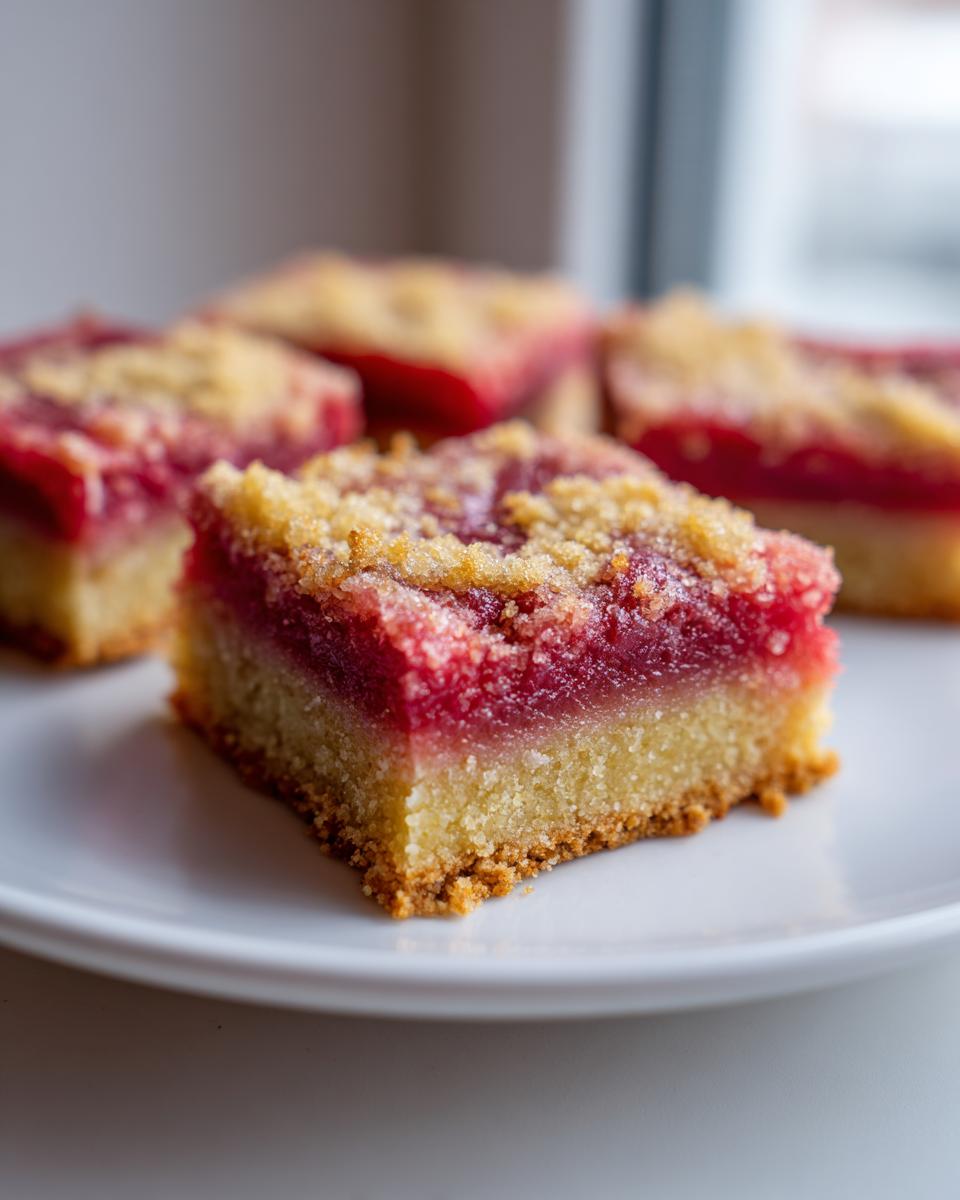
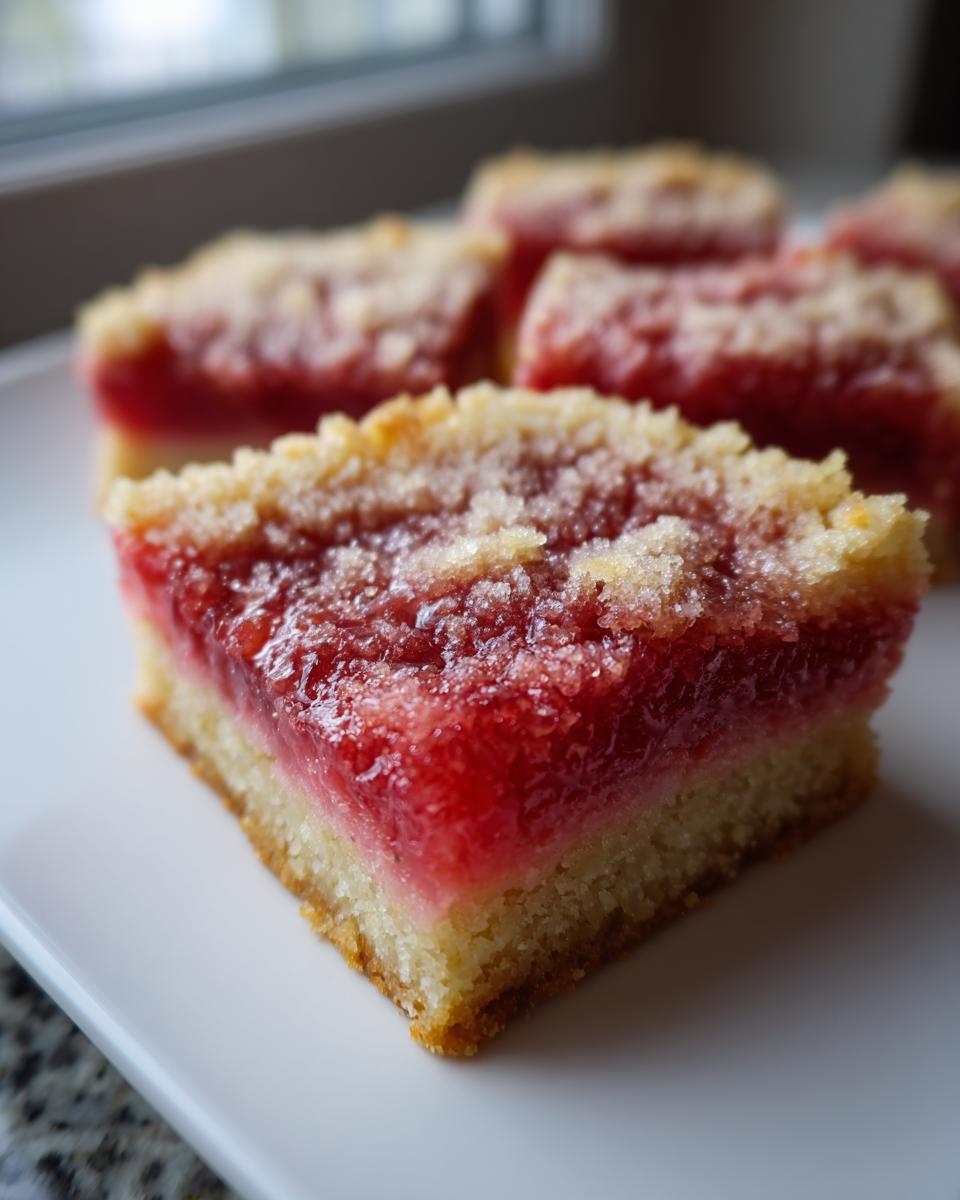
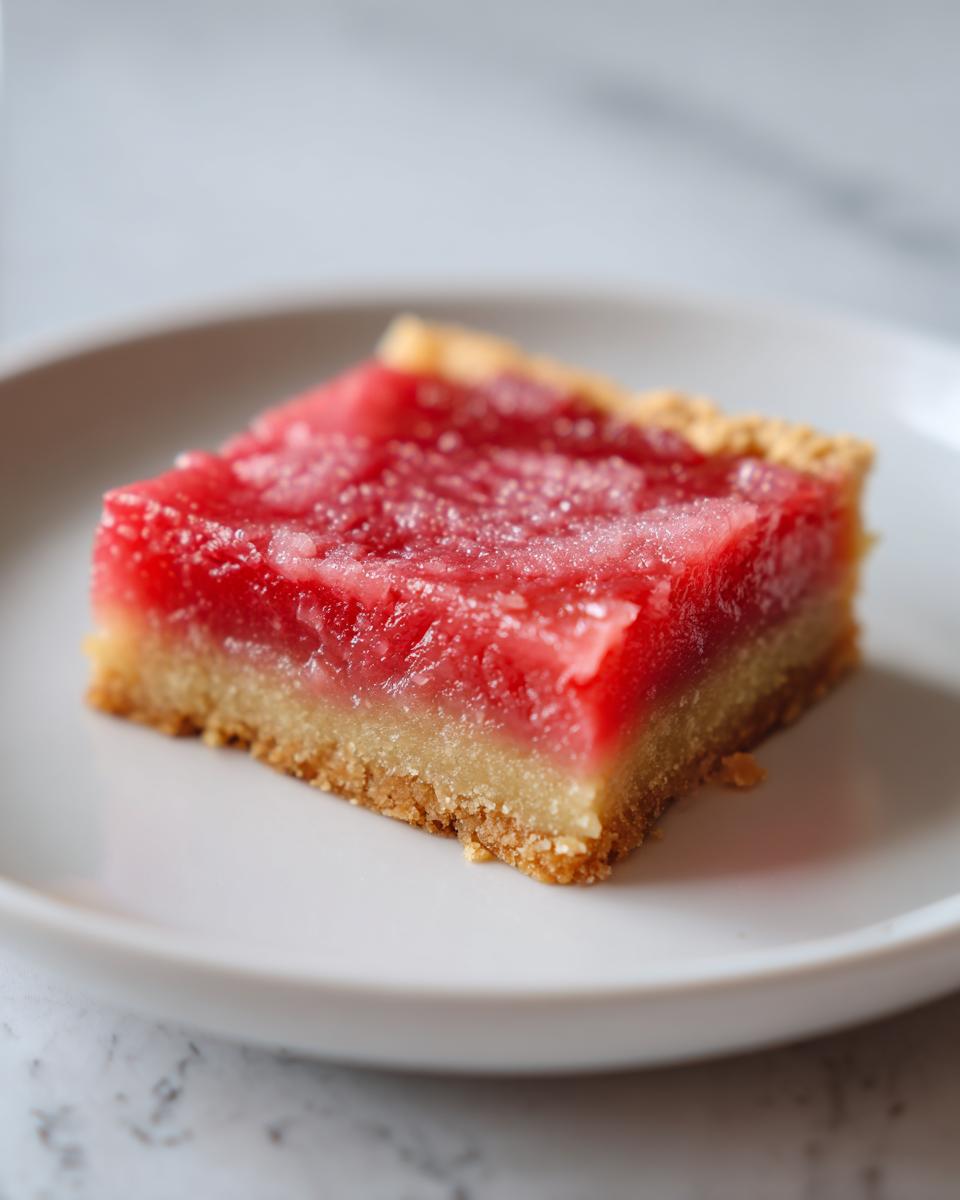
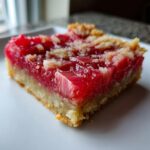
First up is our foundation, that lovely shortbread dessert crust. You’re going to take your softened butter and that first half-cup of sugar and just cream them together until they look nice and fluffy—light yellow, you know the drill. Next, stir in the two cups of flour and the salt. Mix it just until it starts to come together; you don’t want to work it too much! It should look crumbly, like wet sand. Press this mixture as firmly and evenly as you can right into the bottom of your prepared pan. We give this crust a little head start in the oven—bake it for 15 minutes until you see the edges just starting to turn pale gold. Take it out, but leave it in the pan!
Assembling and Baking the Tangy Sweet Bars Filling
Now for the star of the show. In a separate bowl—don’t worry about washing the first one—toss those two cups of chopped rhubarb with the filling sugar and the quarter cup of flour. You want to make sure every piece of rhubarb is coated. This step is crucial; that flour helps absorb some of the liquid so the filling sets up nicely. In a tiny little bowl, whisk those two eggs really well with the vanilla. Pour that egg mixture right over the coated rhubarb and stir gently until everything looks unified.
Carefully pour this vibrant filling right over that warm, partially baked crust. Spread it out evenly; no huge clumps! For the final touch, you’re going to take that last quarter cup of flour and just gently sprinkle it lightly over the top of the whole filling. This little layer helps firm things up on top. Pop the pan back into the oven for another 35 to 40 minutes. You’re done when the filling looks set—it shouldn’t wobble too much in the middle—and the edges are nicely golden brown. If you’re looking for more simple baking inspiration, you can check out my other quick favorite recipes while this bakes!
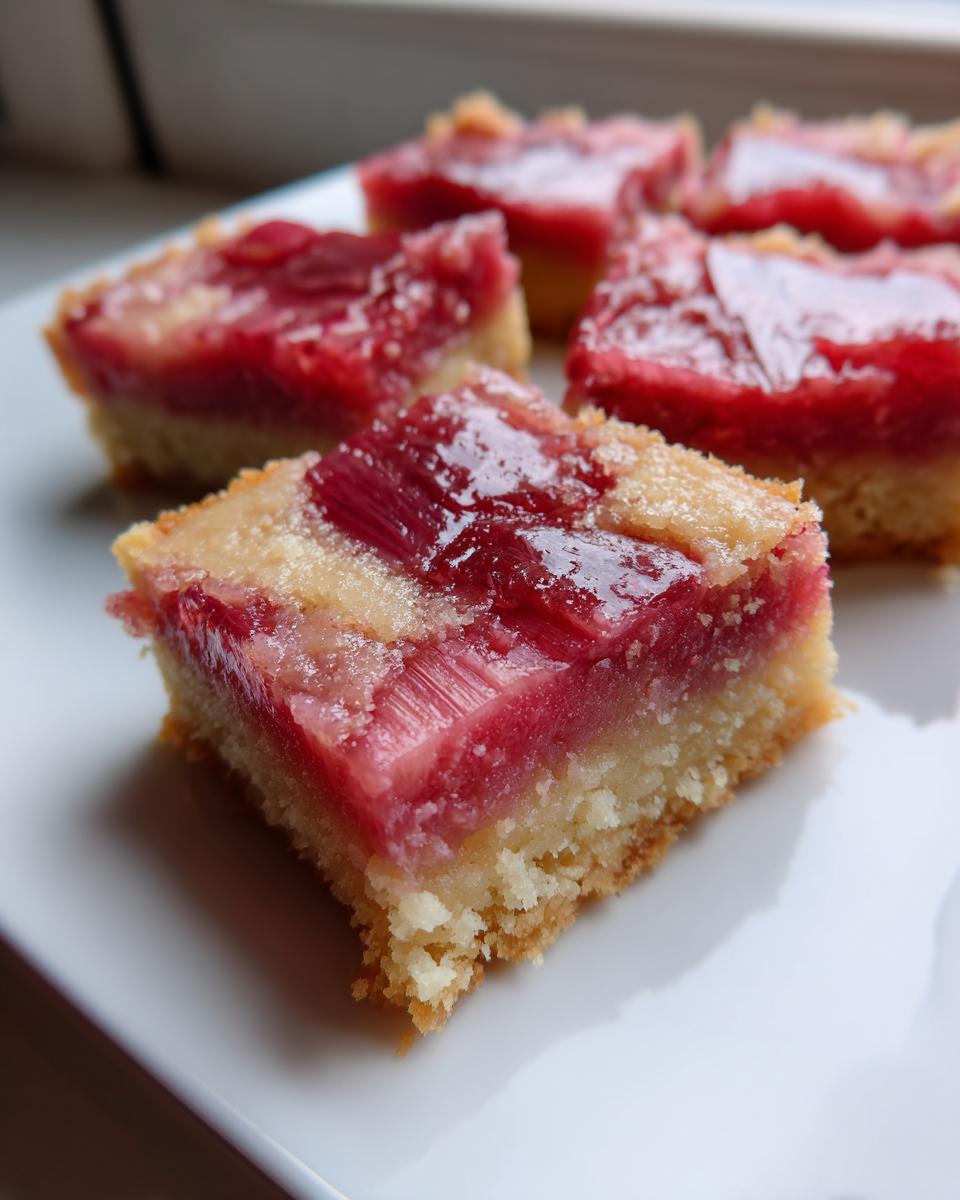
Don’t you dare touch it yet! Those bars need to cool completely in the pan on a wire rack. Seriously, this is where the magic sets up. If you cut them warm, you’ll have lovely, soupy rhubarb bits instead of clean squares.
Tips for Success When Making Rhubarb Dream Bars
I want you to have perfect squares, not a pile of sweet, tangy rubble! The biggest pitfall here is rushing the cooling process—you absolutely must let these bars chill out completely before you try to lift them by that parchment sling. If you slice them too soon, that gorgeous filling runs everywhere! For that phenomenal buttery crust texture, remember to cream the butter and sugar for the base until it’s truly pale and fluffy. That aeration is what keeps the shortbread from turning into a dense brick.
Also, if you feel your rhubarb is super watery, toss the chopped pieces with the filling sugar and let it sit for maybe ten minutes before draining off any excess liquid before you add the egg mixture. A little planning goes a long way! For more simple, rewarding recipes perfect for busy times, check out my breakfast ideas—sometimes the simplest baking is the most satisfying!
Storage and Reheating Instructions for Your Rhubarb Dream Bars
Since this is a fruit-filled bar, they really love the cold! Once these rhubarb bars are completely cooled, slice them up, cover them tightly, and pop them in the fridge. They keep beautifully in the refrigerator for about four days—and honestly, the filling firms up even more overnight which I love. Don’t worry about reheating them; they taste fantastic straight from the fridge or sitting out on the counter for about 20 minutes to take the chill off. If you’re making them ahead for a gathering, make sure you review my kitchen safety and policy notes before storing them!
Serving Suggestions for This Seasonal Rhubarb Dessert
Part of the fun of seasonal baking is figuring out the perfect way to serve your masterpiece! Because these Rhubarb Dream Bars have such a wonderful, bright acidity, they pair perfectly with something rich and creamy. My go-to, hands down, is a big scoop of high-quality vanilla bean ice cream. Just lets that tartness shine!
If you’re skipping the ice cream, a simple dollop of fresh, lightly sweetened whipped cream is divine. It really echoes the comforting, homey feel of this rhubarb dessert. If you are looking for some lighter options to balance out your menu, check out my friends’ healthy lunch recipes for ideas on what to serve *before* you dive into these bars!
Frequently Asked Questions About Rhubarb Dream Bars
I know you might have a few questions floating around, especially if this is your first time working with rhubarb! It’s such a unique ingredient, but trust me, once you get the hang of it, these rhubarb bars are a dream come true. Don’t hesitate to reach out if you have more questions; you can always find my contact page right here!
Can I use frozen rhubarb in these Rhubarb Dream Bars?
You absolutely can! If the fresh stalks aren’t available, frozen rhubarb works just fine. The main thing you have to remember, and this is critical, is that you must use the frozen rhubarb straight from the freezer. Do not thaw it! Thawing releases too much liquid, and we want to keep that filling from getting soupy. Just toss it in cold, following the recipe.
How do I prevent the crust from getting soggy?
That’s the fear with any fruit bar! The key reason this recipe stays crisp is twofold: First, we pre-bake that shortbread dessert base for a full 15 minutes until it’s starting to firm up. Second, we toss the fruit with a little flour before adding the eggs—that flour acts like a sponge to catch extra moisture as it bakes. Keep that crust warm when you pour the filling on, too; the partial bake helps seal it!
What makes these Rhubarb Dream Bars so tangy?
That incredible, bright flavor comes straight from the rhubarb itself! It’s naturally quite acidic, which is why people love it so much—it gives the whole bar a thrilling wake-up call for your taste buds. We balance that natural tartness with the sugar in the filling, but rest assured, that lovely tang that defines these bars will definitely come through!
Estimated Nutritional Snapshot for Rhubarb Dream Bars
Now, I know some of you are tracking macros or just curious about what you’re enjoying! I’ve put together an estimate for these Rhubarb Dream Bars based on standard ingredient measurements. Remember, this is just a snapshot, and if you use different types of butter or adjust the sugar, things will change up a bit. This data is based on getting 18 bars out of the batch, giving you an idea of what you’re looking at per serving.
I always say that good food made with love is worth it, but it’s nice to know the details! If you ever want to check out my guidelines on kitchen practices and best standards, you can look at my terms of use page, though these nutritional estimates are just for your guidance.
- Serving Size: 1 bar
- Calories: 240
- Fat: 13g (Saturated Fat: 8g)
- Carbohydrates: 31g
- Protein: 3g
- Sugar: 22g
- Fiber: 1g
See? Not too shabby for a delightful buttery crust treat! The sugar content looks high, but remember, that accounts for the fruit’s natural sugar plus what’s needed to balance the tartness of the rhubarb.
Share Your Rhubarb Dream Bars Experience
Seriously, that’s it! You now have everything you need to bake the best Rhubarb Dream Bars your family has ever tasted. I poured my heart into making sure this recipe works perfectly for you, just like it does for me every spring.
Now, the most important part of my HearthBite philosophy is sharing the joy! I absolutely live to hear how your bakes turn out. Did you try swapping out some of that sugar? Did you add a sprinkle of lemon zest like I sometimes sneak in? Please, please, leave a comment below telling me about your experience, and don’t forget to give the recipe a star rating!
If you’re looking for even more ways to bring simple, comforting flavors into your home, I’ve got some wonderful gluten-free options you might want to explore next. Happy baking, and I can’t wait to see what you create!
PrintRhubarb Dream Bars with Buttery Shortbread Crust
Make these tangy sweet bars featuring a bright rhubarb filling over a rich, buttery shortbread dessert crust. This seasonal baking recipe is simple and comforting.
- Prep Time: 20 min
- Cook Time: 50 min
- Total Time: 70 min
- Yield: 18 bars 1x
- Category: Dessert
- Method: Baking
- Cuisine: American
- Diet: Vegetarian
Ingredients
- 1 cup unsalted butter, softened
- 1/2 cup granulated sugar
- 2 cups all-purpose flour
- 1/4 teaspoon salt
- 2 cups chopped fresh rhubarb
- 1 cup granulated sugar
- 1/4 cup all-purpose flour
- 2 large eggs
- 1/2 teaspoon vanilla extract
- 1/4 cup all-purpose flour (for dusting/topping)
Instructions
- Preheat your oven to 350 degrees Fahrenheit. Line a 9×13 inch baking pan with parchment paper, leaving an overhang for easy removal.
- Prepare the crust: In a medium bowl, cream together the softened butter and 1/2 cup sugar until light and fluffy.
- Mix in 2 cups of flour and salt until just combined and crumbly. Press this mixture evenly into the bottom of the prepared baking pan.
- Bake the crust for 15 minutes until lightly golden. Remove from the oven.
- Prepare the filling: In a separate bowl, combine the chopped rhubarb, 1 cup sugar, and 1/4 cup flour. Toss gently to coat the rhubarb.
- In a small bowl, whisk the eggs and vanilla extract together. Pour the egg mixture over the rhubarb and stir until everything is coated.
- Pour the rhubarb filling evenly over the warm, partially baked crust.
- Sprinkle the remaining 1/4 cup of flour lightly over the top of the filling.
- Return the pan to the oven and bake for 35 to 40 minutes, or until the filling is set and the edges are golden brown.
- Let the bars cool completely in the pan on a wire rack before lifting out by the parchment overhang and cutting into squares.
Notes
- For the best texture, allow the bars to cool completely before slicing; this prevents the filling from running.
- If you do not have fresh rhubarb, you can substitute with frozen rhubarb, but do not thaw it before using.
- This recipe makes a wonderful seasonal baking treat perfect for potlucks.
Nutrition
- Serving Size: 1 bar
- Calories: 240
- Sugar: 22
- Sodium: 65
- Fat: 13
- Saturated Fat: 8
- Unsaturated Fat: 5
- Trans Fat: 0
- Carbohydrates: 31
- Fiber: 1
- Protein: 3
- Cholesterol: 45