

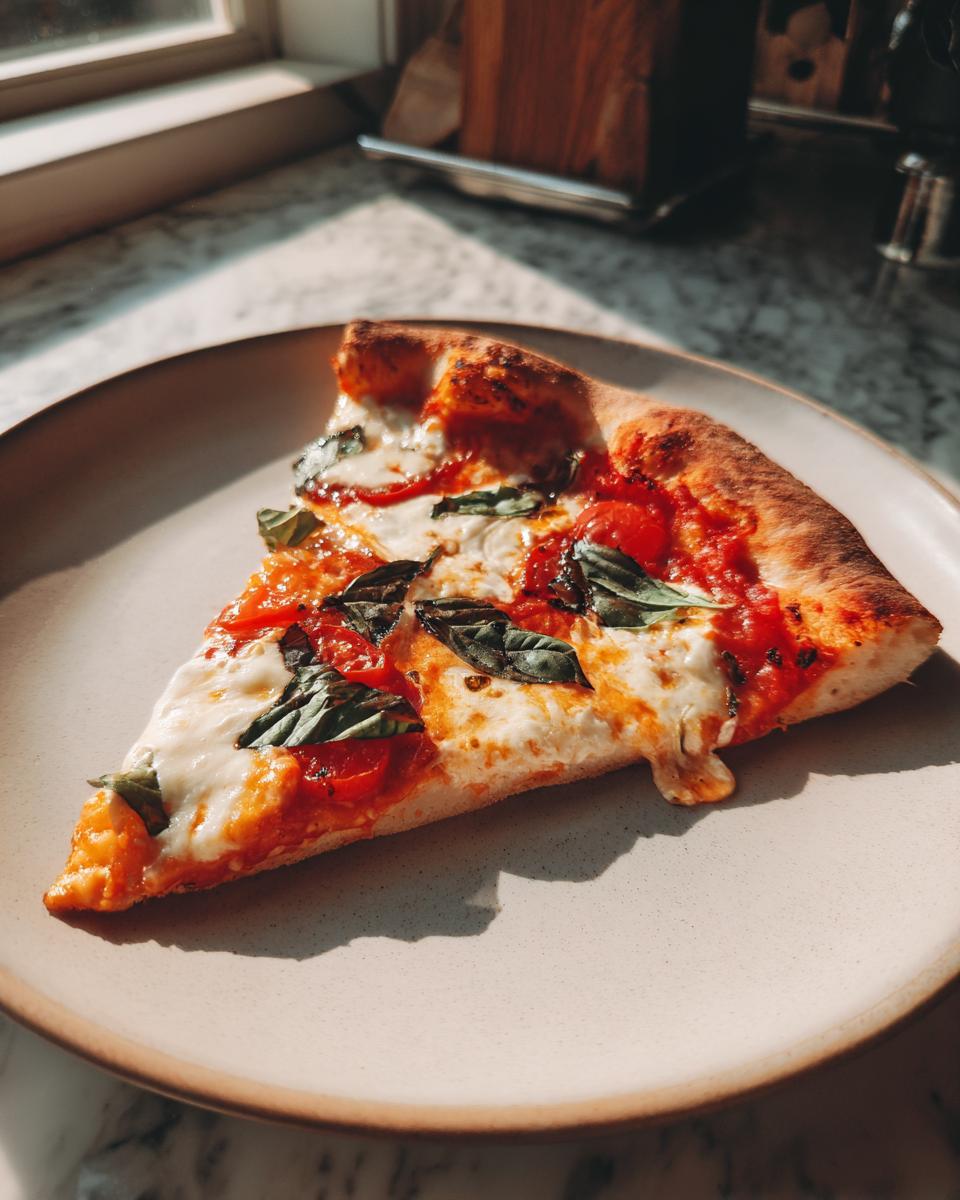
It’s Friday, friend, and you know what that means! Forget takeout menus—this is the perfect evening to celebrate National Pizza Party Day right in your own kitchen. For me, Sarah Miller, the best food connects people, and nothing says connection like a perfect, gorgeous pizza fresh from the oven. That’s why I’m sharing my absolute favorite: the Homemade Margherita Pizza.
This isn’t one of those fussy recipes that takes all day. We’re embracing simple, beautiful Italian flavors. Think vibrant tomato, creamy fresh mozzarella, and bright basil. It’s pure artisan simplicity, but done right here on your countertop. The magic of HearthBite is bringing that comforting, soul-warming feeling into your weekday routine, and this pizza, with its thin, crackly crust, is guaranteed to bring everyone to the table.
- Why This Homemade Margherita Pizza is Your Perfect Party Centerpiece
- Gathering Ingredients for Authentic Homemade Margherita Pizza
- Mastering the Thin Crust Pizza: Shaping the Homemade Pizza Dough
- Preheating for the Best Homemade Margherita Pizza Results
- Assembling Your Homemade Margherita Pizza: Sauce and Cheese Application
- Baking Instructions for Perfect Thin Crust Pizza
- Finishing Touches: Adding Basil to Your Homemade Margherita Pizza
- Tips for Success When Making Artisan Pizza at Home
- Frequently Asked Questions About Homemade Margherita Pizza
Why This Homemade Margherita Pizza is Your Perfect Party Centerpiece
When you’re hosting, the last thing you want is a recipe that ties you down to the oven for an eternity. That’s where this beauty shines! This recipe delivers that incredible, authentic artisan pizza experience without the fuss. I’ve tested so many variations, but this simplicity—just great tomatoes, great cheese, and a perfectly blistered thin crust pizza—is what truly impresses. It keeps the flavor profile clean so you can focus on your guests.
It’s all about maximizing flavor while minimizing stress, which is exactly what HearthBite is all about for your big celebration. Making this for pizza night ensures you get that elegant, restaurant-quality result that’ll have everyone asking for the recipe!
- It looks absolutely stunning on the table—the perfect centerpiece for your party.
- We are using just the freshest ingredients, which is the secret to the real Neapolitan flavor profile.
- The best part? The total time commitment is shockingly low!
Quick Prep and Bake Times for Your Homemade Pizza Dough Night
Seriously, you won’t believe the magic that happens here. With just 20 minutes of active prep time before it hits the heat, you’re almost there. And here’s the real kicker for your big Friday night: it only bakes for about 12 minutes. That means from start to slicing, your pie is ready in about 32 minutes total! That speed lets you actually spend time with your guests instead of babysitting the oven. You can even use that small prep window to get everything else set up for the party!
Gathering Ingredients for Authentic Homemade Margherita Pizza
You know me, I believe the flavor of an artisan pizza lives and dies by the quality of these basic components. Since we’re keeping it simple for this Homemade Margherita Pizza, every single item needs to be the best you can find. Don’t skimp here; it’s worth the extra trip to the store!
Here is what you’ll need to gather for our perfect disc of deliciousness:
- 1 recipe homemade pizza dough (make sure it’s room temperature and ready to stretch!)
- 1 cup crushed San Marzano tomatoes (don’t settle! They are less acidic.)
- 1 teaspoon fine sea salt
- 1 tablespoon extra virgin olive oil
- 8 ounces fresh mozzarella cheese, sliced or torn into small pieces
- 1/4 cup fresh basil leaves
- 1 tablespoon semolina flour (this helps keep things from sticking!)
Ingredient Notes and Substitutions for Artisan Pizza
Let’s talk quality for a minute. See those San Marzano tomatoes? They are sweet and naturally low in moisture, which is key so we don’t end up with a soup on our crust. And for the cheese, fresh mozzarella is the gold standard; it melts beautifully and tastes like cream.
If you absolutely must substitute, use whole-milk, low-moisture mozzarella, but I beg you, drain it really well first! Wet cheese equals a soggy pizza, and we are aiming for that amazing crispy texture we worked so hard for. Remember, tearing the basil instead of slicing also keeps those precious leaves from going brown too quickly.
Mastering the Thin Crust Pizza: Shaping the Homemade Pizza Dough
Okay, this is where we separate the good pizza from the truly great pizza. After letting that homemade pizza dough rest—and trust me, don’t skip that rest time!—it needs to be treated gently. We are aiming for a truly satisfying thin crust pizza.
When I first started trying to make my own Homemade Margherita Pizza, I wrestled that dough like it was a stubborn cat! I’d either punch all the air out by rolling too hard, or it would tear right down the middle when I tried to lift it. The secret is gentle pressure, focusing on pushing the air to the edges to form that lovely rim, stretching it slowly into a 12-inch circle. Don’t use a rolling pin unless you want cracker texture; use your fingertips and knuckles!
Next is the transfer phase! You absolutely must dust your pizza peel generously with semolina flour. This acts like tiny ball bearings under the dough, ensuring it slides smoothly off onto that screaming hot stone. If you skip this, the dough will stick, and you’ll know the pain of losing a carefully crafted pie. A light dusting is all you need, but make sure it covers the whole area where the pizza will sit!
Preheating for the Best Homemade Margherita Pizza Results
If the dough handling is the heart of this pizza, the preheating is absolutely the soul! You might see Step 2 and think, “Forty-five minutes? That’s a long time to wait.” Trust me on this one, because this is the difference between making a good pizza and achieving that gorgeous, crackly thin crust pizza you dream about.
We need that oven to be roaring hot, and the pizza stone or steel needs time to soak up that heat. If you just throw your Homemade Margherita Pizza onto a stone that’s been warming for ten minutes, the stone’s temperature will plummet the second the dough hits it. That equals steam, steam equals soggy bottom, and soggy bottom is the enemy of perfect pizza!
I always pop my stone in when I start mixing the sauce—that gives me a good head start. You want the oven cranked right up to 500 degrees Fahrenheit, and you need to let that stone preheat for a full 45 minutes. That extended time ensures you’ve got professional-level heat radiating up into that dough, instantly crisping the bottom layer. It’s technical, yes, but this one single step guarantees that beautiful, slightly charred, artisan pizza finish every single time.
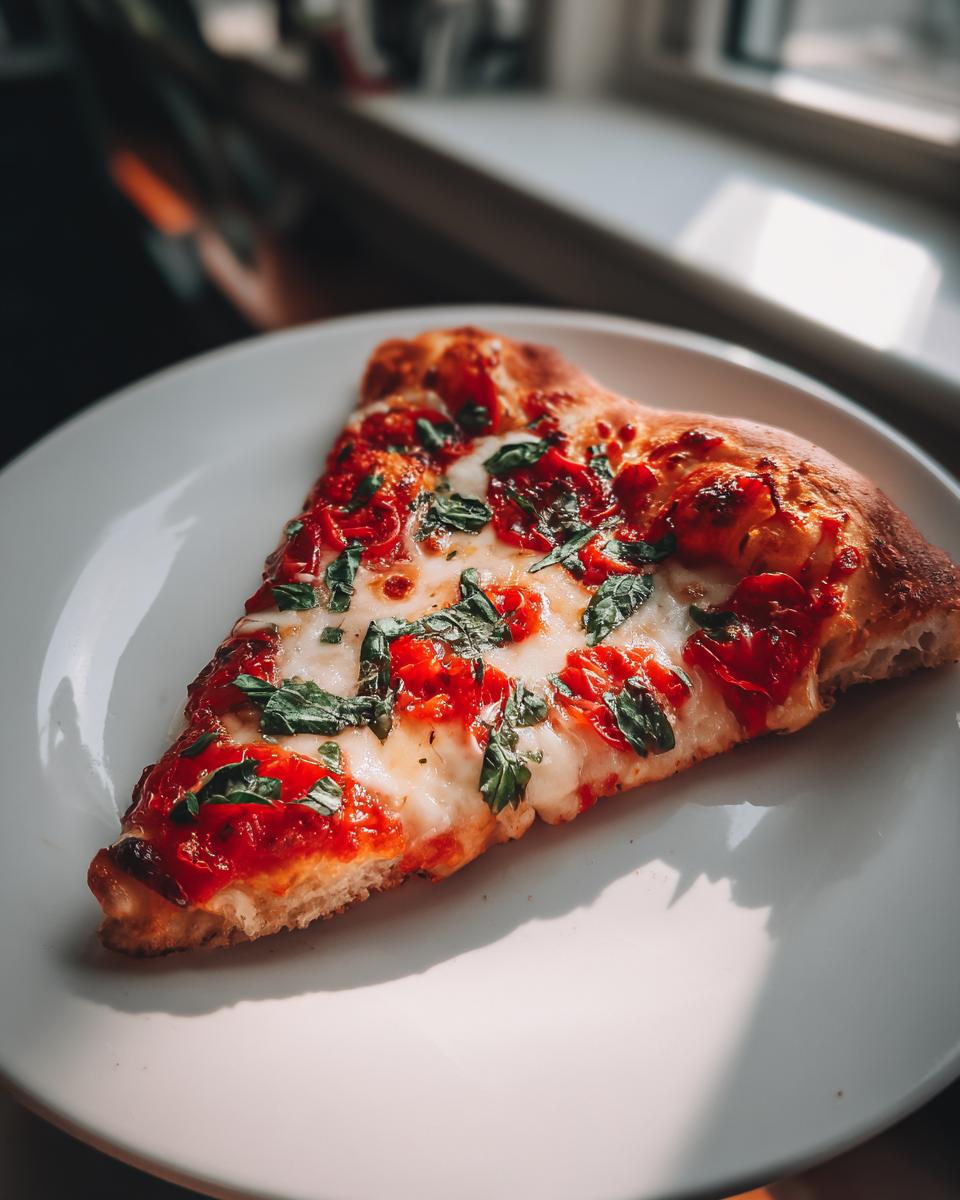
Assembling Your Homemade Margherita Pizza: Sauce and Cheese Application
Now that your oven is a roaring inferno and your dough is stretched perfectly, we move onto the layering. This is where the simplicity of the flavors really shines through in your Homemade Margherita Pizza. Remember when I told you we weren’t cooking the sauce? Well, now is the time to mix those crushed San Marzano tomatoes with just a touch of sea salt and that beautiful olive oil. That’s it! No herbs, no garlic powder, just super fresh tomato flavor hitting that hot crust. You can find my favorite simple recipe for that uncooked sauce right here, but honestly, keeping it raw is the key to that brightness!
Take your prepared peel with the dough on it, and start spreading that uncooked sauce evenly across the surface. You must leave about a 1-inch border everywhere. This crust edge is going to balloon up and get those lovely dark spots, and it needs room to breathe! If you spread the sauce too close to the edge, it’ll just burn or run off.
Next up is the cheese. We are using fresh mozzarella, which is wonderfully soft. Don’t just dump it on! Distribute your torn or sliced pieces strategically across the sauce. You want patches of creamy cheese separated by bits of tomato sauce showing through. This even dispersal ensures that when it melts, you don’t end up with one huge, solidified blob of cheese in the middle, which ruins the whole artisan pizza vibe. Spread it nicely, leave some breathing room, and you are ready for the oven!
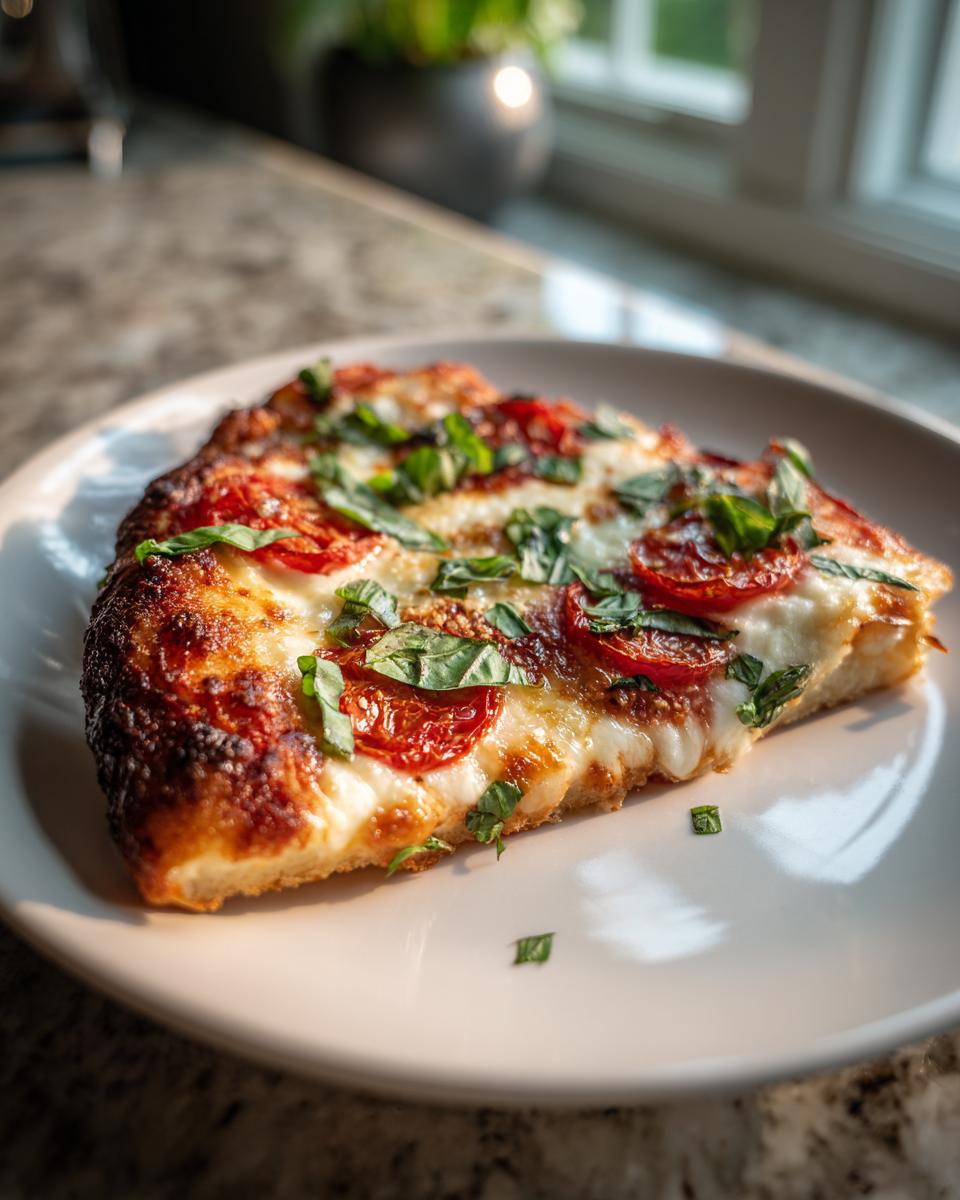
Baking Instructions for Perfect Thin Crust Pizza
This is the moment of truth, the big slide! You’ve got your insanely hot pizza stone waiting patiently, and your Homemade Margherita Pizza is perfectly assembled on the peel dusted with semolina. You have to move fast here, but smoothly. Take a deep breath, open the oven door (careful of that 500-degree heat!), and with a quick, decisive jerk and wiggle motion, slide the pizza right off that peel and onto the stone. It needs to be one confident motion, or you risk dough bunching up—and nobody wants that!
Now, step back and watch the magic happen! Since we followed the rules and preheated that stone for 45 minutes, the bottom of this thin crust pizza should start setting almost immediately. Keep an eye on it through the oven window. The official time is anywhere from 8 to 12 minutes, but honestly, every oven is different. You are looking for two things: the cheese should be gloriously melted, bubbly, and maybe have a few tiny golden spots, and the crust edges should be puffed up and nicely browned.
If you’re using a smaller oven or one that runs cool, you might be closer to 13 or 14 minutes. If yours is a beast, it might be done at 7. That’s why tasting and watching is so important! Resist the urge to open the door too much, but check after 8 minutes. As soon as that crust looks perfectly done, get your peel underneath and carefully draw your delicious thin crust pizza out of the heat. It’s going to smell incredible!
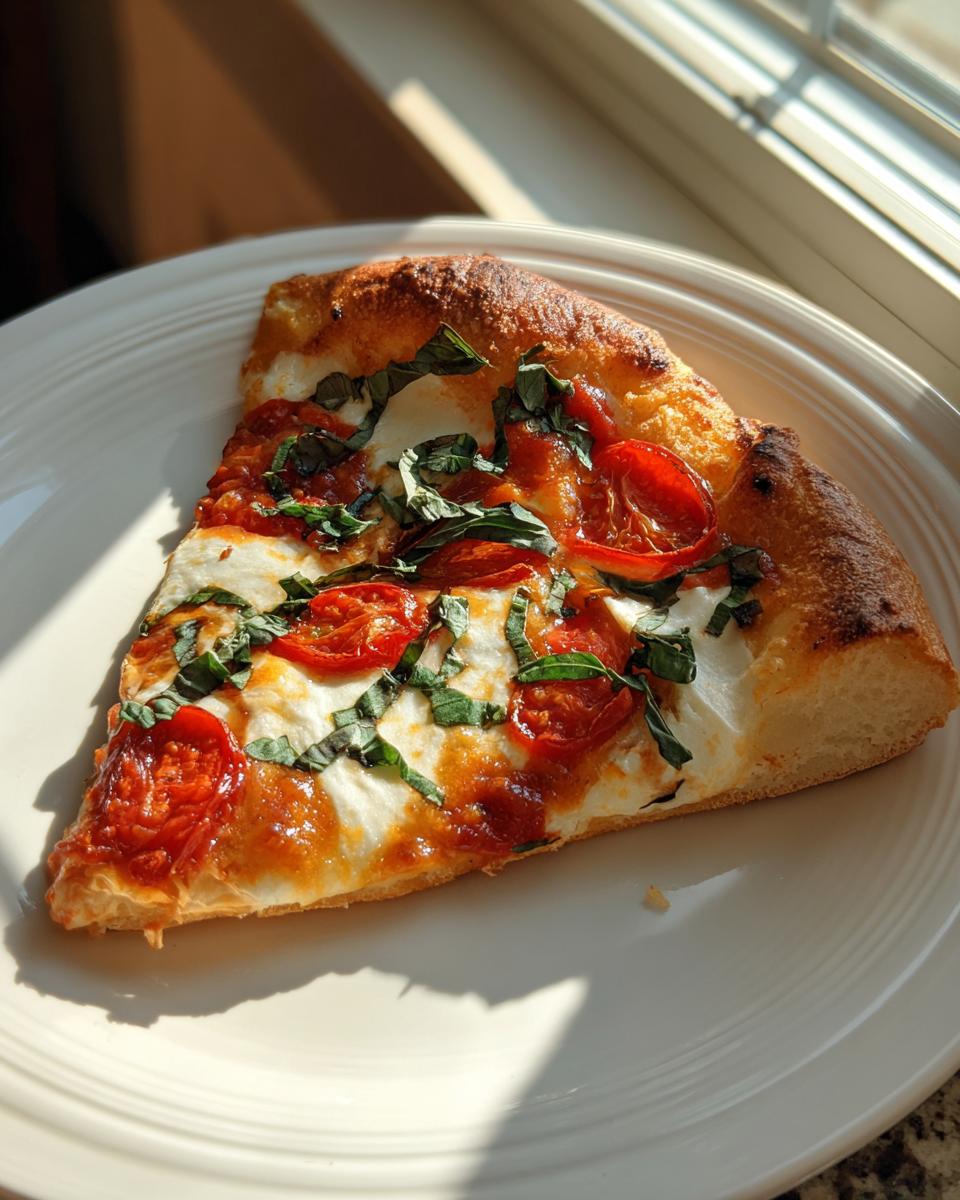
Finishing Touches: Adding Basil to Your Homemade Margherita Pizza
The pizza is out! It’s sizzling, the cheese is gooey, and the aroma filling your kitchen right now is pure Italian comfort. But hold on, one crucial step remains before you grab that first slice of your perfect Homemade Margherita Pizza. We need the basil, and timing is everything here.
You absolutely cannot put the fresh basil on before it goes into the oven. I learned this the hard way early on; fresh basil leaves turn black and crisp up into little bitter flakes when exposed to that 500-degree heat. We want bright green, fragrant pops of flavor, not dried herbs!
As soon as you slide that beauty onto a cutting board—literally seconds after it leaves the stone—that residual heat is still intense. Grab those fresh leaves and scatter them immediately over the hot mozzarella. The heat will wilt them just enough to release their sweet, peppery oils without actually cooking them. This is how you get that authentic, vibrant flavor our margherita pizza deserves. If you’re making a whole spread of food for your party, quick meals like this are essential, and you can check out more ideas for quick easy dinner recipes later!
One last little trick, just like I mentioned in the notes: tear the basil leaves with your hands instead of chopping them with a knife. When you cut basil, the blades bruise the leaves and bring out enzymes that start turning them brown faster. Tearing them releases the oils more gently. It’s a small step, but when you are aiming for perfection every time, these little details matter. Now slice it up, and enjoy the fruits of your labor—you’ve earned this amazing pizza night!
Tips for Success When Making Artisan Pizza at Home
You’ve got all the instructions, but since we’re aiming for that truly authentic, restaurant-worthy artisan pizza experience right here at HearthBite, I want to share a few hard-earned secrets that always ensure my Homemade Margherita Pizza turns out flawlessly. Remember, cooking should bring joy, not frustration, so let’s troubleshoot any potential pitfalls now!
When it comes to the homemade pizza dough, handling temperature is everything. If the dough feels sticky and springs back immediately when you try to stretch it, it means it’s too cold. Don’t fight it! Let it sit on the counter, maybe covered with a light cloth, for an extra ten minutes. Cold dough shrinks; room-temperature dough relaxes and stretches beautifully into that required thin crust pizza without tearing.
We talked about the pizza steel or stone, but let me drill this in: maximum heat is non-negotiable for that crisp bottom. If you’re worried your oven bottoms out at 500 degrees, check the manual! If you can safely push it to 525 or 550, do it! The quicker the initial cooking burst, the less time moisture has to steam the crust. It’s all about radiating that high heat right into the base the second you slide that pie in.
- The Peel Transfer Test: Before you even put sauce on your dough, do a quick test. Give your semolina-dusted peel a little shake with the raw dough on it. If the dough scoots easily, you’re good to go! If it drags, lift the edges and add just a tiny bit more semolina underneath the sticky spots. Better to add dust now than try to pull a wet pizza off a static peel later.
- Sauce Sparingly: This is another massive secret for the thin crust pizza. Less is definitely more with the sauce. You only need enough to coat the dough lightly, leaving that beautiful inch of crust exposed. Too much sauce means the crust can’t crisp up because it’s swimming in liquid.
- Basil Tearing Rule: I know I mentioned it before—tear, don’t cut!—but I put it here as a final, glowing reminder. That technique keeps the basil looking fresh and vibrant, giving your beautiful margherita pizza that final splash of color that screams artisan quality.
If you follow these specific tips along with the main instructions, you are locking in success. You’ll be amazed how often friends ask where you ordered your artisan pizza from when they find out you made it yourself! For more inspiration on making your Friday night feel truly special, check out some of my favorite comfort food recipes on the site!
Frequently Asked Questions About Homemade Margherita Pizza
I always get the same trickle of questions after people try my Homemade Margherita Pizza for the first time—usually around big celebrations like National Pizza Party Day! It’s wonderful that everyone is diving in to make their own artisan pizza, but sometimes those little details trip people up. Let’s clear up a few things so you bake with total confidence!
What is the best way to prevent my thin crust pizza from becoming soggy?
This is the number one problem people face trying to achieve that beautiful, crisp thin crust pizza! You have to attack the moisture aggressively. First, your oven absolutely must be screaming hot—500 degrees minimum—and your stone or steel needs that full 45 minutes to preheat. This intense heat cooks the dough instantly so it sets before the toppings have a chance to release their moisture. Second, use minimal sauce! You want a light coating, not a pool covering the base. If you follow those two things, you won’t see one bit of sogginess.
Can I make the homemade pizza dough ahead of time for National Pizza Party Day?
Oh, absolutely! If you’re hosting a party, you need to get as much done ahead of time as possible. My homemade pizza dough is great when made a day or two ahead. After you finish kneading, put it in a lightly oiled bowl, cover it tightly with plastic wrap, and stick it right in the fridge. The cold fermentation actually develops great flavor, too! Just remember this crucial tip: if you take it straight from the fridge to stretch it, it will fight you. You need to let that dough sit on the counter, covered, for at least 90 minutes so it warms up and relaxes before you attempt that 12-inch stretch.
Does the sauce for this margherita pizza need to be cooked?
Nope! And this is one of the most important differences between authentic margherita pizza and a standard American pie. We are intentionally keeping the sauce uncooked. We only mix those crushed San Marzanos with salt and olive oil. When that raw, slightly acidic, bright tomato mixture hits the 500-degree stone, it essentially cooks right there on the pizza during those 10 minutes in the oven. This technique preserves a fresh, vibrant tomato flavor that you just can’t get from a simmering pot of sauce. It’s part of that beautiful, simple Italian profile!
PrintHomemade Margherita Pizza for National Pizza Party Day

Make an artisan, thin crust pizza at home with fresh mozzarella, simple tomato sauce, and basil. This recipe is perfect for your next pizza party.
- Prep Time: 20 min
- Cook Time: 12 min
- Total Time: 32 min
- Yield: 1 large pizza (4 servings) 1x
- Category: Dinner
- Method: Baking
- Cuisine: Italian
- Diet: Vegetarian
Ingredients
- 1 recipe homemade pizza dough (enough for one 12-inch thin crust)
- 1 cup crushed San Marzano tomatoes (canned)
- 1 teaspoon fine sea salt
- 1 tablespoon extra virgin olive oil
- 8 ounces fresh mozzarella cheese, sliced or torn into small pieces
- 1/4 cup fresh basil leaves
- 1 tablespoon semolina flour (for dusting)
Instructions
- Prepare your homemade pizza dough according to your preferred recipe. Allow it to rest at room temperature for at least 30 minutes before shaping.
- Preheat your oven to 500 degrees Fahrenheit (260 degrees Celsius) with a pizza stone or steel placed on the middle rack for at least 45 minutes.
- In a small bowl, mix the crushed tomatoes with the sea salt and olive oil. Do not cook the sauce.
- Lightly dust a pizza peel with semolina flour. Gently stretch or roll your dough into a 12-inch thin circle. Place the dough onto the prepared peel.
- Spread the tomato sauce evenly over the dough, leaving a 1-inch border for the crust.
- Distribute the fresh mozzarella pieces evenly over the sauce.
- Carefully slide the pizza from the peel onto the hot pizza stone or steel in the oven.
- Bake for 8 to 12 minutes, or until the crust is golden brown and the cheese is melted and bubbly. Cooking time varies based on oven temperature.
- Remove the pizza from the oven. Immediately scatter the fresh basil leaves over the hot cheese.
- Slice and serve your artisan pizza immediately.
Notes
- For an extra crispy thin crust pizza, ensure your pizza stone is fully preheated.
- If you do not have fresh mozzarella, use low-moisture, whole-milk mozzarella, but drain it well first.
- Tear the basil leaves instead of cutting them to prevent browning.
Nutrition
- Serving Size: 1 slice
- Calories: 350
- Sugar: 5
- Sodium: 550
- Fat: 15
- Saturated Fat: 7
- Unsaturated Fat: 8
- Trans Fat: 0
- Carbohydrates: 38
- Fiber: 2
- Protein: 16
- Cholesterol: 30