
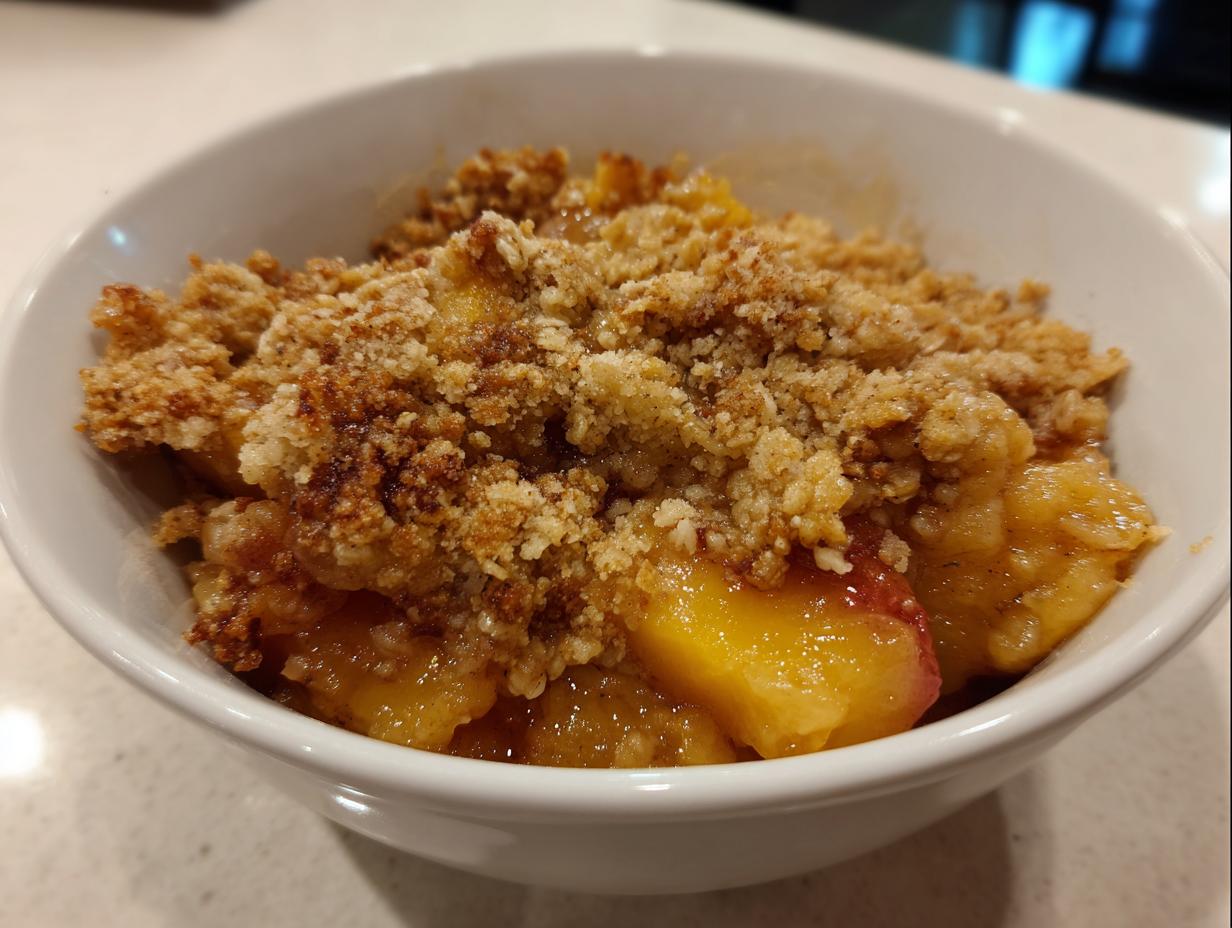
There’s just something about the aroma of baked fruit that instantly feels like home, isn’t there? It’s the smell of slow evenings and family gathered around the table. That’s why I’m so thrilled to share what I genuinely believe is the ultimate easy peach crisp recipe. Forget fussy pie crusts; this dessert is all about tender, spiced peaches nestled under the most perfectly buttery oat topping you can imagine. For me, HearthBite is built on moments just like this—creating simple, deeply comforting food that connects us. This crisp is fast enough for a weeknight but special enough for any gathering. Trust me, you’re going to make this over and over again!
- Why This Is The Best Easy Peach Crisp Recipe
- Gathering Ingredients for Your Homemade Peach Crisp
- Step-by-Step Instructions for the Perfect Peach Crisp
- Tips for Making a Truly Rustic Peach Dessert
- Serving Suggestions for This Comforting Peach Dessert
- Storing and Reheating Your Leftover Peach Crisp
- Frequently Asked Questions About Making Peach Crisp
- Estimated Nutrition for This Simple Summer Dessert
- Share Your Experience with This Peach Crisp
Why This Is The Best Easy Peach Crisp Recipe
When I developed this recipe, there were three things I absolutely needed: it had to be fast, it had to turn out perfectly every time, and the topping had to have real crunch. If you’re looking for a reliable easy peach crisp recipe that satisfies those cravings without keeping you tied to the kitchen, this is the one. It’s all about maximizing flavor with minimal fuss.
- It’s a true weeknight wonder—you’ll only spend about 15 minutes getting the fruit mixed and the topping scattered before it goes into the oven.
- It works beautifully whether you have fresh peaches on hand or you pull a bag of frozen ones out of the freezer.
- The texture payoff is huge; the fruit bubbles up tenderly, and the topping stays wonderfully crisp.
Quick Prep Time for Your Peach Crisp
Seriously, this is what makes it a lifesaver. We’re talking only 15 minutes of hands-on time to get everything assembled. That means you can decide you want a warm, comforting peach dessert at 6 PM and still be sitting down to eat before 8 PM. It’s that kind of quick peach dessert we all need in our rotation.
The Secret to a Perfectly Buttery Oat Topping
The true star here, besides the sweet peaches, is definitely the crunch. We’re aiming for that signature buttery oat topping that holds its shape. The key is using very cold butter cut into small cubes! When you cut that cold butter into the dry mix, you’re creating little pockets of fat that melt slowly while baking. Those pockets create that beautiful, crunchy, crumbly texture that makes a crisp so satisfying.
Gathering Ingredients for Your Homemade Peach Crisp
Now that you’re excited about making this incredible homemade peach crisp, let’s talk ingredients. Because this recipe is so simple, the quality and preparation of what you use really matter. I’ve laid out exactly what you need so you don’t run into any surprises when it’s time to mix. Remember, clarity here is key to getting that perfect baked peaches flavor!
For the Tender Peach Filling
This is where most of the flavor comes from, so make sure your peaches are smelling sweetly ripe—whether they’re fresh off the tree or straight from the freezer bag. You’ll need about 6 cups of peach slices. I always toss them gently in a bowl with the following:
- Granulated sugar (about half a cup)
- A bright squeeze of fresh lemon juice to keep things tart and balanced
- Ground cinnamon (just one teaspoon for warmth)
- A little whisper of ground nutmeg—that quarter teaspoon really boosts the peach flavor!
- And finally, a quarter cup of all-purpose flour to help thicken those lovely juices as they bake up.
Creating the Buttery Oat Topping for the Peach Crisp
This is the part everyone fights over! We want this topping messy, crumbly, and utterly delicious for that signature crispy peach crumble finish. Make sure your butter is straight out of the fridge because the coldness is non-negotiable for the best result. You are mixing:
- One cup of good old-fashioned rolled oats—don’t use quick oats here, please!
- Packed light brown sugar (about three-quarters of a cup) for that deep caramel note
- Another half cup of all-purpose flour
- A tiny pinch of salt to wake everything up
- And half a cup of *cold* unsalted butter, cut into small, pea-sized pieces before you start combining.
Step-by-Step Instructions for the Perfect Peach Crisp
Alright, we have our gorgeous, spiced fruit base ready, and we have our rustic little oat clouds waiting to go on top. Now it’s just a matter of putting it all together the right way. Don’t rush the preheating—that oven temperature is critical for getting that crisp texture right away. This whole process for making this peach crisp is incredibly straightforward, which is why I love it so much. If you’re making this for brunch one day, you can check out my easy breakfast recipes later!
Preparing the Fruit Base
First things first: make sure your oven is warmed up to 375°F (190°C). Lightly grease whatever baking dish you’re using; an 8×8 inch pan works perfectly, but a 9-inch pie plate is also lovely for a more rustic look. Take that bowl of spiced peaches you mixed up earlier and just pour it gently into your greased dish. Don’t pile it up in the middle; just use a spoon or spatula to spread those sweet slices out into one even layer. They should fill the bottom nicely.
Assembling the Buttery Oat Topping for the Peach Crisp
Now we move to the topping bowl—this needs your focus! Since the butter is cold, you need to work quickly so it doesn’t melt before it gets into the flour and sugar mixture. I use my fingertips for this, rubbing the cold cubes of butter into that dry mix of oats, brown sugar, and flour. You’re looking for coarse crumbs, and I mean *coarse*. You should still see little pea-sized chunks of butter visible everywhere. Those chunks are what turn into those magical pockets of crunch that define a great fruit crisp with oats. Once it looks shaggy and crumbly, just sprinkle it right over the peaches. And please, hear me on this: do *not* press the topping down at all. Leave it loose and airy!
Baking Times and Tips for Your Peach Crisp
Slide that dish into your preheated oven. You’re looking at 40 to 50 minutes total baking time for this peach crisp. You’ll know it’s close when the fruit filling around the edges is bubbling up thick and slow, and the oat topping is turning a gorgeous, deep golden brown. Here’s my tip for keeping that topping perfect: if you notice it getting too dark before the filling is cooked, just loosely drape a piece of aluminum foil over the top for the last 10 minutes. Baking it should always finish with a mandatory cool-down period. Let the finished peach crisp rest on the counter for at least 15 minutes. This important time lets those juices thicken up so soupiness doesn’t leak all over your plate when you serve it!
Tips for Making a Truly Rustic Peach Dessert
Part of the joy of making a dessert like this is knowing it doesn’t have to be perfect to be brilliant. This is meant to be a rustic peach dessert—imperfectly beautiful! Over the years, as I’ve tested this recipe for friends and family, I’ve picked up a few tricks to ensure that no matter what fruit supply I have on hand, the result is always fantastic, gooey, and delicious. These little tweaks help make these baked peaches recipe favorites year after year. If you finish cleaning up and still have some energy, check out my recipes for healthy lunch recipes for tomorrow!
Handling Fresh vs. Frozen Peaches in Your Peach Crisp
This is where people often get nervous, especially when peaches aren’t perfectly in season. Don’t worry about thawing frozen fruit! Honestly, it’s one of the best shortcuts. If you use frozen peaches, just toss them straight from the freezer into your bowl with the sugar and spices. They release their moisture right in the oven. It means you get that wonderful, thick filling without waiting hours for things to thaw.
And yes, you absolutely *can* use canned peaches if you’re making this in a pinch, but you must drain them really, really well first. Too much syrup in the bottom of the dish, and you end up boiling the fruit instead of baking it, which ruins that lovely crisp texture we worked so hard for. Stick to the dried-off fruit suggestions, and you’re golden. Using frozen means this specific peach crisp is available almost any time of year!
Achieving Extra Crispness
I mentioned earlier that cold butter is the first step for a great topping, but if you want to go next-level for that unbelievably crunchy topping, try this trick. Once you mix up your topping ingredients—the oats, brown sugar, flour, and butter—cover the bowl and pop it into the refrigerator for about 15 minutes before you sprinkle it over the peaches. When the topping hits the hot fruit, having that fat mixture be extra chilled helps it hold its structure better during the initial blast of heat. It makes a noticeable difference in the final texture of your dessert! My favorite crispy peach crumble is always one that chills out before going near the oven.
Serving Suggestions for This Comforting Peach Dessert
The moment I pull this golden masterpiece out of the oven, my kids start eyeing the freezer. That’s because while this is amazing all by itself—warm, sweet, and fragrant—it hits a whole new level when paired with something cold and creamy. Honestly, if you serve a peach crisp without ice cream, you’re missing out on half the experience, in my humble opinion!
We usually go for classic vanilla, but don’t let that stop you from getting creative. The mix of warm spiced fruit with cold vanilla is just heavenly. This is definitely my favorite way to serve this dessert to serve with ice cream.
- Vanilla Ice Cream: The absolute must-have. The cold temperature melts wonderfully into the warm peach juices, creating a little sauce right in the bowl.
- Whipped Cream: If you prefer something lighter than ice cream, a big cloud of fresh whipped cream works beautifully. Sometimes I even add a tiny drizzle of caramel sauce over the cream.
- Salted Caramel Sauce: Speaking of sauces, if you’re feeling ambitious, a drizzle of homemade salted caramel—like my soft, chewy sea salt caramels—makes this simply decadent. A little salt cuts through the sweetness of those baked peaches perfectly.
The crucial thing is letting it rest those 15 minutes we talked about! That little wait time ensures the filling has set up just enough so that when your scoop of ice cream hits the plate, you get defined fruit and topping, not just a warm puddle. It’s worth every second of patience!
Storing and Reheating Your Leftover Peach Crisp
I sincerely hope you have leftovers because this peach crisp is truly just as good the next day, even if the topping softens up a tiny bit. Don’t despair about the topping, though; we have ways to bring that crunch back! Generally, leftovers from baking fruit desserts keep really well, and this recipe is no exception.
For storage, the key is waiting until the crisp has cooled completely—I mean room temperature! If you seal up warm fruit, you’re just inviting sogginess and steam condensation. Once fully cooled, cover your baking dish tightly with plastic wrap or transfer the portions into an airtight container. You can keep it on the counter for about a day if your kitchen is cool, but I always recommend popping it in the fridge for safety, especially given the fruit content. It should be good for about three or four days tucked away happily in there.
Waking up that Crisp Topping
When you’re ready for your next serving, the method you use to reheat it makes all the difference in reviving that wonderful texture. Microwaving is fast, yes, but it turns out the oats a little gummy. If you have time, use your oven! A quick blast at about 350°F (175°C) for 10 minutes is usually all it takes to heat through the fruit underneath and reform some of that glorious crunchy texture on top.
If you’re really in a rush—and I get it, sometimes you just need that comfort food *now*—you can use the microwave, but do it in short 30-second bursts. And here’s my secret addition for reheating small single servings: once you zap it in the microwave, sprinkle just a tiny dusting of brown sugar and maybe a few extra oats right on top of the warm area, then pop it under the broiler for just 60 seconds! Watch it like a hawk—broilers work fast!—and you’ll get a fresh crust in no time.
If you’re looking for other make-ahead treats, you should see how simple my easy freezer jam is; it’s perfect for topping morning toast!
Frequently Asked Questions About Making Peach Crisp
It’s funny how often simple desserts bring up the most questions! People want this homemade peach crisp to be perfect, and I get that. It saves me a lot of time answering emails if I just put down the common things folks ask when they’re aiming for that great, comforting peach dessert. Check these out—you might find your own question answered right here!
Can I make this easy peach crisp recipe ahead of time?
Yes, you absolutely can make parts of this ahead of time, which is great for entertaining. I usually prepare the fruit filling and the buttery topping separately and store them in the fridge, covered, for up to 24 hours. When you’re ready to bake your easy peach crisp recipe, just assemble it right before it goes into the oven. If you assemble the whole thing—fruit and topping—and then refrigerate it for too long, the moisture starts to wick up into the oats, and you lose that crispiness we worked so hard to achieve. Bake it fresh for the best result!
What is the difference between a crisp and a crumble?
That’s a classic dessert debate! Technically, a crumble topping usually relies on a mix of flour, sugar, and butter rubbed together, maybe with some oats, but the *crisp* is defined by having a significant amount of oats—which is why this is a peach crisp and not a peach crumble. The oats toast up and give you that signature sound and texture when you break into it! For my version, since we use heavy rolled oats mixed in with the brown sugar topping, we nail that fantastic, crunchy texture every time. It’s really what makes this fruit crisp with oats so appealing.
I did see a lovely recipe where they used canned peaches if you ever need a backup plan—you can check out how they handle canned peaches if you find yourself in a pinch!
I also get asked a lot about making things ahead for potlucks. If you’re after truly simple baking that lets you prep in advance, you might like looking at my recipes for easy cool whip cookies; those are great for setting out on a buffet.
Estimated Nutrition for This Simple Summer Dessert
I always include the nutrition breakdown because, while this simple summer dessert is pure comfort food, it’s nice to know what we’re dealing with! I want to be totally transparent about what goes into these treats. Keep in mind that these numbers are estimates based on the ingredients listed in the recipe above—things like the exact sweetness of your peaches or if you decide to drizzle extra caramel on top (which is totally recommended!) can shift these figures.
If you are tracking macros or watching sugar intake, use this as a guideline. If you’re looking for ways to lighten things up next time (maybe by using less brown sugar in that fantastic topping), you should also take a look at my section on gluten-free recipes for alternative flour ideas!
Here are the averages based on a single serving:
- Calories: About 380 per serving
- Total Fat: 18 grams (Be mindful of that 11 grams of saturated fat—that’s the butter doing its job!)
- Carbohydrates: 55 grams
- Protein: A humble 4 grams
- Sugar: Roughly 35 grams (This is where the peaches and brown sugar shine through!)
This is why we add that scoop of ice cream afterward, right? To balance out the sweetness! Enjoy every bite of this peach crisp, my friends; it’s worth every little number on this list.
Share Your Experience with This Peach Crisp
Now that I’ve shared my favorite tips and tricks for making this wonderfully simple and comforting dessert, it’s your turn! I truly hope this recipe brings the same warmth to your kitchen that my grandmother’s tried-and-true recipes brought to mine many years ago. Baking is all about sharing, and I love reading about how you’ve made this recipe your own.
Did you end up sprinkling extra cinnamon on top? Did you manage to get that golden brown color, or did you have to cover it with foil halfway through? Tell me everything!
If you made this peach crisp and loved the perfectly spiced filling and that crunchy texture, please come back and leave a star rating right below this post. Knowing that this recipe worked perfectly for you makes my day. I especially want to know if you topped it with the ice cream, or maybe you tried a scoop of homemade whipped cream instead! Tag me on social media if you took a picture of your gorgeous dessert. I’m dying to see how your peach crisp with brown sugar topping turned out!
If you have any lingering questions that I didn’t manage to cover in the FAQ section, please don’t hesitate to reach out to me directly through my contact page. Happy baking, and enjoy every warm, fruity bite!
PrintThe Ultimate Easy Peach Crisp with Buttery Oat Topping

Make this comforting peach crisp using fresh or frozen peaches. It features tender, spiced fruit topped with a wonderfully buttery oat crumble that bakes up perfectly crisp.
- Prep Time: 15 min
- Cook Time: 45 min
- Total Time: 60 min
- Yield: 6 servings 1x
- Category: Dessert
- Method: Baking
- Cuisine: American
- Diet: Vegetarian
Ingredients
- 6 cups fresh or frozen peach slices (if frozen, do not thaw)
- 1/2 cup granulated sugar
- 1 tablespoon lemon juice
- 1 teaspoon ground cinnamon
- 1/4 teaspoon ground nutmeg
- 1/4 cup all-purpose flour
- 1 cup old-fashioned rolled oats
- 3/4 cup packed light brown sugar
- 1/2 cup all-purpose flour
- 1/2 teaspoon salt
- 1/2 cup (1 stick) cold unsalted butter, cut into small pieces
Instructions
- Preheat your oven to 375°F (190°C). Lightly grease an 8×8 inch baking dish or a 9-inch pie plate.
- In a large bowl, combine the peach slices, granulated sugar, lemon juice, 1 teaspoon cinnamon, 1/4 teaspoon nutmeg, and 1/4 cup flour. Toss gently to coat the peaches evenly.
- Pour the peach mixture into your prepared baking dish and spread it into an even layer.
- In a separate medium bowl, prepare the topping. Combine the rolled oats, brown sugar, 1/2 cup flour, and salt. Mix these dry ingredients together.
- Cut in the cold butter pieces using a pastry blender or your fingertips until the mixture resembles coarse crumbs with some pea-sized pieces of butter remaining. This creates the buttery oat topping.
- Sprinkle the oat topping evenly over the peach filling. Do not press it down.
- Bake for 40 to 50 minutes, or until the topping is golden brown and the peach filling is bubbly around the edges. If the topping browns too quickly, loosely cover it with foil for the last 10 minutes of baking.
- Remove from the oven and let the peach crisp cool for at least 15 minutes before serving. This allows the filling to set slightly.
- Serve warm, ideally with a scoop of cold vanilla ice cream for the best dessert experience.
Notes
- You can use canned peaches for this recipe; drain them well before mixing with the sugar and spices.
- For an extra crisp topping, chill the topping mixture for 15 minutes before sprinkling it over the fruit.
- This simple fruit crisp pairs wonderfully with vanilla ice cream or a dollop of whipped cream.
Nutrition
- Serving Size: 1 serving
- Calories: 380
- Sugar: 35
- Sodium: 150
- Fat: 18
- Saturated Fat: 11
- Unsaturated Fat: 7
- Trans Fat: 0
- Carbohydrates: 55
- Fiber: 5
- Protein: 4
- Cholesterol: 45