
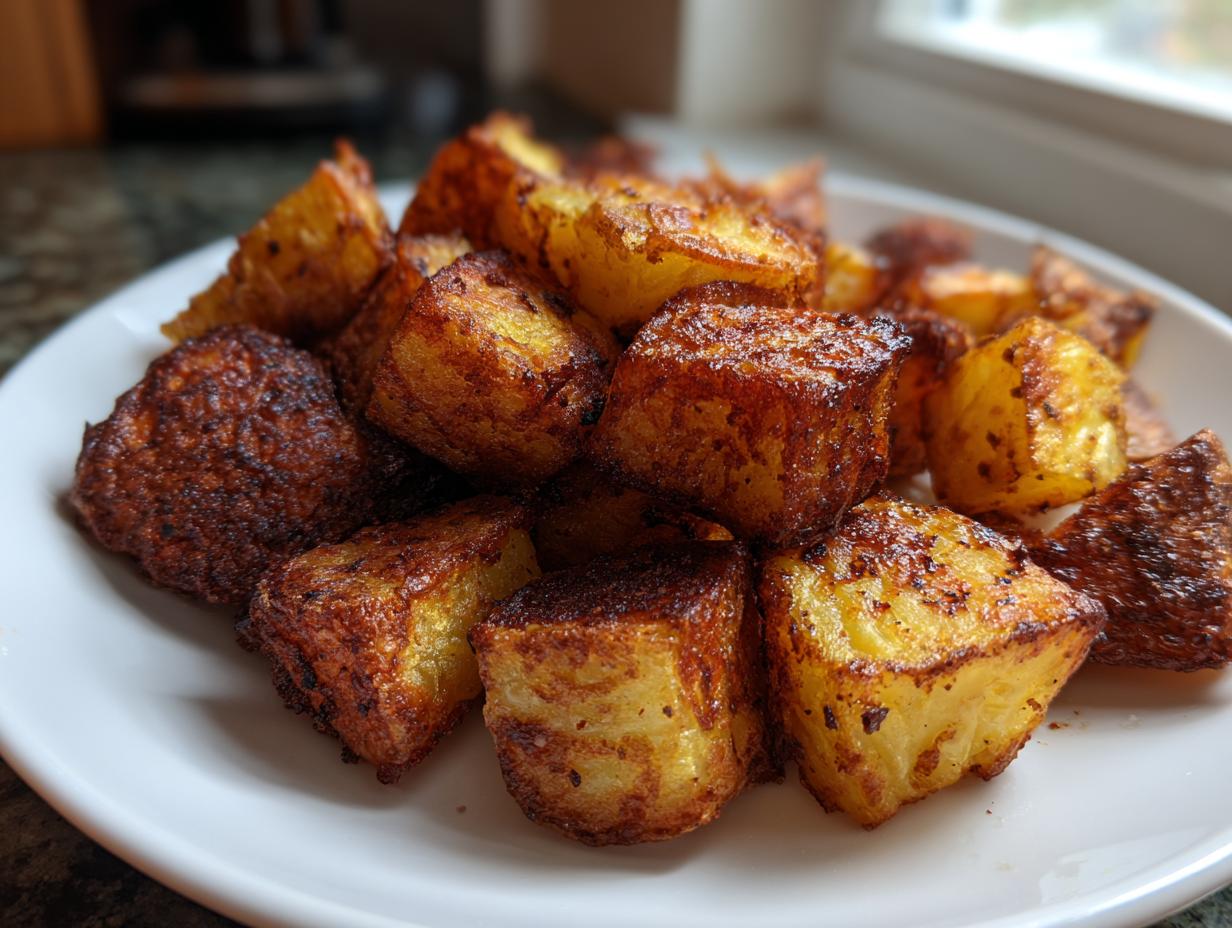
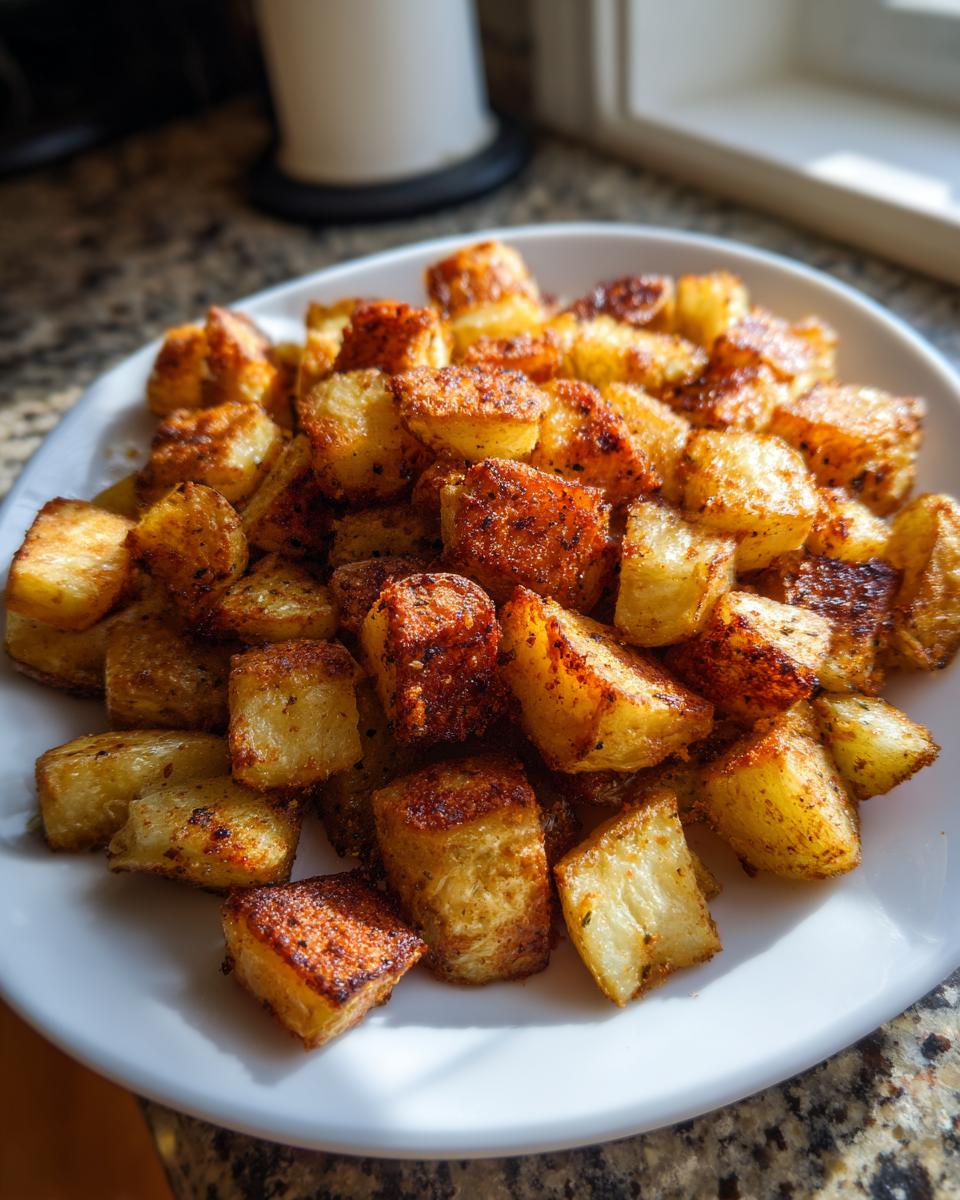
There’s nothing quite like the smell of perfectly seasoned potatoes wafting from the kitchen on a Saturday morning. It just signals comfort, doesn’t it? Forget those soggy, steamed compromises you sometimes get when you rush things. Here at HearthBite, I’m Sarah Miller, and my goal is always to bring you reliable, comforting food that actually works for your busy day. That’s why I’ve perfected these Ultimate Crispy Oven Roasted breakfast potatoes. If you’re looking for an amazing side dish to pair with your eggs—maybe from my collection of easy breakfast recipes—this is it. Seriously, this sheet pan method is nearly foolproof. We’re talking a deeply golden, shatteringly crisp exterior with an interior that melts in your mouth. If achieving maximum crispiness easily is what you want, you’ve definitely landed in the right spot. These are about to become your go-to side dish for every single brunch.
- Why These Oven Roasted breakfast potatoes Are The Best
- Gathering Ingredients for Crispy breakfast potatoes Recipe
- How to Make Oven Roasted breakfast potatoes Perfectly Crispy
- Tips for Perfect breakfast potatoes Every Time
- Variations: Beyond Basic breakfast potatoes
- Serving Suggestions for Your Brunch Side Dishes
- Storage and Reheating Instructions for Leftover breakfast potatoes
- Frequently Asked Questions About breakfast potatoes
- Nutritional Estimates for This Dish
Why These Oven Roasted breakfast potatoes Are The Best
I know you’ve probably tried every trick in the book to get those diner-style crispy breakfast potatoes at home, right? Me too! That’s why I want to show you why this oven method is the one that finally sticks. When you make these, you’re not just making a side dish; you’re unlocking the secret to a perfect morning meal. Trust me, once you try them this way, you won’t go back to the stovetop when you’re aiming for that ultimate crunch factor.
- They are ridiculously easy! Once they hit the oven, you can walk away and focus on getting your eggs just right. No more standing over a hot skillet playing defense against burning spots.
- The flavor payoff is huge for the tiny amount of effort. We use pantry staples to make a seasoning blend that really wakes up that earthy potato flavor.
- They are incredibly popular for a reason. Every time I test these for a weekend brunch, they disappear first!
Fluffy Inside Crispy Outside potatoes Guarantee
That textural contrast is everything, isn’t it? We’re aiming for two things here: edges that look almost caramelized and a middle that’s soft and steamy. The magic happens because we use super high heat—425 degrees is no joke! That blast of dry heat cooks the outside rapidly, shattering any surface moisture that tries to form steam. This leaves the interior protected and beautifully fluffy. It’s honestly much more reliable for beginners than the skillet method where you risk scorching the outside before the inside has a chance to fully cook.
Simple Seasoned breakfast potatoes
You don’t need a spice cabinet full of weird ingredients for these flavorful bites. Nope! My philosophy is always about maximizing common ingredients. We build flavor using simple garlic powder, onion powder, and a little paprika for color. That kick of cayenne is optional, but I always sneak it in because it brightens up the whole dish. These seasoned breakfast potatoes taste like the best version of what you already have stocked—no fancy shopping trips required for this recipe!
Check out my guide on comfort food recipes if you’re looking to add more homey favorites to your rotation once you’ve mastered these potatoes!
Gathering Ingredients for Crispy breakfast potatoes Recipe
Okay, let’s get down to business with what you need! For this recipe, simplicity is key, but choosing the right potato makes a huge difference in how crispy your final product turns out. Don’t stress if an ingredient measurement looks slightly different than what you usually use—this recipe is tested and true for that perfect oven roast!
- You’ll need about 2 lbs of potatoes. I tell everyone to grab Yukon Golds or Russets.
- We’re using 3 tablespoons of a nice high-heat oil, like avocado oil or just regular olive oil.
- For seasoning, keep salt and pepper handy, plus 1 teaspoon each of garlic powder and onion powder.
- Don’t forget the paprika for color—about 1/2 teaspoon—and if you like a little zing, a tiny pinch of cayenne pepper is totally optional but delicious!
Potato Selection and Preparation Notes
This is where people sometimes rush, but hold on! Potato choice really impacts texture. If you want them a little creamier on the inside but still firm, Yukon Golds are fantastic. If you want pure, fluffy dryness inside that soaks up all that crisp exterior crust, go with Russets. Either way, you have to scrub them really well! I use a clean vegetable brush right under running water. We keep the skins on, because honestly, the skin is where a lot of that crispiness develops, and it adds great flavor.
Also, when you dice them, try your best to keep them roughly the same size, about one inch. If you have massive chunks next to tiny slivers, the tiny ones will just turn into little potato chips while the big ones are still softening up inside. Consistency equals success here, my friend!
How to Make Oven Roasted breakfast potatoes Perfectly Crispy
Alright, this is where the magic really happens! We’re moving away from the sometimes tedious skillet method and leveraging the massive power of our convection oven. This roasting technique is how we guarantee you get those glorious, deep golden brown potatoes without hovering over the stove for 40 minutes straight. It’s a simple process, but you have to follow these few crucial preparation steps if you really want that rock-solid crisp exterior.
First things first: heat is your friend! Crank that oven up to 425 degrees Fahrenheit. A hot oven mimics the environment of a deep fryer, evaporating moisture fast so the potato cubes can actually brown instead of just steaming themselves into mush. Lay out your diced potatoes on a baking sheet lined with parchment paper. And listen closely, because this step is non-negotiable if you want success!
The Secret to How to Make Crispy Potatoes: Drying and Seasoning
If you want to know how to make crispy potatoes, it all comes down to starch management. Starch creates steam; we want dryness! If you didn’t soak them beforehand (though I highly recommend it!), you absolutely *must* pat them bone dry with paper towels. Water beads are the enemy of crispiness, so blot, blot, blot!
Next, we oil. Drizzle on your avocado oil and use your hands—really—to massage it over every single surface. You want them slicked, not swimming. Once they’re coated, sprinkle on that beautiful seasoning mix we put together. Toss everything until you can see a uniform dusting of color on every surface. This even coating ensures even browning when we go into the oven.
Roasting Technique for Golden Brown potatoes Side
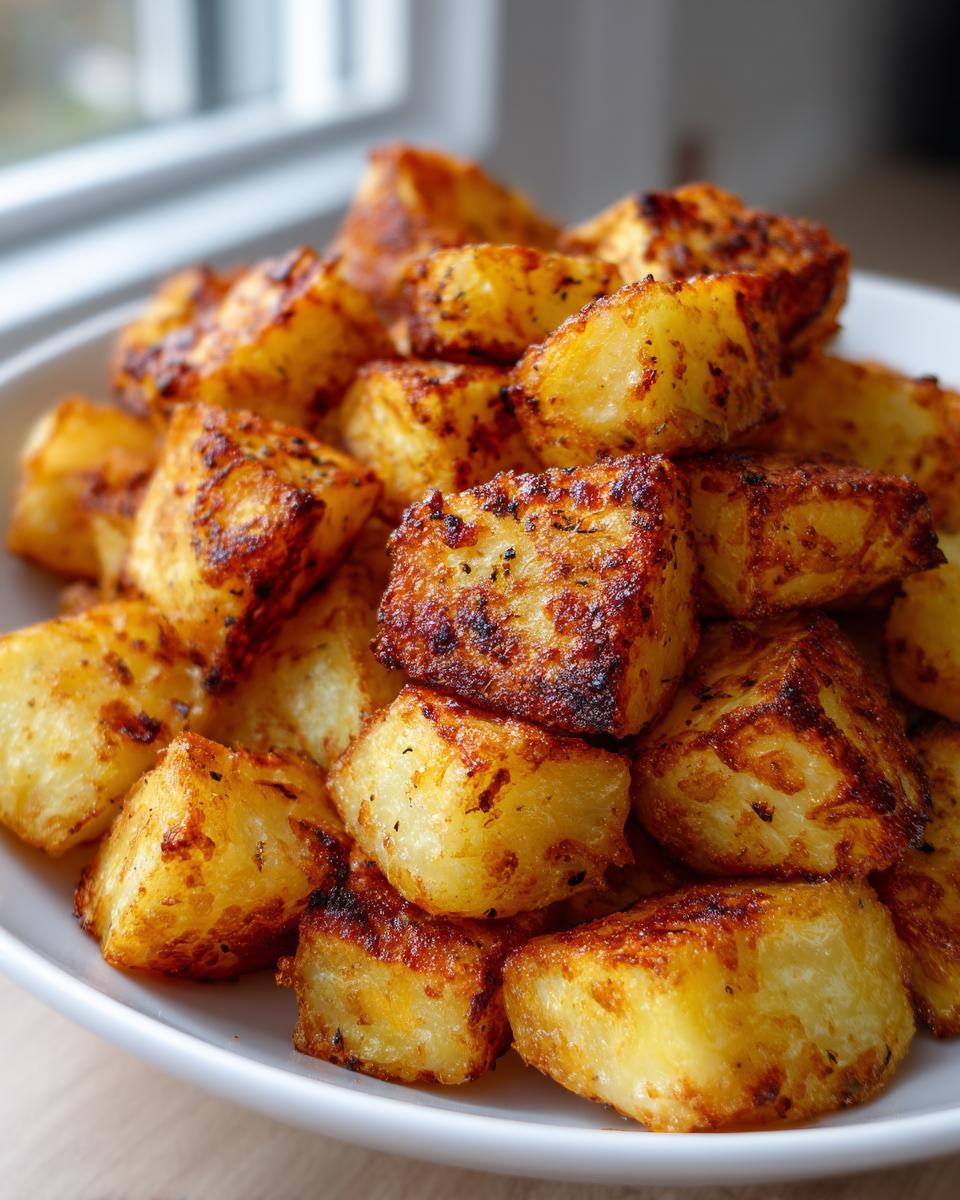
Once seasoned, spread those cubes out in a single, lonely layer on that baking sheet. I cannot stress this enough: if they are overlapping or crowded, they will steam! If you’re making a huge batch for a crowd, just use two pans, spaced apart. They need room to breathe to become that perfect golden brown potatoes side we crave.
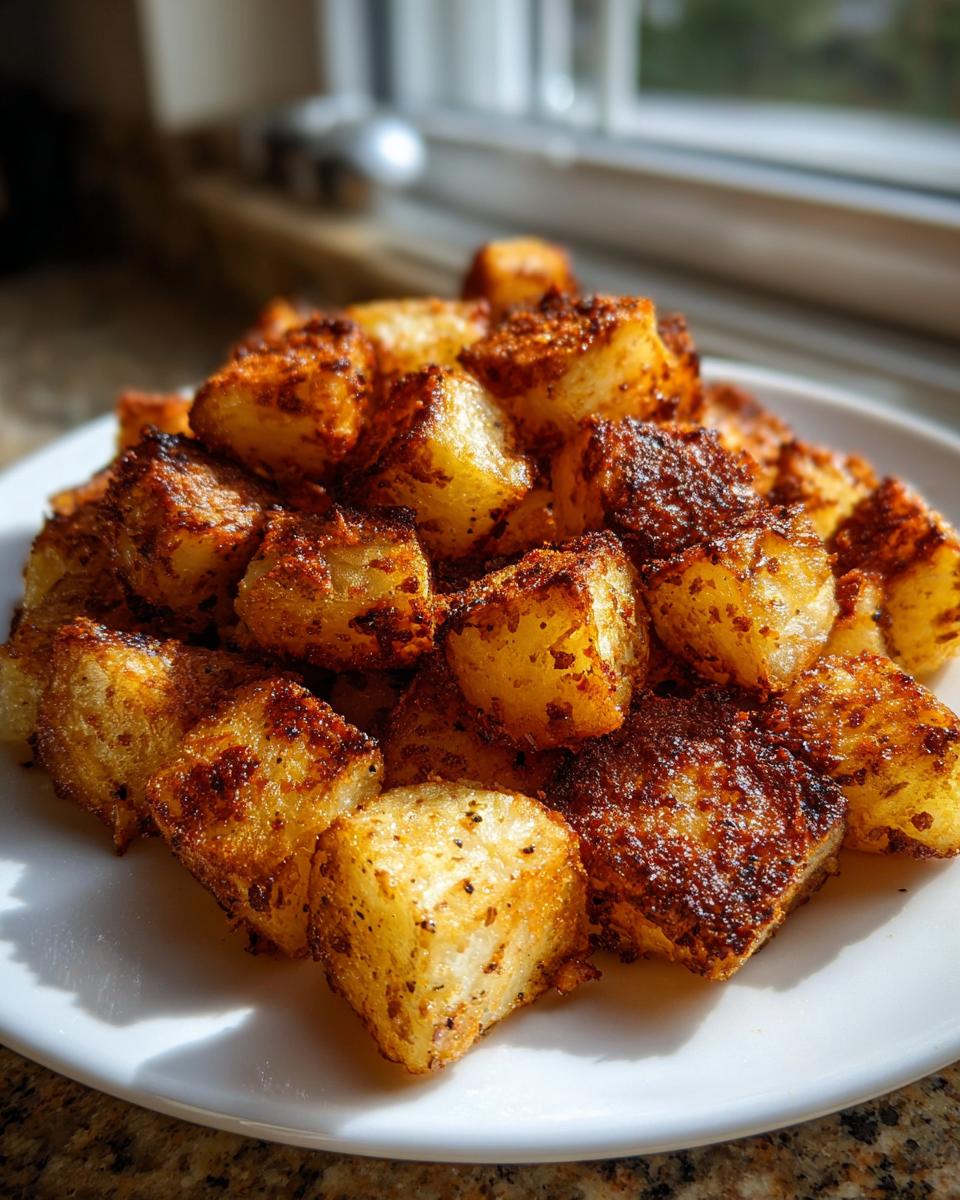
We roast for 20 minutes untouched. Then, pull the pan out—careful, it’s hot! Use a wide spatula to flip or toss them all over so the other side gets direct heat contact. Pop them back in for another 15 to 20 minutes. When they come out the second time, they should be deeply browned and sound slightly hollow when you tap them with your spatula. That’s the sound of success!
If you’re looking for more fantastic roasted vegetable ideas, make sure you check out my recipe for easy roasted potatoes and carrots. You know the oven is already hot, right?
It takes a little patience, but checking out tips from places like The Best Roasted Potatoes really shows that timing and temperature are key in this whole process!
Tips for Perfect breakfast potatoes Every Time
Now that you know the main roasting method, I want to share a few little secrets I picked up through trial and error over the years. This is the difference between good potatoes and *must-make-them-every-weekend* potatoes. Remember, cooking is about intuition layered on top of reliable technique, and these tips bring that intuition right to you!
Don’t be afraid of high heat, but be smart about it. If your oven runs hot, you might be able to shave off five minutes in the second roasting stage. Conversely, if your oven runs cool, keep an eye on them past the 35-minute mark until they hit that deep golden color. I always watch for the color first, not the timer!
Regarding your baking pan—the material matters! I insist on a standard, light-colored aluminum sheet pan. Darker pans absorb too much heat too quickly and can scorch the oil and the edges of the potatoes before the center is fluffy. For the absolute crispiest result, I highly recommend trying a perforated pan if you have one, like those specialized roasting trays. Those little holes let even more hot air circulate underneath them, mimicking a professional convection oven.
If you’re making my rich twice-baked potatoes later in the week, you can even dice up extra potatoes now and store them (cold, *not* seasoned) in the fridge for up to two days. Just add another 5-10 minutes to the total cook time when you roast them later on.
For an ultimate crispness boost, check out what others are nailing at sites like Kitchen User—they focus heavily on the texture science, which really backs up what we’re doing here with the high heat!
Variations: Beyond Basic breakfast potatoes
Part of what makes home cooking so fun is turning a reliable base recipe into something new for your weekday rotation. Since the high-heat roasting technique is so solid, you can really play around with what you toss in with your potatoes! You can easily transform these into any kind of side dish!
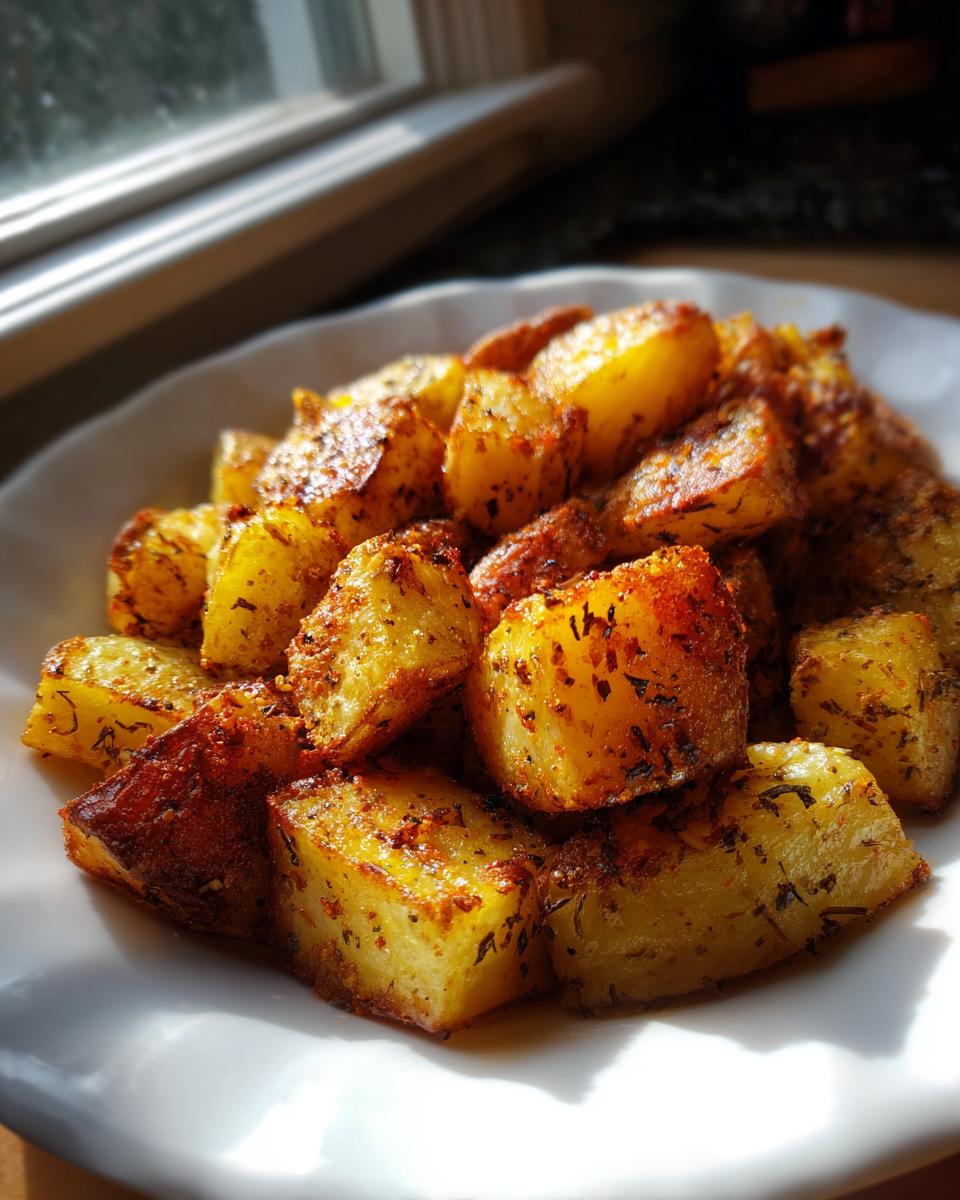
If you’re feeling adventurous, add chopped red onion or bell peppers during the last 15 minutes of roasting. Toss them in when you flip the potatoes. Since they cook faster than potatoes, we don’t want them turning to mush right at the start. For herbs, try swapping out the paprika for some dried rosemary or thyme—it gives them a wonderful, earthy, almost rustic flavor profile that’s amazing alongside savory sausage.
Don’t forget you can always add a sprinkle of smoked paprika instead of regular paprika. That really punches up the flavor and gives them a beautiful, deep color that screams “diner style” even though they came out of your own oven!
Quick Morning potatoes Alternatives (Skillet and Air Fryer)
I designed this as an oven recipe because I love the hands-off nature, but I know sometimes you need quick morning potatoes *fast*! If you’re short on time, you can definitely adapt this. For making true Skillet Breakfast Potatoes, you’ll need to pre-cook your cubes slightly. Boil them in salted water for about 5-7 minutes until they just start getting tender on the outside—then drain them super well! Heat about 1/4 cup of oil in a heavy skillet over medium-high heat and cook them in batches, careful not to overcrowd. They’ll take about 15-20 minutes, flipping every few minutes until crispy.
If you have an air fryer, they go wild in there! For Air Fryer Breakfast Potatoes, reduce the oil slightly (maybe 2 generous tablespoons) and air fry at 390 degrees. You’ll shake the basket every 8 minutes, and they’re usually done in about 20-25 minutes total. It’s definitely faster than the oven, but you usually have to cook in smaller batches, so watch your quantities!
Serving Suggestions for Your Brunch Side Dishes
Now that you have this massive pile of gorgeous, golden, crispy hash browns fresh from the oven, the real fun begins: deciding what glorious things to serve them with! Seriously, these potatoes are so versatile, they elevate everything on the plate. They are honestly my favorite thing to serve during our big weekend brunches because they look fancy but take zero last-minute fuss.
Of course, the classic pairing is eggs any style—over easy, scrambled, or maybe even a beautiful poached egg where the yolk can mingle with those spicy potato crumbs. If you’re making a full American spread, you have to have bacon or sausage links nearby. These potatoes are sturdy enough to stand up to the richness of maple syrup-drenched sausage patties!
But don’t stop at breakfast! I often make an extra batch of these simple breakfast sides on Sunday afternoon and reheat them for Tuesday night’s dinner alongside something simple, like broiled pork chops or even grilled chicken. They work just as well next to a steak as they do next to pancakes. If you’re looking for a truly show-stopping brunch centerpiece, try pairing these with my recipe for easy biscuits and gravy—the potatoes disappear fast underneath a blanket of creamy sauce!
Making breakfast potatoes for a Crowd
If you’re hosting brunch for book club, church, or just a house full of hungry kids, you’ll definitely need to scale this recipe up. When you double or triple the quantity for breakfast potatoes for a crowd, you have to remember that crispy surface area is essential! I know it’s tempting to try and cram it all onto one pan, but please, please don’t do it.
If you try to force too many potatoes onto one tray, they will trap moisture and steam. The entire batch will end up soft and sad. Instead, use two, or even three, large sheet pans for your potatoes. Make sure every single cube has space around it to breathe. Yes, this means you have to monitor two sets of potatoes roasting, but I promise you, the payoff of having perfectly crispy potatoes for every single guest is absolutely worth the extra sheet pan!
Storage and Reheating Instructions for Leftover breakfast potatoes
If you somehow manage to have any of these golden beauties leftover—which, honestly, is a feat in itself—don’t just toss them! We want to make sure these flavorful potatoes are just as good the next day. Storing and reheating them properly is key to keeping that satisfying crunch we worked so hard to achieve.
For storage, let the potatoes cool completely before you even think about putting them away. Warm potatoes create condensation in an airtight container, and condensation is the sworn enemy of crispy food. Once cool, transfer them to a zip-top bag or a container and keep them in the fridge. They hang out happily in the cold for about three to four days. This is perfect for using them later in the week for quick lunches!
Now, for the reheating, you have options, but only one is truly superior if you want that just-out-of-the-oven texture. Please, please, do not microwave them! Microwaving turns crispy things immediately soft and rubbery. Instead, get that oven preheated back up to about 400 degrees Fahrenheit.
Spread the leftover breakfast potatoes out onto a clean baking sheet. No need to add extra oil unless they look really dry. Pop them into the hot oven for about 8 to 10 minutes. This dry heat will drive out any residual moisture and crisp up those exterior edges again. They’ll be practically perfect—maybe skip the initial 20 minutes of the original roast and go straight to the finishing phase!
If you need even more ideas for making mealtime manageable now that you’ve mastered these sides, you might want to check out my go-to recipe for crockpot chili—sometimes you just need to let the slow cooker do the heavy lifting!
Frequently Asked Questions About breakfast potatoes
I always get so many great questions once people start making these potatoes! It shows you’re paying attention to the details, which is how you become a truly great home cook. Since we’re aiming for something absolutely delicious and reliable—like aiming for that perfect Crispy Breakfast Potatoes result—let’s tackle the most common things readers ask me about!
Can I use sweet potatoes for this recipe?
Oh, sure thing! Sweet potatoes are delicious, but they behave a little differently than white potatoes. They have higher sugar content, so they brown much faster. If you swap them in, you absolutely need to keep an eye on them. I’d drop the oven temperature down to 400 degrees Fahrenheit instead of 425, and you might find they are done closer to the 30-minute mark total. Keep testing them! They won’t get quite the same dry, starchy fluffiness inside as a Russet, but they will be wonderfully caramelized!
What is the best way to get diner Style Potatoes Recipe texture?
If you want that authentic, thick, Diner Style Potatoes Recipe texture—super crispy cube edges but creamy centers—the answer is always twofold: high heat and even coating. Seriously, use that 425-degree oven! You must ensure every single surface of that diced potato has oil clinging to it before it goes in the oven. If there’s a dry spot, that spot will stay dull and soft. Also, don’t skimp on the parchment paper, and never, ever let the potatoes touch or overlap on the pan. That air circulation has to happen!
When you’re done making these amazing hash browns, maybe move right on to my recipe for easy sausage and rice skillet for a complete meal!
Nutritional Estimates for This Dish
I always like to give you guys a general idea of what you’re working with nutritionally when you make these breakfast potatoes. Remember, these numbers are estimates, and they can swing a little based on exactly how much oil you use or the size of your potatoes. But this gives you a great baseline for planning out your morning meal!
This breakdown is based on 6 generous servings from the full recipe batch, focusing on the oil and seasoning blend we used. It’s comforting food, but by roasting instead of deep-frying, we keep the fat content reasonable!
- Serving Size: About 1.5 cups
- Calories: Around 250
- Total Fat: About 11 grams (mostly healthy unsaturated fats from the avocado oil!)
- Carbohydrates: 35 grams (that’s the good energy you need for the morning!)
- Protein: 4 grams
- Sugar: Super low, just about 1 gram
Keep in mind that if you decide to go heavy on the butter when serving or cover them in a cheesy sauce, those numbers are definitely going to change. For me, using these as a simple side for scrambled eggs keeps the whole plate balanced and satisfying. Enjoy the crunch!
PrintUltimate Crispy Oven Roasted Breakfast Potatoes

Make the best breakfast potatoes with this easy oven-roasted recipe. These potatoes achieve a golden, crispy exterior and a fluffy interior every time, perfect for any morning meal or brunch side dish.
- Prep Time: 15 min
- Cook Time: 40 min
- Total Time: 55 min
- Yield: 6 servings 1x
- Category: Breakfast
- Method: Oven Roasting
- Cuisine: American
- Diet: Vegetarian
Ingredients
- 2 lbs Yukon Gold or Russet potatoes, scrubbed and diced into 1-inch cubes
- 3 tablespoons avocado oil or olive oil
- 1 teaspoon salt
- 1/2 teaspoon black pepper
- 1 teaspoon garlic powder
- 1 teaspoon onion powder
- 1/2 teaspoon paprika
- 1/4 teaspoon cayenne pepper (optional, for a little heat)
Instructions
- Preheat your oven to 425 degrees Fahrenheit (220 Celsius). Line a large, rimmed baking sheet with parchment paper for easier cleanup.
- Place the diced potatoes in a large bowl. If you want extra crispy potatoes, soak the diced potatoes in cold water for 30 minutes, then drain them completely and pat them very dry with paper towels. This step removes surface starch, which helps them crisp.
- Drizzle the potatoes with the avocado oil. Toss well to coat every piece evenly.
- In a small bowl, mix together the salt, pepper, garlic powder, onion powder, paprika, and cayenne pepper (if using). Sprinkle this seasoning mix over the oiled potatoes and toss again until the seasoning is distributed.
- Spread the seasoned potatoes in a single layer on the prepared baking sheet. Do not overcrowd the pan; use two sheets if necessary. Crowding leads to steaming, not crisping.
- Roast for 20 minutes. Remove the pan from the oven and carefully flip or toss the potatoes using a spatula.
- Return the pan to the oven and roast for another 15 to 20 minutes, or until the potatoes are deeply golden brown and crispy on the edges.
- Serve immediately as a delicious side dish for eggs or bacon, or as part of your weekend brunch spread.
Notes
- For the crispiest results, ensure your potatoes are completely dry before adding oil and seasoning.
- For a party size batch, use two large baking sheets to maintain the single layer required for proper roasting.
- These make excellent make ahead breakfast potatoes; reheat them in a 400 degree oven for 10 minutes to restore crispness.
Nutrition
- Serving Size: 1.5 cups
- Calories: 250
- Sugar: 1
- Sodium: 350
- Fat: 11
- Saturated Fat: 1.5
- Unsaturated Fat: 9.5
- Trans Fat: 0
- Carbohydrates: 35
- Fiber: 4
- Protein: 4
- Cholesterol: 0