
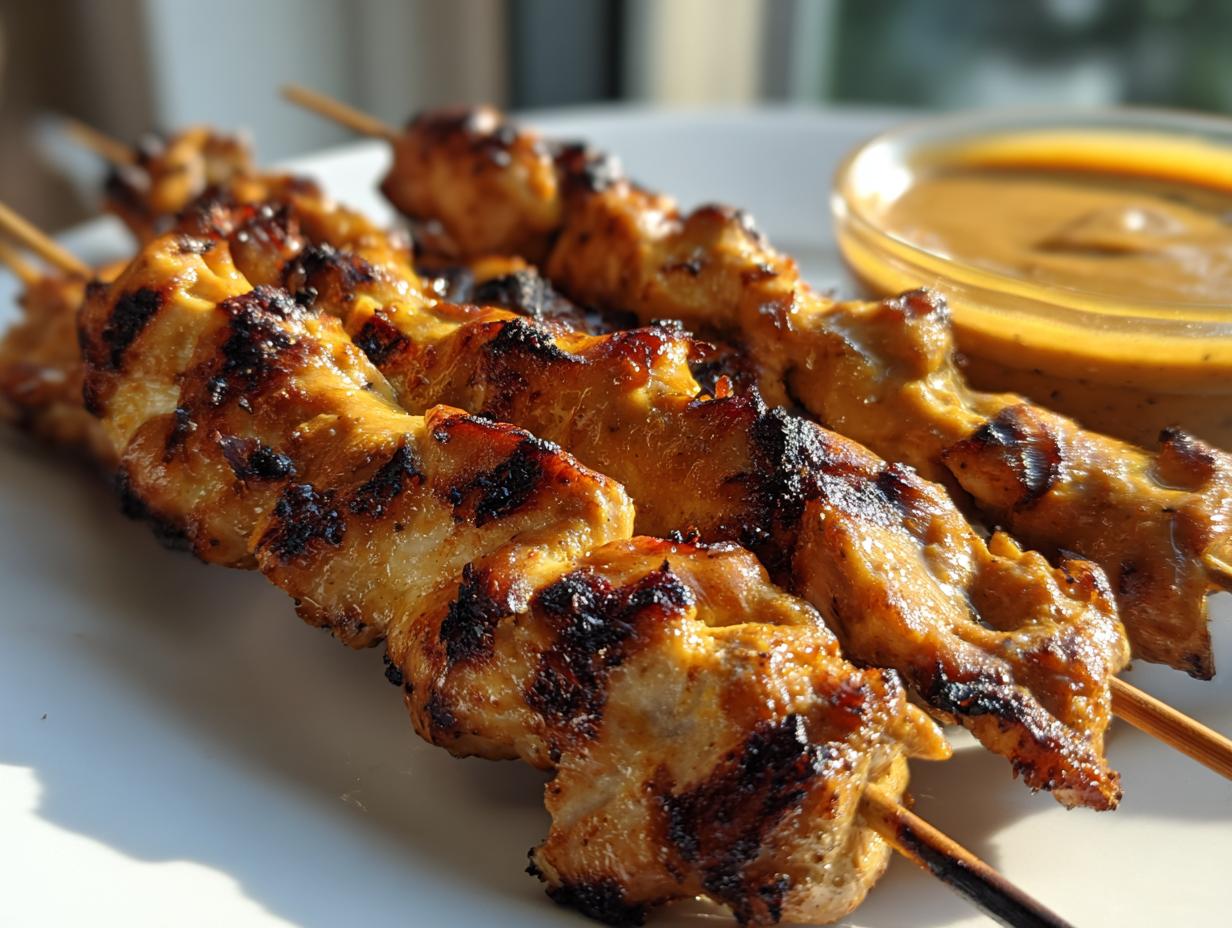
Oh, that moment when you’re scrolling through dinner ideas, completely craving that vibrant, satisfying flavor you usually only get from your favorite Thai spot? I know that feeling well! That’s why I’m so thrilled to share what has become a staple in our home: the Easy Thai Chicken Satay Skewers with Quick & Creamy Peanut Sauce. Truly, this recipe captures that authentic street food magic without needing hours of effort, making it perfect for a weeknight meal or a fun party appetizer. When I first worked this recipe out—focusing heavily on that aromatic marinade—I realized this simple chicken satay dish embodies everything HearthBite stands for: deep comfort, shared joy, and big flavor achieved simply. If you’re looking for those quick, easy dinner recipes that pack a punch, this is it. Trust me, once you nail this technique, you won’t order it out anymore!
- Why This Easy Chicken Satay Recipe Works for Your Family
- Ingredients for Flavorful Chicken Satay and Creamy Peanut Sauce
- Mastering the Marination for Juicy Chicken Skewers
- How to Prepare the Best Chicken Satay
- Tips for Perfect Homemade Satay Every Time
- Serving Suggestions for Your Chicken Satay Dinner
- Storing and Reheating Leftover Chicken Satay
- Frequently Asked Questions About Making Chicken Satay
- Estimated Nutritional Value for This Chicken Satay Recipe
Why This Easy Chicken Satay Recipe Works for Your Family
Here at HearthBite, we believe every recipe should meet you where you are—busy, maybe a little tired, but still wanting something wonderful for dinner. This Chicken Satay Recipe isn’t just about good food; it’s about reliable comfort that comes together fast. We tested this over and over to make sure it’s foolproof, aligning perfectly with our mission to bring you truly comforting meals.
What makes this version a keeper? It’s all about efficiency and results. You get that takeout quality without the wait!
- Quick Prep Time: Seriously, the marination is mostly hands-off. We aim for meals that fit into a standard weeknight schedule.
- Juicy Chicken Skewers: Using thighs keeps the meat incredibly tender, even if your grill gets a little hot!
- Authentic Flavor: That aromatic blend of turmeric and cumin gives you that unmistakable taste of comfort-food recipes from Southeast Asia, right in your backyard.
Ingredients for Flavorful Chicken Satay and Creamy Peanut Sauce
Getting started is the easiest part, I promise! You just need to gather your components. I’ve broken this down so you know exactly what goes into that amazing marinade and what builds that divine, creamy dipping sauce. Remember, using chicken thighs instead of breasts is my secret weapon here—they just stay so much juicier when they hit the heat!
Oh, and if you’re using wooden skewers for grilling, make sure they’ve been soaking in water for at least half an hour. That little step prevents them from turning into charcoal while your meat cooks perfectly.
For the Marinated Chicken Satay Skewers
- 1.5 lb boneless, skinless chicken thighs, cut into 1-inch strips (The best cut for tenderness!)
- 120 ml full-fat coconut milk
- 30 ml soy sauce
- 1 tablespoon brown sugar
- 1 teaspoon ground turmeric
- 1 teaspoon ground cumin
- 1/2 teaspoon ground coriander
- 1/2 teaspoon salt
- 1/4 teaspoon black pepper
- Wooden skewers (soaked in water for 30 minutes if grilling)
For the Quick & Easy Peanut Sauce Recipe
This sauce is the star that really makes this Homemade Satay shine. It comes together faster than you think!
- 1/2 cup creamy peanut butter
- 60 ml hot water (to help everything melt together)
- 30 ml soy sauce
- 1 tablespoon lime juice
- 1 tablespoon brown sugar
- 1 teaspoon grated fresh ginger (don’t skip this!)
- 1 clove garlic, minced
- 1/2 teaspoon red pepper flakes (just for that little kick, optional)
Mastering the Marination for Juicy Chicken Skewers
Alright, now that we have all our colorful spices and creamy coconut milk lined up, it’s time for the flavor infusion! This step is critical for getting that amazing, tender result you expect from great quick, easy dinner recipes. Remember, we are building the authentic taste right here.
First, grab that bowl with the coconut milk. You’re going to whisk everything together—the soy sauce, brown sugar, turmeric, cumin, coriander, salt, and pepper. Keep whisking until that little bit of brown sugar dissolves. You want a smooth, golden marinade swimming in the bottom of the bowl. It should smell heavenly already!
Next, toss in those chicken thigh strips. Make sure every single piece gets completely coated in that fragrant bath. Don’t just mix it; use your hands (yes, really!) to gently massage the marinade right into the meat. This helps the flavors penetrate deeper, which is part of why we get such juicy chicken skewers.
Now for the waiting game—and this is where patience pays off! Cover that bowl up tight and tuck it into the fridge. While you technically *can* cook these after just 30 minutes if you are in a massive rush, for the best results, I really advocate for at least one hour. Honestly, if you can let those spices work their magic for between one and four hours, you’ll be rewarded with chicken that practically melts in your mouth. That four-hour window is my sweet spot for maximum flavor saturation!
How to Prepare the Best Chicken Satay
Okay, we’ve marinated our meat—now let’s put the whole amazing homemade satay experience together! This is where we bring everything to life, from the rich dipping sauce to those beautifully charred grilled chicken dinner pieces. Don’t rush the sauce, and definitely make sure those skewers have had a nice long soak!
Making the Creamy Dipping Sauce
We need to tackle the sauce first so it’s ready for dipping when the chicken comes off the heat. Get a small saucepan going—you want low heat here, remember we are just coaxing things to mix, not frying!
Toss in your peanut butter, hot water, soy sauce, lime juice, brown sugar, fresh ginger, minced garlic, and those pepper flakes if you like heat. Stir it gently and constantly until it turns gorgeous and smooth. It should look like velvet. If you feel it’s getting too stiff or clumpy—which happens sometimes depending on your peanut butter—just add a tiny splash of water, maybe a teaspoon, until you get that perfect creamy dipping sauce consistency. Take it off the heat and let it sit while the chicken cooks.
Cooking Your Thai Chicken Skewers
Time to get those skewers sizzling! Thread the marinated chicken strips onto your soaked wooden sticks. Leave just a tiny sliver of space between each piece—we want them close enough to feel like a skewer, but not so packed that the heat can’t get around them.
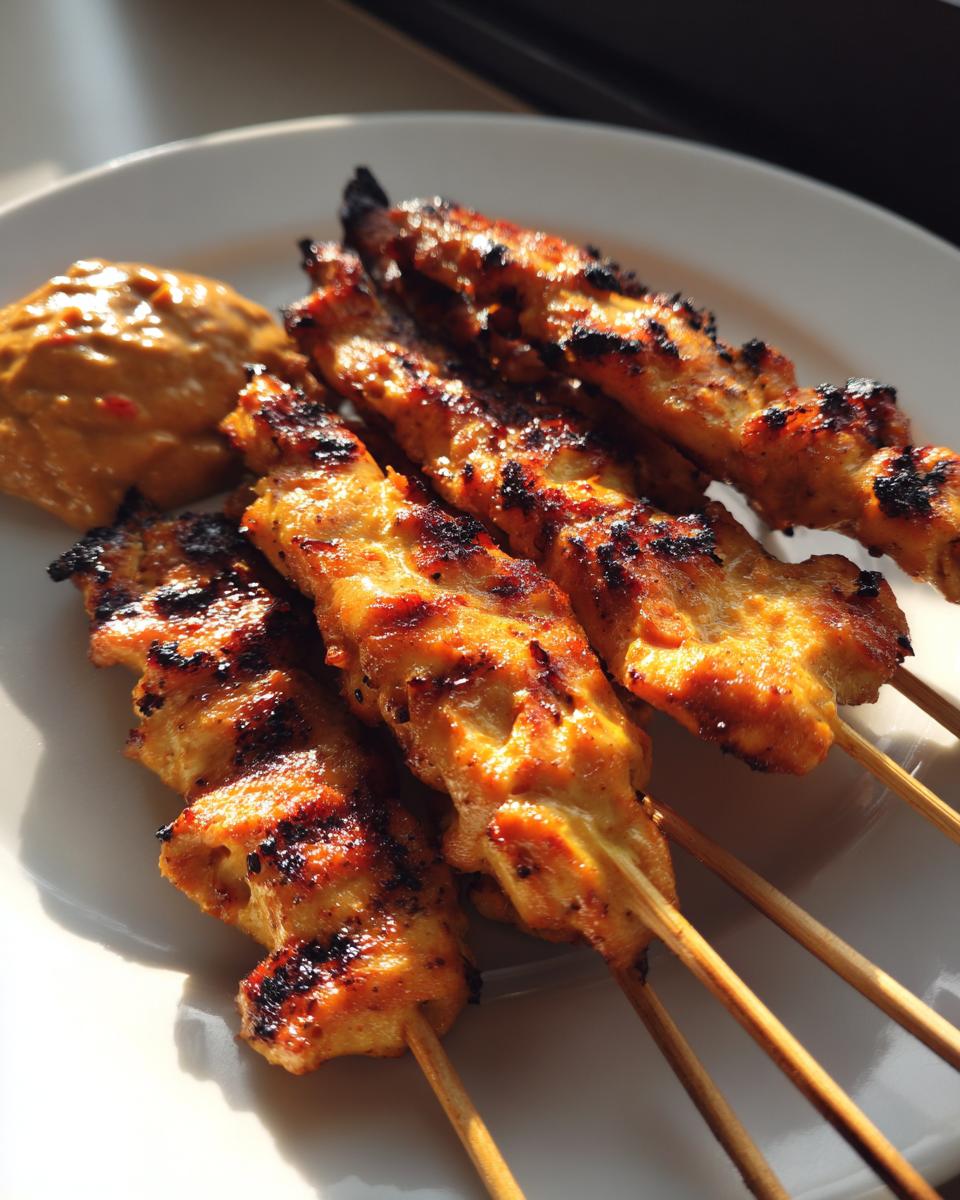
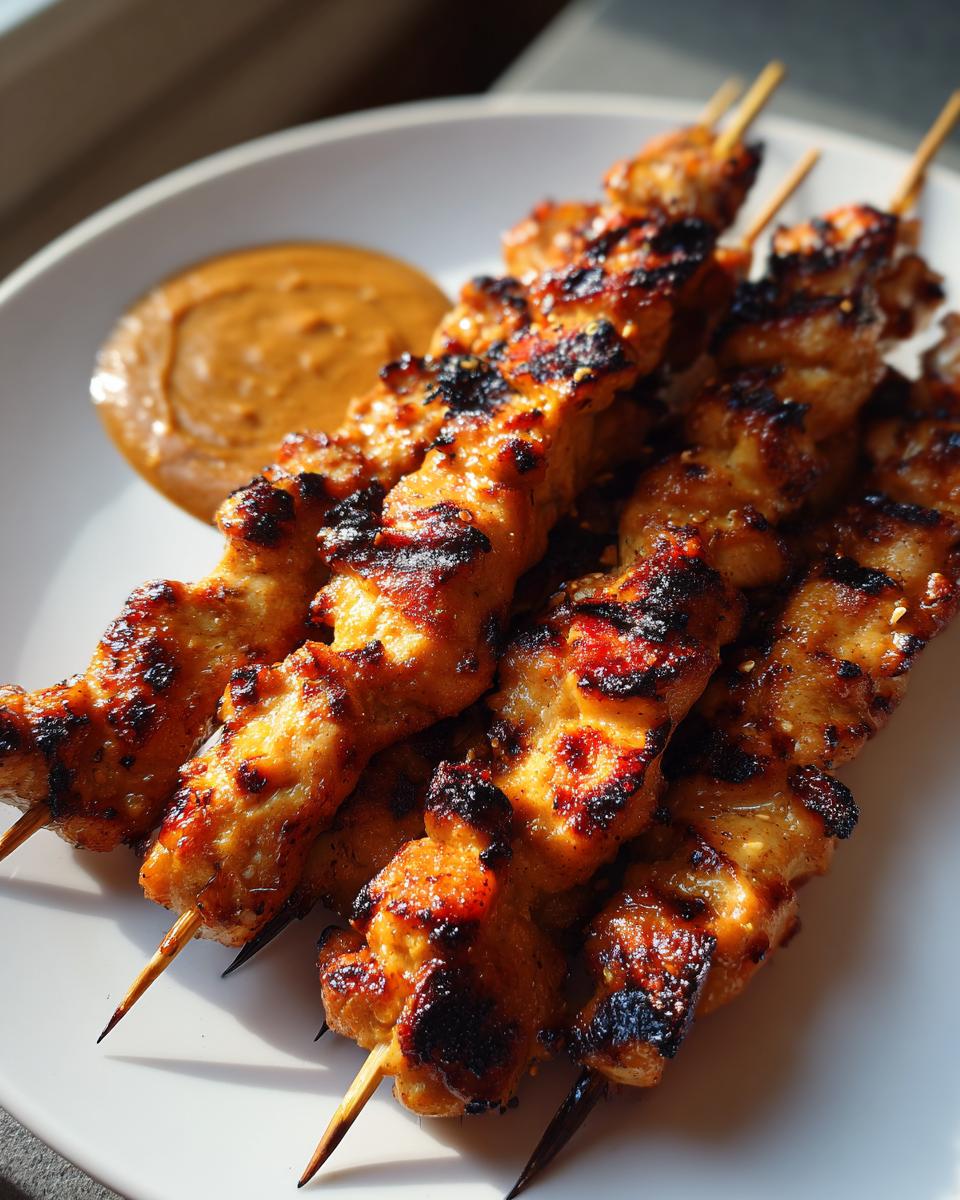
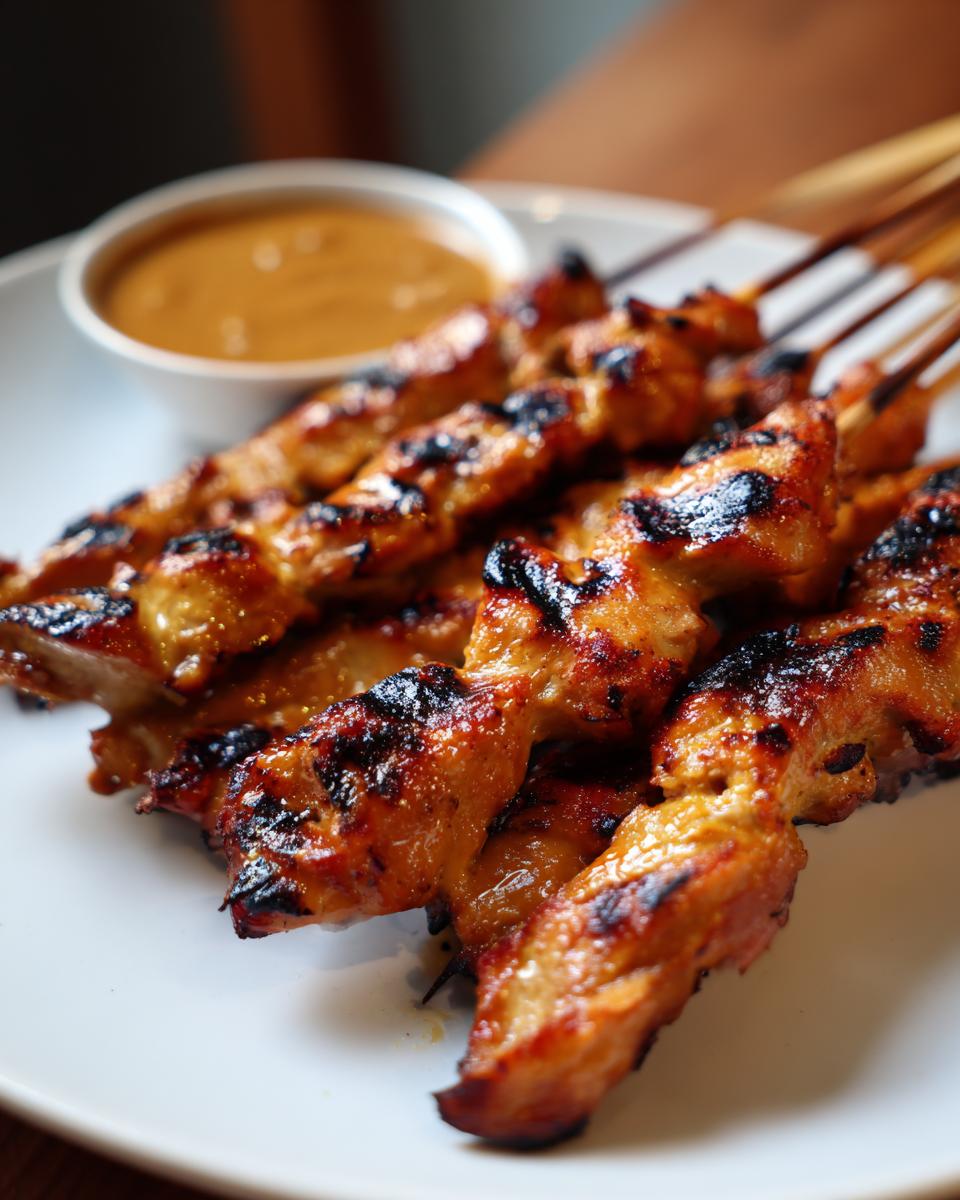
If you’re grilling, get your grates nice and hot over medium-high. Lay those skewers down and cook them for about 3 to 4 minutes on each side. You are looking for those lovely dark char marks. If you’re stuck inside (I know those rainy days happen!), use a large skillet over medium-high heat and add just a tablespoon of oil. Cook them for maybe 4 to 5 minutes per side until they are perfectly done all the way through. Seriously, check the center just to be sure! Serve them immediately, piled high, right next to that warm peanut sauce.

Tips for Perfect Homemade Satay Every Time
Even when a recipe is straightforward, those little details make the difference between good and *amazing*. Think of these as the professional nudges I learned over the years to make sure my chicken satay is always a showstopper, whether it’s an appetizer or a main course!
To keep things easy and delicious, remember these few golden rules:
- Stick with Thighs: I mentioned it before, but I’m saying it again! Chicken thighs are your best friends for maintaining moisture. Chicken breast can dry out fast, but thighs stay tender.
- Soak Those Skewers: If you are grilling, this isn’t optional! Soaking the wooden skewers in water keeps them from burning up before the meat is ready.
- Go Gluten-Free Easily: If you need to adapt this for health reasons, swapping out regular soy sauce for a gluten-free version is a simple switch that keeps all that delicious flavor packed in.
- Make Sauce Ahead: The peanut sauce keeps beautifully! You can whip this up the day before. It might thicken up in the fridge, but just thin it out with a little hot water when you’re ready to serve. It’s a great way to streamline your cooking. For other great dipping sides, check out my easy garlic aioli recipe!
Serving Suggestions for Your Chicken Satay Dinner
When these flavorful skewers come off the grill, you have a choice to make: are these going to be an appetizer, or the main event? Either way, they are absolutely fantastic! Because the marinade is so bold and aromatic, these Asian chicken recipes pair beautifully with simple sides that let the meat and the peanut sauce shine.
If you are loading up for a full Grilled Chicken Dinner, you definitely need a base! My go-to way to make this a complete meal is to serve the skewers over a big bowl of fluffy jasmine rice. It just soaks up all those extra marinade drips, which, let’s be honest, is half the fun.
For something a bit lighter, especially if it’s summer, I always prepare a quick, crunchy slaw. You don’t need a complicated recipe—just shredded cabbage, carrots, maybe some thinly sliced purple onion, tossed with a tiny bit of lime juice and maybe a drizzle of sesame oil. It cuts right through the richness of that creamy dipping sauce perfectly.
These are also amazing cold the next day, which makes them a fantastic option for healthy lunch packing! Just pull the meat off the stick, toss it in a container with some leftover rice or greens, and you’re set for a delicious, low-effort midday meal. It takes all the guesswork out of making up satisfying meals!
Storing and Reheating Leftover Chicken Satay
Don’t you just love when leftovers are almost as good as the first time around? With this chicken satay, that’s definitely the case, provided you store it correctly. We want to protect that wonderful texture we worked so hard to create!
For the best results, always separate the components first. Don’t store the cooked skewers sitting directly in the leftover peanut sauce. The sauce is wonderful, but it will make the chicken soggy if left soaking overnight, and nobody wants mushy meat the next day.
Here’s the plan for storage:
- Chicken Skewers: Let the cooked chicken skewers cool down completely on a rack. Once cool, slide the chicken meat off the wooden sticks—it’s easier to handle this way—and place it into an airtight container. It keeps beautifully in the fridge for about 3 to 4 days.
- Peanut Sauce: Store any leftover peanut sauce recipe in its own separate, sealed container. It can usually hang out in the fridge for up to a week. It might firm up quite a bit because of the peanut butter, so don’t panic!
When you’re ready to enjoy your leftovers (perfect for a quick weeknight chicken lunch!), reheating needs a gentle touch to keep things juicy.
If you’re reheating the chicken, I strongly recommend using a skillet or an air fryer rather than the microwave. Pop the meat in a skillet over medium heat with just a tiny splash of water or broth—it helps steam it just slightly while it heats through, preventing dryness. If using the air fryer, just a couple of minutes at 325°F should warm it nicely without burning the spices.
As for that rich sauce? Simply take it out of the fridge about 20 minutes before you plan to eat, and stir in a teaspoon or two of hot water until it’s creamy and dippable again. Easy peasy! This makes packing up leftovers for lunch such a breeze.
Frequently Asked Questions About Making Chicken Satay
When I share a recipe as loved as this Chicken Satay Recipe, I always end up with just a few lingering questions from folks trying it out for the first time. Don’t worry if you had a different pan in mind or if you needed to adjust the spice! That’s what home cooking is all about—making it work for *your* kitchen.
Can I bake these Thai Chicken Skewers instead of grilling?
Absolutely! If you’re not breaking out the grill, these bake up wonderfully! For an even healthier option that still results in great flavor, arrange your skewers on a foil-lined baking sheet. Set your oven to 400°F (200°C). They usually take about 15 to 20 minutes, turning halfway through until they look golden brown. That’s a fantastic way to get a great result for your flavorful dinner ideas!
Is it okay to use chicken breasts for this recipe?
You can, but chicken thighs are truly the champion here! Thighs have a bit more fat and connective tissue, so they stay incredibly tender and moist even with the quick cooking time required for simple skewer recipes. Chicken breast can sometimes get a little dry, so if you must use them, make sure you don’t overcook them past that sweet spot! Don’t let them sit on the heat for more than 4 minutes per side.
How far ahead can I prepare the Easy Peanut Sauce?
This is one of my favorite things about this recipe! You can definitely make that Peanut Sauce Recipe completely ahead of time. I often make a double batch because we use it on everything. Store it in a sealed container in the fridge for up to a week. Just remember that it will definitely thicken up in there! When you go to serve it, treat it like you’re reviving leftovers: take it out 20 minutes early and whisk in a teaspoon or two of hot water until it’s perfectly smooth and dippable again.
What’s the best way to serve this as a healthy chicken dinner?
For a truly balanced meal, think about color and texture! While rice is traditional, to keep it light and fresh, I love serving this over a bed of cauliflower rice or alongside a vibrant cucumber salad. The freshness perfectly complements the rich, savory satay. You can find some great inspiration for grain sides over in my gluten-free recipes section, too, if you’re avoiding wheat!
Estimated Nutritional Value for This Chicken Satay Recipe
When we talk about bringing restaurant-quality food home, especially for a satisfying Grilled Chicken Dinner or even trying to keep things reasonable with our Healthy Chicken Dinner goals, I know you want to peek at the details! I’ve put together the estimated nutritional breakdown for this Chicken Satay, based on the amounts listed in the recipe.
Please remember, just like with Grandma’s baking, these numbers are an educated guess! The exact brands of peanut butter you use, how much oil you brush on, or even the size of your chicken thighs can change these values slightly. We always say, the best nutrition comes from enjoying real, wholesome ingredients made with love at home!
Here is the breakdown based on one serving (roughly 4 skewers):
- Serving Size: 4 skewers
- Calories: 380
- Fat: 22g
- Saturated Fat: 6g
- Carbohydrates: 15g
- Protein: 30g
- Sugar: 8g
- Sodium: 450mg
See? Thirty grams of protein is fantastic, making this a really filling and wonderful flavorful dinner idea for the whole family. It’s exactly the kind of satisfying but manageable meal I love to share here!
PrintEasy Thai Chicken Satay Skewers with Quick & Creamy Peanut Sauce

Make tender, juicy chicken satay skewers marinated in aromatic spices and serve them with a rich, homemade peanut dipping sauce. This recipe brings authentic Thai flavor to your kitchen, perfect for a weeknight dinner or a party appetizer.
- Prep Time: 20 min
- Cook Time: 15 min
- Total Time: 1 hour 35 min
- Yield: 4 servings 1x
- Category: Dinner
- Method: Grilling
- Cuisine: Thai
- Diet: Low Fat
Ingredients
- 1.5 lb boneless, skinless chicken thighs, cut into 1-inch strips
- 120 ml full-fat coconut milk
- 30 ml soy sauce
- 1 tablespoon brown sugar
- 1 teaspoon ground turmeric
- 1 teaspoon ground cumin
- 1/2 teaspoon ground coriander
- 1/2 teaspoon salt
- 1/4 teaspoon black pepper
- Wooden skewers (soaked in water for 30 minutes if grilling)
- For the Peanut Sauce:
- 1/2 cup creamy peanut butter
- 60 ml hot water
- 30 ml soy sauce
- 1 tablespoon lime juice
- 1 tablespoon brown sugar
- 1 teaspoon grated fresh ginger
- 1 clove garlic, minced
- 1/2 teaspoon red pepper flakes (optional)
Instructions
- Combine the coconut milk, 30 ml soy sauce, brown sugar, turmeric, cumin, coriander, salt, and pepper in a bowl. Whisk until the sugar dissolves.
- Add the cut chicken strips to the marinade, ensuring all pieces are coated. Cover the bowl and refrigerate for at least 1 hour, or up to 4 hours, for best flavor.
- While the chicken marinates, prepare the peanut sauce. In a small saucepan, combine the peanut butter, hot water, 30 ml soy sauce, lime juice, brown sugar, ginger, garlic, and red pepper flakes (if using).
- Heat the sauce mixture over low heat, stirring constantly until smooth and creamy. Remove from heat and set aside. If the sauce is too thick, add water, one teaspoon at a time, until you reach your desired dipping consistency.
- Thread the marinated chicken pieces onto the soaked wooden skewers, leaving a small space between each piece.
- Cook the skewers: For grilling, cook over medium-high heat for 3-4 minutes per side until cooked through and lightly charred. For pan-cooking, heat 1 tablespoon of oil in a large skillet over medium-high heat and cook the skewers for 4-5 minutes per side.
- Serve the hot chicken satay skewers immediately with the creamy peanut sauce for dipping.
Notes
- Soaking wooden skewers prevents them from burning on the grill.
- For an authentic taste, use chicken thighs instead of breasts; they stay juicier.
- You can substitute gluten-free soy sauce to make this dish gluten-free adaptable.
Nutrition
- Serving Size: 4 skewers
- Calories: 380
- Sugar: 8
- Sodium: 450
- Fat: 22
- Saturated Fat: 6
- Unsaturated Fat: 16
- Trans Fat: 0
- Carbohydrates: 15
- Fiber: 3
- Protein: 30
- Cholesterol: 85