
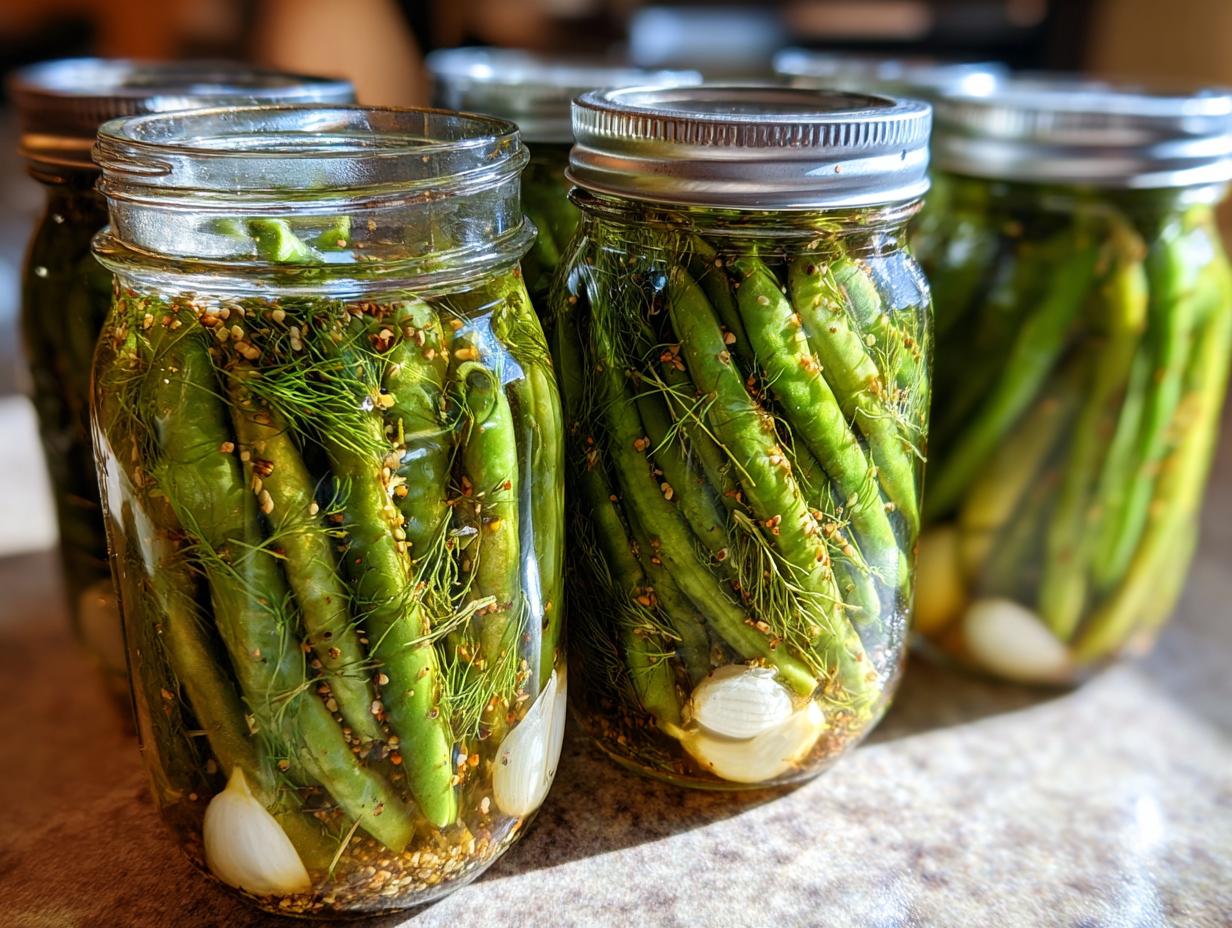
Oh, I know that craving! You know, that intense, salty, unbelievably tangy feeling you get when you just need a snack that *crunches*? That’s why I’m obsessed with making the absolute best **dilly beans** every summer when the green beans start coming in. A good pickled green bean—a proper dilly bean—is just unmatched.
What I love most is that this recipe is totally flexible. I’m going to show you how we prep these babies for both the quick refrigerator pickling method—which means you can eat them tomorrow!—and the traditional water bath canning process so you can stock up for winter. Sarah Miller always says that preserving the garden bounty is one of the best ways to show love in the kitchen, and trust me, these zesty little snacks are packed with that comforting, homemade feeling. You are going to love how easy this is!
- Why This is the Best Dilly Beans Recipe You Will Ever Make
- Ingredients for Perfect Dilly Beans
- How to Make Dilly Beans Using the Quick Refrigerator Method
- Water Bath Canning Instructions for Long-Term Dilly Beans Storage
- Customizing Your Dilly Beans: Making Spicy Pickled Green Beans
- Storage and Reheating Instructions for Dilly Beans
- Frequently Asked Questions About Dilly Beans
- Serving Suggestions for Tangy Vegetable Snacks
- Estimated Nutritional Data for Dilly Beans
Why This is the Best Dilly Beans Recipe You Will Ever Make
Look, I’ve tried a ton of recipes over the years, and honestly, most of them turn out limp and sad after a week. Not these! I developed this recipe specifically obsessing over texture. That’s why I’m confident this is the Best Dilly Bean Recipe you’ll ever find. They stay snappy, they’re bursting with that deep dill pickle flavor, and you get to choose how you save them!
- Superior Crunch: We handle the beans right from the start to guarantee that satisfying snap.
- Total Flexibility: Refrigerator quick pickles or shelf-stable canned jars—it’s your call!
- Intense Flavor: Perfectly balanced brine for that irresistible tangy kick.
We’ve tested this method time and time again. The results are consistent: perfect, crunchy, savory snacks every single time.
Achieving Maximum Crunch in Your Dilly Beans
Texture is everything when it comes to pickled green beans, right? If they’re soft, what’s the point? My one non-negotiable trick is giving the fresh beans an ice bath! Soak those trimmed beans in ice water for about four hours before you even think about packing the jars. This shocks the cells just enough to help them hold up against the hot brine later. Also, please, please use the freshest, firmest beans you can find in the garden or at the market. They make all the difference!
Ingredients for Perfect Dilly Beans
Getting these ready is half the fun, but you need the right building blocks for that amazing tangy flavor. This list makes exactly six pint jars, so if you’re swimming in beans from the garden, grab extra jars! Don’t skip on the quality here; these simple ingredients pull all the weight in the flavor department.
- 3 lbs fresh green beans, ends trimmed
- 6 cloves garlic, peeled
- 18 heads fresh dill (or 6 tablespoons dried dill seed)
- 18 teaspoons mustard seeds
- 18 teaspoons celery seeds
- 18 teaspoons red pepper flakes (optional, for spicy pickled green beans)
- 3 cups white vinegar (5% acidity)
- 3 cups water
- 3 tablespoons pickling salt
Ingredient Notes and Substitutions for Dilly Beans
Okay, let’s talk tweaks! If you can’t find **fresh dill** heads, use dried dill seed—that’s what I listed—but use the seeded amount, not a direct swap. The vinegar must be the standard 5% acidity stuff; don’t use cleaning vinegar or anything weird! As for the salt, please stick to pickling salt. It dissolves better and won’t make your brine cloudy. If you’re dreaming of those Spicy Pickled Green Beans, that’s where those red pepper flakes come in. Add more if you’re brave!
How to Make Dilly Beans Using the Quick Refrigerator Method
If you just can’t wait another week for canned goods to cure, this is your fast track to deliciousness! This Quick Pickle Recipe lets you enjoy your savory dilly beans in about 24 hours. It’s super straightforward, which is why I love having jars of these in the fridge all the time.
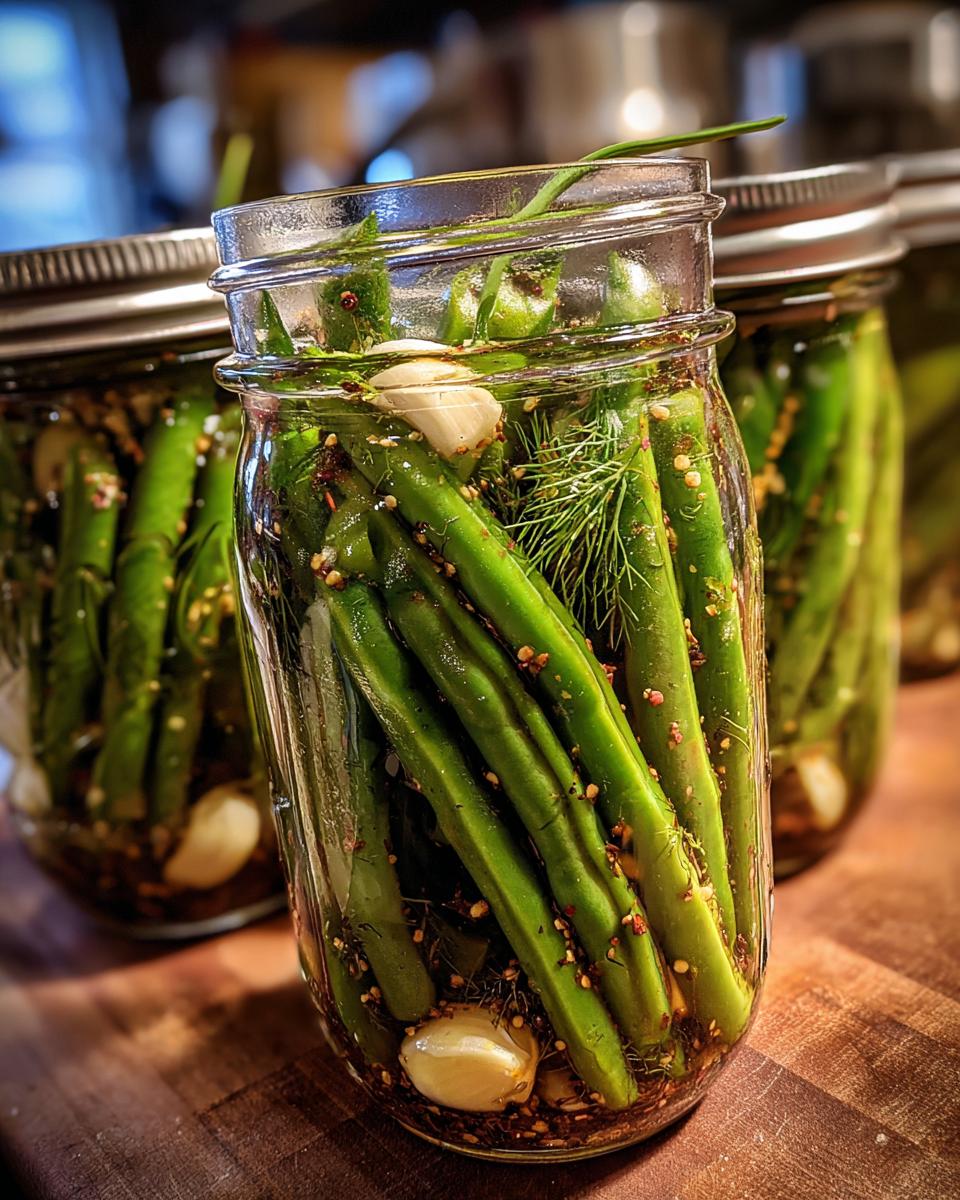
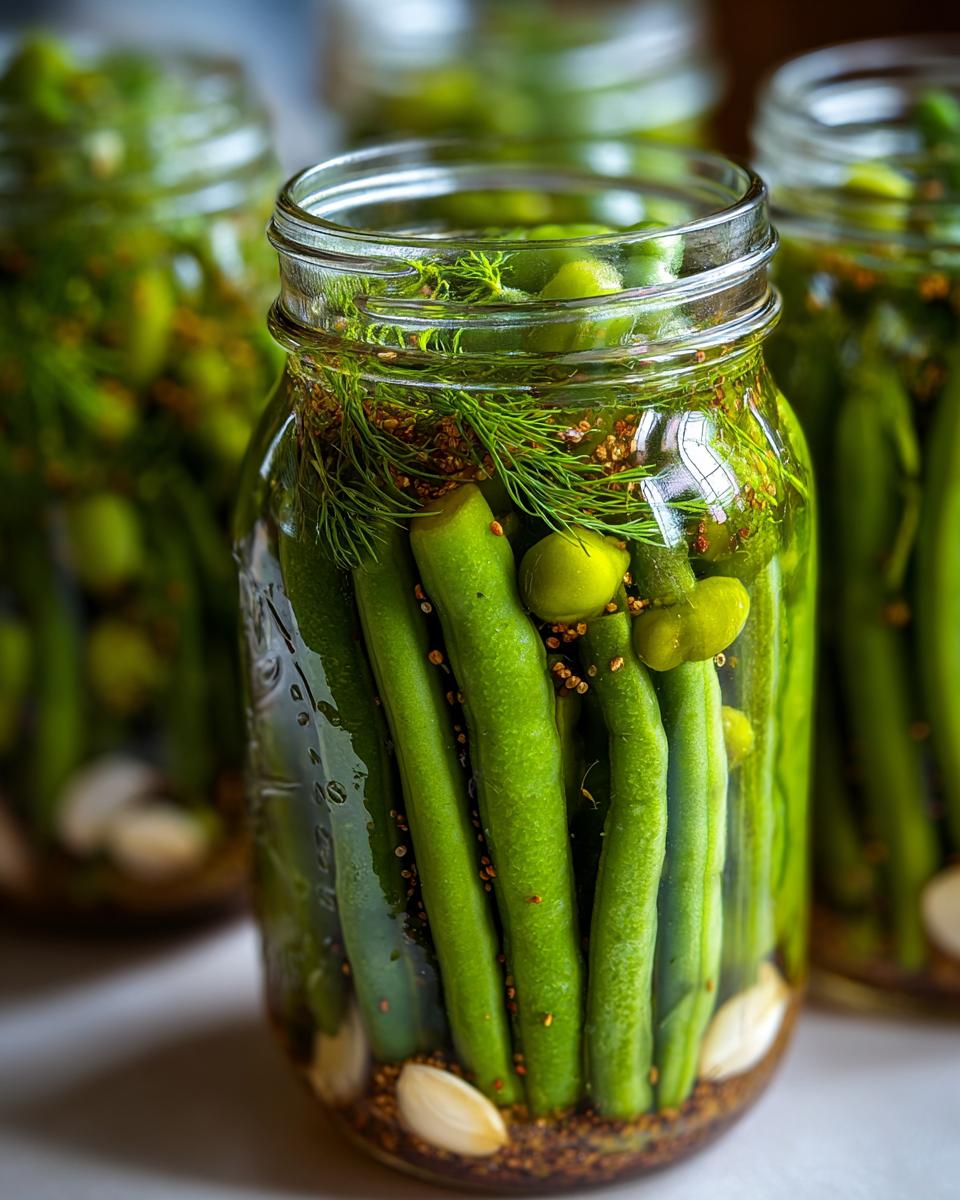
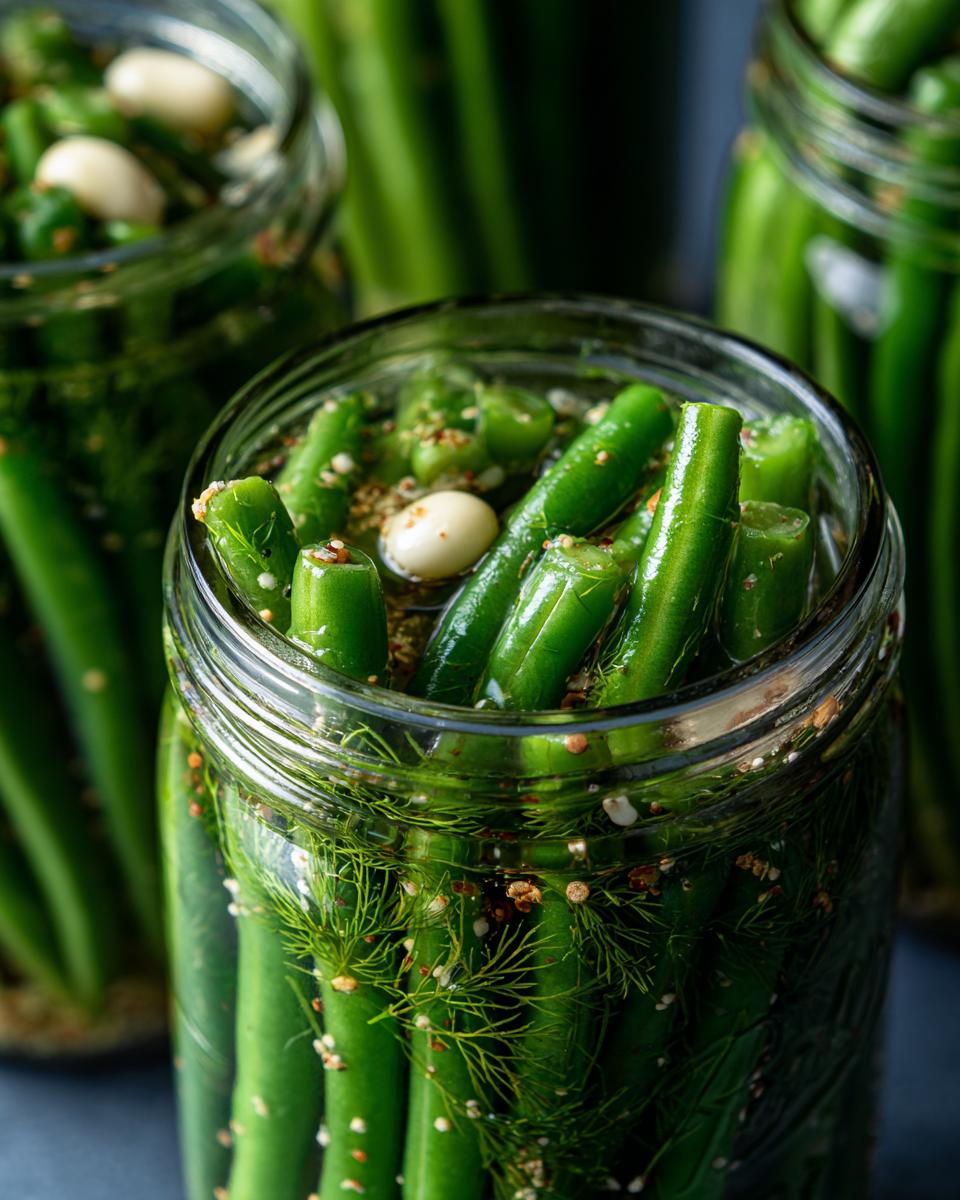
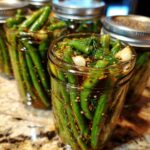
You’re going to follow all the same steps for packing the jars—that means loading up each pint with your garlic, dill sprigs, mustard seed, and celery seed right at the bottom. Then, pack those crunchy beans in tight, vertically if you can manage it!
When it comes to the brine, just combine that vinegar, water, and salt on the stove like normal, bring it to a boil until everything dissolves, and then pour that hot liquid right over your packed beans. Leave that half-inch headspace, wipe those rims clean, and seal them up tightly! Don’t worry about the water bath cans or processing time. Just let them cool on the counter for an hour, then seal them tight and pop them straight into the fridge. They are snack-ready in a day, but trust me, they taste even better after about three days chilling out in that tangy brine!
Water Bath Canning Instructions for Long-Term Dilly Beans Storage
Now, if you harvested more beans than you can eat in a month, we have to talk about the tried-and-true method: water bath canning. This is how we ensure our Water Bath Canning Green Beans last all year long. Safety is number one here, so listen up!
First, make sure all your pint jars are sparkling clean and kept piping hot right up until you start filling them—this helps prevent thermal shock when the hot brine goes in. We already packed those jars tightly with spices and beans in the previous steps. Once packed, that wonderful hot brine goes in, making sure you leave 1/2 inch of headspace. That space is crucial for a proper seal, so don’t fill it to the brim! Wipe the rims down—any sticky residue can stop the lid from sealing right. Once lidded fingertip tight, get those jars into the canner. You can find even more deep dives on this process over at How to Can Dilly Beans if you want a visual reference!

For this standard recipe, you need to process those sealed jars in a full, rolling boil for exactly 10 minutes. If you live somewhere high up, you absolutely must adjust that time for altitude; it’s a safety must! Once the time is up, carefully take the jars out and let them sit undisturbed on a towel for a full day. You’ll hear those wonderful pings as the lids seal. If you’ve done it right, you now have shelf-stable **dilly beans**!
Tips for Success When Canning Dilly Beans
Canning takes a little more attention than the fridge method, but it’s worth it! Always remember to keep the jars hot until filling. Another big thing is double-checking your altitude adjustments; a minute too little processing time and you risk spoilage, so be precise! When they come out, check those seals after 24 hours. If the center of the lid doesn’t depress when you poke it, it’s sealed perfectly. If it pops up and down, that jar of beans goes straight into the fridge for immediate eating. No waste!
Customizing Your Dilly Beans: Making Spicy Pickled Green Beans
Okay, now that we’ve mastered the classic tangy profile, what if you want to kick things up a notch? If you’re reaching for those Spicy Pickled Green Beans instead of the mild version, it’s incredibly simple to adjust our recipe. Remember those red pepper flakes in the ingredient list? That’s your lever!
For a little warmth, stick with the 1 teaspoon per two jars that I listed. If you want a real blaze, maybe bump that up to a full teaspoon in *every* jar. I also love dropping a couple of thin slices of fresh jalapeño right in with the garlic and dill when I pack the jars. That combination makes truly addictive **dilly beans**. Seriously, I find myself reaching for the spicy ones first every time they come out of the fridge! You know, speaking of simple flavor boosts, if you ever need a quick sweet treat to balance out all this tang, you absolutely have to check out my recipe for easy no-bake peanut butter pie.
These seasoned **dilly beans**, whether you keep them cool or can them up, are such an easy way to give a standard vegetable a huge personality boost. You can even try adding a tiny bit of smoked paprika to the brine for a deeper, smoky heat instead of just pure chili fire. Have fun with it!
Storage and Reheating Instructions for Dilly Beans
Storing your wonderful **dilly beans** is actually the easy part, which is great after all that packing! If you made the refrigerator version, those need to live in the cold; they are basically fresh pickles, so keep them chilled the whole time and enjoy them within a month or so.
For the canned jars, once they have successfully sealed, they are shelf-stable, meaning they can hang out in a cool, dark pantry until you open the lid. Once you pop that seal, though, treat them exactly like the refrigerator batch—into the fridge they go! And don’t even think about reheating them! These beauties are meant to be enjoyed cold and crunchy, marinated perfectly in that tangy Vinegar Brine Recipes. They just taste better straight out of the jar!
Frequently Asked Questions About Dilly Beans
I totally get it; when you’re diving into preserving your own veggies, you naturally have a million questions! Especially when it comes to keeping things crunchy and safe. We want those **Pickled Green Beans Recipe** success stories, not floppy failures!
Here are a few things I hear asked all the time when people are learning how to make these tangy treats at home. Don’t worry if you mess up the first time; that’s part of learning any Homemade Condiments technique!
How long until my Dilly Beans are ready to eat?
This depends entirely on which method you used! If you went the quick route and made Refrigerator Pickles, you can technically sneak one after about 24 hours. But honestly? They really need three full days chilling in the fridge to soak up that full flavor. If you went through the water bath process for storage, they are technically safe and ready to go as soon as the jars have cooled and sealed completely!
Can I use different vegetables in this Vinegar Brine Recipe?
Absolutely, this Vinegar Brine Recipe is fantastic! People often pickle carrots or small cauliflower florets using the same spices, which result in wonderful Tangy Vegetable Snacks. Just remember that if you’re canning them using the water bath method, you MUST check a reliable tested source for processing times. Different vegetables take different amounts of time to process safely, so always check the specific guidelines if you substitute a vegetable that isn’t a green bean!
Another common worry is about getting that brittle crunch. If you notice your beans getting soft, look back at your ingredients—chances are you either didn’t ice bath them long enough before packing, or you used old, limp beans to begin with. Freshness is key to guaranteeing those **Crunchy Dill Pickles**!
Serving Suggestions for Tangy Vegetable Snacks
Now that you’ve got jars full of beautiful, spicy, or classic **dilly beans**, what do you do with them? Honestly, I eat them straight over the sink while putting away the canning gear, but they are also brilliant as a side dish!
These make fantastic **Tangy Vegetable Snacks** all on their own. They cut right through the richness of a burger or grilled cheese sandwich—seriously, slice one up right on top! They are also the perfect, sharp addition to any cheese board or charcuterie spread. If you’re feeling inspired to make something creamy to pair with the crunch, you should check out my avocado egg salad recipe; the tanginess of the **dilly beans** balances the creaminess perfectly. You’ll find tons of great pairing ideas over at Dilly Beans, too!
Estimated Nutritional Data for Dilly Beans
I know some of you lovely folks like to keep track of what’s going into your body, even when you’re snacking on preserved veggies! Since these are so intensely flavorful and low in almost everything else, they make a fantastic light snack. Remember, since we’re dealing with vinegar and salt, the sodium is what stands out here. Everything I list below is an estimate based on the recipe yields, assuming a standard serving size.
For easy reference, here’s the breakdown for just four of these amazing, crunchy servings. If you’re looking for some ideas on quick, easy meals to serve alongside your brine creations, check out my healthy lunch recipes!
- Serving Size: 4 beans
- Calories: 15
- Total Fat: 0g
- Saturated Fat / Trans Fat: 0g
- Cholesterol: 0mg
You can see they are super low-cal, which is great, but keep an eye on that sodium unless you’re taking the refrigerator route and can rinse them a bit before eating! The good news is that they clock in at just 1 gram of sugar, meaning that tanginess really comes from the vinegar and spices, not added sweetness. Enjoy them guilt-free!
PrintThe Ultimate Crispy Dilly Beans: Easy Refrigerator & Water Bath Canning Recipes
Make addictive, tangy Dilly Beans using this guide. You get instructions for both quick refrigerator pickling and traditional water bath canning to preserve your crunchy dill-flavored green beans.
- Prep Time: 30 min
- Cook Time: 15 min
- Total Time: 45 min
- Yield: 6 pints 1x
- Category: Preserves
- Method: Canning/Pickling
- Cuisine: American
- Diet: Vegetarian
Ingredients
- 3 lbs fresh green beans, ends trimmed
- 6 cloves garlic, peeled
- 18 heads fresh dill (or 6 tablespoons dried dill seed)
- 18 teaspoons mustard seeds
- 18 teaspoons celery seeds
- 18 teaspoons red pepper flakes (optional, for spicy pickled green beans)
- 3 cups white vinegar (5% acidity)
- 3 cups water
- 3 tablespoons pickling salt
Instructions
- Prepare the jars: Wash pint jars and lids thoroughly. Keep the jars hot for canning, or use clean, cold jars for refrigerator pickles.
- Prepare the beans: Wash the green beans well. Trim the tough ends off each bean.
- Pack the jars: For each pint jar, place 1 garlic clove, 3 sprigs of fresh dill (or 1 teaspoon dill seed), 1 teaspoon mustard seeds, 1 teaspoon celery seeds, and 1 teaspoon red pepper flakes (if using) in the bottom. Pack the green beans tightly into the jars vertically.
- Make the brine: In a saucepan, combine the vinegar, water, and pickling salt. Bring the mixture to a rolling boil, stirring until the salt dissolves completely.
- Fill the jars: Carefully pour the hot brine over the beans in each jar, leaving 1/2 inch headspace. Remove air bubbles using a non-metallic utensil. Wipe the rims clean.
- Seal the jars: Place the lids and screw bands on fingertip tight for canning, or seal tightly for refrigerator pickles.
- For Refrigerator Pickles: Let the jars cool to room temperature, then place them in the refrigerator. The Dilly Beans are ready to eat in 24 hours, but the flavor improves after 3 days. Keep refrigerated.
- For Water Bath Canning: Process the sealed jars in a boiling water bath canner for 10 minutes, adjusting for altitude if necessary. Remove jars and let them cool undisturbed on a towel for 12-24 hours. Check seals. Store sealed jars in a cool, dark place.
Notes
- For the crunchiest Dilly Beans, use very fresh, young green beans.
- If you prefer a stronger dill flavor, use fresh dill heads instead of seeds.
- Adjust the red pepper flakes amount to control the heat level of your spicy pickled green beans.
- For best texture in canning, soak the raw beans in ice water for 4 hours before packing.
Nutrition
- Serving Size: 4 beans
- Calories: 15
- Sugar: 1
- Sodium: 290
- Fat: 0
- Saturated Fat: 0
- Unsaturated Fat: 0
- Trans Fat: 0
- Carbohydrates: 3
- Fiber: 1
- Protein: 0
- Cholesterol: 0