
Oh, you know I love anything that gives you an unbelievable texture contrast! There is just something so deeply satisfying about biting through a perfectly golden, crunchy exterior only to find a warm, tender interior waiting underneath. If you’ve seen the buzz online, you know everyone is talking about making the ultimate crispy rice base, and honestly, they aren’t wrong—it’s addictive! Here at HearthBite, we specialize in recipes that are completely reliable and feel deeply comforting, even when they feel trendy. This foundational recipe gives you the sturdy, savory rice squares you need, whether you pile them high with spicy tuna or toss them into your favorite vibrant salad. It’s simple, it’s foolproof, and it’s ready to become your new favorite side dish or appetizer. You can find more of our comforting mains when you check out our collection of comfort food recipes!
We aren’t messing around with complicated steps here. This is about getting that ideal snap every single time using simple ingredients. This entire process is the foundation for so many incredible Asian side dish recipes we love, and I promise, once you master pressing and frying this base, you’ll be finding excuses to make these little flavor bombs all the time. Because sharing good food that brings people together is exactly what we do here!
- Why This Foundational Crispy Rice Recipe Works So Well
- Ingredients for Your Perfect Crispy Rice Base
- Step-by-Step: How to Make Crispy Rice
- Expert Tips for the Best Homemade Crispy Rice
- Creative Crispy Rice Topping Ideas
- Making Crispy Rice Patties for Snacking
- Storage and Reheating Your Crispy Rice
- Frequently Asked Questions About Crispy Rice
- Sharing Your Perfect Crispy Rice Creation
Why This Foundational Crispy Rice Recipe Works So Well
What separates a great snack from an unforgettable one? It’s all about that texture, right? This crunchy rice recipe guarantees you get that perfect contrast: a deep golden, satisfyingly crisp outside hugging a pillow-soft, seasoned interior. When people ask me for the best homemade crispy rice, this is the one I share because we build it right from the start. It feels a little bit special without demanding a ton of fuss, which fits right into our HearthBite philosophy for quick, easy dinner recipes.
The secret ingredient, besides the vinegar and salt, isn’t a spice—it’s the rice itself! You absolutely need short-grain sushi rice here. It has the right starch content to become properly sticky when cooked, which means it holds its shape when you press it and fry it. If you try this with long-grain rice, it just crumbles on you. Trust me, using the right grain is the first step to success!
Achieving the Perfect Press and Chill for Crispy Rice
Once you season that warm rice, you have to compact it like you mean it! Get it into that 8×8 pan and press. I use the bottom of a measuring cup to really smoosh it down until it feels like concrete. That firm compaction means your rice block won’t fall apart when it hits the hot oil. Then, the chill time is non-negotiable; we need it rock solid before cutting!
Ingredients for Your Perfect Crispy Rice Base
Okay, let’s talk about what you need to gather for the base. Keeping things simple is part of the magic here, and since this is the foundation—the thing we want to top with spicy tuna or throw on a salad—the ingredients have to be good quality. I always say that clarity in your ingredient list builds trust! We aren’t using anything complicated, but the ratios really matter for that satisfying crunch we are aiming for. You can grab your other healthy staples from my favorite healthy lunch recipes category once you master this base.
Here is exactly what you need right here:
- 3 cups cooked short-grain sushi rice, cooled completely—and I mean cold!
- 2 tablespoons rice vinegar
- 1 teaspoon sugar
- 1 teaspoon salt
- 2 tablespoons neutral oil, like canola or vegetable, specifically for frying because we need something with a high smoke point.
Step-by-Step: How to Make Crispy Rice
Alright, let’s get this base fried! This is the part where your effort in chilling pays off tenfold. This easy crispy rice tutorial breaks down exactly how to take that firm block and turn it into those irresistible golden bites. I always put the rice in the pan the day before, so when it comes time to cook, I can whip these up in about 15 minutes flat—perfect for a weeknight appetizer! You can find loads of easy main dishes that pair well with this side in my easy breakfast recipes section, though these are amazing any time of day.
Seasoning and Compacting the Rice
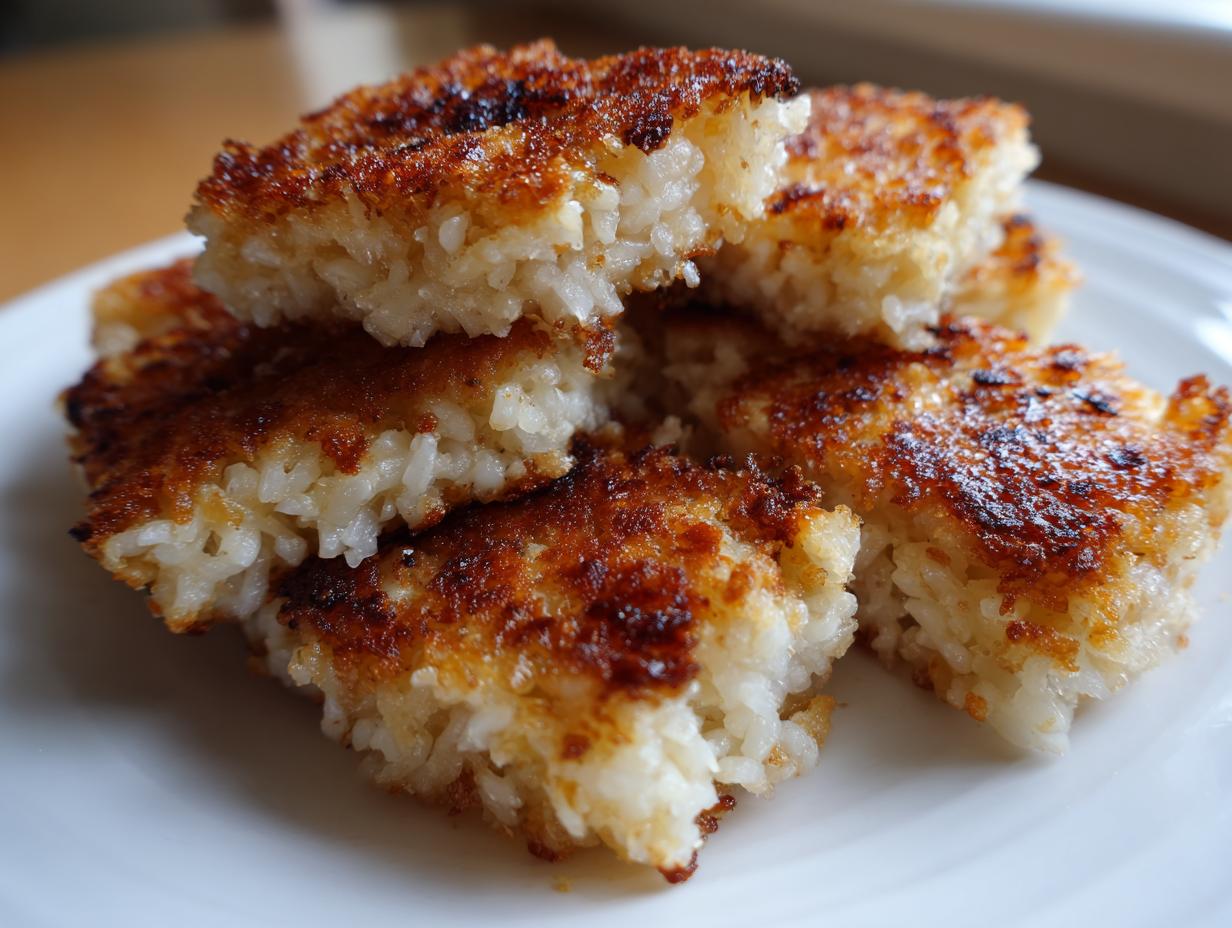
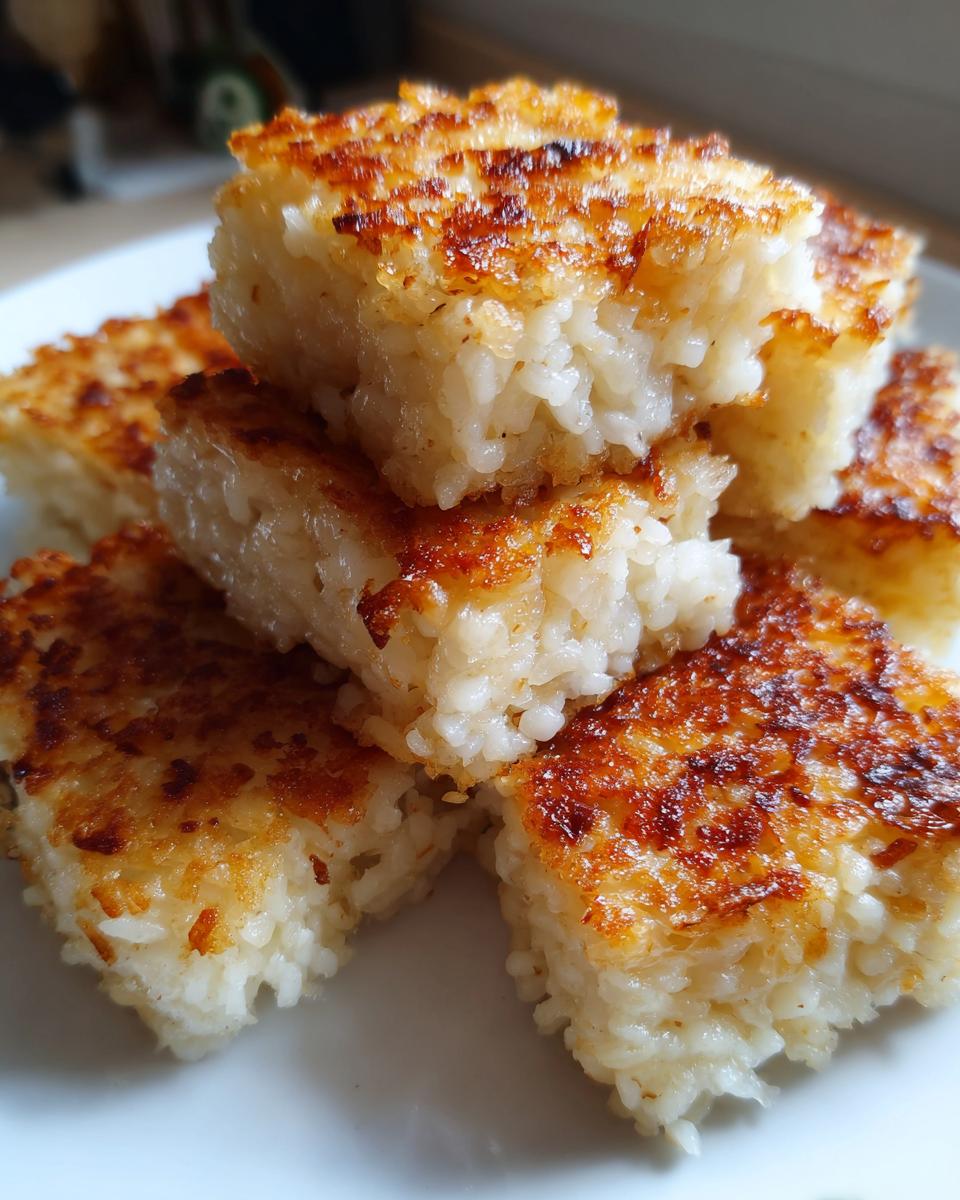
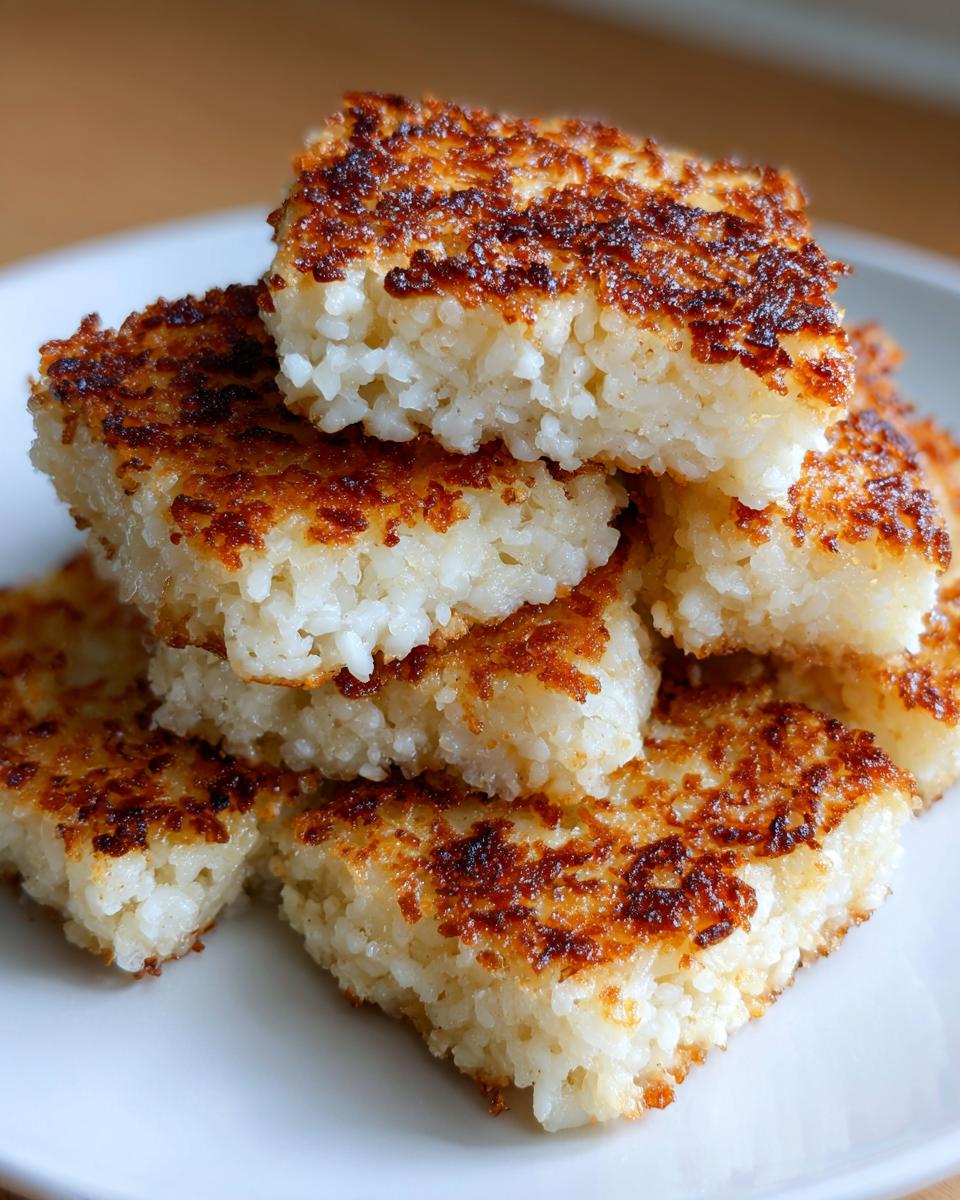
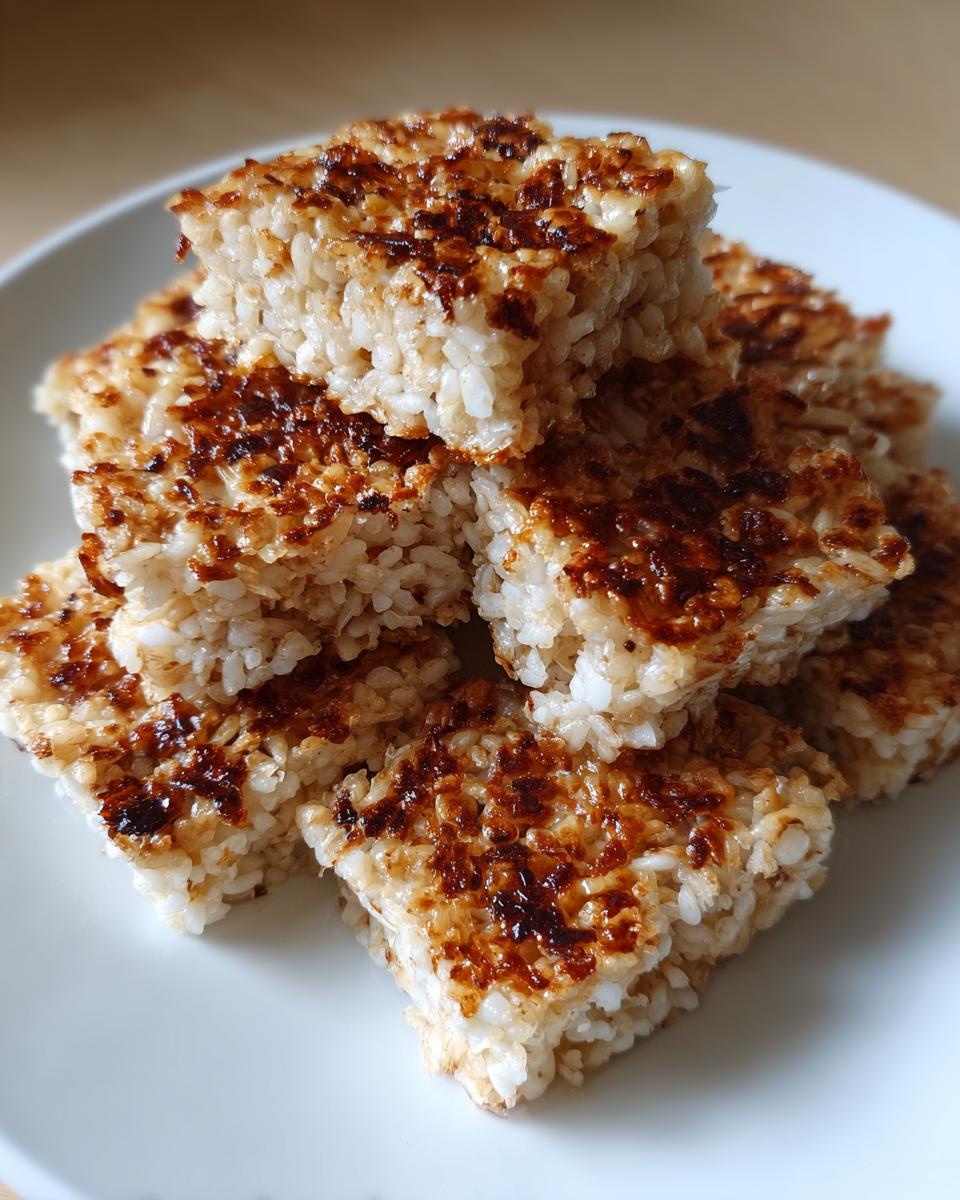
Start gently! You can’t overmix once the seasoning hits the rice, or it gets gummy. In a big bowl, combine your cooled rice with the vinegar, salt, and sugar. Use a spatula and fold it just until everything is evenly distributed. Next, get that 8×8 pan lined with plastic wrap—that overhang is your friend later, trust me! Pour the seasoned rice inside and start pressing. I mean *press*! You want that layer to be about an inch thick and totally uniform. This firm compaction is the secret backbone that helps these solidify into perfect savory rice squares.
The Frying Technique for Golden Crispy Rice
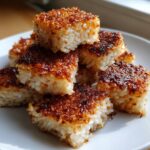
Time to bring out the non-stick pan! Heat your neutral oil over medium-high heat. You’ll know it’s ready when it shimmers slightly, but don’t let it start smoking! Carefully place your cut rice pieces into the hot oil. Do not, I repeat, *do not* overcrowd the pan! If you put too many in at once, the oil temperature drops immediately and you end up steaming the rice instead of frying it. We want that deep golden brown, so let them anchor themselves for about 4 to 6 minutes before you even think about flipping. Press down lightly with your spatula as they fry—that pressure guarantees maximum contact for that amazing crunch. Once they are golden on the bottom, flip and repeat until they look beautiful on both sides. They are done when they look golden and feel super firm!
Expert Tips for the Best Homemade Crispy Rice
Listen, I know everyone is talking about the latest viral rice hack they saw online, but honestly, achieving that ideal snap in a home kitchen comes down to knowing a couple of shortcuts. While pan-frying gives you that undeniable, restaurant-quality crust—and that’s my favorite way to go—I want you to know you still have options! My notes mention an oven baked crispy rice trick: bake the blocks first at 400°F (200°C) for about 20 minutes, then cut them and give them a quick 2 minutes per side in the pan. This two-step method helps dry them out beautifully before frying. We want reliability here, which is why so many folks trust foundational techniques like this one from sources like The Real Food Dietitians!
You can explore some of our other reliable methods over on our gluten-free recipes page! And never, ever try to reheat these in the microwave. You ruin the entire point! If you have leftovers, pop them onto a tray in an air fryer or a 375°F oven for about 5 minutes until that crunch comes right back. Happy frying, friends!
Creative Crispy Rice Topping Ideas
The beauty of this neutral, perfectly seasoned base is that it’s just waiting for you to get creative! When people see how easy it is to make these savory rice squares, they ask me what to put on them. Honestly, you can go any direction you want—it’s the perfect canvas for adding flavor and texture to almost any meal. These make such an elegant appetizer crispy rice when you top them with just a little dollop of something special!
Since we are seeing so many fresh, vibrant salads trending right now, using these squares as a crouton replacement is a game changer. Think about tossing a few into a big bowl of greens, like the amazing salmon salad recipe you can find for inspiration over at Kalejunkie! The crunch factor they add is just unbeatable.
To give you some reliable crispy rice topping ideas, here are a few flavor profiles that just sing against that slightly acidic, salty rice patty:
- Spicy & Creamy: This is probably the most popular for a reason! Mix canned tuna or cubed baked salmon with a touch of sriracha, low-fat mayo, and maybe a squeeze of lime. Spoon this right on top of your warm crispy rice square.
- Umami Boost: Drizzle with a mix of soy sauce, a tiny bit of brown sugar, and perhaps some thinly sliced scallions or chives. This is fantastic if you’re serving them alongside one of my easy shrimp fried rice variations.
- Vegetarian Crunch: Mash some creamy avocado with a pinch of sea salt and top with everything bagel seasoning or sesame seeds. This is a wonderful, quick snack!
Seriously, the possibilities are endless once you have that crunch foundation locked down. Don’t be afraid to experiment!
Making Crispy Rice Patties for Snacking
Sometimes you don’t want a whole square, right? Maybe you’re hosting a party or you just want that perfect little bite-sized snack. This is where turning our base into individual little rice patties for snacking comes in handy! It totally expands what you can do with this base, moving it from a side dish right into the appetizer category. If you loved my recipe for mashed potato cakes, you need to try these savory twists.
To make these into individual shapes—sometimes called spicy rice cakes if you load them up with a bit of chili crisp—you just need to adjust the shaping step slightly. It’s all about keeping that integrity so they don’t crumble when they hit the heat. Think about the texture you want; are you aiming for something that feels like a little pillow, or do you want them thin and cracker-crisp?
If you’re cutting squares from the chilled block, you’re already halfway there! Just ensure your cuts are clean. If you are making them fresh without chilling a full block, here’s what I do: after seasoning the rice, I lightly dampen my hands—just a tiny bit of water helps the rice stick to itself—and I form small, tight disks about an inch thick. You still need to press them firmly so they hold their shape.
When it comes to frying these smaller patties, you might actually get a better crust because there is more surface area relative to the interior! Cook time will be shorter, too—maybe 3 or 4 minutes per side max. You can find some inspiration for party-sized snacks over at Recipe Council if you want to see how they structure theirs. Remember, keeping them small is an invitation to pile on the toppings, just like we talked about before. It’s fun, it’s satisfying, and it’s guaranteed to disappear fast!
Storage and Reheating Your Crispy Rice
Okay, let’s be real: the absolute best, most glorious crunch happens the minute these come out of the hot oil. That’s when they are truly perfect! But who has leftover crispy rice? If you do, and I hope you do, you need to know how to bring that texture back to life. Forget the microwave entirely. The microwave is the enemy of crispiness; it heats the water molecules in the rice and just turns everything soggy, and we simply cannot sabotage our beautiful easy homemade soft chewy sea salt caramels level of texture!
For storage, pop any leftovers into an airtight container immediately after they’ve cooled down to room temperature. They should keep fine on the counter for a day if you don’t plan on refrigerating them, but for longer storage, the fridge is safer.
Now, for the resurrection! You want dry heat to suck out any lingering moisture. The oven is fantastic for this if you have a batch. Lay your crispy rice pieces out in a single layer on a baking sheet—no overlapping!—and pop them into an oven preheated to about 350°F (175°C). Give them about 5 to 7 minutes. You’ll hear them start to crisp back up as they warm through. If you have an air fryer, even better! A quick 3 to 4 minutes at 375°F usually does the trick, bringing back that satisfying golden crunch we worked so hard to create!

Frequently Asked Questions About Crispy Rice
I always get so many questions whenever I post photos of these little golden nuggets! It shows me how much you all love a good texture moment. Making this base really sets you up for success, but sometimes you just have little questions about ingredients or process, and that’s okay! We aim for complete confidence in the kitchen here at HearthBite, so let’s clear up some common concerns about mastering this how to make fried rice base technique. Don’t forget to check out our collection of easy quick no-cook pizza sauce recipe ideas for other fast additions to your cooking repertoire!
What is the best rice for crispy rice?
This is probably the most important question, honestly! You absolutely need a high-starch, short-grain variety. That means it should be labeled as sushi rice or Calrose rice. These types get wonderfully sticky when cooked and cooled, which lets you press them into a tight block that won’t dissolve when it hits the hot oil. If you grab long-grain rice, like Basmati or Jasmine, it just won’t compact enough. So, for the best rice for crispy rice, head straight to the sushi rice aisle!
Can I use leftover fried rice for this recipe?
That’s a tempting idea for cutting down waste, isn’t it? But I would really advise against it for this specific base recipe. The goal here is to control the seasoning and—this is key—the moisture level! Leftover fried rice has oil, maybe soy sauce, and other flavorings already in it, which can throw off the balance of our simple vinegar seasoning. Plus, it might not have the perfect level of stickiness needed for forming that solid 1-inch block. For the strongest crunch and the cleanest, most neutral canvas for your toppings, we need to start fresh with plain, seasoned rice that we compact ourselves.
Sharing Your Perfect Crispy Rice Creation
Now that you have successfully created the foundational, perfectly crunchy rice base, I truly hope you have some fun with it! That’s the goal here at HearthBite—to give you reliable recipes that bring joy and connection to your kitchen. Whether you top these savory rice squares with spicy tuna, load them into a salad, or just eat them plain straight from the cooling rack (no judgment!), I really want to know how it went for you.
When you give this recipe a try, please come back and leave a rating! Five stars encourages me to keep testing and sharing the recipes that truly work for busy home cooks like us. Your feedback truly helps build this community where we can connect over the simple, satisfying pleasure of a good meal.
If you snap a picture of your beautiful, golden-brown crispy rice—maybe before you’ve even added toppings—I would be thrilled if you tagged me on social media! It means the world to me to see your creations being shared and enjoyed right alongside your family moments. If you have any questions at all as you go through the steps, don’t hesitate to drop a comment below or reach out directly through our contact page. Happy cooking, and I can’t wait to hear about your perfect crunch!
PrintSimple Crispy Rice Base for Toppings and Salads
Learn how to make the perfect foundational crispy rice squares. This easy tutorial yields a crunchy exterior and soft interior, ideal for serving as an appetizer or topping salads.
- Prep Time: 20 min
- Cook Time: 15 min
- Total Time: 4 hours 35 min
- Yield: 16 servings 1x
- Category: Side Dish
- Method: Pan Frying
- Cuisine: Japanese Inspired
- Diet: Vegetarian
Ingredients
- 3 cups cooked short-grain sushi rice, cooled
- 2 tablespoons rice vinegar
- 1 teaspoon sugar
- 1 teaspoon salt
- 2 tablespoons neutral oil, for frying
Instructions
- Combine the cooled rice, rice vinegar, sugar, and salt in a bowl. Mix gently until the seasoning is evenly distributed.
- Line an 8×8 inch baking pan with plastic wrap, leaving an overhang on the sides. Press the seasoned rice firmly and evenly into the prepared pan. You want the layer to be compact and about 1 inch thick.
- Cover the rice with plastic wrap and press down again to compact it further.
- Refrigerate the rice block for at least 4 hours, or preferably overnight, until it is very firm.
- Remove the rice block from the pan using the plastic wrap overhang. Place it on a cutting board and remove the plastic wrap.
- Cut the firm rice block into desired shapes, such as 2×2 inch squares or small rectangles.
- Heat the neutral oil in a large, non-stick skillet over medium-high heat until shimmering.
- Carefully place the rice pieces into the hot oil, ensuring not to overcrowd the pan. Work in batches if necessary.
- Fry the rice pieces for 4 to 6 minutes per side, pressing down gently with a spatula to encourage even browning. You are aiming for a deep golden brown and a satisfying crunch.
- Remove the crispy rice pieces from the skillet and place them on a paper towel-lined plate to drain excess oil.
- Serve immediately as a base for toppings like spicy tuna or use them to add crunch to your favorite salads.
Notes
- Use short-grain sushi rice for the best texture and stickiness.
- For an oven baked crispy rice method, press the rice into a pan, bake at 400°F (200°C) for 20 minutes, then cut and pan-fry briefly for extra crispness.
- This base recipe is excellent for making savory rice squares appetizers.
Nutrition
- Serving Size: 1 square
- Calories: 150
- Sugar: 1
- Sodium: 180
- Fat: 4
- Saturated Fat: 0.5
- Unsaturated Fat: 3.5
- Trans Fat: 0
- Carbohydrates: 27
- Fiber: 1
- Protein: 3
- Cholesterol: 0