
There are some days when only one thing will do, right? That deep, satisfying hug from a meal that just *feels* like home. For me, and for everyone here at HearthBite following Sarah Miller’s philosophy, that feeling comes wrapped in pastry. I’m talking about the ultimate comfort food: the classic homemade beef meat pie. Forget those sad little frozen versions; this is the real deal. We’ve perfected this recipe to deliver that rich, savory filling and a flaky crust that sings, making it reliable and totally achievable for the modern home cook.
- Why This Classic Beef Meat Pie Recipe is Your New Favorite Comfort Food Pie
- Ingredients Needed for the Best Meat Pie Recipe
- How to Prepare Your Homemade Meat Pie Step-by-Step
- Tips for Success When Making a Perfect Meat Pie
- Make Ahead Beef Pie and Freezer Friendly Pies
- Serving Suggestions for Your Savory Meat Pie
- Storage and Reheating Instructions for Leftover Meat Pie
- Frequently Asked Questions About Making a Meat Pie
- Share Your Classic Meat Pie Creations
Why This Classic Beef Meat Pie Recipe is Your New Favorite Comfort Food Pie
I get it, you’re looking for something truly nourishing, a hearty dinner pie that tastes like you spent all day on it, even if you didn’t. That’s exactly what we aimed for with this recipe. It’s the definition of a comfort food pie, and honestly, it’s perfect for those chilly nights or when you just need a win in the kitchen.
What makes this recipe different from all those other savory pastry dishes floating around? It’s the balance. We nailed the texture and the flavor complexity so you get maximum payoff for minimum fuss. Trust me, once you taste this, you won’t go back!
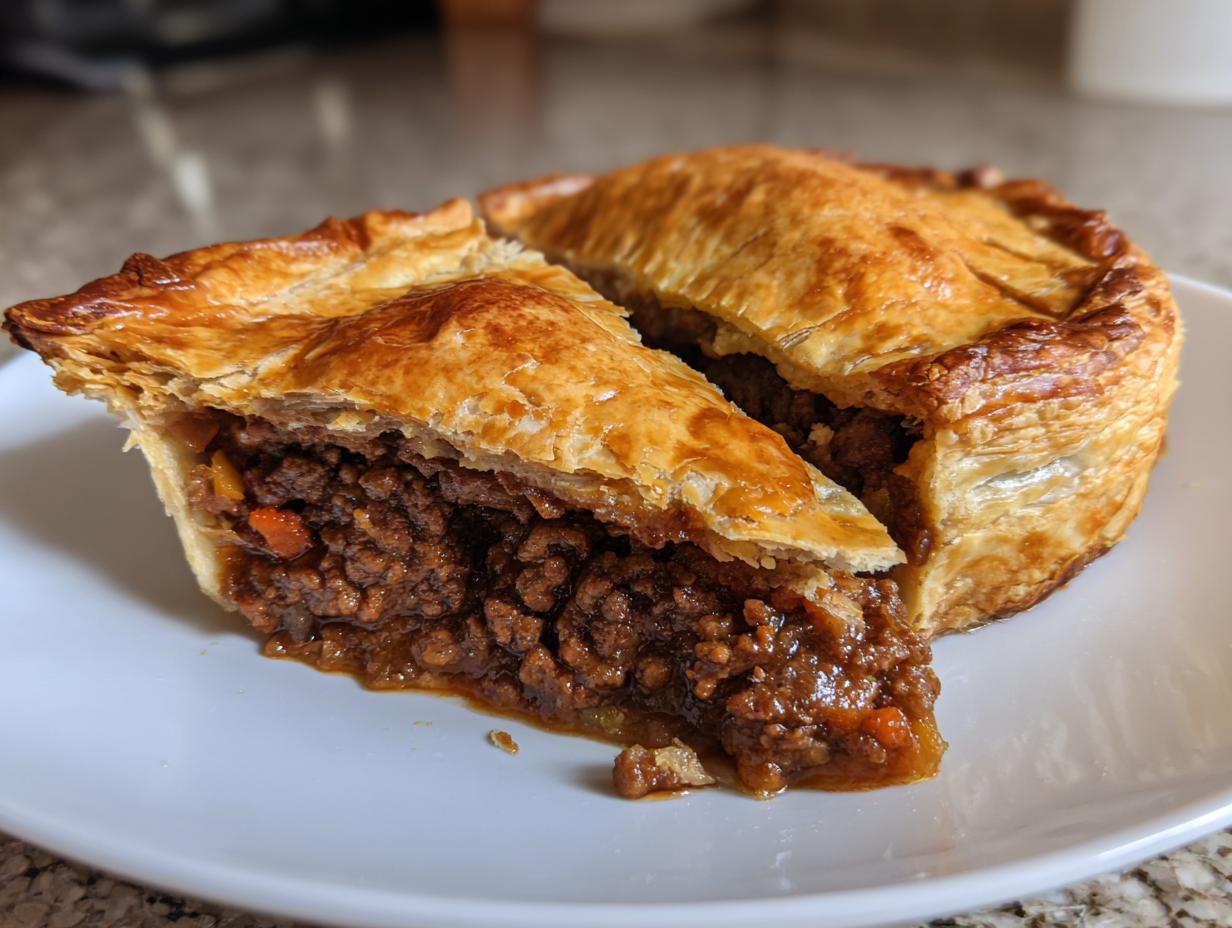
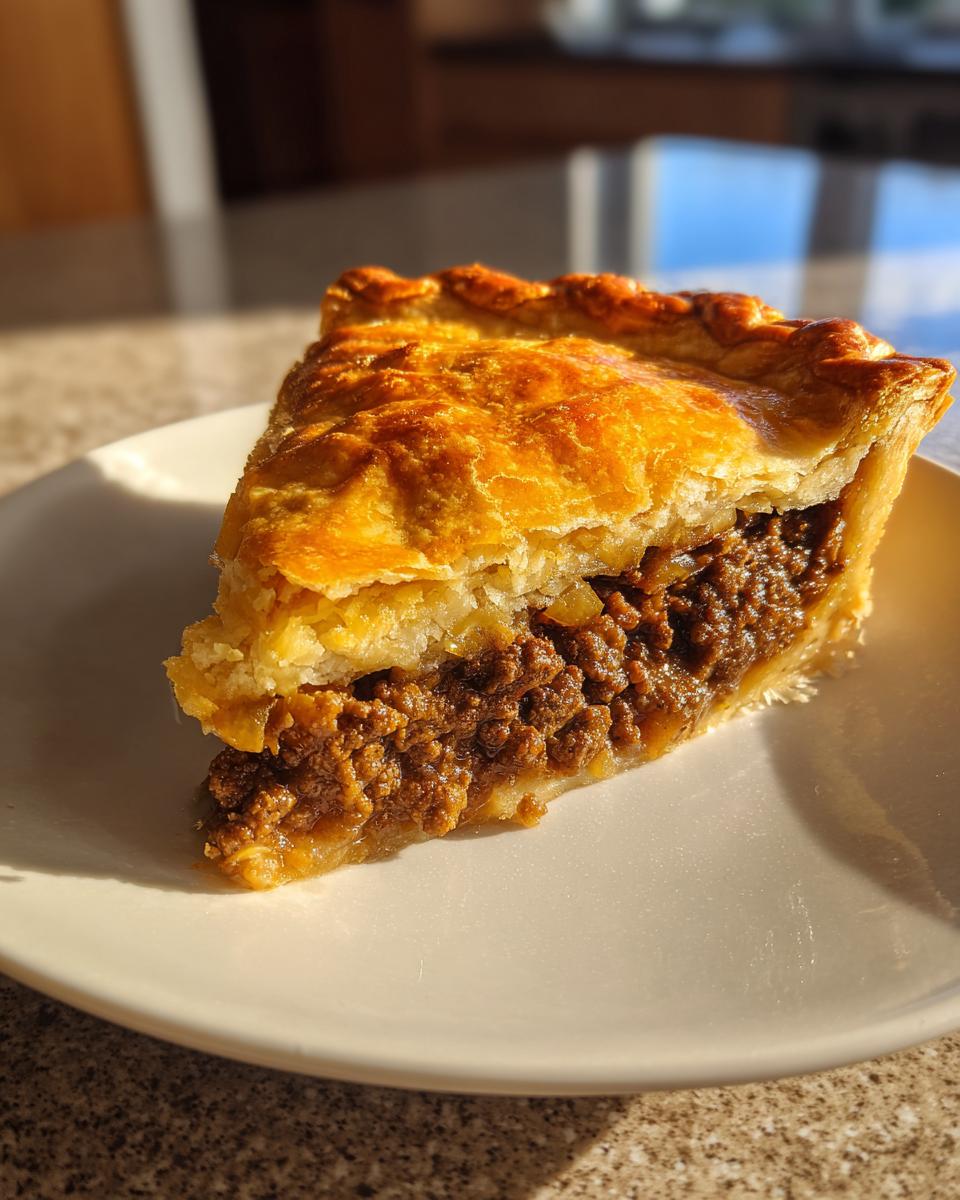
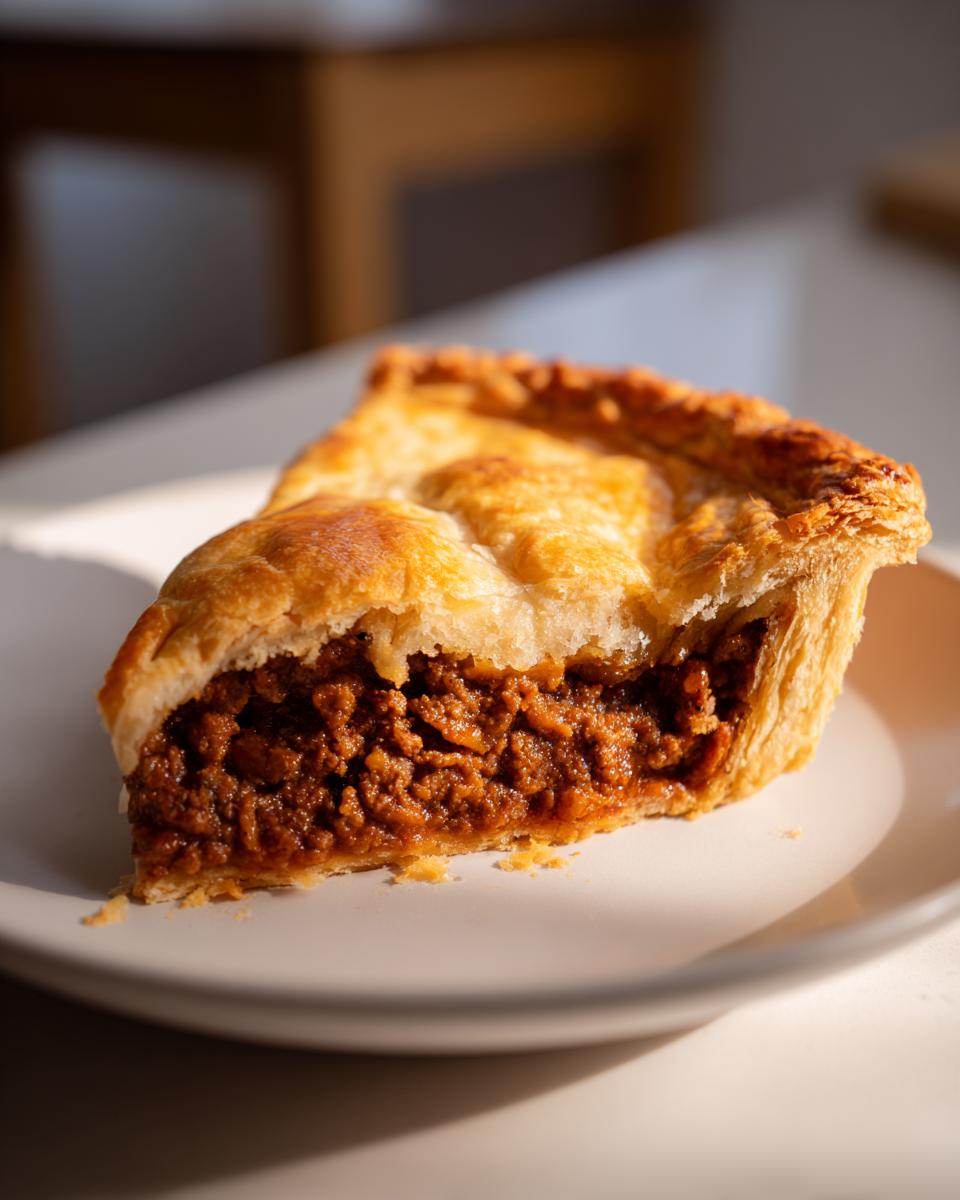
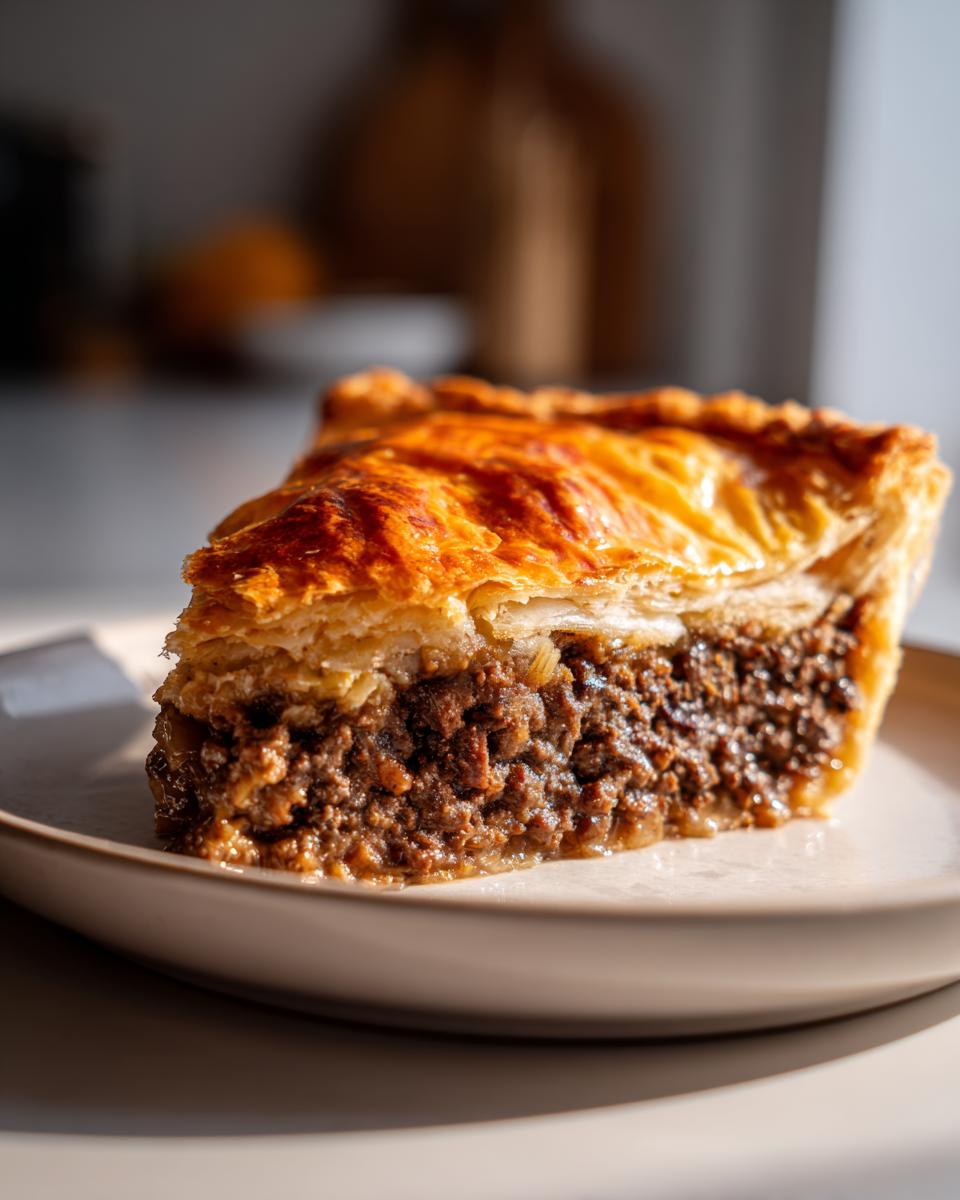
Rich, Savory Steak Pie Filling
We build this gravy slowly, folks. The initial sautéing of the mirepoix (onions, celery, carrots) gives us a sweet base, but the real magic comes when we stir in that beef broth and optional splash of red wine. That deep savory flavor isn’t just about the beef; it’s about creating a rich gravy that clings perfectly to every bite of meat. You can actually take this amazing steak pie filling recipe and use it under mashed potatoes for a Cottage Pie, too—it’s that versatile!
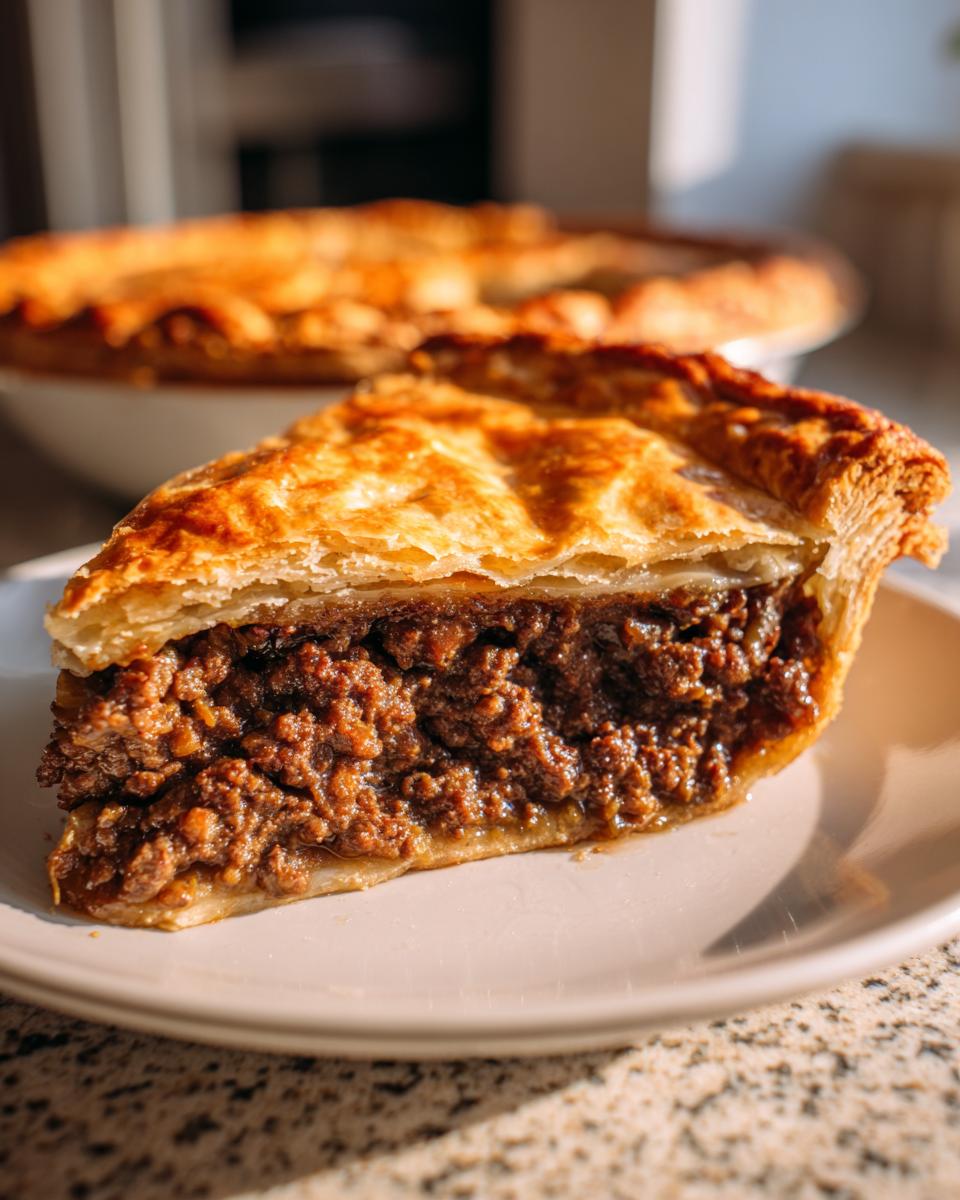
Buttery, Flaky Pastry Pie Crust
I know some bakers scoff at store-bought dough, but please hear me out! When you’re making a big family meal, sometimes we just need a shortcut. Using good quality refrigerated crusts means you get that beautiful, golden, flaky pastry pie crust texture without the stress of cutting in cold butter. The trick is making sure you brush it generously with that egg wash. It puffs up beautifully in the oven, giving you that bakery-style finish every single time.
Ingredients Needed for the Best Meat Pie Recipe
If you want the absolute best homemade brown gravy base for your meat pie, you need the right players on your team. This ingredient list is straightforward—no ten-hour braising required here! Using 80/20 ground beef is my little secret here; that bit of fat renders down beautifully and keeps our minced meat pie filling from drying out while it bakes. It keeps everything juicy!
- 2 tablespoons olive oil
- 1 large onion, chopped
- 2 carrots, diced
- 2 celery stalks, diced
- 1.5 pounds ground beef (80/20 recommended)
- 2 cloves garlic, minced
- 1/4 cup all-purpose flour
- 2 cups beef broth
- 1/2 cup dry red wine (optional, but totally worth it!)
- 1 tablespoon Worcestershire sauce
- 1 teaspoon dried thyme
- 1 teaspoon dried rosemary
- 1/2 cup frozen peas
- Salt and black pepper to taste
- 2 (9-inch) refrigerated pie crusts (or whatever easy weeknight pie recipe pastry you prefer)
- 1 large egg, beaten (for that gorgeous egg wash finish)
How to Prepare Your Homemade Meat Pie Step-by-Step
Okay, let’s get down to business! If you’ve been looking for an easy beef pie recipe that delivers incredible results, this is it. Don’t let the multi-step process scare you; it’s just a sequence of simple actions adding layer upon layer of flavor. We are going to tackle the filling first, make sure it’s perfect, and then we move onto the glorious pastry part.
Creating the Savory Meat Pie Filling
This is where the depth comes from! Start by heating up your olive oil in a big, sturdy pot—a Dutch oven is perfect. Throw in your onion, carrots, and celery (our veggie trio!) and let them get soft. About 5 to 7 minutes over medium heat is plenty to start releasing those sweet aromas.
Next, toss in the ground beef. You need to cook this until it’s beautifully browned throughout. This is super important: once it’s done, you absolutely must drain off any excess grease thoroughly. Seriously, wipe the pot out if you have to! This step prevents a soggy bottom crust, which is the enemy of a great meat pie.
Now we wake up the spices. Add your garlic, thyme, and rosemary and cook for just one minute. Don’t walk away! Just until you can really smell them. Then, sprinkle in that flour and stir it all around so it coats everything. This flour is what’s going to turn our liquid into that thick, clingy gravy, so let it cook for a minute to lose that raw flour taste.
Time for the liquid! Pour in your beef broth and red wine (if you’re using it—it really helps deepen the color and flavor). Add the Worcestershire sauce right away. Now, you need to let this simmer. Keep stirring occasionally until the gravy thickens up nicely, probably around 5 to 8 minutes. It should coat the back of a spoon. Finally, stir in those frozen peas right at the end.
Season it generously with salt and pepper—taste it! Since this is going into pastry, it needs to be well-seasoned. Once it’s perfect, take it OFF the heat and let the filling cool down for at least 15 minutes. I cannot stress this enough: putting hot filling into cold pastry is a disaster waiting to happen. It needs to be slightly cooled for assembly.
Assembling and Baking the Meat Pie
While the filling is cooling off, go ahead and preheat your oven to a nice hot 400 degrees Fahrenheit (that’s 200 degrees Celsius). Grease up your 9-inch pie dish. It’s time to lay down the bottom crust! Gently place one pie crust into the bottom and trim the edges, just trimming—don’t crimp yet!
Carefully spoon that cooled, savory filling evenly over the bottom crust. Next, place your second pie crust right over the top. This is where presentation matters! Crimp those top and bottom edges together firmly to seal everything in. You want that gorgeous, thick gravy to stay inside!
Before it goes into the heat, you need to give the top crust a nice brush-down with your beaten egg wash. This is what gives it that magnificent golden shine. And don’t forget the vents! Cut several slits right in the center of the top crust. This lets the steam escape, otherwise, you’ll have a pastry explosion!
Bake the whole glorious thing for 35 to 45 minutes. You are looking for that crust to be deeply golden brown and for the filling underneath to be bubbling hot. Once it’s out, resist the urge to cut it immediately! Let this homemade meat pie rest on a wire rack for at least 15 minutes. This crucial resting time lets the gravy set up, so when you slice into it, you get neat portions instead of a puddle. Perfection!
Tips for Success When Making a Perfect Meat Pie
Making an amazing meat pie isn’t just about following steps; it’s about mastering a few little secrets that keep the crust crisp and the filling rich. When I first started experimenting, I ruined more bottoms than I care to admit! But now, after much trial and error (and cleanup!), I have the insider scoops that make this process smooth. These little tricks are what turn a good pie into one your family will ask for every single month.
Achieving the Ultimate Flaky Pastry Pie Crust
Since we rely on refrigerated dough for speed—and hey, there’s no shame in that!—the biggest rule is temperature. Keep your dough COLD until the absolute second you need it. If it gets soft while you’re rolling it out or fitting it into the dish, pop the whole thing into the fridge for 10 minutes. Cold fat creates steam when it hits that hot oven, and steam is what gives you those glorious, airy layers. That flaky pastry pie crust won’t happen if the fat melts too soon!
For that truly show-stopping, deep golden color on top? Don’t skimp on the egg wash. Just use one whole egg beaten with a teaspoon of water—that’s it. Brush it lightly but completely over the entire exposed top crust, especially right up to the crimped edges. It creates a beautiful, sturdy, shiny seal that looks professional, even if you’re just having it for a Tuesday dinner.
Flavor Boosts for Your Steak Pie Filling
Sometimes you look at 1.5 pounds of ground beef and think, “How can I make this taste like the pub?” It’s all about that liquid in the gravy, my friends! If you want to inject a huge amount of flavor that really complements a steak pie filling, swap out about half a cup of that beef broth for a good, dark beer or some stout. It adds this incredible, malty depth that pairs perfectly with savory dishes. You won’t taste the beer, I promise—just richness!
Also, don’t be afraid to mix up your meat slightly. The recipe calls for ground beef, which is classic. But if you want an even richer, more complex flavor profile for your hearty dinner pie, try swapping out a quarter-pound of the beef for ground pork or even ground lamb. That tiny adjustment in fat and flavor profile makes a huge difference!
Make Ahead Beef Pie and Freezer Friendly Pies
One of the best things about a great meat pie is that it’s incredibly forgiving! It truly shines as a make-ahead hero. I try to always double the filling when I’m making one of these savory meat pie recipes, because let’s face it, no one wants a sink full of dishes after a big dinner. Knowing you have a ready-to-bake freezer friendly pie tucked away is like having emergency comfort food insurance!
For preparing these as make ahead beef pie meals, the rule is simple: Assemble everything *before* it goes into the oven. Do not bake it first. Once you’ve got your cooled filling nestled neatly into your pie dish with the bottom crust already in place, cover that whole thing tightly. I use plastic wrap first, pressing it gently right onto the crust edges, and then wrap in a layer of foil. This double-wrap system stops freezer burn better than anything.
When you’re ready to bake it from frozen, you’ll need patience, my friend. You can’t rush perfection! Pull that pie out of the freezer the night before and let it thaw slowly in the refrigerator overnight. If you bake it straight from frozen, the outside will burn before the center thaws properly.
Once thawed, brush on the egg wash (since the first layer might have dried out a bit in the fridge) and pop it into that 400°F oven. Because it’s starting cold, you’ll need to add about 10 to 15 minutes to that standard baking time. Just keep an eye on it until it’s bubbling hot and golden brown. For other freezer tips, you might enjoy checking out my notes on how to handle freezer jam—the principles of keeping things sealed tight apply there too!
Serving Suggestions for Your Savory Meat Pie
Now that you have this rich, beautiful meat pie sitting on your counter, piping hot and smelling like heaven, what do you serve alongside it? A meal this comforting doesn’t need complicated side dishes, trust me. We want supporting roles here, things that soak up that delicious gravy without stealing the show!
For me, simplicity wins. A hearty dinner demands something creamy to balance the flaky crust, and something fresh to cut through the richness.
Creamy Mashed Potatoes or Fluffy Rice
You absolutely need a vehicle for leftover gravy, and mashed potatoes are the champions of that mission. Make them creamy, buttery, and slightly chunky—no need for a perfectly smooth purée here; we’re doing comfort food!
- Pro Tip: If you don’t want to make mash, a simple, fluffy white rice works great, too! It soaks up every last drop of that rich sauce.
A Bright Green Side Salad with Tangy Vinaigrette
This part is non-negotiable if you want to feel remotely balanced after eating pie! The richness of the beef and pastry just begs for something sharp and acidic to snap your palate back into focus. A very simple side salad does the trick.
Toss together some crisp lettuce, maybe a few thinly sliced red onions, and dress it lightly with a lemon or red wine vinaigrette. The fresh crunch and tang make the entire savory meat pie experience feel lighter!
Simple Steamed or Roasted Vegetables
To sneak some extra goodness in without much fuss, I often roast whatever is seasonal. Right now, I’m obsessed with using my recipe for garlic and herb roasted vegetables. Broccoli, green beans, or even some simple roasted carrots pair wonderfully with the thyme and rosemary flavors already in the filling. You just toss them with a little oil and salt, roast them while the pie cools, and you’re done!
Storage and Reheating Instructions for Leftover Meat Pie
Oh, heavens, if you have leftovers—and that’s a big “if” because this meat pie is dangerously delicious—you need to treat them right! The biggest challenge with any savory pie is handling the leftover pastry. We want that crust to snap, not sweat, the next day.
First things first: never, ever cover a hot pie! Let that beautiful homemade meat pie cool down completely on the counter. If you trap steam underneath the foil while it’s still warm, you ruin the crust texture we worked so hard for. Once it’s room temperature, cover it loosely with plastic wrap or transfer slices into an airtight container.
In the fridge, this pie lasts beautifully for about three full days. We’re not talking just reheating it the next day; we mean great leftovers three days later! Remember, the crust will soften a little bit just sitting in the cold, but that’s salvageable.
The Best Way to Reheat Meat Pie
If you want that glorious, flaky texture back, you have to use the oven. I know, it takes longer, but darling, it’s worth it! Think of reheating like a mini bake session.
For a full slice (or two), wrap it loosely in foil. Placing it in foil helps protect the crust from drying out while it warms through. Pop it into a 350°F (175°C) oven for about 15 to 20 minutes. You want the filling hot all the way to the center. Once it’s hot, you can take the foil off for the last 5 minutes if the top looks a little dull; the residual heat will crisp it right up!
When You Need Speed: Microwave Tips
Look, I’m not judging if you need that savory goodness immediately! Microwaving leftovers is fine, but you must accept the trade-off: the pastry will be softer. That’s the physics of microwaves folks—they heat moisture, and pastry holds moisture.
If you must use the microwave, just reheat a single slice on a microwave-safe plate. Start with 60 seconds, check it, and perhaps add 30-second bursts after that until it’s hot. My trick to improving the texture afterward? If you have time, pop the microwaved slice onto a baking sheet under the broiler for just 1 to 2 minutes—watch it like a hawk! That quick blast of dry heat can wake up the crust again, giving you something close to your original, perfect meat pie.
Frequently Asked Questions About Making a Meat Pie
I always get so many great questions after people try making this classic! It truly is one of those savory dishes that invites tinkering, but it’s important to know what you can change and what you absolutely shouldn’t mess with. Here are the main things I hear folks wondering about when they are tackling their first meat pie.
Can I use puff pastry instead of pie crust for this meat pie?
Oh yes, you absolutely can! It completely changes the vibe, though. If you use puff pastry instead of the standard pie crust, you’ll end up with a much lighter, airier, and crispier top layer. It’s delicious, especially if you love that rich, buttery shatter when you cut into it. The only thing to watch out for is structure. Since puff pastry doesn’t hold up quite as well as a sturdy shortcrust, I strongly recommend using a standard pie crust for the bottom layer, then layering your puff pastry on top. This gives you the best of both worlds for your savory meat pie recipe!
What is the best way to make the gravy thick for this minced meat pie?
We rely on that simple flour dusting method, which is quick and reliable. Remember when we added the flour right after the veggies and browned it for a minute? That’s the key! It creates a roux in the fat, which thickens the liquid when you add the broth. Make absolutely sure you let that filling simmer gently for those 5 to 8 minutes until it’s visibly thicker before you take it off the heat. If you pull it too early, it turns into soup, not gravy! If you are having trouble, remove about a half-cup of the hot liquid later, mix in a teaspoon of cornstarch—let’s call it a cornstarch slurry—and whisk that back into the hot pot. Simmer for one minute and watch it thicken right up!
Can I turn this into individual meat pies or hand pies recipe?
You totally can! This filling is fantastic when scaled down into individual meat pies, like little individual servings in ramekins or using a muffin tin—which is a great idea for game days. Since the filling is already cooked, you are mostly just needing to bake the pastry until it’s golden. If you use small molds or muffin tins, your baking time will drop significantly, probably down to 20 to 25 minutes. Keep an eye on the pastry color instead of just relying on the timer. They come out looking so cute, like miniature versions of the big classic!
Share Your Classic Meat Pie Creations
And that’s it, my friends! You now have every secret I know for turning simple ingredients into the most comforting, hearty, and reliably delicious classic beef meat pie. It’s a recipe that’s meant to be shared, to bring people around the table, and to fix just about any dinner slump!
I truly hope you’ve enjoyed making this. While I know how this recipe works perfectly in my kitchen, the real magic happens when you bring it home and make it your own. Did you try adding a splash of stout to the gravy? Did the kids request they be made into those cute little individual meat pies we talked about?
Please, if you loved this homemade meat pie, let me know! Don’t be shy! Drop a comment below telling me how it turned out or if you tweaked the herbs a little bit. And if you took a picture of that beautiful, flaky, golden crust, I would absolutely love to see it! Tag us on social media—sharing your culinary wins is my favorite part of being here in the kitchen with all of you. Happy baking, and until the next comforting bite!
PrintClassic Homemade Beef Meat Pie: The Ultimate Comfort Dinner

Bake this classic beef meat pie for a hearty, satisfying meal. This recipe delivers a rich, savory ground beef filling encased in a buttery, flaky pastry crust, making it the ultimate comfort food for your family dinner.
- Prep Time: 25 min
- Cook Time: 45 min
- Total Time: 80 min
- Yield: 6 servings 1x
- Category: Dinner
- Method: Baking
- Cuisine: American Comfort
- Diet: Vegetarian
Ingredients
- 2 tablespoons olive oil
- 1 large onion, chopped
- 2 carrots, diced
- 2 celery stalks, diced
- 1.5 pounds ground beef (80/20 recommended)
- 2 cloves garlic, minced
- 1/4 cup all-purpose flour
- 2 cups beef broth
- 1/2 cup dry red wine (optional)
- 1 tablespoon Worcestershire sauce
- 1 teaspoon dried thyme
- 1 teaspoon dried rosemary
- 1/2 cup frozen peas
- Salt and black pepper to taste
- 2 (9-inch) refrigerated pie crusts (or homemade flaky pastry)
- 1 large egg, beaten (for egg wash)
Instructions
- Heat the olive oil in a large pot or Dutch oven over medium heat. Add the chopped onion, carrots, and celery. Cook until softened, about 5 to 7 minutes.
- Add the ground beef to the pot. Cook, breaking it up with a spoon, until it is fully browned. Drain off any excess grease.
- Stir in the minced garlic, thyme, and rosemary. Cook for 1 minute until fragrant.
- Sprinkle the flour over the meat mixture and stir well to coat everything. Cook for 1 minute.
- Pour in the beef broth and red wine (if using). Stir in the Worcestershire sauce. Bring the mixture to a simmer, stirring occasionally, until the gravy thickens, about 5 to 8 minutes.
- Stir in the frozen peas. Season generously with salt and pepper. Remove the filling from the heat and let it cool slightly, about 15 minutes.
- Preheat your oven to 400 degrees Fahrenheit (200 degrees Celsius). Lightly grease a 9-inch pie dish.
- Place one pie crust into the bottom of the prepared pie dish. Trim the edges if needed.
- Spoon the cooled meat filling evenly into the bottom crust.
- Place the second pie crust over the filling. Crimp the edges of the top and bottom crusts together to seal. Cut several slits in the top crust to allow steam to escape.
- Brush the top crust lightly with the beaten egg wash.
- Bake for 35 to 45 minutes, or until the crust is golden brown and the filling is bubbling hot.
- Let the meat pie cool on a wire rack for at least 15 minutes before slicing and serving.
Notes
- For a richer flavor, substitute some of the beef broth with dark beer or stout when making the gravy.
- If you prefer a thicker, crispier bottom crust, pre-bake the bottom crust for 10 minutes before adding the filling.
- This savory meat pie recipe freezes well. Assemble the pie completely, cover tightly, and freeze before baking. Thaw overnight in the refrigerator before baking as directed, adding 10-15 minutes to the bake time.
Nutrition
- Serving Size: 1 slice
- Calories: 480
- Sugar: 4
- Sodium: 550
- Fat: 28
- Saturated Fat: 11
- Unsaturated Fat: 17
- Trans Fat: 0.5
- Carbohydrates: 30
- Fiber: 3
- Protein: 28
- Cholesterol: 95