
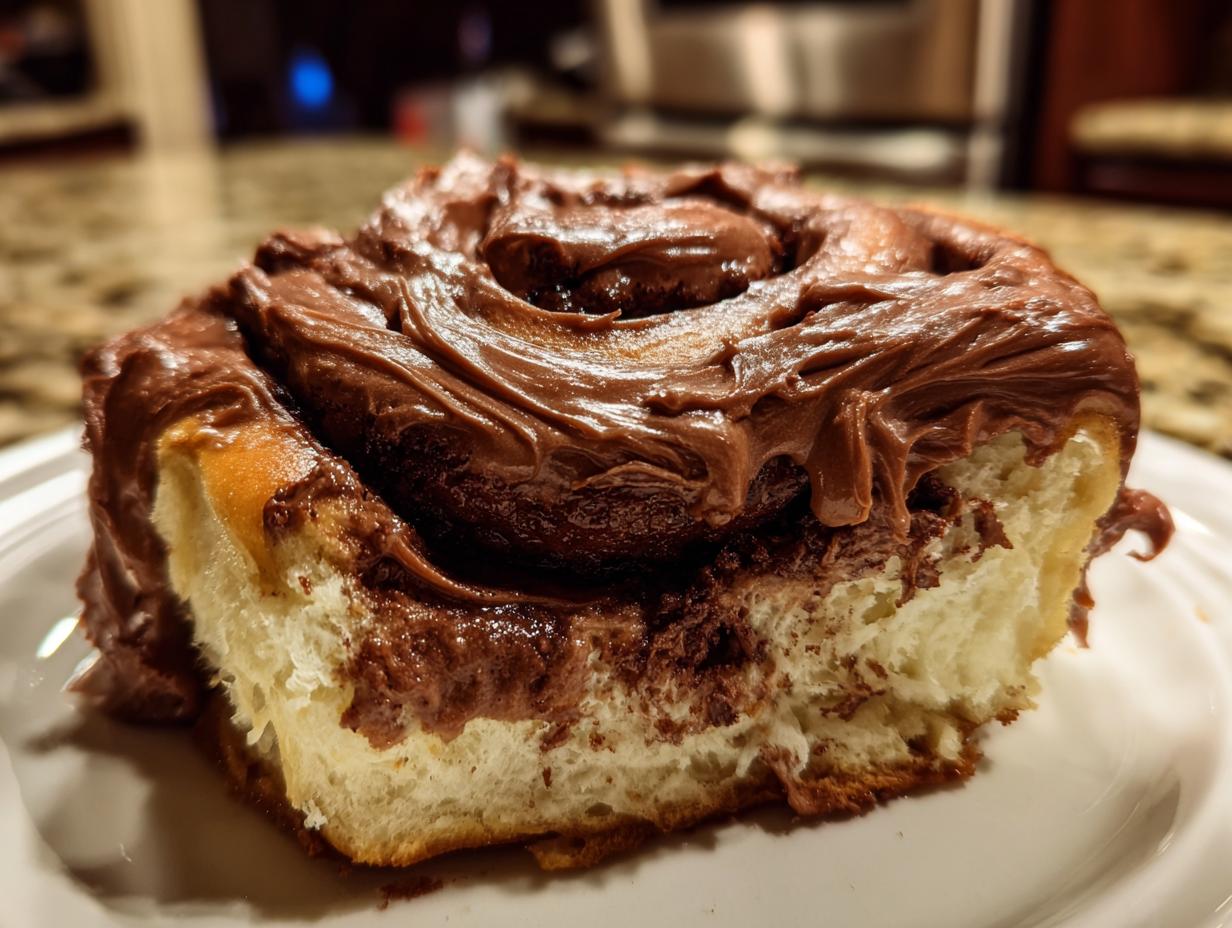
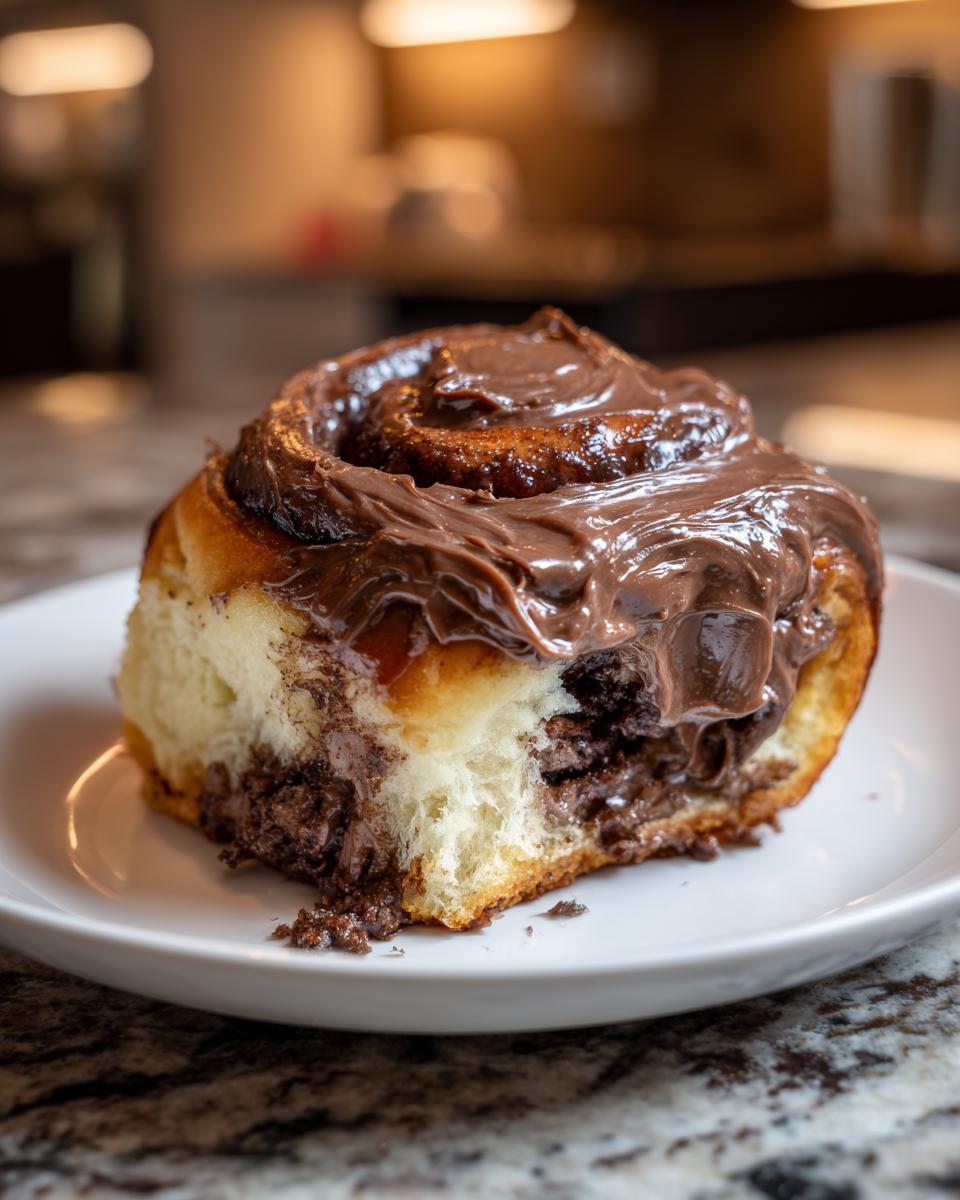
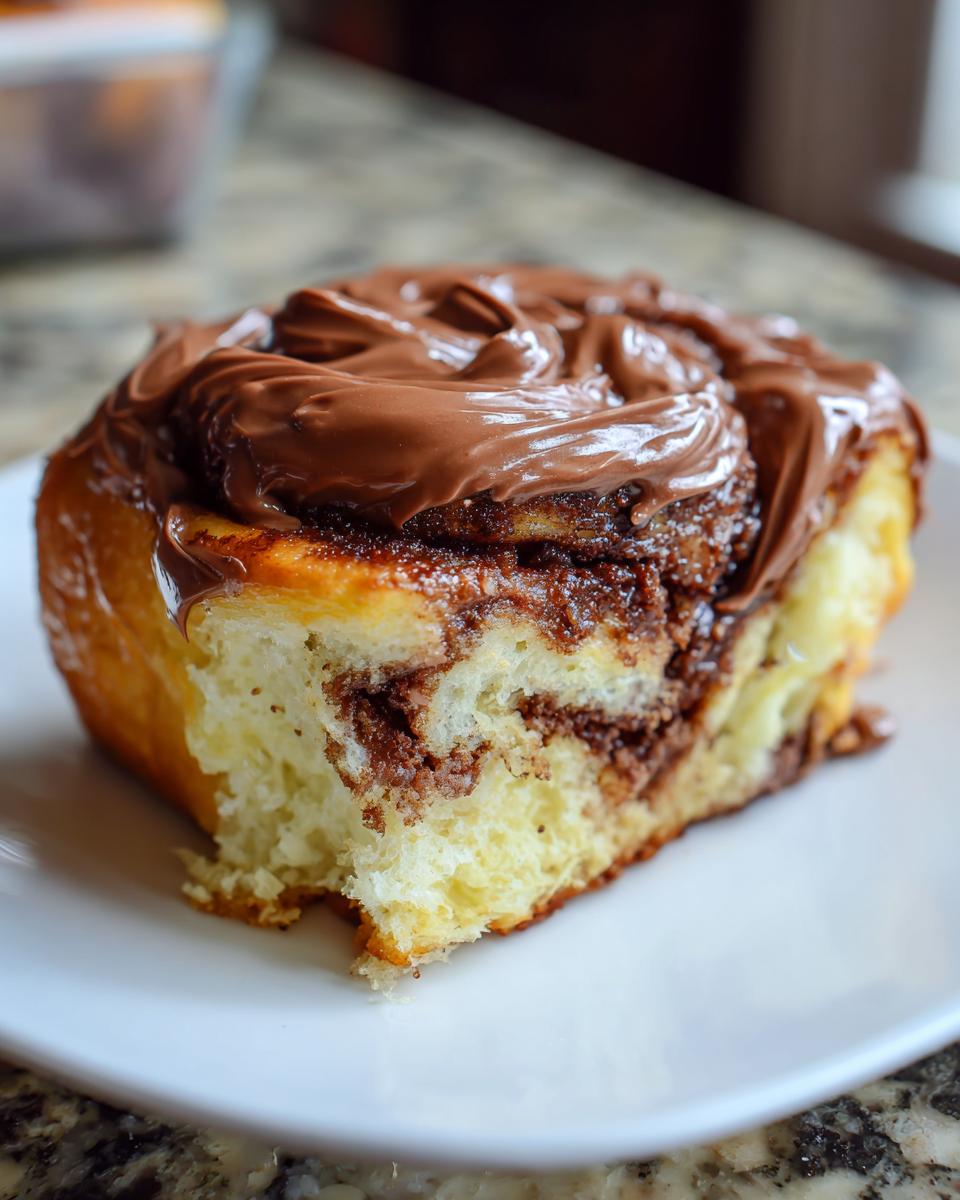
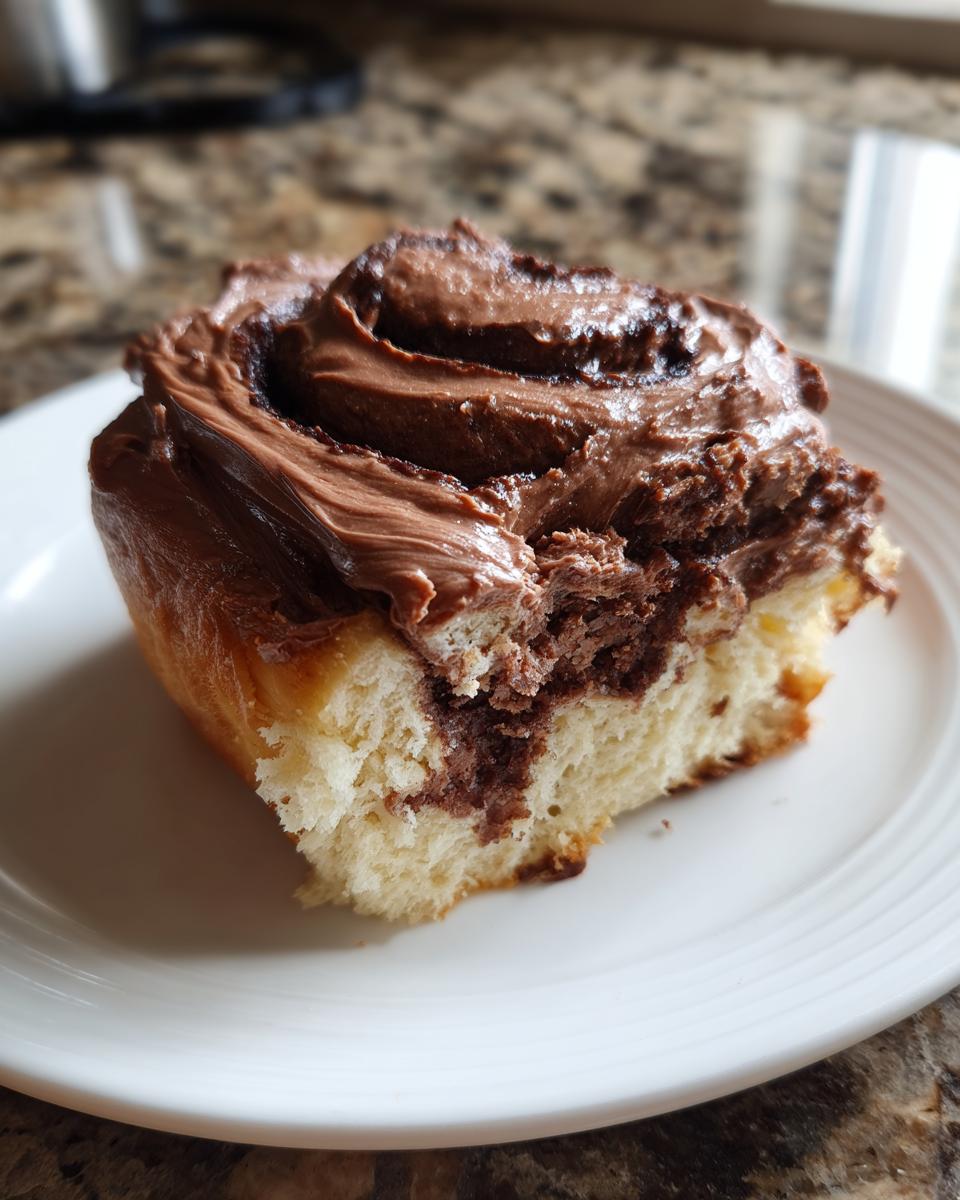
Sometimes, you just need a pastry that hugs you back, right? That’s exactly what happens when you bite into one of these beauties. Forget those dry, sad little spirals you sometimes find; we’re talking about the real deal here. I’m thrilled to share my favorite recipe for The Best Decadent Chocolate Cinnamon Rolls. We’ve managed to harness that soft, fluffy dough and pack it with a rich cocoa swirl and the most unbelievably smooth chocolate cream cheese frosting. Making these feels like the warmest hug in the kitchen, which is why they are my top choice when I need some serious comfort food baking projects! These chocolate cinnamon rolls turn any morning into a cherished memory, which is what HearthBite is all about. Trust me, these are pure joy in bun form!
- Why You Will Love These Decadent chocolate cinnamon rolls
- Ingredients for the Best Homemade chocolate cinnamon rolls
- How to Prepare chocolate cinnamon rolls From Scratch
- Tips for Success with Homemade chocolate cinnamon rolls
- Make Ahead and Storage for chocolate cinnamon rolls
- Variations for Your chocolate cinnamon rolls
- Serving Suggestions for Ultimate chocolate dessert rolls
- Frequently Asked Questions about chocolate cinnamon rolls
- Nutritional Estimate for One Chocolate Cinnamon Roll
Why You Will Love These Decadent chocolate cinnamon rolls
When you’re looking for that perfect weekend bake—something that stops people in their tracks when they walk into the kitchen—this is it. Honestly, these chocolate cinnamon rolls deliver on every promise. You won’t find dry edges here, only sheer, sweet indulgence. Here is exactly why I think this recipe is the one you need to save:
- The Ultimate Gooey Experience: These aren’t just rolls; they are gloriously gooey chocolate cinnamon rolls. Because we frost them while they are still warm, that rich chocolate cream cheese frosting melts right down into every single pocket. It’s heavenly!
- Bakery Style Quality At Home: If you’ve always dreamed of pulling apart a rack of rolls that look exactly like they came from a high-end bakery, this is your recipe. The dough is rich, the spiral is tight, and the end result is pure, satisfying indulgence.
- Deep, Layered Chocolate Flavor: We aren’t messing around with weak cocoa here. We use high-quality cocoa powder *and* finely chopped semi-sweet chocolate right in the filling. This gives you those wonderful bursts of melted chocolate throughout your soft cinnamon rolls with chocolate filling.
- Perfectly Fluffy Dough: Despite all that chocolate goodness, the dough remains light and pillowy. It’s all about that initial rise and a gentle hand while kneading. These are truly fluffy chocolate swirled dough masterpieces.
- Easy Enough for the Weekend: While they taste incredibly impressive, the process is very straightforward once you get the rhythm down. They make an amazing centerpiece for any weekend baking session or brunch idea!
Ingredients for the Best Homemade chocolate cinnamon rolls
Gathering your ingredients is the first big step toward baking something special. I always lay everything out on the counter before I start mixing; it just makes the whole process feel calmer and prevents those frantic dashes back to the pantry! You’ll notice I specify things like ‘softened’ or ‘room temperature’—I know it sounds fussy, but trust me, that little bit of prep makes a huge difference in getting that perfect, pillowy texture in our chocolate cinnamon rolls. If you need tips on handling your dough, peek over at my guide on getting the softest, gooiest cinnamon rolls!
For the Fluffy chocolate swirled dough
- 1 cup whole milk, warm (just warm enough that it’s comfortable to put your finger in, not hot!)
- 2 1/4 teaspoons active dry yeast
- 1/2 cup granulated sugar, divided
- 1/4 cup unsalted butter, melted
- 1 large egg, at room temperature (cold eggs can chill the yeast mixture, so please remember this step!)
- 3 1/2 cups all-purpose flour, plus more for dusting
- 1 teaspoon salt
For the Rich Cocoa cinnamon filling
This is where the magic really happens—the deep chocolate flavor mixed with that warm spice we all love. Don’t skimp on the cocoa powder here; it creates the rich color and intense flavor that defines these chocolate cinnamon rolls.
- 1/2 cup unsalted butter, softened to room temperature
- 1/2 cup packed light brown sugar
- 1/4 cup unsweetened cocoa powder
- 1 tablespoon ground cinnamon
- 4 ounces semi-sweet chocolate, finely chopped (this melts beautifully into the swirl!)
For the Chocolate Cream Cheese Frosting Rolls
Oh, this frosting! It’s creamy, tangy, and deeply chocolatey. It gets gooey and melts perfectly over the warm rolls, which is exactly what we want for those gooey chocolate cinnamon rolls. Make sure your cream cheese and butter are truly soft.
- 1/2 cup cream cheese, softened
- 1/4 cup unsalted butter, softened
- 2 cups powdered sugar, sifted (sifting is key to avoiding lumps in the frosting)
- 1/4 cup unsweetened cocoa powder
- 1 teaspoon vanilla extract
- 2-4 tablespoons milk (we add this slow until it’s perfect!)
How to Prepare chocolate cinnamon rolls From Scratch
Okay, this is where we put everything together! I know working with yeast dough can sometimes feel a little intimidating, but I promise you, these chocolate cinnamon rolls are incredibly forgiving. We’re going to take this slow and steady so you end up with the softest, fluffiest rolls imaginable. Think of the dough kneading as a little bit of therapy—it works wonders! If you’ve mastered making my homemade caramels, you’ll totally nail this dough after watching that process; the technique shares a lot of the same rhythm. You can check out my caramel process right here if you need a reminder on gentle folding!
Making and Rising the Fluffy Chocolate Swirled Dough
First things first, we wake up the yeast, which is Step 1. In a big bowl, mix your warm milk, the yeast, and just a tiny bit of that sugar. Don’t use water that’s too hot, or you’ll kill the little guys! Wait about 5 to 10 minutes until it gets foamy on top—that’s proof that everything is alive and ready to make beautiful dough.
Next up is mixing the dough (Step 2). We add the melted butter, the rest of the sugar, the egg, the salt, and about half of the flour. Mix until it starts coming together, then slowly add the rest of the flour until you have a soft, slightly sticky ball. Now for kneading! We need this dough to be strong, so knead it on a lightly floured surface for a solid 5 to 7 minutes until it’s smooth and elastic. Here’s my pro tip for checking readiness: after kneading, you should be able to gently stretch a small piece of the dough thin enough to see light through it without it tearing right away—that’s the ‘windowpane’ effect, and it means you have great gluten structure for those fluffy chocolate swirled dough rolls.
Pop that beautiful dough into an oiled bowl, cover it up, and let it have a nice nap in a warm spot for 1 to 1.5 hours, or until it’s doubled in size. Patience is key here!
Assembling and Cutting Your Gooey Chocolate Cinnamon Rolls
While the dough is rising, mix up your filling (Step 4). Just mush that softened butter, brown sugar, cocoa powder, cinnamon, and those chopped chocolate pieces together until it’s a nice, spreadable paste. This thick filling ensures you get beautiful, distinct layers later.
Once the dough has doubled, carefully punch it down. Roll it out on your counter to a rectangle, about 12 by 18 inches. Try to keep the edges straight, even though nobody sees them later! Spread that rich filling evenly all over, but leave a little half-inch border along one of the long sides—this helps seal the log later.
Now, tuck those gooey chocolate cinnamon rolls into a tight log, starting from the long side *opposite* the border you left. Roll it as tightly as you can without squishing the air out. Pinch that seam really well to make sure it stays shut during baking. Then, using a sharp knife or, my favorite, unflavored dental floss, slice that log into 12 equal pieces. Arrange them cut-side up in your greased 9×13 pan (Step 7). Cover them again and let them puff up for a final 30 to 45 minutes. They should look puffy and crowded when they’re ready for the oven!

Baking and Finishing Your Rich Cocoa Cinnamon Buns
Go ahead and preheat your oven to 375 degrees Fahrenheit (Step 8). Bake those beautiful rich cocoa cinnamon buns for 20 to 25 minutes. You want the tops lightly browned and set. Don’t overbake them, or you’ll lose all the gooiness!
While they cool slightly—and I mean slightly, maybe 10 minutes—whip up that frosting (Step 9). Beat your softened cream cheese and butter until they’re perfectly smooth. Then, slowly add the sifted powdered sugar and cocoa. Add the vanilla, and then dribble in the milk one spoonful at a time until you’ve hit that perfect spreadable, decadent texture. If you add too much milk at once, you’ll end up with a thin drizzle instead of that luscious chocolate cream cheese frosting rolls topping!
As soon as they are cool enough to handle but still wonderfully warm, slather that frosting over the top (Step 10). This is the secret to them melting together into one giant, irresistible pan of pure comfort. Serve immediately!
Tips for Success with Homemade chocolate cinnamon rolls
Look, even the best recipes sometimes run into trouble, especially with enriched doughs like the ones we use for these chocolate cinnamon rolls. That’s why I want to share a couple of little tricks I’ve learned over the years to make sure you end up with gooey perfection, not a sticky mess. If you’ve ever stressed about your rolls sticking or your frosting being too runny, these tips from my own baking journey will help you out. For more great baking know-how, check out my advice on making fluffy, bakery-style scones—the lessons often overlap!
The Secret to Warm, Gooey Centers
If you want those truly unforgettable, pull-apart, gooey chocolate cinnamon rolls, timing is everything right at the end. The biggest mistake people make is letting them cool completely before icing. Don’t do it! Let the rolls bake until golden, pull them out, and let them cool on the counter for just 10 minutes—that’s it. While they are still wonderfully warm, spread that thick chocolate cream cheese frosting right over the top. The heat of the rolls melts the bottom layer perfectly, creating that irresistible chocolate ooze between the layers. If you wait too long, the frosting just sits on top.
Preventing Filling Leaks While Rolling
We all hate it when the filling runs out during the second rise or bakes onto the bottom of the pan because the log split. To prevent this, make sure your filling paste is nice and thick, not runny. The key, though, is how you seal the log. After you spread the filling evenly, make sure you leave that clean border—about half an inch—along that one long edge. When you roll it up, that clean edge acts like an envelope flap. Pinch that seam *firmly* to seal it closed before you cut the rolls. This keeps all that delicious chocolate and cinnamon goodness safely inside where it belongs.
Handling Dough Make-Ahead Issues
Sometimes life gets busy, and you can’t bake right away. Good news! These rolls freeze beautifully, or you can use the overnight method. If you let the dough have its first rise, punch it down, and then wrap the whole ball tightly in plastic wrap and pop it in the fridge, it basically pauses time. When you’re ready the next day, just let it sit on the counter until it comes back up to room temperature before rolling it out for the filling. This lets you enjoy fresh, from scratch cinnamon rolls chocolate flavor without all the active time in one go!
Getting the Frosting Consistency Exactly Right
That chocolate cream cheese frosting should be thick enough to hold its shape slightly when you spread it but soft enough to drip beautifully into the crevices. When you are whipping it up, remember that the mixture of butter, cream cheese, and powdered sugar can look incredibly stiff at first. Use the milk sparingly! I always suggest adding only one tablespoon at a time near the end. If you accidentally add too much milk, don’t panic! Just whisk in a little extra sifted powdered sugar until you get back to that perfect, luscious, spreadable texture. It’s easier to add than it is to take away!
Make Ahead and Storage for chocolate cinnamon rolls
I know we all love that beautiful, fresh-from-the-oven scent, but who has time to make dough from scratch every single morning? Nobody! That’s why these chocolate cinnamon rolls are perfect for weekend baking because they are very flexible with timing. Honestly, making them ahead of time is my secret weapon for stress-free brunch serving. You can find more detailed steps on timing out your baking adventure over on my dedicated guide about make ahead chocolate cinnamon rolls, but here are the basics for a successful preparation plan.
Overnight Dough Preparation
This is the best option if you want to wake up to fresh rolls without the morning fuss. After you finish kneading the dough (Step 2) and it has had its first rise (Step 3), don’t let it rise the second time. Instead, gently punch the dough down, give it a quick fold or two, and coat it lightly with oil. Wrap that ball tightly, plastic wrap works best, and tuck it into the refrigerator overnight. The cold temperature slows the yeast way down, letting the flavors develop deeply while you sleep.
When morning comes, take the dough out about two hours before you plan to bake. You need to let it warm up slowly on the counter until it doubles in size again—that’s your second rise. Then, you proceed normally with rolling out the filling and cutting. Easy peasy!
Storing Baked Rolls (Room Temperature)
If you happen to have these incredible decadent chocolate cinnamon rolls leftover (which is rare in my house!), they are best eaten the day they are baked. However, if you must store them, keep them covered tightly at room temperature for up to two days. The chocolate cream cheese frosting doesn’t have dairy stabilizers, so keeping them too long in the fridge can actually dry them out a bit, especially around the edges.
When you want to eat a leftover roll, here’s my trick for bringing back that fresh-baked softness: wrap the individual roll loosely in a damp paper towel (water should be wrung out well!) and microwave it for about 15 to 20 seconds. That gentle steam regenerates the moisture lost overnight. It feels like a miracle every time!
Freezing for Future Comfort Food Baking
You can absolutely freeze these either baked or unbaked. For unbaked rolls, follow the overnight prep method, slice them, place them in a freezer-safe baking dish, cover everything super tightly with plastic wrap and then foil, and freeze them for up to three months. When you want to bake, let them thaw in the pan on the counter for several hours until they’ve puffed up again before baking. If you are freezing already baked rolls, just cool them completely, wrap them individually in plastic wrap, and then place them in an airtight freezer bag. Reheat them the same way with that damp paper towel trick!
Variations for Your chocolate cinnamon rolls
While I absolutely adore these chocolate cinnamon rolls exactly as written—because they are already pretty close to perfect—I also love how adaptable a good dough recipe can be! Baking is supposed to be fun, and sometimes we just need to mix things up a little bit based on what we have in the pantry or what flavor mood we are in. These simple tweaks won’t derail the process, but they give you a completely new (but equally delicious) pastry when you’re done!
Adding a Coffee Kick to the Dough
This is my secret weapon when I make these for a weekend morning treat. That little bit of bitterness from roasted coffee beans enhances the cocoa flavor so wonderfully, making it taste darker and richer without tasting like coffee. You won’t even notice it’s there unless I tell you!
To do this, just dissolve 1 teaspoon of instant espresso powder right into your warm milk when you are activating the yeast in Step 1. That’s it! The deep flavor plays so nicely with the cinnamon and cocoa filling. It turns them into something truly special, perfect for anyone who loves a good chocolate coffee pastry combination.
Switching to a Hazelnut Dream Filling
If you are looking to lean into a more robust, almost Nutella-esque flavor profile, swapping out some of the fats in the filling works like a charm. This is how you create something akin to those famous Chocolate Hazelnut Icing Rolls!
In Step 4, when you are mixing the filling, use the 1/2 cup of softened butter called for, but then swap the 4 ounces of chopped semi-sweet chocolate for 1/2 cup of good quality hazelnut spread (like Nutella). Mix everything—butter, brown sugar, cocoa, cinnamon, and hazelnut spread—together until it forms that thick paste. The hazelnut oils blend beautifully with the cinnamon. If you do this, you might want to switch the topping to a simple vanilla glaze instead of the heavy chocolate cream cheese frosting to let that hazelnut flavor really shine!
Elevating the Frosting with Orange Zest
When I want to make these feel a little less like comfort food and a bit more like a fancy bakery dessert, I brighten up what’s on top. The chocolate and orange pairing is classic for a reason—it cuts through the richness perfectly, making these chocolate glazed cinnamon rolls feel lighter.
When you are mixing your frosting in Step 9, try adding the zest of one small orange along with the vanilla extract. If you use vanilla, cut the amount down slightly. That little hint of citrus oil brightens up the heavy cocoa flavor without making the rolls taste like dessert oranges. It’s subtle, refreshing, and absolutely gorgeous with the dark chocolate swirl underneath.
Serving Suggestions for Ultimate chocolate dessert rolls
When you pull a pan of these ultimate chocolate dessert rolls out of the oven, the only thing left to decide is what to serve alongside them! They are so rich and decadent on their own that they truly stand up well against strong flavors, or they pair just beautifully with something classic and simple. Honestly, a glass of cold milk is sometimes all you need, but since we are making these for special occasions that deserve a little fanfare, I have a few favorites I always pull out when these are on the table. You can find some of my favorite simple ways to make easy breakfast recipes feel more special over on my guide.
The Perfect Coffee Pairing
If these aren’t being served for dessert after dinner, they are certainly meant for a slow weekend brunch, and for brunch, you need coffee—strong coffee! The slight bitterness and acidity of a dark roast cut right through the richness of the chocolate and the sweetness of that cream cheese frosting. It’s the perfect counterbalance, trust me.
I prefer a straightforward French Press brew when serving these; skip the fancy syrups on your coffee because these rolls are already providing all the sweetness needed. If you want to get really fancy, make an iced latte; the cold dairy is surprisingly refreshing against the warm spice of the cinnamon rolls.
Keep it Simple with Dairy
You absolutely cannot go wrong with milk. Whether you prefer whole milk, skim, or a creamy oat alternative, the cool temperature and simple flavor profile are exactly what children (and many adults!) crave when eating something this rich.
If you serve them warm, the contrast between the warm bread and the cold milk is just heaven. For those of you making these for brunch but serving them alongside fruit salad, you might also consider a side of plain Greek yogurt. The tanginess offers a nice, healthy palate cleanser between bites of these heavenly rolls.
Dessert Presentation Ideas
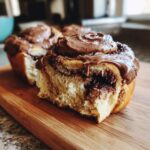
If you’re serving these as an ultimate chocolate dessert roll after a hearty meal, you might want to elevate the presentation just slightly. Instead of serving them straight from the baking dish, I like to gently transfer them (if possible!) to a nice wooden board or a tiered platter.
A tiny dusting of powdered sugar right before serving adds visual contrast to the dark chocolate frosting. I also love to scatter a few raspberries or sliced strawberries around the base of the platter. The bright red color looks stunning next to the dark cocoa, and the slight tartness of the berries is divine when eaten with the sweet roll!
Frequently Asked Questions about chocolate cinnamon rolls
I get so many wonderful questions channeled to me through the contact page—and honestly, that’s my favorite part of running HearthBite, hearing from you all about your baking adventures! It means these recipes are actually making it into real kitchens. Below, I’ve gathered a few of the most common questions I get about making these chocolate cinnamon rolls the absolute best they can be. If you have another burning question after reading these, please don’t hesitate to reach out so I can help you troubleshoot!
This section is all about turning those little baking worries into victories, so you can always achieve those soft cinnamon rolls with chocolate filling you’re hoping for.
Can I use instant yeast instead of active dry yeast for these chocolate cinnamon rolls?
Oh yes, absolutely! Instant yeast is a baking superstar because it saves time. If you are using instant yeast, you can skip Step 1 entirely, which is the whole waiting-for-it-to-get-foamy part. Just whisk your instant yeast right into the dry ingredients—all the flour, salt, and the sugar—before you add those wet ingredients to form the dough.
Because instant yeast doesn’t need that warm bath to wake up, you can mix everything together right away. It still needs that first long rise, though, so don’t rush that part! It just shaves off about ten minutes of waiting time upfront for this easy chocolate cinnamon roll recipe.
How do I get the extra gooey texture in my chocolate cinnamon rolls?
If you’re chasing that “drip-down-your-chin” gooey factor, there are two non-negotiable things you have to do. First, make that filling extra generous! Don’t be shy when spreading that thick cocoa-butter paste over the dough. You want every square inch covered so you get rich layers when you roll it up.
Second, and this is the most important part, is the timing of the frosting. As I mentioned in the main instructions, you *must* frost them while they are still quite warm. Don’t wait until they are room temperature! The residual heat from the rolls warms the chocolate cream cheese frosting just enough so that it melts slightly and seeps down between every layer. That creates pockets of glorious, melted chocolate throughout your roll. If you frost them cold, the frosting just sits stiffly on top.
Nutritional Estimate for One Chocolate Cinnamon Roll
Now, I want to be super clear about something important: these decadent chocolate cinnamon rolls are absolutely made for enjoying! They are pure comfort, and while they are certainly rich, I always like to provide a general idea of what you’re looking at nutritionally. Please remember that these numbers are just an estimate based on the ingredients listed here and standard measurement sizes. If you use more frosting or a different type of chocolate, those numbers will certainly shift!
We figure this recipe yields 12 hearty rolls, so the figures below reflect what’s in one generously frosted serving. Think of this as helpful guidance, not a strict diet plan, because life happens, and sometimes you just need a wonderful, warm pastry, right? If you’re planning a big brunch, maybe balance them out with some fresh fruit this week!
- Serving Size: 1 roll
- Calories: 450
- Sugar: 35g (It’s worth every single gram, I promise!)
- Sodium: 300mg
- Fat: 22g
- Saturated Fat: 13g
- Unsaturated Fat: 9g
- Trans Fat: 0.5g
- Carbohydrates: 58g
- Fiber: 2g
- Protein: 7g
- Cholesterol: 45mg
Enjoy every single bite! That’s my most important nutritional advice when it comes to baking from scratch.
PrintThe Best Decadent Chocolate Cinnamon Rolls with Chocolate Cream Cheese Frosting
Make soft, gooey chocolate cinnamon rolls featuring a rich cocoa swirl filling and topped with a decadent chocolate cream cheese frosting. This recipe delivers bakery-style comfort food perfect for brunch or dessert.
- Prep Time: 45 min
- Cook Time: 25 min
- Total Time: 155 min
- Yield: 12 servings 1x
- Category: Dessert
- Method: Baking
- Cuisine: American
- Diet: Vegetarian
Ingredients
- 1 cup whole milk, warm
- 2 1/4 teaspoons active dry yeast
- 1/2 cup granulated sugar, divided
- 1/4 cup unsalted butter, melted
- 1 large egg, room temperature
- 3 1/2 cups all-purpose flour, plus more for dusting
- 1 teaspoon salt
- 1/2 cup unsalted butter, softened (for filling)
- 1/2 cup packed light brown sugar (for filling)
- 1/4 cup unsweetened cocoa powder (for filling)
- 1 tablespoon ground cinnamon (for filling)
- 4 ounces semi-sweet chocolate, finely chopped (for filling)
- 1/2 cup cream cheese, softened (for frosting)
- 1/4 cup unsalted butter, softened (for frosting)
- 2 cups powdered sugar, sifted (for frosting)
- 1/4 cup unsweetened cocoa powder (for frosting)
- 1 teaspoon vanilla extract (for frosting)
- 2–4 tablespoons milk (for frosting consistency)
Instructions
- Activate the yeast: In a large bowl, combine the warm milk, yeast, and 1 tablespoon of the granulated sugar. Let stand for 5 to 10 minutes until foamy.
- Mix the dough: Add the melted butter, remaining granulated sugar, egg, salt, and half of the flour to the yeast mixture. Mix until combined. Gradually add the remaining flour until a soft dough forms. Knead on a lightly floured surface for 5 to 7 minutes until smooth and elastic.
- First rise: Place the dough in a lightly oiled bowl, turning to coat. Cover and let rise in a warm place for 1 to 1.5 hours, or until doubled in size.
- Prepare the filling: While the dough rises, mix the softened butter, brown sugar, cocoa powder, cinnamon, and chopped chocolate in a small bowl until well combined into a thick paste.
- Shape the rolls: Punch down the risen dough. On a lightly floured surface, roll the dough into a large rectangle, about 12×18 inches. Spread the chocolate filling evenly over the dough, leaving a small border on one long edge.
- Roll and cut: Starting from the long edge opposite the border, tightly roll the dough into a log. Pinch the seam to seal. Cut the log into 12 equal rolls.
- Second rise: Arrange the rolls in a greased 9×13 inch baking pan. Cover and let rise again for 30 to 45 minutes, or until puffy.
- Bake the rolls: Preheat your oven to 375 degrees Fahrenheit. Bake for 20 to 25 minutes, or until the tops are set and lightly browned.
- Make the frosting: While the rolls cool slightly, beat the cream cheese and softened butter together until smooth. Gradually beat in the powdered sugar and cocoa powder. Add vanilla extract and milk, one tablespoon at a time, until you reach a smooth, spreadable consistency.
- Frost and serve: Spread the chocolate cream cheese frosting generously over the warm rolls. Serve immediately for the best gooey texture.
Notes
- For extra gooey chocolate cinnamon rolls, let the rolls cool for only 10 minutes before frosting them while they are still warm.
- If you prefer a thinner glaze over thick frosting, reduce the powdered sugar in the frosting by half and add more milk until it drizzles easily.
- You can prepare the dough the night before, let it rise once, punch it down, wrap it tightly, and refrigerate. Bring it to room temperature for the second rise before baking.
Nutrition
- Serving Size: 1 roll
- Calories: 450
- Sugar: 35g
- Sodium: 300mg
- Fat: 22g
- Saturated Fat: 13g
- Unsaturated Fat: 9g
- Trans Fat: 0.5g
- Carbohydrates: 58g
- Fiber: 2g
- Protein: 7g
- Cholesterol: 45mg