
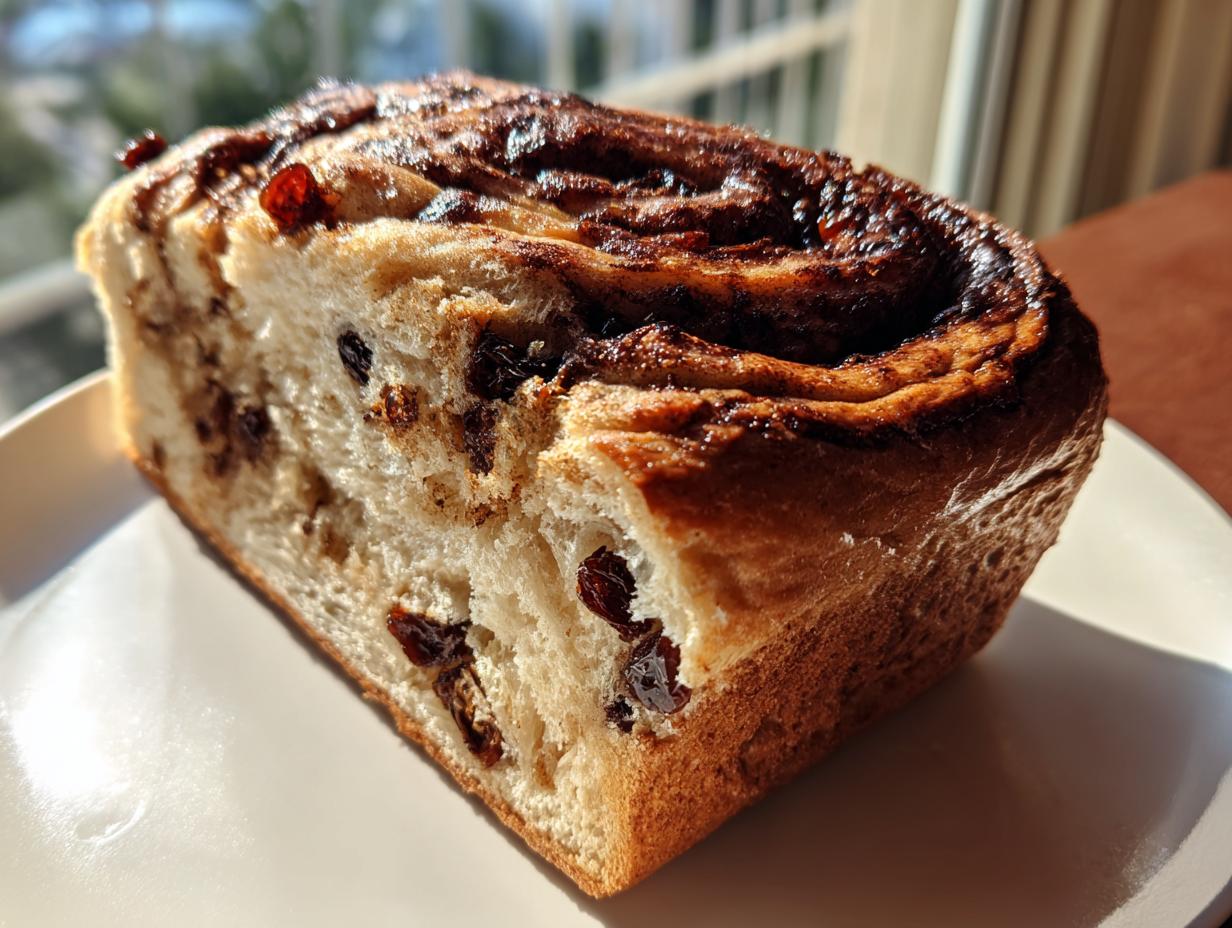
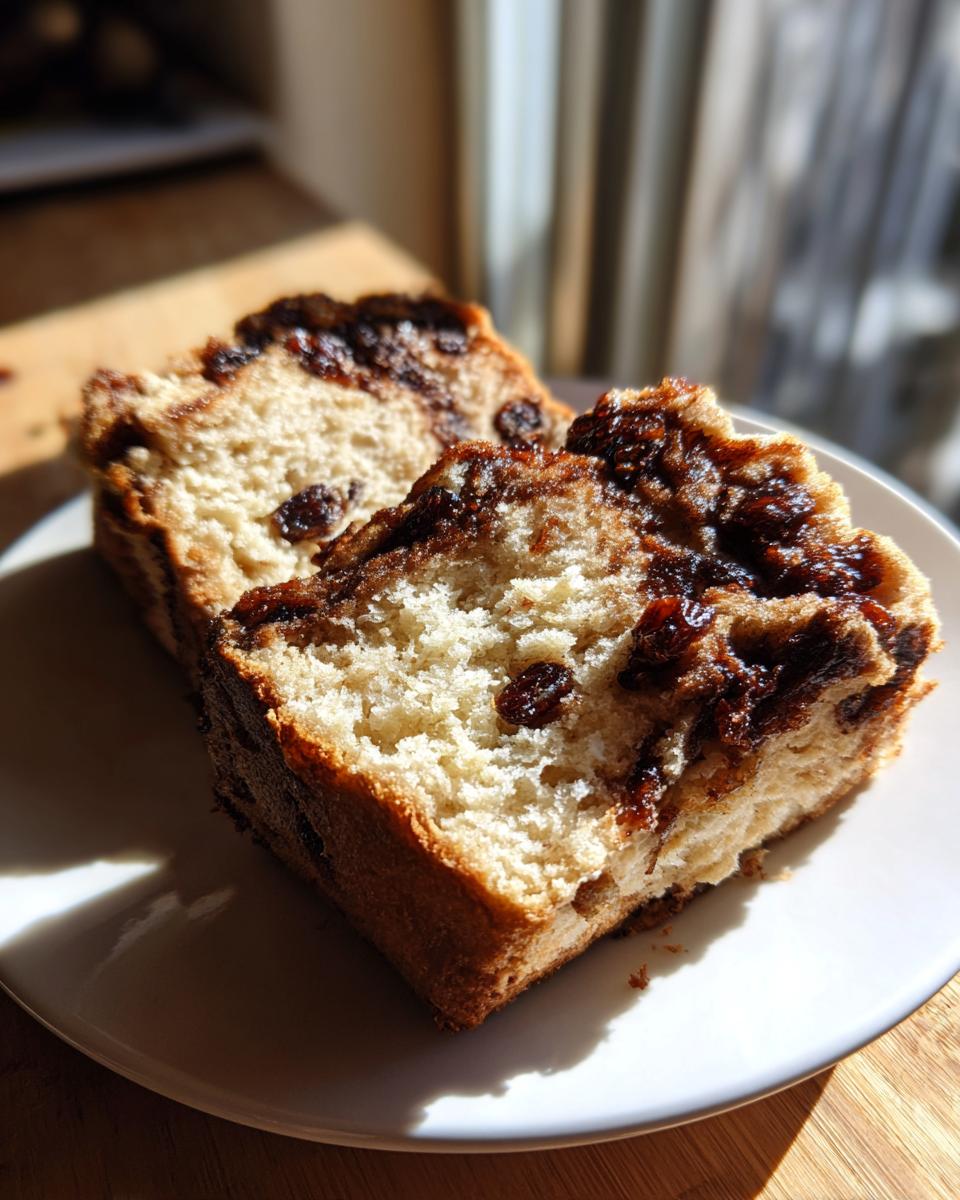
There is truly nothing more comforting than the smell of homemade bread filling your entire house, is there? It instantly turns a regular morning into something special, something cozy. If you’ve been dreaming about that perfect loaf—the one with the crackly, artisan crust on the outside but impossibly soft and fluffy on the inside—then you are in the right place. This is my tried-and-true recipe for a Soft No-Knead Cinnamon Raisin Bread.
Here at HearthBite, my goal is always to bring you recipes that work, every single time, so you can focus on the joy of baking rather than the frustration of failure. This specific raisin bread recipe is a staple for me because it achieves that amazing bakery feel without requiring you to stand over the dough kneading it for ages. You just mix it, let time do the heavy lifting, and wake up to incredible flavor ready for slicing. Trust me, once you try this sweet cinnamon swirl loaf, you won’t look back! It’s the perfect centerpiece for any cozy breakfast ideas.
- Why This Soft No-Knead Cinnamon Raisin Bread is Your New Favorite
- Gathering Ingredients for Homemade Raisin Bread
- Step-by-Step Instructions for Your Artisan Raisin Bread
- Tips for Making the Best Raisin Bread Recipe
- Serving Suggestions for Your Homemade Raisin Bread
- Storage and Reheating Instructions for This Classic Raisin Loaf
- Frequently Asked Questions About Making Raisin Bread
- Estimated Nutritional Information for Raisin Bread
- Share Your Homemade Bread Journey
Why This Soft No-Knead Cinnamon Raisin Bread is Your New Favorite
I know, I know, another bread recipe! But hear me out—this one is a total game-changer, especially if you love delicious results without spending hours working the dough. This recipe is designed to give you that rich, buttery flavor we all crave in a homemade raisin bread, yet it’s shockingly simple. It’s the definition of maximizing flavor while minimizing effort. I developed this version because my busy schedule needed something forgiving, but my heart needed that classic sweet, fragrant loaf.
- It delivers an unbelievably soft baked bread interior, even days later!
- The long, slow fermentation develops a complex, almost sourdough-like flavor naturally.
- It’s a true easy raisin bread—dump, stir, and wait! That’s practically it.
- Perfect for slicing thick and loading up with butter for a truly cozy breakfast.
The No-Knead Advantage for Perfect Raisin Bread
Honestly, the best part about this method is saying goodbye to all that heavy kneading once and for all. We let time and a little yeast magic do the work for us. This long, slow rest develops the gluten structure gently, ensuring we get an open, airy crumb without any arm strain on my end. It truly makes this the most easy raisin bread you’ll ever attempt.
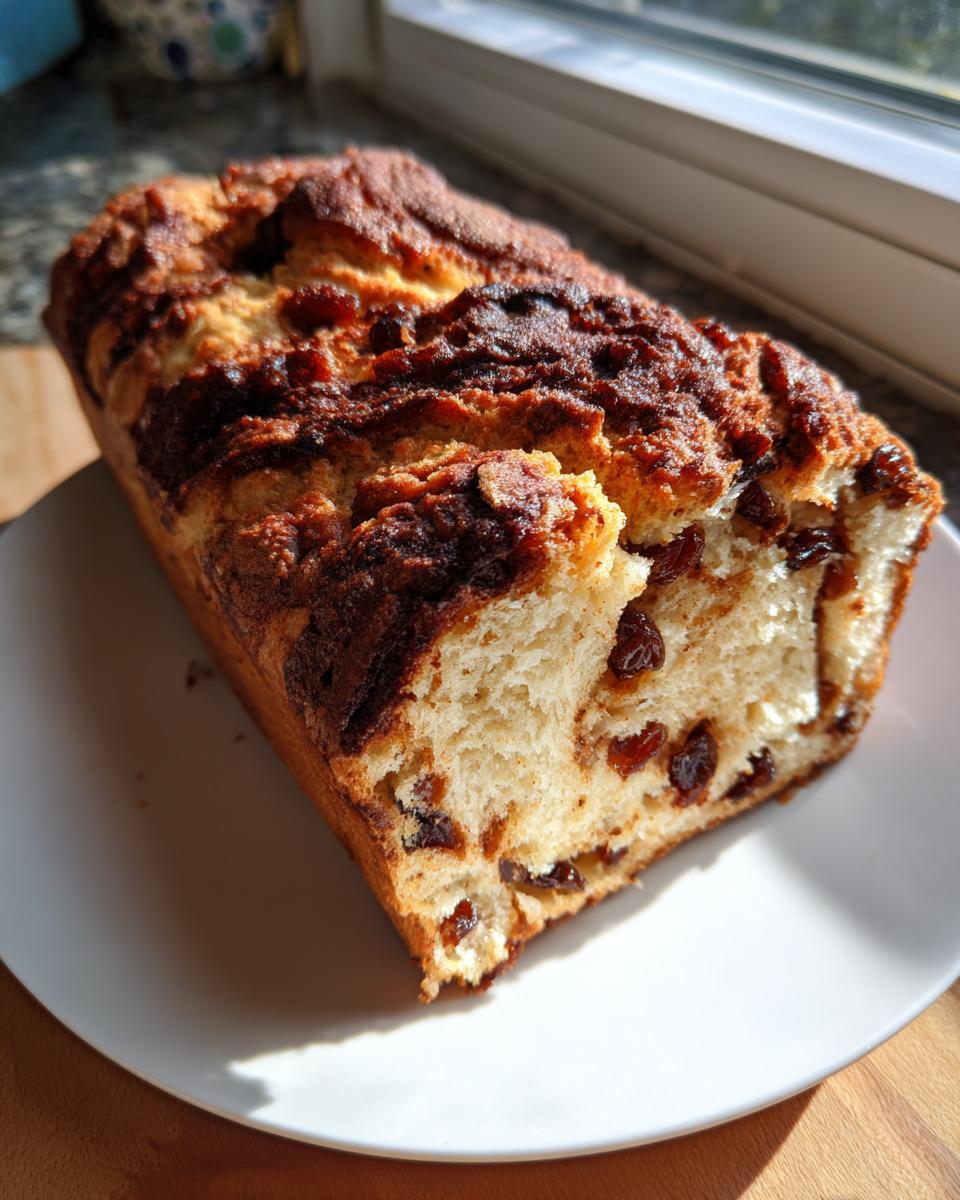
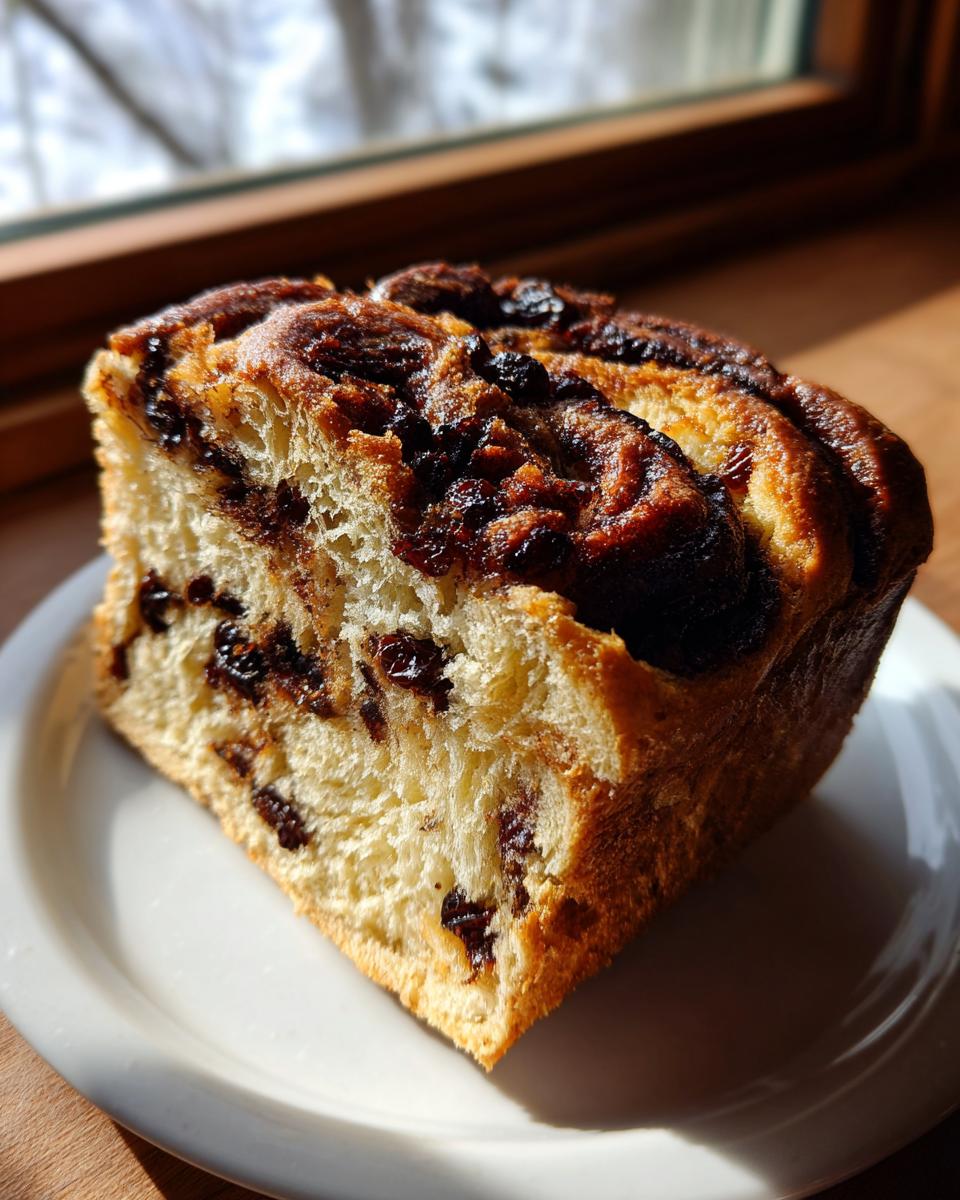
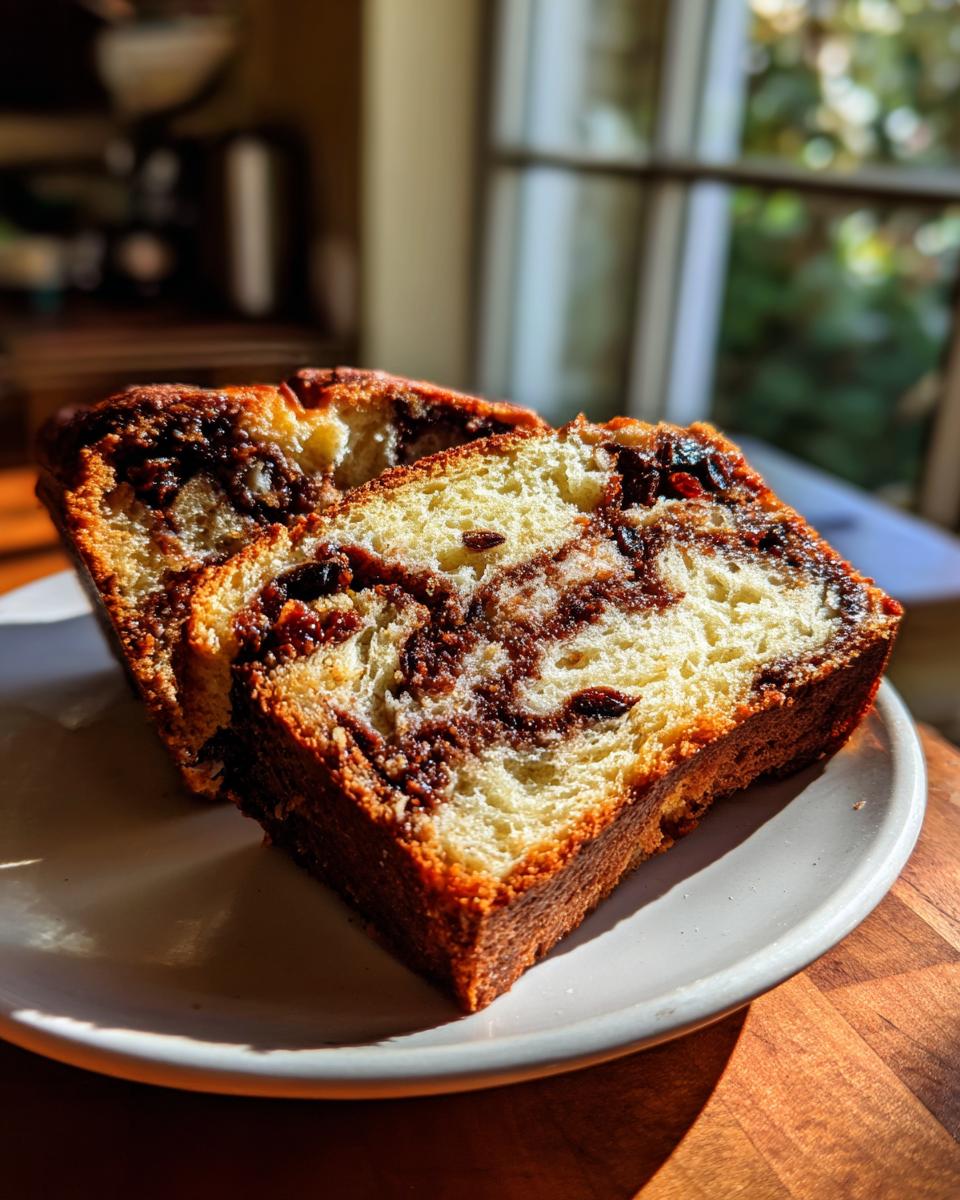
Achieving the Ideal Cinnamon Swirl Loaf Texture
When I bake this using my Dutch oven—which I highly recommend if you want that stunning crust—you get this amazing contrast. You have the sturdy, slightly chewy, golden-brown exterior that screams “artisan bread,” but when you cut into it, it just melts. That contrast between the crust and the super fluffy raisin bread inside is what makes this recipe such a winner.
Gathering Ingredients for Homemade Raisin Bread
Okay, let’s get organized! Because we’re using a no-knead method, the ingredient list looks a little simple upfront, but that is where the magic starts. The key to this sweet raisin bread is making sure we have the exact right kind of yeast and properly prepping those beautiful raisins before they even meet the flour. Don’t worry, grabbing everything is quick, and once you have these items ready, the hard part (the waiting!) begins.
This structure helps us keep our two main sections—the dough base and that glorious swirl—separate until the very last minute. For more inspiration on rich, flavorful loaves, check out my date nut bread recipe!
Ingredients for the Sweet Raisin Bread Dough
These form the foundation of our classic raisin loaf:
- 3 cups all-purpose flour
- 1 teaspoon instant yeast (This is important; don’t use active dry yeast here!)
- 1 teaspoon salt
- 1 tablespoon ground cinnamon (for the main dough flavor)
- 1 cup warm water (make sure it’s between 105-115°F—too hot will kill the yeast!)
- 1/2 cup granulated sugar
- 1 large egg
- 1/4 cup unsalted butter, melted
- 1 1/2 cups raisins, plumped (See notes below—we need them plump!)
Components for the Cinnamon Swirl Filling
This is where we build that rich, flavorful ribbon throughout the interior of your loaf:
- 1/2 cup brown sugar, packed (dark brown gives the best molasses note!)
- 1/4 cup butter, softened (It must be soft enough to create a smooth paste with the sugar)
- 1 tablespoon ground cinnamon (yes, more cinnamon!)
- 1 egg, beaten (We use this for the egg wash right before baking)
Step-by-Step Instructions for Your Artisan Raisin Bread
This is where your patience pays off! With no-knead bread, you have to trust the process, especially that first long rest. I always have to remind myself that the dough is developing amazing, complex flavor while I’m doing literally anything else—washing dishes, watching a show, or even running errands. It’s amazing, right? We’re going to break this down into three manageable parts so you can see exactly how that beautiful swirl forms inside this homemade raisin bread.
If you’re looking for a sweet treat that pairs perfectly with this rich bread, my guide on soft chewy sea salt caramels is a wonderful next project!
Mixing the Dough and the Long Rest for Best Raisin Bread Flavor
First, we make our dry mix. In a big bowl, just whisk together the flour, that instant yeast (don’t forget it has to be instant!), salt, and 1 tablespoon of the cinnamon. It’s simple physics keeping things separate for now! Then, in a separate spot, combine your warm water—aim for that sweet spot around 105-115°F—with the sugar, egg, and melted butter. Pour those wet bits into the dry mixture and use a wooden spoon to mix until it’s just combined. I mean it; stop when you see no dry pockets left. It’s going to look shaggy and rough—that’s exactly what we want!
Now for the big rest! Cover that bowl TIGHTLY with plastic wrap. You want zero air getting in there to dry it out. Leave it sitting someplace warm for 12 to 18 hours. Yes, you read that right! Resist the urge to mess with it. This long, slow fermentation is the secret to that classic, open crumb in your final no knead bread. It’s the difference between a dense brick and truly fluffy raisin bread.
Creating the Cinnamon Swirl and Shaping the Classic Loaf
Once your dough is bubbly and glorious, gently dump it out onto a lightly floured counter. We aren’t punching it down here; we are being gentle! Stretch it out lightly into a rough rectangle, maybe 12 by 18 inches. While that’s happening, quickly whip up your filling: take that softened butter, brown sugar, and the remaining cinnamon and mix ‘til you have a thick paste.
Spread that sweet paste all over the dough, leaving a small border on one long side—this is your seal! Then, sprinkle your pre-plumped raisins evenly over the filling. Now, roll it up tightly, starting from the side *without* the empty border, like you’re rolling up a sleeping bag. Once you have your log, pinch that seam closed really well—we don’t want any filling escaping! Tuck the ends under, place it gently into your greased 9×5 loaf pan, cover it again, and let it rest for 45 to 60 minutes for its final puff-up.
Baking Your Soft Baked Bread Using Two Methods
This is the exciting part, and I give you two options depending on the texture you love most! If you want that bakery crust look, you need to preheat your oven to a blazing 450°F with your Dutch oven sitting inside. If you prefer an all-around softer texture without the hard crust, stick to just preheating your oven to 375°F with the loaf pan in it.
If using the loaf pan, just brush the top with that beaten egg wash for a lovely brown finish and bake for about 30 to 35 minutes. If you’re going Dutch oven style (for that gorgeous artisan raisin bread), carefully score the top lightly, put the dough into the hot pot, cover it, and bake for 20 minutes. Take the lid off and finish for 10 to 15 minutes until it’s deep golden. The crucial final step for both methods? Get the bread out of the pan right away and let it cool completely on a wire rack. Trust me, if you leave it in the hot pan, the bottom steam-cooks and it gets soggy. We want that crust to stay crisp!
Tips for Making the Best Raisin Bread Recipe
Even though this recipe is incredibly forgiving, a few little pointers can take your loaf from great to absolutely legendary. This is where we move past just following directions and start understanding *why* we do things, which is the mark of a good home baker! You’re looking for tender, pull-apart slices, and it often comes down to how you handle those additions.
Baking the perfect loaf is about confidence, and these little tricks are here to boost yours! If you’re interested in other recipes that focus on that wonderfully delicate crumb, you might adore my approach to fluffy bakery-style scones.
Ingredient Notes and Substitutions for Raisin Bread
Let’s talk about those raisins first. Grandma always said, “Don’t put thirsty raisins in thirst-quenching dough!” That’s why we plump them first. Quickly soak them in hot water for about 10 minutes, then drain them really well and blot them dry with a paper towel. This stops them from sucking moisture right out of your beautiful bread dough as it bakes.
Now, about that softness—if you want to lean into an even silkier texture that feels closer to a Japanese milk bread, swap out the water in the wet ingredient mix for whole milk. It adds fat and richness which really enhances that “soft baked bread” feeling. Also, remember that second egg wash in the instructions? That’s key for that shiny, appealing finish on your classic raisin loaf!
Serving Suggestions for Your Homemade Raisin Bread
Now that you’ve baked this gorgeous, fragrant loaf, the real fun starts: eating it! Honestly, my favorite part of any baking project is the first slice. Since this sweet raisin bread has so much built-in flavor from the cinnamon swirl and the plump raisins, it really doesn’t need much fuss at all. But if you want to elevate those cozy mornings, I have a few ways I love to serve it up around my house.
When the bread is still slightly warm (but not so hot that it falls apart!), a thick slice slathered with real, good-quality butter that just melts right into those nooks and crannies is perfection. It’s simple, comforting, and hits every note you want from a raisin bread for breakfast.
For something a little richer, especially on a chilly weekend morning, try these pairings:
- Cream Cheese Delight: Whip up some cream cheese with a tiny drizzle of maple syrup—the slight tang is divine against the spice.
- Nut Butter Power: A hearty spread of almond or walnut butter adds a welcome crunch and protein boost.
- Quick French Toast: This bread makes the absolute best French toast. Because it’s so rich, you don’t need much batter! Just dip quickly and fry it up. Serve it with a side of my old-fashioned banana pudding for the ultimate indulgence.
Even plain, toasted until just golden, this bread fills the house with that amazing warmth. It’s seriously good enough to replace dessert!
Storage and Reheating Instructions for This Classic Raisin Loaf
One of the best things about making a big, beautiful loaf of homemade yeast bread like this is knowing you have breakfast sorted for days! This classic raisin loaf stores beautifully, provided you treat it right. Because it’s so rich in butter and sugar, it actually stays softer longer than leaner white bread, but we still need to keep the crust happy.
Once the bread is completely cool—and I mean completely cool, so we don’t trap any steam and make it sweaty—wrap it tightly. I prefer a couple of layers of plastic wrap followed by a layer of aluminum foil, or just toss it into a large zip-top bag, squeezing out all the air you can. It should sit happily on your counter for about three to four days.
If you need it to last longer, freezing is your friend! Slice the entire loaf first before wrapping it well. This way, you can pull out just one or two slices at a time without having to thaw the whole thing. Frozen bread is fantastic because it lasts for about three months easily. Need some jam to go with your leftover slices? My recipe for easy strawberry freezer jam is perfect!
Now, let’s talk reheating, because nobody wants cold, dry sweet bread in the morning!
Reviving That Fresh-Baked Warmth
If you’re taking a slice directly from the counter, just a quick trip into the toaster is usually all it needs to crisp up the edges nicely. But if you’re pulling one from the freezer, you need a little extra love to bring that soft texture back.
My favorite method for a truly revived slice is the oven or toaster oven. Lay the slice flat on a baking sheet and warm it at about 325°F for maybe 5 to 7 minutes. This gently warms the interior and softens the butter in the raisin swirl without making the outside tough. You get that soft, warm, fresh-baked feeling again instantly! Just be careful not to go too high or too long, or you’ll end up with raisin toast instead of warm, buttery raisin bread.
Frequently Asked Questions About Making Raisin Bread
I always get so many great questions when people try this recipe for the first time, and honestly, that’s just wonderful! It means you’re baking and experimenting, which is exactly what HearthBite is all about. We want this homemade raisin bread to be reliable for you, whether you’re a seasoned baker or just starting out. Here are some of the burning questions I hear most often about getting that perfect loaf every time.
If you need something fast after you’re done baking your bread, make sure you check out my collection of quick and easy dinner recipes—sometimes you bake bread, and then you just need dinner on the table fast!
Can I use a bread machine for this easy raisin bread recipe?
That’s a great question since so many people love the convenience of a bread machine! Now, since this is a true no knead bread recipe, it relies on that 12- to 18-hour rest on the counter to develop flavor. Most bread machines won’t allow for such an extended period. However, you can absolutely use the ‘Dough’ cycle on your machine just to mix everything up and handle the initial kneading part for you! Stop the cycle before the final bake, gently remove the now-mixed dough, shape it with that beautiful cinnamon swirl, put it in your loaf pan, and let it proof on the counter before baking it the regular way in your oven. That way, you get the ease of mixing with the superior crust of an oven-baked artisan raisin bread!
What if I want a raisin bread without cinnamon?
You totally can skip it! If you’re craving a plainer but still sweet classic raisin loaf, maybe you only have dried currants, or perhaps you just want that pure buttery raisin flavor, you are welcome to leave out the cinnamon entirely. Just make sure you reduce the amount you leave out of the dough base (1 tablespoon) and the swirl filling (1 tablespoon). Instead of cinnamon, you could try adding a teaspoon of ground cardamom or even some orange zest for a brighter flavor profile! It’s still going to be a wonderfully soft baked bread!
Estimated Nutritional Information for Raisin Bread
When you’re baking something this wonderfully comforting and sweet, sometimes it’s best not to think too hard about the numbers, right? But I know many of you are curious about what goes into that beautiful, rich loaf. Since every single measurement you use—especially how much butter makes it into that swirl—can change things, please look at this as a helpful guide rather than strict dietary facts. This information is based on the recipe ingredients provided. If you’re looking for lighter ideas that are still delicious, check out my guide to healthy lunch recipes!
This nutrition breakdown is estimated for one generous slice of the loaf, assuming you’ve portioned out the whole thing into about 14 slices. It really shows you how rich this homemade raisin bread is, especially with the added sugars in the swirl!
- Serving Size: 1 slice
- Calories: Approximately 240
- Fat: About 5g (mostly from that delicious butter!)
- Carbohydrates: Around 45g
- Sugar: This clocks in around 14g per slice because of the granulated and brown sugar base.
- Protein: Close to 5g
- Saturated Fat: Roughly 3g
Take these numbers with a grain of salt, or maybe a pinch of cinnamon sugar! The beauty of baking from scratch is that you control every variable. If you really want to lighten it up, you could reduce the brown sugar in the swirl slightly, though I have to warn you, it might affect how gooey that center gets!
Share Your Homemade Bread Journey
Baking is always better when it’s shared, isn’t it? Making this cinnamon raisin bread has brought so much joy to my kitchen, and now that you’ve brought that warm, beautiful swirl loaf into yours, I want to hear all about it!
This is the cornerstone of HearthBite—creating delicious, reliable food that connects us. Did your dough rise perfectly? Did you go for the artisan crust or stick to the softer loaf pan? Did you immediately gobble up the heel of the loaf while it was still warm? Spill all the details! Leave a rating below or drop a comment telling me how your first slice tasted. Sharing your experience helps others feel confident stepping up to bake their own homemade raisin bread.
And please, please tag me if you share photos on social media! Seeing your beautiful, golden loaves reminds me every day that we are all part of one big, comforting kitchen community. Happy baking, friend, and enjoy every moment of that wonderful, aromatic raisin bread for breakfast!
If you loved this, don’t forget to explore my other incredibly easy breakfast recipes for your next cozy morning!
PrintSoft No-Knead Cinnamon Raisin Bread
Bake this soft, homemade cinnamon raisin bread using a simple no-knead method. It develops a beautiful artisan crust while keeping the interior fluffy, perfect for your cozy breakfast.
- Prep Time: 20 min
- Cook Time: 35 min
- Total Time: 13 hours 50 min
- Yield: 1 loaf 1x
- Category: Breakfast
- Method: No-Knead Baking
- Cuisine: American
- Diet: Vegetarian
Ingredients
- 3 cups all-purpose flour
- 1 teaspoon instant yeast
- 1 teaspoon salt
- 1 tablespoon ground cinnamon
- 1 cup warm water (about 105-115°F)
- 1/2 cup granulated sugar
- 1 large egg
- 1/4 cup unsalted butter, melted
- 1 1/2 cups raisins, plumped
- 1/2 cup brown sugar, packed (for swirl)
- 1/4 cup butter, softened (for swirl)
- 1 tablespoon ground cinnamon (for swirl)
- 1 egg, beaten (for egg wash)
Instructions
- In a large bowl, whisk together the flour, instant yeast, salt, and 1 tablespoon of cinnamon.
- In a separate bowl, mix the warm water, granulated sugar, egg, and melted butter. Pour the wet ingredients into the dry ingredients and mix with a wooden spoon until just combined into a shaggy dough. Do not knead.
- Cover the bowl tightly with plastic wrap and let it rest at room temperature for 12 to 18 hours, or until the dough has doubled and is bubbly.
- While the dough rests, prepare the filling: In a small bowl, mix the brown sugar, 1/4 cup softened butter, and 1 tablespoon of cinnamon until combined into a thick paste.
- Gently turn the risen dough out onto a lightly floured surface. Gently stretch the dough into a rough rectangle, about 12×18 inches.
- Spread the cinnamon-butter mixture evenly over the dough surface, leaving a small border on one long edge. Sprinkle the plumped raisins over the filling.
- Starting from the long edge opposite the border, roll the dough tightly into a log. Pinch the seam closed.
- Fold the ends under the loaf. Gently tuck the loaf into a 9×5 inch loaf pan.
- Cover the pan loosely with plastic wrap and let the dough proof in a warm spot for 45 to 60 minutes, or until it has nearly doubled in size again.
- Preheat your oven to 450°F (232°C) with a Dutch oven inside, if using the artisan method. If using a loaf pan, preheat the oven to 375°F (190°C).
- If using a loaf pan, brush the top with the beaten egg wash. Bake for 30 to 35 minutes, or until golden brown and cooked through.
- If using the Dutch oven method, carefully place the dough (scored lightly on top) into the hot Dutch oven, cover, and bake for 20 minutes. Remove the lid and bake for another 10-15 minutes until deep golden brown.
- Remove the bread from the pan immediately and cool completely on a wire rack before slicing.
Notes
- To plump raisins quickly, soak them in hot water for 10 minutes, then drain and pat them dry before adding them to the dough.
- For the softest texture, use whole milk instead of water in the wet ingredient mix.
- This bread is excellent toasted the next day with a pat of butter.
Nutrition
- Serving Size: 1 slice
- Calories: 240
- Sugar: 14g
- Sodium: 280mg
- Fat: 5g
- Saturated Fat: 3g
- Unsaturated Fat: 2g
- Trans Fat: 0g
- Carbohydrates: 45g
- Fiber: 2g
- Protein: 5g
- Cholesterol: 25mg