
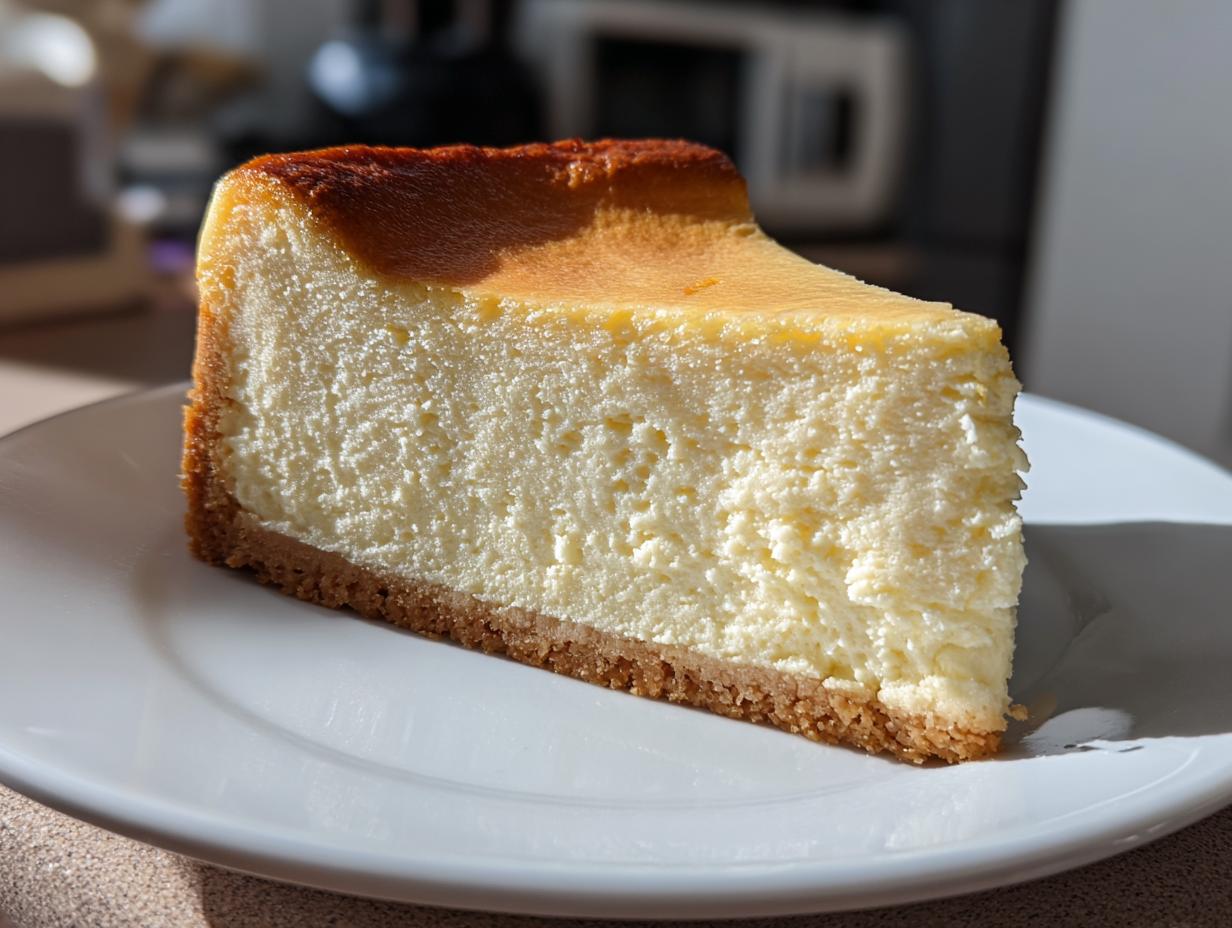
I have to tell you, there’s something magical about the first time you pull a bakery-quality dessert out of your own oven. For me, since starting HearthBite, that magic is best captured in the perfect slice of **new york cheesecake**. It’s iconic—that rich, dense, unbelievably creamy texture shouldn’t be hard to achieve, but I know so many of us have ended up with cracked, sunken disasters. Not anymore! This recipe is the blueprint I developed to finally guarantee that famously smooth, heavy, and tangy finish you expect from the best bakeries. This isn’t just a dessert; it’s a memory waiting to happen, and I want you to nail it on your first try!
- Why This New York Cheesecake Recipe is Your New Go-To
- Gathering Ingredients for Your Classic Cheesecake
- Step-by-Step Instructions for the Perfect New York Cheesecake
- Tips for the Best Cheesecake Ever: Achieving Dense Cheesecake Texture
- Variations on the Classic New York Cheesecake
- Storing and Serving Your New York Cheesecake
- Frequently Asked Questions About Homemade Cheesecake
- Nutritional Estimates for This Decadent Dessert
- Share Your Perfect New York Cheesecake Creation
Why This New York Cheesecake Recipe is Your New Go-To
So, why should you trust my method for this **new york cheesecake**? Because I obsessed over the hard parts so you don’t have to! This isn’t just another recipe; it’s your ticket to dessert perfection.
- Guaranteed **creamy cheesecake** texture thanks to the precise mixing order.
- A truly foolproof approach that delivers a stunning, **no crack cheesecake** every single time—promise!
- That authentic, rich, slightly **tangy cheesecake filling** flavor that makes it famous.
- The perfect balance of dense and velvety that makes it the **Best Cheesecake Ever**!
Gathering Ingredients for Your Classic Cheesecake
Okay, this is where we build the foundation for that amazing, authentic **new york cheesecake** flavor and texture. Please, don’t cheat on the ingredients here! The quality and, more importantly, the *temperature* of these components are responsible for keeping that filling velvety smooth and preventing lumps. Trust me, I learned the hard way that cold cream cheese makes lumpy batter, and lumpy batter leads to cracks!
Before you even start mixing, pull out your cream cheese, eggs, and sour cream. Everything needs to be sitting out on the counter for at least an hour to reach true room temperature. It makes a world of difference for that beautiful, dense cheesecake result!
For the Graham Cracker Crust
- 1 1/2 cups graham cracker crumbs (I crush mine fresh, it smells better!)
- 1/4 cup granulated sugar (just a little to sweeten the base)
- 6 tablespoons unsalted butter, completely melted
For the Tangy Cheesecake Filling
Remember: everything in this list needs to be perfectly room temperature for that luxurious, lump-free texture.
- 4 (8-ounce) packages full-fat cream cheese (This is non-negotiable for a proper dense cheesecake.)
- 1 1/2 cups granulated sugar (for that gentle sweetness)
- 1/4 cup all-purpose flour (This is our little secret stabilizer!)
- 1 teaspoon vanilla extract
- 1/4 teaspoon salt
- 1 cup sour cream, room temperature (This brings the signature tang!)
- 4 large eggs, room temperature (Added last, one by one!)
Step-by-Step Instructions for the Perfect New York Cheesecake
Alright, deep breath! While this sounds like a complicated dessert, breaking it down makes it totally manageable. Remember, the key to that tall, dense cheesecake is keeping the air *out* of the batter, which is what we focus on when mixing. If you want to dive deeper into general baking science before we start, I have a little explanation on techniques over here, like my guide on making homemade sea salt caramels—it will help you understand why mixing speed matters!
Preparing the Graham Cracker Crust and Pan
First things first, get your oven humming at 350°F (175°C). In a medium bowl, mash together those graham cracker crumbs, the small amount of sugar for the crust, and that melted butter until it looks like damp sand. Press this crust firmly and evenly into the bottom of your 9-inch springform pan. Use the bottom of a measuring cup to really pack it down, and push it about 1 1/2 inches up the sides. We bake this crust for just 10 minutes to set it, then pull it out to cool while we move onto the filling.
Now, grab that heavy-duty foil, because this is critical: Wrap the outside of your springform pan *tightly*—bottom and sides—so no water can sneak in when we set up the water bath later. I usually use three layers of foil just to be absolutely certain!
Creating the Creamy Cheesecake Filling
This is where we work to keep things smooth! Start with your room temperature cream cheese in a large bowl. Beat it until it’s truly creamy, scraping down the sides constantly. Then, slowly beat in the larger portion of sugar and the flour—mix until it’s *just* combined. Follow that by mixing in the sour cream, vanilla, and salt.
Here’s the most important part for a gorgeous **new york cheesecake**: Add the four room temperature eggs one at a time, mixing only on low speed after each addition. You want them incorporated, not whipped! Overmixing the eggs is how you introduce air, which causes the cake to rise too fast and then crack when it cools. Keep that mixer slow and steady!
Baking the New York Cheesecake with a Water Bath
Carefully pour that gorgeous filling over your cooled crust. Now, place that foil-wrapped springform pan inside a large roasting pan. Bring a kettle of water to a boil, and *carefully* pour that hot water into the roasting pan until it comes about halfway up the sides of the springform pan. This steam creates the perfect moist environment for a true **no crack cheesecake**.
Bake it for 60 to 75 minutes. You’ll know it’s almost ready when the edges look set, but if you gently nudge the oven rack, the center two or three inches still have a slight jiggle—like soft gelatin. Don’t try to bake it until the center is totally solid, or it will be dry!
The Crucial Slow Cooling Process
Don’t you dare pull it out yet! The biggest mistake people make is rapid temperature change. Once the 60–75 minutes are up, turn the oven off completely. Prop the oven door open just a tiny bit—I stick a wooden spoon in the door jam to keep it slightly ajar. Leave the **new york cheesecake** inside the cooling oven, in the water bath, for a full hour. This slow cooldown is the ultimate insurance policy against cracking and locks in that beautiful, **tall and creamy cheesecake** structure we want. After that hour, you can transfer it out to a wire rack to finish cooling on the counter before you chill it overnight.
Tips for the Best Cheesecake Ever: Achieving Dense Cheesecake Texture
When I first started baking cheesecakes, I swear every single one cracked. It felt like I was fighting the batter! I tried everything—checking the water bath, fiddling with the temperature—but it wasn’t until I focused on the *before* and *after* that I finally achieved the **Best Cheesecake Ever**—the rich, dense slice everyone craves.
It all comes down to respecting the ingredients and managing that temperature change so carefully. If you follow the water bath method above, you’re 90% of the way there, but these final secrets are what take it from good to legendary.
First, remember I stressed room temperature ingredients? That’s number one. But the number two secret? Resist the urge to substitute the cream cheese! This isn’t the time for light versions or blends. That authentic texture of a **new york cheesecake** relies on the fat content of full-fat bricks. Lighter cheeses just don’t set up the same way, and you end up with something closer to a mousse than that incredible, velvety cheesecake we are aiming for.
My biggest cracking disaster happened when I tried to rush the chilling time. I pulled it out after just four hours of refrigeration and the center collapsed slightly—it looked sad! You absolutely must let this beast chill for a minimum of six hours, but honestly, letting it set overnight is what allows that **dense cheesecake** texture to fully form and firm up. It’s worth the wait!
Now, let’s talk about serving. Getting those clean slices can be just as nerve-wracking as the bake itself! To get those perfect wedges that look like they came right from the deli case, you need a hot, sharp knife. Do you remember how we talked about cooling down from the oven? We are applying that principle here! Heat your sharpest knife under really hot water for about 30 seconds, wipe it bone dry, and then slice straight down. Wipe the knife clean, run it under hot water again, and repeat for every single cut. It keeps the filling from dragging and tearing.
If you’re dreaming of toppings, simple is often best to let that amazing texture shine. A drizzle of good quality caramel or a spread of homemade fruit sauce really highlights the richness. Since we are already talking about other comforting treats, you absolutely must check out my recipe for Southern Banana Pudding—another classic where technique makes all the difference!
Variations on the Classic New York Cheesecake
Once you’ve mastered the rich, dense magic of the true **new york cheesecake**, you can start playing around, though honestly, it’s perfect just the way it is! We want to keep that classic character, so we never mess with the base ingredients—the cream cheese, the eggs, or the essential water bath—because that structural integrity is everything.
But toppings? Decorations? Flavor whispers? That’s where you get to have fun! I think of these additions as dressing up the cake without changing its amazing personality. If you’re looking for another truly decadent bake once you’ve conquered this one, check out my recipe for the ultimate moist chocolate fudge cake—another showstopper!
Here are a few simple twists I love to try once the cheesecake is completely chilled and ready to serve:
- A Bit More Brightness: For an extra layer of tanginess, try adding the zest of one whole lemon into the filling right when you mix in the sour cream. It really brightens up that rich cream cheese, making it feel even more restaurant-quality.
- The Classic Fruit Topping: Nothing beats a simple, vibrant fruit sauce spooned right over the top—and not just before serving! I adore a fresh cherry or raspberry sauce. Make sure your sauce is cool, though; you don’t want a warm topping melting your beautiful, firm **creamy cheesecake**.
- Salted Caramel Drizzle: Sometimes simple is best, but with a salty kick? Yes, please! A homemade salted caramel sauce drizzled artfully across the top of the chilled cake adds just the right contrast to the sweetness underneath. It really screams indulgence.
- Chocolate Swirl: If you want to get slightly bolder, pour about 1/3 of your batter into the pan, then pour a small amount of melted bittersweet chocolate (about 4 ounces mixed with a teaspoon of oil) over the top. Layer the remaining filling on top, and run a knife through it gently a couple of times to create a beautiful swirl effect. It won’t impact that signature **dense cheesecake** texture too much!
The key with all these variations is to add them *after* the cheesecake is fully baked and cooled—the baked structure needs to stay untouched during the water bath baking process!
Storing and Serving Your New York Cheesecake
We finally made it! Your beautiful, perfectly smooth **new york cheesecake** is baked, cooled slowly, and now it needs to set up. This is probably the hardest part of the whole process because, honestly, I just want to slice into it right now! But you absolutely cannot rush this final stage if you want that incredible, legendary slice.
The magic truly happens in the cold. For the best **dense cheesecake** texture—the one that feels firm when you cut it but melts like velvet in your mouth—you have to chill it. I insist that you cover it loosely with plastic wrap (don’t let it touch the top surface, of course!) and refrigerate it for a minimum of six hours. But if you can hold out until the next morning? Do it. Overnight chilling really lets that creamy structure settle perfectly.
When it comes to leftovers, which I highly doubt you’ll have much of, refrigeration is the way to go. Keep it covered in the springform pan base or transferred carefully to an airtight container. It keeps wonderfully well for about five days, which is great because sometimes having a slice of cold cheesecake for breakfast is exactly what you need!
Now, about reheating? Because this is a true baked cheesecake, it really wants to be served chilled or at cool room temperature. Trying to heat a slice of cheesecake often ends up with a soggy crust and a weeping filling, so I actually don’t recommend reheating it at all. Just pull your chilled slice out about 20 to 30 minutes before you plan to eat it so it gets that perfect serveable temperature. This allows the flavors to bloom a bit without compromising that beautiful texture you worked so hard to achieve!
And remember that trick I shared earlier for slicing? It pays off most when the cake is perfectly chilled. Get that knife hot, wipe it dry, and watch those slices come out clean, showing off every layer of that fantastic **homemade cheesecake**!
Frequently Asked Questions About Homemade Cheesecake
I know sometimes even the best directions can leave a little question mark hanging over your head, especially when you’re trying to master something tricky like this iconic **new york cheesecake**. Don’t worry, I’ve answered the questions I always get asked when friends tackle this recipe for the first time. If you still have burning questions on **how to make cheesecake**, drop me a comment below! And if you need something faster this week, I always keep my list of quick, easy dinner recipes updated.
Can I skip the water bath when making this new york cheesecake?
Oh goodness, no! I really, truly wish you could, because wrapping that pan in foil is such a hassle, right? But here’s the thing: the water bath is non-negotiable if you want that signature ultra-smooth, rich, and creamy cheesecake. It creates steam, which gently cooks the filling evenly. If you skip it, you risk those terrible cracks because the edges cook way faster than the center. This step is the best insurance policy for success!
How do I ensure my Tangy Cheesecake Filling is perfectly smooth?
This goes right back to temperature and patience during the mixing phase! Even if your ingredients *look* softened, make sure they are truly soft to the touch. When you start beating the cream cheese, really give it a good 2-3 minutes, scraping the bowl down, until it’s genuinely silky before you add *anything* else. If you start with a smooth base, adding the granulated sugar and the flour won’t make it lumpy. And never, ever beat the eggs vigorously—just low and slow until they disappear.
Can I use a different crust besides the Graham Cracker Crust?
You totally can, though the classic **Graham Cracker Crust** is what gives that quintessential New York flavor profile! If you run out of graham crackers, you have a few great options. Shortbread cookies make an amazing, slightly buttery crust that works wonderfully. Or, if you want to lean into a more spiced profile, crushed gingersnap cookies are incredible underneath that rich filling!
Just remember the ratio stays about the same—you need enough crushed cookie base to soak up the 6 tablespoons of melted butter and form a solid layer. Any swap you make will change the final flavor slightly, but it won’t stop you from having a delicious, creamy cheesecake!
Nutritional Estimates for This Decadent Dessert
I know some of you are tracking macros or just curious about what you’re diving into with this rich slice of heaven! This **new york cheesecake** is certainly a treat—we aren’t hiding that fact!
I want to be super clear that these numbers are just estimates based on the full recipe divided into 12 equal servings. What you end up with can vary wildly based on the specific brands of cream cheese or sour cream you grab, so take these as a good guideline, not gospel.
When you are making a **classic dessert** like this, sometimes you have to accept that the richness is the point, but seeing the numbers laid out helps keep things in perspective. Here is the general breakdown per slice:
- Serving Size: 1 slice
- Calories: 450
- Fat: 30g
- Saturated Fat: 18g
- Carbohydrates: 38g
- Sugar: 35g
- Protein: 8g
- Cholesterol: 120mg
It’s certainly a **decadent dessert**, no doubt about it! But honestly, when you get that perfect, **velvety cheesecake** texture, who is looking at the label anyway?
Share Your Perfect New York Cheesecake Creation
And there you have it—the very best roadmap for making a truly authentic **new york cheesecake** right in your own kitchen! You’ve conquered the water bath, you respected the slow cooling, and now you have this masterpiece waiting to be shared.
I pour my heart into these recipes, and I genuinely want to know how it turned out for you! Did you finally achieve that famous dense, velvety texture without a single crack? Please don’t leave me hanging! Head down to the comments section below and leave a rating and a note about your success. Hearing from you makes all the testing and perfecting worth it.
If you snapped a picture of your gorgeous slice, I would absolutely love to see it! Tag me over on social media so I can celebrate your success. It’s moments like these, sharing a classic comfort that fills the house with that incredible, rich aroma, that HearthBite is all about—connecting us through good food. Remember, every moment around the table is a memory in the making. If you’re looking for more family favorites, swing by my collection of comfort food recipes, and happy baking!
And if you’re still dreaming about that perfect slice, check out how others achieved their stunning results over at this stunning recipe guide for even more inspiration!
PrintThe Ultimate Foolproof New York Cheesecake: Rich, Dense, and Creamy

Create the iconic, bakery-style New York Cheesecake at home. This recipe delivers a rich, dense, and tangy filling with a classic graham cracker crust, using simple techniques to guarantee a smooth, no-crack finish.
- Prep Time: 30 min
- Cook Time: 75 min
- Total Time: 8 hours 45 min
- Yield: 12 servings 1x
- Category: Dessert
- Method: Baking
- Cuisine: American
- Diet: Vegetarian
Ingredients
- 1 1/2 cups graham cracker crumbs
- 1/4 cup granulated sugar (for crust)
- 6 tablespoons unsalted butter, melted
- 4 (8-ounce) packages full-fat cream cheese, softened to room temperature
- 1 1/2 cups granulated sugar (for filling)
- 1/4 cup all-purpose flour
- 1 teaspoon vanilla extract
- 1/4 teaspoon salt
- 1 cup sour cream, room temperature
- 4 large eggs, room temperature
Instructions
- Prepare the crust: Preheat your oven to 350°F (175°C). Mix graham cracker crumbs, 1/4 cup sugar, and melted butter. Press the mixture firmly into the bottom and 1 1/2 inches up the sides of a 9-inch springform pan. Bake for 10 minutes. Remove and let cool while you prepare the filling.
- Prepare the water bath: Wrap the outside of the springform pan tightly with heavy-duty aluminum foil, covering the bottom and sides completely to prevent water from leaking in. Place the foil-wrapped pan inside a larger roasting pan.
- Make the filling: In a large bowl, beat the softened cream cheese with an electric mixer until completely smooth. Scrape down the sides of the bowl.
- Gradually beat in the 1 1/2 cups of sugar and the flour until just combined. Mix in the vanilla extract and salt.
- Beat in the sour cream until smooth. Add the eggs one at a time, mixing on low speed after each addition until just incorporated. Do not overmix the batter once the eggs are added.
- Pour the filling over the cooled crust in the springform pan.
- Place the roasting pan with the cheesecake into the oven. Carefully pour hot water into the roasting pan until the water reaches about halfway up the sides of the springform pan. This water bath creates steam for a creamy, no-crack cheesecake.
- Bake for 60 to 75 minutes. The edges should look set, but the center 2-3 inches should still jiggle slightly when gently nudged.
- Turn off the oven, but leave the cheesecake inside with the oven door propped open slightly (use a wooden spoon). Let it cool slowly in the water bath for 1 hour. This slow cooling prevents cracking.
- Remove the cheesecake from the water bath and foil. Let it cool completely on a wire rack at room temperature for about 1 hour.
- Chill: Cover the cheesecake loosely and refrigerate for at least 6 hours, or preferably overnight, before serving for the best dense cheesecake texture.
Notes
- Use room temperature ingredients for the filling; this prevents lumps and ensures a smooth, velvety cheesecake texture.
- Do not substitute the heavy cream cheese for light versions; full-fat cream cheese is essential for the authentic rich, dense New York style.
- To achieve clean slices, run a thin, sharp knife under hot water, wipe it dry, and then slice. Repeat for every cut.
Nutrition
- Serving Size: 1 slice
- Calories: 450
- Sugar: 35g
- Sodium: 350mg
- Fat: 30g
- Saturated Fat: 18g
- Unsaturated Fat: 12g
- Trans Fat: 0.5g
- Carbohydrates: 38g
- Fiber: 1g
- Protein: 8g
- Cholesterol: 120mg