
There is nothing quite like the smell of a truly spectacular homemade dessert filling your kitchen, is there? It instantly takes me back to my childhood—the smell of my grandmother’s kitchen in Ohio, where every holiday centered around her perfect apple pie. I know baking a classic apple pie from scratch can feel intimidating. So many recipes promise perfection but end up giving you either a soggy bottom or apples that taste like mush! But I promise you, setting aside those fears is worth it. Why not start with delicious comfort food recipes like this one?
This recipe isn’t just another iteration; it’s the ultimate classic that delivers that buttery, flaky double crust you dream about and a filling that is perfectly spiced and tender, never watery. After years of tweaking my grandmother’s notes, I’ve created a foolproof method for an extraordinary meal, perfect for making your own cherished memories around the table.
- Why This Classic Apple Pie Recipe is Your New Family Favorite Dessert
- Gathering Ingredients for Your Homemade Apple Pie
- Step-by-Step Instructions for the Perfect Apple Pie
- Tips for Success When Making Classic Apple Pie
- Variations on the Traditional Dessert Apple Pie
- Serving Suggestions for Your Homemade Dessert
- Storage and Reheating Instructions for Apple Pie
- Frequently Asked Questions About Baking Apple Pie
- Nutritional Estimates for This Comfort Food Baking Classic
Why This Classic Apple Pie Recipe is Your New Family Favorite Dessert
I get it—the world is full of dessert recipes, but so many fall short when it really matters, like Thanksgiving dinner! This Classic Apple Pie Recipe cuts through all the noise because it solves the two biggest problems: mushy apples and a pale, soft crust. My promise to you is that this is far from just another recipe; it’s a tested, reliable approach that guarantees you a true Family Favorite Dessert every single time.
When you use my method, you’ll achieve that Perfect Apple Pie you’ve always seen in magazines. We’re not messing around with guesswork here. We focus on technique so you can serve something truly extraordinary!
Achieving the Ultimate Flaky Pie Crust
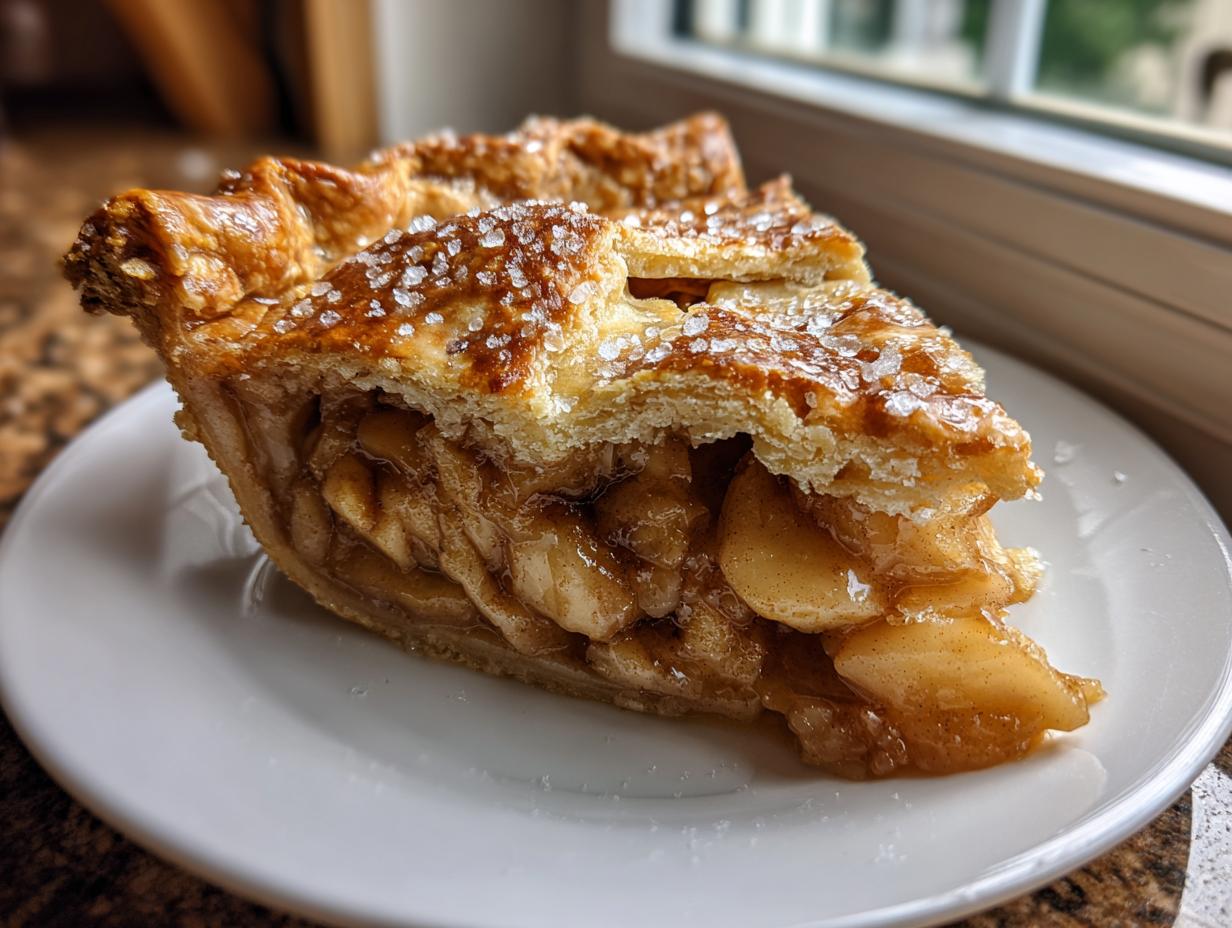
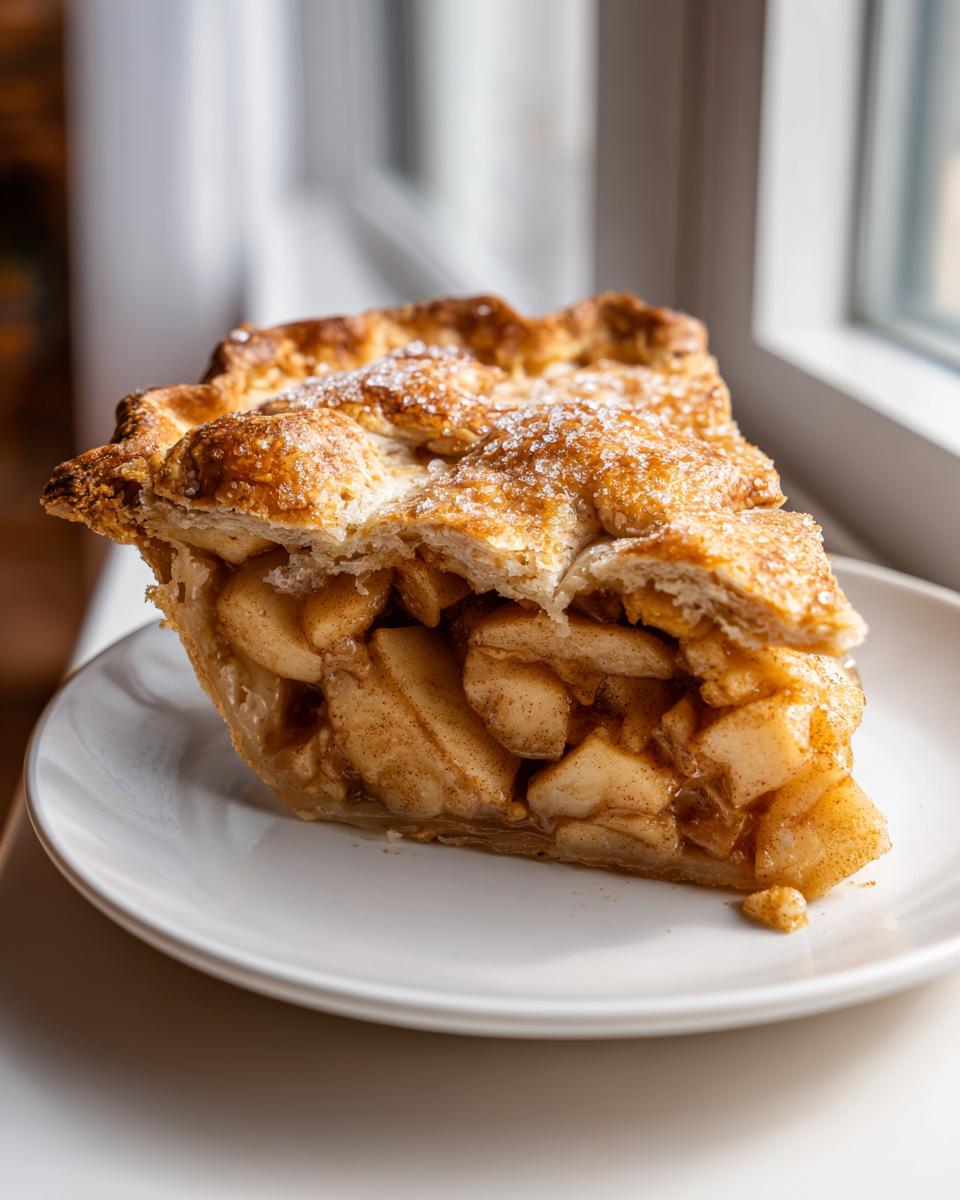
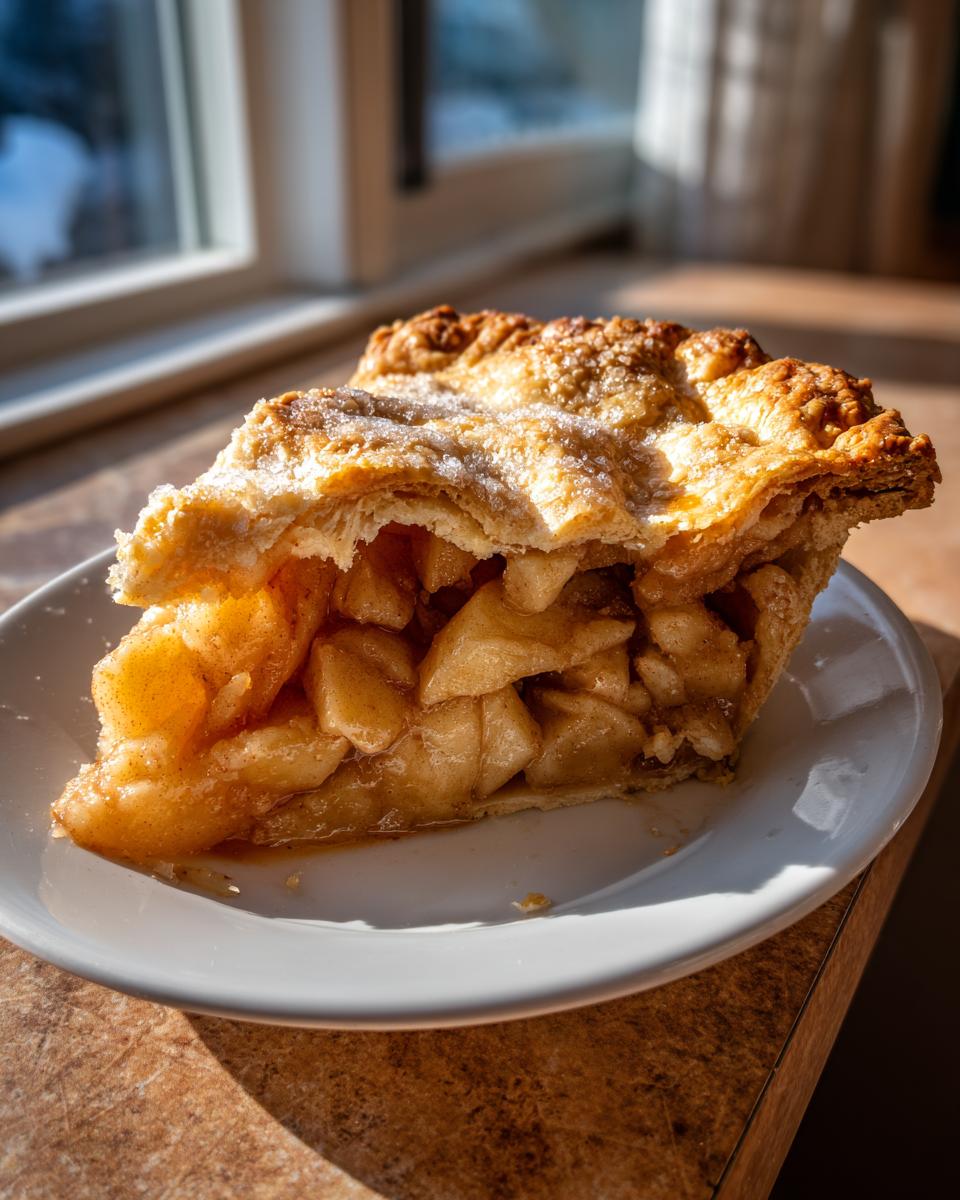
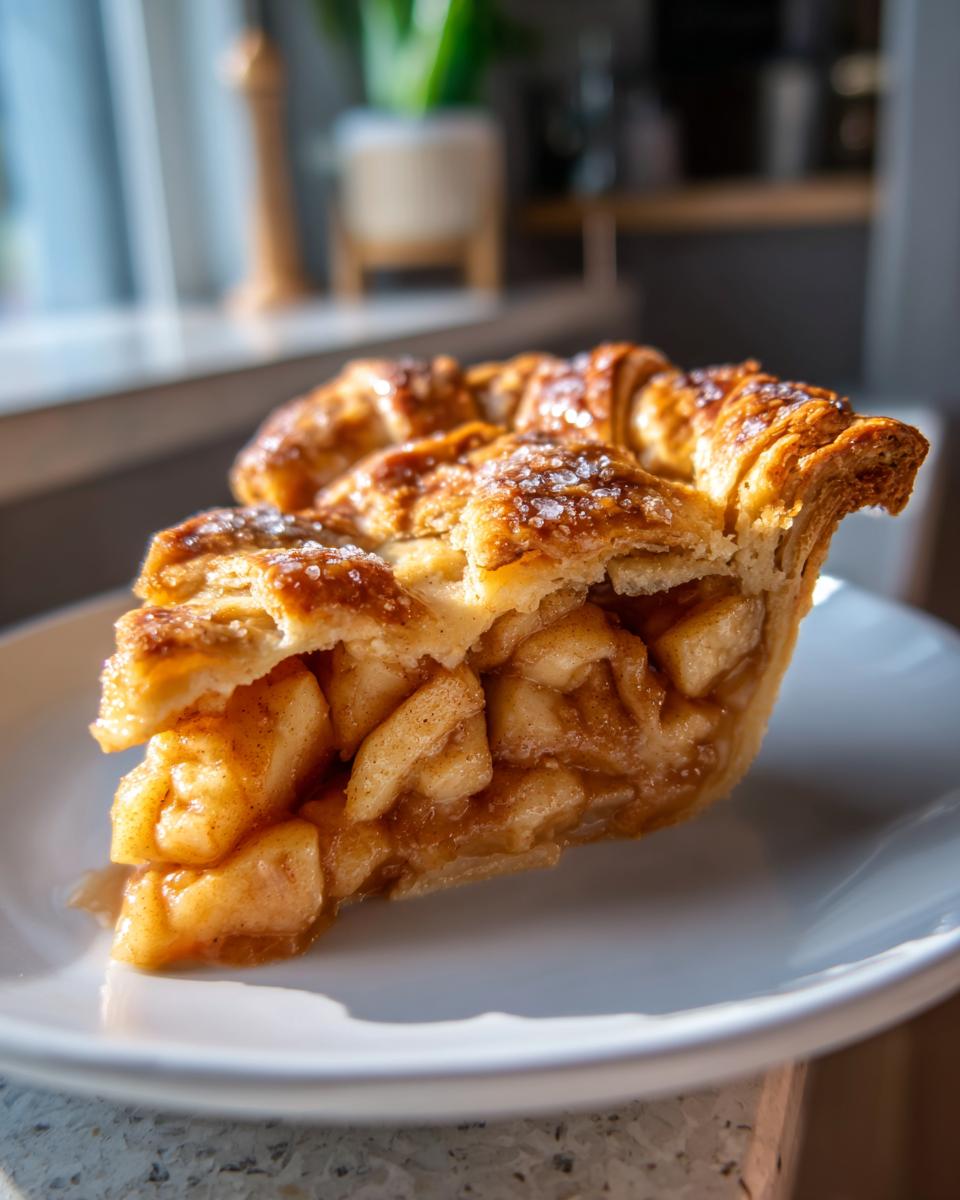
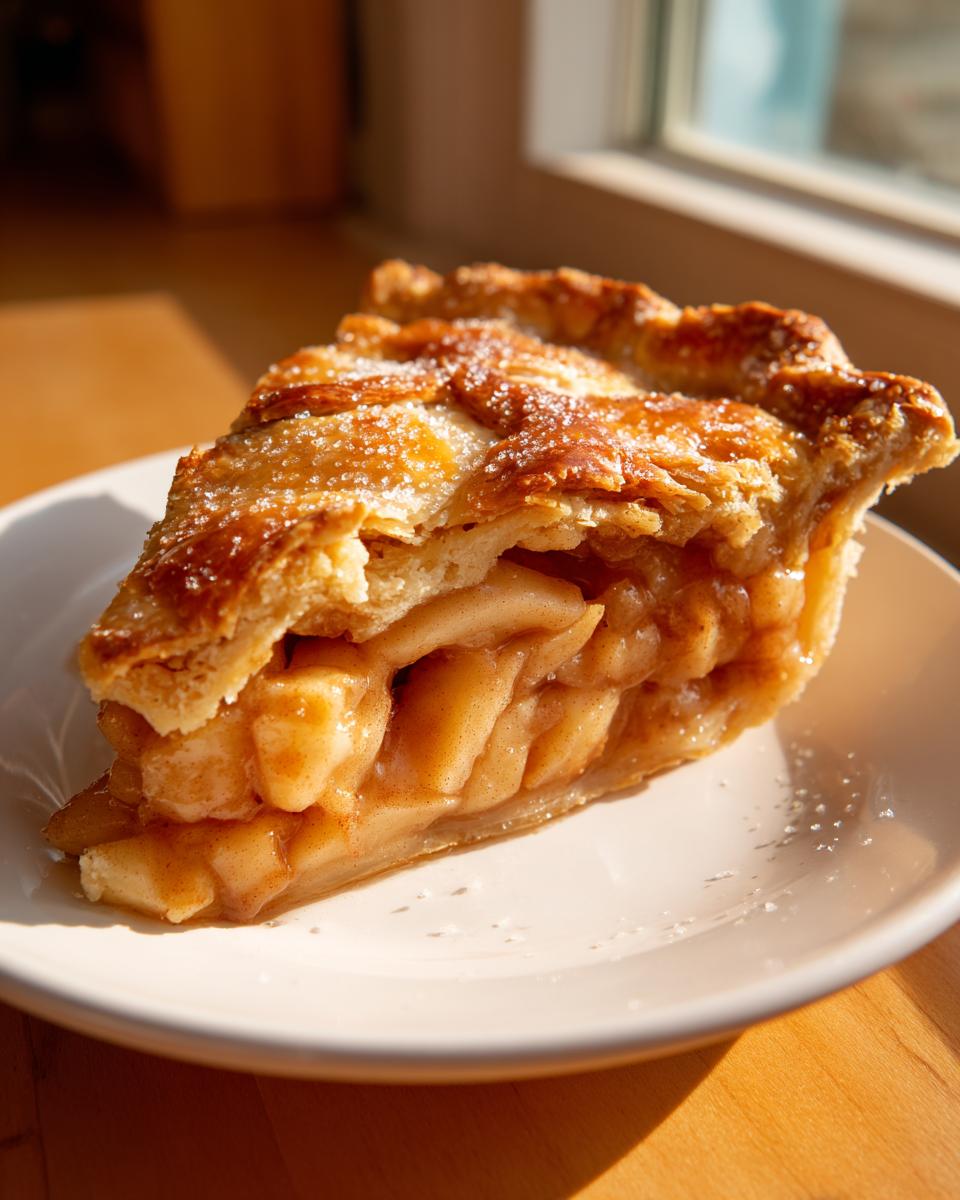
The best part of any apple pie? That shatteringly crisp, buttery crust, of course! My secret for achieving that unbelievable Flaky Pie Crust is all about temperature control. Seriously, don’t skip this part, okay? You must use butter cut into cubes that is stone-cold, right from the fridge. Cold butter hitting a hot oven creates those tiny pockets of steam that puff up the dough leaves we all adore.
If your kitchen is hot, I even pause halfway through mixing the crust and pop the dough back in the fridge. It’s all about keeping things icy! This dedication to cold ingredients is what makes our double crust truly lift off the plate.
The Secret to the Best Apple Pie Filling
The number one way to ruin a beautiful crust is by filling it with watery fruit juice. Nobody wants a soupy mess! That’s why we are tossing the apples with the sugar and flour early.
This step, which seems simple, lets the apples release some of their moisture *before* they even touch the dough. We want slightly tender apples, not stewed ones! The result is the Best Apple Pie Filling—thick, beautifully spiced with cinnamon and nutmeg, and perfectly set after baking. It keeps that bottom crust delightfully crisp, just how a classic should be. For more cozy treats, check out my recipe for old-fashioned southern banana pudding!
Gathering Ingredients for Your Homemade Apple Pie
Okay, time to get organized! Having all your components ready before you start is the key to smooth Homemade Apple Pie success. We’re making a classic American dessert here, and the apples matter! I insist on using firm, tart apples like Granny Smith Apple Pie apples because they hold their shape when baked, giving you those perfect tender slices instead of soup!
We’ll break this down into two parts: the amazing crust and the sweet, spiced filling that goes right inside. Make sure your butter is rock solid for the dough, and have everything else measured out. Trust me, when you see how simple the list is, you’ll feel even more confident about baking this from scratch!
If you want to practice your apple chopping skills separately first, go make some easy baked apples—it’s a great flavor warm-up!
- For the Flaky Pie Crust (This makes two crusts!):
- 2 1/2 cups all-purpose flour
- 1 teaspoon salt
- 1 cup (2 sticks) cold unsalted butter, cut into cubes
- 1/2 cup ice water, plus you might need a tiny splash more
- For the Best Apple Pie Filling:
- 6 large Granny Smith apples, peeled, cored, and sliced 1/4-inch thick
- 1 cup granulated sugar
- 1/4 cup packed light brown sugar
- 1/4 cup all-purpose flour (to thicken!)
- 1 teaspoon ground cinnamon
- 1/4 teaspoon ground nutmeg
- 1/8 teaspoon ground allspice
- 1 tablespoon lemon juice
- 1 large egg, beaten with 1 teaspoon water (this is for the shiny egg wash)
- 1 tablespoon coarse sugar for sprinkling
Step-by-Step Instructions for the Perfect Apple Pie
Alright, let’s get down to business! Making this apple pie is a two-part performance: the crust and the filling. We need to start with the foundation, which means getting that dough nice and cold before we even think about rolling it out. Remember that the chilling time is not optional; it’s where the magic happens for that flaky texture.
Once the dough is chilling, we toss those lovely apples. Once everything is prepped, we move into assembly. We bake it hot first to set the crust, then drop the temperature slightly to gently cook the fruit all the way through. Don’t worry about rushing the cooling step at the end—that’s crucial for a clean slice later!
Making the Flaky Pie Crust from Scratch
Grab one of those chilled disks of dough and get it onto a lightly floured counter. Roll it out gently until you have about a 12-inch circle. Now, you have to carefully ease this into your 9-inch pie plate. Don’t stretch it; just support it! Trim the edges, leaving about an inch hanging over the side—that’s what we use to seal it up tight later.
Get that bottom crust tucked into the fridge while you mix up the filling. It’s all about keeping those little bits of butter frozen!
Assembling and Baking Your Apple Pie
Now pile those spiced, beautifully coated apples right into the unbaked bottom crust. Mound them high in the middle; they settle down while they cook! Roll out the second disk for the top of this glorious Double Crust Pie.
Place the top layer on, crimp those edges together so they seal up tight—no escaping steam allowed except through the vents you cut! Brush it all over with that egg wash and sprinkle on the coarse sugar for sparkle. Bake at 425°F for 15 minutes sharp, then immediately drop it down to 375°F for about 40 to 50 more minutes until it’s gorgeously golden. If you get some drips, don’t fret; just slide a pan underneath it!
You can find more recipes that are great for special occasions right over here, like how to make soft, chewy caramels!
Tips for Success When Making Classic Apple Pie
Getting that perfect results with a Classic Apple Pie Recipe really boils down to respecting the ingredients. Like I mentioned before, keep that butter freezing cold for the dough! However, the biggest lesson I learned the hard way was about the apples. Early on, I used soft apples—like McIntosh—and ended up with a piping hot, beautiful-looking pie that collapsed into apple sauce when cut. Wow, what a disaster that was for a Sunday dinner!
Since then, I stick religiously to Granny Smith for structure, maybe mixing in just one other firm variety for flavor complexity. It keeps the filling chunky. Also, make sure the filling is bubbling thick when you pull it out; that ensures the flour/sugar mixture has set the glaze just right—you can read more about getting that filling perfect over at The Kitchn, which inspired some of my early spice tweaks!
For future baking confidence, you absolutely must look at my guide for fluffy, bakery-style scones; the commitment to cold ingredients is the same!
Variations on the Traditional Dessert Apple Pie
Even though this classic double-crust recipe is the centerpiece of our holiday table, I totally understand sometimes you want a little something different! If you’re aiming for that textural contrast, you can easily turn this into a fantastic Dutch Apple Pie. It’s such a simple switch, honestly.
Instead of making that second crust for the top, you’re just going to whip up a quick streusel topping. Think butter, flour, sugar, and maybe some oats if you feel adventurous! That sweet, crunchy crumble perfectly balances the spiced apples and gives you an incredible Apple Crumb Pie experience. It’s less fussy than weaving a top crust, too, which is a bonus on a busy baking day!
If you want another great way to use up those apples, you have to try my recipe for moist and chewy apple brownies!
Serving Suggestions for Your Homemade Dessert
Isn’t it a joy to present the final product? This incredible Homemade Dessert begs for the perfect sidekick. Forget subtlety when it comes to apple pie! My absolute favorite way to serve it, especially when it’s still warm from the oven, is with a ridiculously big scoop of creamy vanilla bean ice cream. When that cold richness meets the warm, spiced apples, it’s pure magic.
But for a real taste that reminds me of those old-fashioned gatherings, you have to try a thin slice of sharp cheddar cheese placed right on top of your warm piece. It sounds weird, I know, but trust me, the sharp, salty bite off-sets the sweet cinnamon beautifully! If you want to make the caramels to drizzle on top, check out my caramel recipe!
Storage and Reheating Instructions for Apple Pie
Now, the anticipation is over, and you have a perfect pie! But what do you do with the glorious leftovers? Well, because we made this right—no watery filling—this apple pie is pretty hardy. You can keep it loosely covered on the counter at room temperature for maybe two full days. It doesn’t need to be chilled because of all that sugar acting as a preservative, but keeping it covered prevents it from drying out too much.
If you need to keep it longer—say, past day two—then it needs to go into the fridge. When you want a slice later, I highly recommend reheating it. Don’t microwave the whole thing; that ruins the crust instantly! Instead, pop an individual slice onto a baking sheet at about 350°F for 10 minutes. That blast of dry heat re-crisps the pastry beautifully. If you’re making something you need to save for later, check out my recipe for easy strawberry freezer jam; it’s a lifesaver!
Frequently Asked Questions About Baking Apple Pie
I know when you’re attempting a big bake like a from scratch apple pie, you’re going to have questions! That’s totally normal. Baking is fun, but it definitely involves a little bit of science, and sometimes you need that extra reassurance. I’ve gathered a few things people always ask me after they try this recipe. Don’t let these little hurdles stop you from making the pie of your dreams!
We want this to be the easiest dessert you make all year, so let’s clear up any confusion about ingredients or process. We’ll make sure your next attempt is a guaranteed success, even if you’re looking for an easy apple pie solution!
Can I use a store-bought crust for this apple pie recipe?
Oh, honey, yes, you absolutely can! While my heart sings loudest when you make the pastry by hand—you know, for that *ultimate* flakiness—this recipe works beautifully even if you skip that step. Store-bought crust is perfect when you’re in a rush, and this recipe still shines because the filling is so good.
What are the best apples for a non-soggy apple pie filling?
This is critical for avoiding that sad, runny mess! You must use firm, tart apples that hold their shape. I rely heavily on Granny Smith because they provide the perfect tartness and structure. If you want to mix in maybe two softer apples for flavor, that’s fine, but make sure the majority are firm like Granny Smith or Honeycrisp!
If you’re looking for something quick to pair with your amazing pie, check out my guide to quick and easy dinner recipes for the rest of the week!
Nutritional Estimates for This Comfort Food Baking Classic
Now, before you dive fork-first into that glorious slice, I do want to give you a quick rundown of the estimated nutritional information for this wonderful homemade dessert. Remember, since this is truly made from scratch, these numbers are just my best guess based on standard measurements—your specific butter brand, sugar type, or apple size can change things a little!
This recipe is definitely rich, as all the best comfort food baking is, but it’s made with real ingredients, which is what matters most! If you’re looking for lighter fare to balance out your week, feel free to check out my collection of healthy lunch recipes, but right now? You deserve this pie!
- Serving Size: 1 slice
- Calories: 450
- Sugar: 35g
- Fat: 25g
We’ve got 5 grams of protein and around 3 grams of fiber in there, too. Take all these numbers with a grain of salt, really! The most important thing is that every bite makes you feel cozy and connected to whatever special occasion you’re celebrating.
PrintThe Best Homemade Classic Apple Pie with Flaky Double Crust
This recipe delivers the ultimate classic apple pie, featuring a buttery, flaky double crust and a perfectly spiced, tender apple filling. It is a family favorite dessert designed to bring comfort to your table.
- Prep Time: 45 min
- Cook Time: 60 min
- Total Time: 105 min
- Yield: 8 servings 1x
- Category: Dessert
- Method: Baking
- Cuisine: American
- Diet: Vegetarian
Ingredients
- 2 1/2 cups all-purpose flour
- 1 teaspoon salt
- 1 cup (2 sticks) cold unsalted butter, cut into cubes
- 1/2 cup ice water, plus more if needed
- 6 large Granny Smith apples, peeled, cored, and sliced 1/4-inch thick
- 1 cup granulated sugar
- 1/4 cup packed light brown sugar
- 1/4 cup all-purpose flour
- 1 teaspoon ground cinnamon
- 1/4 teaspoon ground nutmeg
- 1/8 teaspoon ground allspice
- 1 tablespoon lemon juice
- 1 large egg, beaten with 1 teaspoon water (for egg wash)
- 1 tablespoon coarse sugar for sprinkling
Instructions
- Prepare the Flaky Pie Crust: In a large bowl, whisk together the 2 1/2 cups flour and 1 teaspoon salt. Cut in the cold butter using a pastry blender or your fingertips until the mixture resembles coarse crumbs with some pea-sized pieces of butter remaining. Gradually add the ice water, 1 tablespoon at a time, mixing until the dough just comes together. Do not overmix. Divide the dough in half, form each half into a disk, wrap in plastic wrap, and chill for at least 1 hour.
- Prepare the Best Apple Pie Filling: In a large bowl, combine the sliced apples, granulated sugar, brown sugar, 1/4 cup flour, cinnamon, nutmeg, allspice, and lemon juice. Toss gently until the apples are evenly coated. Let the filling sit while you roll out the bottom crust.
- Assemble the Pie: Preheat your oven to 425°F (220°C). On a lightly floured surface, roll out one disk of dough into a 12-inch circle. Carefully transfer the dough to a 9-inch pie plate. Trim the edges, leaving a 1-inch overhang.
- Fill the Pie: Pour the apple filling into the bottom crust, mounding the apples slightly in the center. Dot the top of the apples with a few small pieces of leftover butter, if desired.
- Top the Pie: Roll out the second disk of dough. Place it over the filling. Trim the top crust, leaving a 1-inch overhang. Crimp the edges of the top and bottom crusts together to seal. Cut several slits in the top crust to allow steam to escape.
- Bake: Brush the top crust with the egg wash and sprinkle evenly with coarse sugar. Place the pie on a baking sheet to catch any drips. Bake at 425°F (220°C) for 15 minutes. Reduce the oven temperature to 375°F (190°C) and continue baking for 40 to 50 minutes, or until the crust is golden brown and the filling is bubbling. If the edges brown too quickly, cover them loosely with foil.
- Cool: Let the apple pie cool on a wire rack for at least 3 hours before slicing. This allows the filling to set properly.
Notes
- For the flakiest crust, keep all ingredients, especially the butter and water, very cold.
- Use a mix of tart apples, like Granny Smith, and slightly sweeter apples for the best flavor balance.
- If you prefer a Dutch Apple Pie, skip the top crust and use a streusel topping instead.
Nutrition
- Serving Size: 1 slice
- Calories: 450
- Sugar: 35g
- Sodium: 250mg
- Fat: 25g
- Saturated Fat: 15g
- Unsaturated Fat: 10g
- Trans Fat: 0g
- Carbohydrates: 58g
- Fiber: 3g
- Protein: 5g
- Cholesterol: 60mg