
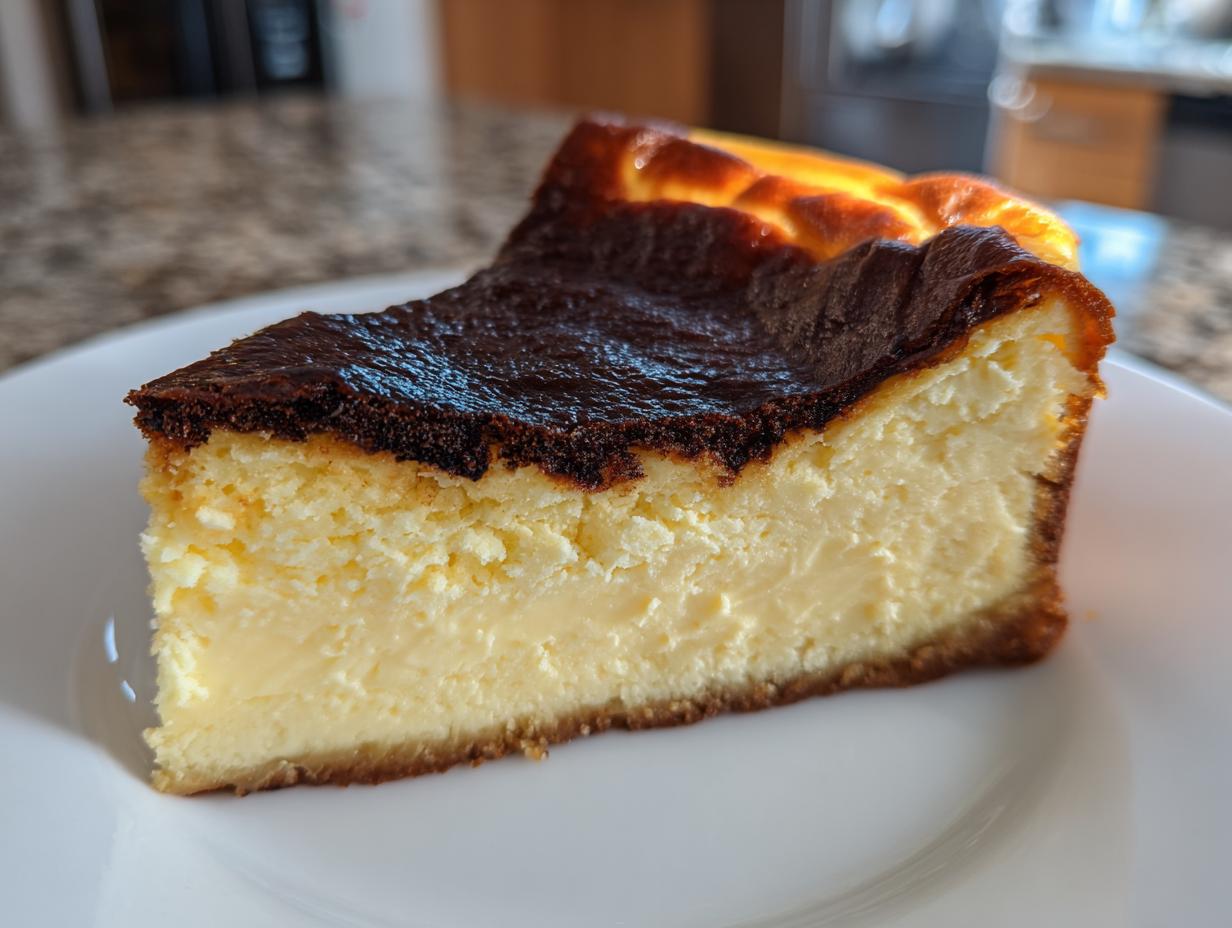
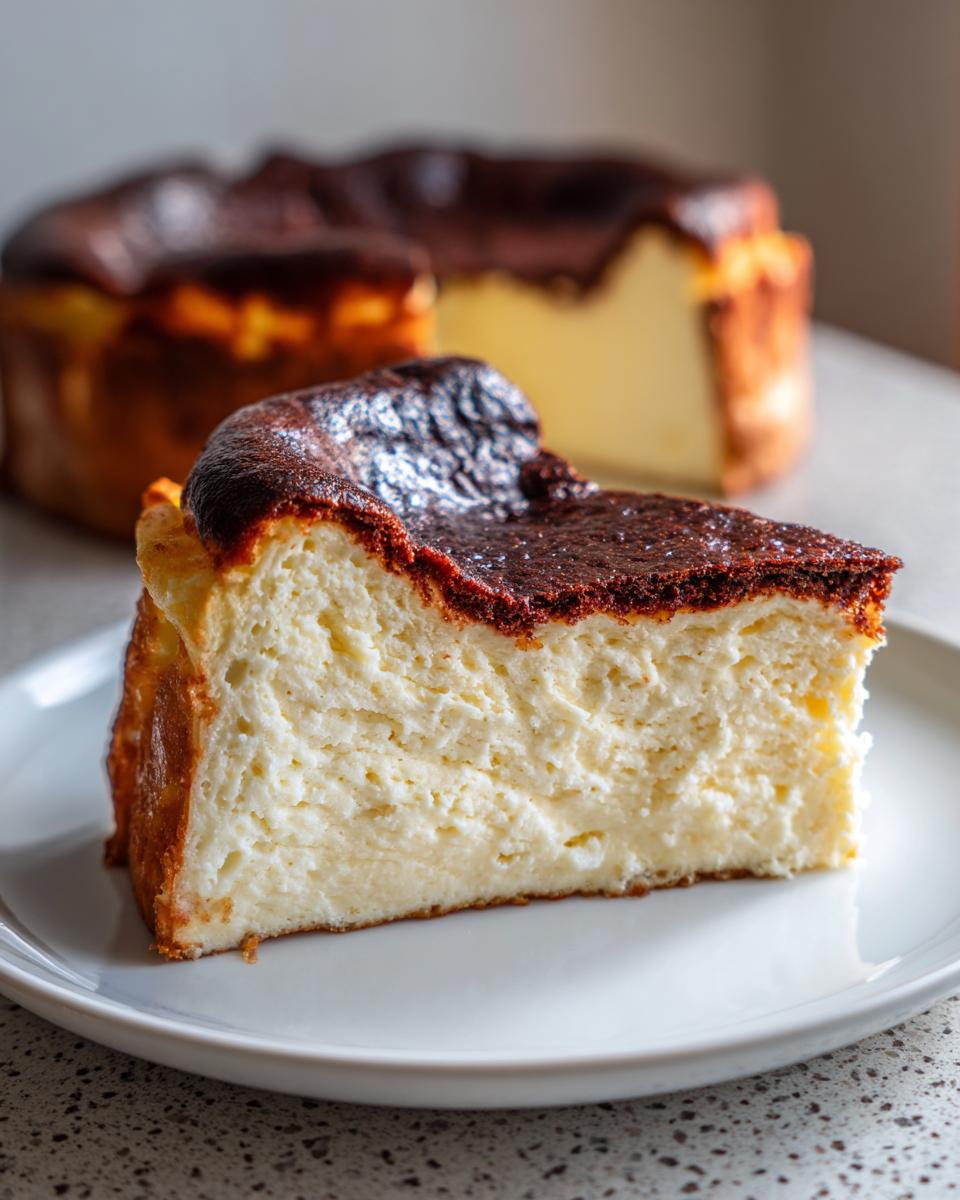
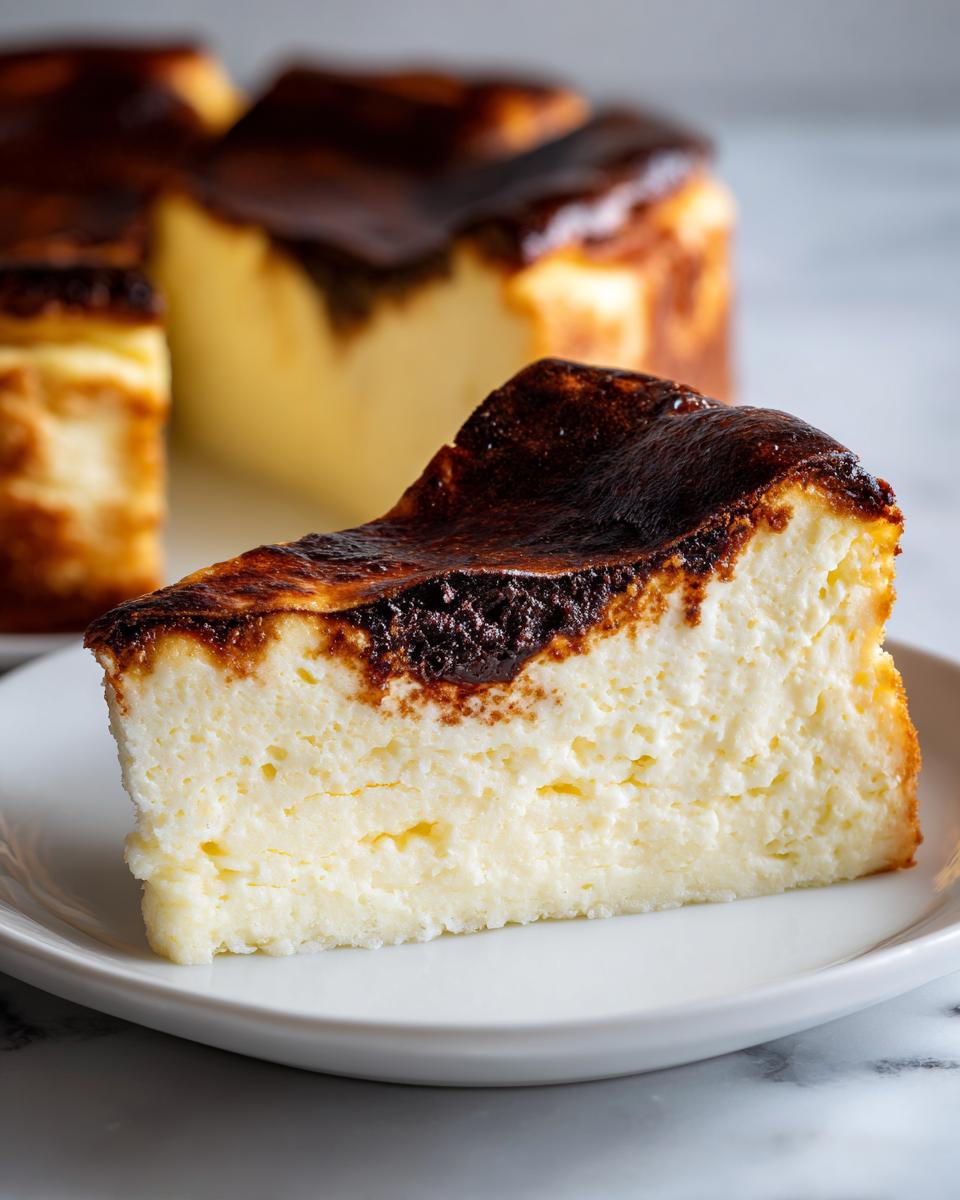
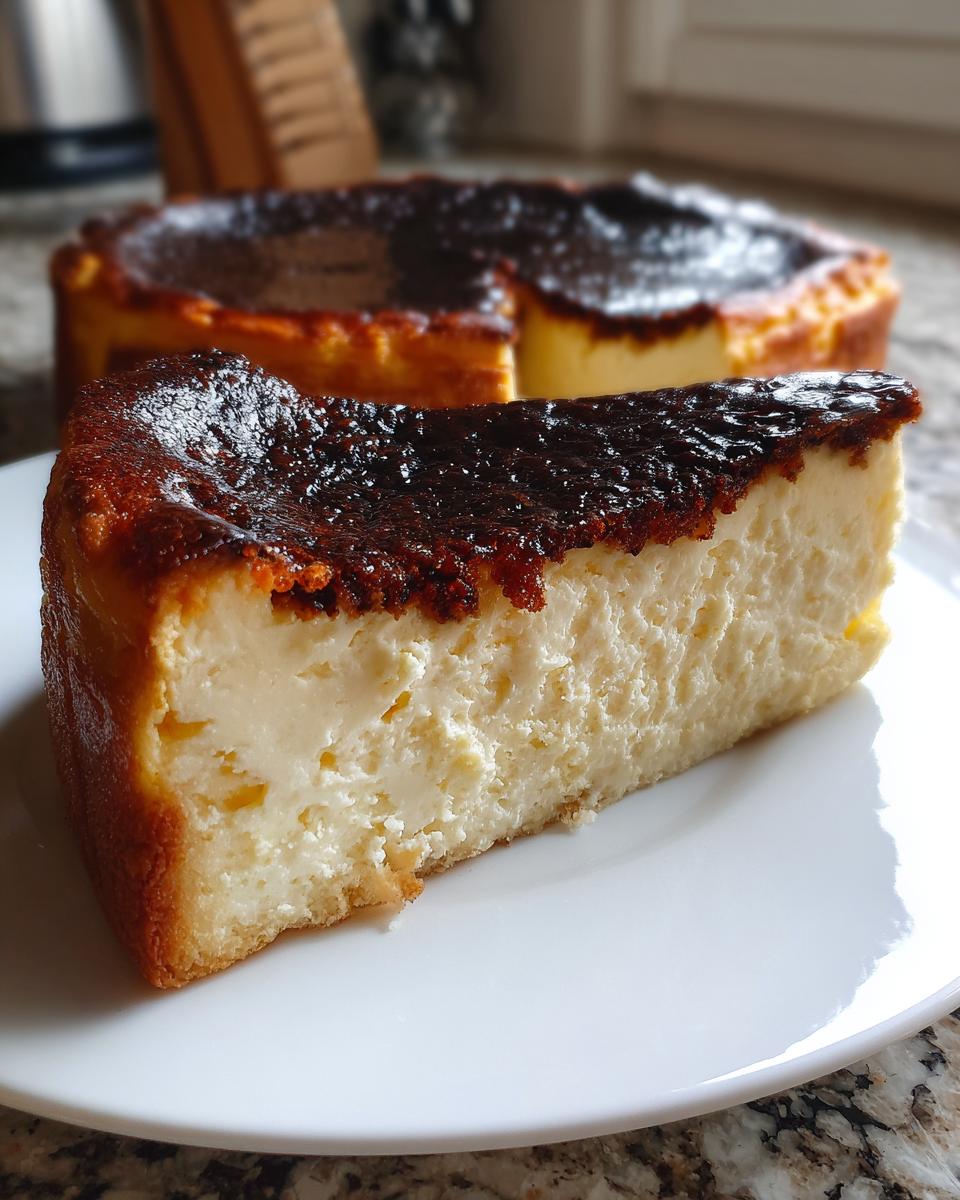
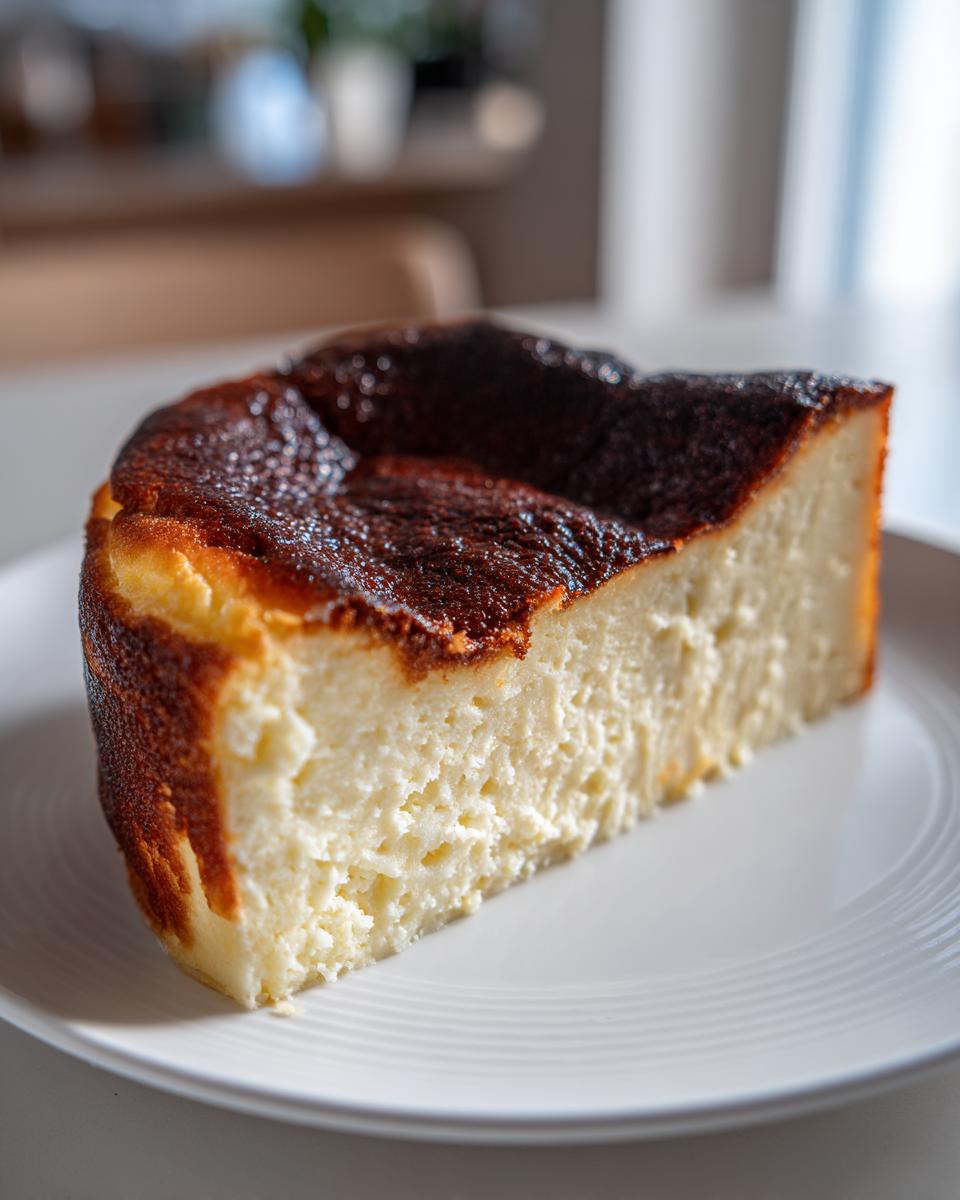
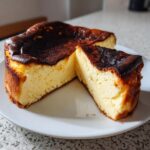
When I want to bring something truly show-stopping to a gathering—something that tastes like it took hours of complicated work—I always reach for this **basque cheesecake** recipe. Seriously, this Spanish classic is the ultimate dessert secret weapon. It looks incredibly gourmet with that deeply caramelized, almost burnt top, but I promise you, no stress is involved! We’re talking rich, velvety smooth center, absolutely zero fussy crust, and no scary water bath needed. It’s the dream: decadent, rustic, and surprisingly simple to pull off in your own kitchen. As someone who believes cooking should bring joy, making an impressive **basque cheesecake** this way feels like magic!
- Why Our Easy Cheesecake Recipe Delivers the Best Basque Cheesecake
- Gathering Ingredients for Your Basque Cheesecake
- Step-by-Step Instructions for a Creamy Basque Cheesecake
- Tips for Success with Your Burnt Basque Cheesecake
- Variations: Making a Basque Cheesecake Loaf Pan Version
- Serving Suggestions for Your Decadent Desserts
- Storage and Reheating Instructions for Basque Cheesecake
- Frequently Asked Questions About Making Basque Cheesecake
- Nutritional Estimates for This Simple Ingredient Dessert
Why Our Easy Cheesecake Recipe Delivers the Best Basque Cheesecake
There’s so much to adore about this dessert, and it all comes down to how effortless it is to achieve that bakery-quality result. If you’ve been intimidated by other cheesecakes, this one is for you! Trust me, you’re going to love these perks:
- It’s a true Crustless Cheesecake—all rich filling, no soggy bottom worries!
- We skip the fussy No Water Bath Cheesecake method entirely. High heat does the work in the oven.
- The top develops that signature, gorgeous deep caramelization all on its own.
- The final texture is unbelievably creamy, almost like a light custard, which is the mark of a perfect basque cheesecake.
You can find more of my simple, yet satisfying recipes, like these mini cheesecake bites, right here on the blog!
Gathering Ingredients for Your Basque Cheesecake
The beauty of this basque cheesecake recipe is that it uses super simple ingredients, nothing fancy needed! But, wow, ingredient prep matters here more than almost any other baking project I know. If you’re going to splurge on one thing, make sure it’s full-fat cream cheese—that fat content is what gives us that incredible, rich texture. For the best, smoothest batter, you absolutely must check your dairy and eggs. They need to be fully at room temperature before you start mixing!
We need just these simple things for a perfect result. If you love other creamy classics, check out my cream cheese corn casserole recipe for another easy win!
- 1.5 lbs (680g) full-fat cream cheese, softened to room temperature
- 1.5 cups (300g) granulated sugar
- 6 large eggs, room temperature
- 2 cups (480ml) heavy cream
- 1 teaspoon vanilla extract
- 1/4 teaspoon salt
- 2 tablespoons all-purpose flour
Getting that cream cheese soft enough that it yields gently to a finger is crucial. Really, truly, don’t try to rush warming up the cream cheese or the eggs; it’s the foundation for a lump-free, creamy cheesecake recipe!
Step-by-Step Instructions for a Creamy Basque Cheesecake
Okay, here’s where the fun—and easy part—really happens! Don’t be scared by the high oven temperature; that’s the trick for creating that signature look. We’re going to follow this sequence exactly to make sure we get that luxurious, creamy interior you are craving in your basque cheesecake. If you need inspiration for the final outcome, check out this post from Butter Joy Kitchen. And don’t forget, we have other amazing baked treats like my pecan pie cheesecake if you want more decadent options later!
Preparing the Pan and Oven for the Basque Cheesecake
First up, crank that oven way up to 400°F (200°C)! For the pan, take two sheets of parchment paper—don’t skimp here—and just press them into your 9-inch springform pan. I like to scrunch them up a bit so the edges stick up raggedly over the sides. That crinkled paper is exactly what gives your finished basque cheesecake its wonderfully rustic, imperfect look. It’s beautiful because it’s messy!
Mixing the Creamy Cheesecake Batter
Now for the mixing. Grab your electric mixer, but we only use it to get things super smooth. Start with just the softened cream cheese until it’s silky smooth—no lumps allowed! Then, slowly add your sugar and mix until creamy. The trickiest part is the eggs: add them one at a time, mixing just until they disappear into the batter. Seriously, stop mixing once they’re incorporated! Pour in the cream, salt, and vanilla, mixing gently. Finally, sift in the tiny bit of flour. Don’t worry if the batter seems very thin; that’s exactly what it should be for this creamy cheesecake recipe.
Achieving the Signature Caramelized Cheesecake Top
Pour that thin batter right into your rustic, parchment-lined pan. Into the hot oven it goes for about 50 to 60 minutes. You are looking for a top that is seriously dark brown—I mean deeply caramelized, maybe even black in spots around the edges. The center, though? It needs to have a big, jiggly wobble, like Jell-O. Once you pull it out, let it cool completely on the counter for about two hours; it will sink, and that’s totally normal! Then, cover it and chill it in the fridge for at least six hours. That chilling time is non-negotiable for setting that incredible texture.
Tips for Success with Your Burnt Basque Cheesecake
I know it feels counterintuitive to bake something until it looks super dark, but that’s the signature magic of the Basque Cheesecake! To make sure you get that amazing, creamy result every single time, I have a few crucial reminders that really separate a good one from the absolute best.
First, please don’t skip that chilling time! I mentioned six hours minimum, but honestly, overnight is when this dessert truly transforms. That long, slow chill firms up the center so it’s custardy instead of runny. It’s the key to serving up perfect slices of these Rustic Dessert Ideas.
Second, the serving tip: Take your finished basque cheesecake out of the fridge about an hour before slicing. Serving it cool, not ice-cold, lets that luxurious, rich texture really melt in your mouth. It pulls all the flavors together beautifully. If you want more little baking secrets, check out my guide on making homemade marshmallows—it’s just as fuss-free!
Variations: Making a Basque Cheesecake Loaf Pan Version
Now, I know not everyone has a huge springform pan lying around, or maybe you just want a Small Batch Cheesecake for a quieter night in. Good news! This recipe is totally adaptable. You can absolutely bake your gorgeous basque cheesecake in a standard loaf pan. It gives a slightly different, maybe more casual presentation, but the crustless, creamy texture remains exactly the same.
If you go the loaf route, remember that the batter is thicker depth-wise, so you’ll need to shave off about 10 to 15 minutes from the baking time. You’ll want to use parchment paper here too, letting it hang over the sides so you can use the overhang as handles to lift it out later. Head over to Recipes by Adam for some great visuals on how they handle the loaf pan method!
It’s also a fantastic way to test the recipe out before committing to a bigger bake. For more simple dinner ideas that go great with dessert, check out my mini meatloaf recipe!
Serving Suggestions for Your Decadent Desserts
Since the basque cheesecake is so intensely rich and flavorful on its own—that deep caramel notes are everything!—I always keep the toppings really simple. We want to complement it, not cover up how amazing that creamy texture is. A light, snowy dusting of powdered sugar right before serving is my go-to presentation trick. It looks so elegant against that dark, burnt top!
If you want a little color pop, fresh seasonal berries are perfect. Raspberries or sliced strawberries cut through the richness beautifully. I love serving mine slightly warmer than fridge-cold, about an hour out on the counter, maybe alongside a bowl of my creamy pumpkin soup if I’m serving it as an afternoon treat!
Storage and Reheating Instructions for Basque Cheesecake
This basque cheesecake is actually fantastic for making ahead of time, which is why it’s such a great recipe for entertaining! Once it’s completely cooled on the rack, wrap that pan tightly with plastic wrap or transfer the whole thing (once chilled) to an airtight container. It keeps wonderfully in the fridge for three to four days.
Now, here’s the big secret for getting that perfect, melt-in-your-mouth creamy texture back: You cannot serve it right out of the fridge! That cold temperature tightens everything up too much. Take your crustless cheesecake out onto the counter for at least 45 minutes to an hour before you plan to slice it. Letting it come up to cool room temperature restores that beautiful, slightly gooey interior we worked so hard to achieve. If you’re looking for a way to preserve fresh fruit to go with it, check out my guide for easy freezer jam!
Frequently Asked Questions About Making Basque Cheesecake
It’s totally normal to have questions when tackling a show-stopper like this! Baking is chemistry, but sometimes it feels like witchcraft, especially with its high heat and temperamental structure. I want you to feel 100% confident making your own incredible basque cheesecake. If you’re looking for more general baking confidence, my easy cool whip cookies are a great place to start!
Why is my Basque Cheesecake not burning on top?
If your burnt Basque Cheesecake isn’t getting that signature dark top, the oven probably isn’t hot enough, or you’re baking too low in the oven cavity. This cake *needs* high heat—I bake mine at 400°F (200°C). If your oven runs cool, try placing the pan on the top rack for the last 10 minutes of baking, but keep a really close eye on it so it doesn’t scorch completely instead of just caramelizing!
Can I skip chilling time for this Creamy Cheesecake Recipe?
Oh, honey, please don’t try to skip the chill time! I know waiting is the hardest part, but that long rest in the fridge—at least six hours, but overnight is best—is crucial. That’s what sets that ultra-creamy texture you’re hoping for in this basque cheesecake. If you try to cut it short, your center will slump too much and might be runny instead of velvety.
What does ‘San Sebastian Cheesecake’ mean?
That’s just the birthplace of this glorious thing! The San Sebastian Cheesecake refers to the city in Spain where this style originated. It’s famous because it’s rustic, wonderfully imperfect looking, incredibly rich, and completely crustless cheesecake perfection. It’s the original classic that we are recreating when making our basque cheesecake!
Nutritional Estimates for This Simple Ingredient Dessert
I like to be upfront about what we’re enjoying here—this basque cheesecake is definitely on the decadent side! While it relies on simple ingredient desserts, that heavy cream and cream cheese add up in richness. Please remember these numbers are just estimates based on the standard serving size outlined in the recipe. Nutrition is always best when food is homemade, but this gives you a general idea!
If you are looking for lighter savory meals, you can always check out my healthy lunch recipes for balance during the week!
Here is the breakdown for one slice:
- Serving Size: 1 slice
- Calories: 450
- Sugar: 35g
- Fat: 35g
- Protein: 8g
- Cholesterol: 150mg
This is truly a show-stopping, elegant dessert, and I hope seeing the breakdown makes you feel good about indulging in a slice (or two!) of this incredible, creamy treat.
PrintThe Best Burnt Basque Cheesecake Recipe: Creamy and Easy
Make the best Basque Cheesecake with this simple recipe. You get a perfectly caramelized, burnt top and an irresistibly creamy, crustless center. This is a decadent dessert that requires minimal prep.
- Prep Time: 15 min
- Cook Time: 60 min
- Total Time: 7 hours 15 min
- Yield: 10 servings 1x
- Category: Dessert
- Method: Baking
- Cuisine: Spanish
- Diet: Vegetarian
Ingredients
- 1.5 lbs (680g) full-fat cream cheese, softened to room temperature
- 1.5 cups (300g) granulated sugar
- 6 large eggs, room temperature
- 2 cups (480ml) heavy cream
- 1 teaspoon vanilla extract
- 1/4 teaspoon salt
- 2 tablespoons all-purpose flour
Instructions
- Preheat your oven to 400°F (200°C). Line a 9-inch springform pan with two large sheets of parchment paper, pressing them into the pan so they crinkle up the sides. This creates the rustic look.
- In a large bowl, use an electric mixer to beat the softened cream cheese until it is completely smooth, with no lumps remaining.
- Gradually add the sugar to the cream cheese mixture and beat until fully combined and creamy. Scrape down the sides of the bowl as needed.
- Add the eggs one at a time, mixing well after each addition until just combined. Do not overmix once the eggs are added.
- Slowly mix in the heavy cream, vanilla extract, and salt until the batter is uniform.
- Sift the flour over the batter and mix on low speed until just incorporated. The batter will be thin.
- Pour the batter into the prepared springform pan.
- Bake for 50 to 60 minutes. The top should be deeply caramelized, almost black in spots, and the edges should be set, but the center should still have a significant wobble. This is key for a creamy cheesecake.
- Remove the cheesecake from the oven. Let it cool completely on a wire rack at room temperature for about 2 hours. The center will sink as it cools.
- Once cool, cover the pan loosely with plastic wrap and chill in the refrigerator for at least 6 hours, or preferably overnight, for the best creamy texture.
- When ready to serve, carefully remove the sides of the springform pan and peel away the parchment paper. Serve this crustless cheesecake at room temperature for the softest texture.
Notes
- For a smaller, easy-to-serve option, you can bake this recipe in a standard loaf pan lined with parchment paper. Adjust the baking time down by about 10-15 minutes.
- Serving the Basque Cheesecake at room temperature enhances the creamy, almost custard-like interior texture.
- Do not use low-fat cream cheese; the high fat content is necessary for the rich, decadent result.
Nutrition
- Serving Size: 1 slice
- Calories: 450
- Sugar: 35g
- Sodium: 250mg
- Fat: 35g
- Saturated Fat: 22g
- Unsaturated Fat: 13g
- Trans Fat: 0.5g
- Carbohydrates: 28g
- Fiber: 0g
- Protein: 8g
- Cholesterol: 150mg