
I know that holiday baking can feel like walking a tightrope, right? You want something that smells amazing, tastes incredible, and looks like it belongs on a magazine cover. Everyone has their must-have pie or their favorite dessert, but what if you didn’t have to choose? Well, I have found the answer, and it stops everyone in their tracks: the pecan pie cheesecake. This recipe perfectly blends that tangy, creamy dream we know and love with that sweet, nutty crunch of a classic pecan pie. You can read more about the heart behind HearthBite and our commitment to comfort food over at our story. Sarah Miller builds every recipe on that deep, soulful feeling, and this fusion dessert is no exception. Trust me, this recipe is unbelievably reliable for making your Thanksgiving or Christmas table unforgettable.
- Why This Creamy Pecan Pie Cheesecake is Your Ultimate Holiday Dessert
- Ingredients for Your Showstopper Pecan Pie Cheesecake
- How to Prepare the Ultimate Pecan Pie Cheesecake
- Tips for Easy Cheesecake Baking Success
- Creative Variations for Your Pecan Pie Fusion Dessert
- Serving and Storing Your Make Ahead Holiday Desserts
- Frequently Asked Questions About Pecan Pie Cheesecake Recipe
- Estimated Nutritional Data for Pecan Pie Cheesecake
- Share Your Showstopper Pecan Pie Cheesecake Experience
Why This Creamy Pecan Pie Cheesecake is Your Ultimate Holiday Dessert
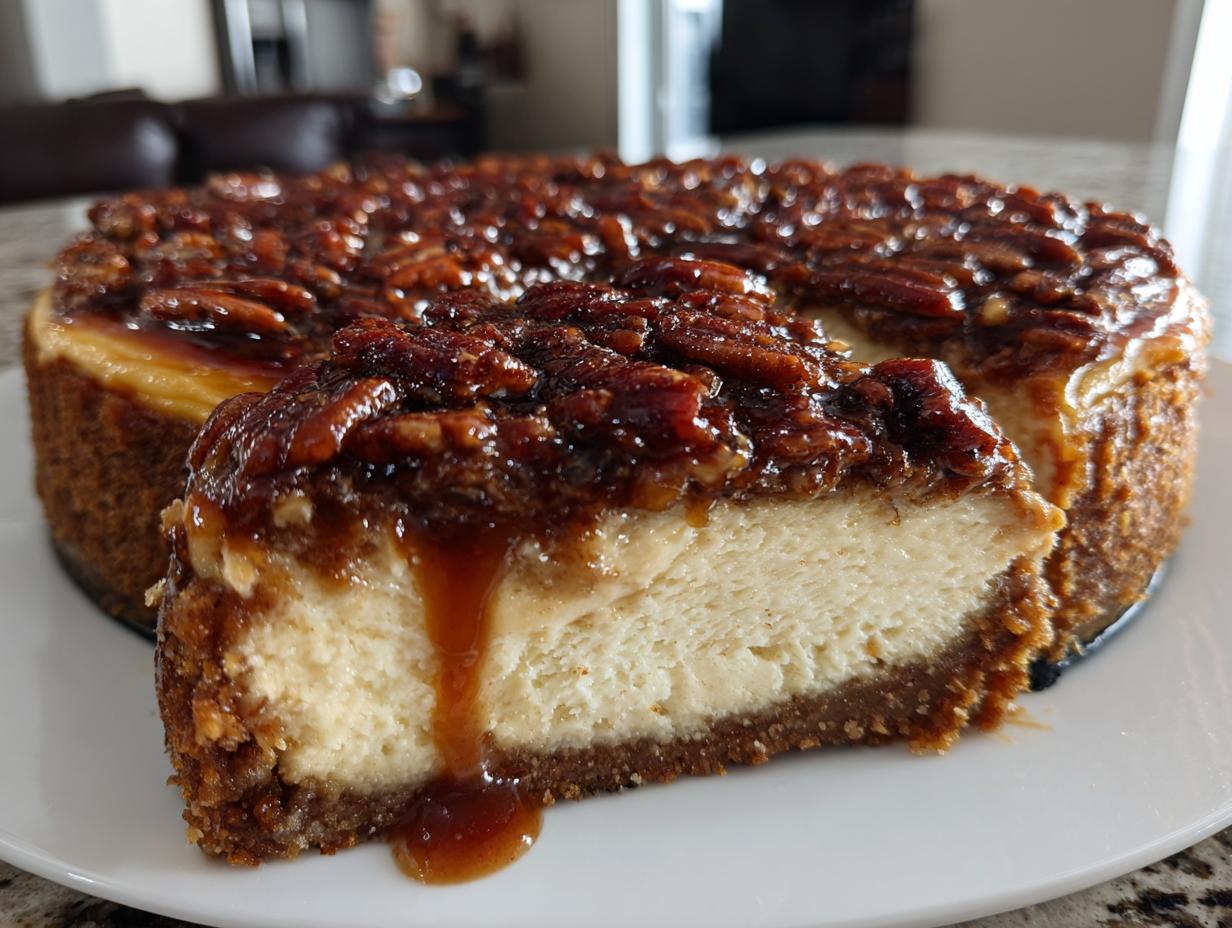
When the holidays roll around, I totally get the pressure to bring out something truly amazing. Our pecan pie cheesecake is exactly that centerpiece dessert you’ve been hoping for. It’s not just about tasting good; it has to look spectacular, and this one always gets gasps when it hits the table. We aimed for the best of both worlds here, and I think we nailed it!
It’s popular for *Thanksgiving Dessert Lovers* because it cuts through the heaviness of the rest of the meal while still feeling supremely indulgent. If you’re looking for real, satisfying treats that feel both classic and new, this is it. If you loved my tips for keeping pumpkin bread moist, you’ll appreciate the similar attention to texture here for this wonderful moist pumpkin bread recipe, but trust me, this cheesecake is on another level!
Achieving the Perfect Velvety Cheesecake Texture
The difference between a good cheesecake and a phenomenal one is usually texture. Nobody wants crumbly or porous when they are expecting that rich, luxurious mouthfeel. Here, we focus heavily on room temperature ingredients—and I mean *room temperature*! If your cream cheese is cold, you’ll get lumps, and lumps mean you have to overmix, which brings in air and causes cracks.
We want that smooth, velvety batter so we can achieve that dreamy texture that defines a true Creamy Cheesecake Dessert. Slow and steady mixing with room-temperature bricks of cream cheese is the secret weapon for that perfect base.
The Decadent Flavor of a Pecan Pie Cheesecake Fusion
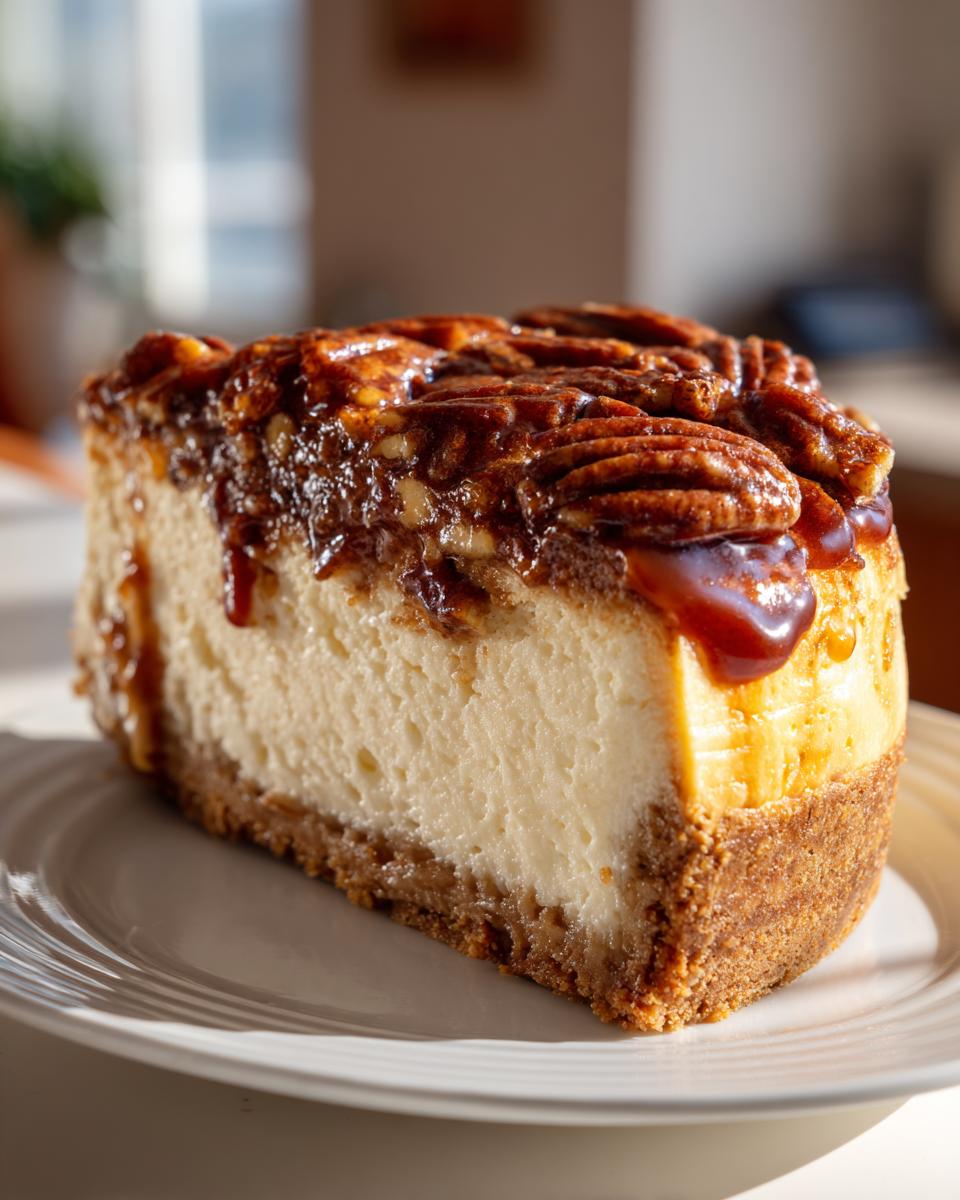
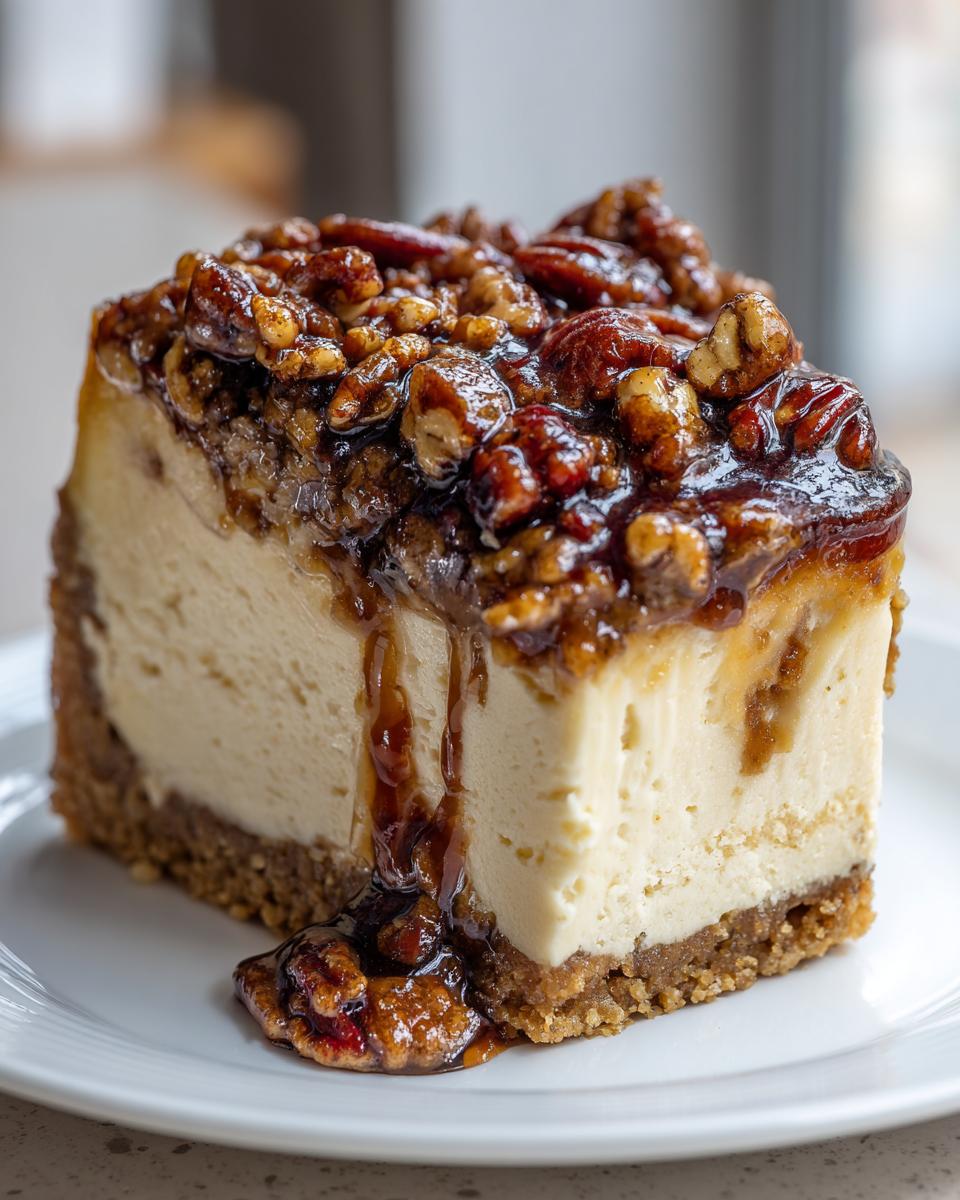
It’s the combination that makes this truly shine. You get that slight, wonderful tang from the cheesecake fighting beautifully against the deep, smoky sweetness of the caramelized pecans. It’s complex, comforting, and surprisingly balanced.
Because we combine these two giants of Thanksgiving desserts, you get a real Pecan Pie Fusion Dessert experience. One slice of pecan pie cheesecake gives you the creamy foundation you crave, followed immediately by that sticky, buttery pecan punch. It’s decadent, but the cheesecake keeps it from ever feeling too heavy!
Ingredients for Your Showstopper Pecan Pie Cheesecake
Okay, gathering your supplies is the calm before the gorgeous storm! Getting these components right means you’re halfway to that perfect slice. I’ve laid them out by section so you don’t accidentally put the butter meant for that gooey topping into your basic crust mix—though, honestly, nothing bad ever comes from too much butter, right?
Remember how I talk about temperature a lot? This is where it matters most. If you want that wonderfully reliable result, make sure your cream cheese and especially your eggs are out on the counter for at least an hour before you start mixing. This recipe is simple, but it relies on a little patience upfront. If you’re looking for inspiration for fantastic holiday side dishes, you should totally check out my thoughts on sweet potato biscuits recipe!
For the Buttery Graham Cracker Crust Cheesecake Base
- 1 1/2 cups graham cracker crumbs (Make sure these are finely crushed—we are building the foundation here!)
- 1/4 cup granulated sugar
- 6 tablespoons unsalted butter, melted (This is what makes it so gloriously buttery!)
For the Creamy Cheesecake Filling
- 3 (8 ounce) packages cream cheese, softened (Seriously, leave these out!)
- 1 1/2 cups granulated sugar
- 1 teaspoon vanilla extract
- 1/4 teaspoon salt
- 4 large eggs, room temperature (They must be room temp for that smooth blend!)
For the Gooey Pecan Topping
- 1 cup pecan halves, for topping (I use halves for the best look, but chopped works too if you need to keep the pieces smaller.)
- 1 (12 ounce) jar light corn syrup (Don’t try to substitute this—it’s essential for that sticky texture!)
- 1/2 cup packed light brown sugar
- 1/4 cup heavy cream
- 2 tablespoons unsalted butter, melted
- 1 teaspoon vanilla extract
- 1/4 teaspoon salt (This cuts the sweetness just right.)
See? Nothing too crazy! Just good ingredients put together with care. That last little bit of salt in the Gooey Pecan Topping is my secret for making the flavors really pop.
How to Prepare the Ultimate Pecan Pie Cheesecake
Alright, now for the fun part—assembly! Baking this showstopper takes time, mostly because we are being incredibly patient to ensure that creamy texture comes out perfect. We are taking this gorgeous pecan pie cheesecake slowly, step by step, and the water bath is non-negotiable, believe me! To make sure you feel super confident and ready for that bake, remember that a lot of baking success comes down to preparation, which is why you should check out my guide on easy cheesecake baking!
Step 1: Preparing the Graham Cracker Crust Cheesecake Foundation
First things first, let’s warm up the oven to 350°F. Wrap that springform pan like you mean it—heavy-duty foil, tight and even, because water proofing is key to keeping our Graham Cracker Crust Cheesecake dry. Mix up those crumbs, sugar, and melted butter, then press it down firmly into the bottom. Don’t be shy! Bake it for ten minutes, let it cool just a touch, and then drop your oven temp down to 325°F. That pre-bake sets a nice, sturdy base.
Step 2: Mixing the Creamy Cheesecake Filling Correctly
This is where we build the ‘creamy’ part of our dream dessert. Now that your cream cheese is softened—and I mean *softened*—beat it with the sugar until it’s fluffy. Add your vanilla and salt. Here’s the major rule: add the room-temperature eggs one at a time, mixing gently until they just disappear into the batter. If you hear the mixer whirring loudly or the batter looks airy, you’re overmixing! We are aiming for smooth, not whipped mountain peaks.
Step 3: Assembling and Baking the Pecan Pie Cheesecake with Water Bath
Pour that beautiful batter right over your pre-baked crust. Now for the gooey pecan topping! Whisk the syrup, brown sugar, cream, melted butter, and seasonings until it just starts to bubble slightly on the stove. Take it off the heat, stir in those pecans, and then gently pour this rich mixture right over the cheesecake batter. Place your foil-wrapped pan inside a larger roasting pan and carefully pour hot water in until it comes halfway up the sides. Bake this stunner for 60 to 75 minutes. You’ll know it’s done when the edges look set but the very center still has that little jiggle. This water bath is what keeps things moist and crack-free!

Step 4: Cooling and Chilling for the Best Pecan Pie Cheesecake
Don’t you dare rush this part! Once the time is up, turn the oven off, prop the door open just a crack, and let the cheesecake hang out in that residual heat for a full hour. This gradual temperature change is vital for the ultimate pecan pie cheesecake. After that hour, take it out of the water bath, let it cool on the counter completely, and then wrap it up. Seriously, this needs at least six hours, but overnight chilling gives you the absolute best, sturdiest texture for slicing that rich pecan pie cheesecake.
Tips for Easy Cheesecake Baking Success
Listen, making a truly outstanding cheesecake, even one as amazing as this pecan pie cheesecake, sounds intimidating, but it’s mostly about avoiding a few rookie mistakes. We’ve covered the water bath, but let’s talk about temperature because that’s the real secret to smooth sailing and excellent results every time. If you want your holiday baking to go off without a hitch, keeping these baking tips handy is key. If you’re looking for more comforting baked goods, you absolutely have to try my recipe for the best coffee cake with moist sour cream—everything just bakes better with a little cozy warmth!
Temperature Control for Your Pecan Pie Cheesecake
I can’t stress this enough: cold ingredients are the enemy of smooth cheesecake! If your cream cheese is even slightly cool, it won’t blend evenly with the sugar, and you end up with little clumps that require you to mix longer. That aeration is what causes cracking later on.
My rule for all my Easy Cheesecake Baking projects is that the cream cheese and eggs must sit on the counter until they feel perfectly pliable and neutral. Don’t try to rush this by microwaving the cream cheese; that melts the fat unevenly. Just take them out the hour before you plan to start mixing. It pays off wonderfully!
Preventing Cracks in Your Creamy Cheesecake Dessert
The water bath you used deserves all the credit for delivering that incredible, dense, and smooth structure we look for in a Creamy Cheesecake Dessert. The steam creates a humid environment, gently cooking the sides and edges without drying anything out.
But the cooling is just as important as the baking, so don’t skip that hour inside the closed, off oven. That slow transition prevents thermal shock, which is what causes the surface to stubbornly crack right when it hits the cool kitchen air. Patience here guarantees a beautiful, sliceable dessert!
Creative Variations for Your Pecan Pie Fusion Dessert
I love that this pecan pie cheesecake is a fantastic base recipe because it’s so easy to tweak! Once you’ve mastered the creamy texture and that gooey pecan topping, you can start playing around to make it truly yours. I always encourage bakers in the HearthBite community to try something new, especially when it comes to dressing up classic holiday flavors. If you’re looking for quick, no-bake treats for snacking, you should check out my recipe for pecan pie balls—no-bake and so easy!
Adding Southern Style Cheesecake Spice Notes
If you want to push this dessert right into classic Southern territory, you need a little warmth. For a real flavor boost that compliments the brown sugar and pecans beautifully, try adding a whisper of cinnamon right into your cheesecake batter. Just a quarter teaspoon of ground cinnamon transforms it into a true Southern Style Cheesecake!
This spice addition blends so perfectly with the creamy base that it tastes complex, almost like a spiced custard hugging the crust. It’s a subtle change, but it adds such a cozy, familiar dimension to the whole pecan pie fusion dessert.
Making Pecan Pie Cheesecake Bars
Sometimes you’re hosting a huge crowd—maybe a massive potluck or a holiday buffet—and clean slicing is more important than presentation, right? That’s when I pivot and turn this into amazing pecan pie cheesecake bars! It’s super simple to adjust.
Instead of using your springform pan, you’ll press that buttery crust right into a 9×13 inch baking dish. Because the dessert is thinner, you’ll notice a difference in baking time. The cheesecake layer will only need about 40 to 50 minutes to set up. You still pour the pecan topping over it before baking, of course! Once cooled and chilled, these bars slice up cleanly, giving everyone a perfect little square of heaven. It’s an excellent way to guarantee easy serving for your Thanksgiving dessert table.
Serving and Storing Your Make Ahead Holiday Desserts
The absolute best thing about this decadent pecan pie cheesecake? It’s an expert at being a Make Ahead Holiday Dessert! Knowing you can finish this gorgeous thing days before the big event takes such a huge weight off your shoulders when you’re hosting. It needs that chill time anyway, so you might as well use it to relax!
I always aim to have mine completely set in the fridge the day before serving. This makes it the perfect companion to any big Thanksgiving Pecan Dessert spread. For more timing tips on getting ahead of the rush, check out my full guide on make-ahead holiday desserts!
Best Practices for Storing Pecan Pie Cheesecake
Once it’s totally cool and set, cover that springform pan really well with plastic wrap. Don’t press the plastic down onto the gooey pecan topping, though! You can either leave it in the springform ring or carefully remove the sides once it’s super firm. It keeps wonderfully in the fridge for a good four or five days.
If you want to keep the top a little cleaner, you can use toothpicks stuck into the edge of the cheesecake to create a tiny tent with the plastic wrap. You don’t want any fridge smells messing with that beautiful pecan flavor we worked so hard for!
Serving Suggestions for This Holiday Cheesecake Idea
When it comes time to serve your masterpiece, it’s already so rich, it doesn’t really need much dressing up. It’s fantastic served cold, right out of the fridge, alongside a robust cup of black coffee. That bitterness cuts through the sugar perfectly.
If you want something creamy on the side, just keep the toppings simple so they don’t compete with that pecan layer. A tiny dollop of freshly whipped, unsweetened cream is perfect. Seriously, this recipe creates one of those stunning Holiday Cheesecake Ideas that truly sells itself!
Frequently Asked Questions About Pecan Pie Cheesecake Recipe
I get so many questions once people see this gorgeous pecan pie cheesecake, and that’s wonderful! Cheesecake baking can feel a little fussy, but I promise you, once you understand the basics, it’s easy. I’ve collected some of the most common things folks ask me about achieving that perfect creamy texture and making sure the topping stays gooey!
If you’re looking for other easy holiday options that don’t require any baking at all, you should really take a look at my recipe for easy no-bake peanut butter pie. Sometimes, simplifying things is the best move, but for the full showstopper experience, check out these answers first!
Can I make the pecan pie cheesecake topping ahead of time?
That’s a great question for someone planning their holiday timeline! Yes, you absolutely can make the Gooey Pecan Topping ahead of time—just make sure you store it airtight in the fridge. The biggest caveat is that when you go to pour it over the chilled cheesecake batter, you *must* gently warm it up almost to room temperature first.
If you pour cold or even cool pecan topping over your cold cheesecake batter, it will seize up instantly and won’t spread evenly, leaving you with big lumps instead of that beautiful layer. A minute or two in the microwave should warm it up enough to pour nicely.
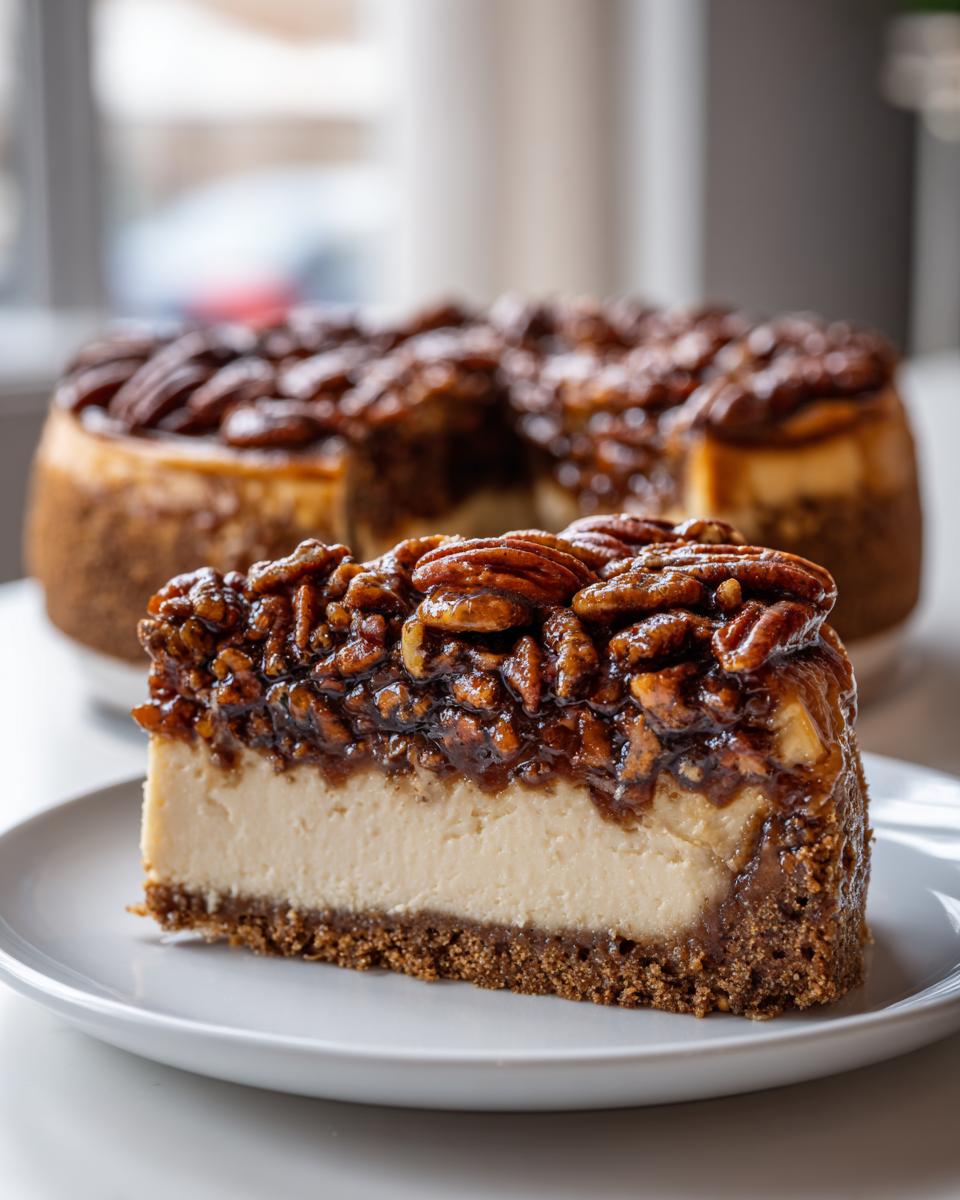
What is the best way to slice a cheesecake with caramelized pecans?
This is a crucial tip for keeping your beautiful presentation intact! You can’t just use a regular room-temperature knife on this layered indulgence. To get clean slices of your Creamy Cheesecake Dessert, especially dealing with that sticky caramel-pecan layer, you need a hot knife.
Here’s my method: Grab a tall glass of very hot water and a long, thin knife. Dip the knife into the hot water and wipe it dry quickly. Make your cut, then immediately dip the knife back into the hot water for the next cut. Wiping it clean and heating it up between every single slice ensures that gooey topping doesn’t drag down the side or stick to your blade. It keeps every slice looking as stunning as the first!
Estimated Nutritional Data for Pecan Pie Cheesecake
Now, I always tell folks that the joy of a holiday treat isn’t counting calories, but if you like to keep track, I’ve got the general gist of what’s in a slice of this glorious Pecan Pie Cheesecake. Please remember, this information is just an estimate, and it can change wildly depending on which brand of cream cheese you grab or exactly how thick you make that buttery crust!
We really pack a lot of flavor in here, combining the rich fats from the cream cheese and butter with the sugars in the crust and topping, so moderation is key! You’re getting a real indulgence here designed for special occasions.
- Serving Size: 1 generous slice
- Calories: Around 550 (Yep, she’s decadent!)
- Sugar: Approximately 55g
- Fat: About 35g (Hello, butter and pecans—worth every gram!)
- Saturated Fat: Roughly 18g
- Carbohydrates: Around 58g
- Protein: About 10g
- Sodium: Around 320mg
This is why we call this an ultimate holiday indulgence! If you are bringing this to a party, it definitely deserves a spot as a featured Showstopper Dessert. Save those lighter treats for another day!
Share Your Showstopper Pecan Pie Cheesecake Experience
Now that you’ve gone through all the steps to create your own slice of heaven, I really, truly want to hear all about it! Making an incredible pecan pie cheesecake is a big accomplishment, and I get so much joy seeing what you all create in your kitchens. Don’t keep that beauty to yourself!
If this recipe brought smiles to your holiday table, please stop by and leave us a rating. Five stars are always wonderful, but honest feedback helps us all bake better. If you have a funny kitchen fail or a small tweak that you think made your pecan pie cheesecake especially good, drop a comment below so the whole HearthBite family can learn from your adventure!
And please, snap a photo of that crack-free, gooey masterpiece and tag us! I love sharing reader success stories on our social channels because it proves that anyone—truly anyone—can make these impressive desserts. If you have any lingering questions after baking, or just want to say hello to Sarah and the team, you can always reach out through the contact page. Happy baking, friends!
PrintUltimate Creamy Pecan Pie Cheesecake with Buttery Graham Cracker Crust
Make this show-stopping dessert that combines a rich, creamy cheesecake base with a gooey, caramelized pecan pie topping over a buttery graham cracker crust. This recipe is perfect for holidays like Thanksgiving and Christmas.
- Prep Time: 30 min
- Cook Time: 75 min
- Total Time: 105 min
- Yield: 12 servings 1x
- Category: Dessert
- Method: Baking
- Cuisine: American
- Diet: Vegetarian
Ingredients
- 1 1/2 cups graham cracker crumbs
- 1/4 cup granulated sugar
- 6 tablespoons unsalted butter, melted
- 3 (8 ounce) packages cream cheese, softened
- 1 1/2 cups granulated sugar
- 1 teaspoon vanilla extract
- 1/4 teaspoon salt
- 4 large eggs, room temperature
- 1 cup pecan halves, for topping
- 1 (12 ounce) jar light corn syrup
- 1/2 cup packed light brown sugar
- 1/4 cup heavy cream
- 2 tablespoons unsalted butter, melted
- 1 teaspoon vanilla extract
- 1/4 teaspoon salt
Instructions
- Preheat your oven to 350°F (175°C). Wrap the outside of a 9-inch springform pan tightly in heavy-duty aluminum foil.
- Prepare the crust: In a medium bowl, mix graham cracker crumbs, 1/4 cup sugar, and 6 tablespoons melted butter until combined. Press the mixture firmly into the bottom of the prepared springform pan. Bake for 10 minutes. Remove and let cool slightly. Reduce oven temperature to 325°F (160°C).
- Prepare the cheesecake filling: In a large bowl, beat the softened cream cheese with 1 1/2 cups sugar, 1 teaspoon vanilla, and 1/4 teaspoon salt until smooth. Beat in the eggs one at a time, mixing just until combined after each addition. Do not overmix.
- Pour the cheesecake batter over the cooled crust.
- Prepare the pecan topping: In a saucepan over medium heat, whisk together corn syrup, brown sugar, heavy cream, 2 tablespoons melted butter, 1 teaspoon vanilla, and 1/4 teaspoon salt. Bring to a simmer, stirring constantly, until the sugar dissolves (about 3 minutes). Remove from heat.
- Stir in the pecan halves until coated. Gently pour the pecan mixture evenly over the cheesecake batter.
- Bake using a water bath: Place the foil-wrapped springform pan inside a larger roasting pan. Carefully pour hot water into the roasting pan until it reaches halfway up the sides of the springform pan.
- Bake for 60 to 75 minutes, or until the edges are set but the center still has a slight jiggle.
- Turn off the oven, crack the door open slightly, and let the cheesecake cool in the oven for 1 hour. This prevents cracking.
- Remove the cheesecake from the water bath and foil. Cool completely on a wire rack. Refrigerate for at least 6 hours, or preferably overnight, before serving.
Notes
- For a crack-free cheesecake, bring all dairy ingredients (cream cheese, eggs) to room temperature before starting.
- If you prefer bars, press the crust into a 9×13 inch pan and bake the cheesecake layer for 40-50 minutes before topping.
- For a Southern Style Cheesecake flavor, add 1/4 teaspoon of ground cinnamon to the cheesecake batter.
Nutrition
- Serving Size: 1 slice
- Calories: 550
- Sugar: 55
- Sodium: 320
- Fat: 35
- Saturated Fat: 18
- Unsaturated Fat: 17
- Trans Fat: 0.5
- Carbohydrates: 58
- Fiber: 2
- Protein: 10
- Cholesterol: 95