
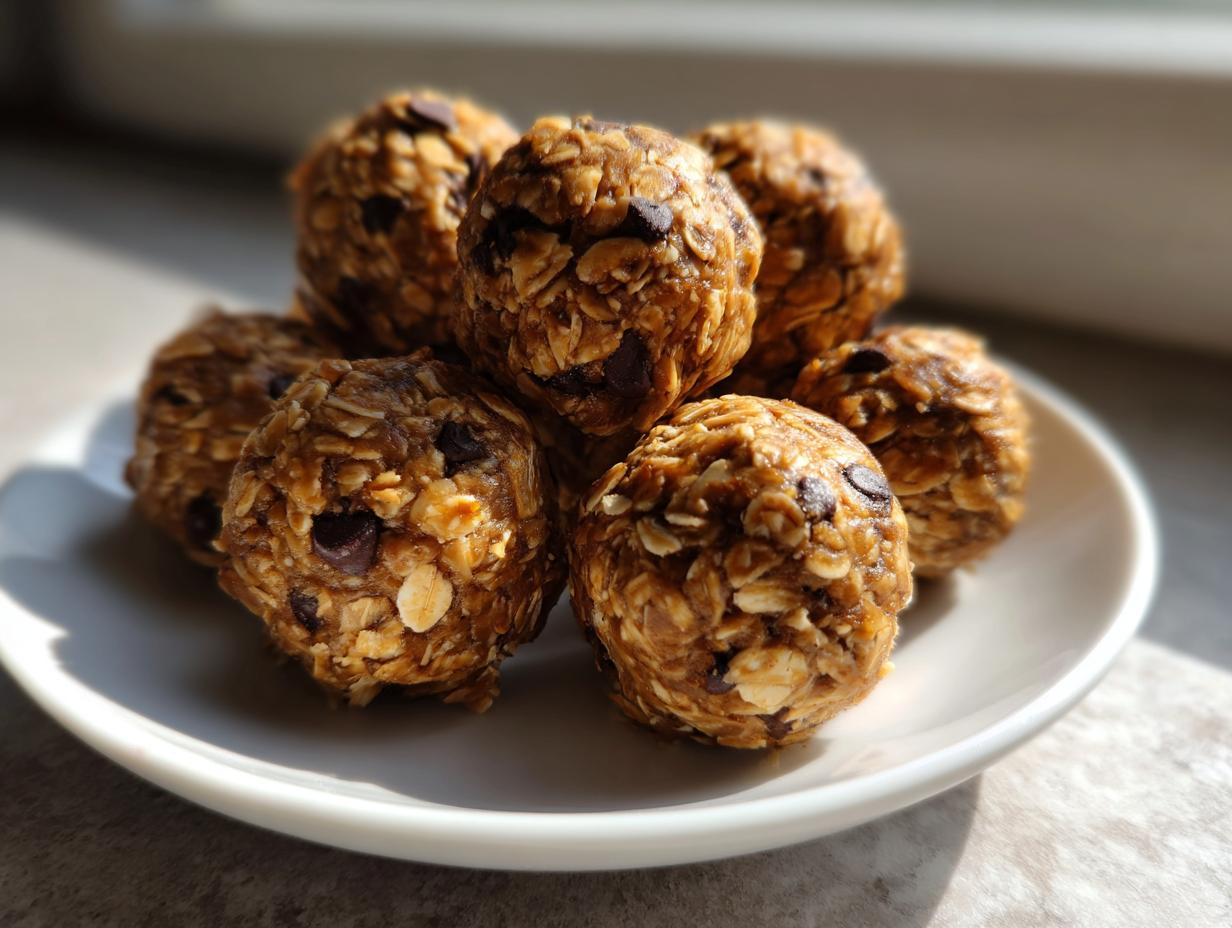
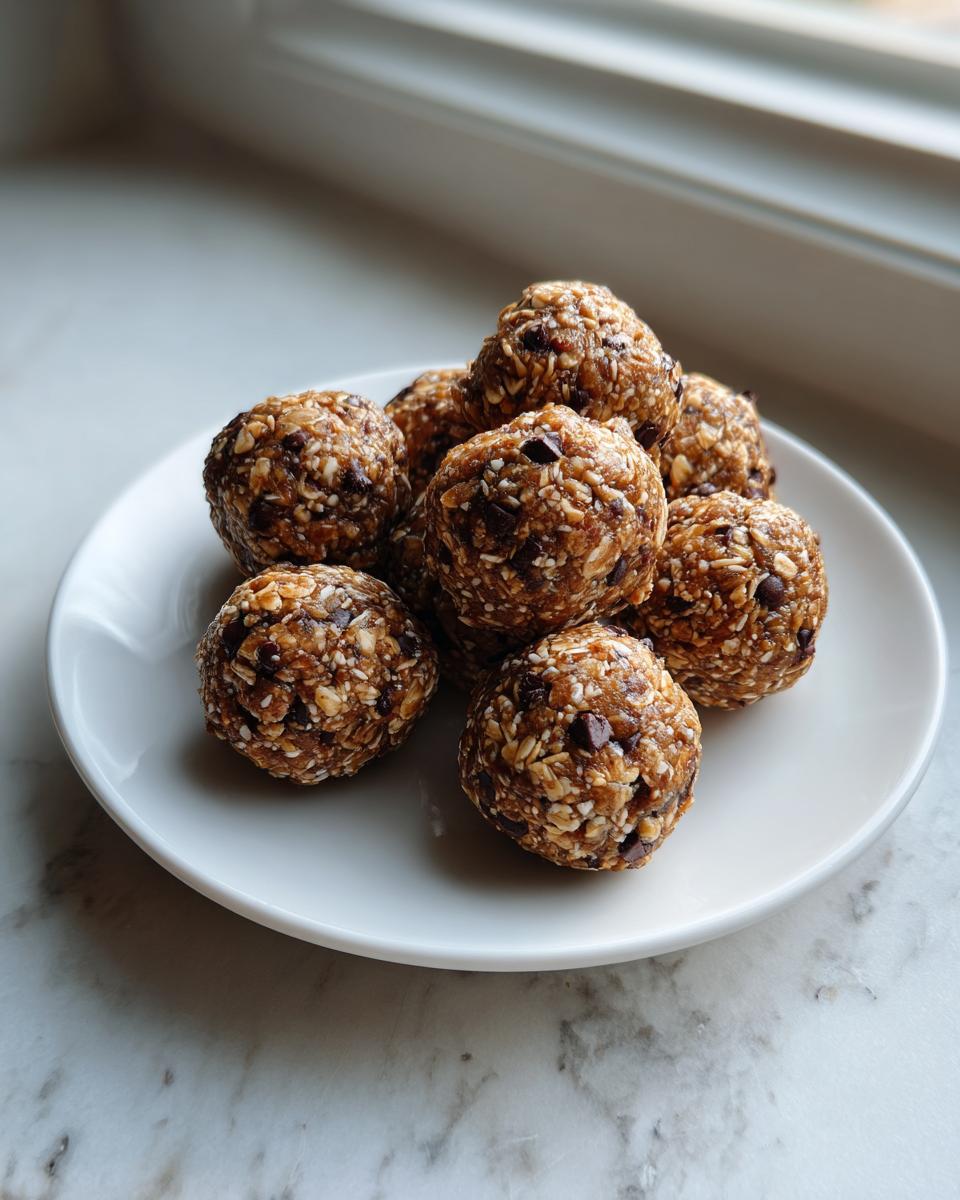
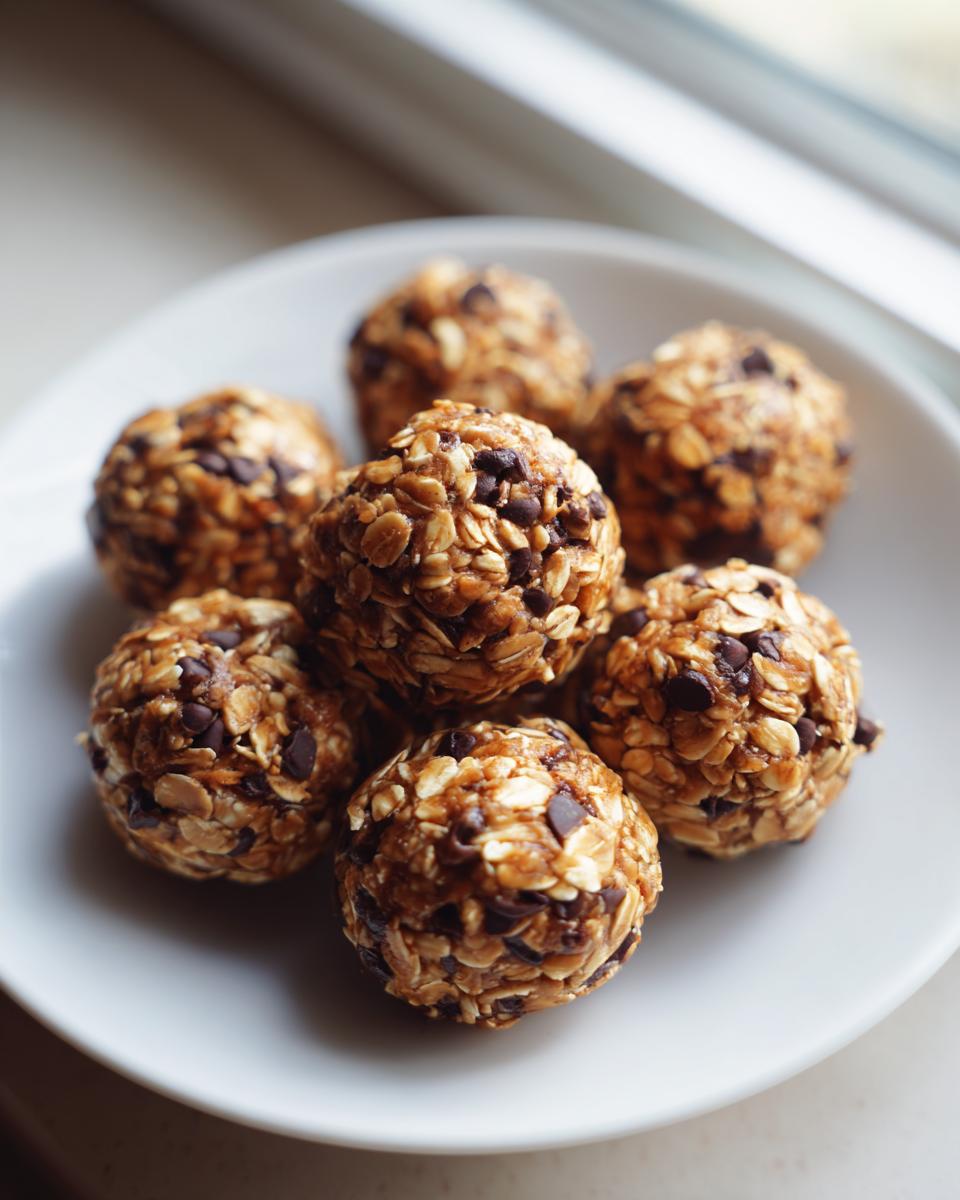
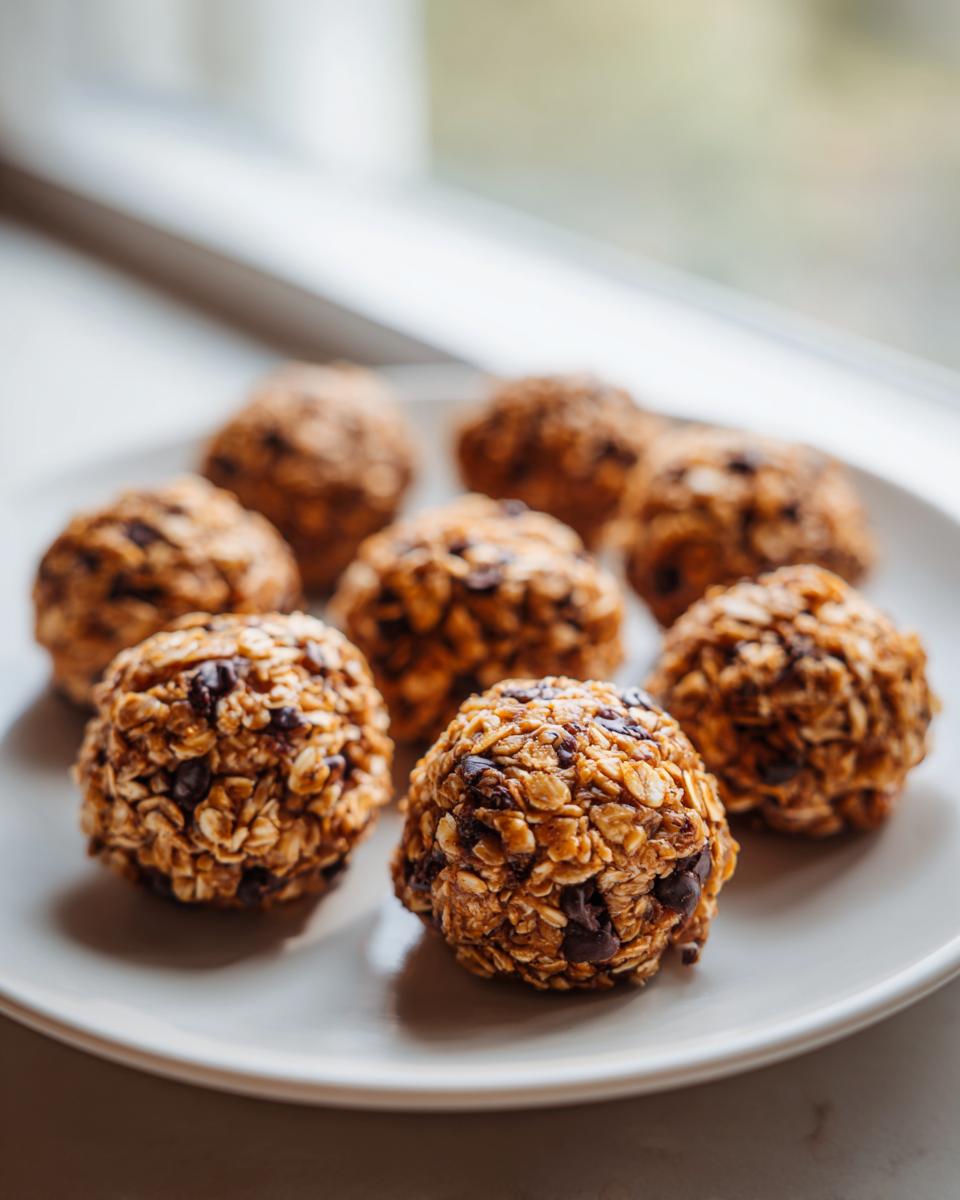
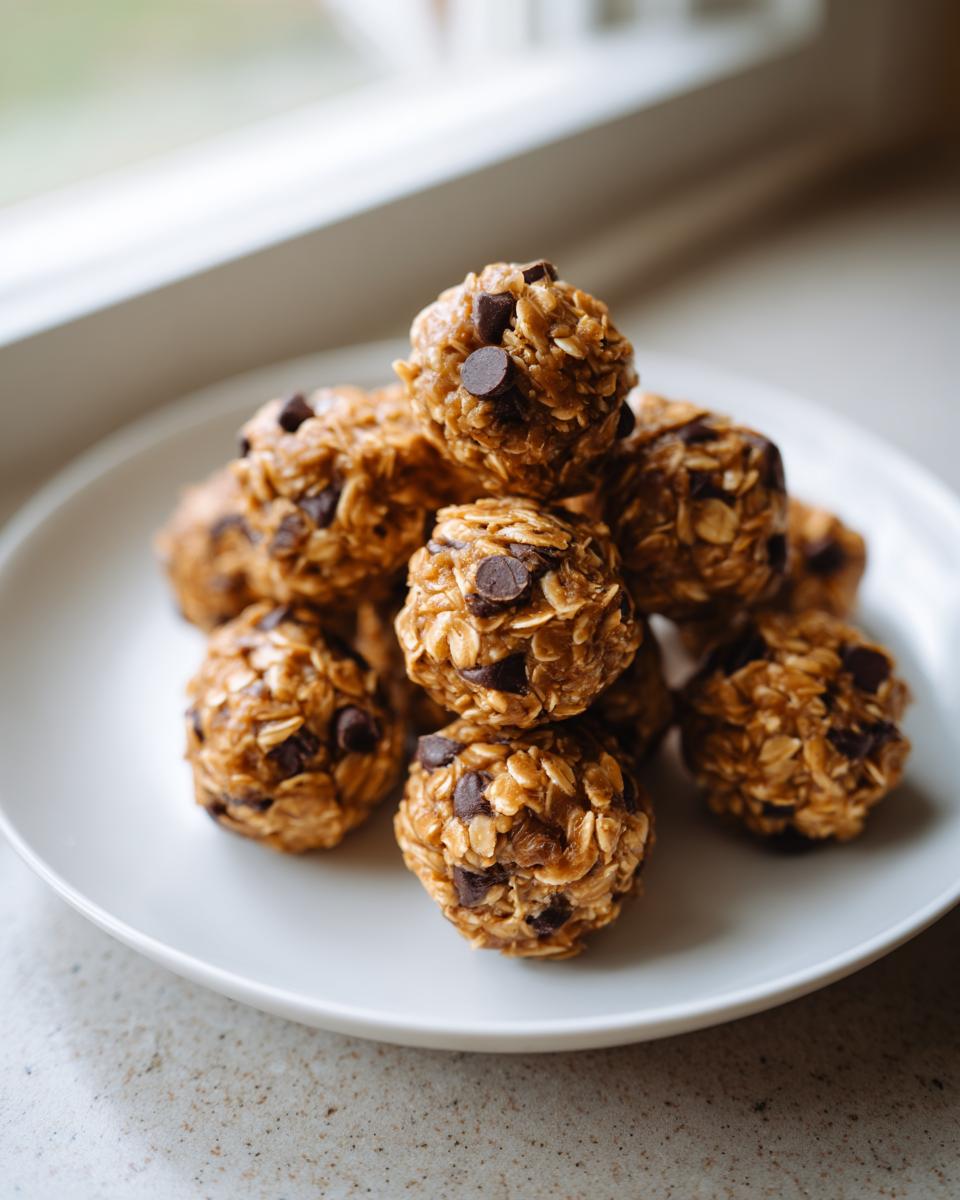
Oh, you know those days, right? The ones where you’re running between meetings, chasing littles, or just trying to squeeze in a workout, and suddenly you realize you haven’t eaten since breakfast? Total energy crash territory. I’m Sarah, and believe me, in the fast pace of getting HearthBite off the ground, I live on easy, satisfying fuel. That’s why I perfected these **protein balls**. Forget dry chalky snacks; these are the absolute best no-bake goodies you’ll ever roll up. They taste more like a peanut butter treat than something you should be eating pre-gym, but guess what? They pack serious nutrition. They come together quicker than boiling water!
If you need a sweet, guilt-free bite that keeps you going until dinner, you must try this simple recipe. If you love easy energy boosters, you might also adore my guide to easy homemade protein bars. You can prep these protein balls ahead of time, so they are waiting for you when you need that boost.
- Why This Peanut Butter Protein Balls Recipe is Your New Go-To Snack
- Gathering Ingredients for Perfect Protein Balls
- Step-by-Step Guide to Making Your No Bake Protein Balls
- Making Ahead and Storing Your Protein Balls for Meal Prep
- Flavor Variations on Classic Protein Balls
- Serving Suggestions for Your High Protein Snacks
- Frequently Asked Questions About Protein Balls Recipe
- Understanding the Nutrition in These Protein Bites
- Share Your Favorite Protein Balls Creations
Why This Peanut Butter Protein Balls Recipe is Your New Go-To Snack
Seriously, I keep these things stocked in my fridge year-round. Why? Because they check every single box for a busy home cook like me. When I promise you something is easy, I mean it. These are the perfect answer when you are staring down a stack of emails or need a healthy pick-me-up before heading out the door for soccer practice.
- They are the ultimate healthy protein snacks—no junk, just good stuff.
- Perfect for throwing in a bag; they’re sturdy little quick energy bites!
- They satisfy that craving for something sweet but feel totally good while eating them.
If you’re looking for more ways to sneak nutrition into your day, check out my favorite healthy lunch recipes for ideas.
Speed and Simplicity: The No-Bake Promise
This is the best part: there is absolutely no oven involved. We’re talking 10 minutes, maybe less if you’ve got your protein powder out already. These are true-blue no bake protein balls. You mix it, you roll it, you chill it. Done! It means you can whip up a batch right before bed for tomorrow’s fuel rush.
Fueling Power: High Protein Content in Every Bite
Don’t let the dessert flavor fool you; these packs a punch! That protein powder is doing the heavy lifting here, making them great for keeping you full longer. I always grab one or two when I need serious post workout fuel after an intense week of cooking. They digest easily and deliver what your body needs fast.
Gathering Ingredients for Perfect Protein Balls
Okay, let’s talk ingredients! Because these snacks are so simple, every single thing you put in matters. You don’t need any weird stuff, just pantry staples I bet you have right now. If you have these six items, you are minutes away from having a full week’s worth of snacks ready to go. Remember, precision here means perfect texture later, so get those measuring cups ready!
- 1 cup rolled oats (Make sure they are rolled, not instant!)
- 1 cup peanut butter (Creamy works best, trust me!)
- 1/2 cup vanilla protein powder (Your standard scoop size works perfectly here)
- 1/3 cup honey or maple syrup (This is our binder!)
- 1/4 cup mini chocolate chips (Optional, but are we really going to skip chocolate? I didn’t think so!)
- 1 teaspoon vanilla extract
If you love making things from scratch, I actually have a fantastic recipe for oatmeal pancakes that helps you use up those oats in another way, too!
Ingredient Substitutions for Your Peanut Butter Protein Balls
Flexibility is important in any home kitchen, so don’t worry if your pantry is missing exactly what I listed! The beauty of these protein balls is how adaptable the base recipe is. If you run out of peanut butter, swapping in almond butter works great—it just gives you a slightly different, nuttier flavor profile. If you need to keep the sugar low, use a sugar-free maple syrup alternative instead of the regular honey or maple syrup. Just try to keep the quantity the same, though! If you use almond butter, the mix might feel a tiny bit softer, so you might need to pop them in the fridge for an extra 10 minutes before rolling.
Step-by-Step Guide to Making Your No Bake Protein Balls
This process is so straightforward, you’ll be shocked how fast they come together. I always set out my ingredients first, and once everything is portioned, the actual mixing takes less than five minutes. Remember, since we aren’t baking anything, the goal here is to create one cohesive, slightly sticky dough that everything holds together in. We need that perfect balance so they don’t fall apart when you grab them!
- In a big sturdy bowl, dump everything right in: the oats, that creamy peanut butter, the vanilla protein powder, your honey or maple syrup, the vanilla extract, and those little chocolate chips if you’re feeling fancy!
- Now, you need to mix it all up until it’s completely uniform. Use a solid spoon at first, but honestly, I always switch to my hands near the end. Get in there and make sure there are no dry pockets of powder hiding anywhere.
- Once it looks like thick cookie dough, roll those gorgeous protein balls into little one-inch rounds. You should get about 18 of them.
- Line a tray with parchment paper—this saves time later—and set the balls on it.
- The most important step for structure: Pop the whole tray into the fridge to chill for at least 30 minutes. This firms them up beautifully before you eat them!
Expert Tips for Mixing and Rolling Your Protein Balls
Listen, sometimes the texture just isn’t cooperating, and that’s okay! If your mixture seems super crumbly or too dry after trying to mix it up, just add water or milk just a teaspoon at a time until you see the dough start to hold when you squeeze it. Don’t go crazy, or you’ll end up with mush! On the flip side, if it’s too sticky? Pop it in the freezer for 10 minutes—that usually firms things up enough to roll.
Here’s my little trick: If my peanut butter has been sitting in the fridge and it’s super stiff, I microwave it for about 15 seconds first. Not hot, just warm enough to be completely drippy. Softened nut butter mixes so much easier with the protein powder without fighting you the whole time. You can always find more tips on how to nail these easy peanut butter balls on my site!
Making Ahead and Storing Your Protein Balls for Meal Prep
This is where these little bites truly shine for me! If you’re trying to eat healthier during a hectic week, having something ready to grab is the secret sauce to staying on track. These energy balls are practically begging to be part of your Sunday routine. You mix them up, roll them out, and boom—you’ve got snacks ready for days!
Once they are firm from that initial chill time, transfer them into an airtight container. I prefer glass containers because they keep things feeling fresh longer, but honestly, any container that seals tight works. You can keep them in the refrigerator for up to a full week. I love that they are ready to throw into my lunch bag or my kid’s snack box without any extra thought.
Want to make a huge batch for even busier weeks? Go for it! These freeze beautifully. Just make sure they are completely firm before you freeze them. Lay them out on parchment paper on a small tray, freeze them solid for maybe two hours, and then transfer them straight into a heavy-duty freezer bag. They keep their texture really well in the freezer for up to three months. When you need one, just pull it out and let it thaw on the counter for five minutes while your coffee brews. It’s just like a little homemade grab-and-go moment, thanks to that meal prep patience!
Speaking of saving time, if you’re looking for other make-ahead lunches, honestly, my easy creamy chicken tortilla soup is another freezer favorite of mine that saves me when the week gets totally out of hand.
Flavor Variations on Classic Protein Balls
The base recipe is fantastic, truly, but sometimes you just need a little shake-up, right? I always have people asking me how to make these into different flavors since they love the texture so much. Good news—since this is just a no-bake mixture, it is incredibly easy to customize! Think of the original recipe as your blank canvas waiting for a little artistic flair.
If you found my base recipe a little too simple for your tastes, I highly recommend experimenting with different extracts or add-ins. It only takes a minute, and suddenly you have a whole new snack ready to go. You can even check out more of my easy treats like my easy no-bake chocolate coconut balls for more inspiration!
Chocolate Protein Balls Makeover
This is probably the most requested variation! If you want to turn these peanut butter favorites into decadent chocolate protein balls, you only need to make one small substitution. Instead of using vanilla protein powder, swap it directly for chocolate protein powder. That’s it!
If you want an extra deep, dark chocolate flavor—the kind that tastes like a brownie?—add one tablespoon of unsweetened cocoa powder along with the protein powder. You might notice it thickens the dough slightly, so keep that teaspoon of water or milk handy just in case you need to loosen it up a bit again!
Boost the Spice and Extract Game
Want something a little warmer? Forget the vanilla extract sometimes! Try swapping it for almond extract. Just half a teaspoon gives these energy balls a totally sophisticated, slightly nutty flavor that pairs beautifully with the peanut butter. It really elevates the whole experience.
For these spice variations, I usually leave the chocolate chips out unless I’m making purely dessert-style bites. Adding a tiny pinch of cinnamon or even a whisper of instant coffee grounds (like, just half a teaspoon) can completely transform the flavor profile without adding any extra work. It’s amazing what those little background notes can do to a simple snack!
Serving Suggestions for Your High Protein Snacks
Now you have these beautiful, perfectly chilled little powerhouses ready to go. What do you do with them? Honestly, half the time I just grab one while I’m standing in front of the fridge, but they are actually perfect for a few specific moments. Since they’re so rich and satisfying, you don’t need a huge portion to feel refueled.
For my morning coffee routine, if I need just a little something extra to get me through that first hour of work, two of these alongside my mug is just perfect. They give me that slow-release energy so I don’t crash before lunch. They make a fantastic, quick breakfast if you’re really running behind and can’t manage even my moist sweet potato muffins.
Because they are so dense with peanut butter and protein, they truly pass as a guilt free dessert too. If I’m craving something sweet after dinner but don’t want a heavy slice of actual cake, popping one or two of these makes the craving disappear instantly. They are rich enough that you feel like you had a real treat!
Also, try pairing them with fresh fruit! A few of these high protein snacks next to a bowl of berries or some sliced apples makes for a really balanced afternoon combination. The sweetness of the fruit cuts through the richness of the peanut butter perfectly. It’s such a simple way to turn a snack into a mini-meal!
Frequently Asked Questions About Protein Balls Recipe
I get so many questions about tweaking these simple protein bites, and I love hearing how everyone customizes them! Since these are so adaptable, it’s natural to wonder about substitutions or shelf life. Here are the things folks ask me most often about making this protein balls recipe perfectly for their needs.
Can I use a different type of protein powder besides vanilla?
Yes, absolutely! Vanilla is my go-to because it blends nicely with everything, but feel free to use unflavored protein powder if you want a pure peanut butter oat flavor. If you use chocolate, remember what I said earlier about needing a little extra milk or water to keep the texture workable. Whey, soy, or even pea protein powders generally work just fine in this base recipe, but just be aware that plant-based powders can sometimes soak up moisture faster, making the dough look a little drier initially.
How long do these last? Do they need to be refrigerated?
Since these contain perishable ingredients like nut butter and honey, refrigeration is key to keeping them fresh and firm! I store mine in an airtight container in the fridge, and they hold up beautifully for about a week. If you make a huge double batch (and you should!), they freeze wonderfully. I mention how to freeze them in the meal prep section, but generally, three months is a safe bet in the freezer if you wrap them tight.
How do I make these vegan or dairy-free?
This is an easy switch, thankfully! To make these fully vegan or dairy-free, you just swap out the honey for maple syrup, which keeps them perfectly sweet and sticky. If your protein powder is whey-based (dairy), you’ll need to switch to a plant-based version, like a soy or pea protein powder. If you do that, keep an eye on the consistency because plant powders can sometimes dry things out a bit more than whey!
Why are my finished protein balls crumbly instead of sticking together?
That usually means your binder ingredients weren’t quite sticky enough, or maybe your nut butter was too stiff. Don’t panic! This is why I always suggest having an extra teaspoon of water or milk ready. Add it just a tiny bit at a time while mixing by hand until you can press a small bit of the mixture and it holds its shape without cracking. If you skip the chilling step, they can also feel crumbly right when you roll them, so make sure they get that 30 minutes in the fridge to set!
If you’re interested in other easy treats that use simple swaps, you have to see my recipe for easy creamy mini cheesecake bites—I have notes there about using coconut oil for people avoiding nuts too!
Understanding the Nutrition in These Protein Bites
I know many of you are tracking macros or just really care about what you’re fueling your body with, and that’s something I completely respect. When I developed this protein balls recipe, I wasn’t just aiming for delicious; I wanted something that genuinely served as healthy fuel. Because we’re using whole oats and a solid scoop of protein powder, these little gems really deliver staying power!
I’ve calculated the nutritional information for a single ball based on the ingredients listed above—meaning precisely one serving size. Just keep in mind that these numbers are estimates, of course! Once you start swapping out peanut butter for almond butter, or choosing a different protein powder brand, the final tally will shift slightly. That’s the reality of home cooking, but this gives you a great baseline for your macros!
Here is the breakdown for one perfectly rolled bite:
- Serving Size: 1 ball
- Calories: 150
- Protein: 8g (That’s excellent for such a small snack!)
- Total Fat: 9g
- Carbohydrates: 12g
- Sugar: 7g
See? Eight grams of protein just makes these perfect protein bites for a post-hike re-up or a midday energy lift. They truly fit so many different eating plans. If you’re looking for other snack ideas that also hit those protein goals, you must check out my recipe for easy homemade protein bars—they use a similar principle!
Share Your Favorite Protein Balls Creations
Now that you have all the secrets to rolling perfectly shaped, delicious, no-bake protein balls, I truly want to hear what you think! Did you swap the chocolate chips for dried cherries? Did you use cashew butter instead of peanut butter? This community is really about sharing what works in our own kitchens, so please don’t be shy!
When you make these for your family or your weekly meal prep, snap a quick picture and share it with me! Tagging me helps others see how easy and customizable this recipe truly is. Seeing your creations just warms my heart and reminds me why I love sharing these simple recipes from my hearth to yours.
If you made these and they made your busy week easier—and I really hope they did—please take a moment to drop a rating down below. Five stars means the world to me and helps other busy home cooks find this reliable recipe! Any questions you have about shelf life or texture, throw them into the comments too. If you need to get in touch directly for anything at all, you can always head over to my contact page!
PrintEasy No-Bake Peanut Butter Protein Balls for Quick Fuel
Make these simple, no-bake protein balls using pantry staples. They are packed with protein and peanut butter, perfect for a quick, healthy snack or post-workout fuel.
- Prep Time: 10 min
- Cook Time: 0 min
- Total Time: 10 min
- Yield: 18 servings 1x
- Category: Snack
- Method: No-Bake
- Cuisine: American
- Diet: Vegetarian
Ingredients
- 1 cup rolled oats
- 1 cup peanut butter (or almond butter)
- 1/2 cup vanilla protein powder
- 1/3 cup honey or maple syrup
- 1/4 cup mini chocolate chips (optional)
- 1 teaspoon vanilla extract
Instructions
- Place the oats, peanut butter, protein powder, honey, vanilla extract, and chocolate chips (if using) into a large mixing bowl.
- Mix all ingredients together using a sturdy spoon or your hands until a uniform dough forms. If the mixture seems too dry, add a teaspoon of water or milk at a time until it holds together.
- Roll the mixture into small, uniform balls, about 1 inch in diameter.
- Place the finished protein balls on a baking sheet lined with parchment paper.
- Refrigerate the protein balls for at least 30 minutes to firm up before serving.
- Store the finished energy balls in an airtight container in the refrigerator for up to one week.
Notes
- For a lower sugar option, substitute the honey with a sugar-free syrup alternative.
- You can swap peanut butter for almond butter or sunflower seed butter to change the flavor profile.
- These make excellent meal prep snacks for busy weeks.
Nutrition
- Serving Size: 1 ball
- Calories: 150
- Sugar: 7g
- Sodium: 80mg
- Fat: 9g
- Saturated Fat: 2g
- Unsaturated Fat: 7g
- Trans Fat: 0g
- Carbohydrates: 12g
- Fiber: 2g
- Protein: 8g
- Cholesterol: 0mg