
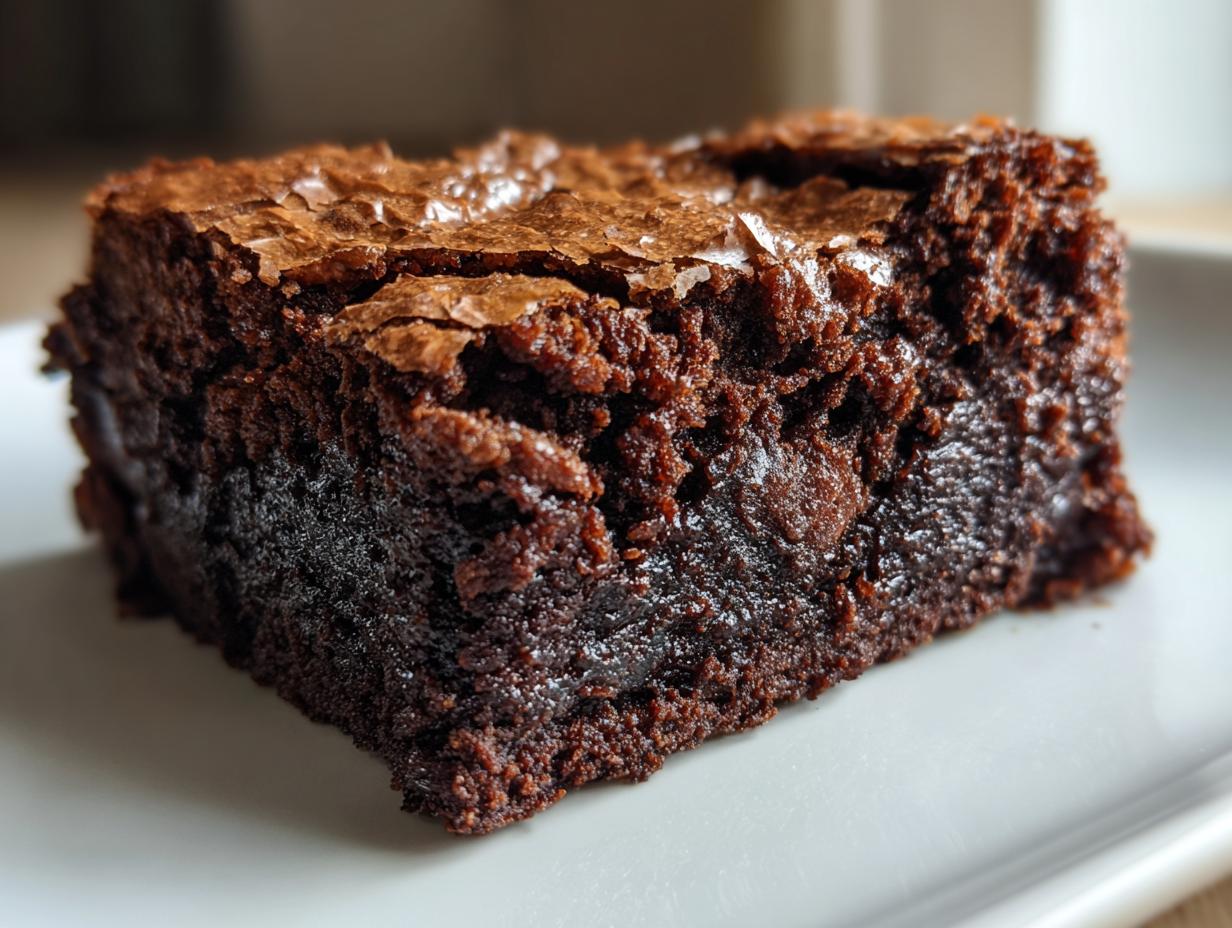
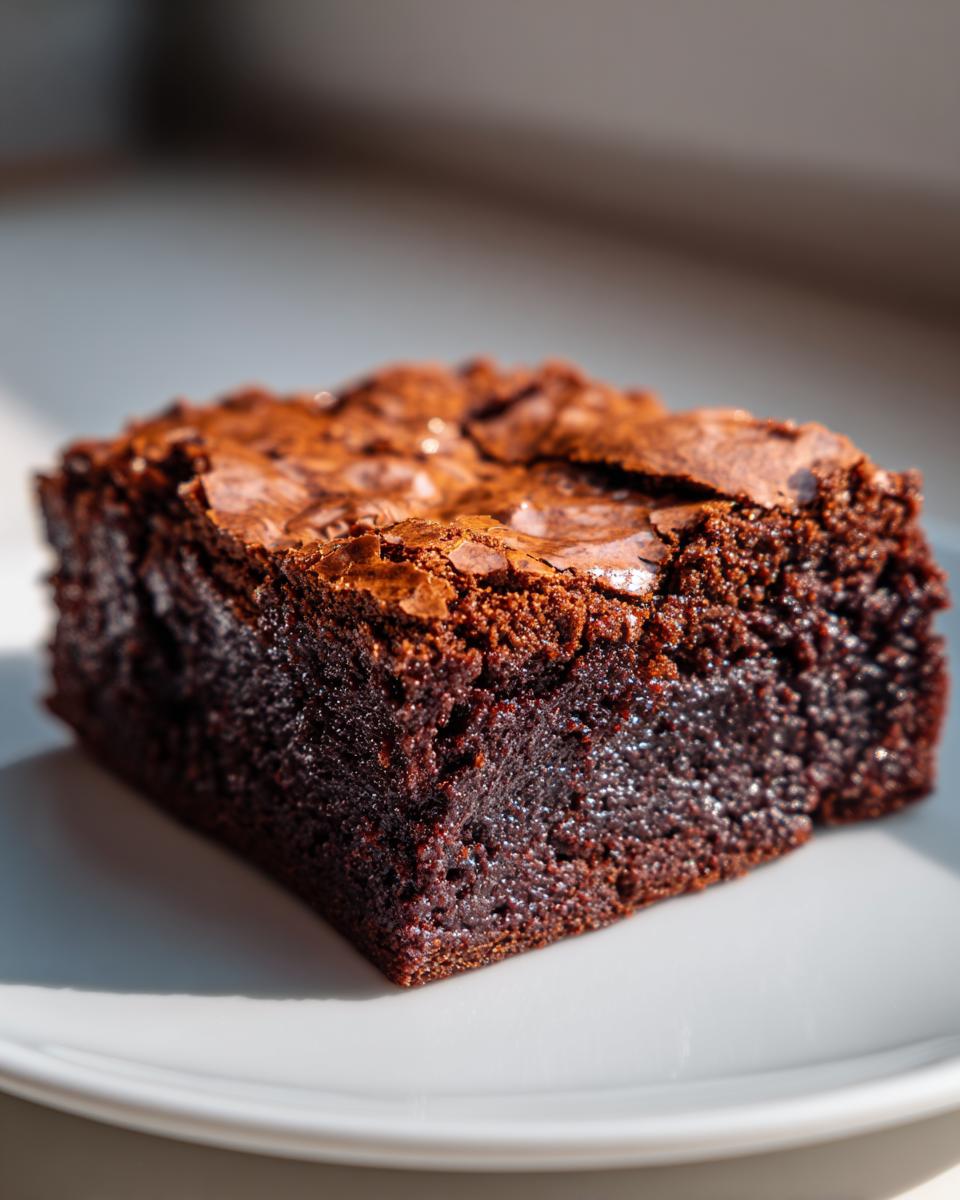
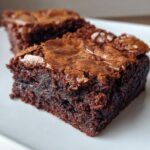
Oh, that moment hits you, doesn’t it? That deep, undeniable craving where only pure, dark chocolate will do? Forget those airy, cakey versions you sometimes end up with. We are here today to talk about serious territory: the Seriously Fudgy Homemade Brownies that require a fork and maybe a napkin or two. This recipe isn’t just popular; it’s the ultimate solution for deep chocolate indulgence, delivering that elusive, dense center paired with a signature crackly top. Every recipe on HearthBite is tested right here in my own kitchen, ensuring that Sarah Miller’s method gives you reliable, comforting results every single time you turn on that oven. If you want to know more about our philosophy of making food that truly warms the soul, you can always check out our story right here.
- Why This is the Best Fudgy Brownie Recipe (Chocolate Indulgence Guaranteed)
- Gathering Ingredients for Seriously Fudgy Homemade Brownies
- Step-by-Step Instructions for Seriously Fudgy Homemade Brownies
- Expert Tips for Seriously Fudgy Homemade Brownies Success
- Ingredient Substitutions for Your Fudgy Brownie Recipe
- Storage and Reheating Seriously Fudgy Homemade Brownies
- Serving Suggestions for These Best Dessert Bars
- Frequently Asked Questions About Seriously Fudgy Homemade Brownies
- Estimated Nutritional Information for This Fudgy Brownie Recipe
Why This is the Best Fudgy Brownie Recipe (Chocolate Indulgence Guaranteed)
I know, I know, everyone claims they have the *best* brownie recipe. But I promise you, this one delivers on the deep chocolate indulgence factor every single time. When I first started testing bakes for HearthBite, I needed a bar that was unapologetically rich, and this combination of butter, two types of sugar, and heaps of chocolate nailed it. It’s the recipe I bring to every potluck, and people always ask me for the secret!
What makes these stand out from the usual suspects? It’s all about that texture contrast:
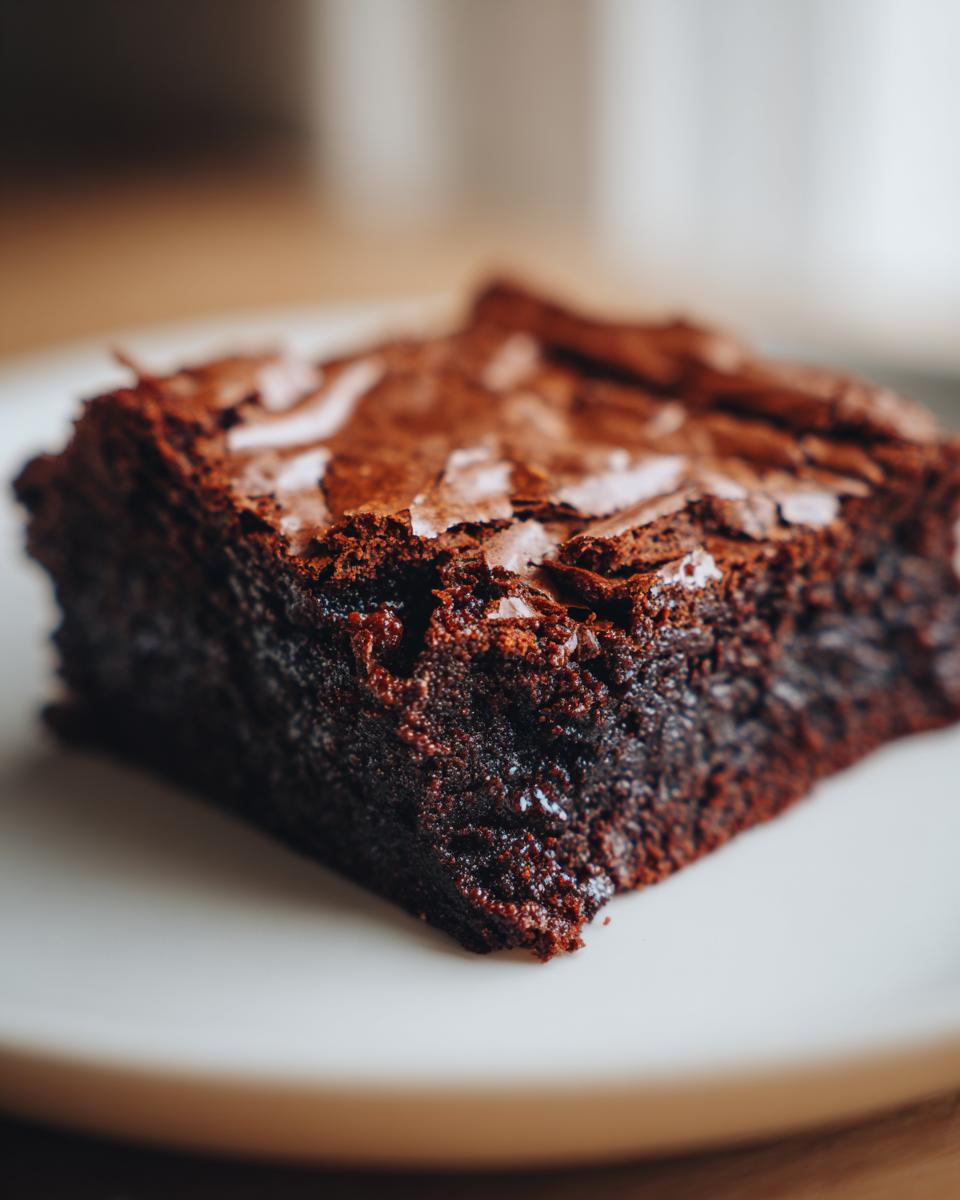
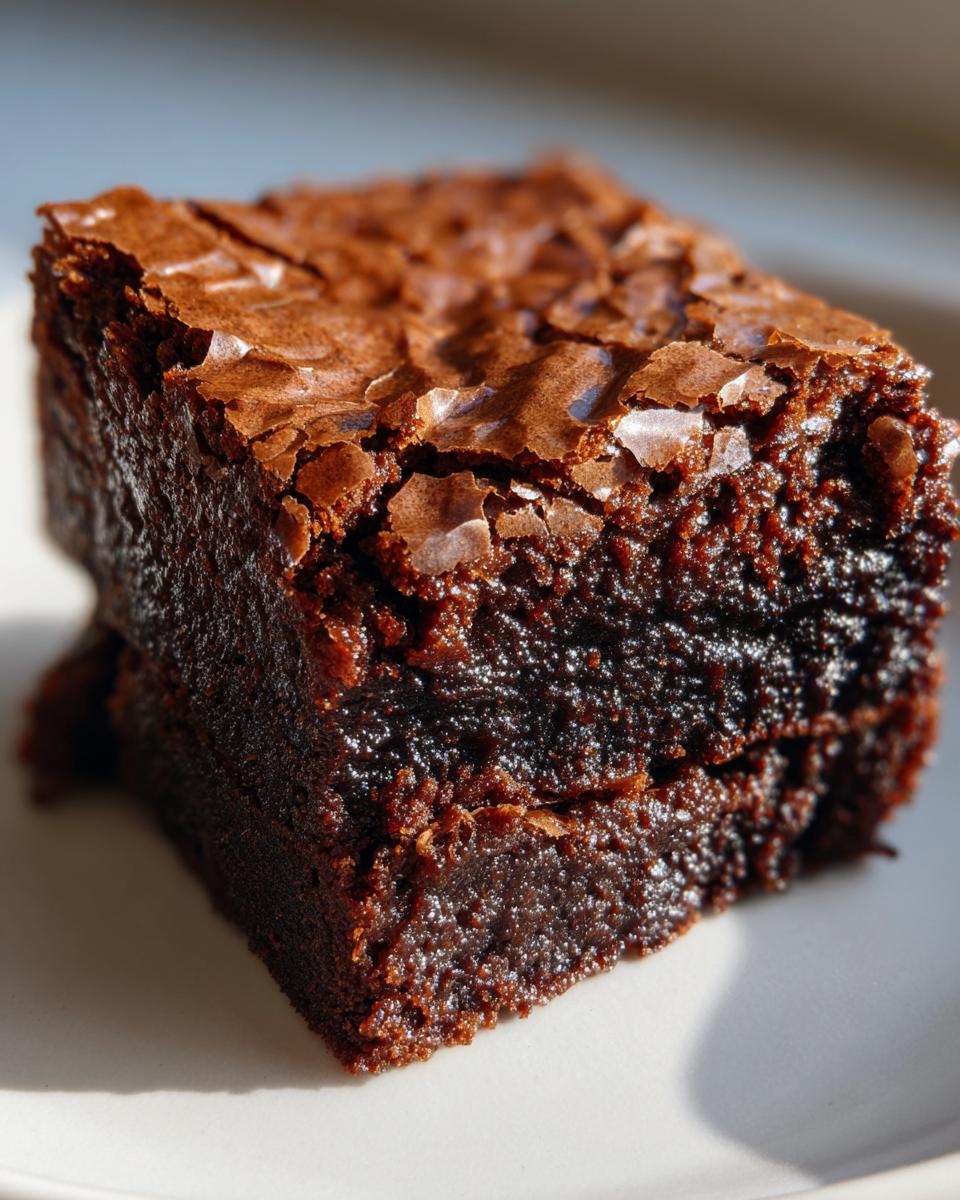
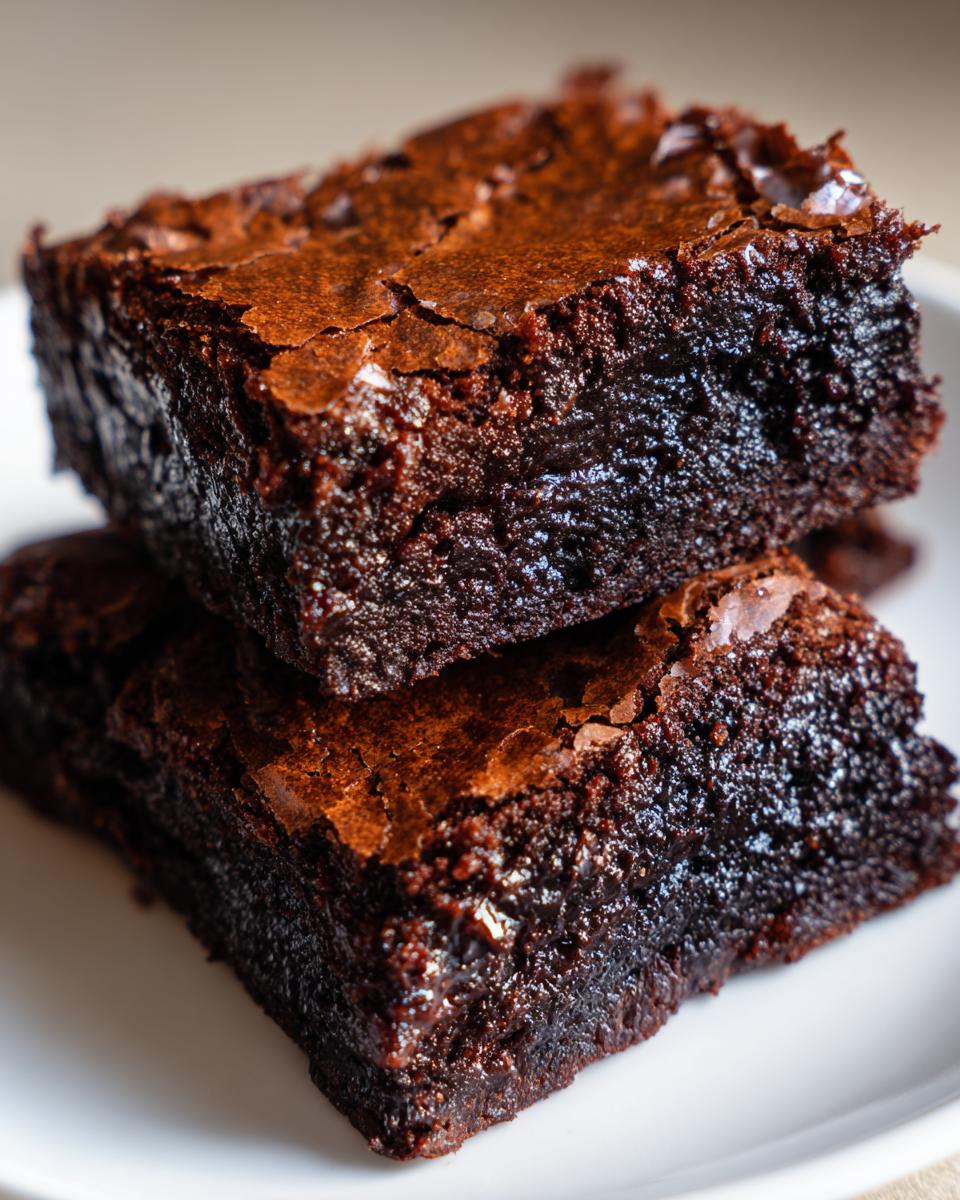
- Dense and Fudgy Center: We keep the flour low. This isn’t a cakey bar; it’s a serious, melt-in-your-mouth chew that feels luxurious.
- The Signature Shiny Top: That beautiful, paper-thin crackly top that everyone hopes for? It happens here, thanks to how we handle the whisking of the sugars and eggs.
- Triple Chocolate Brownies Flavor: With melted chocolate *and* chocolate chips folded in, the flavor goes deep, offering true chocolate satisfaction.
Trust me, making one batch of these reliably delicious bars will make you skip every box mix forever. If you want more cozy, soul-warming dishes like this, check out our collection of comfort recipes.
Gathering Ingredients for Seriously Fudgy Homemade Brownies
When you’re making something as special as these best dessert bars, you really can’t skimp on the ingredients. Because the flavor is so intensely chocolatey, quality matters! We aren’t hiding anything behind a ton of leavening here; we are relying on the real stuff to give us that rich flavor profile. Pay close attention to your sugars, especially that brown sugar—it needs to be packed down nice and firm into your measuring cup, which is key for that dense final texture.
Get everything measured out before you even think about turning on the stove. Mise en place is crucial here, especially timing how quickly we need to work once that chocolate starts melting!
Ingredients List
- 1 cup (2 sticks) unsalted butter
- 4 ounces unsweetened chocolate, chopped
- 1 1/4 cups granulated sugar
- 1 cup packed light brown sugar
- 4 large eggs
- 1 tablespoon vanilla extract
- 3/4 cup all-purpose flour
- 1/2 cup unsweetened cocoa powder
- 1/2 teaspoon salt
- 1 cup semi-sweet chocolate chips
Step-by-Step Instructions for Seriously Fudgy Homemade Brownies
Okay, this is where the magic really starts to happen! Remember how I stressed getting everything ready? That’s because once the chocolate hits the heat, we need to move pretty quickly, but without rushing the actual mixing. We’re aiming for deep flavor development, not toughness. If you want to get a head start on dinner planning later, you can check out some of my quick and easy dinner recipes while your brownies bake!
Preparing the Pan and Oven
First things first: heat up that oven to 350 degrees F. Now, for the pan, and this is one of my favorite tricks for clean removal—don’t just grease it! You absolutely must line a 9×13 inch pan with parchment paper. Crucially, leave some overhang on the sides. You’ll use these overhangs like little handles later to lift the entire cooled block of fudgy goodness right out of the pan. Lightly grease that parchment paper surface too, just for good measure.
Melting Chocolate and Combining Sugars
Grab a medium saucepan, and keep the heat low—I mean really low. We’re melting the butter and that chopped unsweetened chocolate together until it’s completely smooth. Baby that chocolate; if you heat it too fast, it scorches, and we can’t fix that! Once it’s glossy, pull it right off the heat. Then, whisk in both your granulated sugar and that packed light brown sugar until everything looks uniform. Don’t worry about over-whisking here; we are building structure!
Incorporating Eggs and Dry Mix
Now for the eggs. Beat them in one at a time, mixing thoroughly after each one goes in. Seriously, make sure that first egg is fully incorporated before the second one even thinks about joining the party. Stir in your vanilla next. In a separate bowl, quickly whisk together your flour, cocoa powder, and salt. When you add the dry ingredients to the wet mixture, this is your moment of patience! Add the dry ingredients slowly, mixing only until you stop seeing streaks of flour. Stop immediately. I cannot stress this enough: overmixing the flour develops gluten, and gluten is the enemy of a truly fudgy brownie!
Baking and Achieving the Crackly Top Brownies Finish
Gently fold in those semi-sweet chocolate chips—we don’t want to deflate all that carefully incorporated air. Spread the batter evenly into your prepared pan. Pop it into the oven for 25 to 30 minutes. Here’s the key for the crackly top brownies: you want to pull them when the edges look set, but the center still looks a little soft or even slightly underdone. Insert a toothpick near the edge; it should come out with moist crumbs attached, but not wet batter. That residual heat is going to finish the center perfectly as it cools, giving you that dense, satisfying bite.
Expert Tips for Seriously Fudgy Homemade Brownies Success
If you follow the main steps but these few little pointers just aren’t clicking, don’t panic! These are the ‘Sarah Miller approved’ tweaks that take these from good to absolutely legendary, ensuring you get that perfect texture every time you go for chocolate indulgence. Because these are designed to be so rich, a few details make all the difference in keeping them moist.
We talked about pulling them early for that ultimate fudgy texture, and that’s crucial for the top too. Overbaking is the number one way to destroy the crackly top brownies dream! The residual heat that stays trapped in the pan continues to set the center as they cool down on the rack. Seriously, give them at least two full hours on the counter before you even think about cutting them.
Also, about the chocolate itself—since we have so much going on in the flavor department with this fudgy brownie recipe, skip anything labeled ‘baking chocolate’ that tastes waxy. I insist on using high-quality baking chocolate for those first four ounces that melt down. The deeper the initial chocolate flavor, the better the final result will be. For an even denser experience—if you want them bordering on solid chocolate perfection—try swapping out 1/4 cup of the flour for cornstarch. It really cuts the structure just enough!
If you’re looking for quick ideas for the morning after you devour these, you can check out some of my go-to reliable recipes, like these easy breakfast recipes.
Ingredient Substitutions for Your Fudgy Brownie Recipe
I totally understand that sometimes we have to work with what’s in the pantry! While I am a firm believer in using exactly what the recipe calls for when chasing that perfect seriously fudgy homemade brownies texture, sometimes you need a little flexibility. Don’t worry, making swaps won’t ruin the whole thing, but just know that texture might shift slightly!
Let’s talk chocolate chips first, since we use two types here. If you only happen to have bittersweet chips in the cupboard instead of semi-sweet, go ahead and use them! Your brownies will be slightly less sweet and have a deeper, darker edge—which I honestly think pushes them even further toward that ultimate chocolate indulgence.
What if you’re out of brown sugar? You can substitute the 1 cup of packed light brown sugar with granulated sugar, but you *must* add back that molasses flavor it lends. For every cup of brown sugar needed, use 1 cup of white sugar plus 1 tablespoon of molasses. Whisk it in with the wet ingredients. This swap is important because brown sugar is hygroscopic—it holds moisture, which is key for fudginess!
And if you’re curious about trying a flavor variation, I recently played around with swapping out the semi-sweet chips for white chocolate chips in a similar base. It turned into a totally different, but equally amazing, experience! You can see how I tackled that intense flavor profile in my fudgy red velvet brownies recipe, which uses a similar density technique.
Storage and Reheating Seriously Fudgy Homemade Brownies
The hardest part about making a batch of seriously fudgy homemade brownies is stopping yourself from eating them all in one sitting! Good news: these hold up really well, unlike some drier cakes. Because of that gorgeous, dense texture and the high fat content, they store beautifully at room temperature.
Make sure they are completely cool—and I mean totally cool—before you start hiding them away. Store them in an airtight container. If you stack them, put a small sheet of parchment or wax paper between the layers so they don’t stick together once they start getting soft. They’ll stay perfectly fudgy like this for about four to five days. If you need them longer, you can absolutely freeze them! Wrap individual squares tightly in plastic wrap, then tuck them into a freezer bag for up to three months.
Now, reheating them to recapture that just-baked gooeyness is easy. Don’t be tempted to microwave the whole block! Just take one square and zap it for about 10 to 15 seconds. It warms the chocolate chips just enough to soften the center again without drying out those beautiful edges. It’s the perfect little afternoon treat. For more deeply rich chocolate desserts, you should take a peek at my ultimate moist chocolate fudge cake recipe!
Serving Suggestions for These Best Dessert Bars
These best dessert bars are honestly spectacular completely plain—that beautiful crackly top and dense center speak for themselves! But who are we kidding? Everything is better when paired with something cold and creamy, right? When I serve these up for a real treat, I always rely on classic combinations that just enhance that deep chocolate indulgence without fighting the flavor.
You really can’t go wrong with a scoop of really good quality vanilla bean ice cream melting slowly down the sides. The temperature contrast against the room-temperature brownie is just heavenly. If you’re trying to keep things a touch lighter (or just want some color!), a scattering of fresh raspberries or maybe some slightly tart cherries on the plate cuts through the richness beautifully.
My favorite way to serve them up when I’m rushing but still want them to look special is this: skip the glaze, give the top a very light dusting of powdered sugar, and serve it warm with a strong cup of black coffee. It feels very European and very cozy! If you’re done with dessert thinking, you can check out some of my go-to ideas for midday meals here: healthy lunch recipes.
Frequently Asked Questions About Seriously Fudgy Homemade Brownies
If you’ve followed along this far, you probably know how to nail the texture, but sometimes little questions pop up when we stray from the perfect path. Don’t worry about it! I get questions all the time about texture, baking science, and how to keep these treasures tasting fresh. If you’re looking for even more cocoa inspiration after you finish these bars, check out my easy chocolate recipes page!
How do I guarantee the shiny, crackly top on my brownies?
Ah, the crown jewel! That shiny, crackly top comes down primarily to the relationship between the sugar and the eggs. When you whisk the sugars (both granulated and brown) into that warm, melted chocolate mixture, you are dissolving that sugar. Then, when you beat in the eggs one by one, you are incorporating air bubbles that rise to the top surface during baking. That thin crust forms as a result of the sugar drying slightly faster than the center. The absolute most important rule here is: once they are in the oven, do not open the door! And absolutely do not touch them or jiggle the pan while they are cooling. Let that surface set undisturbed.
Can I make these triple chocolate brownies ahead of time?
Yes, you totally can! In fact, often these triple chocolate brownies taste even *better* the next day after the flavors have had a chance to meld together. They are dense enough to handle being stored, just follow the airtight storage instructions we talked about earlier. They stay fudgy and delicious for days, making them the perfect make-ahead dessert bar for parties!
What is the difference between a cakey brownie and a fudgy brownie recipe?
This all comes down to ratios, darling! A cakey brownie has significantly more flour and often includes a leavening agent, like baking powder, to make it rise higher. We want the opposite here for true chocolate indulgence. In this rich fudgy brownie recipe, we intentionally keep the flour low and rely heavily on the fat (butter) and the eggs to create structure. Less flour means less gluten development, which equals that dense, wonderfully gooey center we are aiming for!
Estimated Nutritional Information for This Fudgy Brownie Recipe
Look, I know when you’re making something this decadent, you aren’t exactly counting every single bite, right? But since we believe in full transparency here at HearthBite, I always like to include the facts. These numbers are just estimates, of course! They are based on a standard calculation for making 16 squares from the recipe above. So, if you cut your pieces bigger or smaller, your counts will obviously shift. This is just a general guideline for when you want to know the breakdown of this incredible fudgy brownie recipe.
Remember, these are rich, satisfying squares designed for maximum enjoyment! I’ve linked our privacy policy below if you want to review how we handle information here on the site.
- Serving Size: 1 brownie square
- Calories: 280
- Total Fat: 17g
- Carbohydrates: 32g
- Protein: 4g
- Sugar: 30g
See? Plenty of sugar to help guarantee that beautiful crackly top brownies finish we love so much! Enjoy every bite.
PrintSeriously Fudgy Homemade Brownies with a Crackly Top
Make the best dessert bars with this recipe for triple chocolate brownies that deliver a dense, fudgy center and the signature shiny, crackly top.
- Prep Time: 15 min
- Cook Time: 30 min
- Total Time: 45 min
- Yield: 16 servings 1x
- Category: Dessert
- Method: Baking
- Cuisine: American
- Diet: Vegetarian
Ingredients
- 1 cup (2 sticks) unsalted butter
- 4 ounces unsweetened chocolate, chopped
- 1 1/4 cups granulated sugar
- 1 cup packed light brown sugar
- 4 large eggs
- 1 tablespoon vanilla extract
- 3/4 cup all-purpose flour
- 1/2 cup unsweetened cocoa powder
- 1/2 teaspoon salt
- 1 cup semi-sweet chocolate chips
Instructions
- Preheat your oven to 350 degrees F. Line a 9×13 inch baking pan with parchment paper, leaving an overhang on the sides for easy removal. Lightly grease the paper.
- In a medium saucepan over low heat, melt the butter and chopped unsweetened chocolate together, stirring until smooth. Remove from heat.
- Whisk the granulated sugar and brown sugar into the melted chocolate mixture until fully combined.
- Beat in the eggs one at a time, mixing well after each addition. Stir in the vanilla extract.
- In a separate bowl, whisk together the flour, cocoa powder, and salt.
- Gradually add the dry ingredients to the wet ingredients, mixing only until just combined. Do not overmix.
- Fold in the semi-sweet chocolate chips.
- Spread the batter evenly into the prepared pan.
- Bake for 25 to 30 minutes. A toothpick inserted near the edge should come out with moist crumbs attached, but the center should still look slightly underdone for maximum fudginess.
- Let the brownies cool completely in the pan on a wire rack before lifting them out using the parchment overhang and cutting them into squares.
Notes
- For the best crackly top, do not overbake the brownies. The residual heat will continue to cook them as they cool.
- Use high-quality unsweetened chocolate for the deepest flavor in these triple chocolate brownies.
- If you prefer a richer, denser texture, substitute 1/4 cup of the flour with an equal amount of cornstarch.
Nutrition
- Serving Size: 1 brownie square
- Calories: 280
- Sugar: 30
- Sodium: 110
- Fat: 17
- Saturated Fat: 10
- Unsaturated Fat: 7
- Trans Fat: 0
- Carbohydrates: 32
- Fiber: 2
- Protein: 4
- Cholesterol: 75