
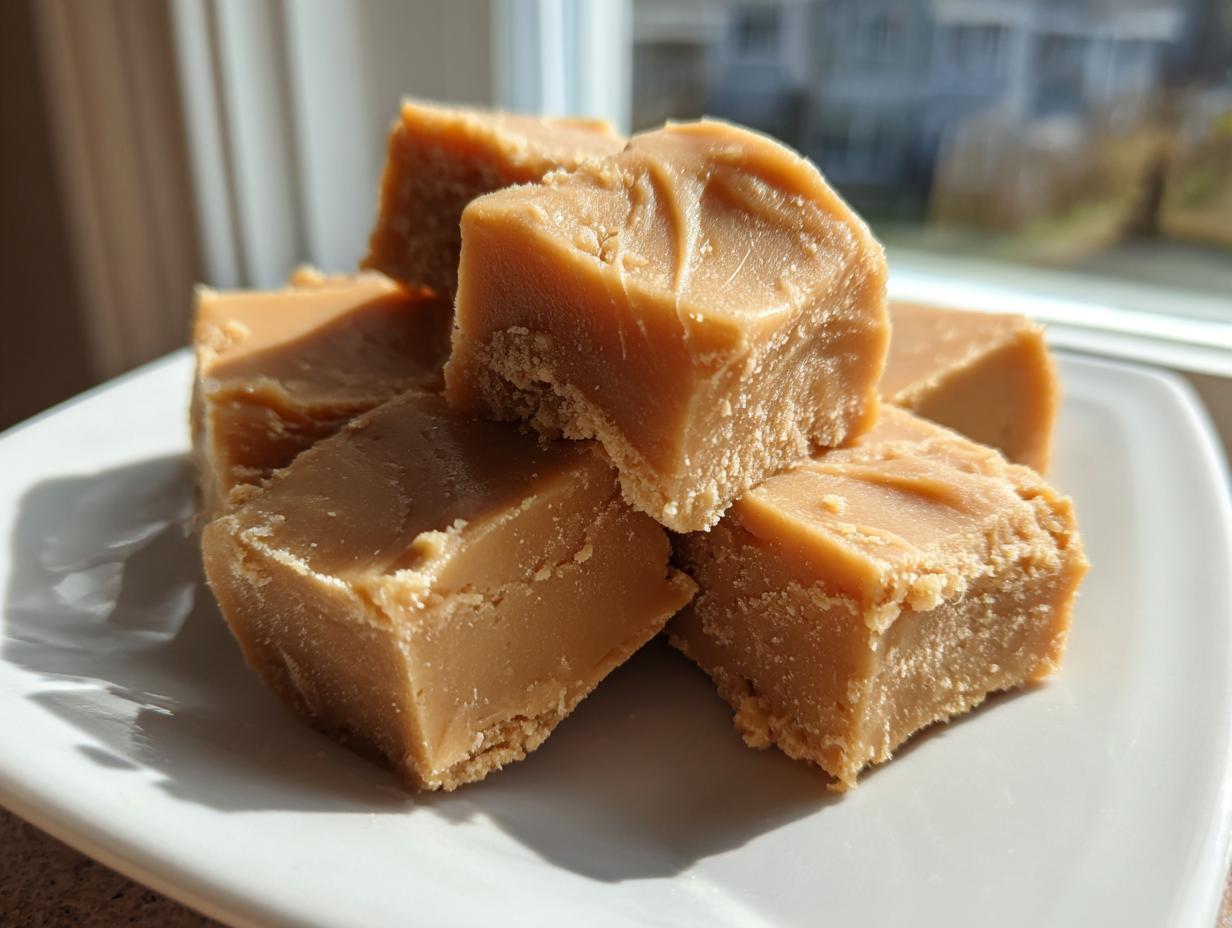
Do you ever just crave that old-school candy shop magic? The kind of sweet that wraps you up in a cozy memory? Forget the chocolate for a minute, because today, we’re diving deep into the rich, buttery world of penuche fudge. This isn’t just any dessert; it’s a piece of candy history. When I first started HearthBite, I knew I had to nail this recipe, the one that tastes exactly like the ‘good stuff’ our grandparents used to sneak when making holiday candy. This creamy, perfectly smooth confection relies entirely on the deep, comforting flavor of brown sugar. If you want to know more about why I started sharing these timeless treats, you can always check out the story behind HearthBite right here. Trust me, mastering this old fashioned fudge technique is easier than you think, and it’s going to become your go-to sweet treat!
- What Exactly is Penuche Fudge? A Classic Confection
- The Secret to Creamy Penuche Fudge: Ingredients and Prep
- Step-by-Step Instructions for Old Fashioned Penuche Fudge
- Tips for Success When Making Penuche Fudge
- Storage and Making Ahead for Holiday Candy Making
- Penuche Fudge Variations and Serving Suggestions
- Frequently Asked Questions About Penuche Fudge
- Nutritional Estimates for Your Homemade Candy Recipe
- Share Your Success Making Penuche Fudge
What Exactly is Penuche Fudge? A Classic Confection
So, what makes Penuche Fudge so special? If you’re expecting that familiar deep cocoa flavor, you’ll be happily surprised! Penuche—say it like Pen-oo-chee—is what happens when you make fudge all about the glorious flavor of butter and brown sugar. It’s rich, deeply caramelized, and boasts unbelievable notes of butterscotch. This is truly an old fashioned fudge, a vintage candy recipe that doesn’t involve a single drop of chocolate! People sometimes call it a sweet vanilla fudge because the vanilla really sings against that deep caramel foundation. If you love rich, buttery sweets, this creamy fudge recipe is your answer to the best no chocolate fudge you’ll ever make.

The Secret to Creamy Penuche Fudge: Ingredients and Prep
Okay, let’s talk secrets, because this creamy fudge recipe hinges entirely on what you put in the pot and how you treat it before we even turn on the heat. Making candy is chemistry, but don’t let that scare you! It just means we need to be precise with our measurements for that perfect melt-in-your-mouth candy texture. The good news? Prep work is fast—we’re looking at just 15 minutes before we start cooking. Remember, the quality of your butter and sugar makes a huge difference here since there’s nowhere for weak flavors to hide!
Essential Ingredients for Perfect Penuche Fudge
You only need a handful of things, which is why this feels so beautifully humble and old-fashioned. But you must measure them correctly. Seriously, pack that brown sugar in tight!
- 2 cups light brown sugar, packed—don’t skimp here!
- 1 cup whole milk or heavy cream (I prefer cream for extra richness!)
- 1/2 cup unsalted butter—no substitutes, please; we need that pure buttery flavor.
- 1/2 teaspoon salt (This keeps the sweetness from being overwhelming.)
- 1 teaspoon vanilla extract (Add this *after* cooking, trust me.)
- 1/4 cup powdered sugar (This is just for dusting the pan, like a gentle hug for the fudge.)
Equipment Needed for this Simple Stovetop Fudge
Because we are cooking sugar on the stove, we need the right gear to handle that heat evenly. Using the proper saucepan prevents scorching, which is the quickest way to ruin this beautiful brown sugar fudge recipe.
- An 8×8 inch baking pan. You must line it with parchment paper, making sure you leave an overhang—this is your handle for getting the finished candy out later!
- A heavy-bottomed saucepan. Seriously, medium heat on a thin pan equals disaster. We need that thick bottom to distribute the heat gently.
- A reliable candy thermometer. This is non-negotiable for this old fashioned fudge. We’re aiming for an exact temperature, and spoons, cold water tests—they just don’t cut it when you want perfect consistency.
- A sturdy wooden spoon or spatula. You’ll need something strong for the vigorous beating at the end!
If you have any technical questions about measurements or substituting ingredients, don’t hesitate to reach out via my contact page. I love hearing from you kitchen adventurers!
Step-by-Step Instructions for Old Fashioned Penuche Fudge
This is where the magic happens, and I want you to feel completely confident marching into this! We’re making old fashioned fudge, which means respecting the process, especially those critical temperatures. Don’t rush the thermometer; it’s the best friend you have when trying to achieve that unbelievable, melt-in-your-mouth candy finish. Follow these steps closely, and you’ll have stunning, creamy blocks of penuche fudge before you know it.
Cooking the Penuche Fudge Base to the Right Temperature
First, get your sugar, milk, butter, and salt into that heavy-bottomed saucepan. Stir constantly over medium heat until the butter is gone and the sugar has dissolved. Now, this is the most important rule for avoiding graininess: once it starts to boil, you must stop stirring! Put that precious candy thermometer right in there. You need the mixture to hit exactly 234°F (112°C)—that’s the soft-ball stage. If you stir while it’s boiling, you risk creating tiny sugar crystals, and suddenly, your creamy dream turns into a gritty mess. We absolutely cannot have that in our penuche fudge!
Beating and Setting Your Melt in Your Mouth Candy
When that thermometer nudges 234°F, yank the pan off the heat immediately. Don’t even scrape the sides—just let it be! Now, we wait. You need patience here; let it cool undisturbed until the temperature drops down to 110°F (43°C). Once it hits that cooler mark, stir in your vanilla, and then you get to work beating it vigorously! You’ll see a noticeable change; the mixture will shift from glossy and wet to looking quite dull, thicker, and starting to hold its shape almost instantly. You have to work fast now! Scrape that thickened fudge quickly into your prepared pan. Don’t press it down; just let it settle. It will set up beautifully on its own at room temperature while you go put your feet up!

If you’re worried about this process, don’t stress—I’ve put together a little guide on my best practices for candy making that covers thermometer mishaps and cooling times, just in case!
Tips for Success When Making Penuche Fudge
Since this brown sugar fudge recipe relies on crystalline structure, a few little tricks can elevate it from ‘good’ to ‘absolutely legendary.’ Don’t worry if your first attempt felt a little shaky; that’s how you learn the rhythm of sugar! These tips are the shortcuts I’ve picked up over years of making this batch for every single fall dessert party.
Let’s go over the biggest pitfalls. You want that beautiful, smooth texture, not something that looks like gritty sand. This means absolute dedication to the cooking process, even when you’re tempted to give the pot a little shake!
- Heavy Pan, Low Stress: I cannot stress this enough—use the heaviest pan you own! If your pan is thin, the heat fluctuates wildly, especially around the edges, which gives you uneven cooking. We need slow, steady heat for a flawless finish on this old fashioned fudge.
- The No-Stir Zone: Seriously, once you hit that boiling point and insert the thermometer, walk away, or at least keep your hands firmly away from the spoon! Stirring introduces seed crystals that trigger premature graininess. It feels unnatural, like you’re ignoring a simmering pot, but this sacrifice buys you true melt-in-your-mouth candy results.
- Check Your Thermometer Calibration: If you’re battling weird textures even when you follow the steps, your thermometer might be lying to you! Before you start this recipe, check it in boiling water. It should read 212°F (100°C) at sea level. If it reads higher or lower, you’ll need to adjust your target cooking temperature slightly.
- The Importance of Cool Down: Remember that cooling stage—waiting for it to drop from 234°F down to 110°F? That pause is vital. It allows the sugar molecules to settle into the right formation before you aggressively beat them. Rushing this step leads to grainy fudge 9 times out of 10.
If you ever have questions about the finer points of candy making or need to review our site guidelines, I keep all that information handy on the terms of use page. Happy fudging!
Storage and Making Ahead for Holiday Candy Making
One of the best things about being able to make perfect penuche fudge is that it’s a fantastic make-ahead treat! If you’re diving into holiday candy making, you know you need things done weeks in advance, and luckily, this caramel fudge holds up beautifully. Because this is such a rich, buttery confection, we need to treat it right so it doesn’t absorb any weird smells or get sticky.
The key is keeping it sealed up tight and away from extreme temperatures. We want that melt-in-your-mouth texture to last right up until you serve it!
Storing Penuche Fudge at Room Temperature
For basic storage when you plan to eat it within a week or two, room temperature is my go-to method. Once the fudge is completely set—and I mean *completely* set, don’t rush this part—you need to wrap it up well. Seriously, if you don’t wrap it right, it can get sticky quick!
- Cut the fudge into squares first.
- Wrap each square individually in plastic wrap. I find that two layers of plastic give you the best protection.
- Place the individually wrapped pieces into an airtight container. A cookie tin works perfectly for holiday displays!
- Keep this container in a cool, dark pantry. Avoid putting it near the stove or any warm appliances. Stored this way, your brown sugar fudge recipe squares will stay creamy and fresh for about 10 days.

Making Penuche Fudge Ahead for Gifting
If you’re planning for a big holiday cookie exchange or gifting platter, you can definitely make this vintage candy recipe further in advance. This is where freezing comes in handy. It’s a lifesaver for busy times! I often make my entire batch right after Halloween!
- Wrap the fudge pieces tightly, just like you would for room-temperature storage, using plastic wrap.
- Pop those wrapped pieces into a heavy-duty freezer bag. Get as much air out as you can before sealing it—air is the enemy of homemade candy!
- It freezes beautifully for up to three months.
When you’re ready to serve or gift these morsels, just pull them out of the freezer and let them thaw slowly right inside their packaging, still wrapped, on the counter for a few hours. This condensation control keeps the surface from getting icky. If you’re interested in more make-ahead advice, especially around jams, I shared some great tips related to my no-cook freezer jam technique that might give you some new organizational tricks!
Penuche Fudge Variations and Serving Suggestions
The beauty of a classic confection like this penuche fudge is that while the original recipe is perfect all on its own, it’s also a fantastic canvas for playing around! Since it’s already a rich, sweet vanilla fudge, you don’t need much to switch things up. My goal is always to enhance that beautiful caramel backbone without overwhelming it. If you adore deeper, toffee-like notes, I have a super simple trick for you.
I love seeing what creative twists people put on simple desserts. If you’ve ever made my fudgy maple sweet potato brownies, you know I enjoy a good flavor mix! You can find those on the blog here.
Elevating the Caramel Flavor with Dark Brown Sugar
If you want to lean into that caramel fudge vibe, especially if you’re making this as a fall dessert recipe, try swapping out half of your light brown sugar for dark brown sugar. Dark brown sugar has a much higher molasses content, which deepens the flavor considerably—it almost pushes this into butterscotch fudge variation territory! It’s subtle, but oh so good.
Another easy win that makes this a spectacular homemade candy recipe is adding texture. Since this fudge doesn’t have chocolate to hide behind, you need quality mix-ins. I learned this from my grandmother: whatever you add, toast it first! Toasting nuts brings out their essential oils and makes them incredibly fragrant.
- Nutty Crunch: Fold 1/2 cup of lightly toasted pecans or walnuts in right before you beat the mixture—once it starts to lose its gloss.
- Warm Spice Kick: Add 1/4 teaspoon of ground cardamom along with your vanilla extract. Cardamom has an almost citrusy, warm note that pairs unexpectedly well with the brown sugar.
- A Touch of Salinity: Instead of just using salt in the cooking stage, sprinkle flaky sea salt right on top of the fudge immediately after pouring it into the pan. It looks gourmet and provides that perfect little flavor burst against the sweetness.
Serving Suggestions for Your Classic Confection
Honestly, this penuche fudge is so good it stands tall all by itself, but presentation matters when you’re serving it up or boxing it for gifts. Since it’s such a rich treat, a little goes a long way, making it perfect when served alongside something slightly acidic or bitter.
When I serve this at home, I always set out a plate of fudge next to a fresh pot of coffee. The deep, warm sweetness of the fudge just cuts through the bitterness of a strong brew perfectly. It makes a lovely afternoon treat!

For dessert platters, especially during the holidays, try cutting the squares a bit smaller, maybe 3/4 inch, and lining them up beside brighter, tangier things:
- A small bowl of tart dried cranberries or cherries.
- Thin slices of green apple.
- Another simple confection, like a peppermint bark, so the brown sugar flavor remains distinct.
This simple stovetop fudge elevates any table. It proves you don’t need complicated steps or fussy ingredients to create something truly memorable and delicious!
Frequently Asked Questions About Penuche Fudge
I know candy making can feel a little intimidating, especially when you’re dealing with exact temperatures! But really, once you know the key steps for temperature control and cooling, this penuche fudge is a breeze. I’ve gathered some of the questions I see most often about getting that perfect, creamy result. If you still have something on your mind after reading through, feel free to reach out via my contact page—I’m always happy to help troubleshoot your homemade candy recipe!
Can I make this creamy fudge recipe without a candy thermometer?
Oh, I really, really advise against it if this is your first time! Temperature is what separates a smooth, melt in your mouth candy from a sugary disappointment. That 234°F soft-ball stage is exact for a reason! If you absolutely do not have a thermometer, you can try the traditional soft-ball test: drop a tiny spoonful of the boiling mixture into a cup of ice-cold water. If it forms a soft, pliable ball that flattens slightly when you press it gently, you’re in the right zone. But honestly, thermometers are inexpensive now, and using one turns this guesswork into guaranteed success!
Why did my penuche fudge turn out grainy?
Graininess is the nightmare of every fudge maker, but it almost always comes down to one of two things, both of which we talked about above! The first big culprit is stirring the mixture while it’s boiling. That agitation forms crystals too early. The second is rushing the cooling process. If you start beating the mixture before it cools down to that crucial 110°F, you are effectively encouraging those unwanted crystals to form. It’s all about patience during the cooling stage for a truly creamy fudge recipe!
Is this considered an old fashioned fudge?
Absolutely, yes! This is the definition of old fashioned fudge. Penuche has been around for generations, pre-dating many modern recipes, especially those involving quick microwave methods. It’s one of those wonderful classic confections that relies on simple, pure ingredients like butter and brown sugar cooked down perfectly. It brings such a comforting, nostalgic flavor to any dessert table, especially when wrapped up as holiday candy making gifts.
Nutritional Estimates for Your Homemade Candy Recipe
I always get asked about the numbers, and while I concentrate more on the joy this sweet treat brings than counting every calorie, I want to be transparent about what goes into a piece of this delightful penuche fudge. Remember, this is an old fashioned candy, meaning it’s rich in butter and sugar—that’s where that unbelievable, smooth texture comes from! These figures are just estimates based on the ingredients listed for this particular brown sugar fudge recipe, made into 36 small squares.
When you look at these numbers, especially the sugar content, think of this as a truly special occasion treat, perfect for gift-giving or those cozy fall evenings. It’s made with basic ingredients, so you know exactly what you’re getting!
- Serving Size: 1 square
- Calories: About 145
- Sugar: 24g (That’s the brown sugar singing its flavor song!)
- Fat: 5g (Mostly from that delicious unsalted butter we used.)
- Saturated Fat: 3g
- Carbohydrates: 25g
- Protein: 1g
The beauty of making your own homemade candy recipe is that you control the ingredients—if you use heavy cream instead of milk, the fat content will be slightly higher, giving you an even richer bite. But overall, these estimates should give you a good idea of what a wonderful, traditional piece of caramel fudge provides!
Share Your Success Making Penuche Fudge
You did it! You navigated the tricky world of candy temperatures and landed yourself a batch of the creamiest, most comforting penuche fudge around. Doesn’t that rich brown sugar aroma just smell like home? Here at HearthBite, recipes aren’t just instructions; they’re little snapshots of connection, and I absolutely live for seeing how they turn out in your kitchens.
Whether you made this for the first time or you’re a seasoned pro turning out batches for holiday candy making, I want to hear all about it! Did it set up perfectly? Did you manage to keep your hands off the pot while it was cooking? I’m always curious to know if you tried one of the variations or if you stuck strictly to the classic sweet vanilla fudge profile.
Did you pair it with coffee like I suggested, or maybe you used it to top a plate of my favorite morning scones? Tell me everything!
Please take a moment to leave a star rating right here on the recipe card below—it helps other folks feel confident diving into this old fashioned fudge recipe. And if you snap a picture of your beautiful, non-grainy squares, please tag me on social media! Seeing your success is truly the sweetest bite of the day for me. Thanks for letting HearthBite be a part of your kitchen memories.
PrintOld-Fashioned Penuche Fudge: Creamy Brown Sugar Candy
Make classic Penuche fudge, a rich, buttery confection with deep caramel notes, using this simple, old-fashioned stovetop method. This recipe guarantees a smooth, melt-in-your-mouth texture perfect for holiday candy making.
- Prep Time: 15 min
- Cook Time: 15 min
- Total Time: 4 hours
- Yield: 36 squares 1x
- Category: Dessert
- Method: Stovetop Cooking
- Cuisine: American
- Diet: Vegetarian
Ingredients
- 2 cups light brown sugar, packed
- 1 cup whole milk or heavy cream
- 1/2 cup unsalted butter
- 1/2 teaspoon salt
- 1 teaspoon vanilla extract
- 1/4 cup powdered sugar (for dusting pan)
Instructions
- Lightly grease an 8×8 inch baking pan and line it with parchment paper, leaving an overhang for easy removal. Dust the parchment paper lightly with powdered sugar.
- Combine the brown sugar, milk (or cream), butter, and salt in a heavy-bottomed saucepan.
- Stir the mixture constantly over medium heat until the butter melts and the sugar dissolves. Stop stirring once it reaches a boil.
- Insert a candy thermometer. Continue to cook the mixture without stirring until the temperature reaches exactly 234°F (112°C), which is the soft-ball stage. This step is crucial for creamy fudge.
- Immediately remove the pan from the heat. Do not scrape the sides of the pan.
- Let the mixture cool undisturbed until it reaches 110°F (43°C). This cooling period prevents graininess.
- Once cooled to 110°F, add the vanilla extract. Begin to beat the mixture vigorously with a wooden spoon or a sturdy spatula.
- Continue beating until the fudge loses its glossy shine, thickens considerably, and begins to look dull and creamy. This may take several minutes.
- Quickly pour the thickened fudge into the prepared pan. Do not spread or press it down.
- Allow the fudge to set completely at room temperature for several hours, or chill briefly if you need to speed up the process.
- Once firm, lift the fudge out using the parchment overhang, cut it into 1-inch squares, and serve your melt-in-your-mouth candy.
Notes
- For the smoothest texture, use a heavy-bottomed pan to distribute heat evenly and prevent scorching.
- Do not stir the mixture while it is boiling; stirring introduces sugar crystals that cause graininess.
- If you prefer a stronger caramel flavor, you can substitute half of the brown sugar with dark brown sugar.
- This classic confection is wonderful when wrapped individually for gifting during the holidays.
Nutrition
- Serving Size: 1 square
- Calories: 145
- Sugar: 24g
- Sodium: 45mg
- Fat: 5g
- Saturated Fat: 3g
- Unsaturated Fat: 2g
- Trans Fat: 0g
- Carbohydrates: 25g
- Fiber: 0g
- Protein: 1g
- Cholesterol: 15mg