
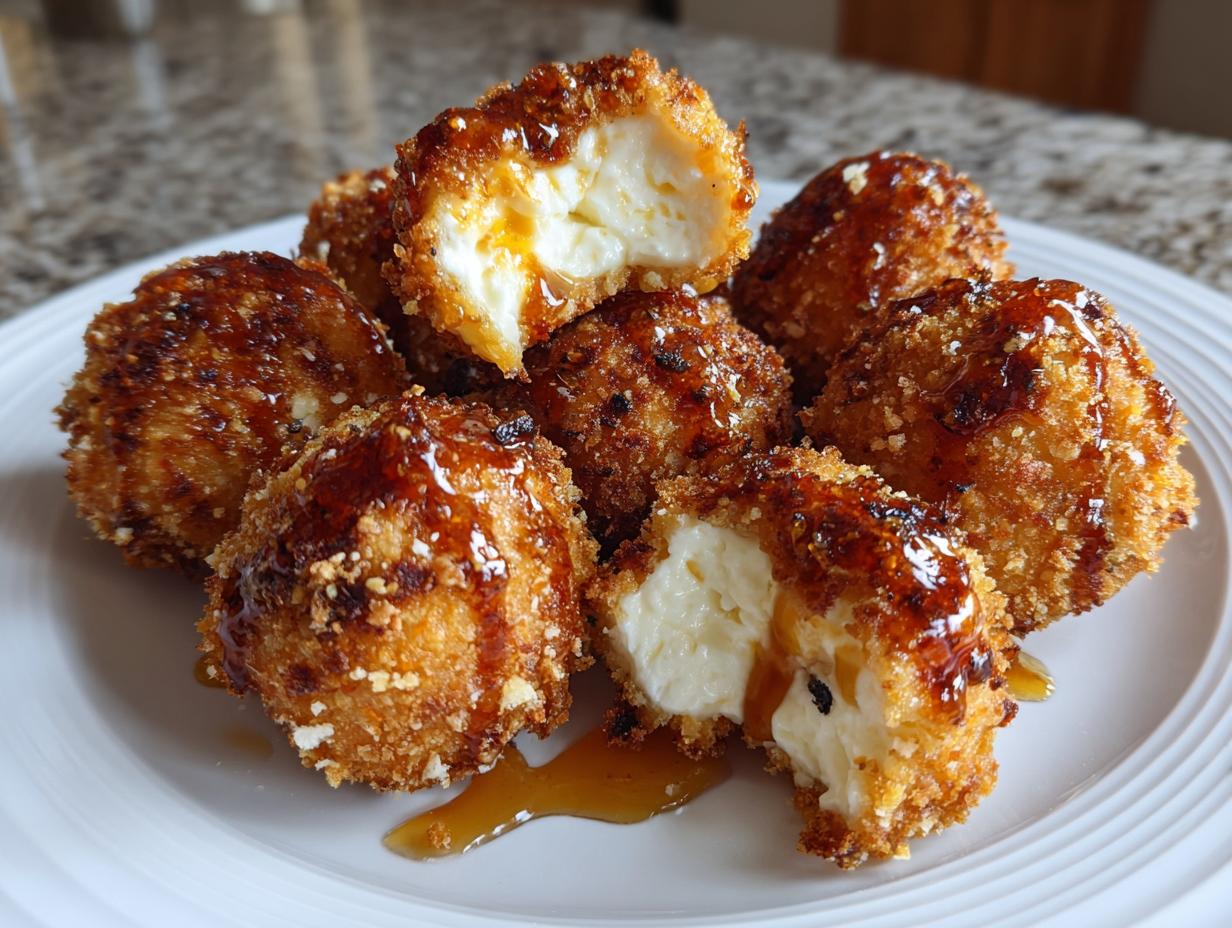
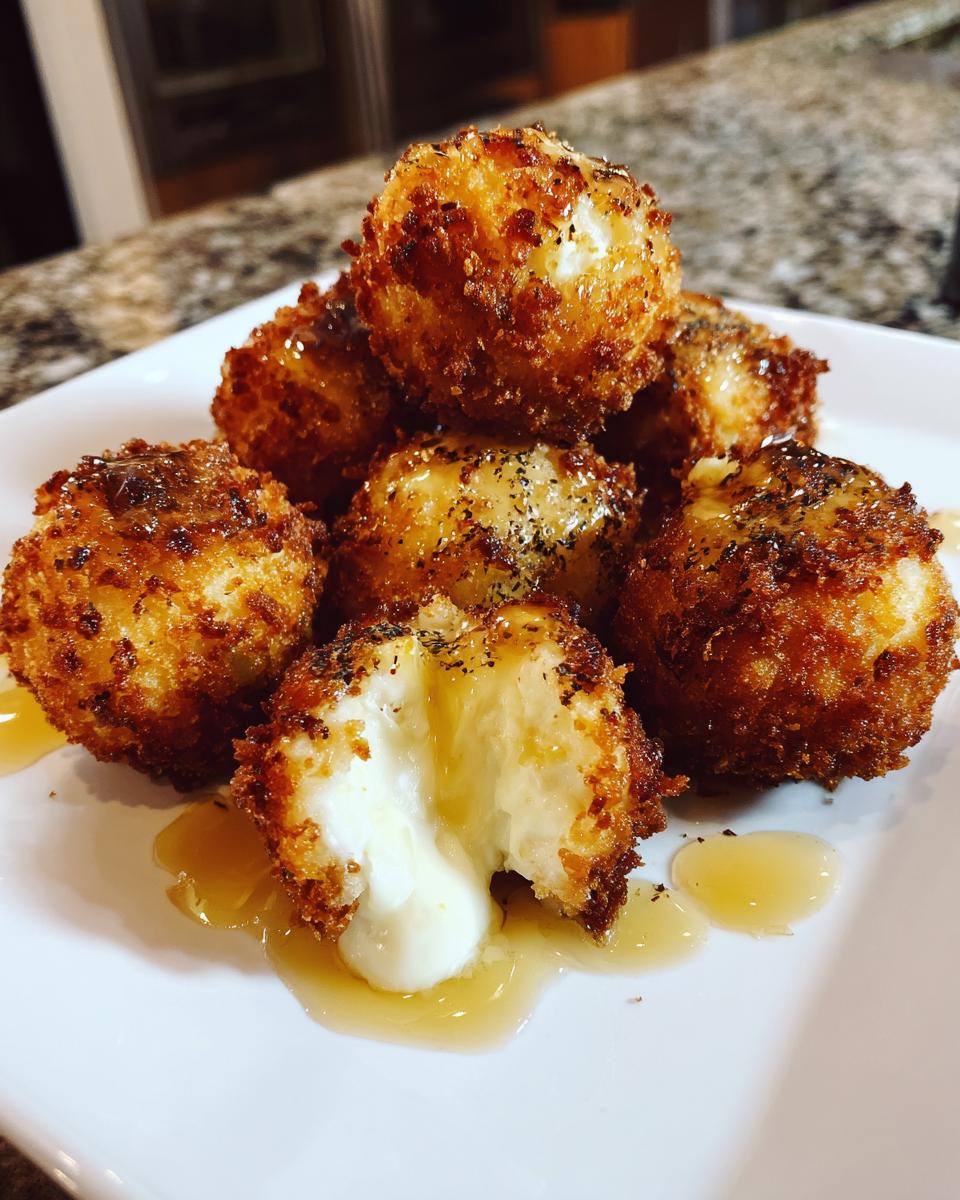
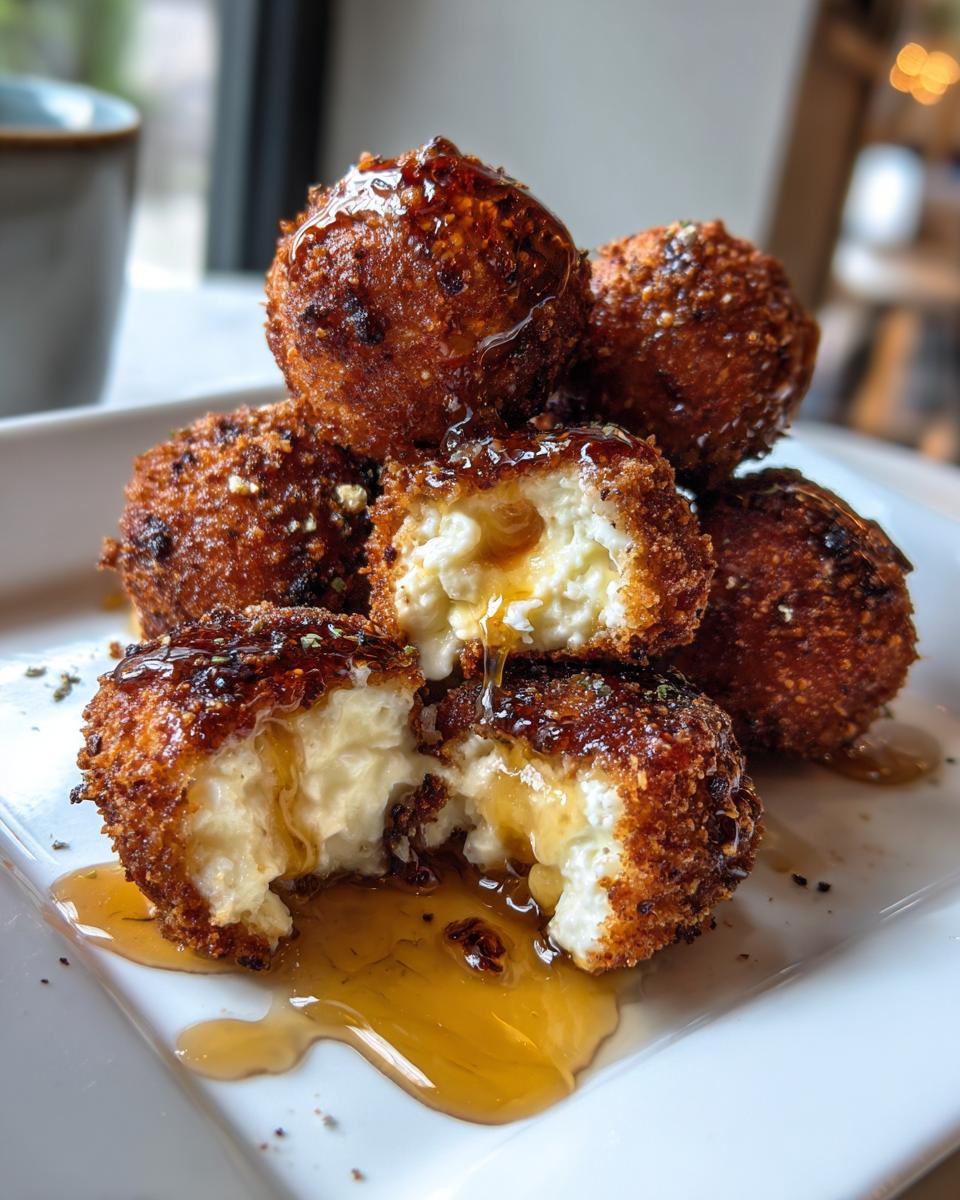
When it’s time to host, you need party appetizers that wow people without stressing you out, right? That’s exactly why I’m so obsessed with these amazing goat cheese balls. They hit that perfect sweet spot: impossibly crispy on the outside, yet warm and wonderfully creamy inside. Yes, you can even toss them in the air fryer if you need less fuss! Here at HearthBite, Sarah Miller’s philosophy is all about joy and reliability in the kitchen, and you can read more about our story here. These treats deliver confidence on a platter every single time you make them.
- Why You Will Love These Crispy Fried Goat Cheese Balls
- The Essential Ingredients for Perfect Goat Cheese Balls
- Step-by-Step Guide to Making Fried Goat Cheese Balls
- Air Fryer Goat Cheese: A Crispier Alternative for Your Goat Cheese Balls
- Flavor Variations for Your Goat Cheese Appetizers
- Make Ahead Appetizers: Preparing Goat Cheese Balls in Advance
- Serving Suggestions for Festive Cheese Platter Presentation
- Storage and Reheating Instructions for Creamy Cheese Appetizer
- Frequently Asked Questions About Goat Cheese Balls
- Share Your Tangy Cheese Treats
- Estimated Nutritional Data for Honey Goat Cheese Bites
Why You Will Love These Crispy Fried Goat Cheese Balls
Honestly, these aren’t just little appetizers; they are flavor bombs designed to make your guests happy and your life easier. If you need a showstopper that’s actually surprisingly simple, this is it. You are going to want to bookmark this one immediately because it solves all your entertaining needs!

- Amazing Texture Contrast: Oh my goodness, the outside is shatteringly crispy from the panko, and then you hit that warm, tangy, melted center. It is just divine!
- The Perfect Party Food Recipes: These are bite-sized, easy to handle, and look totally gourmet on a platter—a guaranteed hit for any gathering, big or small.
- Truly Easy Cheese Ball Recipe: Even though they look fancy, the process is just a simple three-step dredge. I promise you, this is beginner-friendly!
- Make-Ahead Genius: You can coat these little darlings hours ahead of time and chill them. That’s a lifesaver when you’re trying to manage everything else before guests arrive.
- Savory and Sweet Bites: Served with that mandatory drizzle of honey, you get that perfect savory and sweet balance that keeps everyone reaching for more.
- Great for Entertaining Snacks: Whether it’s a casual Tuesday or a huge holiday bash, these satisfy that craving for something rich, warm, and satisfying.
The Essential Ingredients for Perfect Goat Cheese Balls
Okay, listen up! The secret to making sure these goat cheese balls don’t turn into melty puddles of deliciousness when they hit the hot oil is having quality ingredients and keeping that cheese *cold*. We aren’t doing a traditional large cheese ball here; we are making individual bites, and they need structure! Don’t skimp on the coating ingredients because they are what holds everything together.
Coating and Cheese Base Ingredients
You need three shallow dishes set up for breading—it’s like an assembly line! For the cheese itself, make sure it’s the soft kind, but you absolutely must chill it before shaping it into those perfect little balls. Trust me on the chilling part!
- 8 ounces of soft goat cheese (must be chilled until very firm!)
- 1/2 cup of all-purpose flour
- 2 large eggs, beaten really well
- 1 cup of Panko breadcrumbs—we want maximum crunch!
- 1 teaspoon of dried thyme (this adds such a lovely savory note)
- 1/2 teaspoon of salt and a tiny pinch of black pepper
Frying Medium and Finishing Touches
We are going for that classic crispy finish, so you’ll need decent oil, but the real showstopper comes at the end with the drizzle. These Honey Goat Cheese Bites are nothing without that sweet contrast.
- Vegetable oil, enough to fill your pot about two inches deep (for frying)
- About 1/4 cup of pure honey for drizzling over the top—don’t be shy!
- Flaky sea salt for that gorgeous final sprinkle.
Step-by-Step Guide to Making Fried Goat Cheese Balls
This is where the magic happens, and honestly, the process is so quick once you have everything ready to go. The key, which I can’t stress enough, is keeping that goat cheese cold and moving fast during the coating process! If you follow these steps exactly, you’ll get that incredible crunch we are aiming for. Before you even think about heating the oil, get your setup ready.
Preparing the Coating Stations
You need organization, like setting up a proper kitchen assembly line! Take three separate, shallow dishes. Put your flour in the first one. In the second, pour in those beaten eggs so they are nice and ready to go. The third dish is reserved for your Panko mixture—that’s the thyme, salt, and pepper mixed with the Panko breadcrumbs. Make sure those crumbs are thoroughly seasoned!
Forming and Coating the Goat Cheese Balls
Now, work quickly! Grab that chilled goat cheese and use a small spoon or your hands to roll out little balls, aiming for about 1 inch wide; you should get around 12 to 15. Immediately dredge it in the flour, shaking off any extra. Next dip it into the egg bath, and finally, you have to roll it really well in the Panko. Really press that coating on so it sticks tight! Once done, place them on a plate lined with parchment paper and chill them for at least 30 minutes. That chill time stops them from exploding frying!
Frying to Golden Perfection
Time for the heat! You need your oil in a heavy pot to reach exactly 350°F (175°C). Honestly, use a thermometer—that’s how you guarantee success. Carefully drop just 3 or 4 of those chilled balls into the oil at a time; don’t cram the pot. They cook ridiculously fast, usually only 1 to 2 minutes total, just turning them until they look beautifully golden brown. Scoop them out fast onto paper towels to drain. You can find another great guide for frying tips right here. Remember to serve these immediately while they are piping hot and drizzled generously with honey!
Air Fryer Goat Cheese: A Crispier Alternative for Your Goat Cheese Balls
Okay, I totally get it. Sometimes you want that golden crunch, but you also don’t want to deal with a whole pot of hot oil. That’s why I love having an Air Fryer Goat Cheese option up my sleeve, especially when I’m rushing to clean up after a party!
This method is fantastic because it uses way less oil but still gives you that great texture. Trust me, they get just as crispy when you follow this exact temperature guide. If you are looking for other crispy appetizer ideas, be sure to check out some great resources online, like what they recommend for air frying these bites.
You need to treat the coating just the same as the frying method—make sure those little gems are super well-coated and nicely chilled because the heat in the air fryer is intense!
- First things first, skip the oil bath. Instead, take your fully coated and chilled goat cheese balls and give them a very light spray with cooking spray. Don’t drench them, just a nice little mist so the exterior browns up nicely.
- Arrange them in a single layer in your air fryer basket. You absolutely cannot overlap them! If they touch, they won’t crisp up evenly, and we want that beautiful crunch all around.
- Set your air fryer temperature to 380°F (195°C). This higher temperature really helps lock in the creamy insides before they have a chance to melt out.
- Air fry them for about 6 to 8 minutes total. About halfway through—say, right around the 4-minute mark—you need to pause and carefully flip every single one over.
- Once they look golden brown and feel firm to the touch, pull them out right away! They’ll be ready for that honey drizzle. This method is so much cleaner for quick snacks!
Flavor Variations for Your Goat Cheese Appetizers
We are working with a spectacular base here, but sometimes you need to shake things up, especially if you are making these for a holiday spread! These goat cheese appetizers are so versatile. We established the classic thyme-seasoned version, but if you want to take these bites from “delicious” to “OMG, what is in this?”, you just need to tweak that coating a little bit. It’s so easy to make these feel seasonal!
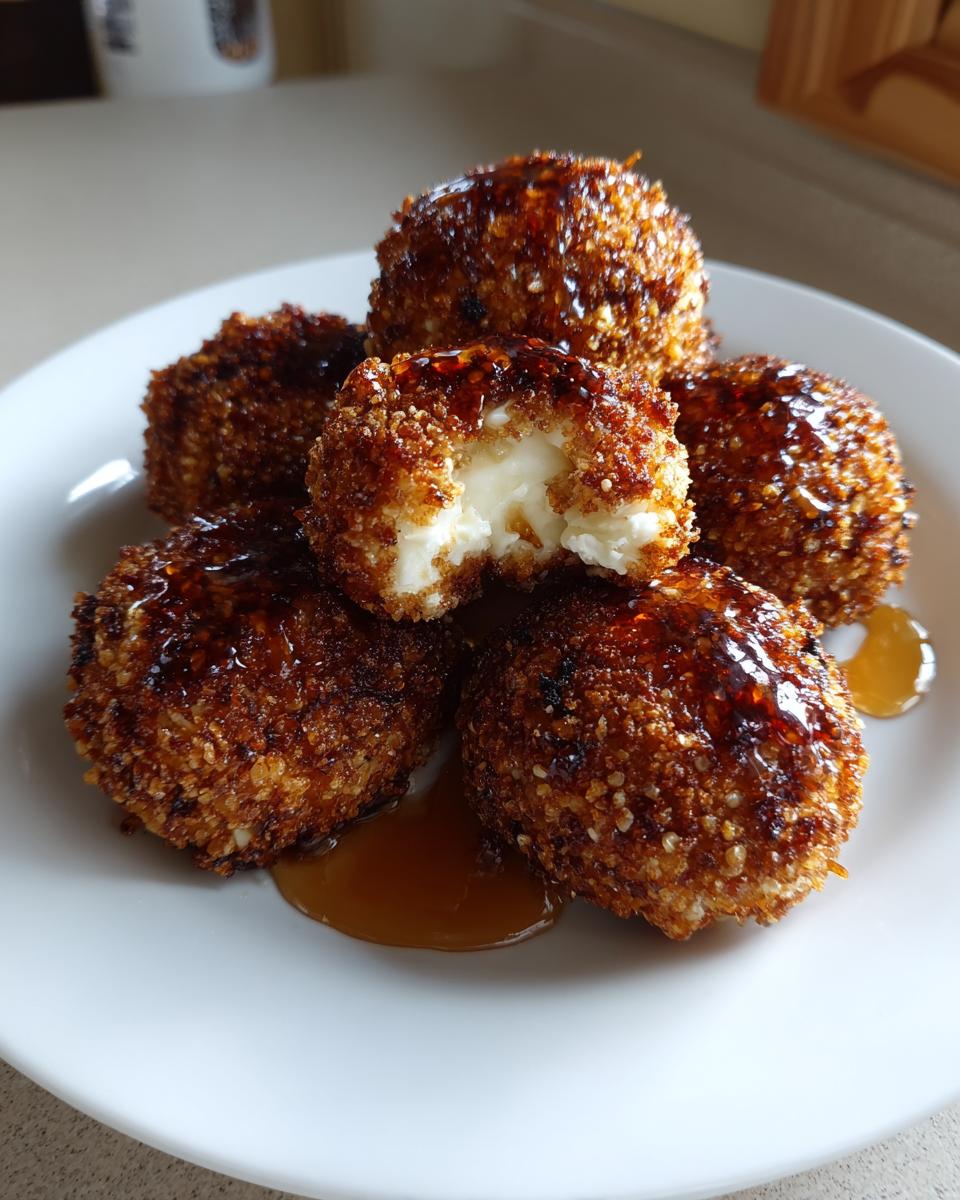
The Festive Cranberry Pecan Goat Cheese Balls
If you’re looking for the ultimate holiday hit—especially around Thanksgiving or Christmas—you absolutely have to try the Cranberry Pecan version. It brings amazing color and texture to the crunch!
This is so simple: just take your toasted pecans and roughly chop them up. You want them small enough to stick nicely to the cheese ball, but still chunky enough to taste them. Mix those chopped pecans right into your seasoned Panko breadcrumbs. Then, mix in some finely chopped dried cranberries with them! The result is this gorgeous, tangy, sweet, and nutty coating. If you want to see a beautiful example of how great this looks, check out some inspiration on this festive recipe. It’s my go-to for a packed festive cheese platter setup.
Sweet and Tangy Honey Goat Cheese Bites
When we talk about the honey drizzle, we aren’t just putting it on top as an afterthought—it’s part of the flavor profile, making these honey goat cheese bites totally addictive! But if you want even more sweetness infused into the cheese itself, try this trick.
Before you start rolling the cheese balls, take your chilled 8 ounces of goat cheese and very gently fold in about two tablespoons of apricot preserves right into the cheese base itself. Don’t overmix, or the cheese gets too soft! That jam melts slightly when fried, giving you a surprise burst of tangy sweetness right from the center. When that comes out under the crispy coating and hits that honey drizzle on top? Pure heaven. It’s the perfect way to transition from a purely savory appetizer to a delightful sweet and savory treat.
Make Ahead Appetizers: Preparing Goat Cheese Balls in Advance
Hosting is supposed to be fun, right? It’s NOT supposed to mean you are stuck in the kitchen while everyone else is mingling! That’s why I count these goat cheese balls as one of my favorite *make ahead appetizers*. You can do nearly all the messy work the morning before, or even the day before, and just fry them up right before everyone arrives. It takes all the pressure off!
When you can prepare something ahead of time, it lets you actually enjoy your own party. Guests love walking past the line of people waiting for fresh appetizers, but who has time for that? This method lets you focus on setting out the wine and making sure your holiday starters are ready to go. If you want to see how someone else packages these up for easy serving, check out this tip on making them ahead here.
The absolute key here is that chilling step we talked about—but we are taking it a step further by freezing them solid. When you’re ready to use them, you don’t even need to fuss with thawing. You can also reach out to us anytime if you hit a snag while prepping; we’re happy to help you troubleshoot at our contact page.
- Coat Them Completely: Follow the full flour, egg, panko process exactly as described in the main steps. Make sure that panko coating is pressed on nicely and evenly all the way around.
- The Quick Freeze: Once they are fully coated, lay the little balls out in a single layer on a parchment-lined baking sheet. Make sure they aren’t touching! Pop this tray straight into the freezer.
- Hardening Up: Let them freeze completely for at least an hour. You want them rock solid, like little cheese marbles.
- Storage: Once they are frozen solid, you can just toss them all into one good, heavy-duty freezer bag or an airtight container. They last beautifully in the freezer for a good few weeks, ready for any impromptu party!
When it’s party time, just pull out exactly how many you need from the freezer. You fry them straight from frozen—no need to wait for them to come to room temperature! You just need to add about an extra minute or so to your frying time. They hold their shape perfectly. See? Stress-free entertaining!
Serving Suggestions for Festive Cheese Platter Presentation
Making these crispy spheres is just half the battle; presentation is everything when you are serving party food recipes that are supposed to look elegant! Since these are warm, fried items, you can’t just dump them onto a cold cheese board alongside brie and crackers. They need their own moment to shine, though it’s easy to integrate them.
For a big gathering or as one of your main Thanksgiving starters, I always set these up on a separate serving dish. Remember, we want that crust to stay crisp! If you put them directly next to softer items, the residual heat and steam can make the coating soggy fast. So, dedicate a special little bowl or platter just for the warm, honey-drizzled bites.
Here are a few ways I like to plate them up for maximum impact. It turns a simple appetizer into one of those gourmet finger food items everyone remembers!
- The Honey Fountain: Place the freshly fried balls around a small pinch bowl filled with your honey. I sometimes swirl a little melted apricot preserve or even a bit of fig jam into that honey bowl for an extra layer of sophisticated sweetness. People can drizzle as much or as little as they like.
- Herb Garland: Use fresh herbs—rosemary sprigs or even tiny sage leaves—to garnish the platter under the cheese balls. The vibrant green looks amazing next to the golden brown crust and the deep amber of the honey. It really ties into that fresh, wholesome feeling Sarah talks about here at HearthBite.
- Pairing Perfection: Because goat cheese has that lovely tang, these go beautifully with lighter, crisp wines. Think a chilled Sauvignon Blanc or maybe even a slightly off-dry Riesling—it cuts right through the richness of the frying. If you are serving cocktails, anything citrusy or herbal works wonders!
- Bread/Cracker Context: Even though they are great on their own, if you set them near your main cheese platter, make sure the bread or crackers nearby are plain. We don’t want competing flavors overwhelming that thyme and goat cheese goodness. Simple water crackers or thin baguette slices are perfect vehicles for scooping up any extra honey left on the platter.
The goal is to build a little mound of warm, gooey goodness that contrasts beautifully with the cool, creamy elements on the rest of your spread. It’s all about contrast, darling!
Storage and Reheating Instructions for Creamy Cheese Appetizer
Okay, so if you’re lucky enough to have any of these irresistible creamy cheese appetizers left over—which I highly doubt, knowing how fast they disappear—don’t just toss them! You definitely don’t want to microwave leftovers though; that’s the quickest way to go from crispy perfection to mushy sadness in about ten seconds flat. We want to preserve that beautiful crunch we worked so hard for when we made these goat cheese balls!
Storing them properly means you can enjoy the leftovers tomorrow, maybe even served over a simple green salad for lunch instead of just as a starter. It’s all about planning ahead, even for leftovers!
Storing Leftovers Safely
If you have any remnants that didn’t quite get finished right after frying, let them cool down completely to room temperature first. You don’t want to trap any steam, which causes sogginess. Then, here is the drill:
- Place the cooled cheese balls in a shallow, airtight container. Don’t just cram them into a zip-top bag where they might smash together; they lose their shape and crunch that way.
- If you really need to layer them, put a small piece of parchment or wax paper between the layers—think of it as tiny protective blankets for your fried treats so they don’t stick together.
- They last great like this, refrigerated, for about three, maybe four days. They won’t be *as* crisp as the first batch, but they are still totally worth saving!
Reheating Tips for Maximum Crispness
Since we are avoiding the microwave at all costs for these fried guys, we have two stellar options for bringing them back to life. Both methods rely on dry, circulating heat to crisp up that Panko coating again. If you followed my freezing instructions earlier, these reheating steps work perfectly for those too—just add a couple of minutes to the timings!
If you’re looking to bring that fresh-out-of-the-fryer texture back, you must use one of these dry heat methods. It’s the only way to keep them snappy!
- Oven Method (Best for large batches): Preheat your oven to a gentle 350°F (175°C). Arrange the leftover cheese balls in a single layer on a baking sheet lined with foil or parchment. Heat them for about 8 to 10 minutes. Keep an eye on them—they heat fast!
- Air Fryer Method (Fastest Fix): If you kept your air fryer basket handy (and I know you did!), this is the winner for quick reheating. Set the air fryer to 375°F (190°C). Cook them for just 4 to 6 minutes. I usually shake the basket once halfway through to make sure everything gets an even blast of heat.
Once they are hot all the way through, pull them out immediately and give them a fresh, tiny drizzle of honey. Wow, they taste just as good the second time around!
Frequently Asked Questions About Goat Cheese Balls
It’s totally normal to have a few questions when you’re trying out a new appetizer, especially one that involves frying cheese! We want these tangy cheese treats to be perfect every time, whether they are going onto your festive cheese platter or just serving as quick entertaining snacks. Here are the things I hear most often when people are working through this recipe.
Can I substitute the goat cheese for cream cheese in this recipe?
You absolutely *can*, but I have to warn you, it changes the whole feel of the dish! Goat cheese gives us that lovely, sharp tanginess that plays so well against the sweetness of the honey drizzle, and it melts into a rich, slightly grainy creaminess. If you swap it out for plain cream cheese, you lose that tang, and honestly, it just becomes sweeter and much softer when fried. For these crispy goat cheese balls, I really recommend sticking to the goat cheese for that signature flavor complexity!
What is the best way to keep these goat cheese balls warm before serving?
Truthfully, these are at their absolute peak goodness for about five minutes right after they come out of the oil—that contrast between hot and crunchy is perfection! If you have to hold them for a little while before guests arrive, I recommend setting up a warming tray set to its lowest possible setting. You can spread them out quickly on a platter placed over that gentle heat. The main goal is to avoid trapping steam, which is what kills the crispiness. A quick 3 to 5 minutes in a 300°F oven works too, but serving them hot out of the fryer is always the winning strategy for these!
If you ever have any lingering questions about our recipes or this privacy policy, please don’t hesitate to reach out! You can find our policy details here.
Share Your Tangy Cheese Treats
Now that you’ve mastered the art of creating these perfectly crispy, tangy bites, I absolutely need to hear all about it! Honestly, seeing your creations is what makes all this kitchen work worthwhile. I’m Sarah, and sharing food is how I share love, and I hope making these tangy cheese treats brought a little joy to your home too.
Did they turn out golden and crunchy? Were the honey drizzles perfect? Did your guests fight over the last one? Don’t keep the details to yourself!
Please take a moment to give this recipe a star rating right here on the page—it really helps other home cooks know what’s worth making next. And if you snapped a picture of those beautiful golden spheres, I want to see them! Tag us on social media when you share your amazing party food photos. Let’s celebrate making incredible, easy appetizers together!
Estimated Nutritional Data for Honey Goat Cheese Bites
Since we want everyone to be comfortable making these rich appetizers, I think it’s important to talk about what goes into them. Now, you have to remember that these numbers are just an estimate, okay? We are making honey goat cheese bites here, and if you decide to skip the frying and use the air fryer method, or if you sneak in extra honey because, well, you deserve it, the final count will shift a bit! These figures are based on the assumption you are making about 14 uniform balls after frying.
We always strive for transparent, reliable recipes here at HearthBite, so here is a good ballpark idea of what one serving (which we are counting as 3 little balls) looks like:
- Serving Size: 3 balls
- Calories: About 250
- Fat: Roughly 20g (Keep in mind a good chunk of that is from the frying oil, so air frying helps balance this!)
- Saturated Fat: Around 12g
- Carbohydrates: About 10g
- Sugar: Approximately 5g (That’s mostly from the honey drizzle, which is the best part!)
- Protein: A solid 8g to keep you going through all the party mingling!
- Cholesterol: Around 40mg
This tells us these goat cheese balls truly are a savory treat packed with richness. Enjoy them, knowing a little indulgence is part of what makes gatherings so special. Just don’t count on these being the low-cal option if you drown them in honey!
PrintCrispy Fried Goat Cheese Balls with Honey Drizzle

Make these crispy fried goat cheese balls for an easy, impressive appetizer. They are creamy inside, crunchy outside, and perfect for parties or holidays.
- Prep Time: 20 min
- Cook Time: 10 min
- Total Time: 30 min
- Yield: 12-15 servings 1x
- Category: Appetizer
- Method: Frying
- Cuisine: American
- Diet: Vegetarian
Ingredients
- 8 oz soft goat cheese, chilled
- 1/2 cup all-purpose flour
- 2 large eggs, beaten
- 1 cup panko breadcrumbs
- 1 teaspoon dried thyme
- 1/2 teaspoon salt
- 1/4 teaspoon black pepper
- Vegetable oil, for frying (about 2 inches deep)
- 1/4 cup honey, for drizzling
- Flaky sea salt, for finishing
Instructions
- Combine the panko breadcrumbs, dried thyme, salt, and pepper in a shallow dish.
- In a separate shallow dish, place the flour. In a third dish, place the beaten eggs.
- Take the chilled goat cheese and form it into small balls, about 1 inch in diameter. You should get about 12 to 15 balls. Work quickly so the cheese stays cold.
- Dredge each cheese ball first in the flour, shaking off excess.
- Dip the floured ball into the beaten egg, letting excess drip off.
- Roll the cheese ball thoroughly in the seasoned panko mixture, pressing gently to make sure the coating adheres completely. Place coated balls on a parchment-lined plate.
- Chill the coated cheese balls for at least 30 minutes to help the coating set. (This step is important for preventing leaks during frying.)
- Heat the vegetable oil in a deep, heavy-bottomed pot or Dutch oven to 350°F (175°C). Use a thermometer to monitor the temperature.
- Carefully place 3 or 4 cheese balls into the hot oil, ensuring you do not overcrowd the pot.
- Fry for 1 to 2 minutes, turning occasionally, until they are golden brown and crispy.
- Remove the balls with a slotted spoon and place them on a paper towel-lined plate to drain excess oil.
- Serve immediately while warm, drizzled with honey and sprinkled with flaky sea salt.
Notes
- For an air fryer option, spray the coated cheese balls lightly with cooking spray. Cook in a single layer at 380°F (195°C) for 6 to 8 minutes, flipping halfway through, until golden.
- You can make these ahead by coating them completely and freezing them on a tray for 1 hour. Then, transfer them to a freezer bag. Fry directly from frozen, adding 1 minute to the frying time.
- For a festive variation, mix finely chopped dried cranberries and toasted pecans into the panko coating mixture.
Nutrition
- Serving Size: 3 balls
- Calories: 250
- Sugar: 5
- Sodium: 250
- Fat: 20
- Saturated Fat: 12
- Unsaturated Fat: 8
- Trans Fat: 0
- Carbohydrates: 10
- Fiber: 1
- Protein: 8
- Cholesterol: 40