
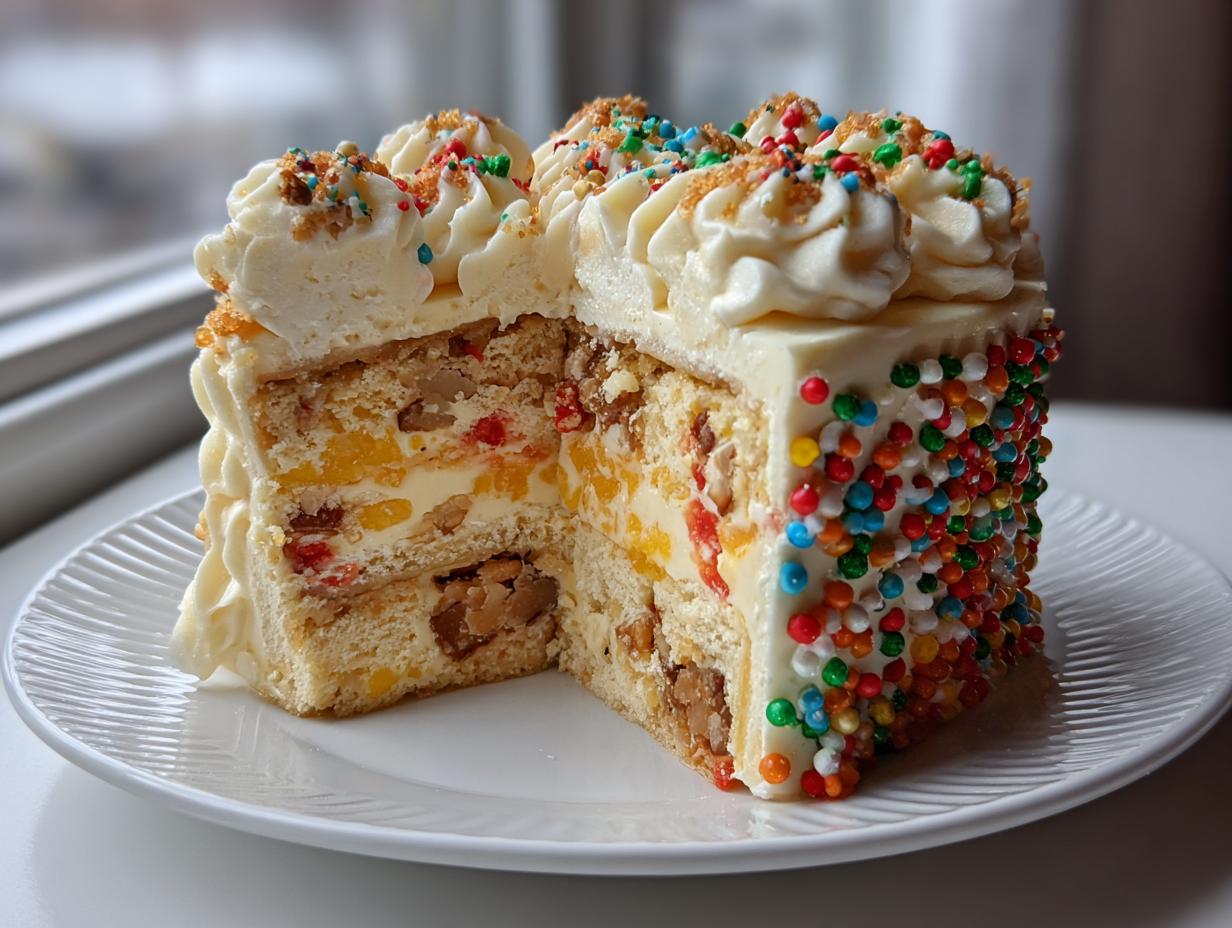
Oh, the holidays! There’s just nothing like that feeling when you pull something truly special out of the oven—something that smells like pure nostalgia and promises a table full of happy faces. Forget boring gingerbread this year; we are going straight for the showstopper! I promise you, dear baker, this **Christmas Tree Cheesecake** recipe is going to become the undisputed king of your festive dessert spread. Seriously, who can resist transforming those iconic, soft, spongy Little Debbie Christmas Tree Cakes into something rich and wonderfully decadent? Here at HearthBite, we believe food should connect us to our favorite memories, and what’s more connected than taking a childhood favorite and elevating it into a creamy, dreamy holiday centerpiece? Trust me, this recipe is rock solid and reliable; it’s comfort food dressed up in its holiday best.
We’re talking about a dessert that makes people stop mid-conversation just to stare at it before they’ve even taken a bite. Make sure to check out what we stand for here at the HearthBite kitchen if you love making food that feels like a warm hug!
- Why This Little Debbie christmas tree cheesecake is Your New Holiday Favorite
- Gathering Ingredients for Your christmas tree cheesecake
- Step-by-Step Instructions to Make the christmas tree cheesecake
- Decorating Your Showstopper Holiday christmas tree cheesecake
- Tips for the Best christmas tree cheesecake Results
- Storage and Make Ahead Tips for this Festive Cheesecake Centerpiece
- Frequently Asked Questions About the christmas tree cheesecake Recipe
- Nutrition Estimate for Your Creamy Holiday Cheesecake
- Share Your Festive Dessert Table Ideas
Why This Little Debbie christmas tree cheesecake is Your New Holiday Favorite
I know, I know—putting snack cakes in a cheesecake sounds a little wild, but trust me on this one. This isn’t just pretty; it’s built on the quiet confidence you get from a recipe that just *works* every single time. It’s the perfect marriage of adult dessert elegance and childhood joy. If you love finding those amazing reliable comfort food recipes, this is it!
- It’s your instant Festive Cheesecake Centerpiece—the decorating is easy, but the payoff is huge!
- It captures pure Nostalgic Christmas Treats flavor without feeling heavy or overly sweet.
- Zero fuss with complicated shaping; the Little Debbie cakes do all the heavy lifting for you!
- The texture is unbelievably luscious—guaranteed Creamy Holiday Cheesecake goodness from edge to edge.
Gathering Ingredients for Your christmas tree cheesecake
Okay, let’s talk ingredients! This is where we build the foundation for that spectacular Creamy Holiday Cheesecake flavor. Honestly, using quality cream cheese here is non-negotiable; it’s the difference between a dreamy texture and one that feels grainy. You’ll notice this recipe is short on ingredients, which is perfect for busy holiday schedules, but make sure everything is measured right!
For the Buttery Graham Cracker Crust
For the crust, we stick to the classics—it needs that perfect sandy crunch to hold up against the rich filling. You’ll need:
- 180 g graham cracker crumbs (make sure they are finely crushed!)
- 85 g unsalted butter, melted
For the Creamy Cheesecake Filling
This is the heart of the dessert. The most important tip here? Your cream cheese absolutely has to be softened to room temperature. If it’s cold, you’ll end up with lumps, and trust me, we want smooth sailing here. The star, of course, is the nostalgic goodness:
- 675 g cream cheese, softened
- 100 g granulated sugar
- 1 teaspoon vanilla extract
- 2 large eggs
- 12 Little Debbie Christmas Tree Cakes, roughly chopped
For the White Chocolate Ganache and Decorations
The topping is what ties that Christmas tree look together! We’re making a simple white chocolate glaze, and then grabbing just a few extra Little Debbie Cakes for that final festive look:
- 1 cup white chocolate chips
- 1/2 cup heavy cream
- Green food coloring (optional, just a drop or two for decorating cream)
- Assorted holiday sprinkles
Step-by-Step Instructions to Make the christmas tree cheesecake
Alright, let’s get baking! Because this is a holiday showstopper, we have a few steps to follow carefully, especially around the cooling process. We want that picture-perfect, crack-free top for our amazing Christmas Tree Cheesecake. Don’t rush the chilling, and everything else falls right into place! I’ve linked my guide to another one of my favorite layered bakes, my Red Velvet Cheesecake, if you’re feeling ambitious later.
Preparing the Crust and Oven Setup
First things first: get your oven warmed up to 325°F (160°C). Grab that 9-inch springform pan and give it a good light greasing—we don’t want anything sticking when it comes time to slice! Mix those graham cracker crumbs with your melted butter until it looks like damp sand. Press that firmly into the bottom of the pan, nice and tight. Pop this crust into the preheated oven to bake for exactly 8 minutes. While that’s setting, we can get the filling going.
Mixing the Ultimate Creamy Cheesecake Filling
This step is critical for that smooth, E-E-A-T-approved texture. In a big bowl, you need to beat that softened cream cheese until it’s totally smooth, then mix in your sugar until combined. Next, add your eggs, but here’s the secret: add them one at a time, mixing just enough after each one until it disappears. Seriously, stop mixing the second they’re incorporated! Overmixing brings in too much air, which means cracking later, and we don’t want that. Once the batter is smooth, gently—I mean *gently*—fold in those chopped Little Debbie Christmas Tree Cakes. They should be distributed like delightful, sugary pockets inside the batter.
Baking and Cooling the christmas tree cheesecake Perfectly
Pour that beautiful, chunky filling over your cooled crust. Now, bake it for about 45 to 55 minutes. You’re looking for the edges to be set firm, but the very center—maybe a silver dollar size—should still have a tiny wiggle when you gently nudge the pan. This is where patience pays off! Once the time is up, turn the oven off. Don’t pull it out yet! Prop the door open just a crack and leave the cheesecake inside for a full hour. This slow decline in temperature is the secret trick to avoiding major cracks. After the hour, take it out and let it cool completely on the counter before heading to the fridge for at least 4 hours, or better yet, overnight.
Making the White Chocolate Ganache
While the cheesecake is chilling, you can whip up the ganache, which acts as our beautiful, snowy topping. Heat your heavy cream in a small saucepan until it’s right about to simmer—you’ll see little bubbles forming around the edge. Pour that hot cream right over your white chocolate chips sitting in a bowl. Let it sit there, untouched, for five whole minutes to melt those chips down. Then, whisk it slow and steady until it’s completely smooth and glossy. You need to let this cool down until it’s thick enough to pour without immediately running off the sides; kind of like a thick syrup. It pours beautifully over that cold, set cheesecake!
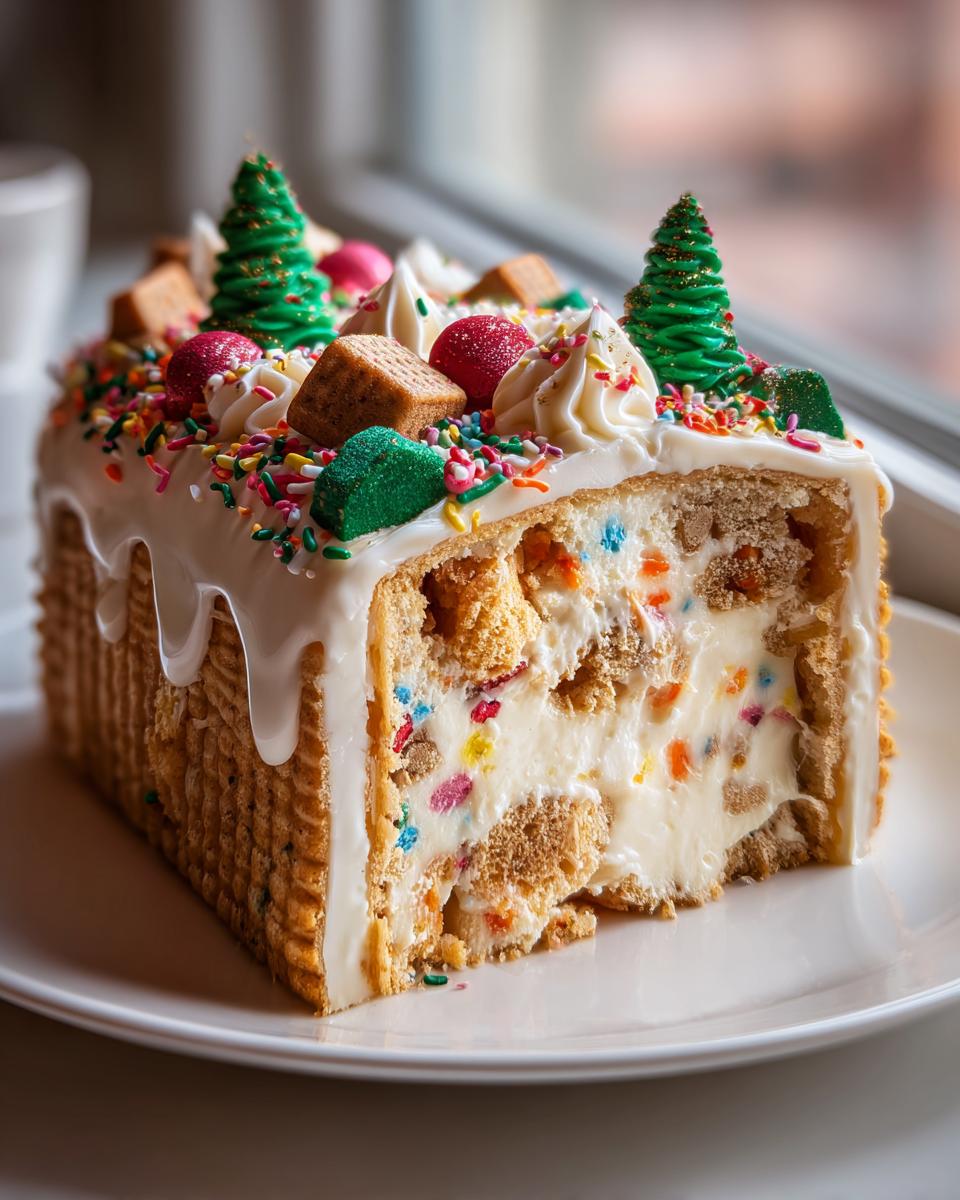
Decorating Your Showstopper Holiday christmas tree cheesecake
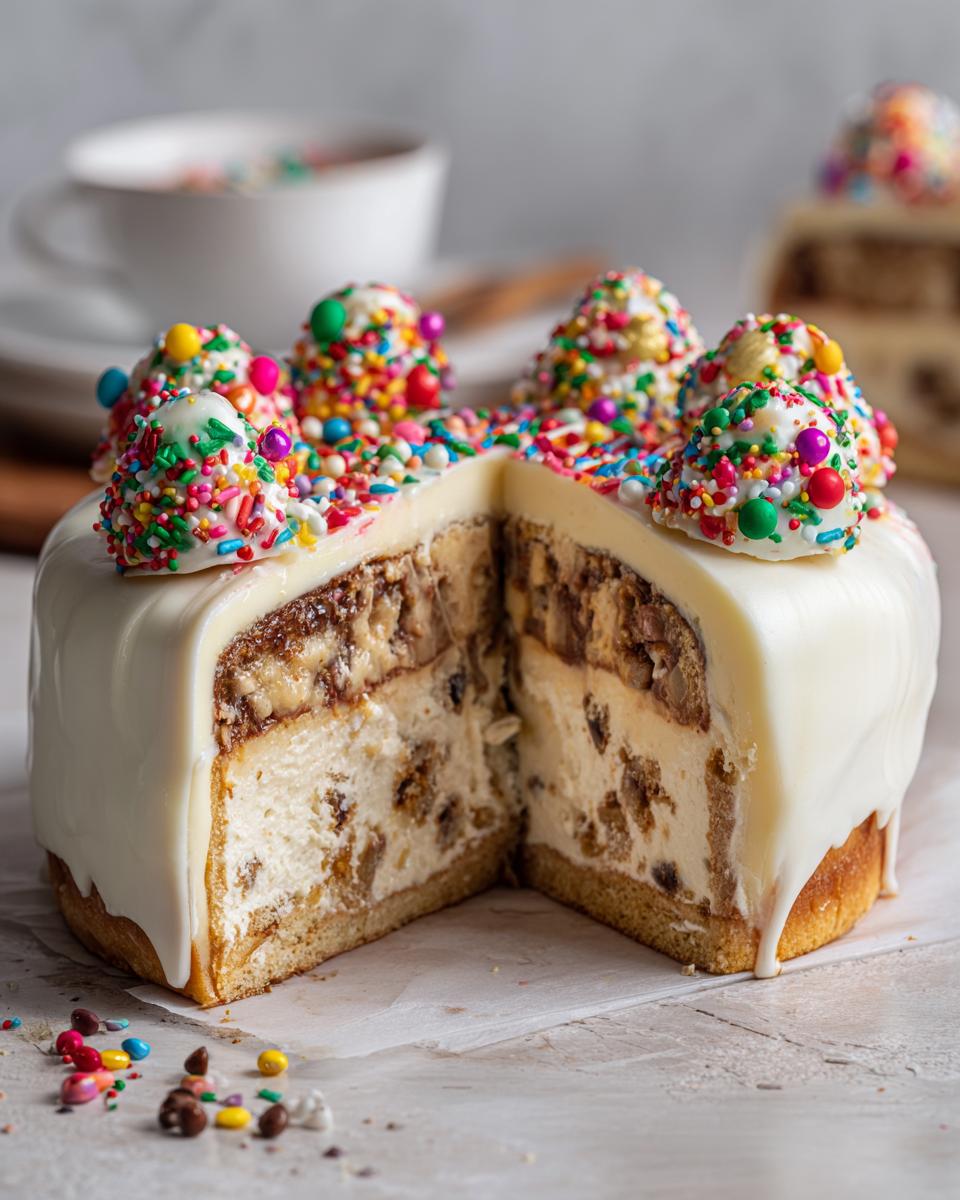
Okay, this is the moment! After all that cooling time, it’s time to turn your creamy base into that show-stopping Decorated Christmas Dessert masterpiece. First, make sure your white chocolate ganache has cooled just enough so it’s spreadable but still flows sweetly over the surface. Pour it slowly over the top of your chilled cheesecake—it should set into a smooth, elegant white layer. Don’t smooth it down too much, though; we want some texture!
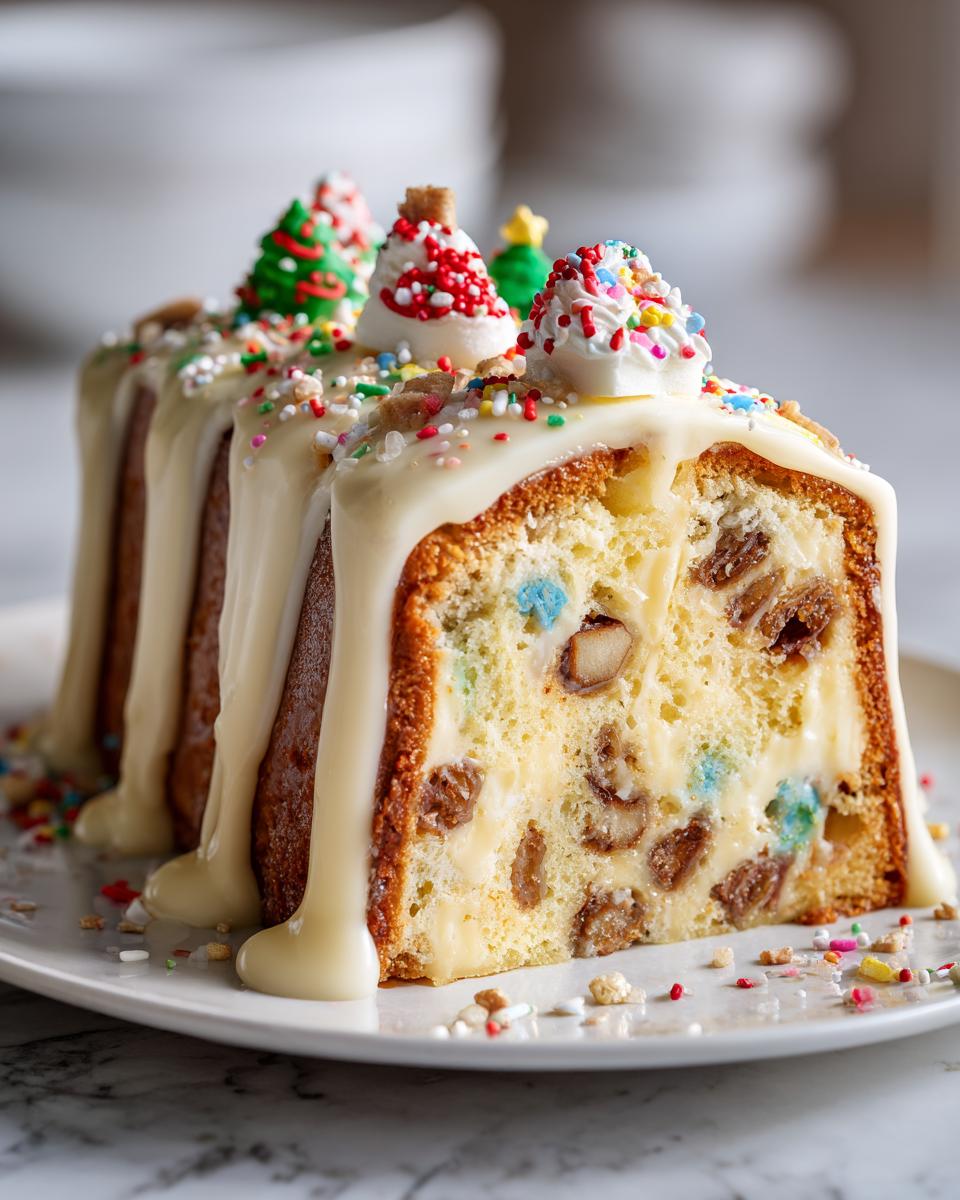
Next, grab those extra Little Debbie Christmas Tree Cakes you saved. Here’s my trick for that tree shape: arrange the whole or halved cakes around the edge of the cheesecake, starting from the bottom edge and working your way up in a triangle or cone shape to mimic a full evergreen. It looks so whimsical! If you’re looking for great sturdy icing for other holiday projects later on, you have to check out my guide on perfect sugar cookie icing.
If you want to get extra fancy, I sometimes take a little bit of store-bought whipped topping, mix in a drop or two of green food coloring, and use a piping bag. You can pipe little swirls around the base of the Little Debbie cakes to look like snow-dusted branches or even pipe a star right on top! Finish it all off with a generous shake of your favorite holiday sprinkles—the more colorful, the better. This is fun, easy decorating that seriously delivers big holiday impact!
Tips for the Best christmas tree cheesecake Results
I’ve fiddled with this recipe quite a bit over the last few Christmases, and I’ve learned a couple of key things that turn a good cheesecake into an absolutely amazing Christmas Tree Cheesecake. When I first tried adding chunks of cake to a baked custard, honestly, I was terrified—I thought it would turn into mush! But what I discovered is that the density of the cream cheese mixture hugs those little cakes perfectly. Speaking of which, if you’re planning on making a homemade frosting for any other holiday cookies later, I highly recommend checking out my recipe for the best cream cheese frosting; it pipes beautifully!
Now, let’s talk shortcuts, because holidays are busy. If you just don’t want to deal with turning on the oven—or maybe your oven is already full of turkey or ham—you absolutely can make this a no-bake version. The texture won’t be quite as cake-like in the filling, but it will still be incredibly creamy and delicious. You just skip steps 1 through 4 entirely. Mix your cream cheese, sugar, vanilla, and eggs (yes, you still need the eggs for structure even in a semi-no-bake, otherwise it’s too soft!), fold in those chopped Little Debbie cakes, pour it into the prepared crust, and transfer the whole thing straight to the fridge. You’ll need at least 6 hours, but overnight is so much better for that truly firm, sliceable texture.
Here are a few quick hits I swear by for success:
- Room Temperature is Key: I cannot stress this enough: softened cream cheese and room-temperature eggs guarantee you will avoid those lumps and get that smooth, velvety base. Cold ingredients fight each other, and that leads to a grainy texture, not the Creamy Holiday Cheesecake we’re aiming for.
- Don’t Peek While Baking: Once you put it in the oven, resist the urge to open the door for the first 40 minutes. Even a sudden draft of cold air can shock the internal structure and cause it to deflate or crack on top.
- Ganache Consistency Check: When you’re making that white chocolate topping, if it cools down too much while you’re distracted, it can get stiff and hard to pour. If that happens, just put the bowl over a pan of barely simmering water—a gentle warm-up is all it needs to become perfectly pourable again.
Storage and Make Ahead Tips for this Festive Cheesecake Centerpiece
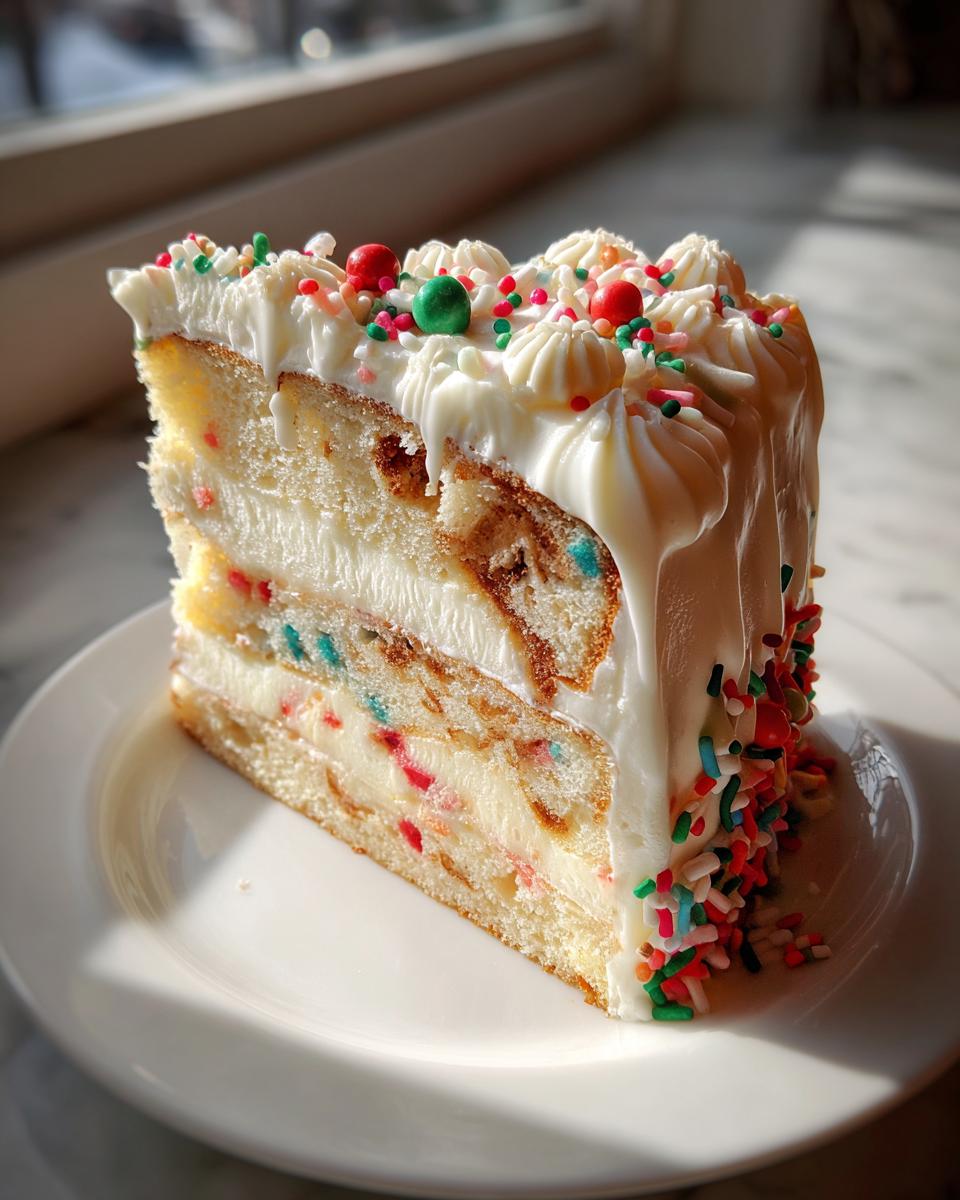
One of the absolute best things about making a showstopper like this Christmas Tree Cheesecake? You don’t have to scramble on Christmas Eve! This is truly a spectacular Make Ahead Christmas Sweet, and in fact, chilling it is what makes it taste even better the next day. The moisture from the Little Debbie Cakes soaks into the surrounding cream cheese filling, making everything even creamier and more deeply flavored overnight. I promise you won’t regret making this the day before!
Remember I mentioned chilling for at least 4 hours in the steps? If you are serious about the best texture—that perfect, firm slice that doesn’t crumble when you cut it—you need to leave this thing in the fridge for at least 8 hours, but honestly, overnight is my sweet spot. The longer it rests under that cling wrap, the firmer that white chocolate ganache gets mixed with the filling.
To store it once it’s fully decorated, wrap the springform pan loosely with plastic wrap or transfer the chilled cheesecake onto a serving platter and cover it gently with a cake dome or large container. It keeps beautifully in the refrigerator for up to four days. If you happen to have leftovers (which is rare in my house!), you can freeze it, though I don’t recommend freezing it once you’ve added the whipped cream or fresh decorations.
Just wrap it tightly in plastic wrap, then foil, and toss it in the freezer for up to a month. When you’re ready to enjoy it, just move it, still wrapped, into the fridge overnight to thaw slowly. If you’re planning on freezing anything else this season, like jams, you might want to check out my easy guide to easy strawberry no-cook recipe for using up extra fruit!
Frequently Asked Questions About the christmas tree cheesecake Recipe
It’s totally normal to have questions when you’re mixing a classic like cheesecake with a beloved snack cake! I’ve rounded up the ones I get asked most often when people are planning out their Holiday Cheesecake Ideas. If you’re looking for other easy options, I have a fantastic No-Bake Oreo Cheesecake coming up next week!
Can I make this a truly No Bake Christmas Cheesecake?
Oh, yes, you absolutely can! This is one of the joys of using the Little Debbie cakes—they don’t rely on baking to give that structural integrity they usually have. For a true No Bake Christmas Cheesecake, you just skip the oven setup and the initial crust baking (Step 1 and 2). Make your crust mixture and press it into the pan, then go straight to the filling (Steps 3 and 4). Once it’s mixed, pour it in and pop it into the fridge. You’ll need it to chill for a minimum of 6 hours to get firm enough to slice beautifully, but overnight is always my recommendation for that sturdy structure.
What if I cannot find Little Debbie Christmas Tree Cakes?
Don’t panic if your grocery store runs out of the seasonal favorites! The goal of this recipe is that sweet, spiced, soft cake texture suspended in cream cheese, so we can improvise. If you can’t find the exact Little Debbie Christmas Tree Cakes Dessert, you have a couple of great swaps. My first suggestion would be to use plain vanilla snack cakes, like Zebra Cakes with the chocolate coating scraped off, or even just plain vanilla pound cake cut into small chunks. Alternatively, you could ditch the cake chunks in the filling entirely, skip the crust, and instead stir an extra half cup of white chocolate chips and a teaspoon of cinnamon into the filling base. It won’t have the nostalgia factor, but it will still taste divine!
How far in advance can I prepare this Holiday Cheesecake Ideas?
This is a fantastic question because it lets you focus on other holiday chaos! As a general rule for any great cheesecake, the flavor profile absolutely deepens overnight once all those components meld together in the fridge. So, while you *can* make this 8 hours ahead, I firmly stand by making it the day before your party. This gives the chopped snack cakes plenty of time to soften beautifully into the filling, guaranteeing the ultimate experience for everyone grabbing a slice of your Festive Cheesecake Centerpiece.
Nutrition Estimate for Your Creamy Holiday Cheesecake
Now, let’s talk fuel! I always say that everything tastes better with a little bit of butter and sugar, which is why this Creamy Holiday Cheesecake is definitely a treat, not an everyday snack! When we talk about nutrition in baking, especially with something as rich as cheesecake studded with snack cakes, it really is just an estimate.
The figures below are based on the standard ingredients used in the recipe above and a serving size of one slice. Remember, the final numbers can definitely shift based on the exact brand of cream cheese or white chocolate chips you pick up, so treat this as a helpful guide!
- Serving Size: 1 slice
- Calories: 450
- Fat: 30g (Note: That’s 18g Saturated Fat—balance it out with some veggies the next day!)
- Carbohydrates: 40g
- Sugar: 35g (Yup, that’s where the Little Debbie magic happens!)
- Protein: 7g
- Cholesterol: 95mg
- Sodium: 300mg
This rich dessert certainly packs a punch, but it is worth every single delicious bite come Christmas morning. Don’t stress too much about the details; just make sure you’re serving it with a big smile!
Share Your Festive Dessert Table Ideas
Well, that’s it! We’ve officially taken a childhood staple and turned it into a stunning centerpiece. Seriously, I hope this amazing **Christmas Tree Cheesecake** hits your table this year and brings all those warm, fuzzy feelings with it! That’s what HearthBite is all about, right? Creating those moments where everyone gathers around, forgets the chaos of the season for a minute, and just savors a truly special bite.
I absolutely live to see how your holiday baking turns out! Were your Little Debbie decorations perfect? Did you use tons of sprinkles on your **Festive Cheesecake Centerpiece**? Please, please tell me all about it in the comments below. Seeing your success stories gives me such joy and helps me know I’m giving reliable, family-worthy recipes.
If you snapped a picture of your finished creation—and I know you did because this thing is gorgeous—tag me on social media! Show off that creamy, nostalgic beauty! If you have any final questions about storage or how to get that ganache just right, feel free to drop those here, or you can always reach out to me directly on my contact page. Happy holidays, and enjoy every decadent slice of your handmade **Christmas Tree Cheesecake**!
PrintLittle Debbie Christmas Tree Cake Cheesecake: A Nostalgic Holiday Centerpiece
Create a show-stopping holiday dessert by transforming nostalgic Little Debbie Christmas Tree Cakes into a rich, creamy cheesecake. This recipe provides simple steps for a festive centerpiece that tastes as good as it looks.
- Prep Time: 25 min
- Cook Time: 55 min
- Total Time: 7 hours 20 min
- Yield: 12 servings 1x
- Category: Dessert
- Method: Baking
- Cuisine: American
- Diet: Vegetarian
Ingredients
- 180 g graham cracker crumbs
- 85 g unsalted butter, melted
- 675 g cream cheese, softened
- 100 g granulated sugar
- 1 teaspoon vanilla extract
- 2 large eggs
- 12 Little Debbie Christmas Tree Cakes, roughly chopped, plus extra for topping
- 1 cup white chocolate chips
- 1/2 cup heavy cream
- Green food coloring (optional, for decoration)
- Assorted holiday sprinkles
Instructions
- Preheat your oven to 325°F (160°C). Lightly grease a 9-inch springform pan.
- Prepare the crust: Mix the graham cracker crumbs and melted butter until combined. Press the mixture firmly into the bottom of the prepared springform pan. Bake for 8 minutes. Let the crust cool while you prepare the filling.
- Prepare the cheesecake filling: In a large bowl, beat the softened cream cheese and granulated sugar until smooth. Mix in the vanilla extract. Beat in the eggs one at a time, mixing just until combined after each addition. Do not overmix.
- Gently fold in the roughly chopped Little Debbie Christmas Tree Cakes into the cream cheese mixture.
- Pour the filling over the cooled crust in the springform pan.
- Bake for 45 to 55 minutes, or until the edges are set and the center has a slight jiggle.
- Turn off the oven, prop the door open slightly, and let the cheesecake cool inside the oven for 1 hour. This prevents cracking. Remove from the oven and cool completely on a wire rack.
- Chill the cheesecake in the refrigerator for at least 4 hours, or preferably overnight.
- Prepare the white chocolate ganache: Heat the heavy cream in a small saucepan until it just begins to simmer. Remove from heat and pour over the white chocolate chips in a heatproof bowl. Let stand for 5 minutes, then whisk until smooth. Let the ganache cool slightly until it thickens to a pourable consistency.
- Pour the cooled ganache over the top of the chilled cheesecake.
- Decorate: Arrange whole or halved Little Debbie Christmas Tree Cakes around the edge of the cheesecake to mimic a tree shape. Use green-tinted whipped cream or frosting to pipe ‘branches’ or a star on top. Finish with holiday sprinkles for ornaments.
Notes
- For a no-bake version, skip the oven steps and chill the filling for 6 hours or until firm.
- If you want a deeper green color for the decoration, mix a few drops of green food coloring into your whipped cream or frosting before piping.
- This creamy holiday cheesecake is best made ahead of time to allow the flavors to meld.
Nutrition
- Serving Size: 1 slice
- Calories: 450
- Sugar: 35
- Sodium: 300
- Fat: 30
- Saturated Fat: 18
- Unsaturated Fat: 12
- Trans Fat: 0.5
- Carbohydrates: 40
- Fiber: 1
- Protein: 7
- Cholesterol: 95