
There’s just something about that perfect, over-the-top lunch, right? The kind you usually only wait in line for. Well, friends, I am here to tell you that you absolutely don’t need a drive-thru window to get that incredible eating-what-you-want feeling. My promise to you today is figuring out how to nail that elusive balance: a chicken breast so juicy it practically melts, encased in the crunchiest, craggiest coating imaginable. This crispy fried chicken sandwich recipe isn’t fussy; it’s built on simple, reliable techniques rooted in comfort cooking. We’re taking the chaos out of deep frying and giving you a homemade chicken sandwich that will make you wonder why you ever settled for less!
- Why This Crispy Fried Chicken Sandwich Recipe Delivers Restaurant Quality
- Essential Ingredients for Your Homemade Chicken Sandwich
- Step-by-Step Instructions for the Perfect Crispy Fried Chicken Sandwich
- Tips for the Best Crispy Fried Chicken Sandwich Every Time
- Ingredient Notes and Substitutions for Your Fried Chicken Recipe
- Serving Suggestions for Your Homemade Chicken Sandwich Meal
- Storage and Reheating Instructions for Leftover Crispy Fried Chicken Sandwich
- Frequently Asked Questions About Making a Crispy Fried Chicken Sandwich
- Share Your Perfect Crispy Fried Chicken Sandwich Creation
Why This Crispy Fried Chicken Sandwich Recipe Delivers Restaurant Quality
I’ve made a lot of mistakes in the kitchen—we all have!—but when it comes to chicken sandwiches, I’ve finally perfected the method that guarantees that amazing contrast: tender inside, shattering crust outside. You get the reliability of a great comfort food recipe, but elevated. It’s all about these two non-negotiable steps that make your homemade chicken sandwich feel truly special.
The Secret to the Juiciest Chicken
You simply can’t skip the soaking! The buttermilk bath isn’t just about flavor, trust me. That gentle acid works magic by breaking down the proteins in the chicken just enough to make it super tender. It locks moisture in, so when it hits that hot oil, it cooks through without drying out. You need at least four hours for this, but overnight? Game changer. Your chicken will be unbelievably juicy.
Achieving the Ultimate Crispy Chicken Coating
This is where we build the crunch! We use a blend that swaps out some flour for cornstarch. That starch is the secret weapon for that craggy, extra-crispy exterior you crave on a restaurant-quality crispy fried chicken sandwich. Then, we do the double-dip—wet, coat, wet again, and coat again! That repetition grabs the oil and sets that gorgeous, textured shell.
Essential Ingredients for Your Homemade Chicken Sandwich
Okay, assembly is fun, but the magic starts here. I’ve written out exactly what you need for the best result. Don’t be tempted to swap ingredients too wildly here, especially with the coating—this ratio is what gives you that perfect texture. This is reliable stuff, the kind you can trust on your busy weeknights or when you’re planning the ultimate ‘Eat What You Want Day’ lunch. We have linked our guide to easy breakfast recipes just in case you need a quick meal idea for another time, but for now, focus on this amazing fried chicken recipe!
For the Chicken and Marinade
- 2 boneless, skinless chicken breasts, halved horizontally (This gives you four nice, even cutlets!)
- 1 cup buttermilk
- 1 teaspoon hot sauce (Just a dash for warmth, not heat!)
For the Crispy Fried Chicken Sandwich Dredge
This is our powerhouse dry mix. Whisk this together thoroughly so everything is evenly distributed:
- 2 cups all-purpose flour
- 1/2 cup cornstarch
- 2 teaspoons salt
- 1 teaspoon black pepper
- 1 teaspoon paprika
- 1/2 teaspoon garlic powder
- 1/4 teaspoon cayenne pepper (Adjust if you want more kick!)
For Assembly and Frying
- Vegetable oil, for frying (You’ll need about 2 inches deep in your pot)
- 4 hamburger buns
- Butter, softened (For toasting—don’t skip this!)
- Your favorite pickles, sliced
- Mayonnaise or spicy aioli, for serving
Step-by-Step Instructions for the Perfect Crispy Fried Chicken Sandwich
This is where all that planning—the soaking, the whisking—pays off! Don’t rush the frying part; that’s when things can go wrong if you let the temperature drop. Remember, we’re looking for perfection from the brine all the way to the final assembly of your homemade chicken sandwich. Pop over to quick easy dinner recipes later, but right now, focus on managing that oil!
Marinating the Chicken
First things first, get that chicken soaking. Pop your halved chicken breasts into a bowl and cover them completely with the buttermilk and that teaspoon of hot sauce. Cover that tightly and stick it right in the fridge. I know, waiting is the hardest part, but you really need at least four hours. Honestly, if you can manage it overnight? That’s when the flavor and tenderness really lock in.
Preparing the Crispy Coating Mix
While your chicken is getting cozy, get your dry dredge ready. In a wide, shallow dish—I like using a casserole dish so I have room to maneuver—whisk together all your flour, cornstarch, salt, pepper, paprika, garlic powder, and cayenne. Make sure there are no clumps of starch hiding anywhere! This is the coating that’s going to form our amazing crust.
Frying Technique for Maximum Crisp
Now, heat about 2 inches of your vegetable oil in a heavy pot. This is non-negotiable: use a thermometer! You need that oil steady at 325°F (160°C). If it’s too cold, the coating gets greasy; too hot, and the outside burns before the inside is done. Take the chicken from the buttermilk, let the excess drip off (don’t wipe it!), and press it firmly into the flour mix. If you want that super craggy crust for your Crispy Fried Chicken Sandwich, dip it back into the buttermilk quick—just a second!—then coat it again in the flour. Fry 6 to 8 minutes per side, turning gently, until the internal temp hits 165°F (74°C). Pull them out immediately and let them drain on a wire rack.
Assembling Your Homemade Chicken Sandwich
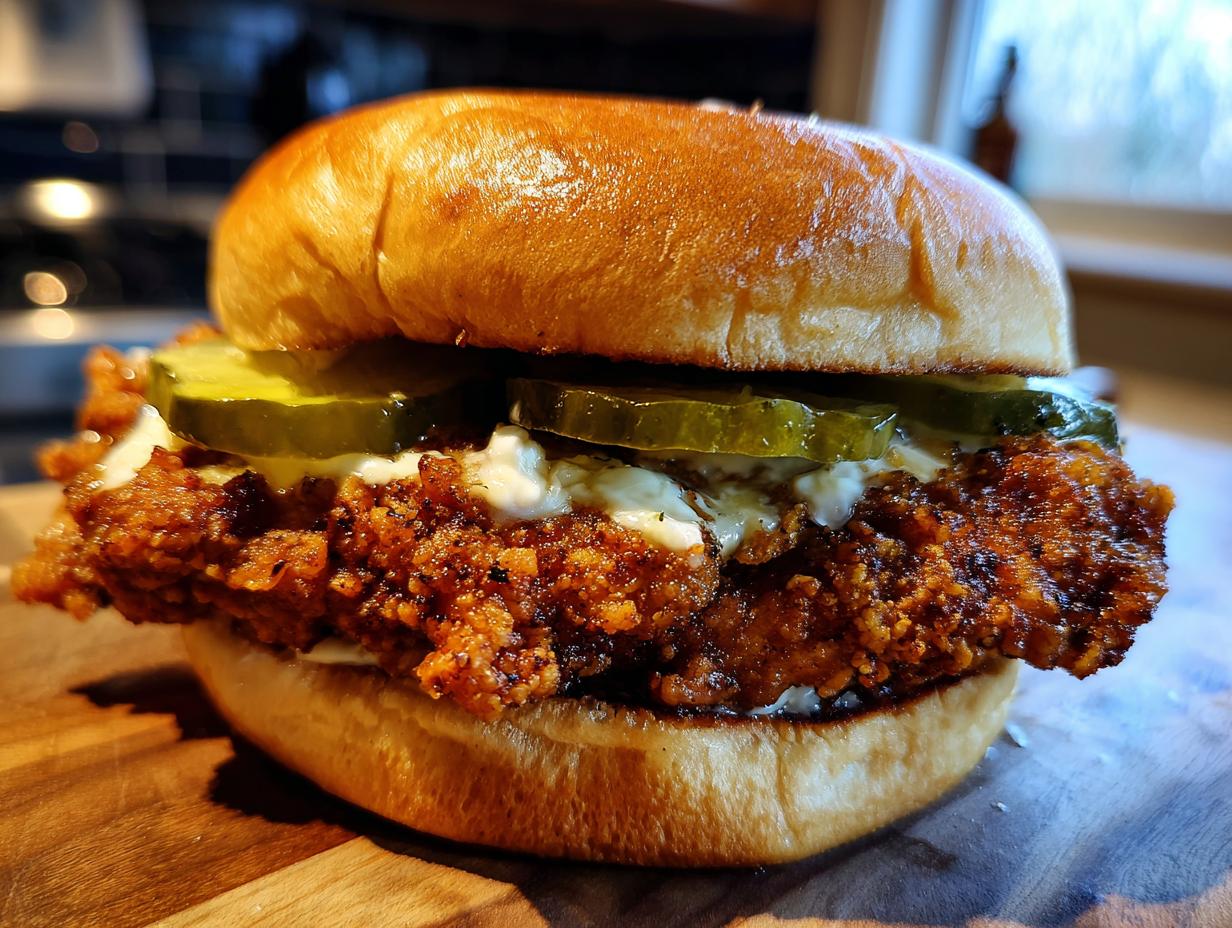
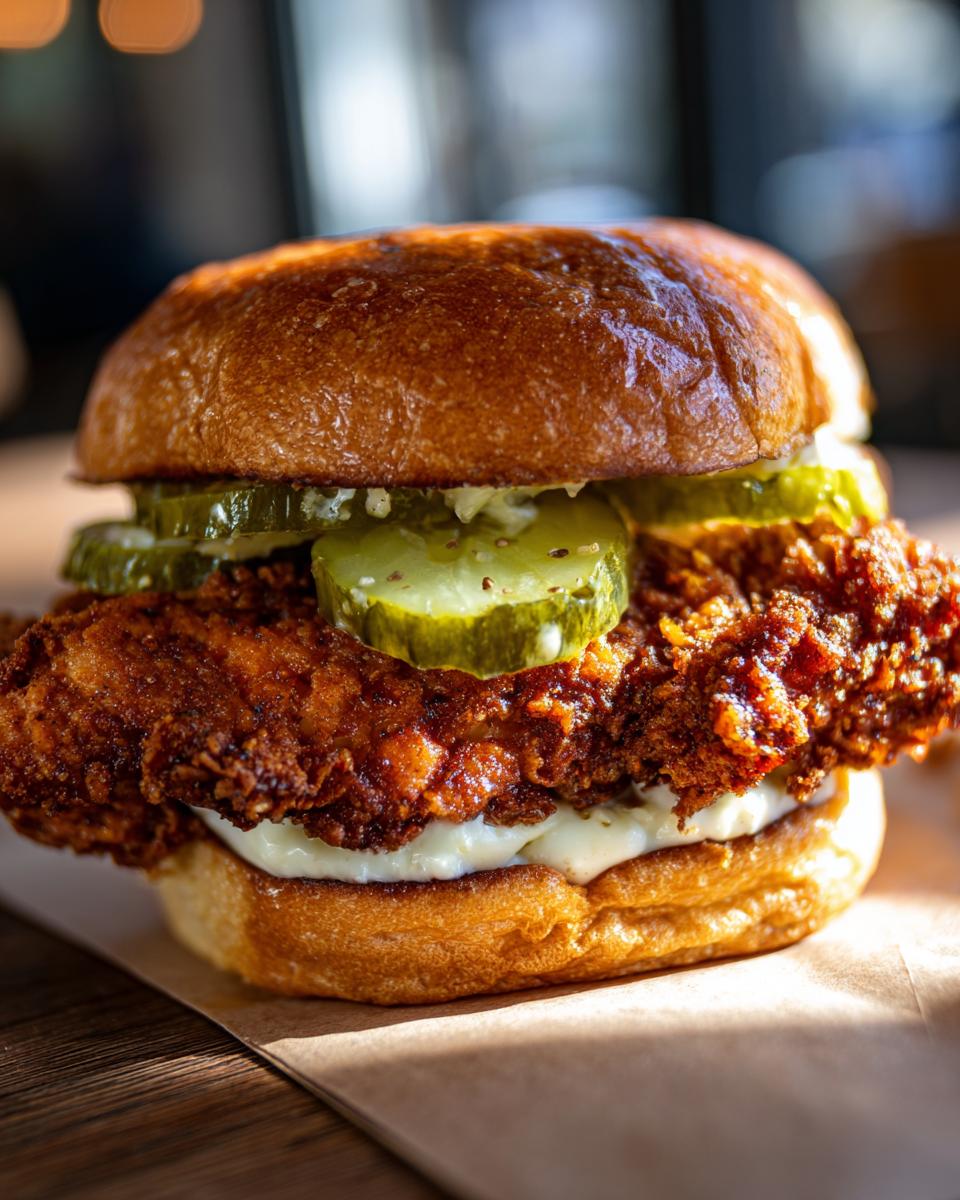
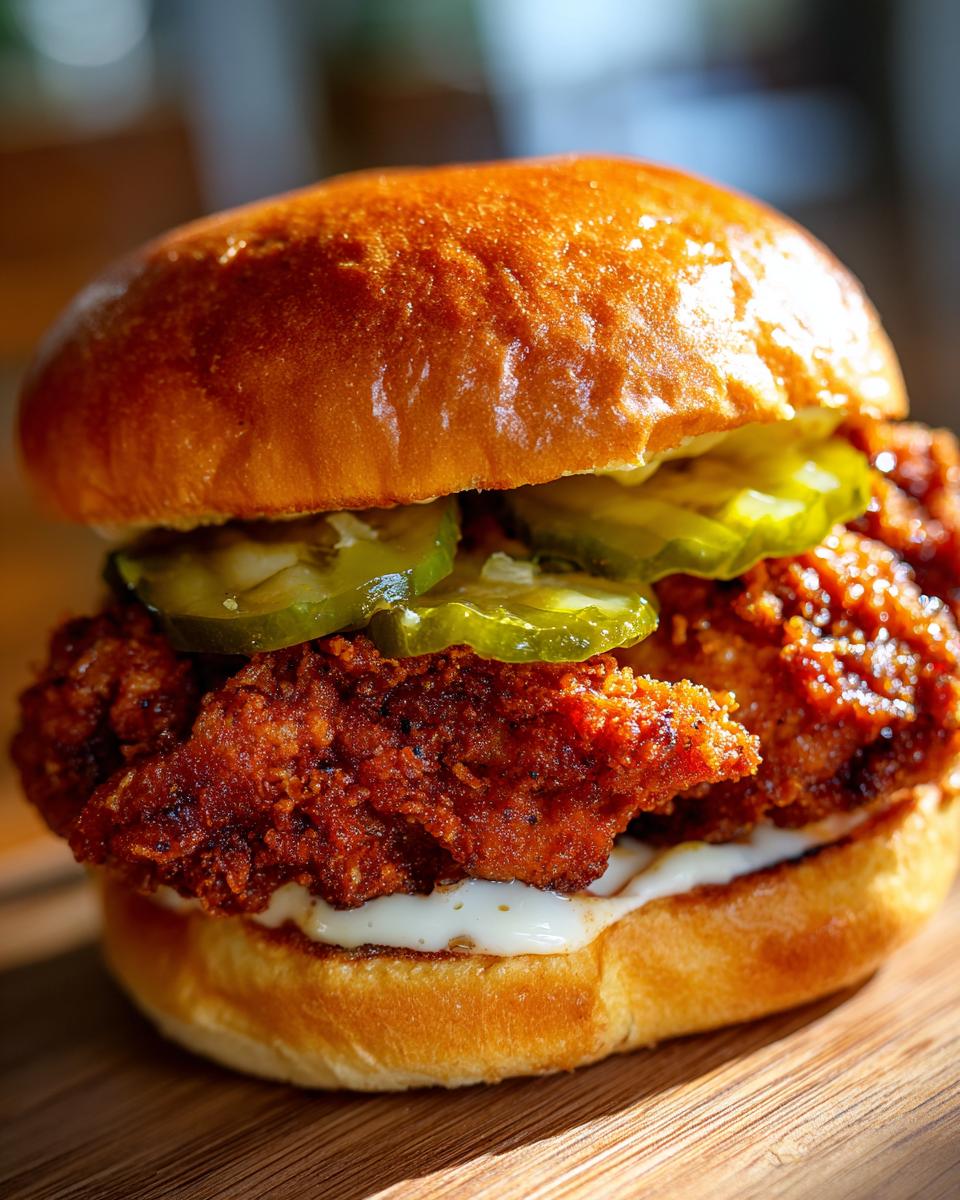
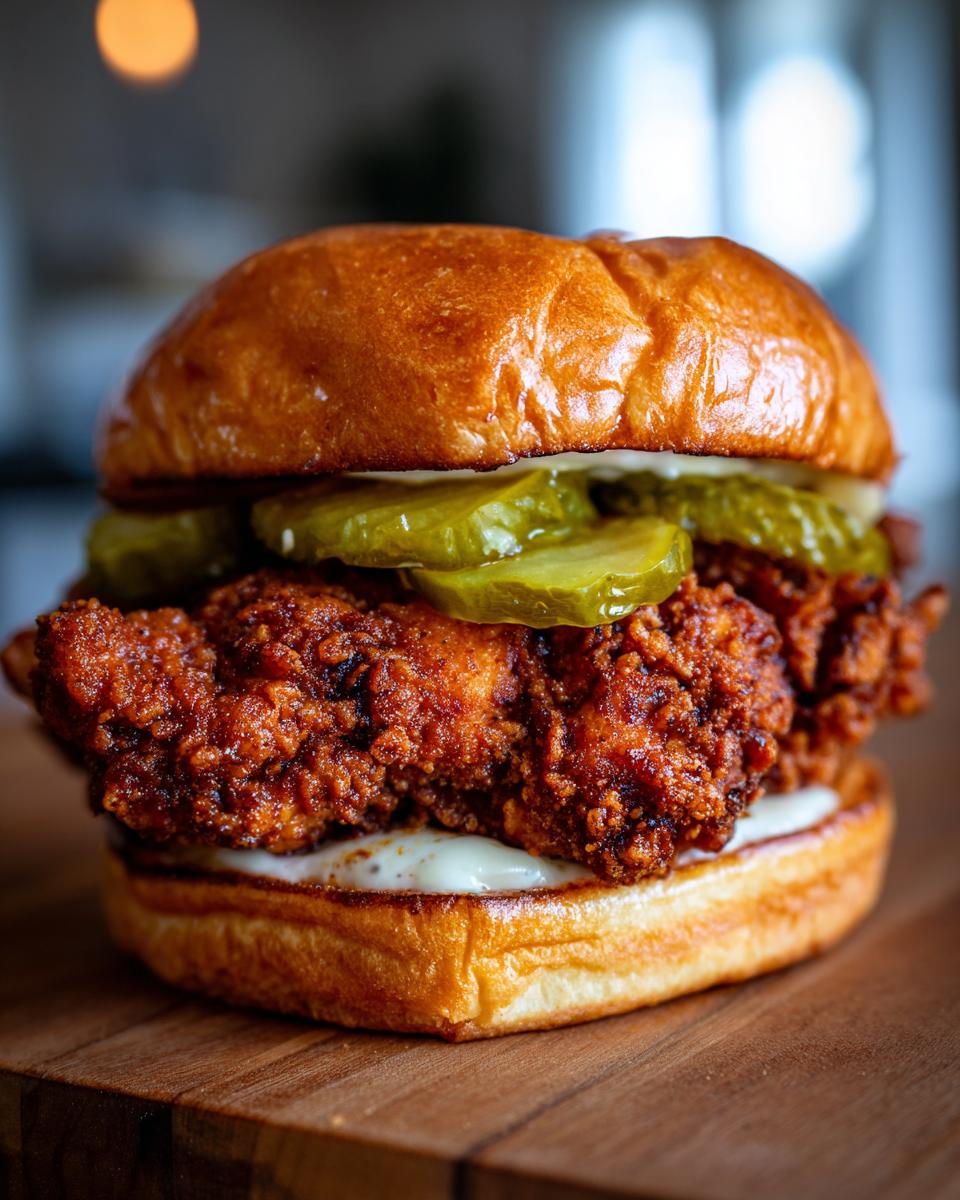
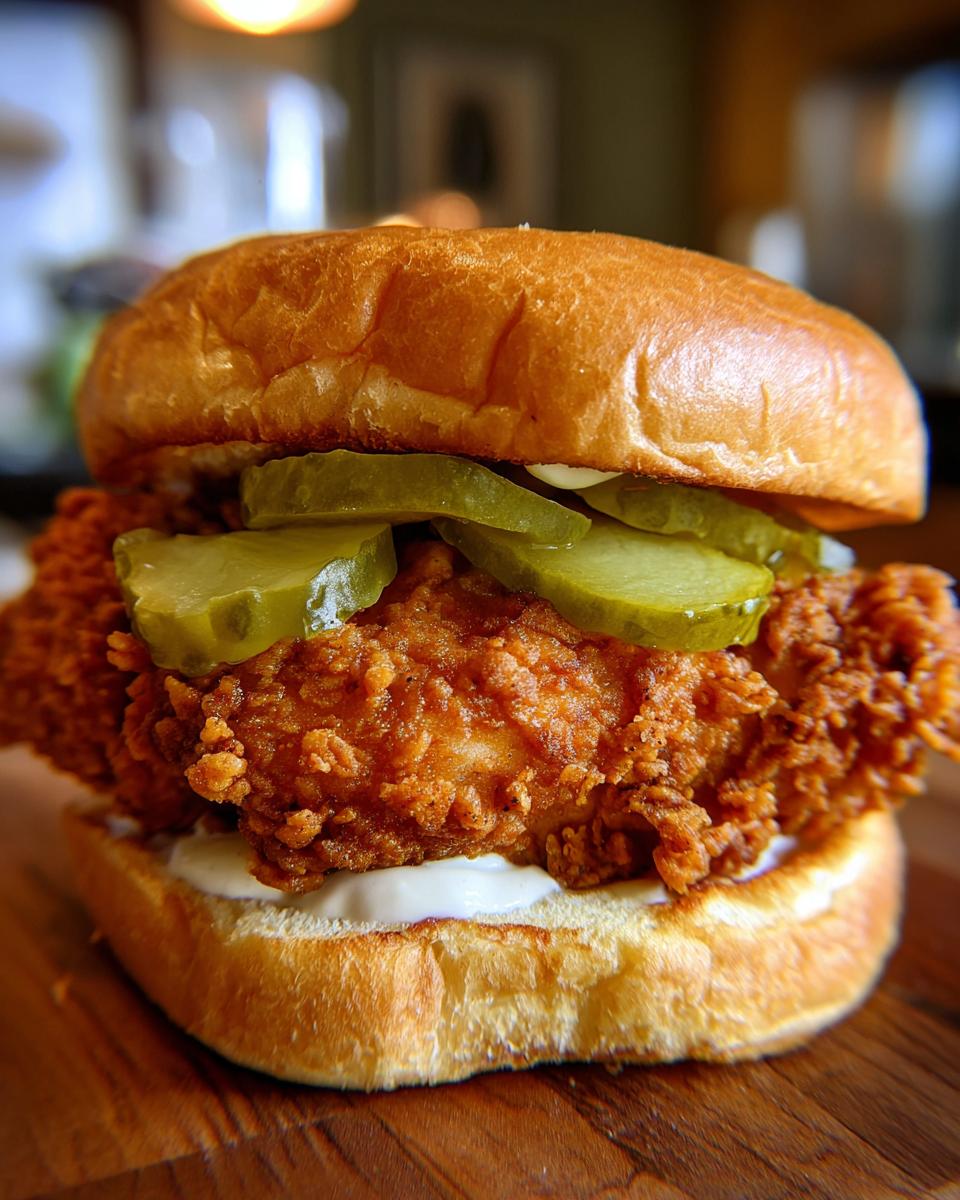
While the chicken rests for a minute, grab your buns. Lightly butter the insides and toast them in a dry skillet until they look golden brown and smell amazing. That toasting adds structural integrity—we don’t want soggy bottoms! Spread your mayo or spicy aioli generously on both halves, set that golden, perfectly cooked chicken fillet right on top, layer on your favorite crisp pickle slices, and crown it with the top bun. Get ready for the best homemade chicken sandwich you’ve ever made!
Tips for the Best Crispy Fried Chicken Sandwich Every Time
Look, I’ve made this fried chicken recipe enough times to know where the little pitfalls are. Mastering the crispy fried chicken sandwich isn’t just about the ingredients; it’s about managing the process. Here are the secrets I guard closely to ensure that crust stays on and stays crunchy. I think you’ll find these tips really helpful when you make your next homemade chicken sandwich!
First off, that oil temperature is everything. If your oil starts looking dark or smoky halfway through your batch, pull it off! Old oil makes for dull-tasting chicken. Since you’re frying in batches, make sure the temperature comes back up to 325°F between pieces. Don’t just guess; an instant-read thermometer is your best friend here.
Also, don’t skimp on the resting time for the marinade! I often prep the chicken the night before I plan to fry it. Even if you think you’re pressed for time, try to give it those four hours minimum. That’s what guarantees the juiciest result possible.
If you end up with extra breaded cutlets, don’t worry! You can set them on a tray covered with parchment paper and tuck them into the fridge for up to two hours before frying. They firm up a little more, which actually helps the coating stay attached when it hits the hot oil for your crispy fried chicken sandwich.
Finally, when you pull the chicken out, season it *right away* while it’s still piping hot and slightly oily. A light sprinkle of salt adheres instantly and boosts that spice blend we worked so hard on to create that perfect flavor profile.
Ingredient Notes and Substitutions for Your Fried Chicken Recipe
When you’re aiming for that perfect home-run meal, sometimes you realize you’re missing one tiny thing in the pantry. Don’t panic! Because this is a HearthBite classic, I’ve figured out the reliable substitutes that keep the spirit of the recipe intact. While I always want you to use the listed ingredients for the absolute best outcome, life happens, and we need a backup plan. If you are looking for ways to adapt your usual recipes, check out our guide on gluten-free recipes!
The buttermilk is the most crucial piece that needs a stand-in if you run out. You can easily whip up a substitute! Just take a cup of regular milk—any kind is fine—and stir in one tablespoon of lemon juice or white vinegar. Let that sit on the counter for about five or ten minutes. It’ll curdle slightly; that’s exactly what you want. It mimics the acidity needed to tenderize that chicken.
As for the oil, you need something neutral with a high smoke point. I listed vegetable oil because most people have it, but peanut oil is fantastic if you have it on hand, though it has a slightly nutty flavor. Canola oil works just as well. The key isn’t the specific type as much as keeping that smoke point high, which is why maintaining 325°F is so important!
If you want to make this truly a spicy chicken sandwich, don’t just reach for crushed red pepper flakes in the coating. I find that adding a dash of smoked paprika enhances the heat beautifully without changing the texture of the dredge mix. You can also just put an extra dash of your favorite hot sauce directly into the buttermilk the day before!
Serving Suggestions for Your Homemade Chicken Sandwich Meal
So, you’ve managed to pull off the perfect, crunchy, juicy homemade chicken sandwich. Congratulations! I know that feeling; it’s pure culinary triumph. Now, we have to figure out what goes with it, because a champion sandwich deserves champion sides. You can’t just serve this masterpiece naked on a plate, right? This is comfort food elevated, so let’s keep the sides easy and satisfying.
When I make these on the weekend, I usually lean into that classic barbecue joint vibe. You need something cool and crisp to cut through the richness of that perfectly fried crust. My go-to is always a simple, tangy coleslaw. You can find my quick slaw recipe linked over here, though honestly, any recipe works! The brightness is great.
Of course, if you’re like my kids, only fries will do. But here’s my little trick: ditch the soggy carton fries. Take some simple Russets, toss them lightly in olive oil and salt, and bake them hot and fast. They won’t be deep-fried, but they still get that satisfying crispness that pairs beautifully with the main event.
If you need something a little lighter, which I sometimes crave after all that decadent frying, just slice up some cucumbers and tomatoes, maybe toss them with a little vinegar and dill. It brings a nice fresh break. Remember, even though we’re going big with the sandwich, we still want the whole meal to feel balanced and enjoyable. Now, if you’re looking for ideas for another day when you need quick fuel, you can check out some easy breakfast recipes!
Storage and Reheating Instructions for Leftover Crispy Fried Chicken Sandwich
Oh, leftovers! That’s the dream, isn’t it? A surprise, delicious lunch waiting for you the next day. But we both know the enemy of leftover fried chicken: sogginess. The minute that crunchy crust touches moisture from the pickles or the bun, it starts to surrender. So, for the best survival rate of your crispy fried chicken sandwich components, we need to separate everything immediately! Don’t try to store the whole assembled sandwich—it’ll be sad.
Wrap the chicken fillet tightly in a paper towel first (this wicks away any residual steam), then place it in an airtight container. The pickles and any leftover sauce go into their own little jars. Keep everything refrigerated for up to three days. If you want to read more about our philosophy and the story behind HearthBite, check out our About Page!
Now, for the reheating—this is critical! If you even think about the microwave, you’re going to turn that incredible crust into rubbery regret. We need dry, radiant heat to wake up that crunch. The absolute best way to revive a leftover Crispy Fried Chicken Sandwich fillet is in the oven or, even better, an air fryer.
Set your oven to about 375°F (190°C) and place the chicken directly on the rack—no pan underneath so air can circulate. Let it heat through for about 10 to 12 minutes. If you use an air fryer, 350°F for about 6 minutes works perfectly. Once the chicken is hot and crispy again, you can quickly toast those buns, add your cold pickles, and build a brand-new, spectacular sandwich. I promise, it’ll taste almost as good as the first time!
Frequently Asked Questions About Making a Crispy Fried Chicken Sandwich
I get so many messages asking me about the logistics of deep frying at home, or how to adjust the flavor, so I thought I’d pull the most common questions right here! We want everyone to feel confident making this gorgeous fried chicken recipe. Check out my quick answers below. If you’re looking for another quick meal idea after this project, pop over to where I keep my easy breakfast recipes!
Can I make this a spicy chicken sandwich?
You absolutely can crank up the heat if you’re feeling bold! The spice comes from the cayenne pepper in the dry dredge mix. I put in just 1/4 teaspoon because I like balance, but if you want a true spicy chicken sandwich, go ahead and double that cayenne or even add a teaspoon of chili powder in there. You’ll taste the heat in every bite of that breaded chicken!
Is it possible to use an air fryer for this fried chicken recipe?
Yes, you can! But I have to be honest; it won’t have the exact same rich crunch as deep frying. If you must air fry, I suggest you still do the double-dredge technique, then spritz the coated chicken lightly with cooking oil before placing it in the basket. It gets done nicely, but that deep-fried crust is hard to beat!
What is the best oil to use for deep frying the breaded chicken?
For the absolute best results, you want a neutral oil that can handle high heat without smoking right away. Vegetable oil, just like I listed, is fantastic and cost-effective. Peanut oil is a close second, giving a little flavor boost. Just make sure whatever you use is fresh for every batch if you’re frying a lot of pieces. We want that perfect golden color on our crispy chicken!
Share Your Perfect Crispy Fried Chicken Sandwich Creation
That’s it! You’ve done it. You have successfully brought that amazing, indulgent restaurant experience right into your own kitchen. I truly hope putting in that little bit of effort makes enjoying your Crispy Fried Chicken Sandwich feel extra special. That’s how we do things here at HearthBite—we put in the love, and we reap the delicious rewards!
Now that you’ve shared a meal with your family or friends, I would be so grateful if you would come back here and let me know how it turned out. Did you try the double-dip technique? Did you dust yours with a little extra cayenne for that spicy chicken sandwich explosion?
Please leave a quick rating below the recipe card and drop your thoughts in the comments! Tell me what you served alongside your homemade chicken sandwich. I absolutely love seeing your creations! If you snap a photo of that perfect golden crust, feel free to send it my way through the Contact Page—nothing makes my day more than seeing my recipes warming up your homes!
PrintRestaurant-Quality Crispy Fried Chicken Sandwich

Make the perfect breaded crunch and juicy interior for an indulgent homemade chicken sandwich.
- Prep Time: 20 min
- Cook Time: 20 min
- Total Time: 4 hours 20 min
- Yield: 4 servings 1x
- Category: Lunch
- Method: Deep Frying
- Cuisine: American
- Diet: Low Lactose
Ingredients
- 2 boneless, skinless chicken breasts, halved horizontally
- 1 cup buttermilk
- 1 teaspoon hot sauce
- 2 cups all-purpose flour
- 1/2 cup cornstarch
- 2 teaspoons salt
- 1 teaspoon black pepper
- 1 teaspoon paprika
- 1/2 teaspoon garlic powder
- 1/4 teaspoon cayenne pepper
- Vegetable oil, for frying
- 4 hamburger buns
- Butter, softened
- Your favorite pickles, sliced
- Mayonnaise or spicy aioli, for serving
Instructions
- Place the chicken pieces in a bowl. Pour buttermilk and hot sauce over the chicken. Cover and refrigerate for at least 4 hours, or preferably overnight.
- In a shallow dish, whisk together the flour, cornstarch, salt, pepper, paprika, garlic powder, and cayenne pepper to create the dry dredge mix.
- Remove the chicken from the buttermilk, letting excess drip off, but do not pat dry.
- Dredge each piece of chicken thoroughly in the flour mixture, pressing the coating firmly onto the meat. For extra crispiness, dip the coated chicken back into the remaining buttermilk briefly, then coat again in the flour mixture.
- Heat about 2 inches of vegetable oil in a deep, heavy-bottomed pot or Dutch oven to 325°F (160°C). Use a thermometer to maintain the temperature.
- Carefully place the breaded chicken into the hot oil, ensuring not to overcrowd the pot. Fry in batches.
- Fry for 6 to 8 minutes per side, turning occasionally, until the internal temperature reaches 165°F (74°C) and the crust is deep golden brown and crispy.
- Remove the chicken from the oil and place it on a wire rack set over a baking sheet to drain excess oil. Season immediately with a pinch of salt.
- Lightly butter the cut sides of the hamburger buns and toast them in a dry skillet over medium heat until golden brown.
- Assemble your homemade chicken sandwich: spread mayonnaise or aioli on both toasted buns, place a crispy chicken fillet on the bottom bun, top with pickle slices, and place the top bun on. Serve immediately.
Notes
- For the juiciest result, ensure your frying oil temperature stays consistent. If the oil is too cool, the crust will absorb too much grease.
- If you prefer a spicier coating, increase the amount of cayenne pepper in the dry dredge mix.
- You can prepare the chicken coating ahead of time by placing the dredged pieces on a tray and refrigerating them for up to 2 hours before frying.
Nutrition
- Serving Size: 1 sandwich
- Calories: 650
- Sugar: 8
- Sodium: 1100
- Fat: 35
- Saturated Fat: 7
- Unsaturated Fat: 28
- Trans Fat: 0
- Carbohydrates: 45
- Fiber: 2
- Protein: 40
- Cholesterol: 150