
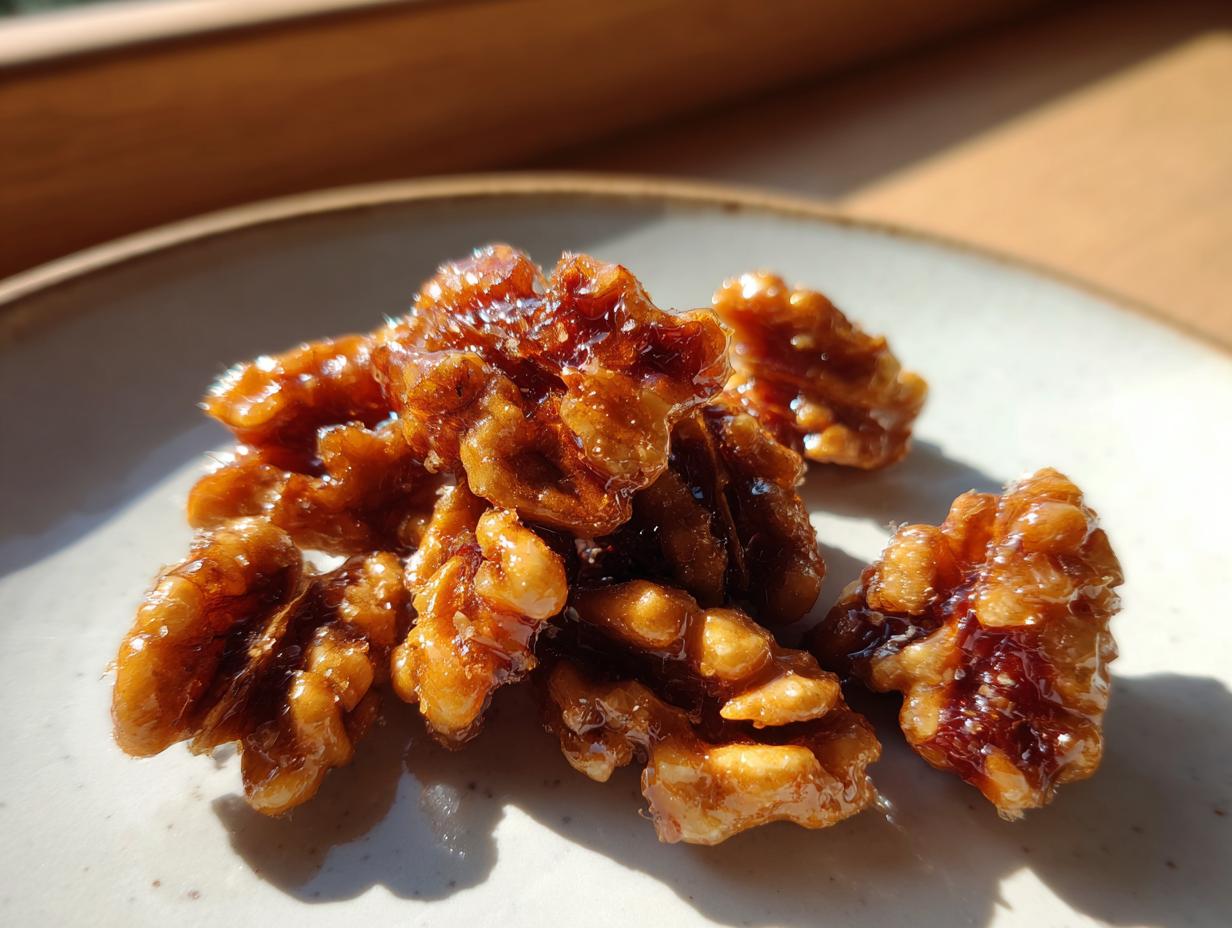
Oh, I just *adore* these little bites of crunch! There is nothing quite like taking warm, earthy walnuts and transforming them into sweet, utterly addictive little gems. If you’ve ever wanted those perfectly glazed walnuts you find at specialty shops, stop looking right now. This is it! I’m sharing my absolute best, simplest stovetop method for making classic **candied walnuts** right in your kitchen in under fifteen minutes. Back when I was just starting HearthBite, these were my go-to snack to toss onto cheese boards when friends dropped by unexpectedly. They always disappear first! For more about my journey in the kitchen, you can read more on the HearthBite story page. Trust me, once you make these perfectly sweet and crunchy walnuts this way, you won’t bother with the oven or any complicated recipes again. We’re keeping it real, easy, and delicious, just how cooking should be.
- Why You Will Love This Easy Candied Walnuts Recipe
- Essential Ingredients for Perfect Candied Walnuts
- Stovetop Candied Walnuts Tutorial: Step-by-Step Instructions
- Tips for Success with Your Glazed Walnuts Recipe
- Variations: Beyond Classic Sugared Walnuts
- How to Use Your Homemade Candied Nuts
- Storing Your Perfect Candied Walnuts
- Frequently Asked Questions About Candied Walnuts
- Recipe Details and Nutritional Estimate for Candied Walnuts
Why You Will Love This Easy Candied Walnuts Recipe
Honestly, this method takes the cake when it comes to speed and ease. I promise you, these are worth whipping up anytime!
- They are lightning fast! You go from pantry staple to glazed walnuts in just about 15 minutes total.
- It uses our simple stovetop candied walnuts technique, meaning fewer dishes than using the oven.
- You get that amazing sweet and crunchy walnuts texture every single time—never sticky or soft!
- They are incredibly versatile. They jazz up a simple green salad or make a fantastic holiday snack.
Essential Ingredients for Perfect Candied Walnuts
Keeping the ingredient list tight and high-quality is the secret to getting that beautiful crunch instead of a sticky mess. Since this recipe only requires a few things, you want to make sure they are exactly what they should be. We’re making about one cup of these homemade candied nuts, which is the perfect amount for a salad topping or snacking right out of the jar. Seriously, don’t try to double the batch immediately unless you have a very wide, heavy skillet—we need space for stirring!
Ingredient Notes and Substitutions for Candied Walnuts
I always use standard granulated sugar here because it liquefies and crystallizes so reliably on the stovetop. If you wanted a deeper flavor, you could try swapping in half brown sugar, but watch the heat closely as brown sugar burns quicker! You can absolutely use pecan halves or even slivered almonds if walnuts aren’t your favorite, though the name technically changes. Just know that the cook time might shift slightly depending on the nut size.
Stovetop Candied Walnuts Tutorial: Step-by-Step Instructions
Okay, now for the fun part! Grab your smallest, heaviest skillet. We’re using medium heat, which is essential for control here. First, you combine your sugar, water, salt, and cinnamon right in that cold skillet. Give it a little stir just until the sugar feels wet—that dissolves it a bit before the heat kicks in. Once it starts bubbling, toss in your walnuts. From this point on, you need to stir constantly for about five to eight minutes. This constant movement is key; it stops them from scorching!

You’ll see the sugar mixture go through a couple of phases. First, it gets thick and looks kind of dusty or grainy—those are the crystals forming. Don’t panic! Keep stirring, and those crystals will melt back down into a smooth liquid syrup. Watch like a hawk here! You are looking for that liquid to turn a light amber color. Once it coats the walnuts evenly and you see that amber hint, rip that pan right off the heat! If you wait too long, you’ll end up with burnt sugar instead of glazed walnuts.
Achieving the Sweet and Crunchy Walnuts Texture
This step dictates everything! As soon as that beautiful amber color hits, you need to work fast. Pour the hot, coated walnuts right out onto a sheet of parchment paper or, even better, a silicone mat. Use a fork right away to single-out the nuts before the syrup has a chance to set up. This prevents you from ending up with one big, sticky rock instead of individual handfuls. Those little sugary coatings will cool rapidly, hardening into that perfect, shatteringly crisp texture you’re looking for. If you’re thinking about trying something fun, check out my recipe for soft, chewy caramels for a different kind of sweet indulgence!
Tips for Success with Your Glazed Walnuts Recipe
Even with this super simple stovetop method, a few little tricks can make the difference between “good” and “the best.” When you’re working with hot sugar, speed is your friend, but knowing when to back off the heat is even more important. I’ve learned these lessons the hard way, believe me!
- The Vanilla Finish: Right when you pull the skillet off the heat—I mean the second it leaves the burner—toss in 1/4 teaspoon of good vanilla extract. Stir it in quickly before you spread them out. That little addition brings such a cozy warmth to the final product.
- If it Gets Too Gloopy: If you’re mid-stir and the syrup suddenly seems too thick to coat the nuts evenly, don’t panic and don’t add more water! Just gently put the pan back over the lowest possible heat setting for maybe ten seconds, just to loosen it up, then immediately take it off.
- The Fork Trick: Don’t use tongs or a spoon to separate them once they’re cooling. Use a regular dinner fork. The tines help you drag through the syrup just enough to separate the nuts without dragging too much sugar with them.
- Don’t Rush the Cooling: They will feel slightly tacky when they first come out, but you have to let them sit completely, untouched, on that parchment paper for at least twenty minutes. That’s when that hard, satisfying crunch develops.
Variations: Beyond Classic Sugared Walnuts
While my classic recipe hits that perfect sweet spot, I absolutely love messing with the spice profile! If you want to lean harder into that cozy holiday feel, definitely bump up the cinnamon or try adding a big pinch of nutmeg along with it. That’s how you nail those deeply aromatic cinnamon sugar walnuts.
For something totally different, throw in just a tiny, tiny dash of cayenne pepper right when you add the vanilla. It gives you this amazing almost imperceptible warmth at the very back of your throat. I also sometimes swap the granulated sugar for dark brown sugar entirely—it creates a richer, almost caramelized walnuts vibe that’s incredible on a sharp cheddar cheese board. Mix it up, see what makes your family happy!
How to Use Your Homemade Candied Nuts
Once you have these sweet, crunchy treasures cooling on the counter, you’ll find excuses to scatter them over everything! They truly elevate any dish. My favorite, hands down, is on a simple arugula salad—the bitter greens cut right through the sugar coating. Remember how I mentioned cheese boards? They are non-negotiable on any holiday platter alongside brie or goat cheese; it’s classy snacking!
But don’t stop there! Sprinkle them over yogurt or oatmeal for a quick breakfast boost. I also love crushing a few up and using them to crust chicken breasts before baking for an unexpected sweet-and-savory flavor twist. If you’re looking for another great way to use warming spices, check out my recipe for baked apples—these nuts are perfect sprinkled right on top of those, too! Seriously, don’t let them just sit around; find a good home for these little bites of crunchy heaven!
Storing Your Perfect Candied Walnuts
The biggest concern once you make these little beauties is obviously keeping them crunchy! We don’t want them going soft on us, right? The good news is that storage is super simple. Once the nuts have cooled down completely—and I mean completely hard—you just need to tuck them away.
Toss them into an airtight container. I usually use those little glass jars withclamp lids, but any decent container that seals tight will work wonders. You want to keep them at room temperature, too; don’t bother putting them in the fridge! Room temperature seems to keep that hard, sweet coating intact best.
Honestly, they should stay perfectly crisp for at least a solid two weeks. My only warning? Avoid high humidity zones like the porch if you live somewhere sticky. Moisture is the enemy of crunch, so keep that container closed tight and away from the steamy areas of your kitchen!
Frequently Asked Questions About Candied Walnuts
Can I use the oven instead of the stovetop for candied walnuts?
You absolutely can! While I love the speed of the stovetop, roasting oven roasted candied walnuts is a fantastic method for making big batches. You’d toss the nuts with the sugar mixture, spread them on a lined baking sheet, and roast at 325°F (160°C) for about 12 to 15 minutes, stirring halfway through. Make sure you watch carefully so they don’t scorch!
Why are my candied walnuts sticky?
That’s the number one frustration! Stickiness almost always comes down to two things: not stirring enough while cooking, or not taking them off the heat quickly enough. If the syrup doesn’t fully crystallize and then re-melt while you’re actively stirring, it stays sticky. Also, if you don’t spread them out immediately after cooking, they will steam each other and retain moisture. You need that fast cooling on parchment paper for truly sweet and crunchy walnuts!
How long do homemade candied nuts last?
If you store them properly—really well sealed in an airtight container, like mentioned before—they’ll stay fantastic for up to two weeks right on the counter. For the very best results, try not to open the container often. If you find they lose a little snap after over a week, you can quickly toss them in a 300°F oven for about five minutes just to dry them back out a bit, though I usually just make a fresh batch because they are so quick!
Are these cinnamon sugar walnuts healthier than store-bought?
I think so, mainly because you control the ingredients! You’re skipping all those weird stabilizers they use in the store. Plus, you can easily adjust the sugar down or add fantastic things like vanilla candied walnuts if you want to change the flavor profile. If you are looking for other fast ideas for your morning routine, check out my collection of easy breakfast recipes!
Recipe Details and Nutritional Estimate for Candied Walnuts
I’ve gathered all the essential timings and yield information right here so you can plan your kitchen time perfectly. Knowing exactly how long a recipe should take is half the battle, right? This whole process, from grabbing the nuts to having them cooling on the parchment, is truly just fifteen minutes—I timed it again last week when I made a batch because I wanted to top my late-night ice cream!
It yields about one cup of these amazing glazed walnuts. Remember, as with all nutritional information on my blog, these figures are just my best estimate based on the ingredients listed. We’re using simple sugar and walnuts here, so it’s a treat, not a health food, but oh so worth it!
- Prep Time: 5 min
- Cook Time: 10 min
- Total Time: 15 min
- Yield: 1 cup
- Method: Stovetop
- Category: Snack
Here is a quick breakdown of what you’re looking at per serving (about 1/4 cup):
- Calories: 250
- Sugar: 15g
- Fat: 21g
- Protein: 5g
If you ever want to check out how we handle your data when you subscribe or comment, you can always review our privacy policy linked here. Happy snacking!
PrintClassic Stovetop Candied Walnuts

Make sweet and crunchy candied walnuts using a simple stovetop method. These glazed walnuts are perfect for salads, cheese boards, or snacking.
- Prep Time: 5 min
- Cook Time: 10 min
- Total Time: 15 min
- Yield: 1 cup 1x
- Category: Snack
- Method: Stovetop
- Cuisine: American
- Diet: Vegetarian
Ingredients
- 1 cup walnut halves or pieces
- 1/4 cup granulated sugar
- 1 tablespoon water
- 1/4 teaspoon ground cinnamon
- Pinch of salt
Instructions
- Combine the sugar, water, cinnamon, and salt in a small, heavy-bottomed skillet over medium heat. Stir until the sugar dissolves.
- Add the walnuts to the skillet. Stir constantly as the mixture begins to bubble and thicken.
- Continue stirring as the sugar mixture crystallizes and then melts again, coating the walnuts evenly. This process takes about 5 to 8 minutes. Watch carefully to prevent burning.
- When the sugar coating turns light amber and sticks to the nuts, immediately remove the skillet from the heat.
- Quickly spread the coated walnuts onto a sheet of parchment paper or a silicone baking mat. Separate them with a fork before they cool completely.
- Let the candied walnuts cool completely until they are hard and crunchy. Break apart any large clumps before serving or storing.
Notes
- For a vanilla flavor, add 1/4 teaspoon of vanilla extract right after removing the pan from the heat, stirring quickly before spreading.
- If the coating becomes too thick before all nuts are coated, return the pan to very low heat for a few seconds to loosen the syrup.
- Store your homemade candied nuts in an airtight container at room temperature for up to two weeks.
Nutrition
- Serving Size: 1/4 cup
- Calories: 250
- Sugar: 15
- Sodium: 15
- Fat: 21
- Saturated Fat: 2
- Unsaturated Fat: 19
- Trans Fat: 0
- Carbohydrates: 24
- Fiber: 3
- Protein: 5
- Cholesterol: 0