
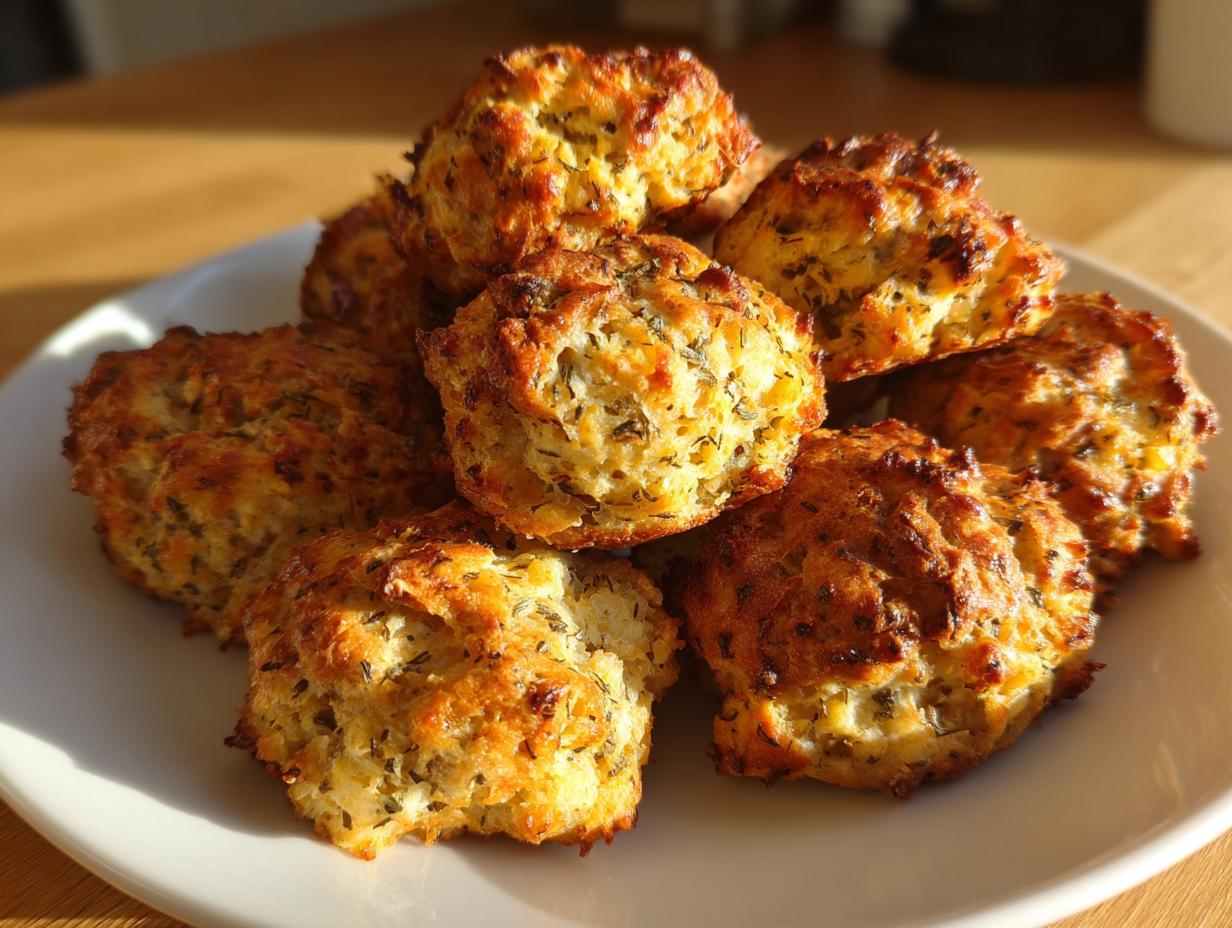
When the holidays roll around, everyone fights for the crispy bits, right? Well, I found the perfect solution: making individual stuffing balls! Honestly, this little trick changed my holiday game forever. We used to cut generous squares of stuffing right out of the main dish, and someone always got stuck with the soggy middle. Not anymore!
These aren’t just easier to serve; they bake up with that incredible, shatteringly crisp golden exterior while keeping the inside savory and moist—truly the best of both worlds. I remember my mom used to bake these when I was little to keep the younger kids occupied while the main stuffing cooked in the bird. The smell of sage and butter baking together instantly brings me back home to Ohio. These comfort food sides are non-negotiable at my table now.
- Why Our Classic Herb Stuffing Balls Recipe Stands Out
- Gathering Ingredients for the Best Stuffing Balls
- Step-by-Step Guide to Perfect Stuffing Balls
- Tips for Success When Making Stuffing Balls
- Make Ahead Stuffing and Freezer Tips for Stuffing Balls
- Variations: Customizing Your Herb Stuffing Bites
- Serving Suggestions for Your Homemade Stuffing Portions
- Storing and Reheating Your Golden Baked Stuffing
- Frequently Asked Questions About Stuffing Balls
- Share Your HearthBite Stuffing Balls Creations
Why Our Classic Herb Stuffing Balls Recipe Stands Out
When you are dealing with a huge holiday spread, you need side dishes that work *for* you, not against you. That’s exactly what these deliver! This recipe is consistently one of my top-tier Thanksgiving Side Dishes because they make serving and staging so much easier.
- That perfect crispy exterior and soft, savory interior ratio—every single bite is golden brown!
- Individual portions mean no fighting over the crusty edges anymore.
- They are the ultimate make-ahead option, taking stress off the big day.
- We stick to classic herbs so the flavor is pure, comforting nostalgia.
Gathering Ingredients for the Best Stuffing Balls
Okay, listen up! The structure of your stuffing balls depends almost entirely on what bread you choose. You absolutely have to use day-old bread cubes—it gives us that structure we need to form a ball that holds its shape. If you use fresh bread, you’re going to end up with a soggy mess, and we want crispy stuffing balls, remember?
We’re keeping things classic here with simple herbs, but make sure you dice your onions and celery small so they soften nicely when we sauté them. Having everything ready to go makes the mixing process smooth as silk.
Ingredient List for Homemade Stuffing Portions
- 8 cups day-old bread cubes (sourdough or French bread work well)
- 1/2 cup butter
- 1 cup chopped onion
- 1 cup chopped celery
- 2 tablespoons fresh parsley, chopped
- 2 teaspoons poultry seasoning
- 1 teaspoon dried sage
- 1/2 teaspoon dried thyme
- Salt and black pepper to taste
- 1 1/2 cups chicken or vegetable broth
- 2 large eggs
Step-by-Step Guide to Perfect Stuffing Balls
This process is fun, but you have to follow the sequence if you want those restaurant-quality golden baked stuffing results. Don’t rush the resting time—that’s where the magic happens!
Preparing the Base and Sautéing Aromatics
First things first, get your oven humming at 375°F (190°C) and pan ready. We need some flavor built early on! Melt that butter in a big skillet over medium heat. Toss in your chopped onion and celery. You want to cook these until they are nice and soft—think tender, sweet, not crispy or brown! That usually takes about 5 to 7 minutes.
Mixing and Moistening the Stuffing Balls Mixture
In your biggest bowl, mix those dry bread cubes with all your seasonings—the poultry seasoning, sage, thyme, parsley, salt, and pepper. Now, add your soft veggies and toss everything together until it looks evenly coated. Separately, just whisk your broth and eggs quickly. Pour that liquid binder over the bread mixture and gently toss until everything is just moistened. Seriously, don’t overmix it!
This is the secret step: let this whole thing sit for a solid 10 minutes. The bread needs time to soak up all that glorious broth. After resting, scoop out portions and roll them firmly between your palms into nice, neat balls.
Forming and Baking Crispy Stuffing Balls
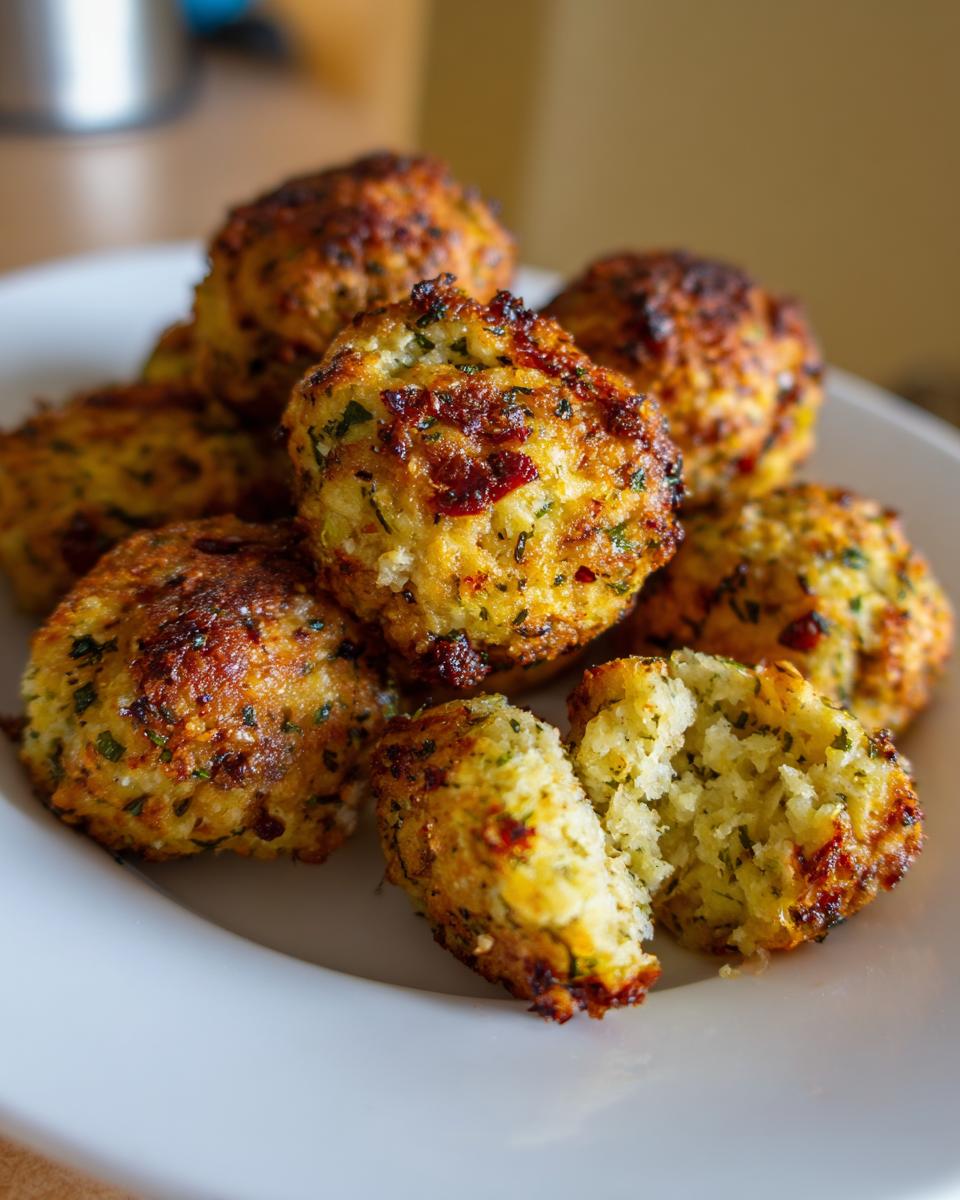
Place those neatly rolled stuffing balls onto your prepared sheet, leaving just a little air space around them so they can crisp up properly. Pop them into the oven for 20 to 25 minutes. You absolutely must turn them halfway through baking. That flip ensures every side gets that wonderful crispy exterior we are aiming for. When they’re golden, they’re done!
Tips for Success When Making Stuffing Balls
I’ve made batches of these stuffing balls that were amazing, and honestly, a couple that were just… fine. When you’re aiming for the very best stuffing balls, usually it comes down to three little things you need to watch while you are assembling them.
First, let’s talk about the bread again. If your bread isn’t quite day-old, don’t panic! You can dry it out fast. Just spread your cubes onto a baking sheet and toss them in the oven at 300°F for about 10 to 15 minutes until they feel totally dry to the touch. This step is non-negotiable if you want that crispy outside!
Next is moisture control. When you add the broth and egg mixture, stir gently. Remember those onions and celery release water while they cook? That just adds to the liquid! If you stir too hard, you work too much gluten into the bread, and they turn into little bricks instead of delicious herb stuffing bites.
Finally, rolling technique. You have to roll them firmly! If you are too gentle, they’ll dry out unevenly or crumble apart in the oven. Firm pressure creates a tight outer layer, almost like a skin, which seals in the moisture. That seal is what gives you the amazing contrast: crispy stuffing balls on the outside and pillowy soft inside. Trust me on the firm roll—it makes all the difference!
Make Ahead Stuffing and Freezer Tips for Stuffing Balls
One of my favorite things about these easy stuffing balls is just how much stress they remove from the big meal day! You can get them totally ready ahead of time. My advice for make ahead stuffing is to roll them all up, put them on a baking sheet, cover them tightly with plastic wrap, and pop them in the fridge for storage up to 24 hours. They chill up beautifully!
If you need to prepare even further out, freezing is an option! You simply freeze the shaped balls right on the sheet tray, then transfer them into a freezer bag once they are solid. When it comes time to bake, don’t thaw them first. Just throw those frozen holiday stuffing bites right into the oven, but add about 5 to 10 minutes onto the original baking time. Easy peasy!
Variations: Customizing Your Herb Stuffing Bites
While these classic herb stuffing balls are perfect just the way they are, I know sometimes you need to switch things up, maybe adding a little meat or some tartness to cut through rich gravy. Don’t feel like you have to stick to my recipe exactly! These homemade stuffing portions are really flexible if you keep the liquid-to-bread ratio in check.
If you’re looking to make these a feature dish instead of just a supporting side, try adding some protein. Everyone loves those savory, hearty flavors around the holidays. We have a few favorite ways to bulk these up and turn them into next-level stuffing balls.
For instance, if you’re itching for Sausage Stuffing Balls, just brown about one cup of mild or spicy breakfast sausage first, drain off any excess grease, and mix that cooked meat right in with your bread cubes and seasonings. It adds so much depth!
If you’re going the poultry route and happen to have leftovers, crumbled cooked chicken or ground turkey works beautifully, too. Just make sure whichever meat you use is already cooked before you add it to the mixture. These become amazing Turkey Stuffing Balls!
And for a little pop of holiday color and flavor? Toss in half a cup of dried cranberries with your dry ingredients. The tartness pairs so well with the sage and thyme, giving you festive little Cranberry Stuffing Balls. Remember, the key is to never add liquidy ingredients unless they are already contained—so cook your sausage or turkey first!
Serving Suggestions for Your Homemade Stuffing Portions
Now that you have these perfectly formed, golden spheres of deliciousness, the fun part begins: what do we eat them with? While they are fantastic on their own as a little snack, they truly shine when they are part of the main event. These are definitely my favorite Appetizer Stuffing Recipe for when guests arrive early!
For our classic holiday setup, they are the perfect partner for a big roasted bird—whether that’s turkey or a chicken. You want to make sure you have a really good, rich gravy ready because every single one of these homemade stuffing portions is just begging to be drenched a little bit. Don’t feel shy about it!
But honestly, my top pairing is just a dollop of sharp cranberry sauce on the side. The tang of the cranberry cuts through the savory butter and herbs perfectly. If you are serving these buffet-style, just set out small bowls of gravy and cranberry sauce nearby. Trust me, they’ll disappear before the main course even hits the table!

Storing and Reheating Your Golden Baked Stuffing
Nobody wants dry, sad stuffing leftovers the next day, right? Since these stuffing balls are already portioned, reheating them is actually way easier than dealing with a giant pan of dressing. They keep their structure wonderfully!
For the fridge, just store them in an airtight container. They are perfectly good for about three to four days. If you want them crispy again—and who doesn’t?—you need a dry heat source. Don’t even try the microwave; it ends up steaming the outside and making them soft! Instead, pop them back into a 350°F oven for about 8 to 10 minutes until they are heated through and you feel that lovely crispness starting to return.
If you froze them (which I highly recommend, especially after the holidays!), you can reheat them directly from frozen. A little longer in that same 350°F oven—maybe 15 to 18 minutes—will do the trick. If they seem to be drying out before they heat all the way through, just toss a teaspoon or two of broth over the top before you put them back in. They should come out tasting almost as good as they did fresh out of the oven!
Frequently Asked Questions About Stuffing Balls
I get so many wonderful questions about these stuffing balls after the holidays! I swear, everyone tries to make them, and most of the time, they turn out great. But just in case you run into trouble or need to make a swap, here are the things I get asked most often about these easy stuffing balls.
Can I use fresh bread instead of day-old bread for these stuffing balls?
You sure can, but you have to give it a little nudge! Fresh bread is too soft and will soak up the liquid way too fast, leading to mushy interiors instead of that perfect texture. If that’s all you have on hand, no sweat. Just spread your fresh bread cubes onto a baking sheet and toast them in the oven at about 300°F for about 10 to 15 minutes. You want them dried out, not browned. Once they feel stiff, let them cool, and then proceed with the recipe. This imitation day-old bread works like a charm for great homemade stuffing portions!
What is the best way to ensure my stuffing balls stay moist inside?
This all comes down to what happens right before you roll them. The number one mistake people make is overmixing once the liquid goes in. If you stir and stir until everything is perfectly combined and uniform, you are developing gluten in the bread, which makes them dense and dry later. The key is to mix gently until just combined, and then you have to let it sit for that full 10 minutes. That resting time allows the bread to absorb the broth evenly and naturally. When you roll them gently but firmly after that rest, you lock in that moisture!
Are these stuffing balls suitable for vegetarian diets?
Yes, absolutely! This specific recipe is designed to be vegetarian-friendly right out of the gate, provided you make one simple swap: use vegetable broth instead of chicken broth. Since we need those eggs for binding, if you happen to be baking for someone vegan or who avoids eggs, you can substitute the 2 large eggs with what’s often called a “flax egg.” Just mix one tablespoon of ground flaxseed with three tablespoons of water, let it sit for five minutes to get gel-like, and use that as your binder for each egg you replace. They turn into wonderful herb stuffing bites either way!
Share Your HearthBite Stuffing Balls Creations
I truly hope these crispy, savory stuffing balls take a central spot on your table this year! My greatest joy here at HearthBite is knowing that a recipe I perfected in my own kitchen is now warming someone else’s home. That’s what cooking is all about, connecting us all.
So, once you’ve made a batch—whether they are classic herb, loaded with sausage, or dressed up with cranberries—I really, really want to hear about it! Don’t keep all that deliciousness to yourself!
Please leave a rating right below the recipe card; five stars lets me know I nailed that perfect crispy-to-soft ratio! If you had any little tweaks or substitutions, drop a comment below. Seeing what you all come up with is the best part of this whole process.
And if you snap a photo of your gorgeous golden baked stuffing—maybe next to the turkey or piled high on a festive platter—tag me on social media! It honestly makes my day to see those homemade portions coming out of your ovens. Happy cooking, everyone!
PrintCrispy Herb Stuffing Balls: The Perfect Make-Ahead Holiday Side

Make these easy stuffing balls for a comforting side dish. They bake up crispy on the outside and stay soft inside, making them ideal for Thanksgiving or any festive gathering. This recipe is simple and great for making ahead of time.
- Prep Time: 20 min
- Cook Time: 25 min
- Total Time: 45 min
- Yield: About 18 servings 1x
- Category: Side Dish
- Method: Baking
- Cuisine: American
- Diet: Vegetarian
Ingredients
- 8 cups day-old bread cubes (sourdough or French bread work well)
- 1/2 cup butter
- 1 cup chopped onion
- 1 cup chopped celery
- 2 tablespoons fresh parsley, chopped
- 2 teaspoons poultry seasoning
- 1 teaspoon dried sage
- 1/2 teaspoon dried thyme
- Salt and black pepper to taste
- 1 1/2 cups chicken or vegetable broth
- 2 large eggs
Instructions
- Preheat your oven to 375°F (190°C). Lightly grease a baking sheet or line it with parchment paper.
- Melt the butter in a large skillet over medium heat. Add the onion and celery. Cook until the vegetables soften, about 5 to 7 minutes.
- In a very large bowl, combine the bread cubes, parsley, poultry seasoning, sage, thyme, salt, and pepper.
- Add the softened onion and celery mixture to the bread cubes and toss to combine evenly.
- In a separate bowl, whisk together the broth and eggs until blended.
- Pour the broth and egg mixture over the bread mixture. Toss everything gently until the bread is evenly moistened. Do not overmix.
- Let the mixture sit for 10 minutes to allow the bread to absorb the liquid.
- Scoop the stuffing mixture and roll it firmly into 1.5-inch balls. Place the stuffing balls on the prepared baking sheet, leaving a small space between each one.
- Bake for 20 to 25 minutes, turning them halfway through, until the stuffing balls are golden brown and crispy on the outside.
- Serve hot with gravy or cranberry sauce.
Notes
- For make-ahead preparation, form the balls and place them on a baking sheet. Cover tightly with plastic wrap and refrigerate for up to 24 hours, or freeze them. If freezing, bake directly from frozen, adding 5 to 10 minutes to the baking time.
- If you prefer a richer flavor, substitute half of the butter with bacon grease.
- For a savory addition, mix in 1 cup of cooked, crumbled sausage or ground turkey with the dry ingredients.
Nutrition
- Serving Size: 1 ball
- Calories: 180
- Sugar: 1
- Sodium: 350
- Fat: 10
- Saturated Fat: 6
- Unsaturated Fat: 4
- Trans Fat: 0
- Carbohydrates: 20
- Fiber: 1
- Protein: 4
- Cholesterol: 35