
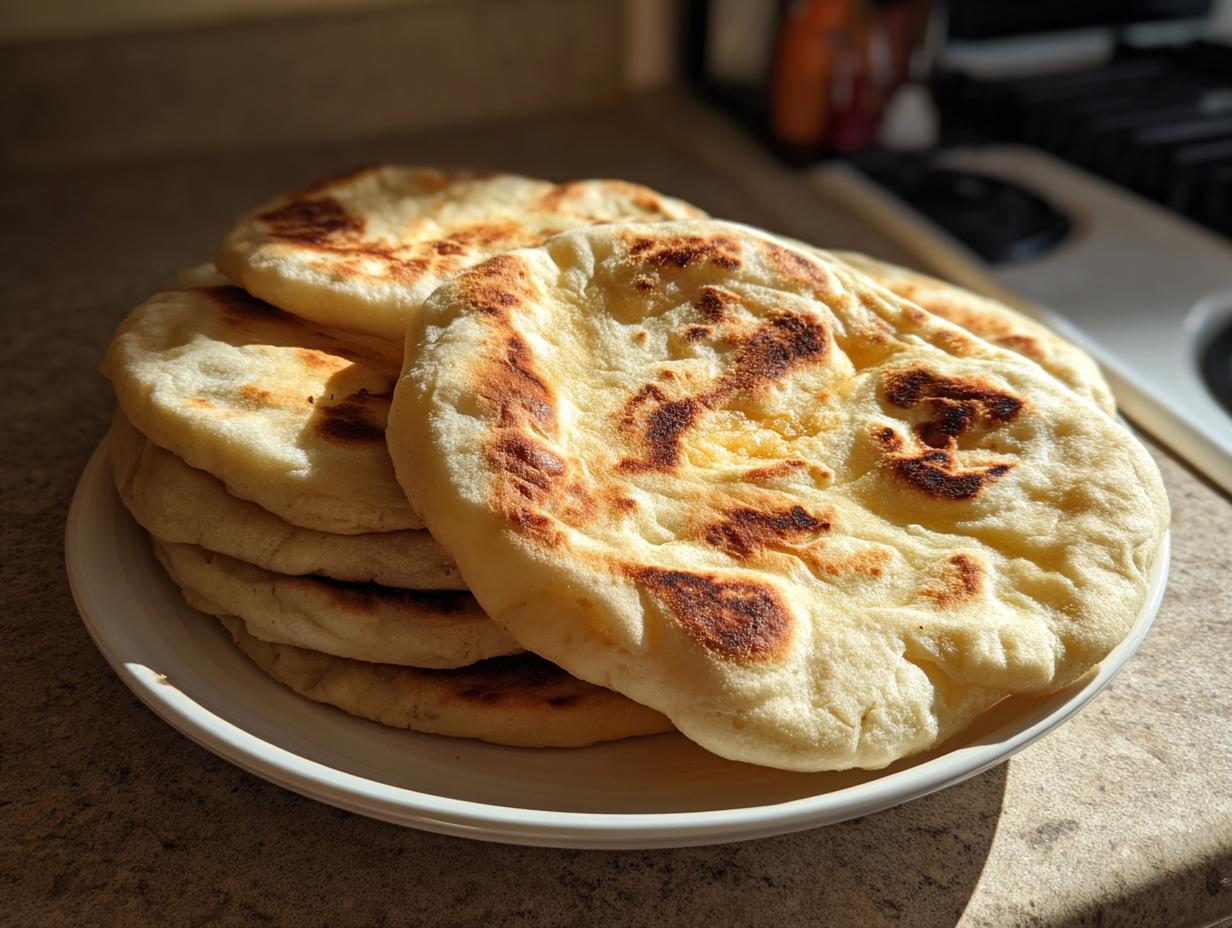
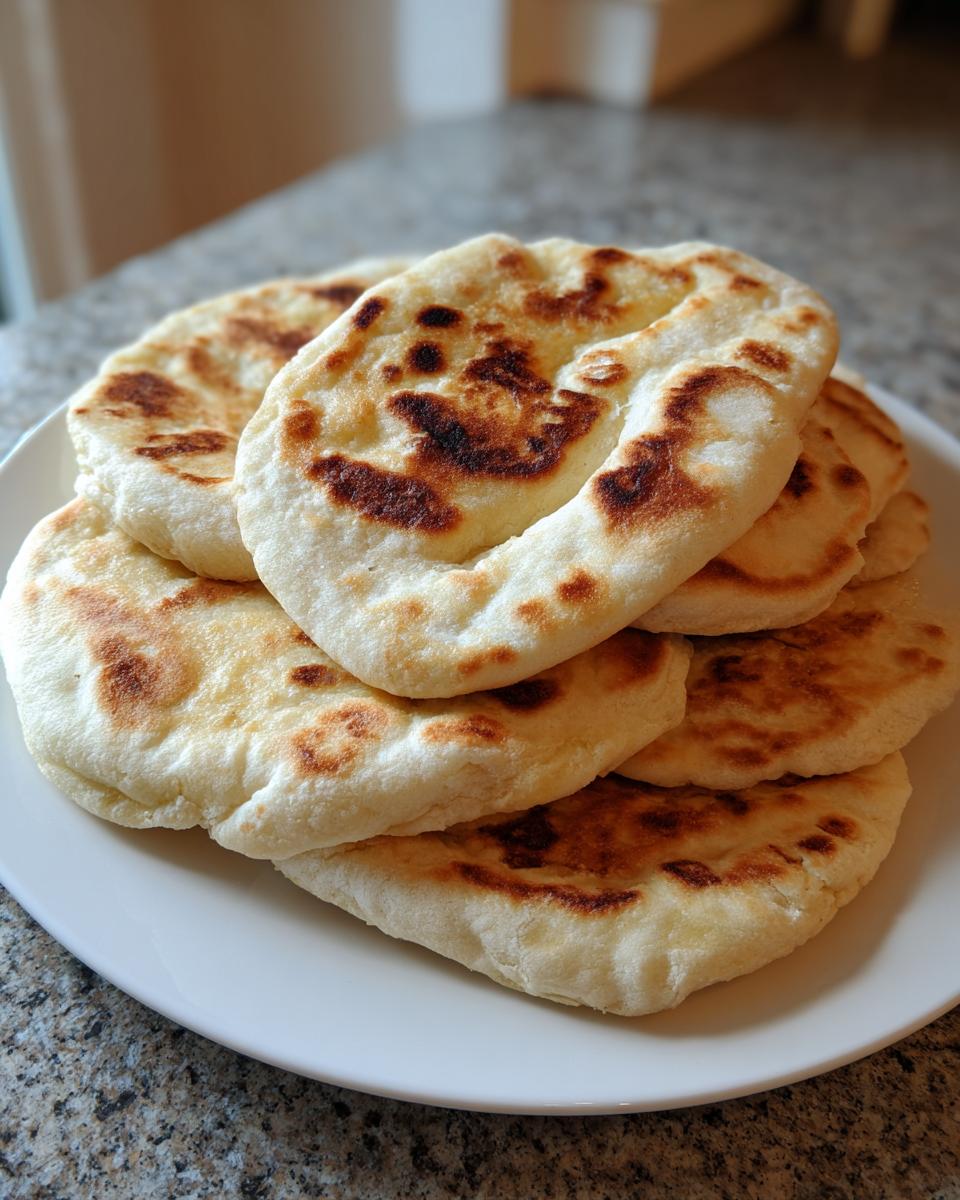
You know, there is truly nothing better than the smell of fresh baked bread filling your entire house. Forget the supermarket shelves! I’m here today to share my absolute favorite, foolproof recipe for homemade pita bread. This isn’t just any flatbread; this is the recipe that guarantees those wonderful, hollow, perfect pockets every single time you cook it. When I first started struggling to bring restaurant-quality comfort food into my own kitchen, mastering this soft flatbread dough was a huge breakthrough for me. It’s simple, it’s fast, and trust me, you’re going to fall completely in love with these warm pita rounds.
- Why This Is the Best Pita Bread Recipe You Will Ever Make
- Ingredients for Foolproof Homemade Pita Bread
- How to Make Pita Bread From Scratch: Step-by-Step Instructions
- Tips for Success with Homemade Pita Bread
- Variations: Making Greek Pita Recipe Style and More
- Serving Suggestions for Warm Pita Bread
- Storage and Reheating Instructions for Fresh Baked Bread
- Frequently Asked Questions About Pita Bread
- Estimated Nutritional Data for Pita Bread
- Share Your Homemade Pita Bread Creations
Why This Is the Best Pita Bread Recipe You Will Ever Make
I’ve tried dozens of flatbread recipes, and honestly, this one keeps winning because it nails the two things everyone wants: incredible softness and those magical, billowy pockets. You don’t need a wood-fired oven or hours of rising time to get authentic results. It’s all in understanding just a couple of key steps when working with your pita bread dough. I’ve linked out to my Italian Bread post if you want to compare techniques, but for pitas, pay attention to these specifics.
- This recipe yields a batch that is noticeably fluffier than most store-bought versions.
- It uses incredibly simple pantry staples, so you can make it on a whim!
Achieving the Soft and Fluffy Pita Bread Recipe Texture
The secret to that soft flatbread dough feel comes down to either your kneading time or a little boost from yogurt. If you skip the optional Greek yogurt (which I highly recommend for extra pillowy results!), you absolutely must commit to giving that dough 5 full minutes of kneading. You’re building strong gluten structure there, which traps air and results in that wonderfully tender chew. It should feel smooth, not tacky, when you’re done.
The Secret to Perfect Pita Bread Pockets
Listen, this is the make-or-break moment for pita bread pockets. That puff? It’s pure science! You need incredibly high, dry heat to flash-steam the moisture inside the dough almost instantly. Whether you use a screaming-hot cast-iron skillet on the stovetop or a preheated baking stone in the oven, the heat needs to be aggressive. If the heat is too low, the surface dries out before the inside can create the steam needed to inflate the bread.
Ingredients for Foolproof Homemade Pita Bread
When you’re aiming for the best pita bread recipe, you really don’t need a massive shopping list. Seriously, these are basic pantry heroes! As you can see below, we’re using just six core items, plus that little optional Greek yogurt trick for ultimate softness. When measuring your water, that 105°F to 115°F reminder is vital—too cool, and your yeast sulks; too hot, and you kill it entirely. Keep it warm and cozy!
- 3 cups all-purpose flour
- 1 cup warm water (about 105-115°F)
- 2 ½ teaspoons active dry yeast
- 1 teaspoon sugar
- 1 teaspoon salt
- 1 tablespoon olive oil
- Optional: 2 tablespoons Greek yogurt for extra softness
How to Make Pita Bread From Scratch: Step-by-Step Instructions
Okay, this is where things get exciting! Making pita bread from scratch feels intimidating, but I promise you, once you see the lovely dough come together, you’ll wonder why you waited so long. We are moving through this methodically, just like the best bakers do. Remember that great tip I mentioned about timing? We’re going to stick close to those windows for the best results. If you need any inspiration while resting your dough, check out my notes on sourdough discard rolls—it’s all about patient waiting!
Activating the Yeast and Mixing the Soft Flatbread Dough
First things first: wake up that yeast! Pour your warm water—and remember, we want that sweet spot between 105°F and 115°F—into a little bowl. Stir in your sugar and then sprinkle the yeast right on top. You absolutely must wait about 5 to 10 minutes. If you don’t see a nice foamy layer building up, your yeast is dead, and you need to start that step over. That foam is your signal that everything is happy!
Once you have that happy foam, you combine the flour and salt in a big bowl. Now, add that yeast mixture, the olive oil, and if you’re indulging, the Greek yogurt. Mix it all up until it looks rough and shaggy. It won’t look like a smooth ball yet, and that’s perfectly fine!
Kneading and the First Rise for Your Pita Bread
Time to get our hands dirty! Turn that shaggy mess out onto a lightly floured counter. You need to knead that dough firmly for about 5 to 7 minutes. I know, your arms get tired, but keep going until it feels smooth and elastic—like soft clay. Place it in an oiled bowl, give it a quick turn to coat, cover it up tight, and stick it somewhere warm. An oven with the light on works wonders. Let it chill out until it’s doubled in size; usually, that takes about an hour for this batch.
Portioning and Rolling the Pita Bread Dough
When your dough has ballooned up, gently punch it down—don’t punch the air out of your kitchen, just the dough! Divide it into 8 equal pieces. Roll each piece until you have a little ball. Cover these 8 balls back up and let them rest for just 10 minutes. This step is non-negotiable, folks! Resting relaxes the gluten so much that when you roll them out, they won’t fight you and spring back into tiny discs.
Now you roll! You’re aiming for those rounds to be about 6 to 7 inches across and super thin, only about 1/8 inch thick. If they are too thick, the pocket won’t form as nicely. If they are too thin, well, they might just turn into crisp crackers!
Cooking the Pita Bread Pockets on the Stovetop
Preheat that heavy cast-iron skillet—or any good, sturdy pan you have—over medium-high heat. And here’s a biggie that confuses people: Do NOT add oil to the pan. We want dry heat here!
When the pan is smoking hot, lay one rolled-out piece of dough right on top. Cook it for about a minute or two until you see big bubbles popping up everywhere. Flip it! Cook the second side for another minute or two. If that beautiful thing doesn’t puff up like a balloon right away, don’t panic! Just take your spatula and gently press down on the top center area. That little bit of pressure forces the steam inside, and voilà—you’ve got yourself a perfect stovetop pita bread pocket!
As soon as one puffs, pull it off and immediately wrap it in a clean kitchen towel. The steam trapped in the towel is what keeps your homemade pita bread incredibly soft while you cook the rest.
Tips for Success with Homemade Pita Bread
I know we covered the stovetop method, which is my personal favorite for that classic edge crispness, but sometimes the oven is just easier, or maybe your skillet isn’t quite getting hot enough. Don’t stress! Whether you are making this for gyros or just dipping into oil, technique trumps tiny details, but these tips ensure success with your pita bread every time. If you want to see another recipe that uses high, dry heat really well, my guide to soft pretzel bites has some great tips on oven management, though the principle here is slightly different.
The biggest tip I can give you, outside of making sure your pan is hot enough, is about handling the cooked bread. If you let a cooked pita sit out on the counter for just one minute, it starts to stiffen up. That towel wrap I mentioned in the instructions? It’s your best friend! When those pitas come off the heat, stack them up and keep them completely covered so the residual steam softens everything back up.
Oven Method Alternative for Puffy Pita Bread Pockets
If your stovetop just isn’t cooperating, or you need to make a huge batch for a party, switching to the oven is brilliant. You want your oven preheated to 475°F (that’s about 245°C). If you have a pizza stone, use it! Heat the stone inside the oven for at least 20 minutes until it’s scorching hot.
You roll your rounds exactly the same way—thin, about 1/8 inch. Then, carefully place them directly onto that screaming-hot stone. They bake really fast, usually just 3 to 5 minutes total. You’ll watch them puff up beautifully right there in the heat. It’s a slightly different texture—maybe a touch drier than the skillet version, but the pocket formation is just as satisfying for stuffing!
Variations: Making Greek Pita Recipe Style and More
So, you’ve mastered the basic loaf, now let’s talk about dressing it up! Lots of folks are specifically looking for that authentic, slightly tangier, herb-infused Greek pita recipe, and this base dough handles those tweaks like a champ. Some Greek versions are known for being just a *touch* richer or having a little more chew, kind of like a soft flatbread dough that’s ready for some grilled chicken.
If you want that true Mediterranean feel, try swapping out two tablespoons of your all-purpose flour for an equal amount of fine semolina flour. It adds a beautiful, slightly chewy texture that just screams ‘souvlaki night!’ Don’t go overboard, though; too much semolina and the pitas might get tough and refuse to puff right. Remember, we want the puff!
For a herby touch, mix in a teaspoon of dried oregano and maybe a tiny pinch of garlic powder along with your salt when you combine the dry ingredients. This version is amazing for dipping. If you want a deep dive into authentic Greek techniques, check out this great resource on their stovetop secrets. For using these flavorful pitas, remember I have a whole collection of quick and easy dinner recipes where these shine!
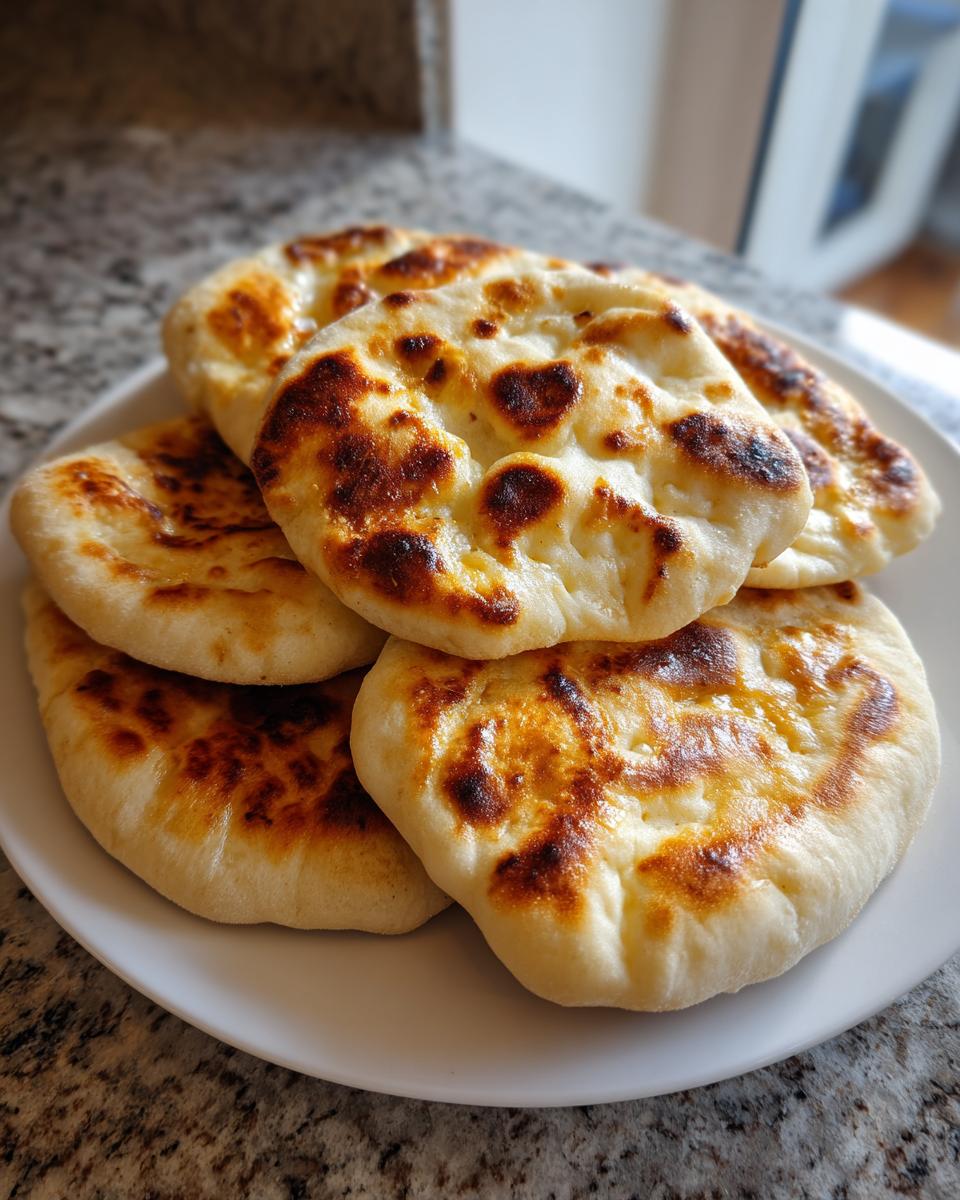
Serving Suggestions for Warm Pita Bread
Okay, you’ve achieved the perfect pillowy disk—now what? This is where the real fun begins! Honestly, these wonderful rounds of warm pita bread are so versatile you’ll wonder how you ever lived without them. The best part? They are totally vegan-friendly, using just simple flour and yeast, so they work for almost everyone at the table, too!
If you want the ultimate Greek experience, you absolutely must use these for your pita for gyros night. Slice open that pocket, load it up with seasoned meat, cool tzatziki sauce, some thinly sliced onions, and tomatoes. It’s dinner magic, I promise you. Making your own instead of grabbing those hard, flavorless store-bought ones makes such a huge difference in the overall experience.
But let’s not forget the simple pleasures! On any given night here at the HearthBite kitchen, you’ll find me serving these up just for dipping. There is no better vessel for thick, homemade hummus or a creamy white bean dip. Use them fresh out of the towel, or if they’ve cooled down a bit, give them a quick 20-second blast back in that hot skillet. Nothing beats pita for dipping when it’s still warm and pliable.
For lighter meals, these mediterranean flatbreads make fantastic wraps. Roll them tightly around leftovers, grilled vegetables, or even some good quality deli meat alongside some spinach. For more ideas on packing up leftovers into delicious midday meals, check out my tips in my healthy lunch recipes guide. They are designed to transform basic meals into something special!
Storage and Reheating Instructions for Fresh Baked Bread
I’m going to be honest with you: the absolute magic of these pitas happens within about three hours of them leaving the hot pan. They are meant to be eaten fresh! Storing them is mostly about preserving that initial softness, because once they cool completely, they can get a little stiff. I never freeze them because the texture just doesn’t hold up well coming out of the freezer, but we can manage short-term storage beautifully.
Right after you cook them, remember that vital step: wrapping every single one immediately in a clean kitchen towel. This traps the steam that’s still escaping, and that steam is what keeps the finished fresh baked bread supple and pliable. Store them wrapped up on the counter in a non-airtight container for maybe a day. A plastic bag will actually make them sweat and then get gummy, so skip those!
If you’re making a huge batch for dinner the next night, you can store them in a paper bag on the counter, but plan to reheat them for guaranteed softness. For reheating? That’s where you get back that warm, fresh-from-the-oven feeling without drying them out. I have a few favorite tricks for reviving other baked goods, like my guide to easy homemade protein bars, but these pitas need something simple and quick.
You need high, directional heat to get the puff back, even if only a little bit. If you are eating them within 12 hours, just a quick 30 seconds per side on a dry skillet over medium heat is perfect. If you’re making them for dipping later on, you can stack a few together on a baking sheet and warm them in a 350°F oven for just 5 minutes. They’ll soften up beautifully, and you might even get a tiny reformation of that classic pocket puff!
Frequently Asked Questions About Pita Bread
Whenever I post a fresh bread recipe, I get flooded with questions, and that’s totally normal! Baking can sometimes feel fussy, especially when you are trying to get that perfect dome. I’ve pulled together the most common things folks ask me about this pita bread recipe so you can bake with total confidence. If you’re looking for some faster morning ideas, I have tons of tips over in my easy breakfast recipes section, but for now, let’s stick to flatbreads!
Can I make this pita bread recipe without yeast?
That’s a great question! For this specific recipe to achieve that beautiful rise and create those signature hollow pockets, you absolutely need yeast. Yeast creates the gas bubbles that cause the bread to inflate dramatically when it hits the high heat. If you skip the yeast, you’ll end up with a very delicious, soft, but flat mediterranean flatbread—more like a thick tortilla or a chapati, really. If you are in a real pinch, a leavening agent like baking powder could work in a pinch, but I can’t promise you’ll get that perfect pocket structure we are aiming for!
How long does homemade pita bread stay soft?
Honestly, homemade pita bread is at its peak performance when it’s still warm from the skillet. I mean, truly, perfectly tender right out of the towel it’s wrapped in! If you manage to have leftovers (which doesn’t always happen in my house!), they generally stay soft enough for dipping or light use for about four to six hours on the counter, provided they are snugly wrapped in a clean, dry kitchen towel as soon as they come off the heat. After that, they usually benefit from a quick refresh, like I documented in the reheating tips above. They won’t last as long as store-bought versions because we aren’t loading them up with preservatives, and that’s a good thing!
Estimated Nutritional Data for Pita Bread
Now, I always tell folks that since we’re baking from scratch with real ingredients, the nutrition labels are never going to be exact like you see on store-bought packages. But just so you have an idea of what you’re enjoying—and because I like to keep things transparent here at HearthBite—here are the estimated values for one serving of our pita bread, based on the yield of 8 rounds. Please remember these are based on the core ingredients and don’t account for what you pile inside!
- Serving Size: 1 pita
- Calories: 180
- Fat: 3g
- Carbohydrates: 34g
- Protein: 5g
This is wonderfully simple, straightforward nutrition, showcasing that homemade pita bread is a clean, satisfying choice for any meal. Enjoy!
Share Your Homemade Pita Bread Creations
I truly hope you loved making these! If you whip up a batch of this fluffy pita bread and achieve those gorgeous pockets, please come back and leave a rating. I live for seeing your kitchen successes. Tell me how you served them—were they for gyros or did you dip them in hummus? Don’t be shy; you can always reach out to me directly through my contact page. Happy baking, friends!
PrintFoolproof Fluffy Homemade Pita Bread with Perfect Pockets
Make incredibly soft and fluffy homemade pita bread that puffs into perfect pockets every time. This easy recipe uses simple ingredients and works well on the stovetop or in the oven, making it ideal for gyros, wraps, or dipping into hummus.
- Prep Time: 20 min
- Cook Time: 15 min
- Total Time: 1 hour 35 min
- Yield: 8 servings 1x
- Category: Bread
- Method: Stovetop/Skillet
- Cuisine: Mediterranean
- Diet: Vegetarian
Ingredients
- 3 cups all-purpose flour
- 1 cup warm water (about 105-115°F)
- 2 ½ teaspoons active dry yeast
- 1 teaspoon sugar
- 1 teaspoon salt
- 1 tablespoon olive oil
- Optional: 2 tablespoons Greek yogurt for extra softness
Instructions
- Combine the warm water, sugar, and yeast in a small bowl. Let this mixture sit for 5 to 10 minutes until it becomes foamy. This shows the yeast is active.
- In a large bowl, mix the flour and salt. Add the yeast mixture, olive oil, and optional Greek yogurt to the dry ingredients. Mix until a shaggy dough forms.
- Turn the dough out onto a lightly floured surface. Knead the dough for 5 to 7 minutes until it becomes smooth and elastic.
- Place the dough in a lightly oiled bowl, turning it once to coat. Cover the bowl with plastic wrap or a clean towel. Let the dough rise in a warm place for 1 hour, or until it has doubled in size.
- Gently punch down the risen dough. Divide it into 8 equal pieces. Roll each piece into a smooth ball.
- Cover the dough balls and let them rest for 10 minutes. This relaxes the gluten, making rolling easier.
- Preheat a heavy-bottomed skillet or cast-iron pan over medium-high heat. Do not add oil to the pan.
- Take one dough ball and roll it into a circle about 6 to 7 inches in diameter and about 1/8 inch thick.
- Carefully place one rolled round onto the hot, dry skillet. Cook for 1 to 2 minutes until bubbles appear on the surface.
- Flip the pita bread. Cook the second side for 1 to 2 minutes. The pita should puff up completely, forming a pocket. If it does not puff immediately, gently press down on the top with a spatula to encourage puffing.
- Remove the puffed pita from the pan and immediately wrap it in a clean kitchen towel to keep it soft while you cook the remaining rounds.
- Serve the warm pita bread immediately with your favorite dips or fillings.
Notes
- For the best pocket formation, ensure your pan is very hot before placing the dough in it. High, direct heat creates the steam needed for the puff.
- If you prefer an oven method, bake the rolled pitas on a preheated pizza stone at 475°F (245°C) for 3 to 5 minutes each until puffed.
- These homemade pita pockets are best eaten the day they are made.
Nutrition
- Serving Size: 1 pita
- Calories: 180
- Sugar: 1
- Sodium: 250
- Fat: 3
- Saturated Fat: 0.5
- Unsaturated Fat: 2.5
- Trans Fat: 0
- Carbohydrates: 34
- Fiber: 2
- Protein: 5
- Cholesterol: 0