
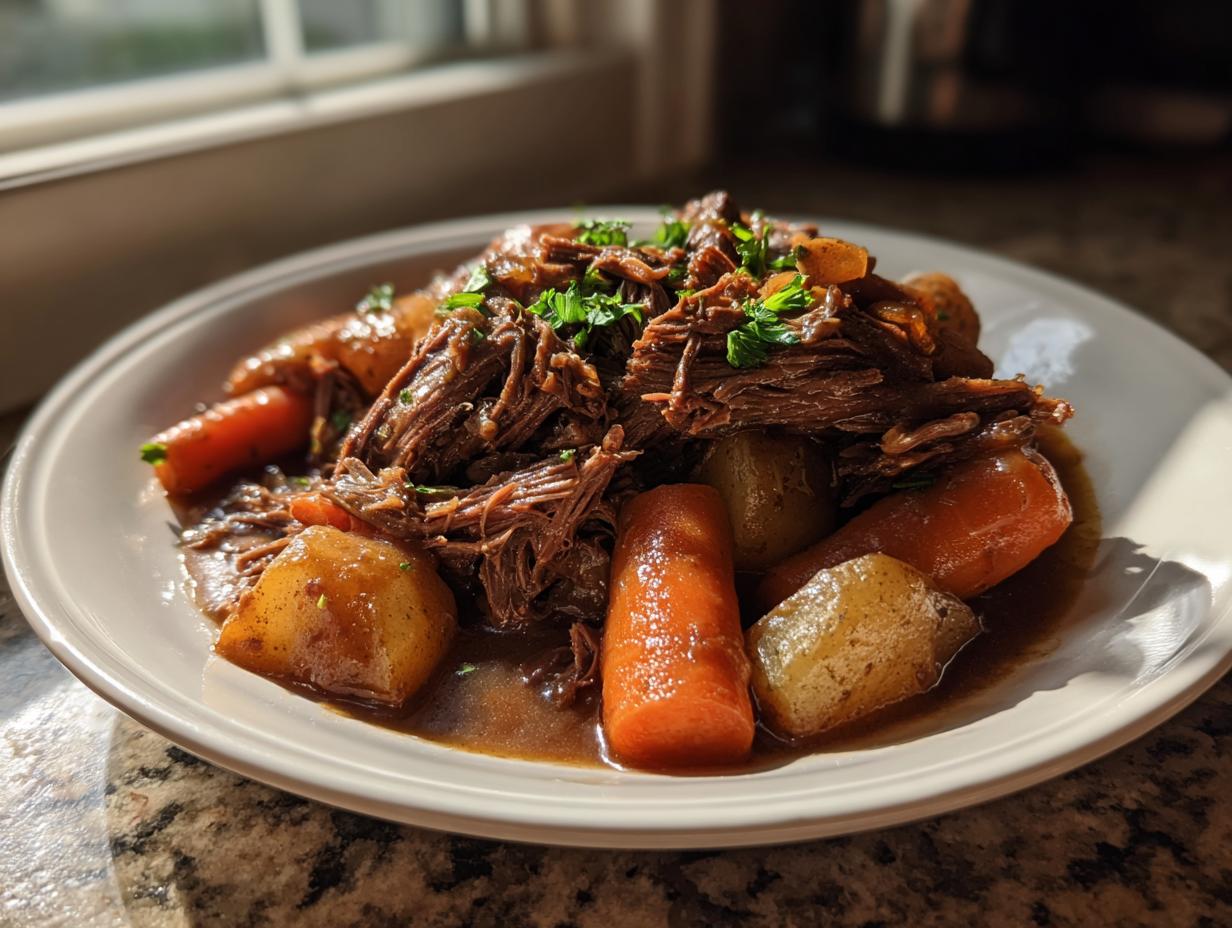
When the world feels too fast and you just need that hug in a bowl, nothing beats a proper comfort food recipes night. Forget those dry, sad roasts you’ve had before! Here at HearthBite, we specialize in making sure your family meals are reliable winners, and this recipe for the Best Classic Pot Roast is my absolute favorite way to usher in that cozy feeling. We’re talking deeply browned beef that shreds with just a fork—truly fall-apart tender beef every single time. This is the kind of cooking that warms the heart and reminds you that good food doesn’t have to be complicated.
- Why This Classic Pot Roast Recipe Delivers Comfort
- Ingredients for Your Hearty Pot Roast Dinner
- How to Cook the Perfect Pot Roast: Dutch Oven vs. Slow Cooker
- Finishing Your Pot Roast Gravy Recipe
- Tips for the Most Tender Pot Roast Every Time
- Make Ahead Roast and Storage Instructions for Your Pot Roast
- Variations on the Classic Pot Roast Theme
- Serving Suggestions for Your Sunday Roast Meal
- Frequently Asked Questions About Making Pot Roast
- Sharing Your Pot Roast Experience
Why This Classic Pot Roast Recipe Delivers Comfort
Honestly, this isn’t just another recipe; it’s a blueprint for guaranteed satisfaction. If you’re looking for a true Tender Pot Roast Recipe that pulls together easily, you’ve found it. I developed this specifically because I needed Hearty Beef Dinner Ideas that looked impressive but didn’t require me to stand over the stove all day. That’s the HearthBite philosophy in action, and you can read all about how we got these recipes tested over at the About Us page!
- It requires minimal hands-on time once it’s actually cooking.
- The flavor gets deeper and richer the longer it braises.
- It cooks beautifully whether you use the oven or the Crockpot.
Achieving Fall Apart Roast Beef Texture
The secret weapon here is the beef chuck roast itself. This cut has just the right amount of connective tissue. When you cook it low and slow, that tissue melts into gelatin, transforming the meat into that melt-in-your-mouth, Fall Apart Roast Beef texture that everyone dreams about. It really requires patience, but the machine does the heavy lifting!
Simple Steps for the Best Pot Roast Seasoning
We build flavor right from the start, which is key for the Best Pot Roast Seasoning. Don’t rush the searing step—ever! That deep brown crust on the meat isn’t just color; it’s pure flavor depth that then dissolves into your cooking liquid. A good pat dry and a generous rub of herbs makes all the difference before that first sizzle.
Ingredients for Your Hearty Pot Roast Dinner
Okay, let’s talk about what’s going into that pot. Because this is a classic, comforting meal, the quality of what you start with really shines through in the end. We aren’t using any wild, complicated things here, just good staple ingredients that create magic when braised together. Trust me, using a beautiful cut of beef is step one to that amazing, savory texture.
I’ve listed exactly what you’ll need below. Make sure those vegetables are cut chunky—we want them tender, but not totally mush by the time the meat is done!
- 3-4 lb beef chuck roast (This is our star!)
- 2 tablespoons olive oil (For that beautiful sear.)
- 1 large yellow onion, quartered
- 4 cloves garlic, minced (Don’t skimp on the garlic, please!)
- 1 teaspoon dried thyme
- 1 teaspoon dried rosemary
- 1 teaspoon salt
- 1/2 teaspoon black pepper
- 1/4 cup all-purpose flour (This helps thicken our gravy later.)
- 2 cups beef broth (Use the best quality you can find—it matters!)
- 1 cup dry red wine (Optional, but wow, does it add depth! Use more broth if you skip it.)
- 2 tablespoons Worcestershire sauce
- 3 large carrots, cut into 2-inch pieces
- 3 celery stalks, cut into 2-inch pieces
- 1.5 lbs Yukon Gold potatoes, quartered
- 2 bay leaves
How to Cook the Perfect Pot Roast: Dutch Oven vs. Slow Cooker
This is where the fun really starts! Whether you’re team oven or team slow cooker, this recipe adapts beautifully. I know people get really attached to their favorite method, so I made sure this pot roast recipe gives you clear instructions for both the heavy-duty Dutch Oven Pot Roast magic and the simple, set-it-and-forget-it Slow Cooker Pot Roast experience. Both roads lead to incredibly tender shredded beef, I promise! If you’ve ever wondered how to get that fall-apart texture in the slow cooker, check out my tips for Slow Cooker Pulled Pork—similar principles apply here!
Step 1: Searing and Building the Pot Roast Flavor Base
First things first: dry that roast off! Pat it down thoroughly with paper towels. Season it up every single side with the herbs, salt, and pepper we mixed—this is your foundational flavor layer. Get your olive oil hot in that Dutch oven until it shimmers, and sear that meat until it’s deeply, gloriously brown on all sides. Then yank it out and toss in your onions until they soften up a bit, followed by that minced garlic for just a minute. That smell alone is heaven!
Step 2: Creating the Braising Liquid and Combining Ingredients
Next up is making our thickener. Sprinkle the flour right over those onions and stir it around for just a minute so it cooks out that raw taste. Now slowly, slowly whisk in your beef broth, the wine if you’re using it (it adds such a rich, savory note!), and the Worcestershire sauce until everything is smooth. Bring that to a gentle simmer, scrape up all those yummy brown bits stuck to the bottom—that’s flavor gold!—then nestle that roast right back in there with the bay leaves.
Method A: Dutch Oven Pot Roast Instructions
If you’re using the Dutch oven, cover that beauty tightly! Pop it into an oven preheated to 325°F (160°C). Seriously, just let it braise completely undisturbed for about 3 to 4 hours. You’re going for that point where you barely nudge the meat and it starts falling apart on its own. This high-heat, lower-liquid method really ensures an extra Juicy Roast Beef!
Method B: Easy Pot Roast with Vegetables in the Slow Cooker
For the slow cooker crew, transfer everything—roast, onions, and liquid—into the basin. Cook it on LOW for 7 to 8 hours, or for a quicker weeknight turnaround, use HIGH for about 4 hours. Here’s the key for this Easy Pot Roast with Vegetables: don’t put the carrots, celery, and potatoes in immediately! Add them during the last two hours on LOW (or the last hour if you went with HIGH). These cook faster and will be perfectly tender when the beef is ready.
Finishing Your Pot Roast Gravy Recipe
Once that roast is fork-tender—and believe me, you will know it when you see it—it’s time for the grand finale: the actual Pot Roast Gravy Recipe! Carefully lift the meat out and set it on a cutting board. Use two forks to easily shred it up; it should basically collapse under the pressure, which is so satisfying. Then, fish out those bay leaves; we don’t need those anymore!
Now, look at that liquid left in the bottom of your pot. That’s pure gold! Skim off any major layer of fat floating on top—you can do this with a spoon or by letting it sit for a minute. If you love a thinner, velvety gravy, just bring that liquid right back up to a simmer on the stovetop. But for that thick, spoon-coating gravy everyone craves? Mix up a little cornstarch slurry—that’s just one tablespoon of cornstarch stirred into two tablespoons of cold water until it’s smooth.
Whisk that slurry right into your simmering juices slowly. Watch it thicken up magically right there on the burner! Once you have your perfect consistency, pour that rich sauce right over your shredded beef and veggies. Check out my guide for homemade brown gravy if you want to elevate this even further!
Tips for the Most Tender Pot Roast Every Time
You’ve mastered the technique, but let me give you three little secrets that seriously take this pot roast from great to legendary. When it comes to that gorgeous chuck roast, you’ve got to commit to the braise time. Don’t peek too early! Rushing it is the fastest way to a tough dinner, and we are aiming for that fall-apart tender result we talked about earlier.
Remember that note about resting? It’s huge. Once your meat is done, let it rest for a solid 15 minutes before you shred it. This lets those juices redistribute instead of running all over your cutting board. If you’re using the beef chuck roast recipes, this resting period is non-negotiable for that juicy roast beef finish.
Also, always use good, rich beef broth. Seriously, if you use that watery kind, your gravy is going to taste thin. A quality stock is the silent hero in making this a proper comfort food recipe!
Make Ahead Roast and Storage Instructions for Your Pot Roast
I often make a big batch of this Family Meal Pot Roast on a Sunday because, honestly, it tastes even better the next day! If you’re planning to make this a Make Ahead Roast situation, you have to be smart about cooling it down. After the pot roast is fall-apart tender and you’ve shredded the meat, let everything cool down completely.
Here’s my golden rule for storage: keep the shredded meat and the vegetables separate from the gravy. Store them in airtight containers in the fridge for up to three days. When you’re ready to eat, just warm the meat and veggies slowly on the stovetop or in the microwave, and then pour that nice, reheated gravy right over the top. It’s the easiest reheat meal ever, and you can revisit those wonderful slow-cooking smells on a busy weeknight!
If you want to know more about prepping meals ahead of time, I have a whole post dedicated to that make-ahead roast strategy!
Variations on the Classic Pot Roast Theme
While this classic pot roast is perfect as is, sometimes you want to shake things up for a cozy winter night! If you’re craving that deep, savory punch, think about turning this into a French Onion Pot Roast. You’d just need to caramelize a couple of extra onions separately and toss them in with the broth, maybe skipping the carrots for onions and celery only.
For an elegant touch, kind of like an Ina Garten Style Pot Roast, really focus on using a high-quality, robust red wine for simmering and adding extra fresh herbs like a sprig of rosemary right over the meat during the braise. It makes the whole house smell divine, transforming a simple meal into a real event!
Serving Suggestions for Your Sunday Roast Meal
Now that you have the ultimate Fall Apart Roast Beef bathing in that amazing gravy, you need the right things to soak it all up! Since this is such a hearty centerpiece, I usually lean toward simple, satisfying sides for our full Sunday Roast Meal setup. You definitely need something creamy for the gravy, so my favorite creamy choice is loading up on my twice-baked potatoes!
If you want something quicker that feels just as homey, a great piece of cornbread is essential for scooping up all those last bits of sauce. You can’t go wrong with a crusty slice of my cast-iron cornbread alongside this pot roast. It’s truly the perfect ending to a cozy, satisfying meal!

Frequently Asked Questions About Making Pot Roast
I know you might still have questions bubbling up—I certainly did when I first started making this! It’s a labor of love, and getting the details right makes all the difference between a good meal and an unforgettable Hearty Beef Dinner. Here are a few things folks ask me all the time about achieving that perfect pot roast.
What is the best cut of beef for a tender pot roast recipe?
Hands down, you want to reach for the chuck roast. It seems tough, I know! But that marbling and connective tissue is exactly what breaks down into the glorious, savory juices that make this a Tender Pot Roast Recipe. If you can find one with good marbling, grab it! Avoid leaner cuts like sirloin for this method, or you’ll end up with dry shreds instead of Fall Apart Roast Beef.
Can I skip searing the meat entirely for a weeknight pot roast?
You technically *can*, but I really, really advise against it if you want real flavor payoff. Skipping the sear means skipping that rich, deep crust that flavors your entire braising liquid and your final Pot Roast Gravy Recipe. If you are in a huge rush, you can sear it for just 2 minutes per side instead of 4, but don’t skip it completely if you want that true Classic Pot Roast Dinner taste.
How do I make the gravy thicker without using cornstarch?
If you’re avoiding cornstarch, the best old-school trick is simply simmering the liquid longer! After you’ve shredded your meat, just let your gravy bubble away uncovered on the stovetop. As the water evaporates, the flavor concentrates and the liquid naturally reduces and thickens. It takes patience, but it results in a slightly more buttery texture than cornstarch sometimes provides. If you need immediate help or have other cooking questions, don’t hesitate to reach out on my Contact Page!
Does this work best for a slow cooker or Dutch oven?
Honestly, for the absolute richest flavor development, I prefer the Dutch oven in a low oven—it traps the heat so beautifully and keeps that lid tight. However, the Slow Cooker Pot Roast method is the champion for convenience, especially if you are heading out the door in the morning for a true Weeknight Pot Roast meal. Both deliver that comforting, tender result!
Sharing Your Pot Roast Experience
That’s it, my friends! Your kitchen should smell like the best kind of Sunday afternoon right now. I really, truly hope this pot roast brings a smile to your family’s faces. If you tried the Dutch oven or the slow cooker method, let me know in the comments below which one you loved best! I always love seeing your beautiful meals, so don’t forget to tag us if you snap a picture. If you want to know more about how we keep our site running smoothly, you can check out our Privacy Policy while you wait for those leftovers to cool!
PrintThe Best Classic Pot Roast with Root Vegetables (Slow Cooker or Dutch Oven)

Achieve fall-apart tender beef with this classic pot roast recipe. This hearty meal, featuring savory beef and root vegetables, works perfectly in a slow cooker or Dutch oven for ultimate comfort food.
- Prep Time: 20 min
- Cook Time: 4 hours
- Total Time: 4 hours 20 min
- Yield: 6 servings 1x
- Category: Dinner
- Method: Braising (Oven or Slow Cooker)
- Cuisine: American
- Diet: Low Fat
Ingredients
- 3–4 lb beef chuck roast
- 2 tablespoons olive oil
- 1 large yellow onion, quartered
- 4 cloves garlic, minced
- 1 teaspoon dried thyme
- 1 teaspoon dried rosemary
- 1 teaspoon salt
- 1/2 teaspoon black pepper
- 1/4 cup all-purpose flour
- 2 cups beef broth
- 1 cup dry red wine (optional, substitute with more broth)
- 2 tablespoons Worcestershire sauce
- 3 large carrots, cut into 2-inch pieces
- 3 celery stalks, cut into 2-inch pieces
- 1.5 lbs Yukon Gold potatoes, quartered
- 2 bay leaves
Instructions
- Pat the chuck roast dry with paper towels. Season all sides generously with salt, pepper, thyme, and rosemary.
- Heat the olive oil in a large Dutch oven over medium-high heat. Sear the roast on all sides until deeply browned, about 3-4 minutes per side. Remove the roast and set it aside.
- Add the quartered onion to the Dutch oven and cook until softened, about 5 minutes. Add the minced garlic and cook for 1 minute until fragrant.
- Sprinkle the flour over the onions and stir constantly for 1 minute to cook out the raw flour taste.
- Slowly whisk in the beef broth, red wine (if using), and Worcestershire sauce until smooth. Bring the liquid to a simmer, scraping up any browned bits from the bottom of the pot.
- Return the roast to the pot. Add the bay leaves. The liquid should come about halfway up the side of the roast.
- For Dutch Oven Method: Cover the Dutch oven tightly and transfer it to a preheated oven at 325°F (160°C). Braise for 3 to 4 hours, or until the meat is fork-tender.
- For Slow Cooker Method: Transfer the roast, onions, liquid, and bay leaves to a slow cooker. Cook on LOW for 7 to 8 hours or on HIGH for 4 hours. Add the carrots, celery, and potatoes during the last 2 hours of cooking (or the last 1 hour on HIGH).
- Once the meat is tender, remove it from the pot and shred it with two forks. Remove the bay leaves.
- If you desire a thicker gravy, skim excess fat from the liquid. Bring the remaining liquid to a simmer on the stovetop. If the gravy is too thin, mix 1 tablespoon of cornstarch with 2 tablespoons of cold water and whisk into the simmering liquid until thickened.
- Serve the shredded pot roast over the vegetables with plenty of rich gravy.
Notes
- For the best sear and flavor foundation, do not skip browning the meat thoroughly before braising.
- If you are making this ahead, cool the roast and vegetables completely, then store them separately from the gravy in the refrigerator for up to 3 days. Reheat slowly.
- Use a quality beef broth for the best flavor in your final gravy.
Nutrition
- Serving Size: 1 serving (approx. 6 oz meat + vegetables)
- Calories: 480
- Sugar: 8
- Sodium: 650
- Fat: 24
- Saturated Fat: 9
- Unsaturated Fat: 15
- Trans Fat: 0
- Carbohydrates: 25
- Fiber: 4
- Protein: 42
- Cholesterol: 125