
Oh, when the air gets that crisp snap, you know what I reach for? Anything that tastes like pure autumn comfort, usually layered! Frankly, nothing beats the immediate satisfaction of a perfect pumpkin crunch dessert sitting on the holiday table. That’s why I’m sharing my version of the Ultimate Easy Layered Pumpkin Crunch Cake. It’s incredibly satisfying, and I promise it’s never failed me when company shows up.
Here at HearthBite, my whole philosophy, as Sarah Miller, is sharing recipes that are wonderfully reliable and truly simple—food that reminds you of home. This particular treat has quickly become a favorite tradition in my own kitchen because it delivers that required creamy pumpkin layer right alongside that unbeatable crunchy topping. It’s fuss-free baking that tastes like you spent hours on it, and isn’t that exactly what we want during the busy fall season? You can read more about our family-focused approach over on our About Page.
- Why This Easy Pumpkin Crunch Cake Recipe is a Must-Try
- Gathering Ingredients for Your Ultimate Pumpkin Crunch
- Step-by-Step Instructions for Perfect Pumpkin Crunch
- Tips for Success with Your Layered Pumpkin Dessert
- Variations on the Classic Pumpkin Crunch Recipe
- Serving Suggestions for Your Autumn Dessert Ideas
- Storage and Reheating Instructions for Pumpkin Crunch
- Frequently Asked Questions About This Pumpkin Crunch Dessert
- Estimated Nutritional Data for Pumpkin Crunch Cake
Why This Easy Pumpkin Crunch Cake Recipe is a Must-Try
If you’re anything like me, you want big flavor without spending the entire holiday weekend chained to the oven. That’s why this Layered Pumpkin Dessert is my go-to for Thanksgiving and other gatherings. It truly is a practically No-Fail Pumpkin Dessert because the assembly is so forgiving!
We skip the fussy layers of traditional baking and lean into a method that’s almost like a hybrid—part classic cake, part easy crisp. You get all the comforting autumn flavors you crave, structured perfectly every single time. If you need more straightforward comfort recipes, I share a few more treasures in my Comfort Food Collection.
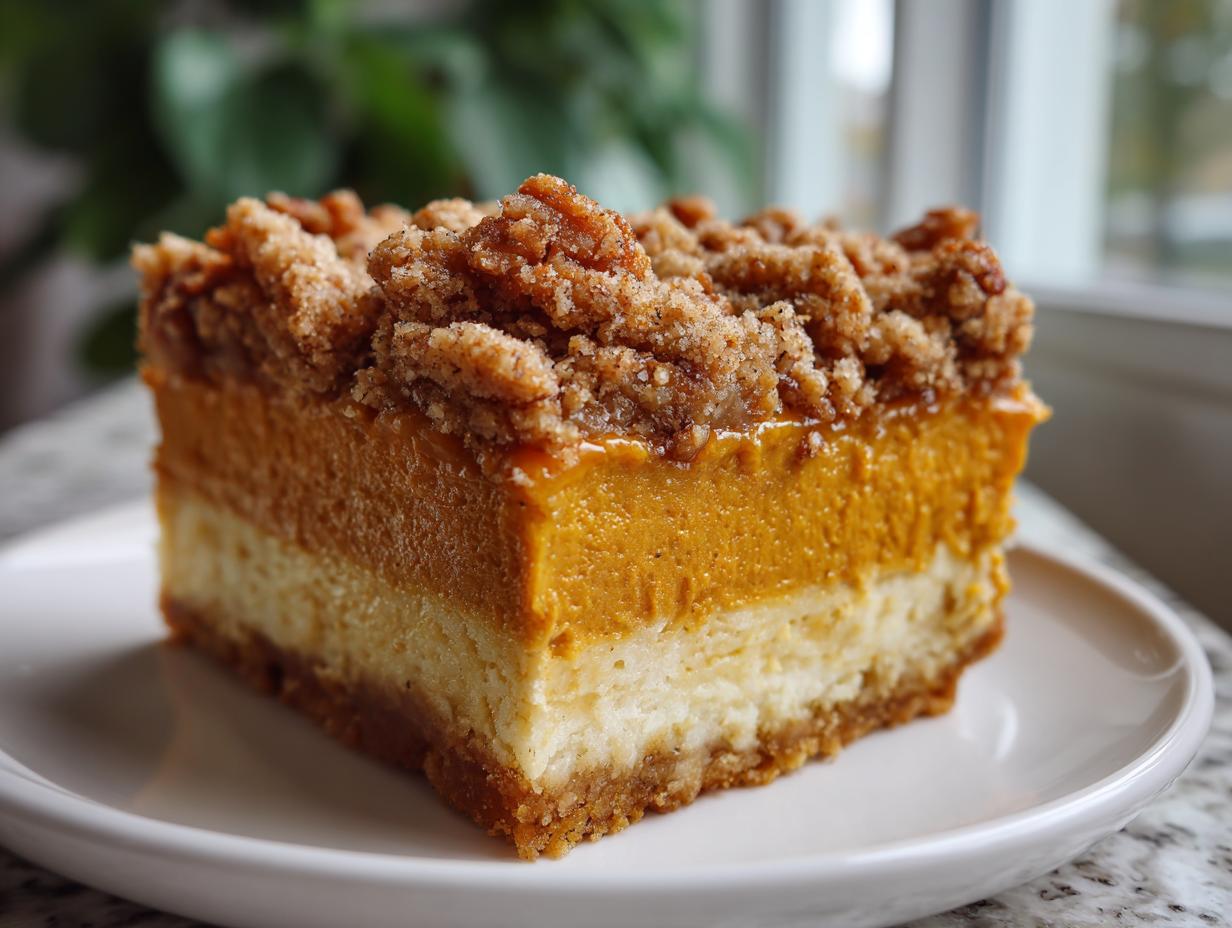
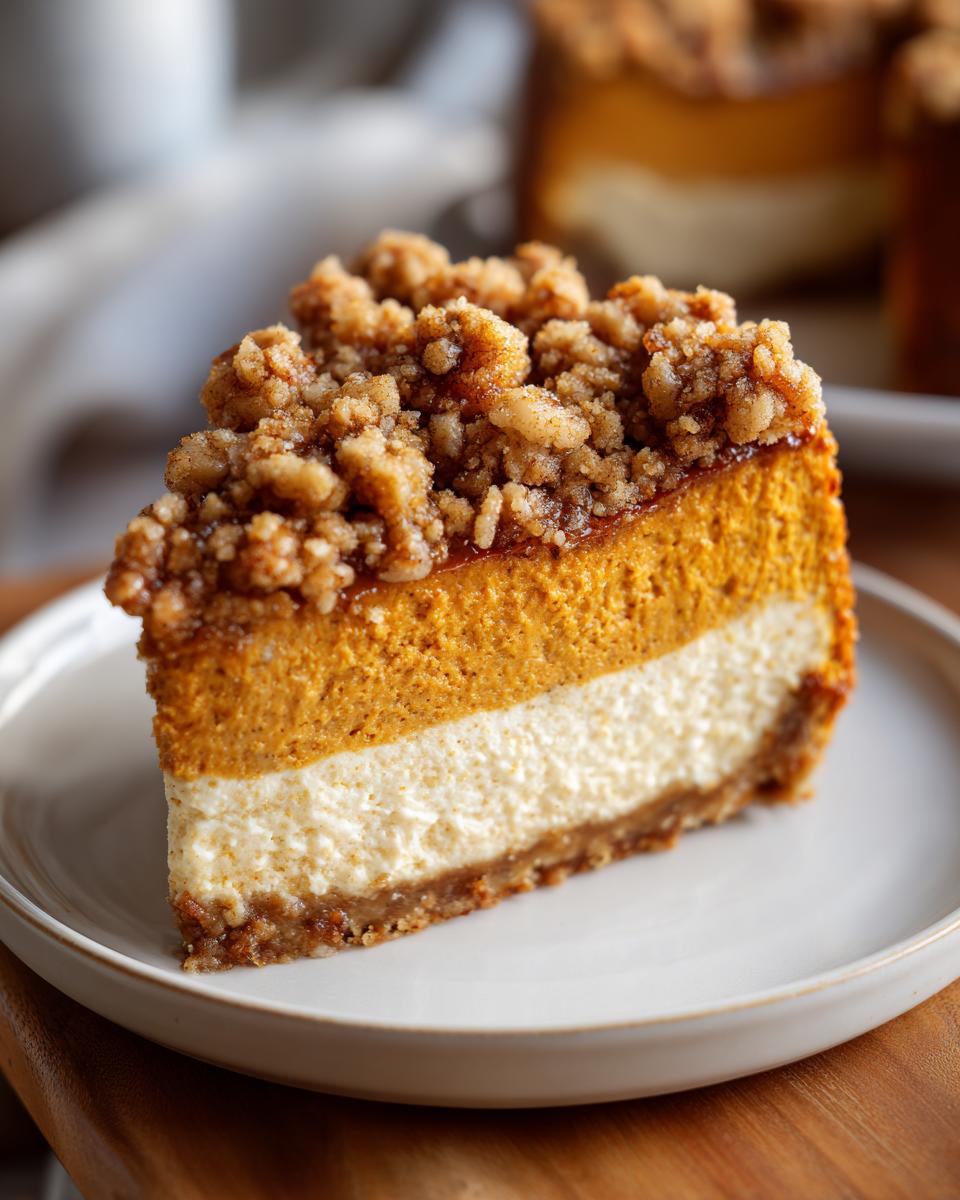
The Perfect Texture: Creamy Filling Meets Buttery Pecan Crunch Topping
Seriously, the contrast here is what makes people ask for the recipe immediately. You have that cool, spiced, creamy pumpkin layer sinking into the slightly gooey crust, all crowned with that salty, satisfying Buttery Pecan Crunch Topping. It’s soft, it’s crunchy, it’s everything!
Simple Assembly for Your Next Holiday Baking Desserts
Forget complicated steps! This recipe leans into that wonderful Pumpkin Dump Cake Style mentality. You mix the crunch layer, press it down, pour the filling over, and top it off. It’s quick prep that makes you look like a baking hero when it comes out of the oven looking gorgeous.
Gathering Ingredients for Your Ultimate Pumpkin Crunch
Okay, for this Pumpkin Crunch, we keep the ingredient list short and sweet because the magic happens in the layering, not in sourcing a thousand specialty items. What matters most here? Using the right pumpkin! Please, grab pure pumpkin puree—not the spiced pie filling, we control the spices here ourselves! We want that rich, dense fall flavor, and that starts with great pantry staples.
This simplicity really lets the textures shine. You can see the full list below, but trust me, having these few things ready means you can whip up a batch anytime the pumpkin craving hits. If you need inspiration for things to pair this with, check out my recipe for Soft Chewy Sea Salt Caramels—they make a great addition to a holiday dessert spread!
- 1 box (15.25 ounces) yellow cake mix
- 1 cup (2 sticks) unsalted butter, melted (don’t try to fake this with margarine, sweetie!)
- 1 cup chopped pecans (make sure they’re chopped small for the best crunch!)
- 1 can (15 ounces) pure pumpkin puree
- 1 can (14 ounces) sweetened condensed milk
- 2 large eggs
- 2 teaspoons pumpkin pie spice
- 1 teaspoon vanilla extract
- 1 tub (8 ounces) frozen whipped topping, thawed (or equivalent homemade whipped cream)
Step-by-Step Instructions for Perfect Pumpkin Crunch
This is where the magic really happens, and I promise it’s easier than even my fanciest pie crust! Since we’re dealing with layers, keeping things straight is key, but the steps are so simple you could probably make this while chatting on the phone. We’re using a two-stage bake here, which is crucial for setting up that beautiful crust before we add the creamy part. Think of it like building the ultimate cozy autumn taco, but it’s dessert!
Before we dive in, make sure your oven is humming along at 350°F (175°C) and your 9×13 inch pan is greased up nicely. If you’re looking for more tips on timing and getting delicate baked goods perfect—especially those that need to cool slowly—you might find my guide on Scone Baking helpful, because cooling is just as important as baking!
Preparing the Crust and Buttery Pecan Crunch Topping
First things first: that incredible topping! In a medium bowl, just toss together your dry yellow cake mix and all those chopped pecans. Now, slowly pour in the melted butter, using a fork to mix it all up. You want this to look crumbly, almost like wet sand that might hold together if you squeezed it hard. This is your base and your crown! Now, here’s the part that needs your attention: press *two-thirds* (that’s the bigger chunk) of that crumb mixture firmly and evenly into the bottom of your baking dish. That’s the crust! Pop that whole dish into the oven for just 10 minutes. We just want it to barely set up before the wet stuff goes on.
Creating the Creamy Pumpkin Filling
While that crust is getting its head start, grab another bowl. This is where we build the heart of our Layered Pumpkin Dessert. You’re going to whisk together the pure pumpkin puree, the sweetened condensed milk—oh, the richness!—along with the eggs for structure, your spices, and that dash of vanilla. Seriously whisk it until it’s totally smooth. You don’t want any streaks of egg or lumps of spice hiding in there. This smooth, creamy mixture pours beautifully and sets up wonderfully when baked.
Baking and Final Assembly of the Pumpkin Crunch Dessert
Once the crust has had its 10 minutes, gently pull it out. Carefully pour that creamy pumpkin mixture right over the slightly set crust. Try to pour slowly so you don’t disturb the base too much! Now, take that remaining one-third of the buttery cake mix and pecan topping you saved and sprinkle it evenly over the pumpkin layer. Back into the oven it goes! Bake this beauty for about 40 to 45 minutes. You’re looking for the edges to look firm and the topping to be golden brown. Crucially, when you take it out, you must let it cool completely—that means at least 1 to 2 hours sitting on the counter. This cooling time is essential so the layers settle before adding the final touch.
Tips for Success with Your Layered Pumpkin Dessert
Baking is always better when you know the little secrets that take a treat from good to absolutely unforgettable! With this Layered Pumpkin Dessert, it all comes down to texture and timing. Remember, we want that maximum crunch contrast against the creamy filling. I have a couple of tricks up my sleeve I learned the hard way—like forgetting to chill it long enough!
When you’re aiming for the best Seasonal Pumpkin Recipes, these finishing touches make all the difference. If you are ever struggling with getting an even, beautiful texture in any of your baked goods, sometimes looking at how others handle sticky batters helps. My guide on the Moist Lemon Loaf has some great universal tips on crumb structure!
Achieving the Best Crunch: Toasting Pecans
My notes suggest lightly toasting the pecans first, and I want to scream from the rooftops that you should do it! It only takes about 5 to 7 minutes in a dry skillet over medium heat, or even a quick stint in the oven while it’s preheating. Toasting wakes up the oils in the nuts, giving you a deeper, richer flavor when you bite into that Buttery Pecan Crunch Topping. It really stops them from tasting dusty next to all that pumpkin goodness.
Chilling Time for Optimal Pumpkin Crunch Performance
This is non-negotiable, folks! After the dessert comes out of the oven and cools down completely on the counter (that’s about two hours), you absolutely have to cover it and pop it into the fridge for at least another two hours. If you try to slice it warm, you’ll end up with a delicious, soupy mess. That final chill allows the condensed milk and pumpkin layer to firm up perfectly, guaranteeing those beautiful, clean slices you want for presentation.
Variations on the Classic Pumpkin Crunch Recipe
Now that you’ve mastered the basics of this fantastic pumpkin crunch, I want to encourage you to play with it! The beauty of relying on simple, good base ingredients is how easily they adapt. Don’t feel tied down just to pecans; walnuts or even slivered almonds make for a wonderful change in texture for the topping. If you need a little extra depth in your fall baking, try swapping just half a teaspoon of the pumpkin pie spice for a quarter teaspoon of ground cardamom—it’s magical!
For those who love experimenting with Seasonal Pumpkin Recipes, you could even fold a tablespoon of molasses right into the pumpkin filling just before pouring. It gives it a richer, deeper color and taste that reminds me of chewy gingerbread. If you enjoy tweaking flavors, you might also love my Cranberry Orange Cookies where small additions really change the whole profile!
Serving Suggestions for Your Autumn Dessert Ideas
Once this glorious Pumpkin Crunch has chilled and set up properly, the real fun begins: deciding how you want to serve it! Since this rich, creamy dessert is wonderfully satisfying all on its own, you don’t need much fuss. However, I adore pairing it with something to cut through the sweetness just a touch.
For a classic evening treat, a simple, good cup of hot coffee or a creamy latte is perfect right alongside a square. The warmth of the coffee contrasts so nicely with the chilled dessert. If you’re serving it after a big meal, consider a small scoop of vanilla bean ice cream—the cold makes that buttery pecan topping just snap when you bite into it!
Because this recipe has ties to the wonderful food culture in Hawaii—you can even read about the inspiration behind the Hawaiian Pumpkin Crunch style—some folks prefer it when it’s slightly less frigid than straight from the back of the fridge. If you chill it for only an hour instead of two, it’s still firm enough to hold its shape but yields a little softer, warmer flavor profile. It’s all personal preference!
If you happen to be looking for a great way to use those same autumn spices in the morning, I’ve got a few go-to recipes over on my Easy Breakfast Recipes page that are perfect for pairing with leftovers!
Storage and Reheating Instructions for Pumpkin Crunch
Once you manage to get through the initial serving frenzy, you’ll want to know how to keep those leftovers tasting just as fantastic. Since this Pumpkin Crunch Cake has that lovely dairy topping—the whipped cream—we have to be a little careful with storage. Don’t cover the whole pan tightly with plastic wrap directly touching the frosting, or you risk that beautiful white layer getting a little weird and weeping.
The best place for this dessert is definitely the refrigerator. It doesn’t just keep the filling firm; it actually lets those complex fall spices deepen overnight. Honestly, I think day two is even better! You’re looking at about 3 to 4 days max for peak deliciousness. This stability makes it one of the most reliable Simple Pumpkin Treats for making ahead of a big event.
Now, about reheating—and this is important for anyone planning to save some—you absolutely cannot reheat this once the whipped topping is on. The topping will melt into a puddle, and that’s just sad. If you wanted to enjoy a piece warm, you’d have to slice off a portion *before* putting the whipped cream on, then bake just that piece until warm, and top it with a fresh dollop of cream or maybe a bit of vanilla ice cream. For the chilled leftovers stored in the fridge, just pull them out about 15 minutes before serving so they aren’t quite rock-hard cold. You can learn a lot about storing perishables by checking out my tips on making Freezer Jam, since that teaches you how to handle dairy and fruit shelf stability!
Frequently Asked Questions About This Pumpkin Crunch Dessert
It’s funny how everyone has a slightly different trick up their sleeve for their Pumpkin Crunch Dessert! I get so many great questions about this recipe, which just means you all are planning on making it for serious crowds, and I love that! Let’s tackle these common queries so you can whip up your batch with total confidence. If you ever have a burning question about any recipe here, don’t hesitate to reach out through my contact page!
Can I make the pumpkin crunch ahead of time?
Oh yes, you absolutely can prep ahead, which is wonderful for Holiday Baking Desserts! You can totally combine the crust/topping mix, bake the crust, pour on the pumpkin filling, and bake the whole thing through. Let it cool completely on the counter as directed. Here’s the hitch: Do *not* put the whipped topping on until you are ready to serve, or at least within 4 hours of serving. The topping needs to stay nice and fluffy, so keep the baked dessert chilled and covered until the very last minute before spreading that cool layer on top.
What is the difference between this and a standard Pumpkin Dump Cake Style recipe?
That’s a great question, because they sound similar since they both rely on simplicity! A true Pumpkin Dump Cake Style recipe usually has you dumping everything—the filling ingredients, the dry cake mix, and the butter—right on top, often resulting in one uniform, soft bake. This recipe, though, is intentionally layered. We bake the crust first, which creates a firm base. Then we pour the creamy filling over that, and *then* we sprinkle the remaining crunch mixture on top before the final bake. It is that distinct layering that gives you the wonderful texture contrast between the firm bottom crust and the creamy middle, which is key to what makes this a true Layered Pumpkin Dessert!
Can I substitute the pecans in the crunchy topping?
You sure can! While I am obsessed with the flavor profile of the Buttery Pecan Crunch Topping, this recipe is highly adjustable. If you have a nut allergy in the house, swapping the pecans for an equal amount of rolled oats is my top recommendation. The oats will mimic the texture beautifully and absorb that butter for a wonderful, wholesome crunch! Alternatively, if you just don’t like pecans, try using chopped walnuts or even sunflower seeds for a different flavor profile in your Simple Pumpkin Treats.
Estimated Nutritional Data for Pumpkin Crunch Cake
Okay, let’s talk numbers, but please remember these are just estimates based on the ingredients I used! Since we all use slightly different brands of cake mix or condensed milk, your actual counts might vary a tiny bit. This big, satisfying slice still packs that perfect blend of fall flavor and sweet indulgence needed for your seasonal pumpkin recipes!
- Serving Size: 1 slice
- Calories: 410
- Fat: 23g
- Carbohydrates: 49g
- Protein: 5g
- Sugar: 38g
Ultimate Easy Layered Pumpkin Crunch Cake
Make this simple, crowd-pleasing Pumpkin Crunch Cake. It features a creamy pumpkin layer, a buttery cake mix base, and a satisfying, crunchy pecan topping. This recipe is perfect for Thanksgiving or any autumn gathering.
- Prep Time: 20 min
- Cook Time: 55 min
- Total Time: 135 min
- Yield: 12 servings 1x
- Category: Dessert
- Method: Baking
- Cuisine: American
- Diet: Vegetarian
Ingredients
- 1 box (15.25 ounces) yellow cake mix
- 1 cup (2 sticks) unsalted butter, melted
- 1 cup chopped pecans
- 1 can (15 ounces) pure pumpkin puree
- 1 can (14 ounces) sweetened condensed milk
- 2 large eggs
- 2 teaspoons pumpkin pie spice
- 1 teaspoon vanilla extract
- 1 tub (8 ounces) frozen whipped topping, thawed (or equivalent homemade whipped cream)
Instructions
- Preheat your oven to 350°F (175°C). Lightly grease a 9×13 inch baking dish.
- Prepare the crust and topping: In a medium bowl, combine the dry yellow cake mix and the chopped pecans. Pour the melted butter over the mixture and toss with a fork until the mixture is crumbly.
- Press two-thirds (2/3) of this crumb mixture evenly into the bottom of the prepared baking dish to form the crust. Reserve the remaining one-third (1/3) for the topping.
- Bake the crust for 10 minutes until lightly set. Remove from the oven.
- Prepare the pumpkin layer: In a separate bowl, whisk together the pumpkin puree, sweetened condensed milk, eggs, pumpkin pie spice, and vanilla extract until smooth.
- Pour the pumpkin mixture evenly over the partially baked crust.
- Sprinkle the reserved one-third (1/3) crumb mixture over the pumpkin layer.
- Return the dish to the oven and bake for 40 to 45 minutes, or until the center is mostly set and the topping is golden brown.
- Let the dessert cool completely on a wire rack, about 1 to 2 hours.
- Once cooled, spread the thawed whipped topping evenly over the entire surface.
- Chill the Pumpkin Crunch Cake for at least 2 hours before slicing and serving.
Notes
- For a richer crunch, toast the pecans lightly before mixing them into the cake mix.
- If you prefer a stronger spice flavor, add an extra half teaspoon of cinnamon to the pumpkin filling.
- This dessert tastes best when served cold, straight from the refrigerator.
Nutrition
- Serving Size: 1 slice
- Calories: 410
- Sugar: 38
- Sodium: 280
- Fat: 23
- Saturated Fat: 10
- Unsaturated Fat: 13
- Trans Fat: 0.5
- Carbohydrates: 49
- Fiber: 2
- Protein: 5
- Cholesterol: 45