
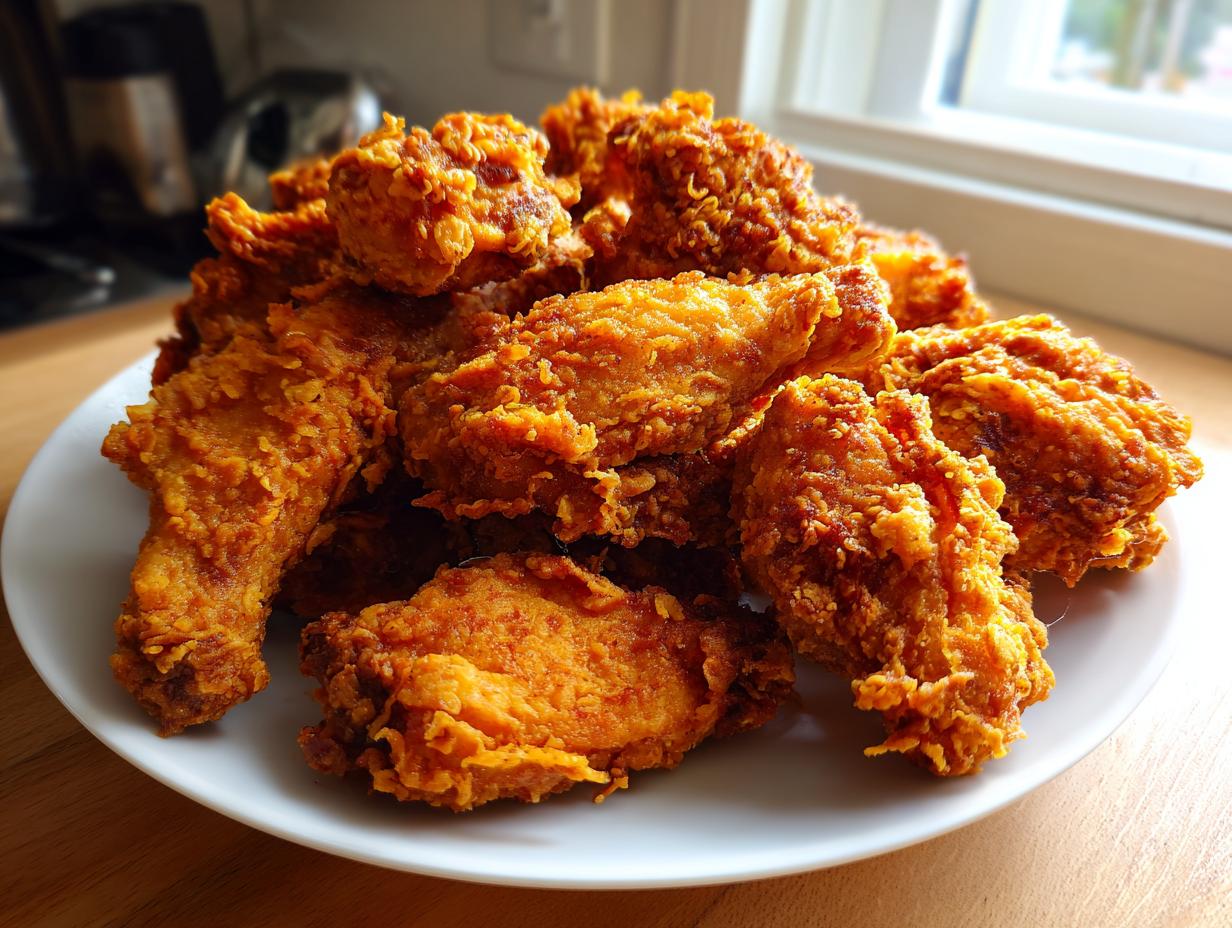
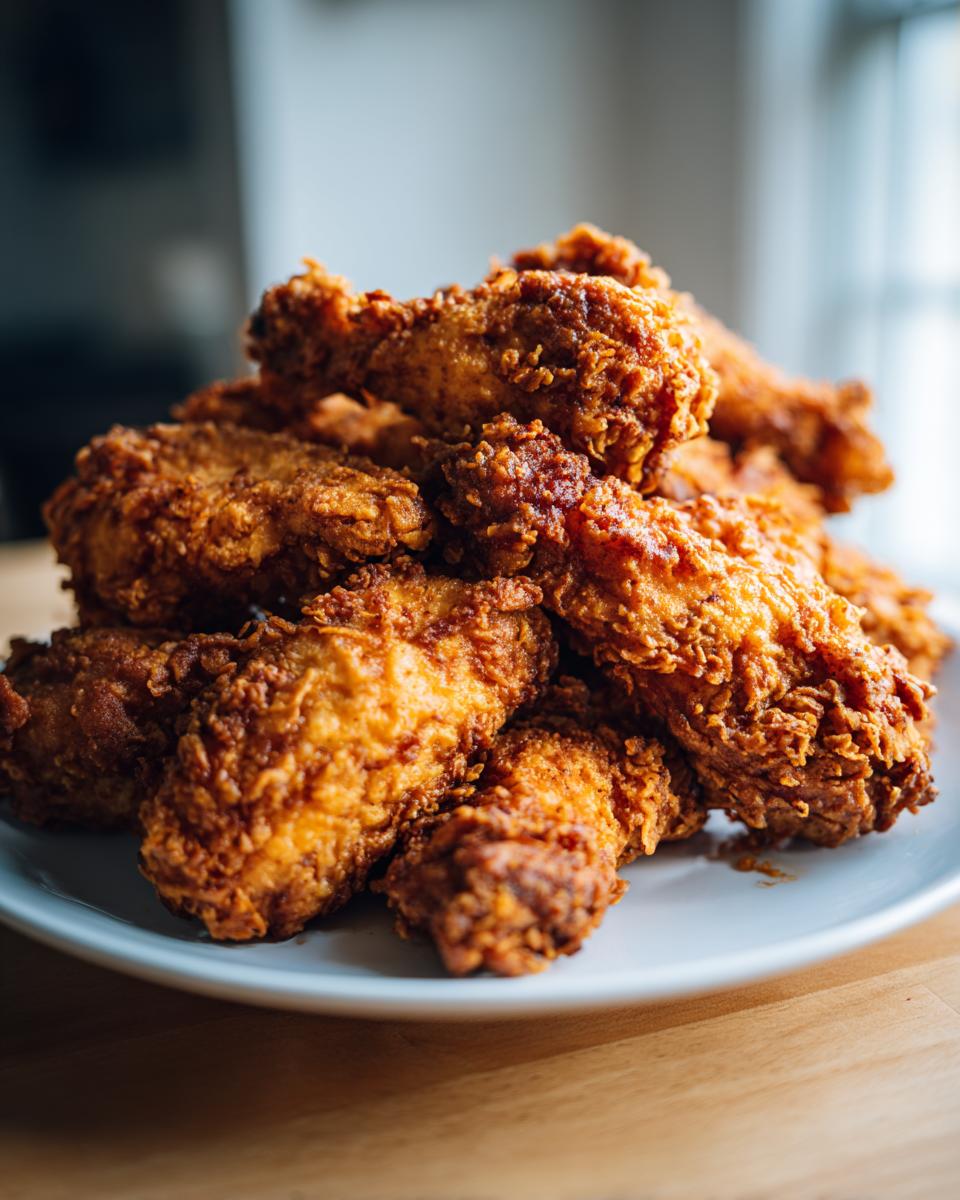
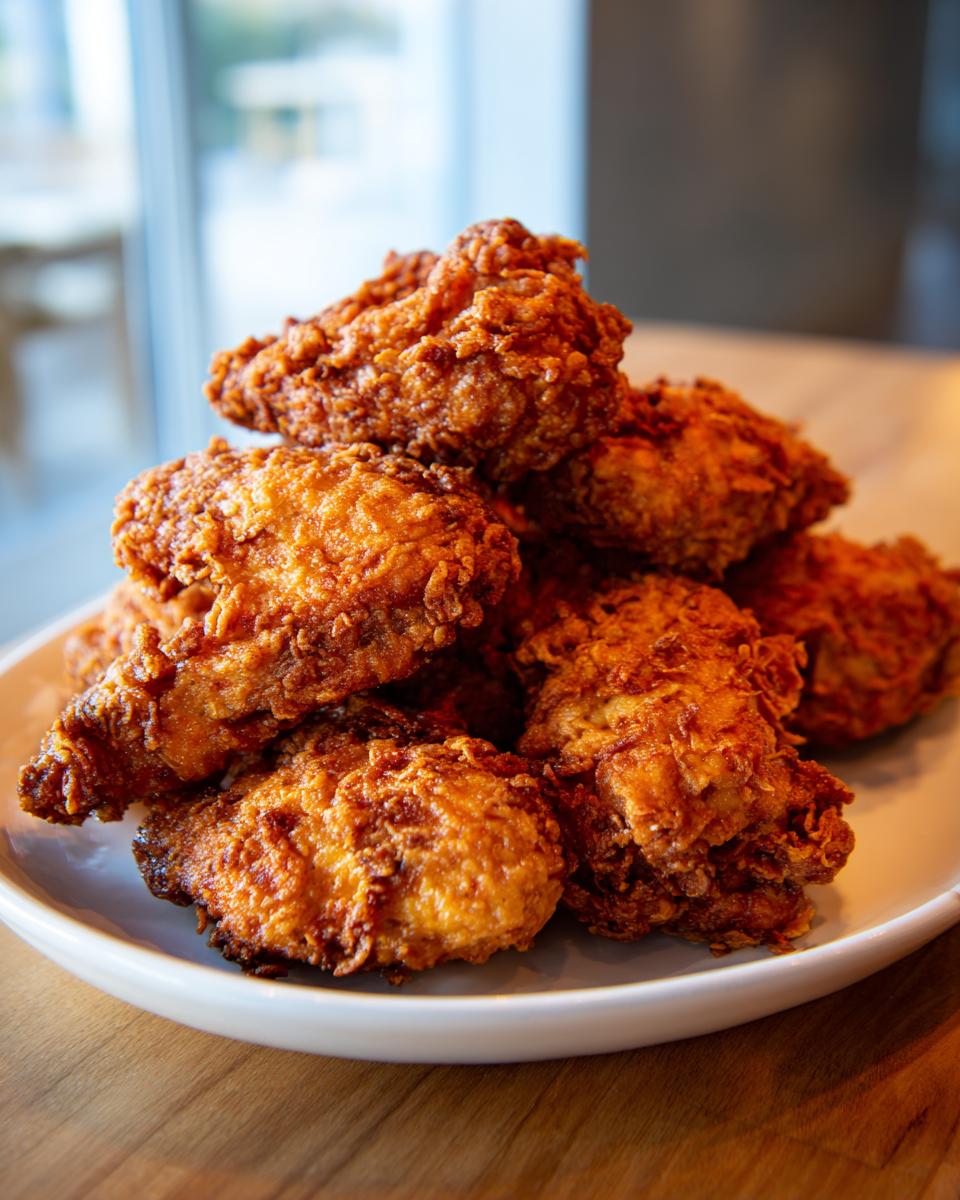
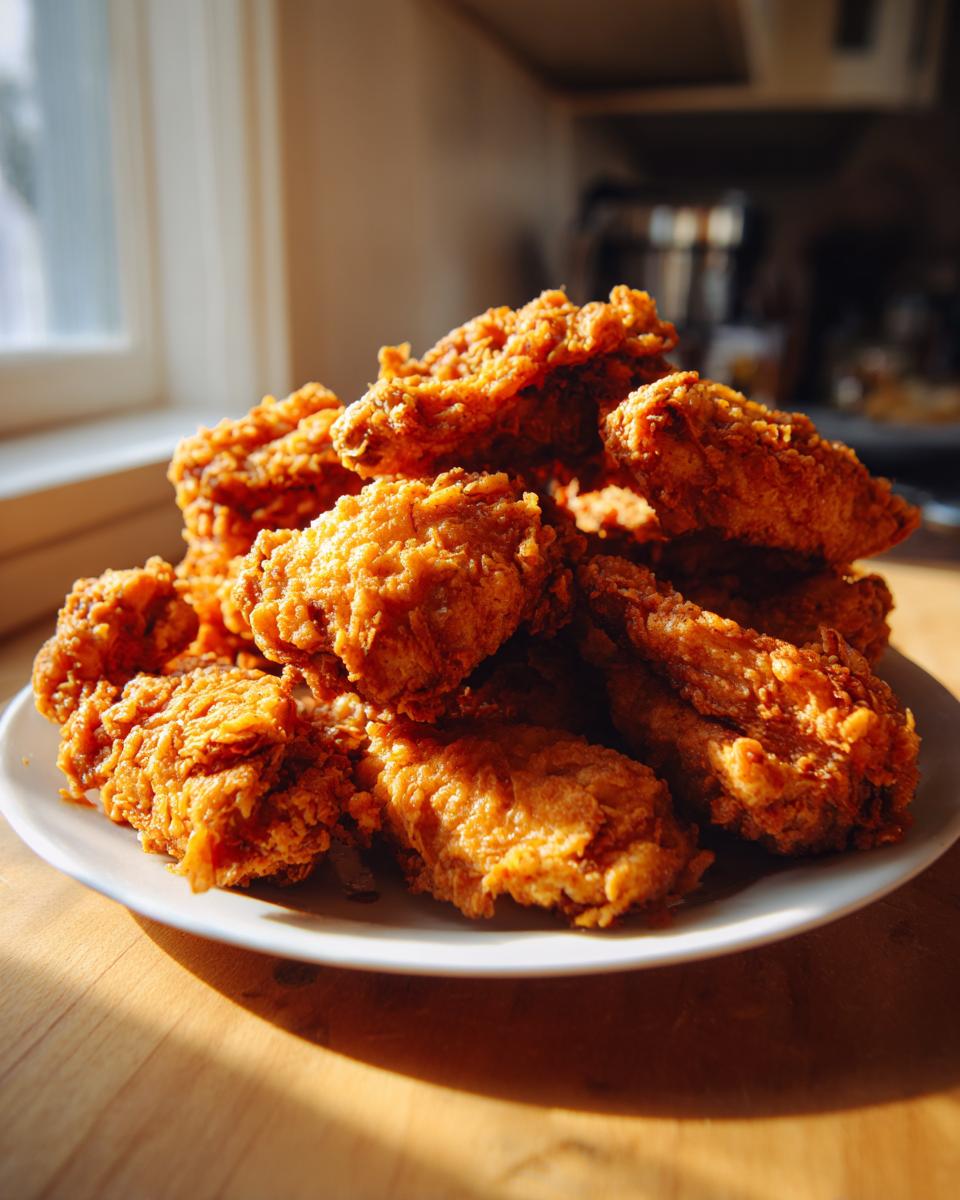
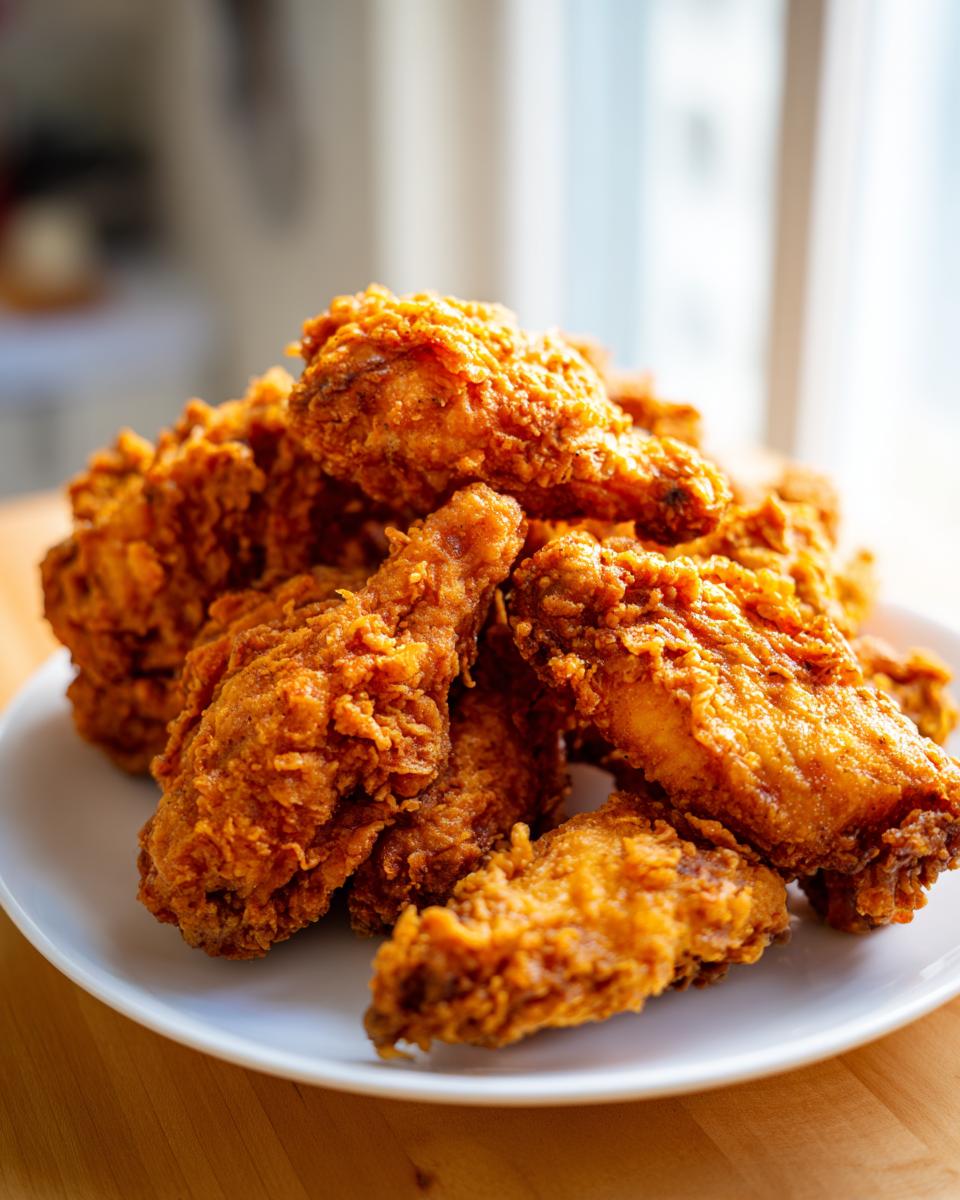
Oh, how I love the sound of perfectly crisp skin breaking when you bite into it! That sound is pure happiness, right? For years, getting fried chicken wings that tasted exactly like they came from that perfect takeout spot felt impossible at home. My kitchen was littered with failed, soggy batches. But I finally nailed it! This recipe delivers that restaurant-quality, shatteringly crispy coating you dream about, and it all comes down to two things: a long, cool soak in buttermilk and using my secret double-dredge technique. Trust me, these are the best fried chicken wings recipe you’ll ever need for game day or Friday night comfort food.
- Why This is the Best Fried Chicken Wings Recipe You Will Make
- Ingredients for Truly Crispy Fried Chicken Wings
- Essential Equipment for Perfect Fried Chicken Wings
- How to Prepare Your Ultimate Fried Chicken Wings
- Tips for Making Southern Fried Chicken Wings That Stay Crispy
- Serving Suggestions for Your Homemade Fried Wings
- Storage and Reheating Instructions for Leftover Fried Chicken Wings
- Frequently Asked Questions About Fried Chicken Wings
- Share Your Ultimate Fried Chicken Wings Success
Why This is the Best Fried Chicken Wings Recipe You Will Make
Friends, I’m telling you, these fried chicken wings tackle the two biggest fryer problems head-on. We aren’t relying on luck here; we are relying on science, which is why this recipe is my go-to when I need absolute perfection—especially for big parties. If you use this method, you’ll stop throwing away half-eaten, soggy chicken!
- We’ve secured tender meat that practically falls off the bone due to proper marination.
- We achieve a crust so crispy it truly rivals your favorite restaurant.
- This method is reliable; once you master the temperature dips, it works every single time.
For the secret to getting wings that stay crispy even after they cool slightly, you can check out some great tips right here.
Guaranteed Juicy Fried Chicken Wings Interior
The time those wings spend chilling in buttermilk is non-negotiable! Buttermilk is slightly acidic, and that acid works magic on the protein in the chicken over several hours. It gently breaks down the tough fibers, essentially tenderizing the meat from the inside out. When you finally drop those marinated pieces into the hot oil, the muscle fibers seize up, locking all that moisture in. That’s how you get unbelievable juicy fried chicken wings!
Achieving Ultimate Crunch with the Double Fried Chicken Wings Method
This two-step fry is where the magic happens for those deep, crunchy exteriors. The first fry cooks the interior gently at a lower temperature. When you pull them out, the coating sets up, but it’s not fully brown yet. Then, you crank the heat up for the second fry. That blast of high heat quickly crisps up that perfectly hydrated flour coating, giving you those incredible, shatteringly crisp fried chicken wings that you can’t get enough of.
Ingredients for Truly Crispy Fried Chicken Wings
Alright, getting that perfect crust on your fried chicken wings starts right here with the ingredients list. Don’t cheat on the buttermilk—it’s the key builder for that moisture barrier! We need all the components for the marinade and the dredge ready before we even think about turning on the stove.
You’ll need:
- 3 lbs chicken wings (make sure you separate the flats and drumettes—it helps them cook evenly!)
- 2 cups buttermilk
- 1 tablespoon hot sauce (just for a tiny bit of background flavor)
- 1 tablespoon salt and 1 teaspoon black pepper for the marinade
- 2 cups all-purpose flour and 1/2 cup cornstarch for structure
- Seasonings: 1 tablespoon paprika, 1 teaspoon garlic powder, and 1 teaspoon onion powder
- Lots of good quality vegetable or peanut oil for the deep frying process.
Remember, quality oil is huge for getting those evenly golden brown chicken wings without burning the coating!
Essential Equipment for Perfect Fried Chicken Wings
When you are aiming for restaurant quality, having the right tools makes all the difference. Honestly, before I got serious about my frying setup, I fought the oil temperature constantly, and that’s why my wings used to come out greasy and sad. For these homemade fried wings, temperature control is king! You absolutely need a few things on hand before you start.
Here is what you’ll want to pull out of the cabinets:
- A heavy-bottomed pot or, ideally, a dedicated deep fryer. The heavy bottom helps maintain heat stability.
- A reliable deep-fry or candy thermometer. I cannot stress this enough! You must monitor that oil.
- Tongs are necessary for gently placing and turning the wings without splashing hot oil. Be safe!
- Multiple clean wire racks set over baking sheets. You need airflow underneath the wings so the bottoms don’t steam and get soggy while resting.
- Slotted spoon or spider strainer for scooping up any little bits of flour that burn off during frying.
Having these basics ready means you can focus entirely on getting that perfect crust and juicy interior without panic!
How to Prepare Your Ultimate Fried Chicken Wings
Alright, buckle up, because this is where we turn good chicken into spectacular, takeout-style crunchy perfection. Don’t rush! The steps are simple, but the timing for the marinade and the two-stage frying process is everything if you want the best fried chicken wings possible. I always set aside an afternoon just for this so I don’t feel rushed. When I make my soft caramels, I use the refrigeration time to prep my dredge, which keeps everything moving:
- First, get your wings soaking.
- Second, mix up your dry seasoning blend.
- Third, master the temperature dance for that incredible crunch!
If you’re looking for help keeping all your kitchen tasks organized, you might want to check out my favorite recipe for easy homemade soft chewy sea salt caramels—it keeps my mind clear while I focus on the tricky fryer stuff!
Step 1: The Buttermilk Marinade for Juicy Fried Chicken Wings
This is the crucial flavor and moisture part, so don’t skimp on the time here! In a big bowl, whisk together your buttermilk, hot sauce, salt, and pepper. Toss in all those separated wings—flats and drumettes—until every single piece is coated. Now, cover that bowl tightly and stick it in the fridge. I mean it—aim for at least four hours, but honestly, go overnight if you can remember! That long chill time is exactly what makes the inside of your juicy fried chicken wings so tender when they hit the hot oil later.
Step 2: Mastering the Double Dredge for Crispy Fried Chicken Wings
While your oil is heating up, get your dry dredge ready—that seasoned flour mix. Pull those wings out one at a time from the buttermilk. Don’t shake off all the excess! Let the big drips fall off, but keep the coating wet. Now, dredge it heavily in the flour blend, pressing hard with your fingers so that dry mix really sticks. Here’s the secret: without wiping it, dip that floured wing back into the leftover buttermilk *just* for a quick second, and then immediately dunk it back into the flour for the second coat. Press that second coat on firmly. That double layer is what creates those craggy, ultra-crisp edges on your fried chicken wings.
Step 3: The Two-Stage Frying Method for Restaurant Quality Chicken Wings
You need a thermometer for this, trust me! First, heat your oil to a gentle 325°F (160°C). You’ll fry your wings in small batches for about 6 to 8 minutes. They should look light golden, just cooked through. Pull them out and let them rest on a wire rack for a moment. Then, crank that heat up—we need the oil blazing hot at 375°F (190°C). Now, fry those same wings again for just 2 to 4 minutes more. They’ll darken quickly into that glorious, deep golden brown. This blast of high heat sets the crust permanently, guaranteeing you have those amazing crispy fried chicken wings. If you skip that second fry, you’ll never get that true restaurant quality. Make sure to check out Chef Dennis’s insights on fried chicken wings if you want more professional tips!
Tips for Making Southern Fried Chicken Wings That Stay Crispy
So, you’ve got that perfect double-coated wing, but how do we keep that beautiful crunch alive until everyone digs in? This is where the resting time and the oil management come into play. If you are aiming for that classic Southern fried chicken wings flavor profile, don’t forget to sneak a teaspoon of cayenne pepper into that dry dredge mix—it gives you a lovely background kick without turning the whole batch into spice bombs.
My favorite trick for making these ahead, which is vital if you’re hosting a big game day event, is option number three from the notes: fry them once completely at the lower temperature (325°F). Let them cool totally—put them in the fridge even! Then, right before serving, drop them into that screaming hot 375°F oil for just a few minutes. That quick second fry reheats them perfectly and resets that crust so you get the absolute best fried chicken wings. It’s a little extra work, but wow, is it worth it!
For serving, these need something sturdy, like my cast iron cornbread, which has the best crispy edge. Also, make sure you check out this inspiration for truly great Southern style wings over at Cooking Storie!
Serving Suggestions for Your Homemade Fried Wings
Once you pull those perfectly golden wings out of the oil, the satisfaction is huge, but the job isn’t quite done! We need the right supporting actors to make these truly shine, especially if they are the star of a game day spread or a big party. Sure, you could eat them plain—and I might sneak a couple like that before anyone sees—but pairing them elevates the whole experience.
The beauty of these homemade wings is that the intensely crispy coating stands up to anything wet or heavy you throw at it. So, don’t be shy with the dips!
- Dipping Sauces: I adore having a few options. My favorite creamy pairing is a sharp blue cheese dressing, but you can never go wrong with ranch. If you want something totally different, you have to try my recipe for easy 15-minute beer cheese dip—it’s decadent and dipping these wings into warm, sharp cheese is just heavenly.
- Classic Sides: Think simple and cooling. Celery sticks and carrot matchsticks are mandatory for cutting through the richness. I also love making a big bowl of simple coleslaw or a classic creamy macaroni salad.
- When You Need Heat: If you want a spicier route, you can easily toss the finished wings in a thin buffalo sauce. But honestly, if you followed Step 2 for the double dredge, the flavor is already perfectly built into that crust!
Whatever you serve them with, make sure you have plenty of napkins ready. These are messy, comforting, and meant to be devoured right away!
Storage and Reheating Instructions for Leftover Fried Chicken Wings
If you somehow manage to have any leftover chicken wings—which is basically unheard of in my house—the biggest concern is always saving that glorious crispiness. We worked so hard building that double-layer crust, and the last thing we want is to steam it into sogginess in the fridge! So, here’s my rule: never, ever store them piled up in a sealed container.
When they cool down after the first day, you need to give them space to breathe. Transfer them to a wire rack set over a rimmed baking sheet. Cover that setup loosely with plastic wrap or foil—just enough to keep them from drying out completely, but allow air circulation. They should usually be fine in the fridge this way for about three days.
Restoring Crispness: Oven or Air Fryer Only!
Listen to me carefully: If you use the microwave to reheat these, you are committing a cardinal kitchen sin! The microwave turns that beautiful crust into rubbery sadness. We need dry heat to suck the moisture back out and re-crisp the coating.
For the absolute best results that mimic that fresh-from-the-fryer texture, the air fryer is your hero. Preheat it to about 375°F (190°C). Lay the wings in a single layer—don’t crowd the basket! Cook them for about 5 to 7 minutes, shaking halfway through. They come out hot, crunchy, and perfect.
If you don’t have an air fryer, the conventional oven works wonderfully too, though it takes a little longer. Set your oven rack to the middle position and heat it up to 400°F (200°C). Place the wings directly on a wire rack set over a sturdy baking sheet. Bake them for about 10 to 12 minutes. Give them a quick flip halfway through so both sides crisp up evenly. You will be shocked how close this gets you to the original flavor!
Frequently Asked Questions About Fried Chicken Wings
I know you might have a few questions bouncing around, especially when you’re trying to recreate that perfect crunch at home. Frying can feel intimidating, I get it! But once you understand the science behind the buttermilk and the double fry—which we covered above—it all clicks into place. These are the top things folks always ask me when they are trying to figure out exactly how to make crispy chicken wings at home.
If you have more general questions about HearthBite or my approach to honest, flavorful home cooking, feel free to check out the About Us page!
Can I make these Korean Fried Chicken Wings instead?
That’s a fun idea, but no, not really using this exact dredge! This recipe is specifically set up for that crackly, flavorful, dry-seasoned crust you find in classic Southern or American-style fried chicken wings. Korean style wings usually involve a thinner layer of potato starch or cornstarch and rely heavily on a wet sauce glaze applied *after* the second fry. If you’re craving that sticky, sweet-and-spicy flavor, you’ll want a recipe dedicated to the glaze method. But for that satisfying, crunchy appetizer that holds up great on a platter, stick with this buttermilk version!
What oil is best for deep fried chicken wings?
This is critical for achieving that beautiful, uniform golden brown color on your deep fried chicken wings. You need an oil with a high smoke point, and you need *a lot* of it so the temperature doesn’t crash when the cold chicken goes in. I strongly recommend using straight peanut oil or a neutral vegetable oil, like canola. These stand up best to the heat required for the double fry without smoking excessively or breaking down too quickly into funky flavors. If you invest in good oil and keep it clean, you can reuse it a couple of times, too!
How do I make sure my homemade fried wings come out looking like takeout style fried wings?
The look comes entirely from Step 2—that double dredge! When you dip that first layer of flour back into the buttermilk for just a moment, you are essentially building little craggy bits onto the chicken. When you press that second layer of dry flour on, those little wet pockets grab the flour and create texture. Those crags and crevices are what turn deep golden brown and look so professional. It’s the visual proof that you successfully made takeout style fried wings right in your own kitchen! For more inspiration on those beautifully colored wings, check out this great pin on making crispy wings here.
My wings aren’t getting super crispy, what went wrong?
If they’re coming out greasy or pale, it’s almost always an oil temperature issue. Either your oil wasn’t hot enough when you started the first fry (which means the coating absorbs oil instead of crisping up), or you added too many wings at once, causing the temperature to drop too low. Remember, after that first fry, you have to crank that heat way up for the second fry! That intense heat is what dries out the crust and makes those amazing crispy fried chicken wings.
Share Your Ultimate Fried Chicken Wings Success
Now that you’ve mastered the buttermilk soak and that crucial double dredge, I am just itching to hear how your ultimate fried chicken wings turned out! Did you get that restaurant-quality crunch? Please drop a rating below and tell me all about your success in the comments. If you made a batch for a party—or just for yourself, no judgment here!—I’d love to see a picture! You can always reach out via my contact page if you run into any snags. Happy frying!
PrintUltimate Buttermilk Fried Chicken Wings for Restaurant-Quality Crunch
Learn the straightforward technique to make deeply satisfying, truly crispy fried chicken wings at home. This recipe focuses on the buttermilk marinade and double-dredge method to keep the meat juicy while delivering a shatteringly crisp exterior perfect for game days.
- Prep Time: 20 min
- Cook Time: 20 min
- Total Time: 4 hours 40 min
- Yield: 4 servings 1x
- Category: Dinner
- Method: Deep Frying
- Cuisine: American
- Diet: None
Ingredients
- 3 lbs chicken wings (flats and drumettes separated)
- 2 cups buttermilk
- 1 tablespoon hot sauce
- 1 tablespoon salt
- 1 teaspoon black pepper
- 2 cups all-purpose flour
- 1/2 cup cornstarch
- 1 tablespoon paprika
- 1 teaspoon garlic powder
- 1 teaspoon onion powder
- Vegetable oil or peanut oil, for deep frying
Instructions
- Combine the buttermilk, hot sauce, salt, and pepper in a large bowl. Add the chicken wings, ensuring they are fully coated. Cover the bowl and refrigerate for at least 4 hours, or preferably overnight, to achieve juicy fried chicken wings.
- In a separate shallow dish, whisk together the flour, cornstarch, paprika, garlic powder, and onion powder. This is your dry dredge mixture.
- Remove the wings from the buttermilk marinade, letting excess drip off, but do not wipe them dry.
- Dredge each wing thoroughly in the flour mixture, pressing the coating onto the chicken to ensure it adheres well. This is the first coat.
- For the ultimate crunch, dip the floured wings back into the remaining buttermilk mixture for just a few seconds, then immediately return them to the dry flour mixture for a second, heavy coating. Press the flour on again. Place the double-coated wings on a wire rack while you heat the oil.
- Pour enough oil into a heavy-bottomed pot or deep fryer to reach about 2 inches deep. Heat the oil to 325 degrees Fahrenheit (160 degrees Celsius). Use a thermometer to maintain this temperature.
- Carefully place 4 to 6 wings into the hot oil, ensuring you do not overcrowd the pot, which lowers the oil temperature. Fry for 6 to 8 minutes, turning occasionally, until light golden brown.
- Remove the wings and place them on a clean wire rack set over a baking sheet. Increase the oil temperature to 375 degrees Fahrenheit (190 degrees Celsius). This step is key for crispy fried chicken wings.
- Return the wings to the hotter oil in batches. Fry for another 2 to 4 minutes until they reach a deep golden brown color and the internal temperature reaches 165 degrees Fahrenheit (74 degrees Celsius). This double fried chicken wings method guarantees crispiness.
- Remove the wings and immediately place them on a clean wire rack lined with paper towels to drain excess oil. Season lightly with extra salt while hot. Serve immediately for the best flavor.
Notes
- For the best results, let the coated wings rest on the rack for 10 minutes before the first fry. This allows the coating to hydrate and adhere better.
- If you prefer Southern fried chicken wings flavor, add 1 teaspoon of cayenne pepper to your dry dredge mixture.
- If you are making these for a party, you can fry them once at 325°F, cool them completely, and then finish them in hotter oil just before serving.
Nutrition
- Serving Size: 4 wings
- Calories: 450
- Sugar: 1
- Sodium: 650
- Fat: 28
- Saturated Fat: 8
- Unsaturated Fat: 20
- Trans Fat: 0
- Carbohydrates: 15
- Fiber: 1
- Protein: 32
- Cholesterol: 120