
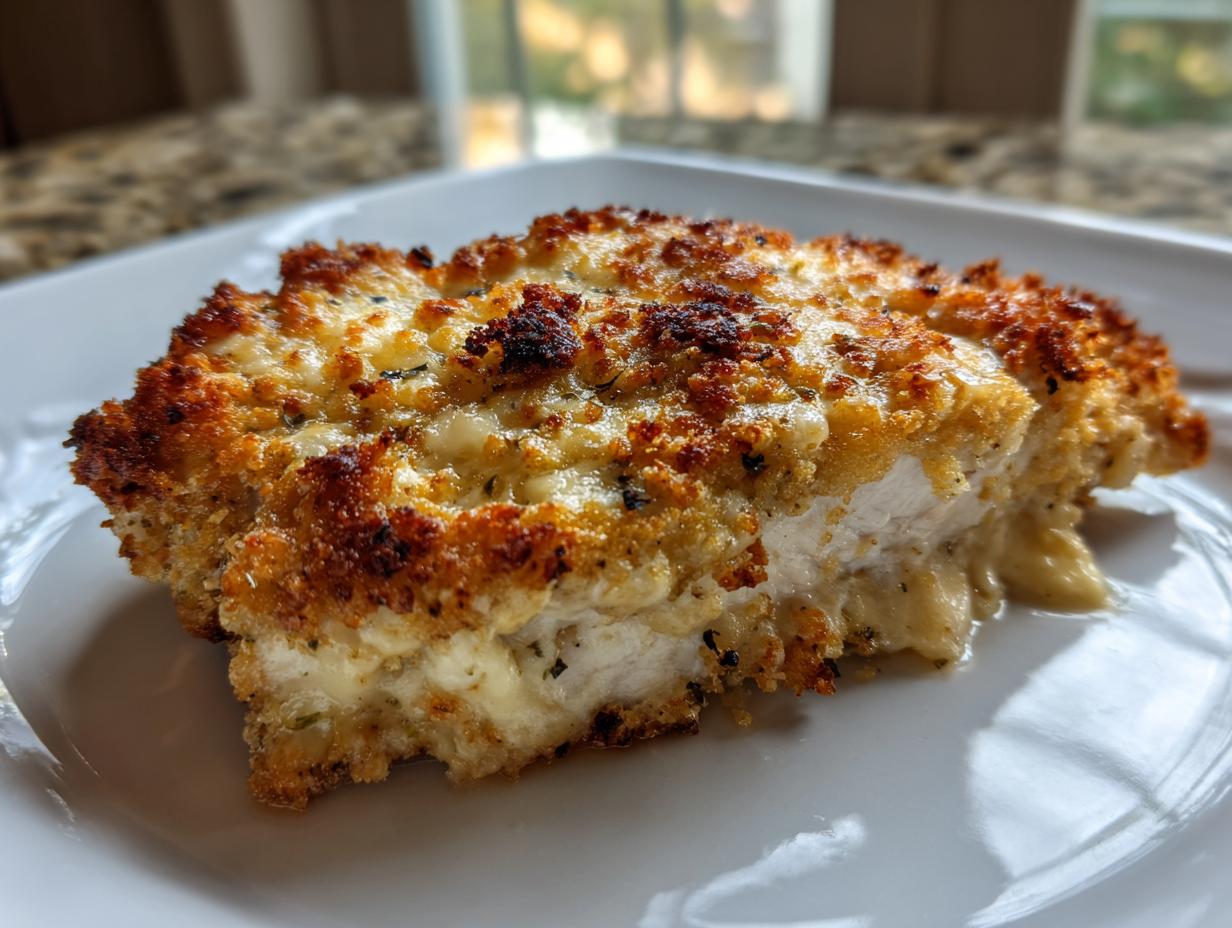
Oh, I know that feeling! You get home, you’re tired, and the thought of making a complicated dinner feels just impossible. Weeknights need to be simple, but we still deserve food that tastes like a hug, right? That’s exactly why Sarah Miller built HearthBite—to bring reliable, deeply comforting meals to your table without the midnight stress. Forget dry, boring dinners! Today, we are diving into the most requested quick dinner ideas: the Creamy Parmesan caesar chicken. Trust me, this is the juicy, melt-in-your-mouth dinner you’ve been needing. It’s pure comfort baked right in twenty-five minutes!
- Why This Creamy Parmesan caesar chicken is Your New Weeknight Staple
- Gathering Ingredients for Your caesar chicken Recipe
- Step-by-Step Instructions for Oven Baked Caesar Chicken
- Tips for the Juiciest Baked Chicken Dinner
- Serving Suggestions for Your Flavorful Chicken Bake
- Storage and Reheating Instructions for Leftover caesar chicken
- Variations on the Classic caesar chicken
- Frequently Asked Questions About caesar chicken
- Share Your Creamy Chicken Recipe Experience
Why This Creamy Parmesan caesar chicken is Your New Weeknight Staple
For me, the real magic of a recipe isn’t just the taste—it’s how easily it fits into your real working life. This comfort-food chicken bake is designed for busy days. When I know I can get dinner on the table without a meltdown, I’m already happy, but when it tastes this good? That’s a win-win!
Here’s why this creamy baked creation is going to live permanently in your roster:
Effortless Preparation for Easy Caesar Chicken
Seriously, ten minutes of prep is all you need! You just mix the sauce, pour it over the chicken, and you’re done. It’s the ultimate low effort dinner because there’s no heavy searing, no complicated layering—just simple assembly before the oven does the heavy lifting.
Juicy Baked Chicken Results Every Time
We all dread that dry, sad chicken breast, but not here! The thick sauce you build acts like a blanket, locking in every single drop of moisture. When it comes out, you get that beautiful, tender, melt in your mouth chicken texture that people rave about online.
Family Friendly Caesar Chicken Bake
If your family is anything like mine, they love familiar flavors. This cheesy chicken bake has that addictive savory flavor that kids and grown-ups adore. It’s a guaranteed crowd-pleaser, meaning less fuss at the table, which is a huge win for any weeknight chicken meal!
Gathering Ingredients for Your caesar chicken Recipe
Okay, let’s get real about what you need for this amazing bake. I made sure this easy Caesar chicken relies on pantry regulars and simple additions. You won’t have to run out to a specialty store, which is key for my low effort dinner philosophy!
- Four boneless, skinless chicken breasts
- 1 cup of your favorite store-bought Caesar dressing
- 1/2 cup grated Parmesan cheese, plus some extra for sprinkling
- 1/4 cup sour cream or, if you’re feeling tangy, plain Greek yogurt
- 1 teaspoon garlic powder
- 1/2 teaspoon dried oregano
- Salt and black pepper to taste
- 1/2 cup seasoned breadcrumbs (optional topping for crunch)
Ingredient Notes and Substitutions
Listen, I always use finely grated Parmesan—the shaker can stuff works perfectly here because it melts right into that creamy sauce instead of clumping. If you don’t have sour cream, Greek yogurt is a fantastic, slightly tangier substitute; it keeps the sauce rich. And if you are skipping the breadcrumbs for a keto version? No sweat! Just maybe add a touch more Parmesan on top to get that golden crust!
Step-by-Step Instructions for Oven Baked Caesar Chicken
This is where the magic happens, and I promise, this is where we keep things ridiculously simple. We want maximum flavor from these oven baked Caesar chicken breasts with minimum fuss. Get your oven fired up to 400 degrees Fahrenheit right away! And make sure you have a trusty baking dish ready—I always wipe mine down with a little non-stick spray or line it with parchment paper. Believe me, cleaning up is much better when you’re expecting a comfy night in!
Preparing the Creamy Caesar Coating
Grab a medium bowl! We need to build that luxurious sauce that keeps the chicken so juicy. Whisk together your Caesar dressing, half of that grated Parmesan, the sour cream (or yogurt if you swapped!), the garlic powder, and the oregano. You want everything smooth, like a lovely, savory soup base. Don’t go crazy beating it; just stir until it’s combined. Remember, we aren’t whipping egg whites here; we’re just marrying flavors. Season it lightly with salt and pepper, but remember that Caesar dressing is already salty!
Baking the caesar chicken to Perfection
Next, nestle those chicken breasts right into your prepared dish. Pour that thick, creamy sauce right over the top and make sure every inch is coated. If you’re using the breadcrumbs—and you should, for that little bit of crispiness!—sprinkle them evenly over the sauce. Now, pop this cheesy chicken bake into the hot oven for about 20 to 25 minutes. You must check that internal temperature with a thermometer! We need 165 degrees Fahrenheit (that’s 74 Celsius) for safe eating. If the top isn’t golden brown when it hits temp, pop it under the broiler for just a minute or two—but watch it like a hawk, those crumbs burn fast!
Tips for the Juiciest Baked Chicken Dinner
We all have that one story, right? That time you followed the directions perfectly, but somehow the chicken still came out tasting like cardboard? Oh man, I’ve been there! I remember making a batch of this Easy Caesar Chicken early on, and half the breasts were thick while the other half were thin, and guess what? The thin ones were crispy on the edges before the thick ones were even safe to eat. Never again! Achieving that beautiful, juicy baked chicken outcome is all about a couple of small, non-negotiable steps. It’s how we turn this into that truly ‘melt in your mouth chicken’ everyone dreams of.
Achieving Even Cooking in Your caesar chicken
My big lesson learned was about thickness uniformity. Chicken breasts are naturally uneven—thicker on one end than the other. If you just toss them in the dish as-is, you’re making the oven play roulette with your dinner! Before you even think about mixing that creamy sauce, take those breasts and place them between two sheets of plastic wrap. Grab a mallet or even the bottom of a sturdy saucepan and pound the thicker end until the whole piece is roughly the same thickness, maybe about 3/4 of an inch. This one little trick ensures that every single piece of your Parmesan Chicken Bake finishes cooking at the same time!
The Importance of Resting the caesar chicken
Once those gorgeous, golden chicken breasts are out of the oven and hitting 165 degrees, you might think you’re done! Hold that thought! I know it’s tempting to slice into that cheesy goodness immediately, especially when the timer dings, but you absolutely must let it rest for five minutes. Think about it: all that moisture and all those flavorful juices have been pushed toward the center by the heat. If you cut it right away, all that liquid rushes out onto your plate. Letting it rest lets those juices redistribute back into the meat fibers. It’s the secret handshake for an unbelievably juicy baked chicken!
Serving Suggestions for Your Flavorful Chicken Bake
Now that you’ve achieved that beautifully rich, creamy, and totally foolproof Parmesan Chicken Bake, the next question is: what goes well with all that decadent flavor? Because this baked Caesar chicken is so savory and comforting, I usually reach for sides that offer some freshness or something simple to soak up that amazing sauce. You don’t want to overcomplicate things; the main dish is the star here!
If you want something roasted and flavorful, I highly recommend my recipe for garlic and herb roasted veggies. Broccoli, asparagus, or even some crisp green beans tossed with olive oil, salt, and pepper bake up perfectly alongside the chicken, often needing almost no hands-on time from me!
If you’re looking for something a little heartier, this dish is just incredible over a bed of plain pasta or rice. That creamy Caesar sauce just coats everything so well—it turns a simple carbohydrate into something truly special. Alternatively, if you’re keeping it light, you can’t go wrong with a big, simple salad. Think crisp romaine, a light lemon vinaigrette, and maybe some shaved Parmesan. It brings that classic Caesar vibe back around without adding extra heaviness, which is great if you’re thinking about healthy lunch recipes for your leftovers the next day!
Storage and Reheating Instructions for Leftover caesar chicken
I always hope leftovers miraculously disappear, but let’s be real—this Caesar chicken is so good, we usually have some! If you’re lucky enough to have some of this creamy chicken bake left over, storing it correctly is super important if you want it to stay juicy for the next day. You definitely don’t want flavor evaporation!
First things first: cool it down slightly, but don’t leave it sitting out forever. Pop those leftovers into a shallow, airtight container. I find that laying them flat keeps them happier. They should last just fine in the fridge for about three to four days. If you’re not getting to them by then, freezing individual portions works great too!
The Best Way to Reheat Your Baked Caesar Chicken
Reheating is where most baked chicken recipes go wrong, right? The sauce tends to tighten up or, worse, separate. For this cheesy chicken bake, I absolutely advise against blasting it in the microwave for too long, even though it’s the speediest choice. If you use the microwave, cover the container loosely and use 50% power in short increments—maybe 45 seconds at a time—to gently wake up the heat without shocking the chicken.
But if you have an extra five minutes, the oven gets you the best result for that melt-in-your-mouth texture. Preheat your oven to a very low 300 degrees Fahrenheit. Place the chicken in a small, oven-safe dish and add just a splash of milk, broth, or even a teaspoon of extra Caesar dressing right into the bottom of the dish. Cover it tightly with foil—this seals in the steam! Let it warm up slowly for about 10 to 15 minutes. It’ll come back tasting almost just as creamy and tender as it did straight out of the oven. That little splash of liquid makes all the difference in keeping your weeknight chicken meal moist!
Variations on the Classic caesar chicken
Sometimes you love a recipe so much, you just have to mix things up a little, right? Even though this creamy Parmesan bake is just about perfect as it is, I love having a few tricks up my sleeve when I need to change things up based on what I have or what mood I’m in. These small tweaks keep our standard weeknight rotation feeling exciting, but they still use the core method that keeps this easy Caesar chicken so reliable.
Here are two of my favorite ways to shake the plate up:
For a little extra kick, try dusting the chicken—before the sauce goes on—with smoked paprika and a tiny pinch of cayenne pepper. That warmth underneath the tangy Caesar flavor is just wonderful, especially when you skip the optional breadcrumbs. It pulls the dish toward a smoky, savory place without making it spicy, which is perfect for a deeper comfort food feel.
The variation everyone asks about, though, is turning it into a full-blown pasta dish! If you want a true Caesar Salad Inspired Dinner that feels like a casserole, this is it. Cook about a pound of your favorite short pasta—penne or rotini works best—until it’s just shy of al dente. Then, instead of putting the chicken breasts in the baking dish, mix the cooked pasta right into that creamy Caesar sauce. You can still bake it for 15 minutes just to let it thicken up and get bubbly, maybe even topping it with extra Parmesan. If you’re looking for more of those cheesy ideas, check out my recipe for cheesy chicken pasta; it’s similar in vibe but uses a different sauce base!
Finally, and this is easy for meal prep days, you can absolutely use pork chops instead of chicken breasts here. They need about 5 to 10 extra minutes in the oven, but they absorb that creamy, garlicky sauce so beautifully. Just remember to keep an eye on the internal temperature!
Frequently Asked Questions About caesar chicken
I totally get it—sometimes you need a quick reassurance before you commit to a recipe, especially when you’re planning your weeknight chicken meals! We’ve covered the basics, but here are a few rapid-fire answers to the things I hear most often about making this creamy chicken recipe.
Can I use chicken thighs instead of breasts for this caesar chicken recipe?
Yes, absolutely! Chicken thighs are super forgiving, and honestly, they stay juicy even if you accidentally cook them a minute too long. Since thighs have a bit more fat, they are fantastic under that creamy sauce. The only thing you gotta remember is that they take a little longer to cook through than breasts. Instead of 20 to 25 minutes, start checking around the 30-minute mark. You still want them to hit that safe 165 degrees internal temperature, but they can safely hang out longer if you need the oven time!
How do I make this a low-carb, cheesy chicken bake?
If you are keeping things low-carb, this cheesy chicken bake is actually super easy to adapt! The first thing you need to ditch is the breadcrumb topping we talked about—that’s where most of the carbs hide. But wait, don’t leave the top naked! Instead, use that leftover Parmesan cheese mentioned in the coating ingredients and maybe even add a thin layer of shredded mozzarella or provolone over the top before baking. This keeps the dish tasting rich and gives you that satisfying golden crust without the breadcrumbs. Also, double-check your Caesar dressing label; some brands sneak in extra sugar! If you’re looking for sides that fit this way of eating, check out my ideas for gluten-free recipes; many of those vegetable sides work perfectly here too!
Share Your Creamy Chicken Recipe Experience
Now that you know all my little secrets for making this incredibly juicy baked Caesar chicken, I just can’t wait to hear about your dinner table success! Honestly, seeing your creations is the best part of sharing these HearthBite recipes with you. Whether this became your new go-to for weeknight chicken meals or you surprised your family with some extra cheesy goodness, I want all the details.
Did you try the breadcrumbs, or did you go low-carb? Did your kids scarf it down? Please, jump down below and leave a rating for the recipe—five stars if it earned its spot in your regular rotation! Your feedback helps other busy home cooks feel confident trying this comfort food chicken bake. Happy cooking, friends, and I hope this simple meal brought some warmth and connection to your home tonight!
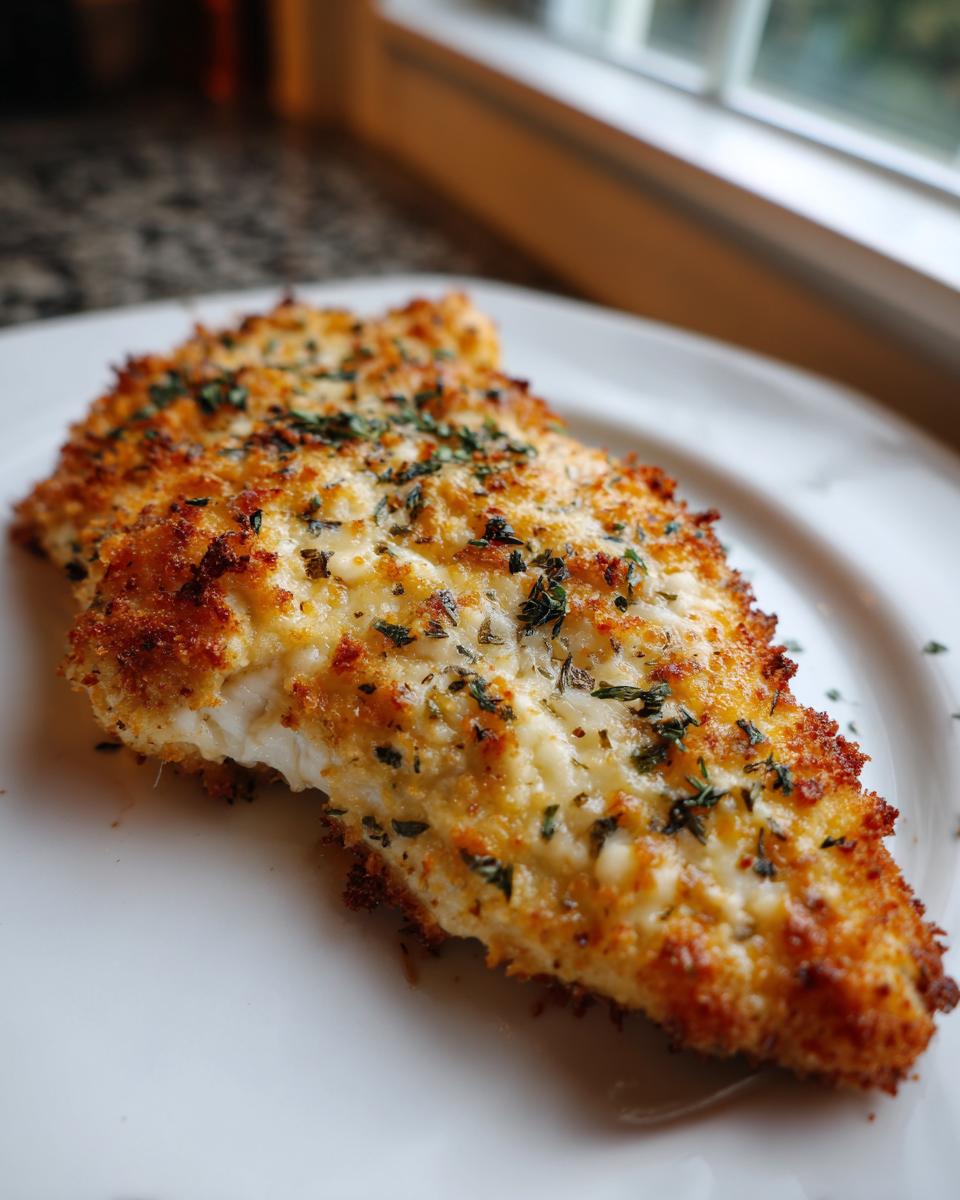
PrintCreamy Parmesan Baked Caesar Chicken

Make this creamy Parmesan baked Caesar chicken for a rich, flavorful dinner. Juicy chicken baked with Caesar dressing and Parmesan cheese is an easy, comforting recipe perfect for weeknights or family meals.
- Prep Time: 10 min
- Cook Time: 25 min
- Total Time: 35 min
- Yield: 4 servings 1x
- Category: Dinner
- Method: Baking
- Cuisine: American
- Diet: Vegetarian
Ingredients
- 4 boneless, skinless chicken breasts
- 1 cup Caesar dressing
- 1/2 cup grated Parmesan cheese, plus more for topping
- 1/4 cup sour cream or plain Greek yogurt
- 1 teaspoon garlic powder
- 1/2 teaspoon dried oregano
- Salt and black pepper to taste
- 1/2 cup seasoned breadcrumbs (optional, for topping)
Instructions
- Preheat your oven to 400 degrees Fahrenheit (200 degrees Celsius). Lightly grease a baking dish or line it with parchment paper.
- In a medium bowl, whisk together the Caesar dressing, Parmesan cheese, sour cream (or Greek yogurt), garlic powder, and dried oregano. Season with salt and pepper.
- Place the chicken breasts in the prepared baking dish. Pour the creamy Caesar mixture evenly over the chicken, ensuring each piece is well coated.
- If using, sprinkle the seasoned breadcrumbs evenly over the top of the sauce-covered chicken.
- Bake for 20 to 25 minutes, or until the internal temperature of the chicken reaches 165 degrees Fahrenheit (74 degrees Celsius) and the topping is golden brown. If the topping is not browned, you can briefly broil it for 1-2 minutes, watching closely to prevent burning.
- Let the chicken rest for 5 minutes before serving. Serve this easy chicken dinner with a fresh salad or roasted vegetables.
Notes
- For extra juicy baked chicken, pound the chicken breasts to an even thickness before coating.
- If you prefer a low-carb option, skip the breadcrumbs entirely.
- This dish pairs well with pasta, rice, or steamed green beans for a complete meal.
Nutrition
- Serving Size: 1 breast
- Calories: 450
- Sugar: 3
- Sodium: 650
- Fat: 28
- Saturated Fat: 12
- Unsaturated Fat: 16
- Trans Fat: 0
- Carbohydrates: 8
- Fiber: 1
- Protein: 40
- Cholesterol: 120