
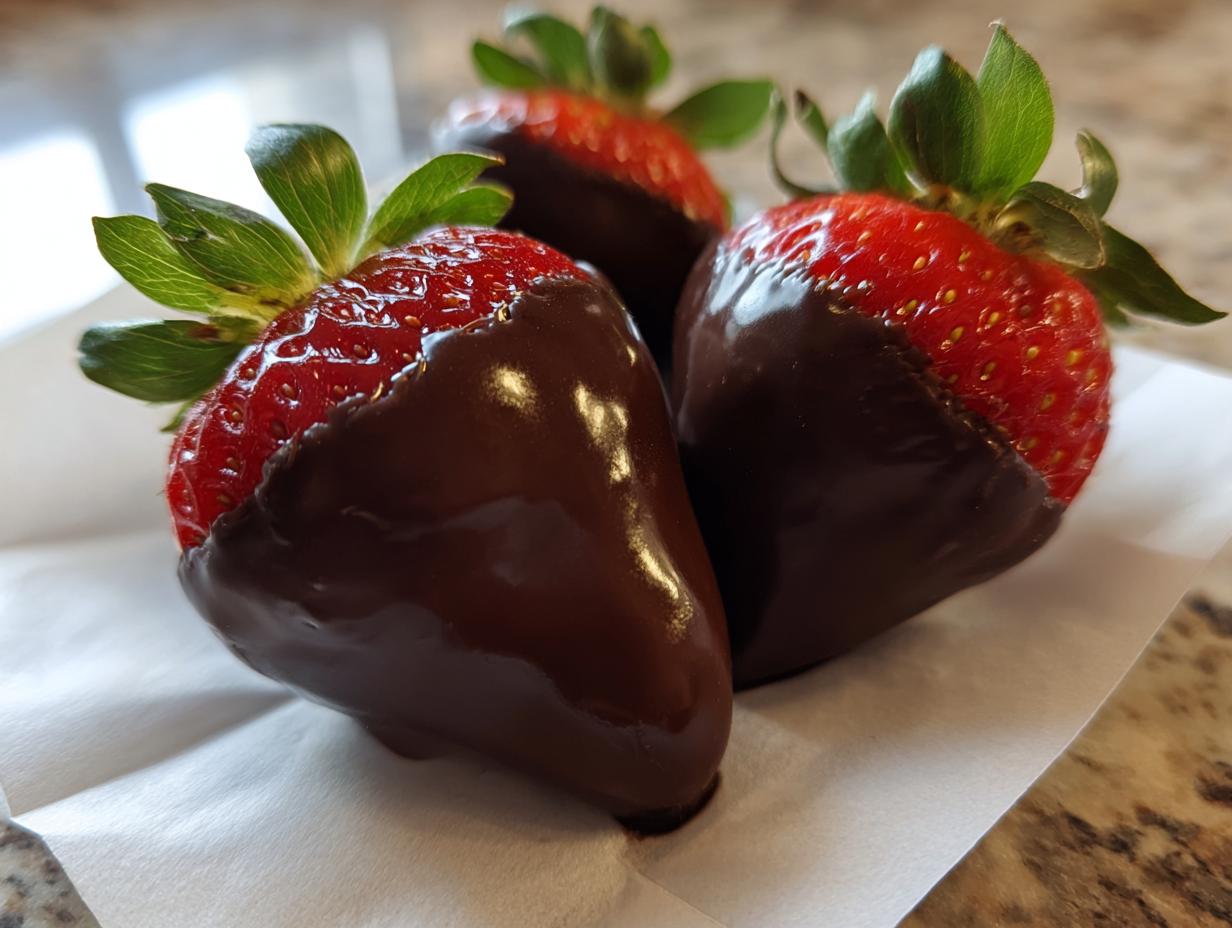
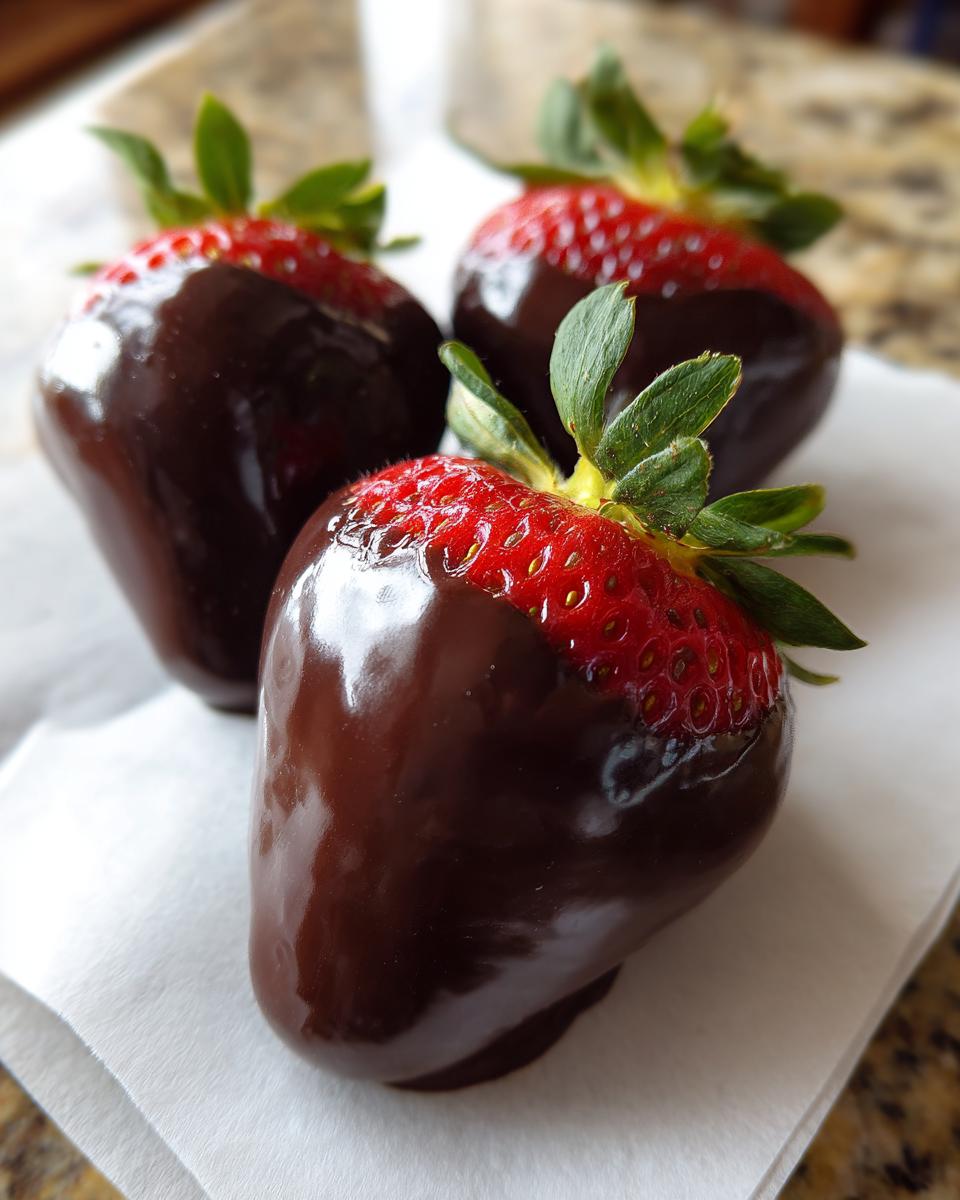
There’s nothing quite like biting into a perfect, cool strawberry dipped in rich, hardened chocolate, is there? I’ve always believed that the most impressive desserts shouldn’t require you to be a pastry chef! That’s why I spent so much time perfecting these chocolate covered strawberries. When I look at them, I don’t just see dessert; I see connections made, celebrations shared, and little moments of pure joy. Trust me, my secret is all about a few foolproof tips that give you that bakery-quality, glossy chocolate covered strawberries finish without all the fuss and heartbreak!
- Why You Will Love Our Ultimate No-Fail chocolate covered strawberries Recipe
- Ingredients for the Perfect chocolate covered strawberries
- How to Make chocolate covered strawberries: Step-by-Step Guide
- Pro Tips to Prevent Common chocolate covered strawberries Problems
- Creative chocolate strawberry variations and Toppings
- chocolate covered strawberries Storage Tips and Make Ahead Planning
- Serving Suggestions for your homemade chocolate dipped strawberries
- Frequently Asked Questions about chocolate covered strawberries
- Nutritional Estimate for chocolate covered strawberries
- Share Your HearthBite chocolate covered strawberries Creations
Why You Will Love Our Ultimate No-Fail chocolate covered strawberries Recipe
Honestly, I’ve made so many batches of chocolate-dipped fruit over the years, and I’ve learned exactly where things go wrong. This recipe isn’t just about melting chocolate; it’s about solving those sticky, annoying problems so you can serve something beautiful every single time. You won’t need to worry about cracking or sliding anymore!
- Super Easy & Quick: Seriously, these come together faster than most no-bake dessert ideas. You can go from pantry to platter in under an hour—perfect when you need something impressive fast.
- Guaranteed Glossy Finish: We use a tiny secret ingredient (that isn’t complicated tempering!) to ensure your coating sets up smooth, shiny, and gorgeous, just like the gourmet chocolate strawberries you see in shops.
- Troubleshooting Built-In: I’ve included all my hard-won knowledge right here regarding why chocolate slides off or starts to sweat later on. You get the solutions upfront!
- Perfect for Gifting: Whether it’s for Valentine’s Day treats or just because, the professional look makes these the perfect thoughtful, homemade chocolate dipped fruit for any gift box.
- Fuss-Free Ingredients: You’re not hunting down specialty items; this uses high-quality chocolate and standard pantry additions to elevate the flavor immediately.
If you’re looking for more quick kitchen fixes, you should check out my guide on easy breakfast recipes too!
Ingredients for the Perfect chocolate covered strawberries
When we talk about making something look gourmet, it really starts with the basics. You only need a handful of things for this classic chocolate covered strawberries recipe, but choosing the right chocolate makes all the difference. Here is what you’ll need to gather before we start melting anything!
- 1 pound fresh strawberries, washed and completely dried
- 12 ounces high-quality melting chocolate (dark, milk, or white)
- 1 teaspoon coconut oil or vegetable shortening (optional, for extra shine)
- Optional toppings: Sprinkles, crushed nuts, white chocolate for drizzling
Strawberry Preparation: The Key to Adhesion
Listen closely, because this is where most people mess up their beautiful berries! You simply cannot dip wet strawberries. If there is even one tiny speck of water left on that fruit, two things can happen: first, the chocolate will seize up right in the bowl, turning into stiff, ugly clumps. Second, if the chocolate does seem to melt okay, it will slide right off the berry once it cools. Ugh! Don’t do it!
So, here is what I do: wash your berries gently, maybe even let them sit on a clean kitchen towel for five minutes. Then, you need to pat every single one completely dry with paper towels. Don’t rub, just pat! Also, leave those festive green stems on—they make the perfect little handle for dipping, which keeps your fingers clean and looks so much better when you present them.
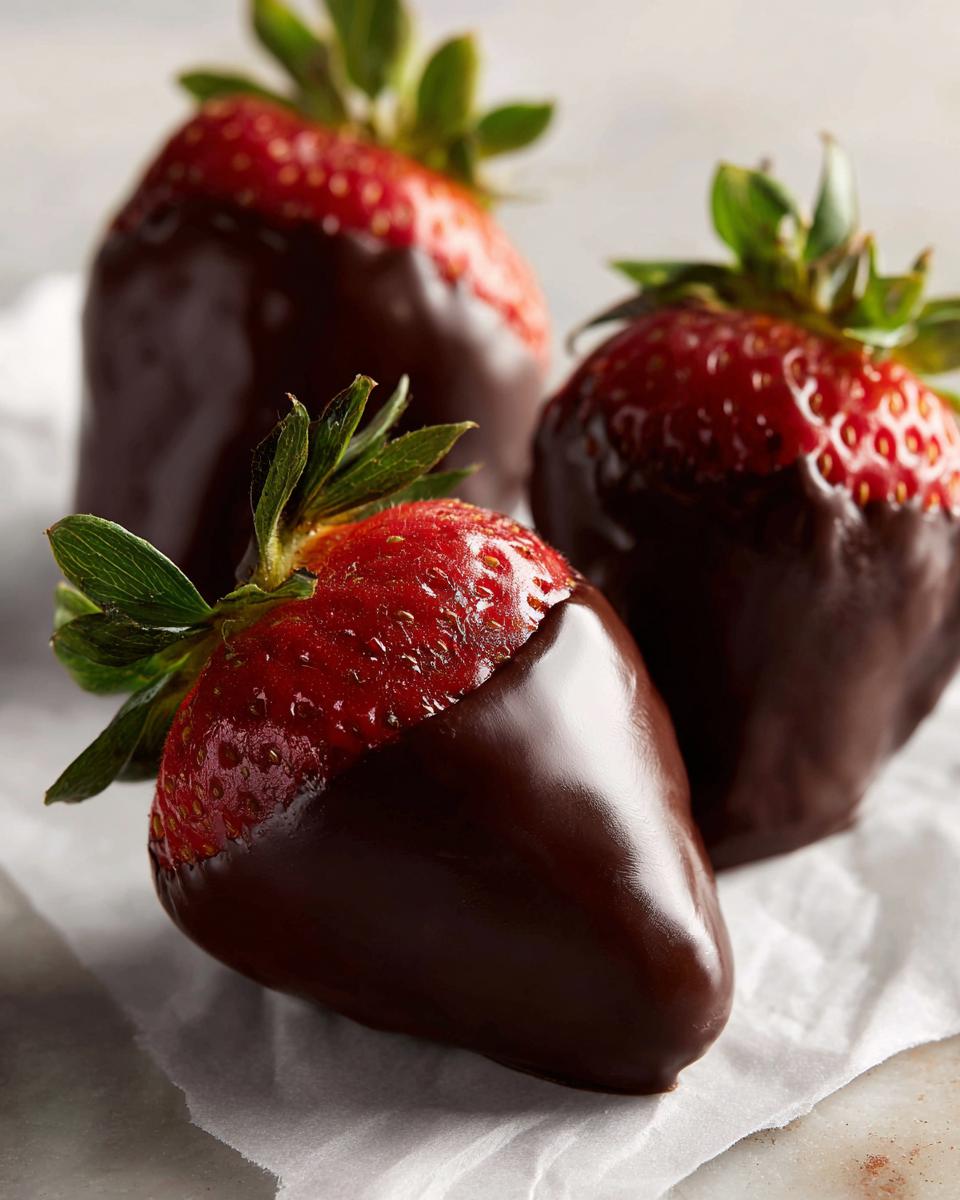
Selecting the Best Chocolate for Dipping Strawberries
You want that satisfying little crack when you bite? Then you need decent chocolate. I always grab good quality chocolate chips or chopped chocolate bars. Using anything that is too waxy, and you’ll end up wondering why your beautiful efforts aren’t setting up right. If you look for chocolate melting wafers or good quality couverture, you are already halfway there to that glossy chocolate covered strawberries look.
My little trick—especially if I’m not taking the time to temper the chocolate properly (and who always has time for that?)—is adding a tiny bit of coconut oil or vegetable shortening. Seriously, just a teaspoon helps thin the mixture beautifully. It makes the perfect chocolate coating that flows smoothly off the berry and sets with a wonderful, vibrant shine. It’s instant gourmet results, folks!
How to Make chocolate covered strawberries: Step-by-Step Guide
Okay, we have our dry berries and our shiny, perfectly melted chocolate. Now for the fun part! Making chocolate covered strawberries look high-end is all about movement and speed here. We want to work quickly while the chocolate is liquid gold. If you’re looking for more quick meal solutions while your berries are chilling, take a peek at my favorite quick easy dinner recipes!
Melting the Chocolate for a Smooth Coating
I use the microwave because honestly, who has time to haul out the double boiler every time? Pop your chocolate and that tiny bit of coconut oil into a microwave-safe bowl. Zap it for 30 seconds, stir it well—even if it doesn’t look melted yet—and then repeat in 30-second bursts. The key to that perfect chocolate coating is stirring until it’s virtually smooth before it even comes out of the microwave. If you prefer the tried-and-true double boiler method, just make sure the simmering water underneath isn’t touching the bottom of your bowl. If water splashes in, your chocolate will seize up instantly, and we can’t have that!
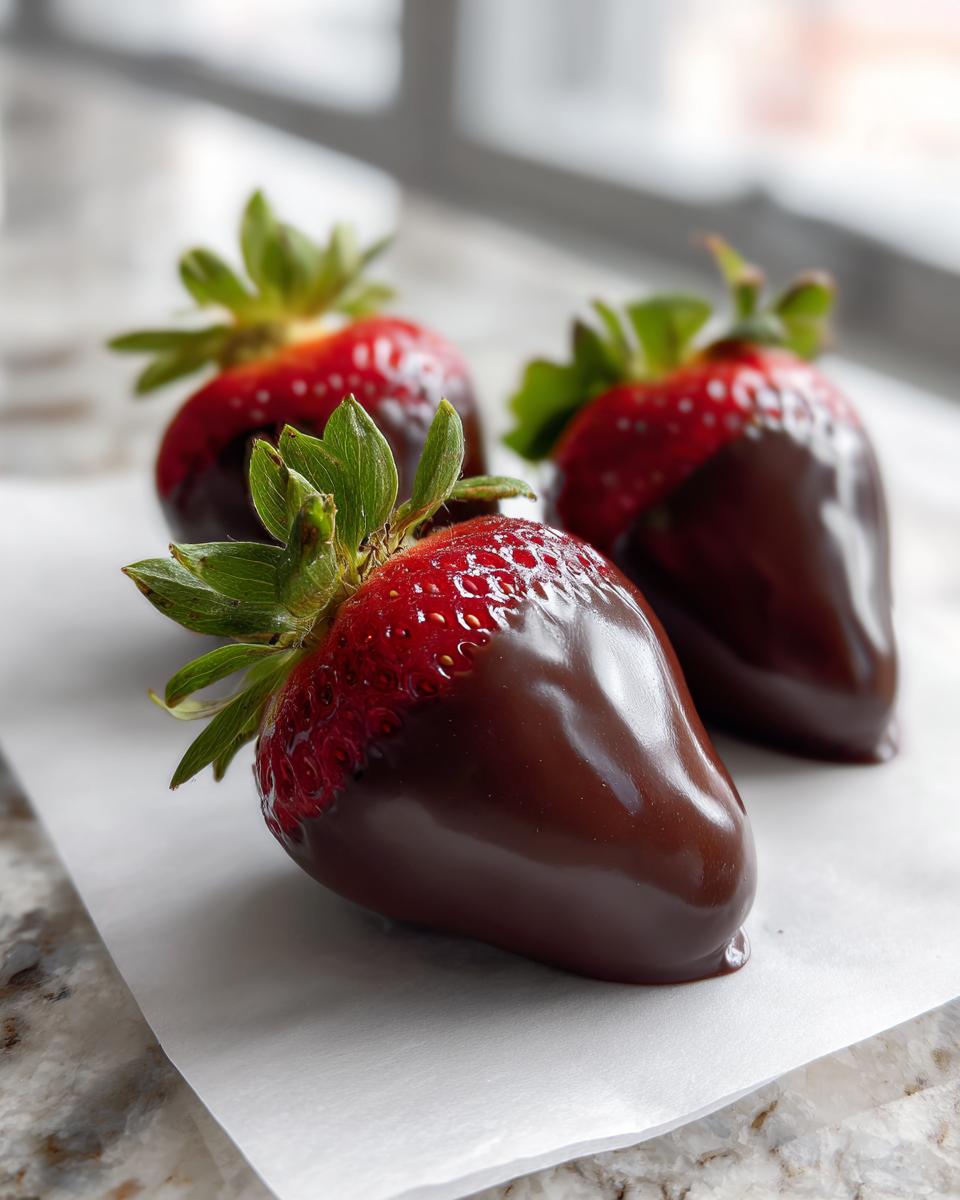
The Dipping Technique for Professional chocolate covered strawberries
Grab that berry by the little stem handle. Dip it straight down into the bowl. I usually tilt the bowl a little so I can roll the berry around, making sure I cover about three-quarters of the fruit. Don’t try to dunk the whole thing; you want that lovely collar of red showing! When you lift it out, hold it over the bowl for just a second or two. Give it a gentle little swirl as you bring it up so the excess drips right back in. This prevents those thick, gloppy bottoms.
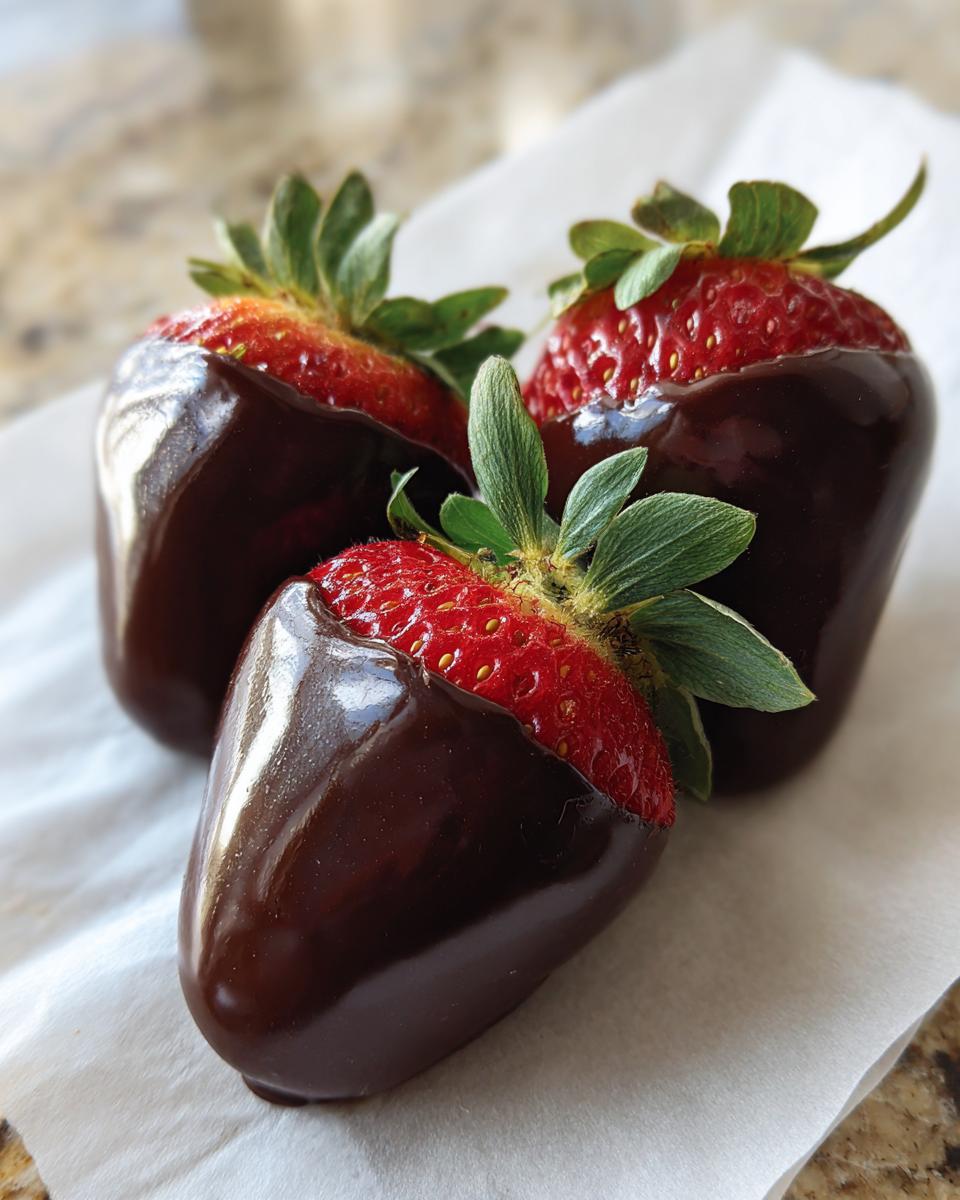
Setting and Decorating Your chocolate covered strawberries
If you’re adding sprinkles or finely crushed nuts, you have to do it *right now*, while the chocolate is still wet. If you wait even five minutes, your toppings just won’t stick! Place the decorated berries right onto a baking sheet lined with parchment paper. They usually set beautifully fine just sitting out at room temperature in about 20 to 30 minutes, which is ideal. If you’re in a hurry, you can pop the tray into the fridge for just 10 minutes, but don’t forget them in there! You can see some lovely inspiration over at Downshiftology on making these as well!
Pro Tips to Prevent Common chocolate covered strawberries Problems
Even when you nail the melting process, sometimes those beautiful chocolate covered strawberries try to stage a rebellion, right? The two biggest crimes are the chocolate sliding off prematurely or, worse, that dreaded condensation that makes them look all sticky and sad. We are fighting both these battles right now! We want a snap, not a slip!
I’ve learned a ton over the years—even tips from folks trying to figure out how to make them last longer for parties or gifts. These solutions are simple, but they truly make the difference between ‘cute homemade’ and ‘bakery worthy.’ If you enjoy making food that looks this good, you might want to browse my other comfort food recipes!
Why Chocolate Slides Off Your chocolate covered strawberries
If your chocolate coating looks like it just gave up mid-dip and slid down to pool at the bottom of the berry, I can tell you exactly what happened—it’s temperature shock! You absolutely must make sure your strawberries are completely dry (we covered that, right?) and also, crucially, they need to be *room temperature* before they even think about meeting that melted chocolate.
When you pull cold strawberries from the fridge, the cold fruit shocks the warm chocolate, causing it to seize up too fast and cling poorly, or it just makes the chocolate too thick too quickly for a smooth dip. Set your berries out on the counter for at least 30 minutes before starting. You want them happy and neutral in temperature!
How to Stop Your chocolate covered strawberries From Sweating
Oh, the dreaded sweat! This usually happens when you try to make ahead chocolate dipped strawberries and then try to serve them. If you store them in the fridge for too long, that cold berry surface creates condensation—sweat—as soon as it warms up on the counter. That moisture leaks through the chocolate coating, making them look awful. Want to know how to prevent chocolate covered strawberries from sweating? My advice is to eat them the same day if you can!
For real, the freshest, best-looking results come when you serve them the day you make them. If you *must* store them overnight, here’s my cheat: keep them in a single layer in a dry, cool spot, not necessarily the coldest part of the fridge, and definitely not an airtight container where moisture gets trapped. If you can look up the tricks others use to combat this, check out this article on preventing leakage because it touches on related moisture issues, too!
Creative chocolate strawberry variations and Toppings
Once you’ve mastered the plain, smooth coating—which you totally will, trust me—you are ready to play! Making chocolate covered strawberries look like they came from a fancy boutique is half the fun, and it’s really just about simple decorating touches.
The easiest way to elevate these is by using contrasting chocolate. This is how you get that gorgeous zebra effect or just a pretty drizzle. If you’re making dark chocolate strawberries, melt some good quality white chocolate chips, thin them down just like we did before with a little coconut oil, and drizzle over the top once the dark chocolate is set. You can dip the berry halfway in the dark, let it set, and then use a fork to drizzle the white on top. It looks incredibly fancy!
Speaking of toppings, don’t be afraid to move beyond just plain chocolate! Right after you dip your berry, there are so many fun things you can try:
- Nuts: Crushed pecans or toasted, slivered almonds add a wonderful crunch texture.
- Texture: Mini chocolate chips or crushed, salty pretzels add a savory note that balances the sweetness.
- Color Pop: Use fun, firm sprinkles if you are making these for a party or holiday. They hold up really well against the chocolate.
If you want to dive deeper into next-level chocolate presentation, I found some super fun chocolate dipped strawberry ideas over on Sarah Scoop’s site that might give you some more inspiration for your next batch.
If you love dipping things in chocolate, you HAVE to look at my recipe for fudgy red velvet brownies; they are divine with a chocolate ganache topping!
chocolate covered strawberries Storage Tips and Make Ahead Planning
This is the part that always stretches my patience, but it’s so important if you want those beautiful treats to last past the party! Can you make ahead chocolate dipped strawberries? The short answer is yes, but you have to be careful because fresh fruit and chocolate don’t always love to hang out for days and days.
For the absolute best and most beautiful results—that smooth, non-sweaty finish—you should really try to eat these the day you make them. I know, I know, that’s not always possible when you’re planning a big event! If you need to keep your chocolate covered strawberries for a little longer, here is the system that works best to maintain that professional appearance.
Keep them stored in a single layer initially, using a clean baking sheet or a shallow dish. If you have to stack them, this is my golden rule: you absolutely must place a layer of wax paper or parchment paper between each layer. This stops the chocolate from sticking to itself or the berry underneath. Keep the container airtight, but remember what I said about humidity—you want cool, but not bone-chillingly cold, conditions if you can manage it.
In my experience, anything past 24 hours starts to show wear. They are definitely best within 24 hours. You can stretch it safely up to two days in the refrigerator, but trust me, the texture of the strawberry changes faster than you’d think. If you are prepping for a big bake-off or party, make your dip layer the day before and then dip the berries the morning of the event. It’s the best compromise!
If you are looking for other ways to preserve that beautiful strawberry flavor, check out my recipe for freezer jam—it keeps that fresh fruit taste alive all year long!
To get a deeper dive into dealing with the moisture problem, check out some advice on how to store chocolate covered strawberries from Amira’s Pantry; she has some great thoughts on condensation control.
Serving Suggestions for your homemade chocolate dipped strawberries
Now that you have these gorgeous, professionally coated chocolate covered strawberries ready to go, the plating is almost as important as the dipping! These treats feel instantly special, so you don’t need to overcomplicate things to serve them wonderfully.
Honestly, my favorite way to serve them is just piled high on a simple, elegant white platter. The contrast between the smooth, dark chocolate and that beautiful red peeking out is all the decoration you need. They look fantastic next to some fresh whipping cream or maybe a light dusting of powdered sugar just for effect.
When it comes to pairing them, I love these with a coffee service after dinner—a little rich chocolate with a robust cup of coffee is heavenly. Or, for a real celebration, they pair perfectly with a crisp sparkling wine or champagne. The bubbles cut right through the richness of the chocolate. For a fun dessert spread, serve them alongside my easy cool whip cookies; it gives people variety without requiring you to bake another fussy thing!
They really shine as the centerpiece on any dessert platter, especially alongside other fruit or small pastries. Since they are already handheld, they are perfect for mingling at parties—just set them out on a nice tray and watch them disappear!
Frequently Asked Questions about chocolate covered strawberries
It’s natural to have a few questions when you’re trying to get that perfect chocolate coating! Making these treats can seem intimidating, but honestly, once you know the small tricks, it’s simple. Here are the things I get asked most often when sharing my homemade chocolate dipped strawberries secrets!
Do I need to temper the chocolate for these chocolate covered strawberries?
This is the big one! If you want that fantastic, brittle snap and super high shine that professional confectioners get, yes, tempering is the technically correct way to do it. Tempering ensures the cocoa butter crystals set up perfectly. *However*, because we are keeping this approachable for everyone, I designed this recipe to skip the intense process of true tempering. Remember that little bit of coconut oil or shortening we added? That addition helps the chocolate set up smoothly and firmly enough for us home bakers! It might not have the crystal-hard snap of professionally tempered chocolate, but it sets beautifully, keeps that great shine, and won’t melt all over your hands when you pick it up. It’s the perfect easy compromise!
What is the best chocolate for dipping strawberries?
If you want the best flavor and the smoothest melt, you absolutely must reach for good quality stuff. Forget using cheap candy melts that sometimes have a waxy texture to them. I highly recommend using nice chocolate chips—like Ghirardelli or Guittard—or chopping up a high-quality baking bar. You want chocolate that contains real cocoa butter, as that’s what gives you that wonderfully rich texture.
For the best chocolate for dipping strawberries, quality really matters: dark chocolate gives a beautiful, deep flavor contrast to the sweet fruit, while milk chocolate makes for a sweeter, more classic treat. Whatever you choose, just make sure it’s something you’d happily eat on its own!
If you need some ideas for quick, delicious meals after you’ve satisfied your sweet tooth, swing over and check out my guide to healthy lunch recipes!
Nutritional Estimate for chocolate covered strawberries
Now, I’m Sarah, and while my focus here at HearthBite is always on flavor and the joy of eating, I know some of you like to keep an eye on the numbers! Please remember that these figures are just an estimate, okay? They can change wildly depending on whether you use dark chocolate versus white chocolate, or if your berries happen to be giants or tiny little sweethearts.
Based on the recipe above (using average-sized berries and standard milk chocolate), here is what you can generally expect for one finished strawberry:
- Serving Size: 1 strawberry
- Calories: 85
- Sugar: 8g
- Fat: 5g
- Saturated Fat: 3g
- Carbohydrates: 10g
- Protein: 1g
It’s pretty balanced for a decadent treat, thanks to all that fresh fruit! If you’re navigating any dietary needs, you might want to look over my other resources, like these gluten-free recipes, which sometimes need creative dessert solutions. Enjoy these beautiful bites!
Share Your HearthBite chocolate covered strawberries Creations
That’s it! You are officially armed with all the secrets to making truly impressive, glossy chocolate covered strawberries. I am so excited for you to try these. When you’re done, your kitchen should smell wonderfully sweet, and you should have a tray of treats that looks impossibly gourmet.
Now, I love hearing from you all! Did you try the coconut oil trick? Did it finally stop your chocolate from sliding off? Please, please tell me about it! Head down to the comments section below, leave a star rating—five stars if you love the no-fail shine!—and share your success stories.
And if you snap a picture of those beautiful homemade chocolate dipped strawberries—maybe you tried a white chocolate drizzle or added those chopped nuts—I would absolutely swoon if you shared it on social media! Just tag us so I can see your gorgeous work. It truly makes my day connecting with you and seeing the joy these simple, connection-forging recipes bring right into your home.
If you run into any questions while you’re setting up your dipping station or trying to fit them all in the fridge, don’t hesitate to reach out via my contact page. Happy dipping, and enjoy every single bite!
PrintNo-Fail Chocolate Covered Strawberries: The Secret to a Glossy, Perfect Coating

Create elegant, bakery-quality chocolate covered strawberries at home. This guide gives you simple steps and pro tips to achieve a smooth, glossy chocolate shell that sets perfectly every time, avoiding common issues like sliding or cracking.
- Prep Time: 15 min
- Cook Time: 5 min
- Total Time: 20 min
- Yield: About 2 dozen 1x
- Category: Dessert
- Method: Dipping
- Cuisine: American
- Diet: Vegetarian
Ingredients
- 1 pound fresh strawberries, washed and completely dried
- 12 ounces high-quality melting chocolate (dark, milk, or white)
- 1 teaspoon coconut oil or vegetable shortening (optional, for extra shine)
- Optional toppings: Sprinkles, crushed nuts, white chocolate for drizzling
Instructions
- Prepare the strawberries: Gently wash the strawberries. It is crucial that you dry them completely. Pat them down with paper towels. Moisture causes chocolate to seize or slide off. Leave the green stems intact for easy dipping and presentation.
- Prepare the dipping surface: Line a baking sheet with parchment paper or wax paper. Set aside.
- Melt the chocolate: Place your chosen chocolate (and coconut oil, if using) in a microwave-safe bowl. Microwave in 30-second intervals, stirring well after each interval, until the chocolate is mostly melted and smooth. Alternatively, melt the chocolate using a double boiler over simmering water, stirring constantly. Do not let water splash into the chocolate.
- Achieve the perfect consistency: Stir the melted chocolate until it is completely smooth and glossy. If the chocolate seems too thick for dipping, stir in a tiny amount (about 1/4 teaspoon) of coconut oil or shortening until the desired dipping consistency is reached.
- Dip the strawberries: Hold a strawberry by the stem. Dip it into the melted chocolate, tilting the bowl slightly if needed to coat about three-quarters of the berry. Lift the berry out, allowing excess chocolate to drip back into the bowl. Gently swirl the berry to smooth the coating.
- Decorate (optional): Immediately after dipping, sprinkle with your desired toppings, or set the berry on the prepared sheet to set before drizzling with a contrasting chocolate.
- Set the chocolate: Place the dipped strawberries on the prepared baking sheet. Allow them to set completely at room temperature for about 20 to 30 minutes, or speed up the process by chilling them in the refrigerator for 10 minutes.
Notes
- To prevent chocolate from sliding off: Ensure your strawberries are completely dry and at room temperature before dipping. Cold, wet berries cause the chocolate to set too quickly or slide off.
- For a professional, glossy finish without tempering: Adding a small amount of coconut oil or vegetable shortening to the melting chocolate helps thin it slightly and promotes a smoother, shinier set.
- Make ahead storage: Store finished chocolate covered strawberries in a single layer in an airtight container in the refrigerator for up to 2 days. If storing longer, place a sheet of wax paper between layers. Avoid storing them for more than 24 hours if possible, as fresh fruit quality declines.
- To prevent sweating: Do not store the finished berries in the refrigerator for long periods, as condensation (sweating) will occur when brought to room temperature. Eat them the same day for best results.
Nutrition
- Serving Size: 1 strawberry
- Calories: 85
- Sugar: 8g
- Sodium: 2mg
- Fat: 5g
- Saturated Fat: 3g
- Unsaturated Fat: 2g
- Trans Fat: 0g
- Carbohydrates: 10g
- Fiber: 1g
- Protein: 1g
- Cholesterol: 0mg